

Page 1

Coi| E|ec ric Range
Care & Cleaning ................... 17-20
Self-Clean Oven
Cleaning Procedures
Maintenance ......................... 21-22
OvenWindow
Oven Light
Troubleshooting ................... 23-:24
Warranty & Service .................... 25
Broiling
DeUayBake
Keep Warm
Broiling
Racks
Form No. A/06/04 Part No 8113P446-60 @2004 Maytag Appliances Sabs Co. Litho USA
Guide de utilisateur ................... 26
Gu_a del Usaario ......................... 54
Page 2
[nstaller: Pleaseleavethis rnanuaIwith this appfiance.
Consumer: Phase read and keep this manual for future
reference. Keepsales receipt and, or canceled check as proot
of purchase.
Model Number
Serial Number
Date of Purchase
if you have questions, call:
1-800-688-1120 {U.S.A.and Canada
1-800-688-2080 { U.S,TTYfor
hearing or speech impaired}
(Mon.-FrL 8 am-8 pm Eastern Tirnd
in our continuing effort to [mprovethe qualityand performance
of our cooHng products, it ma} be necessary to make changes
to the appliance without revising this guide.
For service intfermatie#, see page 25.
To ensure proper and safe operation: Appliance must be
properly installed and grounded by a qualified technician.
Do not attempt to adjust, repair, service, or replace any par
of your appliance unless it is specifically recommended in
this guide. Aft other servicing should be referred to a
qualified servicer.
Always disconnect power to appliance before servicing,
* ALL RANGES CAN TiP AND
CAUSE iNJURiES TO PERSONS
, iNSTALL ANTi:TiP DEVIC
PACKED WiTH RANGE
o FOLLOW ALL iNSTALLATiON
tipping of the appliance from -
abnormal usage orby excessive
loading of the oven door, the appliance
be secured bya properly installed aat!4!p
device.
Warning and WmpoRantSafety Instructions appearing in this
guide are not meant to cover ai[ possible conditions and
situations that may occur. Common sense, caution, and care
must be exercised when installing, maintaining, or operating
the appliance.
Always contact the manufacturer about problems or
conditions you do not understand.
Recognize Safety Symbols, Words, Labels
WARNnNG _ Hazards or unsafe practices which COULD
result in severe personal injury or death.
CAUTION _ Hazards Or unsafe practices which COULD
Read and follow aH instructions before using this
appliance to prevent the potential risk of fire, electric
shock, personal injury or damage to the appliance as a
result of improper usage of the appliance. Use appliance
only for its intended purpose as described in this guide.
To check if device is properly installed, look underneath
range with aflashlight to make sure one of the rear leveling
legs is properly engaged inthe bracket slot. The anti-tip
device secures the rear leveling leg to the floor when
properly engaged. You should check this anytime the
range has been moved.
To Prevent Fire or Smoke
Be sure a[[ packing materials are removed from the appli-
ance before operating it.
Keep area around appliance clear and free from combus-
tibb materiab. FIammabb materials should not be stored in
an oven.
Many plastics are vulnerable to heat. Keep plastics away
from pars of the appliance that may become warm or hot.
To prevent grease fires, do not let cooking grease or other
flammable materials accumulate in or near the appliance.
in Case of Fire
Use dry chemical or foam-type extinguisher or baking soda
to smother fire or flame. Never use water on a grease fire.
1. Turn off appliance to avoid spreading the flame.
2. NEVER pick up or move a flaming pan.
3. Smother oven fire or flame by dosing the oven door.
Page 3
Child Safety
NEVER store itemsof interest to children in cabinets above
an appliance. Children cl!mbing on the applianc_ or on the
appliance door to reach items could be seriously injured.
NEVER leave children alone or unsupervised near the
appliance when it is in use or is stiff hot. Children should
never be aflowed to sit or stand on any part of the appliance
as they could be injured or burned.
Children must be taught that the appliance and utensils in it
can be hot. Let hot utensils cool in a safe place, out of reach
of small chfldren. Children should be taught that an appliance
is not a toy. Children should not be allowed to playwith
controls or other parts of the appliance.
About Your Appliance
NEVER Usean appliance as a step tO r_ch cab!nets above.
Misuse d appiJance doors, such as stepping, leaning Or
sitting on the dooh may result in possible tipping of the
To prevent potential hazard to the user and damage to the
appliance, do not use appliance as a space heater to heat or
warm a room. Also, do not use the oven as a storage areafor
food or cooking utensils.
Do not obstruct the flow of air by blocking the oven venL
DO NOT TOUCH HFATING ELEMENTS OR iNTERiOR
SURFACESOF OVEN. Heating elements may be hot even
though they are dark in color` interior surfaces of any oven
become hot enough to cause bums. During and after use, do
not touch, or let clothing or other flammable materials contact
heating elements or interior surfaces of oven until they have
had sufficient time to cool. Other surfaces of the appliance
may become hot enough to cause burns - among these
surfaces are: oven vent openings, surfaces near these
openings, oven doors and windows of oven doors.
Do not touch a hot oven light bulb with a damp cloth asthe
bulb could break. Should the bulb break disconnect power to
the appliance before removing bulb to avoid electrical shock
NEVER use aluminum foil to cover an oven rack or oven
bottom. Misuse could result in risk of electric shock, fire, or
damage to the appliance. Usefoil only as directed in this
guide.
Ceeking Safety
Never heat an unopened food container in the oven. Pressure
build-up may cause container to burst resulting in serious
personal injury or damage to the appliance.
Use dry, sturdy potholders. Damp potholders may cause
burns from steam. Dish towels or other substitutes should
never be used as potholders because they can trail across hot
elements and ignite or get caught on appliance parts.
Wear proper apparel. Loose fitting or long hanging-sleeved
apparel should not beworn while cooking. Clothing may
ignite and cause burns if garment comes in contact with
heating elements.
Always place oven racks in the desired positions while oven is
cool. Slide oven rack out to add or remove food, using dry,
sturdy potholders. Always avoid reaching into the oven to add
or remove food. If a rack must be moved while hot, use a dry
potholder. Do not let potholder contact hot element in oven.
Use racks only in the oven in which they were shipped/
purchased.
Use care when opening the oven door, Let hot air or steam
escape before removing or replacing food.
PREPARED FOOD WARNING: Follow food manufactureCs
instructions. If a plastic frozen food container and!or its cover
distorts, warps, or is otherwise damaged during cooking,
immediately discard the food and its container, The food
could be contaminated.
Do not allow aluminum foil or meat probe to contact heating
element.
Always turn off aft controls when cooking is completed.
Utensim Safety
Follow the manufacturer's directions when using oven
cooking bags.
This appliance has been tested for safe performance using
conventional cookware. Do not use any devices or accesso-
ries that are not specifically recommended in this guide. Do
not use eyelid covers, stove top grills or add-on oven convec-
tion systems. The use of devices or accessories that are not
expressly recommended in this guide can create serious
safety hazards, result in performance problems, and reduce
the life of the components of the appliance.
2
Page 4
If pan issmaller than element, a portion of the element will be
exposed to direct contact and could ignite clothing or
pothdder.
Only certain types of glass, glass!ceramic, ceramic, eaRRhen-
ware, or other glazed utensils are suitable for cooktop or oven
service without breaking due to the sudden change in
temperature. Follow utensil manufacturers instructions when
using glass.
Turn pan handle toward center of cooktop, not out into the
room or over another surface element. This reduces the risk
of burns, ignition of flammable materials, or spillage if pan is
accidently bumped or reached by small children.
Be sure utensil is large enough to properly contain food and
avoid boflovers. Pan size is particularly important in deep fat
frying. Be sure pan will accommodate the volume of food that
is to be added as well as the bubble action of fat.
Never let a pan boil dry as this could damage the utensil and
the appliance.
Deep Fat Fryers
Use extreme caution when moving the grease pan or dispos-
ing of hot grease. Allow grease to cod before attempting to
move pan.
Ventimating Needs
Clean range hood and filters frequently to prevent grease or
other flammable materials from accumulating on hood or
filter and to avoid grease fires.
When flaming foods under the hood, turn the fan on.
C eaning Safety
Clean cooktop with caution. Turn off all controls and wait for
appliance paRRsto cool before touching or cleaning. Clean
with caution. Use care to avoid steam burns if a wet sponge
or cloth is used to wipe spills on a hot surface. Some cleaners
can produce noxious fumes if applied to a hot surface.
Clean only paRRslisted in this guide.
NEVER leave surface units unattended especially when using
high heaL An unattended boflover could cause smoking and
a greasy spfllover can cause a fire.
This appliance isequipped with different size surface ele-
ments. Select pans with flat bottoms large enough to cover
elemenL Fitting pan size to element will improve cooking
efficiency.
CeimEmements
To prevent damage to removable heating elements, do not
immerse, soak or clean in a dishwasher or self-dean oven. A
damaged element could short resulting in a fire or shock
hazard.
Make sure drip bowls are in place as absence of these bowls
during cooking could damage wiring.
Protec_ve Liners: Do not use aluminum foil to line surface
unit drip bowls or oven bottoms, except as suggested in the
manual. Improper installation of these liners may result in a
risk of electric shock or fire.
Se f-C ean Oven (select models)
DOnot !eaveracks,broiling pan,food orco0kJng utensils, etc.
Do not clean door gaskeL The door gasket is essential for a
good seal. Care should be taken not to rub, damage, or move
the gasket.
Do not use oven cleaners or oven liners of any kind in or
around any paRRof the self-clean oven.
Before self-cleaning the oven, remove broiler pan, oven racks
and other utensils, and wipe off excessive spillovers to
prevent excessive smoke or flare ups.
It is normal for the cooktop of the range to become hot
during a self-clean cycle. Therefore, touching the cooktop
during a clean cycle should be avoided.
3
Page 5

l portant Safety Notice and
The California Safe Drinking Water and Toxic Enforcement
Act of 1986 (Proposition 65Drequires the Governor of Cador-
nia to publish a list of substances known to the State of
California to cause cancer or reproductive harm, and requires
businesses to warn customers of potential exposures to such
substances.
Users of this appliance are hereby warned that when the
oven is engaged in the self-clean cycle, there may be some
Iowqevel exposure to some of the listed substances, including
carbon monoxide. Exposure to these substances can be
minimized by properly venting the oven to the outdoors by
opening the windows and!or door in the room where the
appliance is located during the self-clean cycle.
UMPORT_T NOTICE REGARDUNG PET BURDS: Never
keep pet birds in the kitchen or in rooms where the fumes
from the kitchen could reach. Birds have a very sensitive
respiratory system. Fumes released during an oven sdf-
cleaning cycle may be harmful or fatal to birds. Fumes
released due to overheated cooking oil, fat, margarine and
overheated non-stick cookware may be equally harmful.
Save These instructions for Future Reference
4
Page 6

Surface Controls
Use to turn on the surface elements. An hfhite choice of
heat settings is avaflabHefrom Low to High. The knobs can
be set on or between any of the settings.
Setting the Controls
1. Place pan on surface element.
2. Push in and turn the knob in either direction to the desired
heat setting.
+ The control panel is marked to identify which
element the knob controls. For example, the
graphic at right indicates left front element.
3. There is an element "ON" indicator light on the control
panel. When any surface control knob is turned on, the
light will turn on. The light will turn off when all the
surface elements are turned off.
4. After cooking, turn knob to OFF. Remove pan.
Suggested Heat Settings
The size,type of cookware and cooking operation will affect the
heat setting. For information on cookware and other factors
affecting heat settings, refer to "Cooking Made Simple" booklet.
High (10): Use to bring
warm and melt chocolate |
Low (2): Use to keep foods 1
and butteK
Med. Low (3-4):
Use to continue
cooking covered
foods or steam
foods.
[
3
4
liquid to a boil. Always
reduce setting to a lower
heat when liquids begin to
boil or foods begin to cook.
OFF
J
Mediu¢
Medium (5-7): Use to
maintain slow boil for
large amounts of liquids
and for most frying
operations.
(Style varies by model]
Med. High (8+9): Use
to brown meat, heat oil
for deep fat frying or
sauteing. Maintain fast
boil for large amounts
of liquids.
BEFORECOOKING AFTER COOKING
- Always place a pan on the surface unit before you turn it ° Make sure surface unit is turned off.
on, To prevent damage to rail .2e.never operate surface - Clean up messy spills as soon as possible,
unit without a pan in place.
- NEVER use the cooktop as a storage area for rood or
cookware
DURING COOKING
- Be sure you know which knob controls which surface
unit. Make sure you turned on the correct surface unit.
• Begin cooking on a higher heat setting then reduce to a
lower setting to complete the operation. Never use a
high heat setting for extended cooking,
- NEVER allow a pan to boil dry. This could damage the
pan and the appliance
- NEVER [ouch cooktop until it has cooled, Expect some
parts of the cooktop, especially around the surface units.
tc. uecome warm or hot during cooking. Use potholders
to protect hands.
OTHERTIPS
° if cabinet storage is provided directly above cooking
sur[ace. limit it to items that are infrequently used and can
be safely storee n an area subjected to heat. Tempera-
tures ma._be unsafe for items such as volatile liquids,
cleaners or aerosol sprays.
• NEVER leave any items, especially plastic items, on the
cooktop. The hot air from the vent may ignite flammable
kems melt or soften plastics, or increase pressure in
closed containers causing them to burst
NEVER allow aluminum foil. meat probes or any other
metal object, other than a pan on a surface element, to
...............................
5
Page 7

Coi E ement Surface
+ CHeancooktop after each use,
+ Wipe acidic or sugary spills as soon as the cooktop
has cooHedas these spills may discoHoror etch the
porcdain,
To protect drip bowl finish:
+ To HessendiscoHorationand crazing, avoid using high
heat for Hongperiods+
+ Do not use oversized cookware, PansshouM not
extend more than 1-2 inches beyond the dement+
+ When home canning or cooking with big pots, use
the Canning Hement (Modal CEI_),Contact your
dealer for detaiHsor call 1-877-232-8771 USA
or 1-800-688-8408 Canada to order,
+ CHeanfrequentHy, (See page 19,_)
CoB Dements
+ When an dement ison, itwill cycle on and off to maintain the
heat setting+
+ Coil elements are self-cleaning, Do not immerse in water,
To remove: When cool, raise ele-
ment+ Carefully pull out and away
from receptacle+
To replace: Insert element ter-
minals into receptacle, Guide the
element into place, Pressdown on
the outer edge of element until it
sits level on drip bowl,
TERMINALS
Drip Bow_s
The drip bowls under each surface element catch boilovers and
mustalways be used=Absence of drip bowls during cooking may
damage wiring+
To prevent the risk of electric shock or fire+never line drip bowls
with aluminum foil+
Drip bowls will discolor (blue/gold stains_)or craze over time if
overheated= This discoloration or crazing is permanent=This will
not affect cooking performance=
6
Page 8

Manual Clean Oven Control
(select models)
BAKE
TIMER CLOCK CANCEL ....
A B
NOTE: The display wiil show 12:00 when the appliance is first connected to power or if power is interrupted. The Bake and Broii
indicators Hightwhen function is pressed.
A
B
D
E
F
Bake
Broii
Timer
Clock
CANCEL
Acre'
Use for baking and roasting.
Use for broiling and top browning.
Sets timer.
Use to set time-of-day clock.
Cancels all operations except timer
and clock.
Enters or changes time, oven
temperature. Sets HI or LO broil
Using the Touchpads
Pressthe desired pad.
Pressthe A or V pad to enter time or temperature.
° A beep will sound each time a function pad ispressed. There
is no beep for the A or V pad.
, A double beep wiii sound if a programming error occurs.
Note: Four seconds after pressing the A or V pad, the
time or temperature will automatically be entered. If more
than 30 seconds elapse between touching a function pad
and the A or V pad, the function will be canceled and the
display will return to the previous display.
Setting the CJock
1. Pressthe Clock pad.
° The clock time cannot be set if the control is pro-
grammed for a bake, broil or timing operation.
c D E F
2. Set the correct time of day using the A or V pads. Ifthe
A or V pad is not pressed within 30 seconds, the program
will cancel Pressthe Clock pad and begin again.
Setting the Timer
The timer can be set from one minute 001} up to 99 hours
and 59 minutes (99:59}. Time will be displayed in minutes and
not in seconds. THE TIMER DOES NOT CONTROL THE
OVEN.
1. Pressthe Timer pad.....
° 0:00wiii iight and the coion (:} wiii flash in TIMER
the display. ...........
2. Pressthe A or V pad until the desired time is .....
displayed.
, The timer will begin as soon as the time is set.
° The flashing colon indicates that a timing
operation is in progress. (The colon wiii not
flash if the time of day or oven temperature is
displayed.}
° Two short beeps signal the end of the operation. "0:00"
wiii appear in the display.
If desired, press the Clock pad and the time of day wiii
briefly reappear in the display during a timing operation.
If desired, press the Bake or Broil pads and the current
temperature setting wiii briefly reappear in the display
during a timing operation.
To cancel the timer operation:
Press and hold the Timer pad for several seconds.
Page 9

Baking, Roasting and Broiling
For addidonai baking, roasting and broiihg times and tips, see
"Oeeking Made Simple" bookbt.
Setting the Controls For Baking or Roasting:
1. Press Bake pad.
, 000 will Hightand the Bake indicator Hight BAKE
will flash in the dispDy.
° If you press the Bake pad and do not set an oven
temperature within 30 seconds, the program will
automatically cancel and the time of day will reappear
in the display.
2. Press the A or V pad until the desired oven ......................
temperature is displayed.
, The oven temperature can be set from 170°
to 550° F.
350° will appear in the display when either
A or V pad is pressed once.
Press and tap the A or V pad to change the oven
temperature by 5° increments or press and hold
the A or V pad to change the oven temperature
by 10° increments.
100° or the actual oven temperature, whichever is
higher, will appear in the display when the oven turns
on.
° The temperature in the display will increase in 5°
increments until preset temperature is reached. A single
beep will sound when the oven is preheated.
° Allow 10 to 15 minutes for the oven to preheat.
° To recall preset temperature during preheat, press the
Bake pad. The temperature will be displayed for three
seconds.
Setting the Controls For Broiling:
For best results, use pan designed for broiling.
1. Place broiler pan on recommended rack position. (See
2. Pressthe Broil pad. BROIl.....
3. Pressthe A pad to select Hi (high} broil or the
4. Preheat broil element for three minutes. Broil with the oven
5. After broiling, press Cancel to turn the oven ..............................................
chart on page 15.}
, "SEt" wiii iight and the Broii indicator iight
wiii flash in the display.
_' pad to set Lo Gow} broil
, Select Hi broil for normal broiling.
, Select Lo broil for low temperature broiling to
avoid excessive browning of longer cooking
foods like poultry.
° [f you do not select Hi or Lo Broil within 30 seconds, the
program wiii automatically cancel and the time of day
wiii reappear in the display.
door open to the first stop position (about/4 inches}.
off and remove the broiler pan from the oven.
The current time of day wiil reappear in the
display. ...............................................
° To change oven temperature during cooking, press the
Bake pad, then press the A or _' pad until the
desired temperature is displayed.
3. Place food in the oven. Check food for aloneness at the
minimum cooking time .............
a. At the end of cooking, press the Cancel pad
to turn the oven off and remove the food from
the oven.
The oven features an automatic shut-off. [f the oven is
left on for 12 hours it wiil automatically turn off and 000
wiil appear in the display. Press the Cancel pad and the
time of day wiil reappear in the display.
Page 10

Oven Kneb Centre
(select models)
Oven Temp Knob B,o,
The Oven Temp Knob is used to
seHectand maintain the oven tem-
perature. Always turn this knob just to
the desired temperature. Do not turn
to a higher temperature and then back. 4oo
Setting the Control for Baking and Roasting:
1. Push in and turn Oven Temp knob to desired temperature.
Allow 10-15 minutes for preheating.
2. Place food in the center of oven. Check food for aloneness
at minimum time in recipe. Cook longer if necessary.
3. Remove food from the oven and turn the Oven Temp knob
to OFF.
500
OFF
Warm
350 300
Setting the ControJ for Broiling:
1. For best results, use a broiling pan=Place the broiler pan
on recommended rack position (seechart on page 15).
2. Turn Oven Temp knob to Broil or, for lower temperature
broiling, to 450° R
Lower temperature broiling avoids excessive browning
of longer cooking foods such as poultry.
3. Preheat broil element for three minutes. Broil with the oven
door open to the first stop position (about 4 inches).
4. Check the aloneness by cutting a slit in the meat near the
center to check the color.
5. After broiling, turn the Oven Temp knob to OFF.Remove
the broiler pan from the oven.
Note: For additional baking, roasting and broiling tips, see
"Cooking Made Simple" booklet.
9
Page 11
Serf-Clean Oven Control
(select models)
A B
BAKE
V
C
D
TIME(8
........... HOLD
COOK&,
E
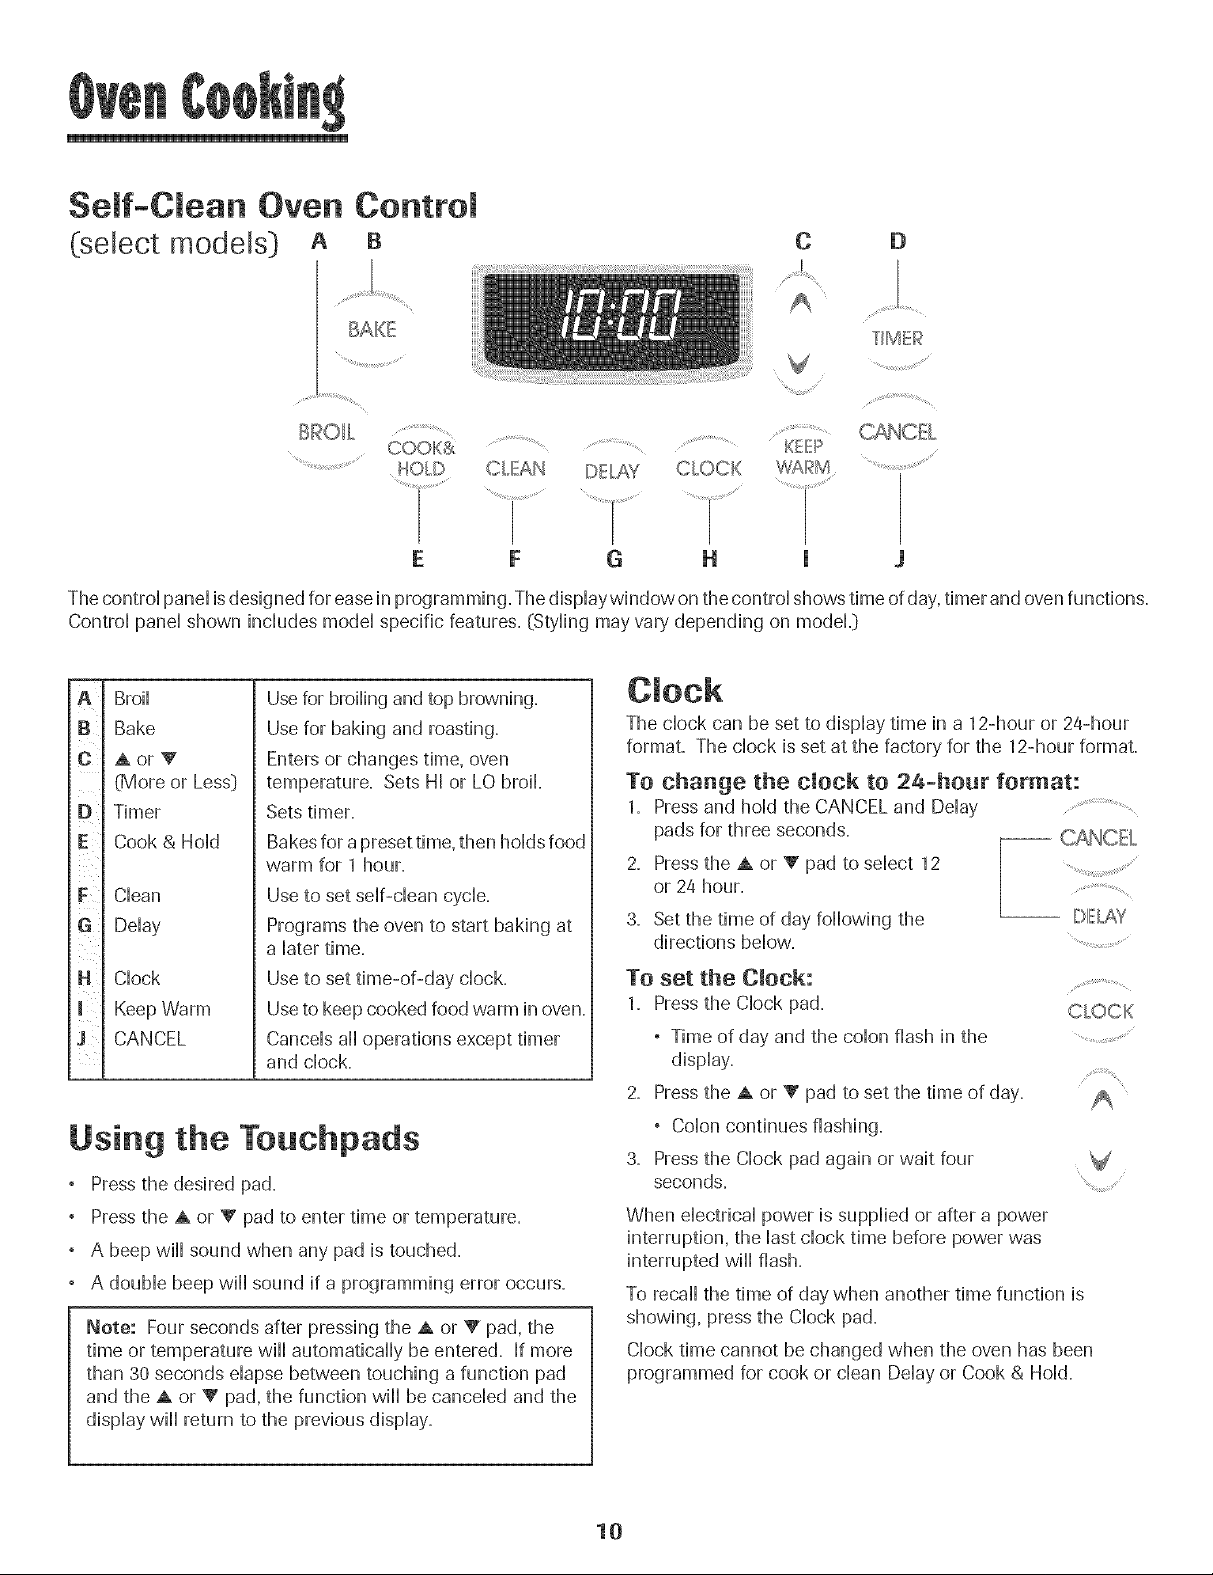
The control panel isdesigned for easein programming. Thedisplaywindow on the control shows time ofday, timer and ovenfunctions.
Control panel shown includes model specific features. {Styling may vary depending on modeL}
A
Broil
B
Bake
C
AorY
(More or Less}
D
Timer
Cook & Hold
Clean
G!
Delay
H
Clock
Keep Warm
CANCEL
Use for broiling and top browning.
Use for baking and roasting.
Enters or changes time, oven
temperature. Sets HI or LO broil
Sets timer.
Bakes for a preset time, then holds food
warm for 1 hour.
Use to set self-clean cycle.
Programs the oven to start baking at
a later time.
Use to set time-of-day clock.
Use to keep cooked food warm in oven.
Cancels all operations except timer
and clock.
Using the Teuchpads
Pressthe desired pad.
Pressthe A or V pad to enter time or temperature.
° A beep will sound when any pad is touched.
° A double beep wiii sound if a programming error occurs.
Note: Four seconds after pressing the A or V pad, the
time or temperature will automatically be entered. If more
than 30 seconds elapse between touching a function pad
and the A or V pad, the function will be canceled and the
display will return to the previous display.
......................................... .......................KEEP
CLEAN DELAY CLOCK
F G H J
The clock can be set to display time in a 12-hour or 24-hour
format. The clock is set at the factory for the 12-hour format.
To change the cJock to 24-hour format:
Pressand hold the CANCEL and Delay
pads for three seconds.
2.
Pressthe A or V pad to select 12
or 24 hour.
8.
Set the time of day following the
directions below.
To set the Olock:
1. Pressthe Clock pad.
, Time of day and the colon flash in the
display.
2. Pressthe A or _' pad to set the time of day.
, Colon continues flashing.
3. Pressthe Clock pad again or wait four
seconds.
When electrical power is supplied or after a power
interruption, the last clock time before power was
interrupted wiii flash.
To recall the time of day when another time function is
showing, press the Clock pad.
Clock time cannot be changed when the oven has been
programmed for cook or clean Delay or Cook & Hold.
-- DIFLAY
CLOCK
10
Page 12

To cance! the Clock dispmay:
If you do not want the time of day to display:
Press and hoid the CANCEL and CHockpads
for three seconds. The time of day will[
disappear from the dispiay
When the chock dispiay is cancelled, press
the CHockpad to brbfiy dispiay the time
of day.
-- CLOCK
To restore the CJoek display:
Press and hoid the CANCEL and CHockpads for three sec-
onds. The time of day will[ reappear in the dispiay.
The timer can be set from one minute (00:01} up to 99 hours
and 59 minutes (99:59}.
The timer can be used independently of any other oven
activity. It can also be set while another oven function is
operating.
The Timer does not control the oven. It only controls a
beeper.
To set the Timer:
1,
Press the Timer pad. TIMER
° 0:00lights in the display.
° The colon flashes in the display.
Press the A or V pad untii the
correct time appears in the display.
° The colon will continue to flash.
3,
PressTimer pad again or wait four seconds.
° The colon continues flashing and the time begins
counting down.
° The last minute of the timer countdown wiii be displayed
as seconds.
4. At the end of the set time, one long beep wiii sound.
s¢_ ¸_¸ ,_
To cancel the Timer:
1. Press and hold the Timer pad for three seconds.
OR
2. Press the Timer pad and set the time to 00:00.
Locking the Controms
The touchpad controls call be locked for safety',cleaning, or
to prevent unwanted use. They will not function when locked.
If the oven is currently in use, the controls cannot be locked.
The current time of day will remain in the display when the
controls are locked.
To lock:
Press and hold the CANCEL and Cook &
Hold pads for three seconds.
LOCKflashes in the display.
To unlock:
Press and hold the CANCEL and Cook & Hold
pads for three seconds.
LOCKdisappears from the display.
COOKS
HOLD
Fault Codes
BAKE or LOCK may flash rapidiy ill the dispiay to aiert you if
there is an error or a problem. If BAKE or LOCKflash in the
display, press CANCEL pad. If BAKE or LOCK continue to
flash, disconnect power to the appliance. Wait a few minutes,
and then reconnect power. If the flashing still continues,
disconnect power to the appliance and call an authorized
servicer.
To set Bake:
1.
Pressthe Bake pad. BAKE
° "BAKE" wiii flash.
° 000wiii iight in the display.
2. Select the oven temperature. The oven tempera-
ture can be set from 170° to 550°. Press or press
and hold the A or V pads.
° 350°wiii iight when either pad is first pressed.
, Pressthe A pad to increase the temperature.
, Pressthe V pad to decrease the temperature.
3. Press Bake pad again or wait four seconds.
° BAKEwill stop flashing and light in the display.
° 100° or the actual oven temperature wiii display. The
temperature will rise in 5° increments until the preset
temperature is reached.
4. Allow the oven to preheat for 8-15 minutes.
° When the set oven temperature is reached, one long
beep will sound.
° To recall the set temperature during preheat, press the
Bake pad.
5. Placefood in center of oven, allowing a minimum of two
inches between utensil and oven walls.
V
11
Page 13
6. Checkcookingprogress.Cookbngerifneeded...................
7. Whencookingisfinished,pressCANCEL.
8. Removefoodfromtheoven.
Baking Notes:
° To change the oven temperature during cooking, press
the A or V pad und] you reach the desired temperature.
° Ifyou forget to turn off the oven, it will automatically turn
off at the end of 12 hours. If you wish to deactivate this
feature, see page 14.
° Foraddidona] baking and roasting tips, see "Cooking
Made Simple" booklet.
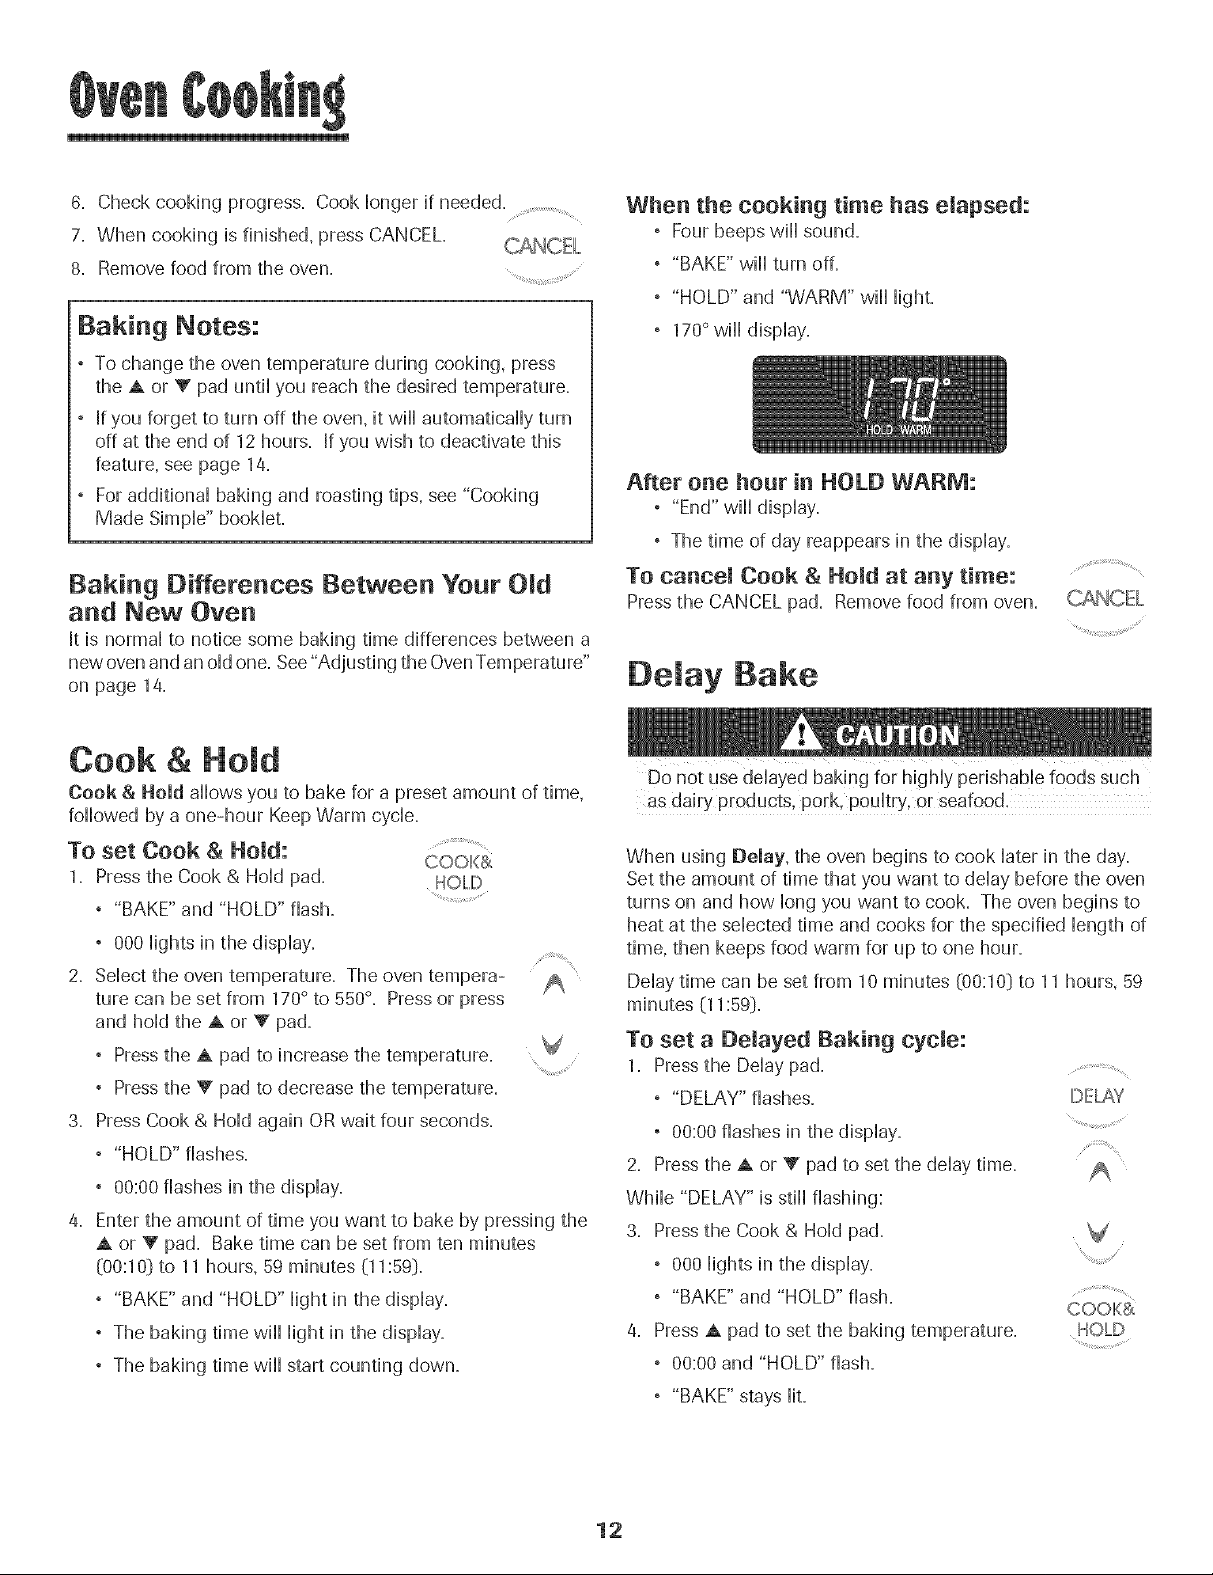
When the cooking time has eJapsed:
° Four beeps will sound.
° "BAKE" will turn off.
° "HOLD" and "WARM" will light.
° 170°will display.
After one hour in HOLD WARM:
° "End" will display=
° The time of day reappears in the display.
Baking Differences Between Your OJd
and New Oven
It is normal to notice some baking time differences between a
new ovenand an oid one. See"Adjusting the OvenTemperature"
on page 14.
Cook & Hold
Cook & Hold allows you to bake for a preset amount of time,
followed by a one-hour Keep Warm cycle.
To set Cook & Hold: ...............................
1. Press the Cook & Hold pad. HOLD
° "BAKE" and "HOLD" flash.
° 000lights in the display.
2. Select the oven temperature. The oven tempera-
ture can be set from 170° to 550°. Pressor press
and hold the A or _' pad.
° Pressthe A pad to increase the temperature.
° Pressthe V pad to decrease the temperature.
3. Press Cook & Hold again OR wait four seconds.
° "HOLD" flashes.
° 00:00flashes in the display.
Enter the amount of time you want to bake by pressing the
A or _' pad. Bake time can be set from ten minutes
(00:10} to 11 hours, 59 minutes (11:59}.
° "BAKE" and "HOLD" light in the display.
° The baking time wiii light in the display.
° The baking time wiii start counting down.
CO01!{&
A
V
To caneeJ Cook & Hold at any time:
Press the CANCEL pad. Remove food from oven.
De ay Bake
as dairy products, pork, poultry, or seafood.
When using Delay, the oven begins to cook later in the day.
Set the amount of time that you want to delay before the oven
turns on and how long you want to cook. The oven begins to
heat at the selected time and cooks for the specified length of
time, then keeps food warm for up to one hour.
Delay time can be set from 10 minutes @0:10}to 11 hours, 59
To set a Delayed Baking cycle:
1. Pressthe Delay pad........
° "DELAY" flashes. DELAY
° 00:00flashes in the display. '............
2. Press the A or 'V pad to set the delay time.
While "DELAY" is still flashing:
3. Pressthe Cook & Hold pad.
° 000lights in the display. ' /
° "BAKE" and "HOLD" flash. ..............
a. Press A pad to set the baking temperature.
° 00:00and "HOLD" flash.
° "BAKE" stays lit.
x
CO01!{&
12
Page 14

5. Press A pad to set the baking time.
° The Dday time, "DELAY", "BAKE" and "HOLD" Hightin
the dispiay.
Keep Warm
For safely keeping foods warm or for warming breads and
plates.
To set Keep Warm:
1.
Pressthe Keep Warm pad. I<{EE?
° "WARM" flashes. ............
WAIRM
When the Delay time has expired:
° "DELAY" will turn off=
° Baking time isdispiayed=
° "BAKE" and "HOLD" are dispiayed=
To set a Delay when Cook & Hold has already
been programmed:
1. Press the Delay pad. DELAY
° "DELAY" flashes. ............................
° 00:00appears
2. Press the A or V pad to set the dday time.
° After four seconds, "DELAY" will
stay Hitto remind you that a de.,layed
cooking cycle has been set. ........................
When the Delay time has expired
and the oven starts:
° The baking time will be dispiayed.
° "DELAY" will turn off.
° "BAKE" and "HOLD" will remain Hit.
To canoe!:
Press the CANCEL pad...................................... .................
° All timed and untimed cooking functions will be
canceled.
° The time of day will reappear in the display.
NOteS:
Do not use deiayed baking for items that require a
preheated oven, such as cakes, cookies, and breads.
Do not use delayed baking if oven is already hot.
° 000 appears in the display.
Select the Keep Warm temperature. The Keep
Warm temperature can be set from 145°to 190°.
Pressor press and hold the A or V pad.
° 170°wiii light when either pad is first pressed. '
, Pressthe A pad to increase the temperature.
, Pressthe _' pad to decrease the temperature.
"@'ARM"and the temperature wiii be displayed while Keep
Warm is active.
To cancel Keep Warm:
1. Pressthe CANCEL pad.
2. Removefood from the oven.
Keep Warm Notes:
° Foroptimal food quality, oven cooked foods should be kept
warm for no longer than 1 to 2 hours.
° To keep foods from drying, cover loosely with foil or a lid.
° To warm dinner rolls:
- cover rolls loosely with foil and place in oven.
- press Keep Warm and A pads to set 170° F.
- warm for 12-15 minutes.
, To warm plates:
- place 2 stacks of up to four plates each in the oven.
- press Keep Warm and A pads to set 170° F.
- warm for five minutes, turn off the oven and leave plates
in the oven for 15 minutes more.
15
- use only oven-safe plates, check with the manufacturer.
- do not set warm dishes on a cold surface as rapid
temperature changes could cause crazing or breakage.
Page 15
Automatic Shut-Off/Sabbath
Mode
The oven vqHautomatically turn off after 12 hours if you
acddentaHy Heaveit on. This safety' feature can be turned off.
TO cancel the 12-hour shut-off and run the
oven continuously for 72 hours:
1. Set the oven to bake (see page 11}...................
2. Press and hoid the CHockpad for three seconds. CLOCK
° SAbwill be dispiayed and flash for five seconds.
° SAbwill then be displayed continuously until turned off
or until the 72-hour time limit is reached.
Adjusting the Oven Temperature
Oven temperatures are carefully tested for accuracy at the
factory. It is normal to notice some baking or browning
differences between a new oven and an old one. As ranges
get older, the oven temperature can shift.
You may adjust the oven temperature if you think the oven is
not baking or browning correctly. To decide how much to
change the temperature, set the temperature 25° higher or
lower than your recipe recommends, then bake. The results
of the "test" should give you an idea of how much to adjust
the temperature.
TO adjust the oven temperature:
1. Press Bake. BAKE
° "BAKE" will also be displayed if a bake cycle is in use
while the oven is in Sabbath Mode.
All other functions EXCEPTBAKE{Timer, Keep Warm,
Clean, etc.} are locked out during the Sabbath Mode.
To cancel Bake when in Sabbath Mode:
Press CANCEL. ...............
° "BAKE" will turn off in the display.
° No beeps will sound.
To cancel the Sabbath Mode:
1. Press the Clock pad for three seconds.
OR
2. After 72 hours, the Sabbath Mode will end.
° SAbwill flash for 5 seconds.
° The time of day will return to the display.
Sabbath Mode Notes:
, Sabbath Mode can be turned on at any time with or
without the oven on.
, Sabbath Mode cannot be turned on if the touchpads are
locked out or when the door is locked.
2. Enter 550° by pressing the A pad.
3. Pressand hold the Bake pad for several
seconds or until 0° appears in the display.
If the oven temperature was previously adjusted, the
change wiii be displayed. Forexample, if the oven tem-
perature was reduced by 15° the display wiii show "-15 °''.
Pressthe A or V pad to adjust the temperature.
Eachtime a pad is pressed, the temperature changes by
5°. The oven temperature can be increased or decreased
by 5° to 35°.
The time of day will automatically reappear in the display.
You do not need to readjust the oven temperature if there
is a power failure or interruption. Broiling and cleaning
temperatures cannot be adjusted.
° When the Sabbath Mode is started, no preheat beep wiii
sound.
° All prompts, messages and beeps are deactivated when
Sabbath Mode is active.
s
, If the oven is baking when Sabbath Mode is set, "BAKE"
will go out at the end of the baking cycle. There will be
no audible beeps.
° Pressing CANCEL wiii cancel a Bake cycle, however the
controi wiii stay in the Sabbath Mode.
° If power faiis, the oven wiii power up in Sabbath Mode with
72 hours remaining and no cycle active.
14
Page 16

To set Broih
1. Press the Broil pad.
" "BROIL" flashes.
° SETis dispHayed.
2. Press the A pad to set HI broil or press the V pad to set
LO broil.
° HIor LO wflHbe dispHayed.
° Sdect HI broil (550° F)for normal broiling. Sdect
LO broil (450° F] for How-temperature broiling of Honger
cooking foods such as pouHtry.
3. After four seconds, the oven wflHstart.
° "BROIL" wflHremain Hit.
4. For optimum browning, preheat broil element for 3-4
minutes before adding food.
5. Place food in the oven. Leave oven door open about four
inches (the first stop]).
BRO_....
6. Turn meat once about halfway through cooking.
7. When food is cooked, press the CANCEL pad.
Remove food and broiler pan from the oven.
, The time of day will reappear in the
display.
Broil Notes:
, Forbest results when broiling, use a pan designed for
broiling.
, Expect broil times to increase and browning to be
slightly lighter if appliance is installed on a 208-volt
circuit.
, HJis used for most broiling. Use LO broil when broiling
longer cooking foods. The lower temperature allows
food to cook to the well done stage without excessive
browning.
, Broil times may be longer when the lower broiling
temperature is selected.
, Foradditional broiling tips and temperatures, refer to the
"Cooking Made Simple" booklet.
BroiJing Chart
I j
FOODS POS_TmON_' , DONENESS COOK TIME
Beef
Steak, 1" thick
Hamburgers, 3/4" thick
Pork
Bacon
Chops, 1"
Ham - precooked slice, 1/2" thick
Poamtry
Chicken Pieces
Seafood
Fish Steaks, buttered, 1" thick
Fillets
The top rack position is #5.
Note: This chart is a suggested guide. The times may vary with the food being cooked.
4
4
4
4
4
4
3 or 4 Well Done 28 - 38 minutes
Medium
Well Done
Well Done
Well Done
Well Done
Warm
Flaky
Flaky
15- 18 minutes
19 - 23 minutes
15- 18 minutes
6 - 10 minutes
22 - 26 minutes
8 - 12 minutes
LO Broil
10 - 15 minutes
8 - 12 minutes
15
Page 17
Oven Vent
When the oven is in use, the area near the vent may become
hot enough to cause barns. Never block the vent opening.
OVEN VENT
Be sure the drip bowl in the vent location
has a hole in the center. Do not cover
the drip bowl with aluminum foil.
OVEN VENT
OPENING
Oven Light
Press the Oven Light switch on the control panel to
turn the oven light on and off.
oven lighf
Oven Bottom
Protect oven bottom against spillovers, especially acidic or
sugary spills, as they may discolor the porcelain enamel. Use
the correct pan size to avoid spillovers and boilovers. Do not
place atensims or amaminam foil directly on the oven
bottom.
To replace:
1. Race rack on the rack support hl the oven
2. Tig the front end up sHightHy.SHiderack back untiHit dears
the Hock-stopposition.
3. Lower front and sHideback into the oven.
Do not cover an entire rack with aluminum foil or place foil
on the oven bottom. Baking results will be affected and
damage may occur to the oven bottom.
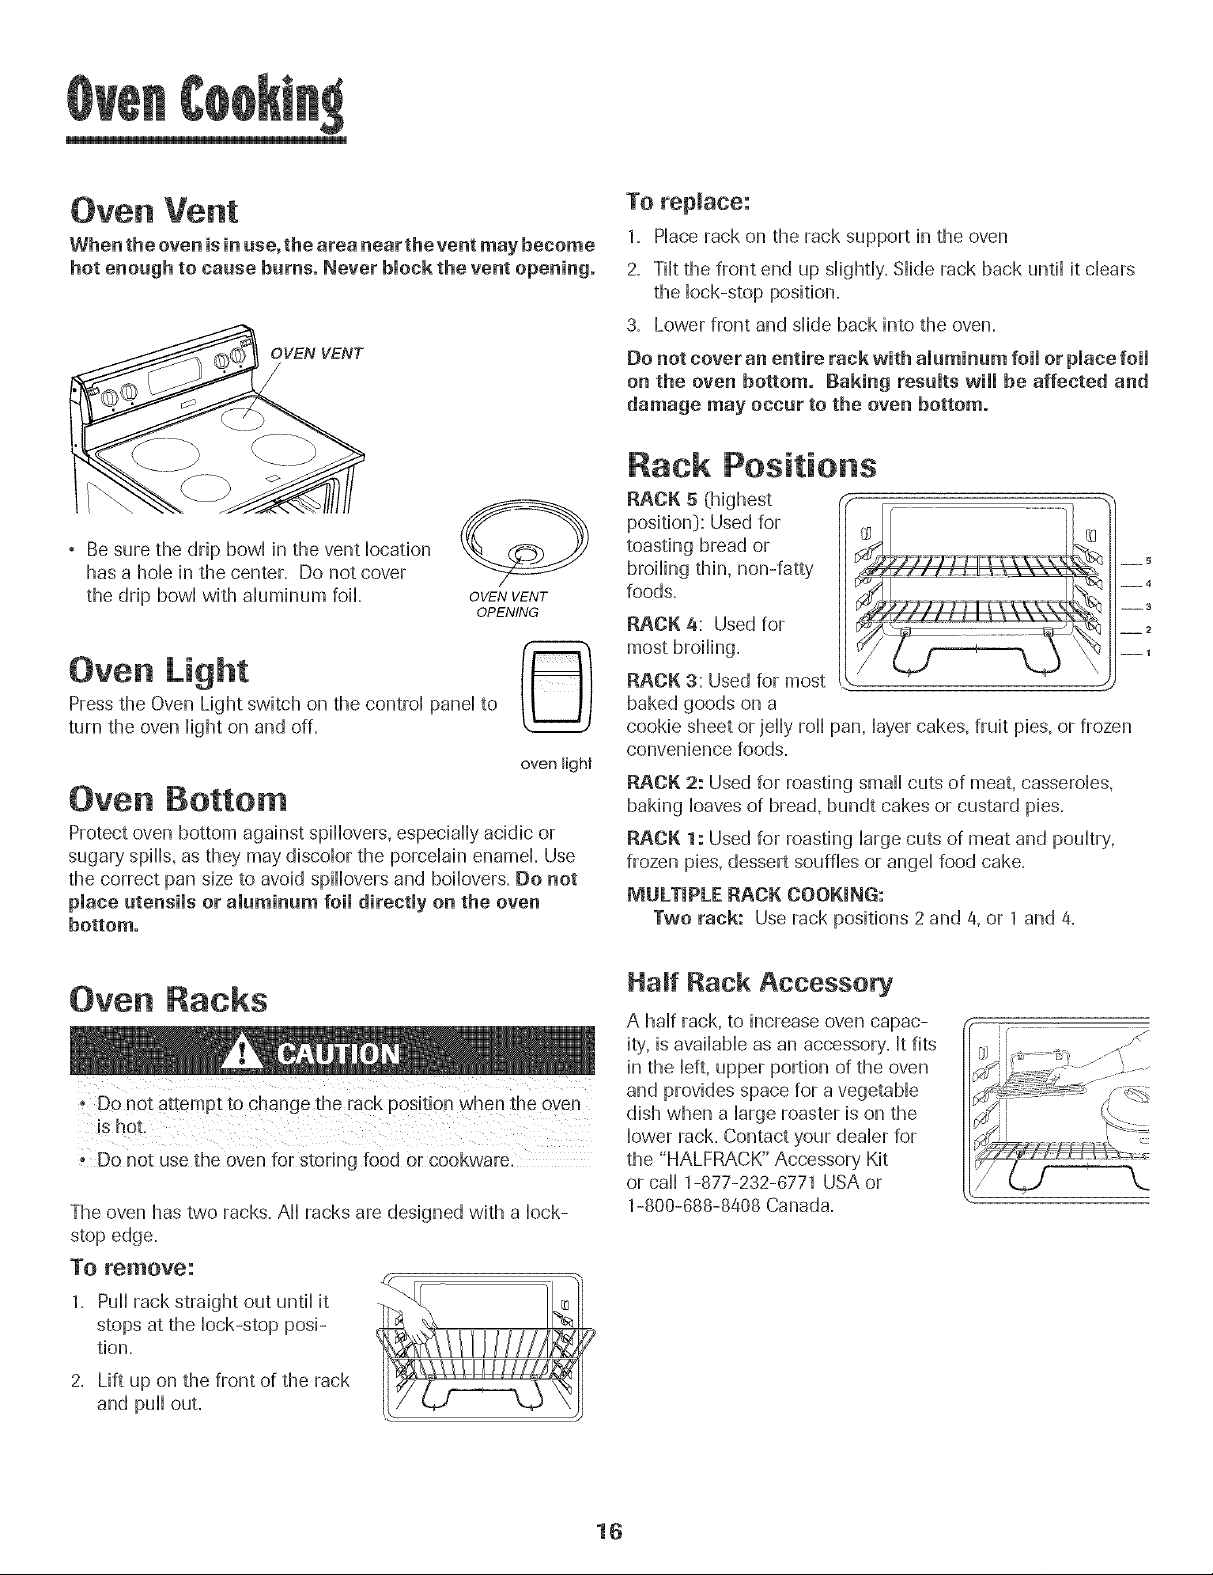
Rack Positions
RACK 5 (highest
position_):Used for
toasting bread or
broiling thin, non-fatty
foods.
RACK 4: Used for
most broiling.
RACK 3: Used for most
baked goods on a
cookie sheet or jelly roll pan, layer cakes, fruit pies, or frozen
convenience foods=
RACK 2: Used for roasting small cuts of meat, casseroles,
baking loaves of bread, bundt cakes or custard pies.
RACK 1: Used for roasting large cuts of meat and poultry,
frozen pies, dessert souffles or angel food cake.
MULTIPLE RACK COOKING:
Two rack: Use rack positions 2 and 4, or 1 and 4.
5
__4
--3
__2
--1
Oven Racks
" DOnot attempt to change the rack pos!ti0n when the oven
is h0t,
, Do nat usethe oven for storing food or cookware.
The oven has two racks. All racks are designed with a lock-
stop edge.
To remove:
1, Pull rack straight out until it
stops at the lock-stop posi-
tion,
2, Lift up on the front of the rack
and pull out,
Half Rack Accessory
A half rack, to increase oven capac-
ity, is available as an accessory. It fits
in the left, upper portion of the oven
and provides space for a vegetable
dish when a large roaster is on the
lower rack. Contact your dealer for
the "HALFRACK" Accessory Kit
or call 1-877-232-6771 USA or
1-800-888-8408 Canada.
16
Page 18
Se f-C ean Oven (select models:}
Note: For manua] dean oven, see page 20.
• it is normal for parts of the range to become hot during a
• To prevent personal injury and damage to the oven door
do not attempt to open door when "LOCK" is displa} ed.
o Avoid touching cooktop, door. window or oven vent area
Do not use commercial oven cleaners on the oven finish
or around any part of the oven. They wiil damage the
finish or parts.
6. Wipe up sugary and acidic spiiiovers such as sweet
potatoes, tomato, or miik-based sauces. Porceiain enamei
is acid-resbtant, not add-proofi The porceiain finish may
1
discoior if acidic spiiis are not wiped up before a seif-ciean
cycie.
To set Self-Clean:
Note: Oven temperature must be bellow 400° F to program
a dean cycie.
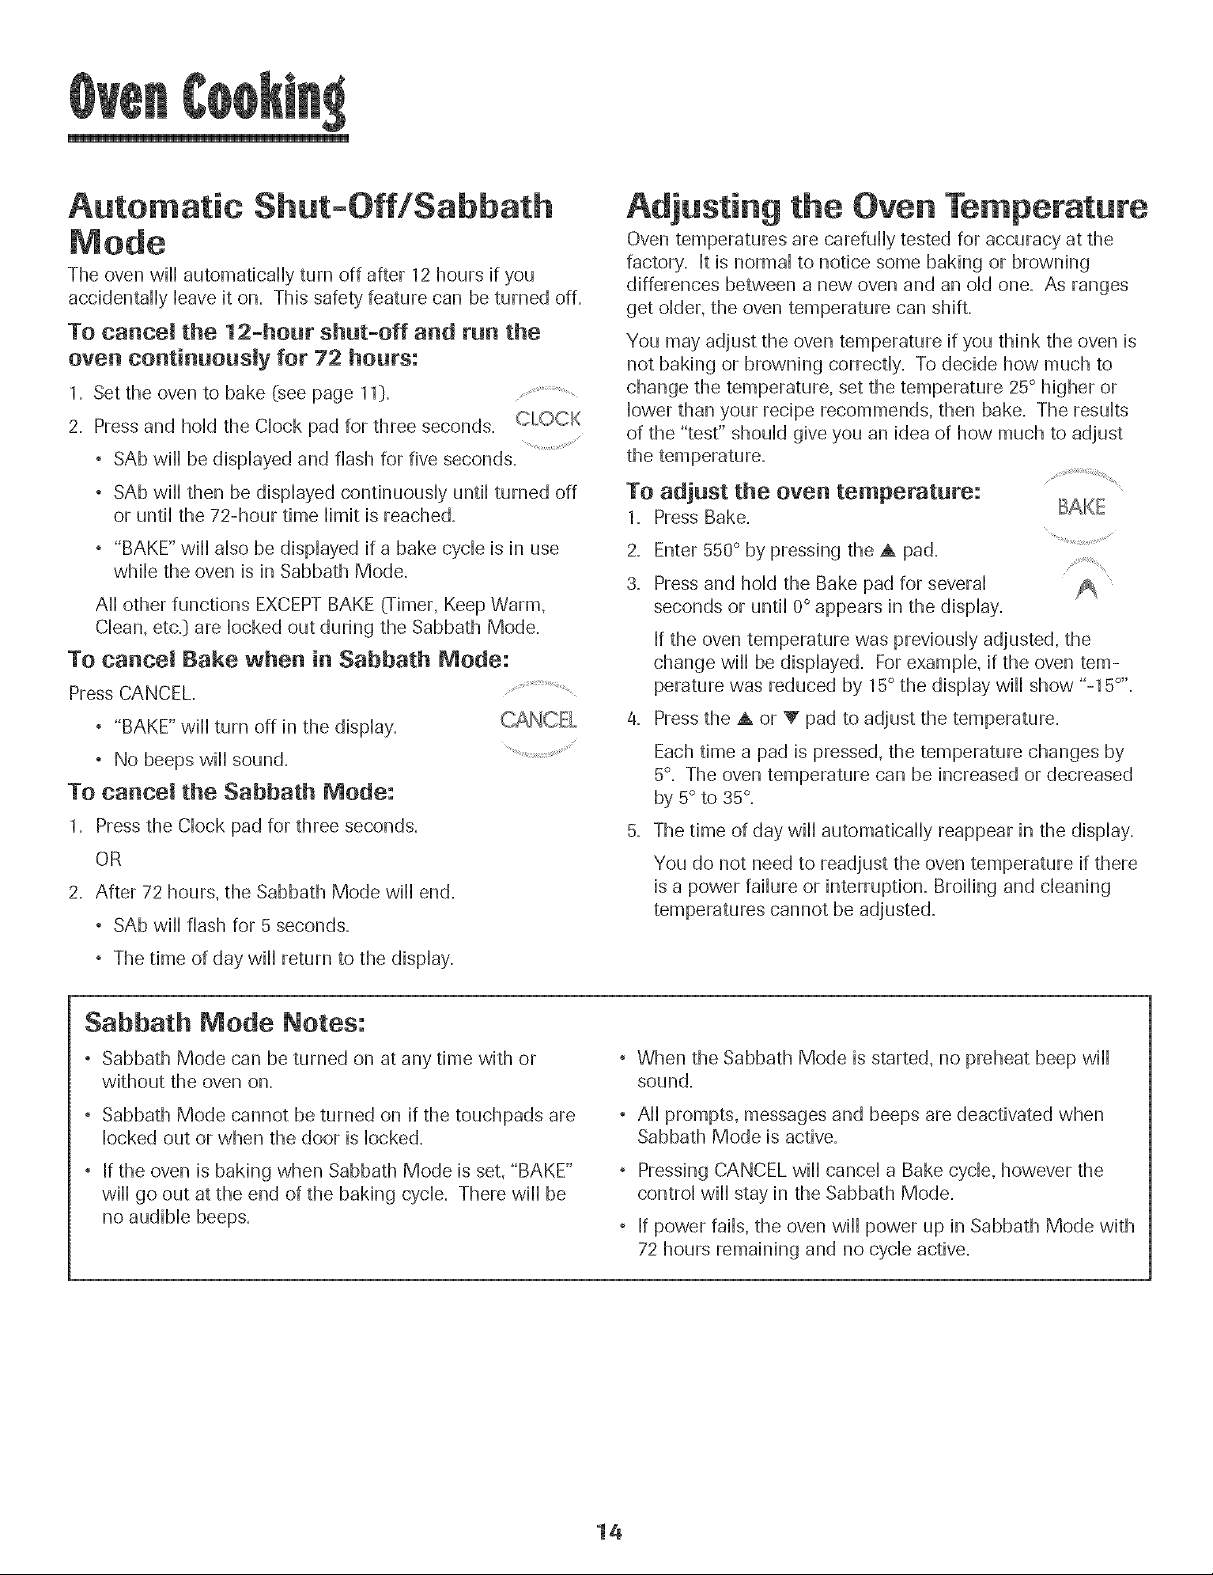
1. Close the oven door.
2. Move door lock lever right to the locked position.
The self-clean cycle uses above-normal cooking temperatures
to automatically clean the oven interior. Do not force the oven
door or lock lever open. This may result in exposure to high
temperatures and be a burn hazard.
It is normal for flare-ups, smoking, or flaming to occur during
cleaning if the oven is heavily soiled. It is better to clean the
oven regularly rather than to wait until there isa heavy build-
up of soii in the oven.
During the cleaning process, the kitchen should be well
ventilated to get rid of normal odors associated with cleaning.
Before Sdf-Cmeaning
1. Turn off the oven light before cleaning. The light may burn
2. Remove broiler pan, all pans, and oven racks from the
oven. The oven racks wiii discolor and may not slide easily
after a self-clean cycle if they are not removed.
3. Clean oven frame, door frame, area outside of gasket, and
around the opening in the door gasket with a nonabrasive
cleaner such as Bon Ami* or detergent and water. The
self-cleaning process does not
clean these areas. They should be
cleaned to prevent soil from baking
on during the clean cycle. (The
gasket is the seal around the oven
door and window}.
a. To prevent damage, do not clean or
rub the gasket around the oven
door. The gasket is designed to seal in heat during the
clean cycle.
5. Wipe up excess grease or spillovers from the oven bottom.
This prevents excessive smoking, flare-ups or flaming
during the clean cycle.
3. Press the Clean pad. CLEAN
, "CLEAN" flashes in the display. ...............
If the door is not closed, beeps wiii sound and "DOOR" wiii
display. If the door is not closed within 45 seconds, the
self-cleaning operation wiii be canceled and the display
will return to the time of day.
4. Press the A or _' pad.....................
° "CL-M" (Medium Soil, 3 hours} is displayed.
5. Press the A or V pad to scroii through the
self-cleaning settings. '_
CL-H" (Heavy Soil, 4 hours} .......................
CL-M" (Medium soil, 3 hours}
CL-L" (Light Soil, 2 hours}
Choosing the soil level of the oven automatically programs
the self-cleaning time.
6. After four seconds, the oven will start cleaning.
° The cleaning time will start counting down in the display.
"LOCK" wiii appear in the display.
"CLEAN" wiii appear in the display.
To
Delay a Self-Clean Cycle: ..............................
1.
Press the Delay pad. Dlli:LAY
° "DELAY" flashes.
00:00wiii appear in the display.
Press the A or Y pad to set the amount of
time you want to delay the cycle. Delay time
can be set from ten minutes @0:10}to 11 hours,
59 minutes (11:59}.
conto
* Brand names for cleaning products are registered trademarks of the respective manufacturers.
17
Page 19

3. PresstheCleanpad.
° "CLEAN"wiiiflash. CWAN
4. PresstheAorV pad.
° "CL-M"(MediumSoil,3hours}
isdisplayed.
5. PresstheAorV padtoscroiithroughthe
seif-cieaningsettings.
CL-H"(HeavySoii,4hours}
CL-M"(Mediumsoii,3hours}
CL-L"(LightSoil2hours}
ChoosingthesoiiieveioftheovenautomaticaHHyprograms
theseif-cieaningtime.
6. Afterfourseconds,CLEAN,DELAYandLOCKwiiiappear
inthedispiaytoshowthattheovenissetforadeiayed
deanoperation.Thedeiaytimeisdispiayed.
If the oven has already been set for a clean
cycle and you wish to set a delay:
1. Press the Deiay pad. DELAY
° "DELAY" flashes...........
° 00:00wiii appear in the dispiay.
2. Press the A or V pad to set the amount of
time you want to deiay the cyclic.
After four seconds, CLEAN, DELAY and LOCK
wiii appear in the dispiay to show that the oven
is set for a deiayed dean operation. The deiay
time is dispiayed.
When the Self-Clean cycle starts:
° "DELAY" wiii turn off.
During the Self-Clean Cycle
When LOCK shows in the dispiay, the door cannot be opened.
To prevent damage to the door, do not force the door open
when LOCK is dispiayed.
Smoke and Smells
You may see some smoke and smell an odor the first few
times the oven is cleaned. This is normal and will lessen in
time.
Smoke may also occur if the oven is heavily soiled or if a
broiler pan was left in the oven.
Sounds
As the oven heats,you may hear sounds of metal parts
expanding and contracting. This is normal and will not
damage the oven.
After Self-Cleaning
About one hour after the end of the self-clean cycle, "LOCK"
will turn off. The door can then be opened. The door can then
be opened. Move door lock lever to the left to unlock.
Some soil may leave a light gray, powdery ash. Remove
it with a damp cloth. If soil remains after wiping, that means
the clean cycle was not long enough. The soil will be re-
moved during the next clean cycle.
if oven racks were left in the oven and do not slide
smoothly after a clean cycle, wipe racks and rack supports
with a small amount of vegetable oil to make them easier to
move.
Fine lines may appear in the porcelain because it went
through heating and cooling. This is normal and wiii not
affect performance.
A white discoloration may appear after cleaning if acidic
or sugary foods were not wiped up before the self-clean
cycle. This discoloration is normal and will not affect perfor-
mance.
° The clean time wiii appear in the display.
To cance[ the Self-Clean cycle: .................................
Press the CANCEL pad.
° All words disappear from the display. .........................................
° All functions are canceled.
° The time of day appears in the display.
° If the oven door is left open, "DOOR" wiii flash in the
display and a signal wiil beep until the door is closed
and the Clean pad is pressed again.
° The oven door wiil be damaged if the oven door is
forced to open when "LOCK" is still displayed.
18
Page 20
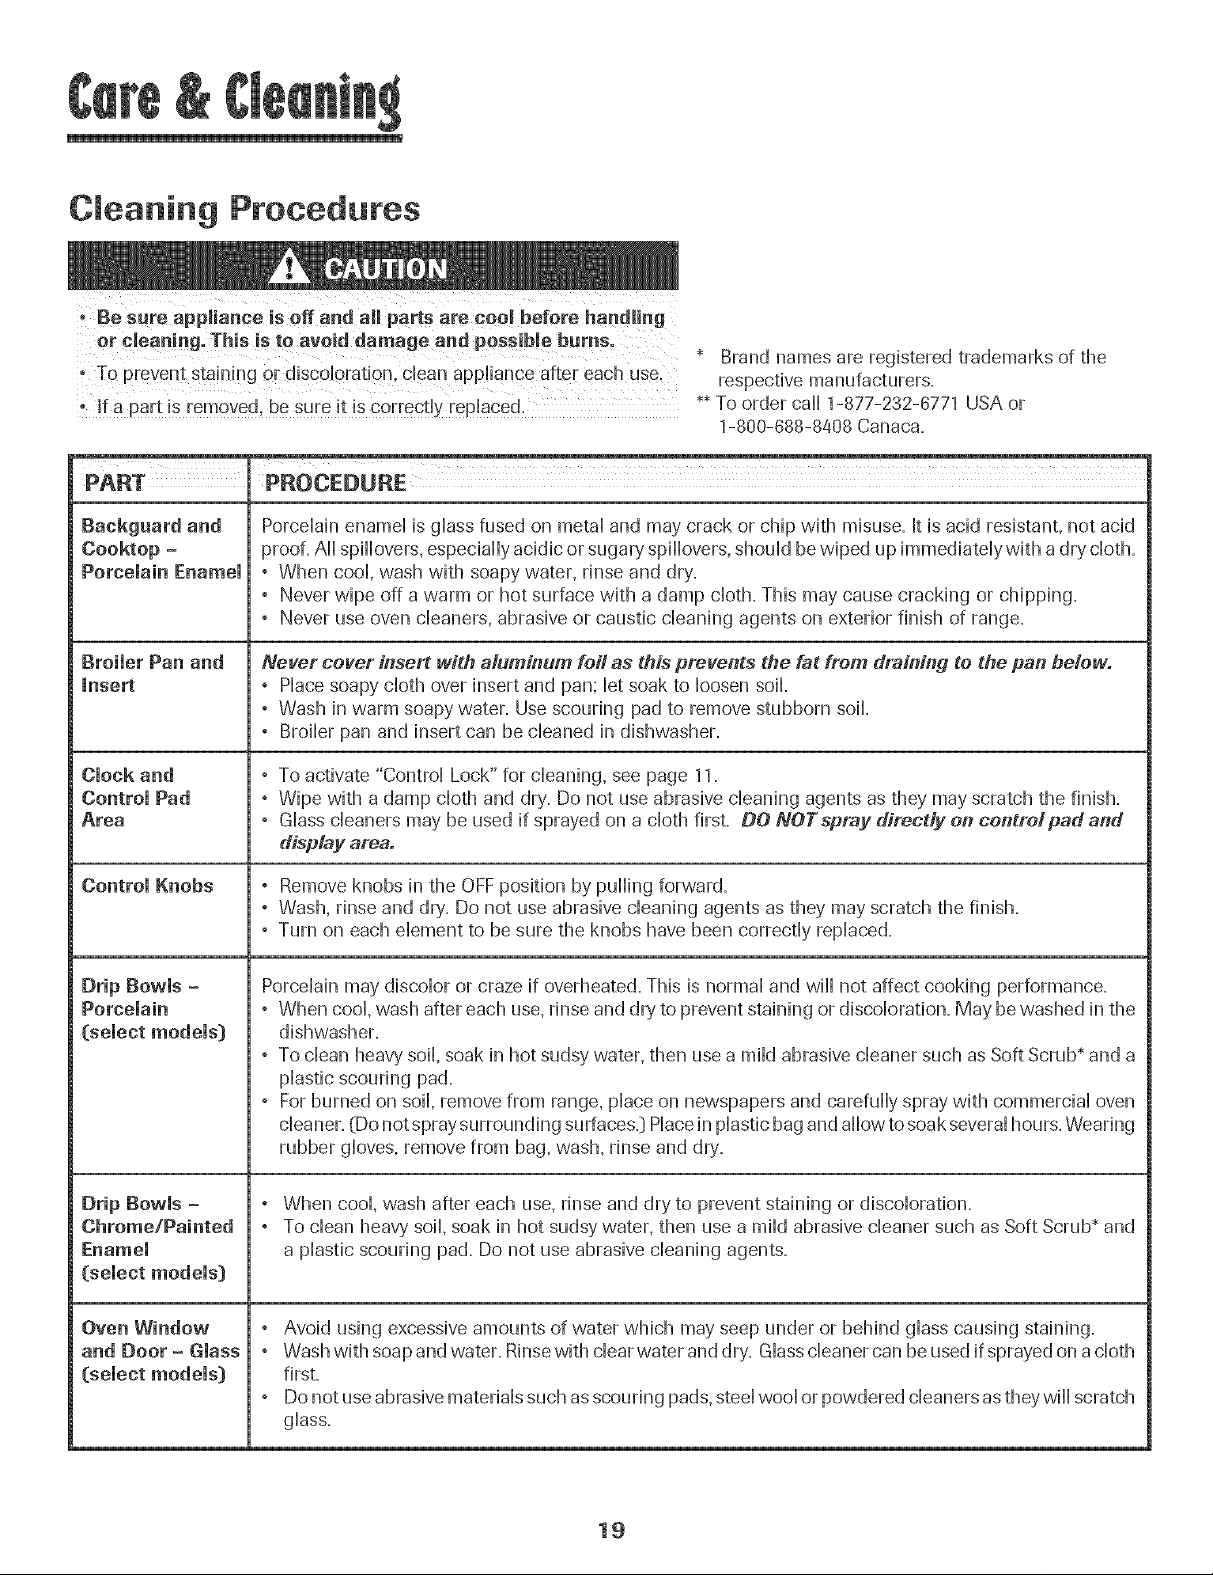
Cleaning Procedures
PROCEDURE
Brand names are registered trademarks of the
respective manufacturers.
** To order caii 1-877-232-6771 USA or
1-800-688-8408 Canaca.
Backguard and
Cooktop -
Porcelain Enamel
Broiler Pan and
insert
Clock and
Control Pad
Area
Control Knobs
Drip Bowls -
Porcelain
(select models}
Porcelain enamel is glass fused on metal and may crack or chip with misuse. It is acid resistant, not acid
proof. All spillovers, especially acidic or sugary'spillovers, should bewiped up immediately with a dry cloth.
, When cool, wash with soapy water, rinse and dry.
, Never wipe off a warm or hot surface with a damp cloth. This may cause cracking or chipping.
, Never use oven cleaners, abrasive or caustic cleaning agents on exterior finish of range.
Never cover insert with aluminum foil as this prevents the fat from draining to the pan below°
° Place soapy cloth over insert and pan; let soak to loosen soil,
° Wash in warm soapy water. Use scouring pad to remove stubborn soil
° Broiler pan and insert can be cleaned in dishwasher.
° To activate "Control Lock" for cleaning, see page 11.
° Wipe with adamp cloth and dry. Do not use abrasive cleaning agents as they may scratch the finish.
, Glass cleaners may be used if sprayed on a cloth first. DO NOTspray directly on controlpad and
display area.
° Remove knobs in the OFFposition by pulling forward.
° Wash, rinse and dry'. Do not use abrasive cleaning agents as they may scratch the finish.
, Turn on each dement to be sure the knobs have been correctly replaced.
Porcelain may discolor or craze if overheated. This is normal and wiii not affect cooking performance.
, When cool, wash after each use, rinse and dry to prevent staining or discoloration. May be washed in the
dishwasher.
° To clean heavy'soil, soak in hot sudsy water, then use a mild abrasive cleaner such as Soft Scrub* and a
plastic scouring pad.
° Forburned on soil, remove from range, place on newspapers and carefully spray with commercial oven
cleaner. {Do notspray surrounding surfaces.} Placein plastic bag and allow to soak several hours. Wearing
rubber gloves, remove from bag, wash, rinse and dr},.
Drip Bowls =
Chrome/Painted
Enamel
(select models}
Oven Window
and Door - Glass
(select models}
, When cool, wash after each use, rinse and dry to prevent staining or discoloration.
° To clean heavy soil, soak in hot sudsy water, then use a mild abrasive cleaner such as Soft Scrub* and
a plastic scouring pad. Do not use abrasive cleaning agents.
, Avoid using excessive amounts of water which may seep under or behind glass causing staining.
, Wash with soapand water. Rinsewith clear water and dry. Glasscleaner can be used ifsprayed on a cloth
first.
, Do not useabrasive materials such as scouring pads,steel wool or powdered cleaners asthey wiii scratch
glass.
19
Page 21

PART PROCEDURE
Oven interior Seif-Cleam
, Follow hstmctions on page 17-18 to set a self-clean cycle=
Manual Clean:
° CHeanfrequentHyusing mild abrasive cHeanersand a pHasticpad=
° Do not use metaHHicscouring pads because they wHHscratch the surface.
° When using commerciaHoven cHeanersfoHHowthe manufacturer's instructions.
° Wipe up acidic spHHs(tomato or milk based foods:)as soon as possible with soap and water. [f the spill
is not wiped up, it may discolor the porcelain.
To make cleaning easier, remove the oven door, if desired. (See Maintenance section on
page 21=]
Oven Racks ° Clean with soapy water.
° Remove stubborn soil with cleansing powder or soap-filled scouring pad=Rinse and dry=
° Racks will permanently discolor and may not slide smoothly if left in the oven during a self-clean
operation. If this occurs, wipe the rack edge and rack support with a small amount of vegetable oil to
restore ease of movement, then wipe off excess oil=
Stainless Steel ° DO NOT USEANY CLEANING PRODUCT CONTAINING CHLORtNE BLEACH.
(sdect modds] ° OO NOT USEABRASIVE OR ORANGE CLEANERS.
° ALWAYS WIPE WITH THE GRAtN WHEN CLEANING.
° Daily Cleaning/Light Soil -- Wipe with one ofthe following -soapy water, white vinegar/water sohtion,
Formula 409 Glass and Surface Cleaner* or a similar glass cleaner - using a sponge or soft cloth. Rinse
and dry. To polish and help prevent fingerprints, follow with Stainless Steel Magic Spray (Part No.
20000008]**.
, Moderate/Heavy Soil J- Wipe with one of the following - Bon Ami, Smart Cleanser, or Soft Scrub* -
using a damp sponge or soft cloth= Rinse and dry'.Stubborn soils may be removed with a damp multi-
purpose Scotch-Brite* pad; rub evenly with the grain. Rinse and dry. To restore luster and remove streaks,
follow with Stainless Steel Magic Spray*.
, Discoloration -- Using a damp sponge or soft cloth, wipe with CameoStainless Steel Cleaner*=Rinse
immediately and dry'.To remove streaks and restore luster, follow with Stainless Steel Magic Spray*.
Oven Door (select , When cool, wash with warm soapy water, rinse and dry,. Never wipe a warm or hot surface with a damp
models}, Storage cloth as this may damage the surface and may cause a steam burn.
Drawer, Door ° For stubborn soil, use mildly abrasive cleaning agents such as baking soda paste or BonAmi=*Do not use
Handle, Side abrasive, caustic or harsh cleaning agents such as steel wool pads or oven cleaners. These products will
Panels - Painted scratch or permanently damage the surface.
Enamel NO TE:Use a dry towel or cloth to wipe up spills, especially acidic or sugary spills. Surface may
discolor or dutl if soil is not immediately removed. This is especially important for white surfaces.
* Brand names for cleaning products are registered trademarks of the respective manufacturers.
** To order direct, call 1-877-232-8771 USA or 1-800-888-8408 Canada,
20
Page 22

Oven Door
Oven Window (select models}
To protect the oven door window:
o Do not place excessiveweight on or stand on an open
oven door. This could cause the range to tip over. break
Do not attempt to open or close door or operate oven until
door is properly replaced.
Never place fingers between hinge and front oven frame.
Hinge arms are spnng mounted. If accidentally hit. the
hinge will slam shut against oven frame and could injure
To remove:
1. When cool, open the oven door to
the first stop position (opened
about four inches}.
2. Grasp door at each side. Do not
use the door handle to lift door.
3. Lift up evenly until door clears
hinge arms.
To replace:
1. Grasp door at each side.
2. Align slots in the door with the hinge arms on the range.
3. Slide the door down onto the hinge arms until the door is
completely seated on the hinges. Push down on the top
corners of the door to completely seat door on hinges.
Door should not appear crooked.
Note: The oven door on a new range may feel "spongy"
when it is closed. This is normal and will decrease with use.
1. Do not use abrasive cleaning agents such as steel wool
scouring pads or powdered cleansers as they may scratch
the glass.
2. Do not hit the glass with pots, pans, furniture, toys, or other
objects.
3. Do not close the oven door until the oven racks are in
place.
Scratching, hitting, jarring or stressing the glass may weaken
its structure causing an increased risk of breakage at a later
date.
i Disc0nnect p0wei to range be[0re replacing l!#ht bu"b.
when replacing bulb,
o Do not touch hot bulb with adamp cloth asthis may cause
the bulb to break.
To Replace Oven Light Bulb:
1. When oven is cool, hold bulb cover in place, then slide wire
retainer off cover.
Note: Bulb cover will fall if not held in place while removing
wire retainer.
2. Remove bulb cover and light bulb. BuL_oovER
3. Replace with a @-watt appli-
ance bulb.
a. Replace bulb cover and se-
cure with wire retainer.
5. Reconnect power to range.
Resetclock.
21
RETAINER
Page 23
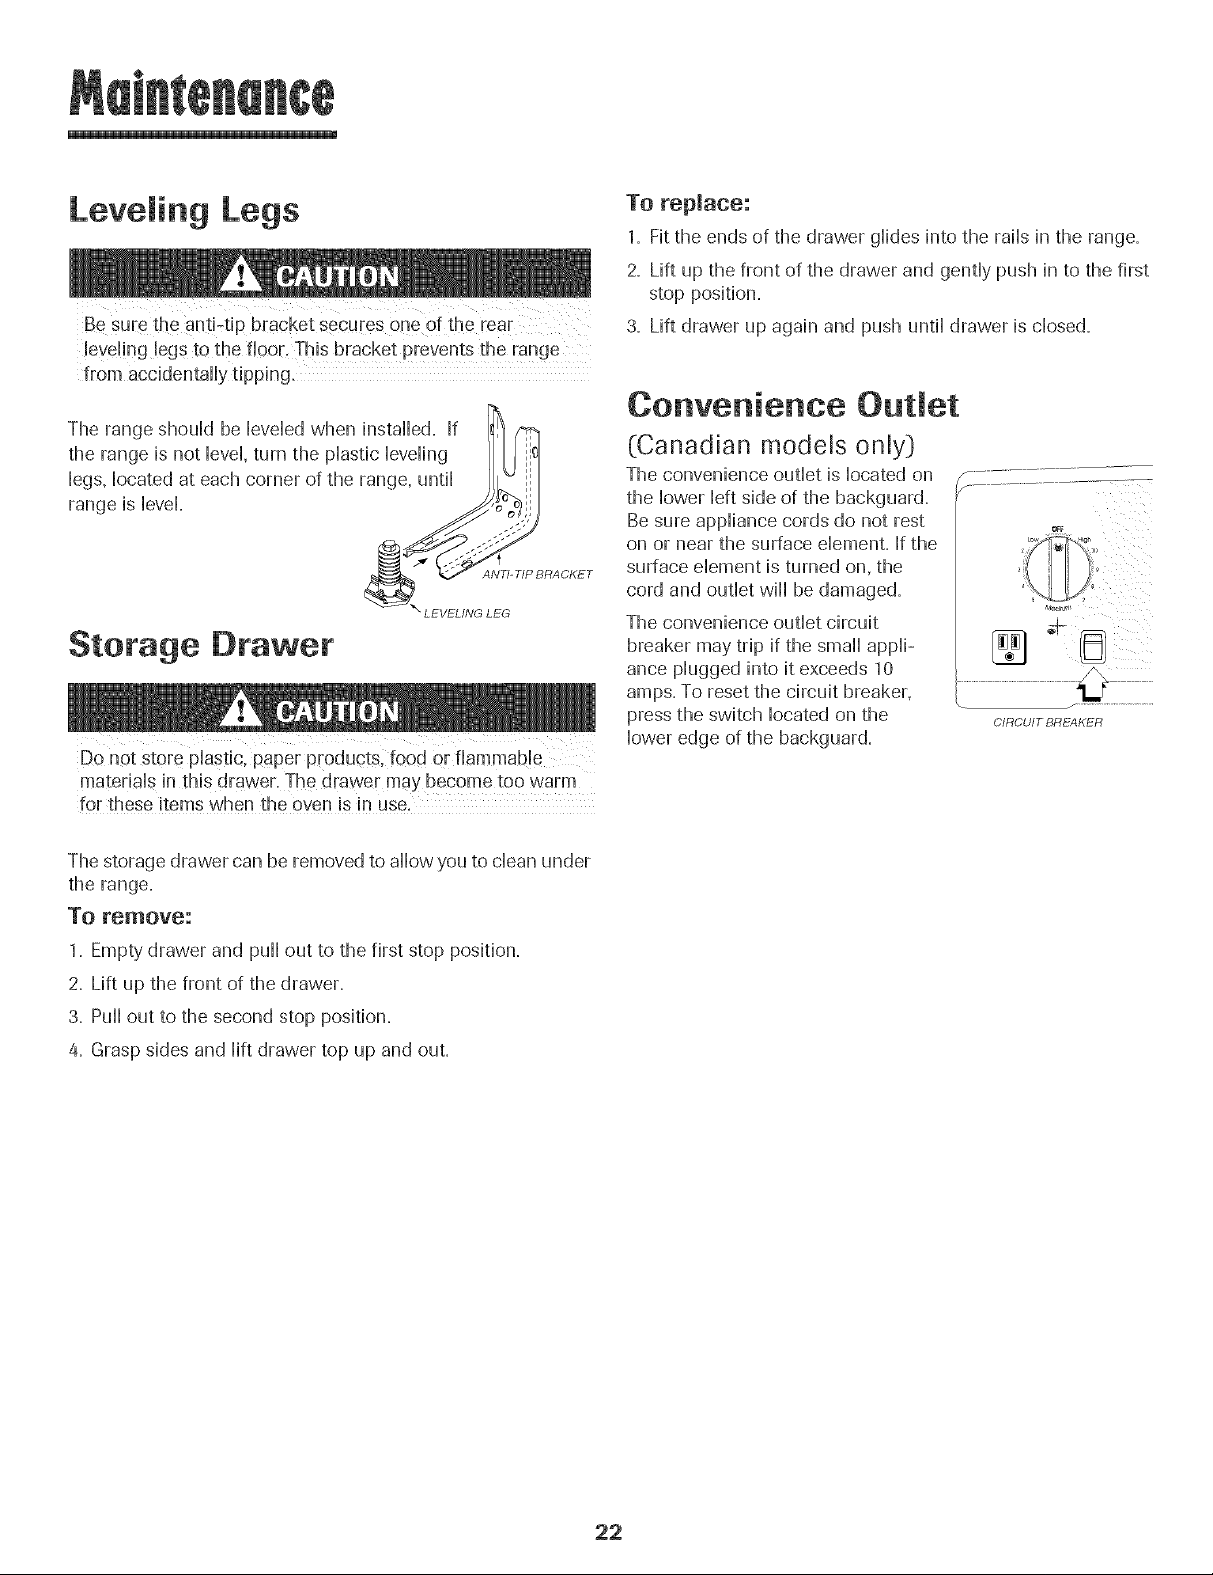
Leve ing Legs
Be suEethe ant!-tip bracket secures one of the rear
from accidentafly tipping,
Storage [}rawer
Do not store phstic, paper products, food or flammab!e
materials in this drawer. The drawer may become too warm
for these items when the oven is in use.
To replace:
1. Fit the ends of the drawer glides into the rails in the range.
2. Lift up the front of the drawer and gently push in to the first
stop position.
3. Lift drawer up again and push until drawer is closed.
Convenience Outlet
(Canadian models only}
The convenience outlet is located on
the lower left side of the backguard.
Be sure appliance cords do not rest
on or near the surface dement. If the
surface element is turned on, the
cord and outlet wiii be damaged.
The convenience outlet circuit
breaker may trip if the small appli-
ance plugged into it exceeds 10
amps. To reset the circuit breaker,
press the switch located on the
lower edge of the backguard.
CIRCUIT BREAKER
The storage drawer can be removed to allow you to clean under
the range.
To remove:
1. Empty drawer and puff out to the first stop position.
2. Lift up the front of the drawer.
3. Puffout to the second stop position.
a. Grasp sides and lift drawer top up and out.
22
Page 24

PROBLEM SOLUTION
For most concerns, try these first. ° Check if oven controHshave been propedy set=
, Check to be sure pHugis secureHyinserted into receptacle.
, Check or re-set circuit breaker. Check or repHacefuse.
, Check power suppHy=
Part or atomof appmiance does not
work.
Clock, indicator words, and/or
lights operate but oven does
not heat.
Baking resumts are not as
expected or differ from
previous oven.
Food is not broiling properly or
smokes excessively.
° Check if surface and/or oven controHshave been propedy set=See pages 5-16=
° Check if oven door is unHockedafter seHf-cHeancycHe=Seepage 18=
° Check if oven is set for a deHayedcook or dean program. See pages 12 & 17=
° Check if ControHLock is activated=See page 11=
° Check if control is in Sabbath Mode. See page 14=
, Oven may be set for a Cook & Hold or delay function.
, The Control Lock may have been set=See page 11=
° Make sure the oven vent has not been blocked. See page 16 for location.
° Check to make sure range is level=
° Temperatures often vary'between a new oven and an old one.As ovens age,the oven
temperature often "drifts" and may become hotter or cooler= See page 14 for
instructions on adjusting the oven temperature (select models[). NOTE: It is not
recommended to adjust the temperature if only one or two recipes are in question.
° See "Cooking Made Simple" booklet for more information on bakeware and
baking=
, Check oven rack positions. Food may be too close to element.
, Broil element was not preheated.
, Aluminum foil was incorrectly used. Never line the broiler insert with foil.
, Oven door was closed during broiling. Leave the door open to the first stop position
(about 4 inches_).
, Trim excess fat from meat before broiling.
, A soiled broiler pan was used.
, Voltage in house may be low.
Oven wimmnot semf-cmean
(select models).
Oven did not clean properly
(select models).
Oven door wimmnot anmock after
semf-cmean cycle (select models).
, Check to make sure the cycle is not set for a delayed start. See page 17.
° Check if door is closed.
, Check if control is in Sabbath Mode. See page 14.
, Oven may be over 400° F.Oven temperature must be below 400° Fto program a
clean cycle.
, Longer cleaning time may be needed.
, Excessivespillovers, especially sugary and/or acidic foods, were not removed prior
to the self-clean cycle.
, Oven interior is stir[ hot= Arrow about one hour for the oven to coo[ after the
completion of a self-clean cycle. The door can be opened when the LOCK is not
displayed,
° The control and door may be locked. See page 11.
cont.
23
Page 25

m
PRGSLEM SGLUTIGN
Moisture collects on oven ° This is normal when cooking foods high in moisture.
window or steam comes from , Excessivemoisture was used when cleaning the window.
oven vent.
There is a strong odor or light , This is normal for a new range and will disappear after a few uses. Initiating a clean
smoke when oven is turned on. cycle will "burn off" the odors more quickly.
° Turning on a ventilation fan will help remove the smoke and/or odor.
° Excessivefood soils on the oven bottom. Use a self-clean cycle (select models}.
Fault Codes (select models} ° BAKE or LOCKmay flash rapidly in the display to alert you if there is an error
or a problem, if BAKE or LOCKappear in the display, press Cancel pad.
If BAKE or LOCKcontinue to flash, disconnect power to the appliance.
Wait a few minutes, and then reconnect power. If the flashing still continues,
disconnect power to the appliance and call an authorized servicer.
° If the oven is heavily soiled, excessive fiareups may result in a fault code during
cleaning. Pressthe Cancelpad and allow the ovento cool completely, wipe out excess
soil, then reset the clean cycle. If the fault code reappears, contact an authorized
servicer.
Noises may be heard. ° The oven makes several low level noises.You may hear the oven relays as they go on
and off. This is normal
° As the oven heats and cools, you may hear sounds of metal parts expanding and
contracting. This is normal and will not damage your appliance.
no display.
° Control may be in Sabbath Mode (select models}. See page 14.There are no beeps and
24
Page 26

Fuji One Year Warranty =
Parts and Labor
For erie (1} year from the original
retail purchase date. any part which
hils in normal home use wHUbe
repaired or repBced free of charge.
Canadian Residents
The above warranties only cover an
appliance installed in Canada that has
been certified or listed by ap propriate
test agencies for compliance to a
National Standard of Canada unless
the appliance was brought into
Canada due to transter of residence
from the Upited States to Canada.
Limited Warranty Outside the
United States and Canada -
Parts Only
For one (1} yea from the date of
original reta[ purchase, any part which
fails in normal home use will be
repaired or rephced free of charge fo[
the part itself, with the owner paying
aii other costs, including labor, mib-
age, transportation, trip charge and
diagnostic chartge, if required.
The spedfb warranties expressed
above are the ONL Y warranties
prodded by me manutacturef: These
wa#antles g_veyou specific legal tights.
and you may also have other rights
which vary fi'om state to state.
What is Not Covered By These
1. Conditions and damages resulting from any of the following:
a. Improper installation, delivery, or maintenance.
b. Any repair, modification, alteration, or adjustment not authorized by
the manufacturer or an authorized servicer.
c. Misuse, abuse, accidents, or unreasonable use.
d. Incorrect electric current, voltage, or supply.
e. Improper setting of any control
2. Warranties are void if the original serial numbers have been removed, altered,
or cannot be readily determined.
3. Light bulbs.
4. Products purchased for commercial or industrial use.
5. The cost of service or service caii to:
a. Correct installation errors.
b. Instruct the user on the proper use of the product.
c. Transport the appliance to the servicer.
6. Consequential or incidental damages sustained by any person as a result of
any breach of these warranties. Some states do not allow the exclusion or
limitation of consequential or incidental damages, so the above exclusion may
not apply.
If You Need Service
® Call the dealer from whom your appliance was purchased or call Maytag
Services sM,Customer Assistance at 1-800-688-1120 U.S.A. and Canada to
locate an authorized servicer.
® Be sure to retain proof of purchase to verify warranty status. Refer to
WARRANTY for further information on owner's responsibilities for warranty'
service.
" If the dealer or service company cannot resolve the problem, write to May'tag
Services sM,Attn: CAIR _ Center, P.O. Box 2370, Cleveland, TN 37320-2370, or
call 1 =800=688=1120 UoSoAoand Canada.
U.S.customers using TTY for deaf, hearing impaired or speech impaired, call
1-800-688-2080.
* User's guides, service manuals and parts information are available from
Maytag ServicessM,Customer Assistance.
When writing or calling about a service problem, please include:
a. Your name, address and telephone number;
b. Model number and serial number:
c. Name and address of your dealer or servicer;
d. A clear description of the problem you are having;
e. Proof of purchase {sales receipt}.
25
Page 27

des _ati_res
sur la surface ............. 31-32
Ides
Itsspirai6s
mefour .............. 33-43
_mauuem
oge Cubson couran[e
GriI
Four
courante GriI
du feur _ autonettoyage
oge D6marrage diff6r6
:erie Maintien au chaud
n courante Gril
maintien Grilles du four
Cuisini_re @|ectrique
en @|@_ents spira|@s
Netteyage ...................................44-47
Four autonettoyant
M6thodes de nettoyage
Entretien ...................................... 48-49
Hublot du four
Lampe du four
Recherche des pannes ............50-51
Garantie et service apres-vente ... 43
Guia demUsuario ...............................54
Page 28

Jnstallateur:Laissezceguideavec appamil,
Consommateur:Vemlbz lire Jeguideetle conserverpour
consu_[ationulterieure.Conservezlafactured'achatoub cheque
encamsecommepreuvede I'achat
Numerode mo@Le
Numerode serie
Dated'achat
Pour toute question, contacter Maytag
1-800-688-1120 (E.-U. et CanadaJ
(Lundi - vendredi, 8 h - 20 h heure de rest,
DaB b cadrede nospratiquesd'ameliorationcons[amede ia
qualit6et de la performanceue nos produitsde cuisson des
modificationsde I'appareilqui nesent pasmentionn@sdartscG
guide ont pu 6tre lntroduites.
Repo_ez-veus _ la page 43 pour plus d'#fformations
concerna#t te set!lice apt@s_venteo
Pour une utiiisatien ad@quate et en s@curit@,il faut que
Fappareil soit convenabbment installe par un technicien
qudifi& et relic a la term.
Ne pas regbr, r@arer ni rempBcer un composant, a moins
que ceB ne soit specifiquement recommande dans ce guide.
Toute autre reparation doit etre effectuee par un technicien
Toujours debrancher I'appareil avant d'y faire de I'entretien.
Les instructions de securite importantes et bs paragraphes
<<avertissement >>de ce guide ne sent pas destines a couvrir
toutes bs conditions et situations qui pourraient se presenter.
II faut faire preuve de ben sens, de prudence et de soin Iors de
Finstdlation, de Fentretien oudu fonctionnement de Fappare&
Toujours prendre contact avec lefabricant dans b cas de
proNemes ou de conditions qui ne seraient pas comprises.
Reconna_tre Jes etiquettes, paragraphes
et symbo_es sur Ja securit6
AVERTISSEMENT _ Dangers eU pratiques dangereuses qui
POURRA!ENT resulteFen @graves b!essuFesou meme! a
mort.
ATTENTmON,=Dangers ou pmtiques dangereuses qui
POURRAtENTresulter en des blessures mineures.
Life routes ies instructions avant d'utiliser cet appareii;
observer toutes bs instructions pour eliminer bs risques
d'incendie, choc ebctrique, dommages materiels et corporeb
que pourrait susciter une utilisation incorrecte de Fappare&
Utiliser Fappareil uniquement pour bs fonctions prevues,
decrites dans ce guide,
Utiliser une lampe torche pour determiner si la bride antibascu-
lement est convenablement installee sous la cuisiniere, L'un des
pieds arriere de reglage de I'aplomb doit etre convenablement
engage dans la fente de la bride, Lorsque la cuisiniere est con-
venablement calee, la bride antibasculement immobilise le pied
arriere centre le sol, Verifier la parfaite immobilisation de la
cuisiniere par la bride apres chaque deplacement de la
culslnlere,
Po r viter i#ce die des
dommages de ramie
S'assurer que tousies materiaux de conditionnement sent
retires de i'appareii avant de ie mettre en marche.
Garder ies materiaux combustibles bien eioignes de i'appareii.
Ne pas ranger de materiaux inflammables dans un four.
De nombreux types de plastique sent affectes par la chaleur.
Garder ies piastiques eioignes des pieces de i'appareii pouvant
devenir chaudes.
Pour emp@her qu'un feu de graisse ne se @clare, eviter toute
accumulation de graisse ou autres matieres inflammables
dans I'appareil ou au voisinage.
27
Page 29

En cas d'incendie
Ne jamab utiiber d'eau pour 6teindre de la graisse
enfiammee. Utiiber du bicarbonate de soude ou un extincteur
poudre chimique ou a mousse pour etouffer bs fiammes.
1. [nterrompre ['aHmentation eiectdque de ['appareH pour
minimiser [a propagation des fiammes.
2. NE]AMAmS saisir ou d@iacer un ustensiie de cuisine
enfiamm&
3, Fermer [aporte du four pour etouffer [es fiammes du four,
S curit6 pour [es enfants
pareii des articles auxqueis [es enfants peuvent slnteresser.
Un enfant tentant de grimper sur rappareii ou sur la porte
pour atteindre un objet, pourrait se blesser gravement.
NE JAMAIS iaisser des enfants seuis ou sans supervision
iorsque i'appareii est en service ou encore chaud. Nejamais
iaisser un enfant s'asseoir ou se tenir sur une pattie queiconque
de i'appareii, li pourrait se biesser ou se brOier.
[Iest important d'enseigner aux enfants que I'appareil et les
ustensiies places dedans peuvent etre chauds. Laisser refroidir
les ustensiies en un lieu sQr,hors d'atteinte des enfants. [I est
important d'enseigner aux enfants qu'un appareii menager n'est
pas un jouet, et qu'iis ne doivent toucher aucune commande ou
autre composant de i'appareii.
Famiiiarisation avec ['apparei[
NE JAMAmS utiiiser un appareii comme escabeau pour
atteindre [es armoires se trouvant au-dessus. Le mauvais
emploi de porte d'appareii comme par exemple en tant
qu'escabeau, le fait de s'appuyer ou de s'asseoir sur la porte.
peuvent entrai'ner [e renveusement de l'appareil, casser [a
porte et gravement biesser, avant d'ajouter ou enlever un plat; utiliser pour cela une
Ne pas utiliser cet appareil pour chauffer ou pour garder
chaude une pi@e, sinon des dommages a i'appareii pourraient
s'ensuivre et ceia pourrait 6tre dangereux pour I'utiiisateur,
Aussi, ne pas utiiiser ie four pour ranger des aliments ou des
ustensiies de cuisine,
Ne pas bloquer ou obstruer 1'eventdu four,
NEJAMAB TOUCHER LES ELEMENTSCHAUFFANTSN[ LES
PAROB INTERIEURESDU FOUR.Les elements chauffants
peuvent etre brQlants meme s'ils ne sont plus rouges. Les
surfaces interieures du four peuvent atteindre une temperature
suffisamment eievee pour infiiger des brOiures. Pendant et
apres usage, ne pas toucher les elements chauffants ni les
parois interieures du four et eviter bur contact avec des
vetements ou autres materiaux inflammables avant qu'ils
n'aient eu le temps de refroidir suffisamment. D'autres surfaces
peuvent egalement atteindre une temperature suffisamment
eievee pour brOier :ies ouvertures d'event et ies surfaces
avoisinantes, ainsi que ies portes et ies hubiots des fours.
Ne pas toucher i'ampouie du four bn]iante avec un chiffon
humide car eiie pourrait se briser. Si tel est ie cas, debrancher
i'appareii avant de retirer i'ampouie pour eviter une decharge
eiectrique.
NE JAMAIS garnir ia sob du four ou une grille du four avec
de la feuille d'aluminium, Ceci pourrait susciter un risque de
d@harge electrique ou d'incendie, ou une deterioration de
I'appareil, Utiliser de la feuille d'aluminium uniquement selon
les instructions de ce guide,
Cuisson et s6curit6
NE JAMA[S faire chauffer un recipient non ouvert dans le
four, L'accumuiation de pression dans ierecipient pourrait
provoquer son eciatement et de graves dommages materiels
ou corporeis,
Utiiiser des maniques robustes et seches, Des maniques
humides peuvent provoquer ia formation de vapeur brQiante,
Ne jamais utiiiser un torchon a vaisseiie ou autre article textile
la place de maniques; un tel article pourrait trainer sur un
element et s'enfiammer, ou accrocher un ustensiie ou un
composant de i'appareii,
Porter un vetement approprie, Eviter de porter des vetements
ampies ou a Iongues manches pendant I'utiiisation de
I'appareil, [is peuvent prendre feu si le vetement entre en
contact avec un element de cuisson brQiant,
Placer toujours ies grilles b ia position appropriee dans ie four
Iorsque le four est froid, Faire coulisser la grille vers I'exterieur
manique robuste et seche, Eviter d'introduire la main clans le
four pour y placer ou retirer un plat, S'ii est necessaire de
deplacer une grille Iorsqu'elle est chaude, utiliser une manique
seche, Ne pas toucher un element chaud avec une manique,
N'utiliser les grilles que dans le four dans lequel elles ont 6te
achetees/expediees,
28
Page 30

Ouvrir toujours la porte du four tres prudemment, Laisser Fair
chaud ou la vapeur s'echapper avant de retirer ou d'introduire
un plat,
AVERTISSEMENT - METS PR_:PARF.S: Respecter les
instructions du fabricant, Si le contenant ou le couverde en
plastique d'un mets surgele se ddorme ou est endommage
durant la cuisson, jeter immediatement le recipient et son
contenu, Les aliments pourraient etre contamines,
Ne pas permettre le contact de papier d'aluminium ou de la
sonde a viande avec les elements chauffants,
Toujours eteindre toutes les commandes une fois la cuisson
terminee,
Ustensiles et s curit
App[iquer [es instructions du fabricant [ors de ['emp[oi d'un
sachet pour cuisson au four,
La securite de fonctionnement de cet appareil a ere testee
I'aide d'ustensiles de cuisine traditionnels, Ne pas utiliser un
ustensile ou accessoire qui n'est pas specifiquement
recommande darts ce guide, Ne pas utiliser de couvre-
element, gril place sur la table de cuisson ou systeme de
convection additionnel, L'utilisation d'un dispositif ou
accessoire qui n'est pas expressement recommande darts ce
guide peut degrader la securite de I'appareil ou sa perfor-
mance, ou reduire la Iongevite des composants,
Si un ustensile est plus petit que I'element utilise, une partie
de I'element chauffant est exposee et peut provoquer
I'infiammation d'un vetement ou des maniques,
Seuls certains materiaux en verre, vitroceramique, ceramique,
gres, ou certains ustensiles vitrifies/emailles peuvent etre
utilises sur la table de cuisson ou darts le four sans risque de
bris sous I'effet du choc thermique, Observer les instructions
du fabricant Iors de I'utilisation d'un ustensile en verre,
Veiller a ne jamais laisser le contenu liquide d'un ustensile
s'evaporer completement; Fustensileet [appareil pourraient
subir des dommages,
Table de cuisson
NE JAMAIS laisser un element de surface allume sans
surveillance, particulierement avec chauffage eleve, Le
debordement du contenu de I'ustensile pourrait provoquer la
generation de fumee abondante et [inflammation de la
graisse,
Cet appareil comporte des elements chauffants de differentes
tailles, Utiliser toujours un ustensile a fond plat, de taille
suffisante pour qu'il puisse recouvrir completement I'element,
Pour optimiser I'efficacite, choisir un ustensile de meme taille
que I'element,
1
Elements spiral s
Pour eviter de deteriorer leselements chauffants amovibles, ne
pas les immerger / tremper / nettoyer darts un hve-vaisselle,
ou darts un four autonettoyant, Un element chauffant
endommage pourrait provoquer un court-circuit suscitant un
incendie ou un choc electrique,
Veiller a ce que la cuvette de recuperation soit toujours en
place Iors de I'utilisation de I'element; I'absence de la cuvette
de recuperation Iors d'une cuisson peut faire subir des
dommages au c8bhge,
Garnitures de protection : Ne pas garnir les cuvettes de
recuperation sous les elements ou le fond du four avec de la
feuille d'duminium, sauf Iorsque ceci est suggere darts le
guide, La mise en place d'un tel garnissage peut susciter un
risque de choc electrique ou d'incendie,
Orienter la poignee de chaque ustensile vers le centre de la
table de cuisson et non vers I'exterieur ou vers un autre
element; ceci reduira le risque de brOlure, inflammation de
matiere inflammable ou renversement (un jeune enfant
pourrait saisir et renverser un ustensile dont le manche est
oriente vers I'exterieur),
Veiller a utiliser un ustensile de taille suffisante pour que le
contenu ne risque pas de deborder, Ceci est particulierement
important pour un ustensile rempli d'huile de friture, Verifier
que la taille de I'ustensile est suffisante pour qu'il puisse
recevoir les produits alimentaires a cuire, et absorber
I'augmentation de volume suscitee par I'ebullition de la
graisse,
Exercer une prudence extreme Iors du deplacement du
recipient de graisse ou Iors de I'elimination de graisse chaude,
Laisser la graisse refroidir avant de deplacer [ustensile,
Hottes d'e×traction
Nettoyer frequemment les filtres et la hotte de la cuisiniere
pour empecher la graisse ou d'autres produits inflammables
de s'accumuler sur les filtres ou la hotte en provoquant des
feux de graisse,
Pour fiamber des aliments sous la hotte, mettre le ventilateur
en marche,
29
Page 31

Nettoyage et s curit
Nettoyer prudemment la table de cuisson, Arreter routes les
commandes et attendre le refroidissement de tousles
composants avant de les toucher ou d'entreprendre le
nettoyage, Nettoyer I'apparefl avec precaution, Travafller
prudemment pour eviter des brQlures par la vapeur en cas
d'utflisation d'un chiffon ou d'une eponge humide lots de
I'elimination d'un produit renverse sur une surface chaude,
Certains produits de nettoyage peuvent generer des vapeurs
nocives Iorsqu'on les applique sur une surface chaude,
Nettoyer uniquement les pieces mentionnees darts ce guide,
Four autonettoyant
(certains modeles}
lechefrite dans le four lots de I'autonettoyage,
Ne pas nettoyer le joint de porte; le joint joue un rOleessentiel
quant a i'etancheite, Ne pas frotter, endommager ou depiacer
le joint,
Ne pas utiiiser de produits de nettoyage pour four ou enduits
de four, darts ie four autonettoyant ou sur ies zones voisines,
Avant d'executer une operation d'autonettoyage, retirer ia
lechefrite, les grilles du four et lesautres ustensiles, et eliminer
par essuyage tout exces de residus renverses pour eviter ia
formation de fumee ou i'inflammation de ces residus,
li est normal que ia surface de cuisson devienne chaude
durant une operation d'autonettoyage; par consequent, eviter
de toucher ia surface de cuisson durant i'autonettoyage,
Avertissement et avis
important pour la s curit
La Ioi californienne _Safe Drinking Water and Toxic Enforce-
ment Act >>de 1986 {proposition 65} stipule la publication par
ie gouvemeur de ia Caiifomie d'une iiste de substances que
I'etat de Califomie considere comme cancerigenes ou
dangereuses pour ie systeme reproducteur, et impose aux
entreprises commerciaies i'obiigation de signaler a ieurs
clients ies risques d'exposition a de teiies substances,
Nous informons ies utiiisateurs de cet appareii que iors d'une
operation d'autonettoyage, iis peuvent etre exposes a une
faible concentration de certaines substances figurant darts la
iiste mentionnee ci-dessus, dont ie monoxyde de carbone,
Pour minimiser i'exposition, veiiier ace que ia piece o_ se
trouve ie four soit convenabiement aeree durant une operation
d'autonettoyage par i'ouverture d'une fenetre ou d'une porte,
AViS iMPORTANT - OISEAUX FAMIUERS : Lesoiseaux ont
un systeme respiratoire tres sensible, Ne pas garder un oiseau
famflier dans la cuisine ou dans une piece ou fl pourrait etre
expose aux fumees, Les fumees emises durant une operation
d'autonettoyage peuvent etre dangereuses ou mortelles pour
un oiseau, de meme que les fumees emises lots du chauffage
excessif de graisse, hufle, margarine, et du chauffage excessif
darts un ustensfle a revetement antiadhesif,
Conserver ces instructions pour consultation ult rieure
3O
Page 32

Boutons de commande
PermettentI'utiIisationdes616meritschauffantsdesurface,avecune
progressioncontinue de la puissanceentreIesr6glagesextr6mes
Low (Bas)etNigh (Elev6)+On peut r6glerun bouton_ toute
positionentrecesdeuxextr6mes.
Suggestions pour r6g age
On doit choisirla puissancedechauffageen fonctionde divers
facteurs :taiIIe,type de I'ustensileetoperation decuisson.Pour
I'informationconcemantles ustensileset autresfacteursaffectantla
puissancede chauffageh utiliser,sereporter_ la brochureLa
cuissonsimplifi6e.
R6g age des commandes
1. PlacerI'ustensilesur 1'616ment.
2. Enfonceret fairetourner le boutonjusqu'_ la positiond6sir6e
(rotationdartsunsensou dans I'autre).
, DesmarquessurIetableaude commande l
identifientI'd!6mentcommand6parchaque bouton.
Parexemple,legraphique_ droiteindique
1'616mentavant/gauche.
3. IIya un t6moin hmineux pour les6i6mentssur le tableaude
commande.LorsqueI'un desboutonsde commanded'un
616mentdesurfaceestaliment_,le t6moins'ilkJmine.Let6moin
s'6teintdSsqu'oninterrempt I'alimentationde1'616ment.
4. Apresunecuisson,ramenerle bouton _ la positionOFF[Arr6t).
RetirerI'ustensiie.
Low (Bas) (2) :Pourfusior[
de chocolatou beurre,ou [e
maintiende latemp6rature
d'un mets.
P4ed.Low (lVloyen
bas) (3°4} : Pour
continuer la cuisson
de mets encasse-
relesferm6espar
couvercleou pour
cuire_ lavapeur.
!
4' 5__
iVledium 0Vloyen)(5+7} :
Pourle maintiende
1'6bullit+onIented'une
grande quantit6de Iiquide
ou pour Ia plupart des
op6rationsdefriture.
Nigh (l_iev+) (le) : Pour
1'6bullitiond'un liquide.On doit
1
toujours r6duireIapuissancede
chauffagedSsqueIatempera-
ture d'6bullition estatteinteou
que I'alimentcommence_ cuire.
OFF i
_ _._xHigh [Lestylepeut
Y
MedoHigh (lVloyen 6mev6)
(8+9} :Pourdssolertes
viandes,chaufferI'huile
[grandefriture ou aliments
saut6s)et pourIemaintien
de 1'6bullitionrapided'une
grandequantit6de liquide.
+o vaderselonle
mod+le
AVANT [A OWSSON
o Placer toujours ['ustensfle sur [616ment avant d'alimenter
I'@k_ment.Pour 6v+terque la culsmle +ene subisse des domn+ages,
ne jamals faire fonctionner un 6+dmentde surface sans y place[
un ustensfle.
• NEJA_A_$ utfliser la table de cuisson comme lieu de rein+sage
d'aliments ou d'ustensfles.
DURANTl.A CUISSON
. Vefller_ bien connaitrela correspondanceentreles boutonsde
commandeet [esdlSments.Vei+le+_commander!'ahmentatton
de 1'616rnen_voulu.
o Commencerlacusson avecune puissancede chauffage
super_eure,puisrddu[rela pu+ssancede chauffagepour
poursuivrelacuisson.Nejamaisuti+iserunepuissance-Je
chauffage61evSepourunecuissonprolongde.
. N[ JAMAIS laisserlecontenu d'un ustensfles'_vaporer
comp+L_:ement;cec+pourraitfairesubiroesdommages
I'ustensileet_ ['appareiL
o NE.IAIVIAI$ toucher +atablede cu+ssonavantqu'ellesesoil
compi_[emen[refro+die.Certameszonesde la .ablede culsson+
particul[erementauvoisinagedes eidmentsde surface,peuvem
devenirtres chaudesdurantune cu[sson.Utiliserdesmaniques.
APR£S LA CUISSON
• S'assureruue1'61dmentest arr_t_.
- El+re+netd_sque possible[ous lesrds+dusoe renversememe[
projectioi+s.
AUTRES CONSEILS
+ S'il_a onearmoirede rangementdlrectementau-dessusde ta
table de cuisson,on nedolt y placerque desarticlespeu
trequemmentutllisdset qui peuvent_treexposes_la chaleur.La
chaleuremlsepar la culsimerepourra+tsusc+terun problSmepou[
desarticles commeliquldesvolati+s,produ[tsde qe[[oyageet
flaconsd'adrosol.
o NEJA_AIS la[sserd'ar[ic+esur latabfe decuisson.
particulierementd'articleen plastique.L'airchaudqu s'dchappe
par 1'6ventdu four pourra+tprovoquerI'inflammationd'un article
inflammable,faire fondre/amollir un articleen plastique,ou
provoquerune augmentationoepress+onprovoquantFSclate'_en[
d'un r_c_p[entferme.
, NEJA_AIS laisserde la feuille d'aluminium,unesonue
t_ermomStrique_ vlanueou un ODjetm6taUiqueau_requ'un
ustensfledecu[sso_surlatable de culsson en[rerencon[ac_
avecun 6[dmentchauffant.
31
Page 33

1
El .ments de la table de
Remarques :
EI6ments spiral6s
o Lorsqu'un6tdmentestutiIis6,il est ailment8par intermittencepour
le maintiende la puissancedechauffaged6sir6e.
®
Les61@mentsspiraJ6ssontautonettoyants.Nepas lesimmerger
dansde I'eau.
• Nettoyerlatable decuissonaprSschaqueutiIisation.
• Essuyertout produit renvers6acideou sucr6sur latable de
cuisson,pour 6viterune attaquechimiqueou unchangement
de couieurde 1'6mail
Pour prot6ger la finition des cuvettes de
r_cup6ration :
• Pourdiminuer la d6colorationet iefendiIlement,6viterd'utiliser
une puissancede chauffage61ev6ependant une p6riode
prolongee.
• NepasutiIiserun ustensiIede trop grandetaille.L'ustensiIene
devraitpasd6borderde plusde 2,5crn - 5 cm (1- 2 pouces)
au-del_de la p6riph_riede I'616ment.
• Lorsde I'utilisationde grossesmarmites,parexemplepour la
pr6parationde conserves,utiliserI'd!6mentspdciaIcon_upour
la pr6parationde conserves0nodSIeCE1}.Prendrecontact
avecle ddtaillantpour obtenirdesd_tails,ou composerle 1-
877-232-8771auxE.-U.ou le 1-800-688-8408auCanadapour
passercommande.
• Nettoyerfr6quemment.(Voirpage48.)
[}_pOSe : SouleverI'616ment
refroidi.Tirerprudemmentpour
extraireI'616mentdu blocde
connexion,
IVlise en place : IntroduireIes
homesde r_16mentdartsIa prise.
Guiderpour la raiseen piace.
Abaisser1'81#mentpourle piacer
d'aplomben appuisur la cuvettede r6cup6ration. BORfVES
Cuvettes de r6cup6ration
Lescuvettesde r6cup6rationsouschaque6i6mentde surface
recueillentIesalimentsqui ont d6borde.IIfaut touiours lesutiliser.
L'absencede cuvettesde r6cup6rationpendantlacuissonpeut
endommagerlesills 61ectriques.
Pourne pasintroduireun risquede choc _lectrique,ou d'incendie,
nejamaisgarnir lescuvettesderecupSrationdefeuiile d'aluminium.
Lescuvettesde rdcup_rationvont se d_colorer(tachesbieues/
dor6es)ou sefendiller_ la Ionguesi eIIessontsurchauff_es.La
decolorationou Ie fendiIIementsont permanents,maisn'affectent
pasla performancede cuisson.
32
Page 34

Commande du four nettoyage manuel (certains modeles]
BAKE
BROIL
TIMER CLOCK CA_CE L _'...........................................
A B
REIVIARQUE: L'afficheurindique 12:00iorsqueFappareilest brancheD premierelois ou en casde pannede courant.Lestemoinslumineux
de cuissoncouranteetde cuissonaugril s'aflumentIorsqueFonappuiesur la touchede fonctioncorrespondante.
A
Cuissoncourante
Gril
B
O
Minuterie
Horloge
e
ANNULER
A (Plus)ou
r
_'(Moins)
S'utJlisepourla cuissoncouranteet le
retissage.
S'utJlisepourIa cuissonau gril etle
rissolagesur partiesuperieure.
Programmelaminuterie.
S'utilisepourprogrammerI'heuredujour.
AnnuletouteslesoperationssaufminuterJe
et horloge.
S'utilisepourentrer ouchangerladuree,la
temperaturedu four.EtablitIe gril
temperatureeleveeou basse.
[Jti isation des touches
• Appuyersurla touchedesiree.
• AppuyersurA (Plus)ou V (Moins] pour entrer Jadureeou Ja
temperature.
• Unbip retentitIorsqueFonappuiesur unetouche de fonction.H
n'ya pasde hip pour la touche A ouV.
• UndouNehip retentitencasd'erreur de programmation.
Remarque :Quatresecondesapresavoirappuyesur lestouches
A ou V, la dureeou la temperatureserontautomatiquement
entrees.Siplusde 30secondess'ecoulententrela pressionsur
une touchede fonction et sur lestouchesA ou V, la fonction
seraannuBe et I'afficheurreviendra_I'affJchageprecedent.
C D E F
2. Mettre _ I'heure_ I'aidedes touchesA ou '_ SiI'on n'appuie
passurcestouchesen moinsde 30secondes,ie programmeest
annuB.Appuyersurla toucheClocket recommencer.
Programmation de Ja minuterie
La minuteriepeut6treprogrammeedeune minute 001)iusqu'_99
heureset 59minutes(99:59).Laduree seraafficheeen minuteset
non ensecondes.LA MINUTERtENECOMMANDE PAS L,EFOUR.
1. AppuyersuplatoucheTimer(Minuterie). ..............................
• 0:00s'ailumeet lesdeux points (:)cJignotent
J'afficheur. ...............................
2. Appuyersur A ou '_ iusqu'a ce que Jadureedesiree
soit affichee.
Laminute@ commence_ decompter@s que la
duree aete programmee.
o Lesdeuxpointsqui clignotent h_diquentqu'un
decompteest en cours.[Lesdeuxpoints neclignotentpassi
J'heureou Iatemp@aturedufour sont affichees0
Deuxhipscourtssignalentla fin de I'operation.0:00parait
['afficheur.
• Si Fonveut,appuyersurIatoucheClocket I'heuredujour
reapparaftbrBvement _ J'afficheurpendantune operation
minutee.
• Si I'onveut,appuyersur IestouchesBakeou Broil etle reglage
de temp@atureactuelJereapparaitbrBvement_ I'affichage
pendantune operationminutee.
A[muiation de la minuterie :
TIMER
R6gJage de Phorioge
1. AppuyersurJatoucheCDck (Horloge].
• L'hodogenepeutpas6treregBe si lefour estdei_ programme
pourune operationde cuissoncourante,de grii ou une
operationmJnutee.
Appuyersur latoucheTimeret la maintenirainsJpendant plusJeurs
secondes.
33
Page 35

Cuisson courante, rStissage et 3,
cuesson au griJ
Pourobtenir desconseiBet des dur@sdecuissoncourante,de
rOtissageet de cuissonau grfl,sereporter_ la brochureLa cuisson
simplifi@.
Programmation des commandes pour une cuisson
courante ou un retissage :
1. Appuyersur latouche Bake(Cuissoncourante}.
° 000s'allumeet Ietemoin lumineuxde cuJsson
courantecJJgnote5 I'affJcheur.
° 8i I'onappuiesur latouche Bake,sansprogrammerune
temp@raturedu four dans les 30secondessuivantes,le
programmeest automatiquementannuIeet I'heuredu]our
reapparait_ I'afficheur.
2. Appuyersur latouche A [Plus}ou V [Moins}iusqu'_ A
ceque Ia temperatured@ir@ du foursoit affichee.
, Latemperaturepeut 6treprogramm@de 75
285°C [170_ 550°F}.
,350 °parait_ I'affbheur IorsqueI'onappub unefoissur la
touche A ou V.
, Appuyer_ plusieursreprisessur la touche A ou'_' pour
changerlatemperaturedufour parintervalbsde 3 °C(5°F}ou
appuyersur latouche A ou V enmaintenantia pression,pour
changerlatemperaturedufour parintervalIesde6 °C 00 °F}.
, 100°ou la temperaturer@lle du four,setonlaque!Ieestlaplus
elevee,parait _ I'afficheurIorsquelefour semet en marche.
, Latemperature_I'afficheuraugmentepar intewalles de3 °C
(5°F},jusqu'_ ceque la temperaturepr@rogramm@soit
atteinte.Unseulhip retentitIorsquelefour est en coursde
pr@hauffage.
, Laisserle four pr@haufferpendant10a 15minutes.
, Pourrappeierlatemperaturepr@rogrammeependantIe
pr@hauffage,appuyersur latouche Bake.Latemperaturesera
afficheependanttrois secondes.
, Pourchangerlatemperaturedu four pendantlacuisson,
appuyersur latouche Bake,puissur latouche A ouV
iusqu'_ce que latemperaturedesireesoitaffich@.
BAKE
4,
Programmation des eommandes
pour la cuisson au grii :
Pourde meilleursresultats,utiliserI'ustensilepr@u pource genrede
CUiSSOn.
1. Placerlalechefrite_ la positionde grille recommand@.07oirle
2. Appuyersurla toucheBroil (Gr[I}. BROIL
3. AppuyersurIatoucheA pourchoisirun griI
4. Pr@haufferI'6Iementde gril pendanttrois minutes.Fairecuireau
5. Apreslegril,appuyersur Cancelpour eteindreIe
PlacerIanourrituredanslefour. VerifierFavancementde la
cuisson_ laduree minimalede cuisson.
LomqueIacuissonestterrain@,appuyersur latouche Cancel
(Annule0 pour eteindreIefour, pub retirer la nourrituredu four.
• Lefour se caractedsepar un arretautomatique.S'ilest Iaisse
en marchependant12heures,il s'arreteraautomatiquementet
000paraitra_ I'afficheur.Appuyersur la touche
CanceletI'heure r@pparakra_ I'afficheur.
tableaude la page42.} .........................................
• SEts'alIumeet le t@Tloinhmineux de cuissonau .....................................................
grfl clignote_ I'afficheur.
temperatureHi (['lev@}ou surIatouche '_ pour
choisir un gril _ temperatureLo [Bass@.
• ChoisirlereglageHi pour un gril normal .....
• ChoisirIereglageLo pour un grfl _ temperaturebasse,afin
d'@iterun rissolageexcessifdesalimentsn@essitantdes
dureesde cuissonplus Iongues,commelavolaille.
• S[t'onnechoisit pasle r6glageHi ou Loen moinsde 30
secondes,Ie programmeseraautoma%uementannul6 et
I'heurereapparakraaI'afficheur.
griI: Iaissel la portedu four ouverte_ la premierebut@ [environ
10cm [4 po]}.
four, puis retirer la I@hefritedu four. L'heuredu
jour reapparait_I'afficheur. ............................................
34
Page 36

R guJateur de four o+
(certains modeles) too,,
_arm
R6gJage du bouton +oo
Le bouton OvenTemp(Temp@aturedu 451
four) permetdes61ectionneret maintenirIa
temp@aturedu four.On dolttoujoursfaire 400 3so 300
tourner ce boutonexactementJUSQU'Ala
positionde Iatemp@atured6sir6e.Ne pas faire tourner Ie bouton au-
del8de la positiond6sir@pour le fairetournerensuiteversle sens
hwerse.
R6giage du four pour uue cuissou courante ou
un r6tissage :
1+ Enfoncedfairetourner le boutonOvenTemp(Temp6raturedu
fou0, jusqu'_ la positioncorrespondant_latemp6ratured6sir6e+
LaisserIefour pr6chaufferpendant10& 15minutes+
2+Placerla nourritureau centredu four+A I'expirationdu temps de
cuissonminimumindiqu6 dartsJarecette,6valuerJedegr6de
cuisson+PoursuivreIacuissonsi c'est n6cessaire+
3. RetirerIemets du four etramenerle boutonOvenTemp
O-emp6ratureduour) _ Japosition OFF(Arr6t).
R6glage du four pour cuissou au gril :
1+ Pourobtenir lesmeilleursr6sultats,utiliserun ustensilecon_u
pour lacuissonaugriL PlacerIaI6chefrite_ la positionre-
command6edansJegrilledu four. (Voirle tableauen page42.)
2OO
2. PlacerIeboutonOvenTemp(Temp@aturedu fou0 a Iaposition
BROIL(GriI)ou _1_Iaposition 450° F[232° C) pour unecuissonau
griJ_ bassetemp@ature.
+ Utiliserla temp6ratureplusbassepour la cuissonau gril pour
@iter un brunissageexcesslfou pour un metsn6cessitantune
Ionguecuisson{parexemplevolailJe).
3. Pr6chaufferI'616mentde griJpendanttrois minutes.Laisserla
porte du fourouverted'environ 10cm (4po) (premierebut6e).
4. Contr61erJedegr6de cuisson:inciser lapiece deviande pros du
centre pouren obsewerIacouleur.
5. A lafin de Iap6riodede culsson,ramenerleboutonOvenTemp
O-emp@aturedu fou0 _ JapositionOff (Arr6t).RetirerJa
I6chefritedu four.
aufour, Ier6tissageougril dansla brochure<{LaCuisine
Remarque : Ontrouved'autresconseilsconcernantiacuisson
SimplJ%e>>.
35
Page 37

Commando du four autonettoyage
A B
COOK& KL:It:P
HOLD CLEAN DE++?_f Ct.OCK WARM
(certains modeJes)
C D
++MER
E F G H l
Letableaudecommandoestcon_upourfaciliter [aprogrammation.Lafen6tre d'affichageindique Fheure,losfonctions avecminuterieet
fonctions du four.Letableaude commandorepr6sentecomprendcaracteristiquesspecifiquesau modele.(Le stylepeut varier selonle
module.)
A
Gril
B ¸
Cuisson courante
A (Phs)ou
V (M0ins)
[I
Minutefie
E
CuJssonet
maJntien
iiii_
Nettoyage
G
Demarrage
differ6
H¸
Horloge
Maintienau
chaud
J
ANNULER
S'utiNsepourlacuissonau griletlerissolage
surpattiesup@ieure.
S'utiiisepourlacuissoncouranteetle
r0tissage.
S'utilisepourentrerouchangerladur6e,la
temp@aturedufour.Etablitlegril
temperatureELEVEEouBASSE
Programraela minuterie.
Pourcuirependantunedur6epr6_tabIie,avec
maintienauchaudpendantuneheure.
S'utilisepoutprogrammerlecycle
d'autonettoyage.
Programrnelefourpourd6buterunecuisson
plustard.
S'utilisepourprogramrnerI'heuredujour.
S'utilisepourmaintenirauchauddansle four
losalimentscuits.
Annuletouteslesop6rationssaulminuterieet
horIoge.
Remarque : Quatresecondesapr_savoirappuyesur los
touchesA ou _', Ia dureeou latemp@aturesera
automatiquemententree+Siplusde 30secondess'ecoulententre
la pressionsur unetouche de fonctJonet cellosurla touche,&
ou V, JafonctionseraannuJeeet J'afficheurreviendra
I'affJchageprecedent+
L'hodogepout 6tre programmeepour afficher[adureedans un
formatde 12ou 24 heures.L'hodogeest programmeeen usinepour
un format de 12heures.
Changement de l'horloge _ un format de 24 heures :
1+ AppuyersurJestouchesCANCEL(AN
NULER)et DeJay[D6marragedifferedet
maintenirIapressionpendanttrois
secondes+
2+ Appuyersur A ou V pour programmerun
formatde 12ou 24 heures+
3+ ProgrammerJ'heureen suivantJesinstruc-
tions donneesci-dessous+
-- DELAY
J
UtiJisation des touches
o Appuyersur latouche desiree+
o Appuyersur ,& [Plus] ou 'V' [Moins) pour entrer la dur@ ou la
temperature+
o Un hip retentitIorsqueI'on appuiesurune touche.
o Undouble hip retentit en casd'erreurde programmation+
R_glage de l'horloge : ............
1. Appuyersur [a touche Clock(Horloge]. CLOCK
o L'heuredu jour etdeuxpointsc@notent_
I'afficheur. ,
2. Appuyersur ,& ou 'V'pour programmerFheure
dujour.
o Lesdeuxpointscontinuent_ clignoter.
3. Appuyera nouveausur Jatouche Clock ou attendre
quatresecondes.
36
V
suite,..
Page 38

LorsqueIe courant6bctrique arriveou apr_sune interruptionde
courant,la derniSreheureavantrinterruption de courantvaclignoter.
Pourrappebr rheure dujour Iorsqu'uneautre fonction de dur@
s'affbhe,appuyersur latouche Clock.
Uheurede I'hodogene peut6trechang6eIorsqueb foura 6t6
programm6pour une cuissonou un nettoyagediff6r6ou pour la
fonctionde cuissonet maintien.
Annumation de maminuterie :
1. Appuyersurla toucheTimeret la maintenirainsipendanttrois
secondes.
OU
2. Appuyersurla toucheTimeret r6glerI'heureb 00:00.
Annulation de l'affichage de l'heure :
Si I'onne desirepasI'affichagede I'heuredu jour :
Appuyersur IestouchesCANCEL(ANNULER)et
Clock(Horloge}et tesmaintenirainsipendant
trois secondes.L'heuredu jour disparaitde
['afficheur.
LomqueI'affichagede I'heureest annul6,
appuyersur Ia touche Clockpour affbher
bri@vementI'heuredu jour.
-- CLOCK
R6affichage de J'heure :
Appuyersur IestouchesCANCELet Clocket lesmaintenirains+
pendanttrois secondes.L'heuredu jour r6apparatt_ I'afficheur.
La minuterie peut 6tre prograpam@ de une minute (00:01} jusqu'a
99 heures et 59 minutes (99:59}.
La minutede peut 6tre utilis6e ind@endamment de toute autre
activit6 du four. Elle peut 6tre aussi programm6e alors qu'une autre
fonction du four est en cours d'utilisation.
La minuterb necommandepas le four.Ellenesert qu'a 6mettredes
bips.
Pregrammatien de maminuterie :
1. AppuyersurIatoucheTimer {Minuterie}. T+ME[_
+ 0:00s'alhme _ I'afficheur.
+Les deux pointsclignotent.
2. AppuyersurIatoucheA {Plus}ou T {Moins}
jusqu'_ceque rheurejuste paraisse_ rafficheur.
+ Losdeux pointscontinuent _ clignoter.
3. Appuyer_ nouveausur latouche Timerou attendrequatre
secondes.
+Les deux points continuent _ clignoter et le d@ompte de la
dur@ commence.
A
Verrouimmagedes commandos
Lostouches peuvent6tre verrouiII@spour desraisonsde s@ur+t6,
nettoyageou pouremp@hertoute utiIisationnon souhait@.Ellesne
pourront6treutiIis6essioliossontverrouill6es.
Si lefour esten cours d'utilisation,lescopamandesne peuvent6tre
verrouill6es.
L'heureactueIIedujour restera_ I'afficheurIorsquelescommandos
serontverrouiil@s.
Verrouimmage:
Appuyersur lostouches CANCELet Cook&
Hoid {Cuissonet maintien}et losmaintenirainsi
pendanttrois secondes.
, Le mot LOCK(VERROUILLAGE}clignote_ ..............................
I'afficheur. +o_OLD
COOl(&
Deverrouillage : ..........................
Appuyersur [estouchesCANCELet Cook& Holdet [esmaintenir
ainsipendanttrois secondes.
, Le mot LOCKd+sparaitde ['afficheur.
Codes d'anoma ie
LesrootsBAKE{CUISSONCOURANTE}ou LOCK(VERROUILLAGE}
peuventciignoter rapidement_ i'afficheurpour pr@eniren cas
d'erreurou de probl6me.Si tei est lecas,appuyersur iatouche
CANCEL.Sibs rootsBAKEou LOCKcontinuent_ ciignoter,
d6brancherI'appareiL£_tendreque+quesminutes,puisrebrancher
I'appareil.Si run des rootscontinue_ ciignoter,d6brancherrappareil
et prendrecontactavecun r@arateurautoris_.
+ Laderni6reminutedu d@ompteseraaffich6esousformede
secondes.
4. A la fin de ladur6e programm@,un hiplong retentit.
37
Page 39

CUiSSOn COUrante
Programmation de macuisson courante :
1. Appuyersurlatouche Bake(Cuissoncourante}.
• Lemot BAKE(CUiSSONCOURANTE)ctignote.
• 000clignote _ t'affJcheur.
2. %bctionner tatemperaturedu four.Latemperature _
peut6treprogrammeede75 a 290°C(170_ 550°F}.
Appuyerunefois sur tatouche A (Plus}ou'_
(Moins},ou appuyersur latouche A ou '_ et la V
maintenirainsi. .....
• 175° (350°} s'allumeIomqueron @pub la
premierefoissur I'unedestouches.
• AppuyersurIatoucheA pouraugmenterla temperature.
• Appuyersurla toucheV pour diminuerIatemperature.
3. Appuyer_ nouveausur latouche Bakeou attendrequatre
secondes.
, Lemot BAKEs'arretede clignoteret s'allumea I'afficheur.
• 38° (100°}ou Ia temp6raturer@lle du fourseraaffich@. La
temperatureaugmenterapar intervalb de 3 °C {5°F}jusqu'a
ceque latemperaturepreprogrammeesoitatteinte.
4. LaisserIefour pr@haufferpendant8 _ 15minutes.
• LorsqueIatemperatureprogrampa@pour lefour est atteinte,
un bip long retentit.
• Pourrappeterla temperatureprogramme pendant le
pr@hauffage,appuyersurla touche Bake.
5. Placerlanourriture au centredu four, en laissantun minimumde
2 pouces(5 cm} entrerustensib et Iesparoisdufour.
6. Wrifier ravancementde la cuisson_ Iadureeminimab de
cuisson.Cuirepius Iongtempsaubesoin.
7. Lorsqueiacuissonest terrain@,appuyersur
latouche CANCEL(ANNULER}.
8. RetirerJanourrituredu four.
Remarques sur cuisson courante
au four :
o Pourchangerla temperaturedufour pendantlacuisson,appuyer
sur latouche A ouV jusqu'_ceque I'onobtiennela
temperaturedesiree.
o Si I'on oublied'arreter Iefour, iIs'arreteraautomatiquementapr@
12heures.Si I'ondesired@activercettefonction,voir page41.
o Pourdesconseilssupplementairessur Iacuissoncouranteet le
retissage,voir la brochureLacuissonsimpIifi@.
BAKE
Diff6rences de cuisson entre 'ancien
four et nouveau
II est normalde remarquerquelquesdifferencesclansladur@ de
cuissonentre un four neuf et un four ancbn. VoirAiustementde la
temperaturedu four_ lapage41.
Cuisson et maintien
Lafonction Cook & Hold (Cuissonetmaintien}permet decuire
pendantunedur@ predetermine, suivie parun cycb de maintien
au chaud d'uneheure.
Programmation de la fonction cuisson et maintien :
1. AppuyersurlatoucheCook& Hold (Cuissonet maintien}.
• LesrootsBAKE(CUISSON)et HOLD COOK&
(MAINTIEN}clignotent. HOLD
• 000s'aiIume_ I'afficheur. .....................
2. Sebctionner Iatemperaturedu four. Latemperature
peut etreprogramme de 75 _ 290°C(170_ 550°F}.
Appuyerunefois sur latouche _ ouV ou appuyer
sur latouche _ ou '_' et la maintenirainsL
• Appuyersurla toucheA pouraugmenterlatemperature.
• Appuyersurla toucheV pour diminuerlatemperature.
3. Appuyer_ nouveausur latouche Cook& Hold OU attendre
quatresecondes.
• Lemot HOLDclignote.
• 00:00clignote_ I'afficheur.
4.
EntrerIadur@ pendantlaqueIIeI'ondesireque la cuissonait
lieuen appuyantsur le touche_ ou V. La dureede cuisson
peut etreprogramme de 10minutes(00:10)a 11heures,59
minutes(11:59}.
• LesrootsBAKEet HOLDs'allument _ I'afficheur.
• Ladureede cuissons'alhme a I'afficheur.
, Ladureede cuissoncommencele comptea rebours.
Lorsq_e _ad_r_e de c_isso_ s'est _co_e :
• Quatrebipsretent[ssenL
• Lemot BAKEs'eteint.
, LesmotsHOLDet WARM [CHAUD}s'aHument.
• 75° (170°}parait _ rafficheur.
suite,,,
38
Page 40

Apr_s une heure de MAiNTIEN AU CHAUD :
• Lemot End(Fin}s'affiche.
• L'heuredu jour reapparaft8 I'afficheur.
Annumation de mafonction cuisson et maintien _ tout
moment : ........
Appuyersur Iatouche CANCEL(ANNULER}.Retirerla
nourrJturedu four.
Cuisson eourante differ e
Ne PasUtilberla cuissondiffer@ pourdesdenreestrSs
perissablescornmelesproduitslaitiers,le porc,la voBille ou les
fruits de met.
Avecla fonctiondiff_r_e, le four se metb cuire plus tard dartsIa
journ@. Programmerla dur@ d'attentedesireeavantque le four ne
semetteen marcheet Iadur@de cuissondesiree.Lefour com-
mencea chauffer _ I'heureselectionneeet cuit pour la dur@
specifiee,puisgardela nourritureau chaud pendantune heure.
Ladureed'attente peut 6tre programmeede 10minutes (00:10}
11heures,59minutes01:59}.
Programmation d'un cycle de cuisson courante
diff6r6e :
1. Appuyersurla toucheDelay(O@Tlarragediffer@. DELAY
o Lemot DELAY(ATTENTE)et 00:00clignote ........................
I'afficheur. ....................
Lorsque la dur6e d'attente s'est _coul6e :
• Lemot DELAYs'6teint.
• Ladur@ de cuissonestaffich@.
• LesrootsBAKEet HOLDsont affiches.
Pour programmer un temps d'attente lorsque la
fonction cuisson et maintien a d_j_ 6t6
programmee :
1. Appuyersurla toucheDeIay(D@_arragediffer@. ...........................
DELAY
• Lemot DELAY(ATTENTE}clignote.
• 00:00paraitb I'afficheur.
2. AppuyersurIatouche_ ou Y pour programmerla
dur@ d'attente.
• Apresquatresecondes,Iemot DELAYrestealIume
pourrappebr qu'un cyclede cuissondiffer@ a _t6 ......................
programme.
Lorsque la deree d'atteete s'est _coulee et que le
four se met e_ marche :
• Ladureede cuissonseraaffich@.
• Lemot DELAYs'eteint.
• LesrootsBAKEet HOLDrestentallumes.
Appuyersur latouche CANCEL(ANNULER}.
• Touteslesfonctionsde cuissonminut@ et
non minut@serontannuI@s.
• L'heuredu jour reapparait8 rafficheur.
2. Appuyersurla toucheA (Plus}ou V(Moins) pour
programmerladur@ d'attente.
Alorsque Ie mot DELAYclignotetouiours
3. Appuyersurla toucheCook& Hold(Cuissonet maintbn}.
o 000s'allume_ I'afficheur. ............................
o LesrootsBAKE(CUiSSONCOLIBANTE}et HOLD HOLD
(MAiNTiEN}clignotent. ............................
4. AppuyersurA pour programmerla temperaturedecuisson.
o 00:00et le mot HOLDclignotent.
o Lemot BAKEresteallure&
5. AppuyersurA pour programmerla dureede cuisson.
o Ladur@ d'attente,IesrootsDELAY,BAKEet HOLDs'allument
I'afficheur.
COOK&
39
_emarq_es :
NepasutiliserIacuissondiff_r_epour des articlesqui
n@essitentquelefour soit pr@hauff& commelesgSteaux,
lespetits biscuitset lespains.
NepasutiliserIecycledecuissonet maintiendifferes si le
four estdeja chaud.
Page 41

Maintien au chaud
Pourmaintenirauchaud dans le fourdesalimentscuits etchauds
ou pour rechaufferpainsetassiettes.
Programmation dn maintien an chand :
1. Appuyersur Iatouche KeepWarm .................
(Maintienau chaud}. KEEP
• Le motWARM(CHAUD[}clignote.
• 000parait _ I'afficheur. A
%Iectionner latemperaturede maintienau chaud.
Celle-cipout 6tre regleede 63 _90 °C (145_._190°F_.
Appuyerune fois surla touche A ouV ou appuyer
sur latouche A ou'Vet Ia maintenirainsi.
75° (170°) s'allumeIorsqueI'on appuiela premierefoissur
I'unedestouches.
• Appuyersur Iatouche A pour augmenterlatemperature.
• Appuyersur latouche V pour diminuerlatemperature.
Lemot WARM(CHAUD}etla temperatureseront affichespendant
que lafonction maintienauchaudest active.
Remarques sur la fonction maintien
au chaud :
o PourobtenirdesquaIitesalimentairesetnutdtivesoptimaIes,
lesalimentscuits au four nedoivent pasetregardesau chaud
plusde 1_ 2 heures.
o Pourempecherlesalimentsde dessecher,lesrecouvrirde
papieraluminium,sansserrer,ou d'un couvercle.
o Pourr_chauffer des petits pains :
- recouvnrlespetitspahlsdepapier alumhliumsansserreret
lespiaceraufour.
- appuyersur lestouchesKeepWarmet A pour
programmer75 °C(170°F}.
- rechaufferpendant 12a 15minutes.
o Pourrechau_er des assiettes :
- placer deuxpilesde quatreassiettesmaximumdansle four.
- appuyersur lestouchesKeepWarmet A pour
programmer75 °C070 °F}.
- rechaufferpendantcinq minutes,arreter lefour et laisserles
assiettesaufour pendantencore15minutes.
- n'utiliserque desassiettespouvantallerau four,a verifier
avecle fabricant.
Annnlation du maintien an chaud :
1.Appuyersur latouche CANCEL(ANNULER}.
2.Retirerla nourrituredu four.
........""" .¸.¸¸¸¸¸¸%,
- ne pasposerdesassiettestiedessur une surfacefroide,les
changementsrapidesdetemperaturepouvantcasser
I'assietteoula fendiller.
4(}
Page 42

Arr t automatique/Mode
Lefour s'arreteautomatiquementapres12heuress'il a 6tO
accidentetlementlaisseen marche.Cettecaract@Jstiquede securite
poutetrearretee.
Pour annulet l'arr_t 12 heures et faire fonctionner le
four en continn pendant 72 heures :
1. ProgrammerJefour pour une cuissoncourante(voirpage38).
2. AppuyersurIatoucheClock (Hodoge}et la maintenirains[
pendanttrois secondes
• SAbsera affiche et clignoterapendant CLOCK
cinqsecondes. ...................
• SAbsera ensuiteaffJch_en continujusqu'_ cequ'on I'arrSte
oujusqu'_ ce que la dur@ limite de 72heuressoitatteinte.
• Lemot BAKE(CUISSONCOURANTE)seraaussiaffichesi un
cyclede cuissoncouranteesten coursaJorsquelefour est en
modesabbat.
ToutesIesautresfonctions (Minuterie,Maintien au chaud,
Nettoyage,etc.}sont verrouillees,SAUFBAKE,pendantle mode
sabbat.
Annnlation de la cnisson conrante alors qne le font
est en mode sabbat :
Appuyersur CANCEL(ANNULER}.
• Lemot BAKEs'eteint_ I'afficheur.
° Aucun bip sonorene retentit.
Annnlation dn mode sabbat :
1. AppuyersurlatoucheClockpendanttroissecondes.
OU
2. Apres72 heures,le modesabbatsetermine.
• SAbclignote pendantcinq secondes.
• L'heuredu iour revient_ J'afficheur.
C_NCEI .....
A]ustement de la temperature
du four
La precisiondes temperaturesdu foura _t6soigneusementv@i%e
I'usine.IIest normalde remarquerquelquesdiff@encesclansla
cuissonentre un four neuf et un four ancien.Au fur et _ mesureque
loscuisinieressontmoinsneuves,latemperaturedu four poutvarJer.
II estpossibled'ajuster latemperaturedu four siI'onpenseque Ie
four necur pasou nerissolepas correctement.Pourdecider de
I'ajustement_ apporter,r(!glerle four _ unetemperaturede 15°C
(25 °F}pluseleveeou plus bassoque la temperatureindiqueedarts
larecette,puisfairecuire Iapr@aration.Losresultatsdu _test >_de
cuissondoiventdonner uneideedu nombrededegresduquel la
temperaturedoit 6tre aiustee.
Ajustement de la temp@atnre du four :
1. AppuyersurIatoucheBake(Cuissoncourante).
2. Entrer285°C[550°F}en appuyantsur la touche A
(Plus}. ..........
3. Appuyersurla toucheBakeetla maintenirainsi
pendantplusieurssecondesoujusqu'_ ceque 0°
paraisse_ J'afficheur.
Si Ia temperaturedu four a 6t_ precedemmentajustee,Ie
changementseraaffJch&ParexempJe,si la temp@aturedufour
a 6t6 reduitede 8 °C 05 °F},I'afficheurindiquera-8 (-15).
4. AppuyersurIatoucheA (Plus)ou V (Moins)pour ajusterJa
temperature.
A chaquelois que I'onappuiesur unetouche, latemperature
changede3 °C(5 °F).Latemperaturedu four pout etre
augmenteeou diminu@ede3 _ 20 °C [5 _ 35°F).
5. L'heuredu jour reapparaitautomatiquement_ J'afficheur.
IIn'estpasnecessairedereajusterIatemperaturedu fouren cas
de panneou d'interruptionde courant.Lostemperaturesde
cuissonau griJetde nettoyagene peuventetreajustees.
BAKE
Remarques sur le mode sabbat :
• Le modesabbatpoutetremis en marche&tout moment,que
lefoursoit en marcheou non.
• Le modesabbatne pout pas 6tin misen marchesi Ies
commandossont verrouiJleesou laporteverrouilIee.
• Sile four esten mode cuissonJorsquelemodesabbatest
programme,lemot BAKE(CUISSONCOURANTE}s'eteint _ Ja
fin du cycledecuisson.IIn'yaura aucunsignal sonoreaudible.
o Lorsquelemodesabbata demarre,aucunhip de prechauffage
ne retentit.
o Tous Iesmessageset los bJpssontdesact[vesIorsquelemode
sabbatestactiE
o Si I'onappuiesur Iatouche CANCEL,un cycle de cuisson
couranteaufour seraannule.Cependant,Jeprogrammateur
resteraen mode sabbat.
o Apresunepannede courant,lefour revienten modesabbatavec
72 heuresrestanteset aucuncycleact[f.
41
Page 43

Cuisson au grim
Programmation de la cuisson au grim:
1. Appuyersur latouche Broil (Gril[.
o Le mot BROIL(GRIL}ciignote.
o Le motSETUAUDER}estaffiche. .....
2. Appuyersur latouche A (Plus[pour programmerungril
temp6rature61ev6eousur latouche V (Moins} pourprograpa-
merun griI _temp6raturebasse.
o LesmotsHI (ELEVEE)ou LO (BASSE]serontaffich_s.
o %lectionner HIbroil (Gril_ternp6rature6by@) (290°C
[550°F])pour un griI normal.%bctionner LO broil (Gril
temp6raturebass@(230°C [450°F]}pour un griI_ tempera-
ture inf_rbure d'aliments_ cuissonplusIonguecomme la
volaille.
3. Apt@ quatresecondes,Iefour se meten mar@e.
o Le mot BROILresteallum6.
4. Pourun rissoBgemaximum,pr@hauffer+'_16mentdegril
pendanttrois ou quatreminutesavantd'ajouterla nourrJture.
5. PlacerIanourrituredanslefour. Laisserla porte du four ouverte
d'environ10cm (4 po] _remi_re but@).
6. Retournerlaviandeunelois _ la moiti6de Iadur6ede cuisson.
7. LorsqueI'alimentest cuit,appuyersur Iatouche
CANCEL(ANNULER}.Retirerla nourritureet la
I@hefrJtedu four.
o L'heuredu jour r6apparait_['affbheur.
Remarques sur Uacuisson au griU:
o Pourde meilleursr@ultatsIorsdu griI, seservird'un ustensib
pr@upour cetypede cuisson.
o Pr6voirdesdur@s decuissonaugriI plus Iongueset un
rissolagek!g_rementmoinsdot6 si I'appareilfonctionnesurun
circuit de 208volts.
o LegriIau reglageHI (Elev@estutilis_ pour la majorit6des
op6rationsde cuissonau gril. UtiliserIegriI au r6glageLO
(Bas]pour lacuissonde metsdevantcuJreplusIongtemps,
afin de bur permettred'6trebiencults sansrissolageexcessif.
o Lesdur6esdecuissonau gril peuvent6tre plus Ionguesavec
une temp6raturede gril inf6rieure.
o Pourdes temp6ratureset des conseibsuppl6mentairessur Ia
cuissonaugriI,se reportera la brochureLacuissonsimplifi@.
TabUeau de cuisson au grH
__ _'_'_,
POS_TION DEGRE DE TEMPS DE CUISSON
AUMENTS DES GRILLES*
Beauf
Bifteck, 2,5 cm (1 po] d'@aisseur
Hamburgers, 2 cm (3/4 po] d'@aisseur
Pot'c
Bacon
COtelettes,2+5cm (1 po}
Jambon- pr6-cuit tranche de 1,3cm 0/2 po]
4
4
4
4
4
4
Voiaiiie
Pouieten morceaux
Fruits de met
Dames de poisson, beurr_es, 2,5 cm (1 po] d'@aisseur
Filetes
3ou4
4
4
Grillesup6rieurea laposition n°5
Remarq_e :Cetableaun'estqu'un guide de suggestions.Lesdur@speuventvarier selon I'aliment_ cuire.
CUISSON
Cuisson moyenne
Bbn cuit
Bien cuit
Bbn cuit
Bien cuit
Tilde
Bien cuit
La chair se detache
La chair se d_tache
TOTAL (_INUTES}
15 - 18 minutes
19 - 23 minutes
15 - 18 minutes
6 - 10 minutes
22 - 26 minutes
8 - 12 minutes
LO Broil-
GrJl_temperature basse
28 - 38 minutes
10 - 15 minutes
8 - 12 minutes
42
Page 44

1
Event du four
[orsque mefour est atiiis_, ia zone voisine de i'_vent peavent
devenir suffisament chauds pour provoquer des br_meurs.Ne
jamais obstruct i'ouverturede i'_vent.
>
Reinstallation :
1= Placerla grilIesurlessupportsclansle four.
2= Soulever16g_rementI'avant Faireglisserla grilIe versI'arri_re
au-del_de la positionde calage.
3= Abaisserlagrille et la faireglisserdartsle four.
Ne pas recouvrir ia totaiit_ d'ane grille avec de ia feuiiie
d'aluminium, nigamir mefonddufouravec demafeaimmed'aluminiam,
Ceci modifierait lesr_sultatsdecaisson aufour,et mefonddufour
pourrait subir des dommages.
° V6rifier que la cuvette de r6cup6ration plac6e
souscet616mentcomporteuntrou central.Nepas OUVERTURE
garnirlacuvettede r6cup6rationavecdelafeuille CENTRALEDELA
d'ahminium= CUVETTEDE
Rf:-CUPERATION
Eclamrage du four
Appuyersur le commutateurd'6clairagedu four situ6sur
letableaudecommandepour allumerou 6teindrela
lampe.
oven light
Sole du four
Prot6gerIasoledesproduits renvers6s,enparticuIieracidesou
sucr6s,ceux-cipouvantd6colorerI'6mailvital% Utiliserdes
ustensilesde la bonnedimensionpour6viterque Iesproduks nese
renversentou passentpar-dessusI'ustensileen bouillant.Ne pas
placer d'astensiles ou de feuille d'aluminiam directement sur
la somedafour.
Grilles du four
o Ne pas rangerde nourritumou d'ustens!!edanslefour.
Le four comportedeuxgrillesavec,pourchacune,un dispositifde
calage.
E×traction :
Positions des grilles
Grille 5 (positionIapIus
haute):Pourcuisson
breveau griI- pain grill6
ou alimentsminces
contenantpeu degraisse.
Grille 4 : Pour[a piupart
descuissonsau griL
Grille 3 : Pour[apiupart
descuissonsde
p_tisseriessur unet61e_biscuits- g_teaux_ 6tages,tartesaux
fruits, metssurgel6s.
Grille 2 : PourrOtissagedepiscesde viande,metsen sauce,cuisson
depain,g_teau16gerencouronne(baba)ou entremets.
Grille 1 : Pourle r6tissagedegrossespiecesdeviandeouvolaille,
tares surgel6es,souffl6sou g_teauxdesanges.
CUISSONSURPLUSIEURSGRILLES:
[}eux grilles: Placer [es grilles aux positions 2 et 4 ou 1 et 4,
Oemi-grille
Unedemi-grille estdisponibleen
accessoire.EIIeaugmentela capacitedu
four et s'accroche_gauche,_ la parle
superieure.Elleestutile pourIacuisson
d'un platde I6gumesIorsqu'ungros rOti
setrouvesur la grille inf6rieure.Prendre
contactavecle revendeurpourde-
manderI'accessoireHALFRACK(demi-
grille)ou pourcommander,composerle
1-800-688-840&
__5
__4
--3
__2
--1
1, TirerIagrille en Iignedmite
jusqu%ce qu'elles'arr6te_ la
positionde calage.
2= Souleverlagrille _ I'avantpour
pouvoirI'extraire.
43
Page 45

5.
Four autonettoyant
(certains modeles}
Remarque : PourB nettoyagemanuaivoirb page47.
EliminerIesresidusde graisseou de produits renvers@sur la
sob avant b nettoyage.Ceciemp@hela formationdeflammes
ou defumee @rant le nettoyage.
G.
Essuyerlesresidussucresetacides,commeIespatatesdouces,
Iatomateou bs sauces_ basede Bit. Laporcetainevitrifi@
pos@deunecertainer@istanceauxcompos@acides,maisqui
n'estpas limit@.Eriepeutsed@oIorersi lesr@idusacidesou
sucresne sontpas enlev@avantdecommencerI'autonettoyage.
o h _st normal que certames p+ecesde la cu+siniere devienuem
tr_s chaudes Jorsd'un cycle de ne[[oyage.
, Pour ev+[erde ',OUSblesser at d'endommager la porte du four
rfessayez pas d'ouvrir ia porte quand <<LOCK
6/ERROUILLAGE} est affiche,
o Eviterde toucher Jasurfacede cuisson,la porte,tehuDIoIet la
Programmation de l'autonettoyage :
de 205°C{400°F}pour programmerun cycb d'autonettoyage+
[ Remarque : La temperaturedufour dolt 6tre situ@ en dessous
1. Fermerla portedu four.
zonede J'eventdu four Iorsd'un cycled'autone_[oyage.
2. Placerlamanettede verrouiilagea la positiondeverrouillage.
o Ne pasutilJserdenettoyantpourfour de commercesur lefirfi
du four ou sur tout autrecomposan_du four. CeJaabimeraitie
fini ou lescomposantsdufour.
L'autonettoyageutilisedestempdraturessuperieures_ celiesde Ia
cuissonnormaIepour nettoyerautomatiquementI'interieurdufour.
NeforcezpasIa porte du four ni Ie levierde verrouiIIagepourIes
ouvdr+Cecipeutprovoquerune exposition_destemperatures
elevees,et doncpresenterun risquede br01ure+
Si lefour esttres sale,il estnormal qu'on observelaformationde
rum@ou de flammesdurant ie nettoyage+Nettoyerlefour
intervallesregulierspIutOtqued'attendre une accumulation
importantede r@idus.
Durant Ie processusd'autonettoyage,ilconvientde bienaerer la
cuisinepour 61iminerlesodeursnormalement6misesdurant le
nettoyage.
3. Appuyersurla toucheCban (Nettoyage}.......
+ Lemot CLEAN(NETTOYAGE}clignotea I'afficheur.
Si Ia porte n'estpasferm@,deships retentissentet ie mot DOOR
{PORTE}parak_ rafficheur.Si la porten'estpasferm@ dartsles
45 secondes,[operationd'autonettoyageestannul@ et ....
I'afficheurrevbnt _ I'heuredu jour.
4. Appuyersurla toucheA (Plus}ou V (Moins}.
• CL-M (Nettoyage- saletemoyenne,3heures}
est affiche.
5. AppuyersurIatoucheA ouV pourvoirdefiler les differents
reglagesdeI'autonettoyage.
CL-H (Nettoyage- salete@aisse,4 heures}
Avant I'autonettoyage
1. Eteindrelalampedu four avant lenettoyage.Celle-cipourrait en
effetgrflIer.
2+ EnleverlaI@hefrite,tous Iesplatset iesgrillesdu four. LesgriIIes
risquentdesed@oloreret de ne plusglisseraussibienapresun
cycled'autonettoyagesion ne Iesenbve pas.
3.
Nettoyerle cadre du four, le cadrede la porte {zoneaI'exterieur
dujoint} et autourde I'ouverturedartsIejoint de laporte,a I'aide
d'un produitde nettoyagenonabrasifcommeBonAmi+ou d'eau
additionn@de @tergent.Leprocessus
d'autonettoyagenenettoie pasces
J \
zones.EIIesdoivent6tre nettoy@spour
emp@herla saletede s'incruster
pendantIe cycle de nettoyage.(Lejoint
assure1'etancheiteautour de laporteet
du hublot du four.}
4. Pourempechertout dommage,nepasnettoyerni frotter lejoint
qui setrouve autourde Ia porte du four. Cejoint estcongupour
@iterles pertesde chaleurpendantlecycle d'autonettoyage.
+Lesnomsde marquedesproduitsde nettoyagesontdesmarquesd@oseesdesdifferentsfabricants.
CL-M (Nettoyage- salet6moyenne,3heures}
CL-L (Nettoyage- salet6legere,2heures}
Lechoixdu niveaudesabt6 du four programme
automatiquementladur@du cycled'autonettoyage.
6. Apr@squatresecondes,le fourcommencelenettoya%
• Ladureede nettoyagecommenceJed@omptea I'afficheur.
+ Lemot LOCK6iERROUILLAGE}parait _ raffJcheur.
o Lemot CLEANparait_ J'afficheur.
D6marrage diff6r8 d'un cycle d'autonettoyage :
1. Appuyersurla toucheDelay(Demarragediffer@. .........................
+ Lemot DELAY{ATTENTE}c[ignote.
+ 00:00parait _ I'afficheur+
44
........%
CLEA//
DIs+24Y
s_ite oo.
Page 46

2. AppuyersurIatoucheA [Plus)ou Y (MoJns}pour ..................
programmerIadu+6ed'attenteavantque ne commence
le cycle.Ladur6e d'attentepeut 6treregl6e,de !0
minutes(00:10}_ 11heures,59 minutes(11:59).
3. Appuyersur latouche Clean(Nettoyage}. .........................
o Le mot CLEAN(NETTOYAGE)va c[ignoter. CLEAN
4. Appuyersur latouche A ou V.
o CL-M (Nettoyage- salet@moyenne,3 heures} A
estaffich@.
5. Appuyersur latouche A ou V pour voirddiler les V
diff6rentsr6glagesdet'autonettoyage.
CL-H [Nettoyage- satet66paisse,4 heures)
CL-M (Nettoyage- saiet6moyenne,3heures)
CL-L[Nettoyage- salet6[6g6re,2 heures)
Pendant Je cycle d'autonettoyage
Lorsquele mot LOCKparak_ I'afficheur,la porte ne peut6tre
ouverte+Pour6viterd'endommagerla porte,ne pasla forcer pour
I'ouvrJrIorsquele motLOCKest affich6+
Fum6e et odeurs
La premJ6refois o8 lefour est nettoy6,il peuty avoirproduction
d'odeuret de fumee+Ceciest normaletdisparaitraa I'usage+
Si lefour esttr6s saleou si la I6chefritea 6t6laisseedansle four, il
peutyavoirproductionde fumee+
Bru+ts
Pendantque lefour chauffe,[Ipeutseproduiredes bruitsde m6tal
en diIatationou en contraction+Ceciestnormalet n'ind+quepasque
le four s'abime+
Apr_s le cycle d'autonettoyage
Le choixdu niveaude salet6du four programme
automatiquementladur6edu cycled'autonettoyage.
6. Apr6squatre secondes,IesrootsCLEAN(NETTOYAGE},DELAY
(ATTENTE)et LOCK(VERROUILLAGE}paraissent_I'afficheur
pour indiquerque le four estprogrammepourune op6rationde
nettoyagediff6r6.Letempsd'attente parait _ I'afficheur.
Si le four a dej_ ete programme pour uu cycle de
uettoyage et que l'ou desire 8tablir uu delai :
1. Appuyersurla touche Delay(D6marragediff6r6}.................
• Lemot DELAY(ATTENTE)cJignote. DELAY
• 00:00parait8 J'afficheur.
2. AppuyersurIatoucheA ouT pour programmerJa A
durded6sir6ede J'attenteavantque ned6buteJe
cycle.
Apr6squatresecondes,les rootsCLEAN,DELAYet
LOCKparaissent_ I'afficheurpour indiquerque Ie four
estprogrammepour une operationde nettoyagediff6r6.
Letempsd'attenteparatt_ I'afficheur.
Lorsque le cycle d'autouettoyage debute :
+ Lemot DELAYs'6teint+
+ Ladur6ede nettoyageparatt_ I'afficheur+
Auuulatiou du cycle d'autouettoyage :
Appuyersur Iatouche CANCEL[ANNULER}+
+ Tousles motsdisparaissentde I'afficheur+
+ ToutesIesfonctionssont annuI6es+
Environuneheureapresla fin du cycle,le motLOCKs'6teint+Ace
moment,laportepeut 6treouverte+Pousserla manettede la porte
versla gauchepour d6verrouiller.
La samet6peut avoir maiss6un r6si_tugris poudreu×. L'enlever
avecun linge humide.S'il restede lasaIete,cetaindiqueque le cycle
de nettoyagen'apas 6t6 assezlong.Cettesalet6restantesera
enlev_eauprochaincycled'autonettoyage.
Si les grilles o_t _t_ laiss_es _ l'i_t_rie_r d_ four pendant le
cycle d'a_to_ettoyage et q_'emmesgmissemroams_r me_rs
supports, lesenduire,ainsique lessupports,d'unefine couche
d'huilev6getale+
De fi_es mig_espeuve_tapparaitre da_s maporeemai_eparce
q_'elle a s_bi ehale_r et refroidisseme_t. Ceciest normalet
n'affecterapasla performance.
U_e decomoratio_blanche pe_t apparaitre apr_s me_ettoyage
si des amimemsaeides o_ s_erSs _'o_t pas _t_ e_mevO.savast
q_e _e comme_ce m'a_to_ettoyage.Lad6colorationestnormale
et n'affecterapas la performancedufour+
_ematq_es :
• Si Iaportedu four n'estpas ferm6e,Iemot DOOR[PORTE)
clignote8 I'afficheuret lefour #metdes hips jusqu'_ ceque la
portesoitferm#eet queJ'onappuie_ nouveausur Clean
(Nettoyage).
• Laporte du four se trouveraendommag#esi ron forceson
ouverturealorsque le mot LOCK(VERROUILLAGE)est encore
affich8.
• L'heuredu jour parait8 rafficheur+
45
Page 47

Mdthodes de nettoyage
* Avantroute manipulation ou operation de netteyage, v_rifier que
I'appareil eat arr_t6 et que tous lea cemposants sent froids, a_in
d'_viter des dommages ou des br_lures.
, Poureviter laformationdetachesou un changemen_ae cou_eur,nettoyer
o Aprdstout ddmontagedecomposan-[s,veillera effectuerun remontage
correct.
PIECES NET[OYAGE
Lea noms de marque sent des marauds
(_eooseesdes differents fabricants=
"" Pour commander directement= comooser
e 1-877-232-677" aux E=-U=eL e
1-800-688-8408 au Canada.
Dosseret et table
de cuissen-
l_mailvitt'ifi_
l=_ehefriteet sa Ne jamais ceuvrir la gri#e de papier d'alumildum; cela emp_ehe la graisse decooler dalls la I_cheMte.
Zone de la console
de commandeet
Beutons de oPlacerchaquebouton_ Iapositiond'ARRET,et retirerchaqueboutonen letirant=
commande oLaver,rinceret fairesecher=NepasutilJserunagentde nettoyageabrasifsusceptiblederayerIafinition=
L'emailvitrifieestduverrelidau metalparfusion.IIpeutsefissurerous'ecaillerencasde mauvaiseutilisation.H est
resistantauxacides,maispastotatementinattaquablepar lesacides.TousIesproduitsrenverses,enparticulier
acidesou sucres,doivent6treessuyesimmediatementavecun Iingesec.
oUnefoisla piecerefroidie,IalaveravecdeI'eausavonneuse,rinceretsecher.
oNeiamaisessuyerunesurfacetiddeouchaudeavecun Iingehumide.CecipourraitlafissurerouI'ecailIer.
oNejamaisutiliserde nettoyantspourfour,d'agentsde nettoyagecaustiquesouabrasifssur lefini exterieurdela
cuisinidre.
• Recouvrirta Idchefriteetsagrilled'un lingesavonneux:hisseragir pourdetachertesresidus=
oLaveravecdeI'eausavonneusetidde.Utiliseruntampon_ recurerpouretiminerlessouillurestenaces.
oOnpeutplacerlesdeuxcomposantsdela Idchefriteclansun hve-vaisselle.
oPourutiliserla fonctionVerrouillagedescommandespourle nettoyage,voirpage37=
oEssuyeravecun linge humide,puisfairesecher=Nepasutiliserun agentde nettoyageabrasifsusceptiblede rayerla
finition=
oOnpeututiliserunproduitde nettoyageduverre,pulverised'abordsurun chiffon=NEPASprejeter le preduit
directemelpt sur /estouches de cemmallde eu sur Faf#cheur.
oFairefonctionnerbridvementchaqueeIementpourverifierque leboutona etecorrectementreinstaiIe=
L'emailpeutsedecolorerouse fendillers'ilestsurchauffe.Ceciestnormaletn'affectepaslesperformancesdecuisson.
oUnefoislescuvettesderecuperationrefroidies,leslaveraprdschaqueutilisation,Iesrinceret Iessecherpoureviter
lestachesou ladeceleration=Lescuvettesderecuperationpeuvent6treIaveesen Iave-vaisselJe=
oPoureliminerIesgrossessouillures,fairetremperclansde I'eausavonneusechaude,puisutiliserunproduit de
nettoyagepeu abrasifcommeSoftScrub_et untampon_ recurerenplastique=
oEncasdesaleteincrusteddartsIescuvettesde recuperation,lesretirerde Jacuisini@re,lesposersurdesfeuilles
de papierjournaletIespulveriserdoucementdenettoyantcommercialpourfour.(Nepaspulveriserdeproduit
surlessurfacesavoisinantes=]Mettrelescuvettesde recuperationdartsunsacen piastiqueet laisserleproduit
agir plusieursheures=Porterdesgantsen caoutchoucpourretirerlescuvettesde recuperationdusac,Javerles
cuvettes,Jesrinceret lessecher=
Cavettes de
• Aprdsle refroidissement,laveraprdschaqueutHisation,rinceret fairesecherpour@iterlaformationdetachesouun
changementde couIeur=
• PoureIiminerdegrossessouiIlures,fairetremperdansdeI'eausavonneusechaudepuisutiliserunproduitdenettoyage
peuabrasifcommeSoftScrub*et untampon_ recurerenplastique=Ne pasutiliserun produitde nettoyageabrasit
suite ooo
46
Page 48

NE_OYAGE
Hubmotet po_e
du four en verre
Int_rieur du four
Grimmesdu four
(terrains mod_mes)
* Eviterd'utilisertropd'eau,qui risqueraitdes'infiltrersousou derriereleverreet detacher.
* Laver_ t'eauet aLJsavon.Rinceravecde t'eaupropreets6cher.Unproduitde nettoyagedu verrepeut6tre utilise
en levaporisantd'abordsurun linge.
* Ne pasutiliserde produitsabrasifscommetamponsh recurer,lained'acierou produitde nettoyageen poudrequi
risqueraientderayerleverre.
*Ex6cuterlesinstructionspr6sent6esauxpages44-45pour rautonettoyagedu four.
Nettoyage manual:
* Nettoyer%quemment avecun tamponde plastiqueet un produitde nettoyagemoyennementabrasif.
* Ne pas utiliser untampon _ recurermetallique,quiformeraitdes rayuressur Iasurface.
* Lorsde remploid'un produitcommercialde nettoyagedefour,appliquerIesinstructionsdu fabricant.
* Eliminerdesquepossiblelesproduitsacidesrenvers6s(produits_ basedehit oudetomate)aveceauetsavon;ces
produitspeuventfaire changerlacouleurde 1'6maillotsd'uncontact prolong6.
Pourfaciliter menettoyage, on peut eniever la porte du four, (Voltla sectionEntretien,page48.)
* Nettoyeravecde I'eausavonneuse.
* Eliminerlessouillurestenacesavecune poudrede nettoyageou untampon _ r6curersavonneux.Rinceret faire
secher.
* Si lesgrilles sontlaiss6esdartsIefourpendantiecycied'autonettoyage,ellessed6colorentet peuventneplustres
biengiisser.Sicetaseproduit,enduirele borddesgrillesetlesupportdesgrillesd'unefinecouched'huileveg6tale,
puisessuyerI'exc6dent.
* NEPASUT]LtSERDE PRODUffS DE NETTOYAGECONTENANTDU JAVELLtSANT.
, NEPASUTILISERDE NETTOYANTS_ ORANGE_OUABRASIFSo
, TOUJOURSESSUYERDANS LE SENSDELA TEXTUREDEL'ACtER LOftSDU NETTOYAGE.
o Nettoyuge joumaiier/saiet_ idg_re - EssuyeravecI'un desproduitssuivants:eausavonneuse,vinaigreblanc/
eau,produit de nettoyagepourverreetsurfaceFormuia409_ou un produitsemblablepour verre- avecun linge
soupleet une6ponge.Rinceretsecher.PourpoIiretenteverlesmarquesdedoigts,fairesuivreparunevaporisation
de Magic Spraypouracierinoxydable(piecen° 20000008)*_.
, Saiet_.mod6rSe/dpaisse - EssuyeravecI'undesproduitssuivants:BonAmi,SmartCleanserouSoftScrub_-
raide d'un lingesoupleou d'uneepongehumide.Rinceretsecher.Lestachesrebellespeuventetreenleveesavec
untamponmulti-usagesScotch-Brite*humidi%.FrotteruniformementdartsIesensdum6tai.Rinceretsecher.Pour
redonnerdu lustreet retirer Iesrayures,fairesuivrepar unevaporisationdeMagic Spraypour acier inoxydable_.
, DScoioration - A I'aided'une epongehumidi%e oud'un Iingesoupie,essuyer_I'aidedu nettoyantCameo
pour acier inoxydabIe_.Rincerimm6diatementetsdcher.Pourenleverlesmarqueset redonnerdu lustre,faire
suivre parune vaporisationde Magic Spraypour acier inoxydabIe*.
Porte du four
(ceH insmod mes),
tiroir de remisage,
poign6e de porte,
panneau× mat_rau×-
*Lesnomsde marquesontdes marquesd6poseesdesdiff6rentsfabricants.
** Pourcommanderdirectement,composerle 1-877-232-6771auxE.-U.ou le 1-800-688-8408au Canada.
* Unefois les pi6cesrefroidies,laver_I'eausavonneusetiede,rinceret secher.Nejamais essuyerune surfacetiede
ou chaudeavecun lingehumide,ceci pouvantendommagerlasurfaceetentrainerunebrCJIurepar Iavapeur.
* Pourlestaches rebelles,utiliserdesagentsde nettoyageIeg6rementabrasifscommela p_te au bicarbonatede
soudeou BonAmR Nepasutiliserd'agentsde nettoyageabrasifs,caustiquesou6nergiquescommelesnettoyants
pourfour ou lestamponsenlained'acier.Cesproduits raieraientou endommageraientde fagonpermanentela
surface.
REMARQUE: UdHserunffllge ell u_ _erche_secpe_r ess_ter ]espreduitsrenvers_s,s_rte_t s'i_sse_tacfdes
e_ sucres. La s_fface peurraitsed_ce]erer eu se _emirsf la sa]et_ _'_tait pas fmm_dfateme_t etffey_e.Ced
est par'dcu#_reme_t important darts le c_s de surfaces b!ancheso
47
Page 49

Porte du four
o Ne pasgrlmpersur laportedu four ouverte,ou lul imposerune
chargeexcesswe.Cecipourrait provoquerun basculementde la
culsm_ere._ebr[sde la porteou des biessurespoul la personne
eoncern6e.
o Ne pastenter douvrir ou fermer la por[eou d'utiliserle four
avantque la porte alt ete convenabiementrdJnstali6e.
• NejamaJsplacerlosdo[gtsentrela charniSreet ie caareavam
au four. Losbrasde charmeresont mont6ssur ressort.Une
charnierepourra[tsereformerbrutafemen[con[rele cadredu
four etprovoquerde s_rJeusesbiessures
Hub[or du four (certains mode[es}
Pour prot6ger [e hub[or de [a porte du four :
1. Nepasutil[ser de produitsnettoyantsabrasffscommedes
tampons_ recureren lained'acier ou desproduitsde nettoyage
en poudrequi rJsqueraientde rayer[e verre.
2. Nepas heurter[e hubiot enverreavecun ustensJ[e,unarticle de
mobiIier,uniouet,etc.
3. Nepasfermer [aportedu four avantque los grilles ne soienten
placedarts[efour.
Toutedegradationdu hubiot de verre- rayure,choc,tension,etc.-
peutaffaiblir sa structureet augmenter[erisquede bris_ unedate
uiterJeure.
Depose de la porte:
1. Apr6s lerefroidissementdu four, ouvrirIa
porte- positionde cuissonaugril (porte
entrouverted'environ 10cm [4 pouces]}.
2. Saisirlaporte dechaquec6t6.Ne pas
utiliserla poign6ede portepour la
soulever.
3. Sou[ever uniform6ment pour d6gager [a porte des charni6res.
1. Saisir[aporte dechaquec6t6.
2. Aligner los fentes avec[esbrasdecharni6resur[acuisiniere.
3. Fairedescendrelaporte pour lapositionnercorrectementsur los
charnieres.Poussersur lesanglessup6rieursde [a porte pour
['enfoncercompietementsur loscharnieres.I[faut que [aporte
soit parfaitementd'ap[omb.
[afermeture de la portedu four d'une cuisini6reneuve;ceciest
[ Remarque : Onpout percevoirune certaine_6Iasticit6>>lots de
normal;cet effet disparaitprogressivement.
La pe du four
o ,D6brancherlacu sini_redur6seakj6[ectriqueavantderemplacer
Iampoule.
• Utiliser une maniques_che pour prot6ger los mains lots du
remp[acementde ['ampoule.
, Ne pastoucher 'ampoue avart qu'e e sesot refrod e
, Ne,pastoucher I'ampou[echaudeavecun[incgehumide;[echoc
thermiquepourrait la briser.
Pour remplaoer l'ampoule du four :
1, Apr6s[e refroid[ssementdufour, rnainten[r[e cabochontout en
en[evant[apiScemeta[[iquequ[ [a maintienten place,
[Remarque : Lecabochontomberas[ on ne [emaintientpasen
place.
2. EnleverIecabochonet I'ampoule. CASOCHON
3. installeruneampoulede 40watts
pour appareiIm6nager.
4. R6instalIerlecabochonet lefil
m6talIiquederetenue.
5. R6tabiir['a[imentationde[a _ RESSORTDERETENUE
cuisini_re.R6g[erde nouveau (f_m_,,//i_u_.)
I'horloge.
48
Page 50

Pieds de r6glage de l'aplo b
Vdrifb_que B brideantibascu!ementagrJppeconvenabbment
fun despie@arrJ6rede r6glagede i'aplomb,pour que la
CU!SiniBrenePUiSSebasculeraccidentellement.
R6installation :
1, Positionnerles extr6mit@desgIissi_resdanslesrails_ ['int6rieur
de la cuisini_re.
2. SouleverI'avantdu tiroir et pousserdoucementiusqu'_[a
position de [apremierebut6e.
3. Soubver_ nouveaule tiroir et le pousseren placepour le fermer.
F_
La cuisini6redolt 6tred'apiombune fois install@.Si [_//#_
eriene rest pas,tourner [espiedsde r6glagede I
['aplomben piastique,b chacundesanglesde [a I kv
ANTIBASCULEMENT
PIEDDEREOLAOE
DEL "APLOfViB
Tiroir de remisage
Nepasremlserclansletlrow de remlsagedesarticlesen
plastiqueou papienou desproduitsallmentalresou mat6naux
inflammables.Lestemp6raturesb I'int6rieurdu t_rx}lrpeuven_
devenwtrop_bv6es pour cesarbcles!orsquelefour esten cours
d'utflisation.
LetJroirde remisagepeut6treenlev6pour pouw_irnettoyersous[a
cuisini_re.
D6pose :
1. Vider[etiroir et [etireriusqu'_ [apositionde [apremierebut6e.
2. Soulever[avast du tiroir.
Prise de courant auxiliaire
(mod61es canadiens seulement}
La prisede courant auxiIiaireestsitu@en bas/_gauchedu
dosseret.VeiiIerb ceque [e cordon d'aiimentationde ['apparei[
utiiis6 nereposepas sur un 616mentde[atablede cuissonou
proximit6:[amiseen marchede ['6[@Tlent / ..............................
chauffantferait subirdesdommagesau
cordond'a[imentationetb [aprisede
courant.
UnappareiIsuscitantune demandede
courantde plusde 10A provoquem
l'ouverturedu disjoncteurqui protSgela
prisedecourant auxiIiaire.Pourr@rmer
[edisjoncteur,appuyersur [e
commutateursituesur le bordinf6rieur
du dosseret.
/
3. Tirerletiroir jusqu'a la positionde la deuxiemebut@.
4. Saisirles cot@et soubver letiroir pour pouvoirle retirer.
49
Page 51

PROBLEME SOLUTION
Pourmapmupartdesprobm_mes oVerifierque les commandesdufour sontcorrectementregIees.
observSs, essayer d'abord mes oVerifier si Iefiche est bien insereedansla prise.
somutionspossibmes,_ droite, oInspecter/rearmerIedisjoncteur.Inspecter/remplacerlesfusibles.
o ContrOlerla sourced'alimentationelectrique.
Non-fonctionnement de i'appareii =
totamoa partieL
L'hormogeou ruesmampesfonctionnent,
ruesroots paraissent_ m'afficheur,
mais mefour ne chauffe pas.
R_suitats de caisson au four
cliff, rents des uttentes ou de ceu× qui
sont produits par mefour ant_rieur,
R6sumtatsincorrects morsdemu
cuisson au grim,ou 6mission
excessive de fum_e.
o Determhlersi lescommandesdeselementsdesurfaceet/ou du four sontconvenablement
reglees.Voir pages31et 43.
o Determinersi la portedu four s'estdeverrouiJleeapr@suneoperationd'autonettoyage.
Voir pages45.
o Determinersi le fourest regle pourune cuissondiffereeou un nettoyagediffer&Voir pages
39 et 44.
oVerifiersi Ieverroui!lagedescommandesesten marche.Voirpage37.
overifier si lacommandeesten modesabbat.Voirpage41.
oLescommandessont peut-etreprogrammeespourunefonction de cuissonetmaintienou
dedemarragediffer6.
oLafonctionde verrouillagedescommandesestpeut-etre activee=Voir page37=
o Determinersi revent du four est obstru&Voir sonemplacementpage43,
oS'assurerque lacuisini_reestd'aplomb.
o Les reglagesdetemperaturevadentsouvententre un four neuf et lefour qu'il remplace.On
observesouventune derivedu regIagedetemperatured'unfour _mesurequ'il vieillit; il peut
devenirplus chaud ou moinschaud.Voir page41 lesinstructionsd'ajustementde la
temperaturedu four(certainsmodeles).REMARQUE: IIn'estpasutile demodifier lereglage
detemperaturesi lavariationn'affectequ'uneou deux recettes.
o Pourd'autresinformationsausujet de la cuissonau four,voir labrochureLa cuisson
simplifiee.
o DeterminerIapositiondesgrilles.Lesalimentspeuvent6tretrop presde I'elementdu griL
o t-_lementdu griI pas prechauff&
o Utilisationincorrectedefeuilled'aluminium.Nejamaisgarnir lagrille de lechefriteavecde la
feuille d'aluminium.
o Portedu four fermeedurant lacuissonau gril. Laisserla porte du four entrouverted'environ
10cm [4pouces)- premierebutee.
o EnleverI'excesde graissesur lapiecede viandeavantla cuissonau griL
o Utilisationd'une lechefritesouillee.
o Latensionelectriquede la maisonest peut-etre basse.
_mpossibimit8d'uutonettoyage du
four (certains modules).
Lefour nese nettoie pus
correctement (certains mod_mes).
La porte da four ne se dSverrouiiie
pas aprSs m'autonettoyage
(certains modules),
o Determinerque['appareiIn'apaseteprogrammepourun autonettoyagediffer&Voir page44.
oVerifierque la porte estfermee.
oVerifiersi Iacommandeesten modesabbat.Voirpage41.
o Lefourest peut-etre_ unetemperaturesuperieure_205 °C_400°F).Latemperaturedu four
doit6tre inferieure_ 205°C[400°F)pour pouvoirprogrammeruncycled'autonettoyage.
o Un tempsde nettoyagepluslong peutetre necessaire.
o Onn'apas61imin6avantI'operationd'autonettoyagelesaccumulationsexcessivesde residus,
particulierementlesresidusd'alimentsacidesousucres.
o L'h_terieurdufour estencorechaud.Attendre environune heureapresI'ach_vementdela
perioded'autonettoyage.IIest possibled'ouvrirlaporteapresladisparitiondu messageLOCK
[VERROUILLAGE)sur I'afficheur.
o Lescommandesetla portesont peut-etreverrouillees.Voir page37.
suite
5O
Page 52

PROBLEME SOLUTION
Accumulation d'humidit6 sur le o Ceciest normaldurant Iacuissond'alimentscontenant beaucoupd'eau.
hubmeteu vapeursertant de m'_vento o Utilisationexcessived'humidit6 Iorsdu nettoyagedu hublot.
Emission d'une ferte edeur eu de o Ceciest normalpour une cuisini6reneuve;cet effet disparaitapresquelquesutilisations.
fum6e lets de la raise en marche L'executiond'un programmed'autonettoyagepermettrade fairedisparakrecetteodeur plus
du four° rapidement.
o Fairefonctionnerleventilateurpour 6vacuerIa fum6eou rodeur.
• Pr6senced'uneaccumulationde r6sidusalimentairessur lefond du four. Ex6cuterune
op6rationd'autonettoyage(certainsmodeles}.
Cedes d'unomalie o LesrootsBAKEouLOCKpeuventclignoterrapidementbI'afficheurpourpr6venird'uneerreur
ou d'un probl_me.Sile motBAKEou LOCKparaitb I'afficheur,appuyersur latouche Cancel
(AnnulerD.Si Iemot BAKEou LOCKcontinueb c@noter,d6brancherI'appareiLAttendre
quelquesminutes,puis rebrancherI'appareiLSi lemot continueb c@noter,d6brancher
I'appareiletprendrecontact avecun r6parateurautoris6.
o Silefouresttl_s sale,Iesflamm_chespeuventproduireun coded'anomalieaucoursducycle
d'autonettoyage.AppuyersurlatoucheCancelettaisserIefourrefroidircompletement,essuyer
Iasalet6enexc6spuisreprogrammerrautonettoyage.Silecoded'anomalier6apparatt,prendre
contactavecun r_parateurautoris_.
Des bruits se font entendreo o Lefour fait plusieursbruitsfaibles.II estpossibled'entendreles relaisdu four qui semettent
en marcheet s'arr6tent.Ceciest normal
o AIorsquelefourser6chauffeetserefroidit,il estpossibled'entendredesbruitscorrespondant
ladilatationetb lacontractiondespi_cesm6talliques.Ceciestnormaletn'endommagepas
I'appareiL
_1n'y u ni bip ni affichageo • Le commandeestpeut-6treen modesabbat (certainsmod_les].Voir page41.
51
Page 53

Garantie complete d'une ann6e -
Pieces e| main-d'_uvre
Durantune p_riode d'un (1) an a
compterde la datede I'achatinitial au
detail,tou[e piece qui serevelerait
ddectueusedansdesconditionsnormales
d'usagemenagerserarepareeou
remplaceegratultement.
Residents canadiens
Les garantles ci-dessuscouvren[un
appareilinstall6au Canada.seuiements'il
a et6 agreepar lesagencesdetest
habflitees[verificationde laconformlt6
une normenat_onaLedu Canada),sauf si
['appare[Ia 6t6 introduit auCanada
!'occasiond'un changementde residence
desEtats-Unisvers leCanada
Garantie limitee hers des Etats-
Unis et du Canada - Pi_ces
seulement
Pendantun [1}an a compter de la dateue
I'achatinitial audetail,toute piecequl se
revdlera_ddectueusedansdescondibons
normalesd'usagemenagerserarepareeou
rempiacdegratultement(pieceseulement};
le propri_,taireaevraassumer_ousies
autresfrais,ycomprisfrais de main
d'(_uvre,dedeplacement,detransport,de
kilornetrageetde diagnostic,ie cas
echeant.
Les gatantles specifiques formul_es ci-
dessussent/es SEULE$ que le fabricant
accorde. Ces garantles vous confare dens
droitsjuridiqL 9ssp_c/fiques e_vouspouvez
eqalementjouir d'autres droits, variables
d'un @tatb/'autre, d'une province a une
BUtTe.
Ne sent pas couverts par ces garanties
1. Lesdommagesou derangementsdus_:
a.Miseen service,Iivraisonouentretieneffectu@sincorrectement.
b.Toutereparation,modification,alterationet tout reglagenonautorisespar le
fabricantou parun prestatairede serviceapres-venteagree.
c.Accidents,mauvaiseutilisationou usageabusifou deraisonnable.
d.Alimentation 6tectrique{tension,intensite}incorrecte.
e.Reglageincorrectd'unecommande.
2. Lesgarantiesnepeuvent6trehonoreessi lesnumerosde seried'origine ontete
enleves,modifiesou nesent pas facilementlisibles.
3. Ampoules.
4. Appareilsachetesauxfins d'usagecommercialou industrieL
5. Lesfrais devisite d'un prestatairedeserviceou de serviceapres-venteencouruspour
lesraisonssuivantes:
a.Correctiond'erreursde raiseen service.
b.initiation de I'utilisateur_ I'emploide rappareiL
c.TransportdeI'appareiIauxIocauxdu prestatairedeservice.
6. Dommagessecondairesouindirectssubispar toute personnesuite au non-respectde
cesgaranties.Certainsetatsou provincesne permettentpas I'exclusionou Ia limitation
desdommagessecondairesouindirects;par consequentleslimitationsou exclusions
ci-dessuspeuventne pass'appliquer_ votrecas.
Si l'intetvention d'un r parateur est
• Contacter[edetaiilantchezqui ['appareiIa 6t6 achet6,ou contacterMaytagServicesSr'a/
service_ la ciienteleau 1-800-688-1120auxE.-U.etCanada,pourobtenir les
coordonneesd'uneagencede serviceagreee.
• VeiIIer_ conserverIafactured'achatpouriustifier de lavaiidit6de la garantie.Pour
d'autres informationsence qui concerneIesresponsabiIit6sdu proprietairea 1'egard
du servicesousgarantie,voir letextede IaGARANTIE.
• Si le d_taillantou ragence de serviceapres-ventene peutr6soudreleprobleme,6crire
MaytagServicessM,attention: CAIR_;Center,P.O.Box2370,Cleveland,TN37320-
2370ou t_J_phonerau1_8_0_688_1128 a_× i_._LIoet Canada.
• Lesguidesd'utilisation,lesmanuelsde serviceet lesrenseignementssur lespieces
sent disponiblesaupresde MaytagServicess_,service_ laclientele.
_e_atq_es :
Lorsdetout contactconcemant un probJeme,fournirI'informationsuivante :
a.Nora,adresseet num_rode tdlephonedu client;
b.Numerode moduleet numdro deseriede I'appareil;
c. Noraet adressedu detaillantou de I'agencede service:
d. Descriptionclairedu problemeobserve;
e.Preuved'achat[facturede vente:).
52
Page 54

_bla de _aterias
m.
_trucciones Impo_antes
s_
bre Seguridad ........................ 54-57
c,
_cin_ _de en la Estufa ............ 58-59
Co_1_les
Ele[_, ntos Tubulares
c,
_cin_ ride en el Homo ............ 80-70
Con eles del Homo de
Lira eza ManuaJ
R__j Hornear
$_ lporizador Asar
Ped _ del Home
Ho lear Asar
Cen eles del Homo Autolimpiante
Horneado Diferido
Estufa E|_ctrica con
E|e_entos Tubu|ares
Cuidado y Limpieza .................. 11-74
Homo Autolimpiante
Procedimientos de Limpieza
Mantenimiento .......................... 75-78
Ventana dd Homo
Luz dd Homo
Locaiizaci6n y Soluci6n
de Averias ...................................77-78
Garantia y Servicin .......................... 29
Page 55

Instalador:Potfavor dejeestaguiajunto con el
eJectroc_omesuco.
Consumidor:Porfavor lea_conservees[agu_apara reterencla
futura. Conservee_recibode compray/o el chequecanceJado
comocomproLantede compra.
Nt_merodeModelo
N0mero de Serie
Fecha de Comura
Si tiene alguna pregunta, llame al:
1-800-688-1120 _EE.UU. et Canad&}
1-800-688-2080 (TTY en EE.UU. para personas
con irnpedimentos auditivos odel habia}
{Lunes - Vbrnes. 8:00 a.m. - 8:00 p.m. Hora del Este}
En nuestro conttnuo af_n de mejorar la caJidady rsndimiento de
nuestros eJectrodom@ticos, puede que sea necesano mod[ficar
el electrodom@tico sin actua[izar es_agu[a.
Para infermaci6n seflre servicie, vet pbgh_a 79.
como resuitado de su uso inapropiado, Utiiice este
electrodomdstico solamente para el prop6sito que ha sido
destinado segOnse describe en esta guia,
Para asegurar funeionamiente eorreete y segure: El
ebctrodomestico debe ser instaBdo debidamente y puesto a
tierra por un t@nico cdificado, No intente ajustar, reparar,
prestar servicio o reemplazar ninguna pieza de este producto
a menos que sea espedficamente recomendado en esta guia,
Todas Bs reparaciones deben ser redizadas por un t@nico
calificado,
Siempre desenchufe el ebctrodom6stico antes de efectuar
alguna reparaci6n.
" TODAS LAS ESTUFAS SE PUEBEN
VOLCAR Y CAUSAR LESIONES
INSTALE EL DiSPOSITiVO ANTI-,
Lasadvertencias e instrucciones importantes sobre seguridad
que aparecen en esta guia no est_in destinadas a cubrir todas
Bs posibbs circunstancias y situaciones que puedan ocurrir.
Se debe ejercer sentido comuJn,precauci6n y cuidado cuando
instab, realice mantenimiento o haga funcionar el artefacto.
Siempre p6ngase en contacto con el fabricante si surgen
probbmas o situaciones que usted no comprenda.
Reconozca los simbolos, advertencias,
etiquetas de seguridad
ADVEP,TENCJA -Peligro o pr_cticas no seguras que
PODRIAN causar bsi6n personal grave o mortal.
PRECAUCJON - %!igr0s 0 pr_icticas no seguras que
PODRIANcausar lesi6n personal menos grave,
eleetredem_stico a (;ausa de use anermal o debide
a peso e×eesivo en la puerta del homo, es neeesario
asegurar el e!ectrodemdstico mediante un
Para verificar si el dispositivo est,1debidamente instalado, mire
debajo de ia estufa con una iinterna para asegurarse de que
uno de los tornillos niveladores traseros estd debidamente
enganchado en la ranura del soporte, El dispositivo antivuelco
asegura el tornillo nivelador trasero al piso cuando est,1
debidamente enganchado, Esto debe verificarse carla vez
que la estufa sea movida,
Pata Evitar un lncendio o
Da o Causado per eJ H mo
Aseg_Jresede que todos los materiaies de empaque hayan
sido quitados dei homo antes de ponerio en funcionamiento.
No coioque materiaies combustibles cerca dei
eiectrodom6stico. No se deben guardar en ei homo
materiales infiamables.
Muchos pl_sticos son afectados por el calor, Mantenga los
plasticos alejados de las piezas del electrodom6stico que se
pueden entibiar o calentar,
Lea y siga todas las instrucciones antes de usar este
electrodum_stico para evitar el riesgo potencial de incendio,
choque ei6ctrico, iesi6n personal o da_o ai eiectrodom6stico
Para evitar incendios de grasa, no permita la acumulaci6n de
grasa de cocinar o de otros materiales inflamables en el homo
o en su cercania,
54
Page 56

i
En Case de lncendio
Use un extintor con producto quimbo seco o deI tipo espuma o
bicarbonato para apagar eI incendio o las llamas, Nunca use
agua en un incendio de grasa,
1, Apague eI homo para evitar que la llama se disperse,
2, NUNCA bvante o mueva una sart6n en llamas,
3, Apague eI fuego o la Ihma deI homo cerrando la puerta deI
homo,
Seguridad para los Ni os
para a!canzar !0s articul0 s pueden bsionarse gravemente_
NUNCA deje a los ni_iossolos o sin supervisi6n cuando ei
homo estd en uso o cuando est6 caliente, Nunca permita que
los ni_ios se sienten o se paren en ninguna pieza del
eiectrodomdstico pues se pueden iesionar o quemar,
NO TOQUE LOS ELEMENTOSCALEFACTORESNI LAS
SUPERFiCiESINTERIORESDEL HORNO, Los eiementos
calefactores pueden estar calientes aOncuando su color sea
obscuro, Las superficies interiores de cuaiquier homo se
calientan Io suficiente como para causar quemaduras, Du-
rante y despu_s dei uso, no toque ni permita que ias ropas u
otros materiales inflamables entren en contacto con los
eiementos caiefactores o ias superficies interiores dei homo
hasta que no se hayan enfriado, Otras superficies dei
electrodom6stico pueden estar Io suficientemente calientes
para causar quemaduras - entre estas superficies est_n las
aberturas dei respiradero dei homo y ias superficies cerca de
estas aberturas, ias puertas dei homo y iasventanas de ias
puertas dei homo,
No toque un foco caiiente dei homo con un paso hu]medo
pues se puede quebrar, Si ei foco se quiebra, desenchufe ei
eiectrodomestico antes de sacar ei foco para evitar sufrir un
NUNC,_ use papei de aiuminio para cubrir ias parriiias dei
homo ni el panel inferior del homo, Eluso incorrecto puede
resultar en un riesgo de choque el@trico, incendio o daSo al
electrodom6stico, Use papel de aluminio solamente como se
indica en esta guia,
Se ies debe ensdiar a los ni_iosque ei eiectrodomdstico y los
utensilios que est_n en dl pueden estar calientes, Deje enfriar
los utensilios calientes en un lugar seguro, fuera del alcance
de los ni_ios, Se ies debe ensdiar a los ni_ios que un
eiectrodom6stico no es un juguete y que no deben jugar con
los controles u otras piezas del artefacto,
lnstrucciones Generales
NUNCA use un electrodom6stico como un peldaHiopara
aicanzar los armanos superiores, El uso incorrecto de las
puertas del ebctrodom6stico tales como pisar sobre alias.
apoyarse o sentarse en la pueH1_apuede resultar en que el
electrodom6stico se vuelque, se rompa la puerta y se
causen lesiones graves,
Para evitar posibles riesgos para el usuario y ddio al
electrodomestico, no use este producto como una estufa para
calentar o entibiar una habitaci6n, Adem_s no use el homo
como un lugar para guardar alimentos o utensilios de cocina,
No obstruya la circulaci6n del aire bloqueando el respiradero
dei homo,
Seguridad al Cocinat
Nunca caiiente un contenedor de aiimento cerrado en ei
homo, La acumulaci6n de presi6n puede reventar el
contenedor causando una lesi6n personal grave o da_ioal
electrodom6stico,
Use tomaollas secos y gruesos, Los tomaollas huJmedos
pueden causar quemaduras por vapor, No se deben usar
toallas de secar los platos ni otros sustitutos en vez de los
tomaollas porque pueden pasar sobre los elementos calientes
y encenderse o pueden quedar atrapados en ias piezasdei
electrodom6stico,
Use vestimentas apropiadas, Las ropas sueitas o ropas con
mangas largas sueltas no se deben usar cuando se est,1
cocinando, La ropa se puede prender fuego y causar
quemaduras si entra en contacto con los elementos
calefactores,
Siempre coioque ias parriiias dei homo en ias posiciones
deseadas cuando el homo este frio, Deslice la parrilla del
homo hacia afuera para agregar o retirar alimentos usando
tomaollas secos y gruesos, Siempre evite colocar o retirar
alimentos del homo sin sacar la parrilla hacia afuera, Si una
parrilla debe set movida cuando est6 caliente, use un
tomaollas seco, No deje que el tomaolla entre en contacto
con el elemento caliente del homo,
55
Page 57

i
Use Bs parriiias soiamente en eI homo en que fueron
enviadas/compradas.
Tenga cuidado cuando abra la puerta deI homo. Pnmero deje
que salga eI aire o vapor caiiente antes de sacar ovoiver a
coIocar eI dimento en eI homo.
ADVERTENCIA SOBRE ALIMENTOS PREPARADOS: Siga
Bs instrucdones de] fabricante de] aiimento. Si un contenedor
de dimento congeiado de pi_istbo y/o su tapa se deform&
comba o de otra manera se da_ia durante la cocd6n,
inmediatamente descarte e] aiimento y su contenedor. E]
aiimento puede estar contaminado.
No permita que e] pape] de aiuminio o ]a sonda de ]acame
toque eI ebmento cabfactor.
Siempre @ague todos los controbs cuando haya terminado
de cocinar.
Seguridad sobre eJ Use
de UtensiJios
Siga las instrucciones del fabricante cuando use bobas para
cocinar en el homo.
Elrendimiento y funcionamiento seguro de este
ebctrodom6stico ha sido comprobado usando utensilios de
cocina tradicionabs. No use ningLin dispositivo o accesorio
que no haya sido espedficamente recomendado en esta guia.
No use cubiertas, rejillas superiores de la estufa o sistemas de
convecci6n para homos. El uso de dispositivos o accesorios
que no sean expresamente recomendados en esta guia puede
crear peligros graves de seguridad, afectar el rendimiento y
reducir la vida Litil de los componentes de este
ebctrodom6stico.
Si el utensilio es mas peque_io que el ebmento, una porci6n
del ebmento quedara expuesta y puede encender la ropa o un
tomaollas.
Sohmente ciertos tipos de utensilios de vidrio, vidrio ceramico,
cerdmica, gres u otros utensilios vidriados son convenientes
para cocinar en la superficie o en el homo sin quebrarse
debido al repentino cambio de temperatura. Siga las
instrucciones del fabricante del utensilio cuando use vidrio.
Gire los mangos de los utensiiios hacia e[ centro de [a
cubierta, no hacia la habitaci6n ni sobre otro elemento
superior. Esto reduce el riesgo de quemaduras, encendido de
materiabs infiamabbs o derrames si el utensilio estocado
accidentalmente o alcanzado por niffos pequeffos.
Asegurese de que el utensilio sea Io suficientemente grande
como para contener en forma debida los alimentos y evitar
derrames. Eltamaffo es particularmente importante cuando se
utilizan freidoras. Asegurese de que el utensilio tiene
capacidad para ei voiumen de aiimentos que se va a agregar
ai iguai que para ia formaci6n de burbujas de ia grasa.
Nunca deje que un utensilio hierva hasta quedar seco pues
esto puede da_iarel utensilio y la estufa.
NUNCA deje los elementos superiores sin supervisi6n,
especialmente cuando este usando los ajustes de calor altos.
Un derrame que no reciba la debida atenci6n puede causar
humo y un derrame de grasa puede causar un incendio.
Este electrodom6stico tiene diferentes tama_ios de elementos
superiores. Seleccione utensilios que tengan bases planas Io
suficientemente grandes para cubrir el elemento. La relaci6n
adecuada entre el utensilio y el elemento mejorar_ la
eficiencia al cocinar.
Emementos Tubumares
Para evitar da_ioa los ebmentos cabfactores removibbs, no
los sumerja, remoje ni lave en un BvavajilBs o en un homo
autoiimpiante. Un eiemento ddiado puede producir un
cortocircuito resultando en un incendio o riesgo de choque
el6ctrico.
AsegSrese de que los platillos protectores est6n en su lugar
pues la ausencia de estos durante la cocci6n )uede da_ar el
aiambrado.
Fortes Protectores: No use papel de aluminio para forrar los
piatiiios protectores o ia parte inferior dei homo, excepto como
se sugiera en ia guia. La instaiaci6n incorrecta de estos forros
puede resuitar en un riesgo de choque ei6ctrico o incendio.
Omlas Freidoras
Use extremo cuidado cuando mueva la olla con aceite o
descarte ia grasa caiiente. Deje que ia grasa se enfrie antes
de intentar mover ia oiia.
Campanas de VentiJaci6n
Limpie con frecuencia ia campana y los fiitros a fin de evitar
que se acumuie en eiios grasa u otros materiaies infiamabies y
para evitar incendios de grasa.
Cuando prepare alimentos flameados debajo de la campana,
encienda el ventilador.
56
Page 58

i
Seguridad en la Li pieza
Limpb con cuidado la cubbrta, Apague todos los controbs y
espere que se enfrien las pbzas deI ebctrodomestbo antes de
tocarias o limpiarias, Limpie con cuidado, Tenga cuidado
para evitar quemaduras de vapor si usa una esponja o un
patio mojado para limpiar derrames en una superfbie caibnte,
Aigunos limpiadores pueden produdr vapores nodvos cuando
se apiican en una superfide cdbnte,
Limpb soiamente las pbzas indbadas en esta guia,
Homo Automimpiante
(modelos selectos}
c0cina, etc, en e! homo durante e[ cic[0 de aut0[impbza,
No iimpie ia junta de ia puerta, Lajunta de ia puerta es
esencial para obtener un sellado herm6tico, Se debe tener
cuidado de no frotar, da_iar ni mover la junta,
No use limpiadores de homo ni forros de homo de ning0n tipo
alrededor ni en ninguna parte del homo autolimpiante,
Antes de iniciar el ciclo de autolimpieza del homo, retire la
asadera, las parrillas del homo y otros utensilios y limpie
cualquier derrame para evitar humo excesivo o llamaradas,
Esnormal que la cubierta de la estufa se caliente durante el
ciclo de autolimpieza, Pot Io tanto, se debe evitar tocar la
cubierta durante un cicio de autolimpieza,
Aviso y Advertencia
lmportante Sobre Seguridad
La Propuesta 65 de la Ley de 1986 del Estado de California
Sobre Seguridad y Contaminaci6n del Agua Potable (California
Safe Drinking Water and Toxic Enforcement Act of 1986} exige
que el Gobemador de California publique una lista de las
sustancias que seg0n el estado de California causan @ricer o
da_o al sistema reproductivo y exige que Bs empresas
adviertan a sus dientes sobre la exposici6n potencial a tales
sustancias,
Se advierte a los usuarios de este ebctrodom6stico que
cuando el homo est,1funcionando en el cido de autolimpieza,
puede haber exposici6n de bajo nivel a dgunas de las
sustancias indicadas en la lista, induyendo mon6xido de
carbono, La exposici6n a estas sustancias puede ser reducida
a un minimo ventilando el homo al exterior en forma
adecuada, abriendo las ventanas y/o la puerta en la habitaci6n
en donde est,1ubicado el ebctrodom6stico durante el cido de
AVISO IMPORTANTE RESPECTOA LOS PAJAROS
DOMESTICOS:
Nunca mantenga los pSjaros en ia cocina o en ias
habitaciones donde puedan llegar los humos de la cocina, Los
p_jaros tienen un sistema respiratorio muy sensitivo, Los
humos producidos durante el cicio de autolimpieza del homo
pueden ser periudiciaies o mortaies para los p_jaros, Los
humos que despide el aceite de cocina recalentado, la grasa,
margarina y los utensilios antiadherentes recalentados
tambi6n pueden set perjudiciales,
Conserve estas instrucciones para referencia futura
57
Page 59

Centreles Superieres
Useestoscontrobs paraencenderlosebmentos supedores.Se
disponede una sebcci6n infinitade ajustesde calor des@'Eow'
(Bajo}hasta'High' (Arto}. Las perittaspuedencolocarseen
cualquierade estosajusteso entreelios.
Programae+6n de les Controles
1. Coloqueetutens+Iiosobreel ebmento superior.
2. Optimay gire IaperilB en cualqubr direcci6nhastael ajustede
calordeseado.
+ Enei paneldecontm! seencuentramarcadocual
elementocontroiacadaperilla. Perejemplo,el
dibujoa laderechaindicael ebmento delantero
izquierdo.
3.
Enel paneldecontrol hayuna luz indicadorade!etemento.
Cuandoseenciendealgunade las periflasde control, Ia hz se
ilumina. La Iuzse apagar_cuandotodos losebmentos
superioresseapaguen.
4.
Despu@decocinarcoioqueIaperilla en la posiciOn'OFF'
{apagado}.Retireel utensilio.
Ajustes de Calor Sugeridos
Eltama_o,tipo de utensilioy Iacocci@afectar_nel ajustedel calor.
ParainformaciOnsobrelosutensiliosy otrosfactoresque afectanlos
ajustesdN calor,consulteel folbto "La CocinaF_cir'.
'Low' (Bajo}(2}: Seutiliza
paramantenerlosalimentos
ca[bntesy derretir chocolatey
mantequiiia.
'Meal, Low'
{MedianoBajo}
(3+8}."Usepara
continuar
cocinando
aiimentos
tapadoso para
+::::::
'Medium' (Mediano}(5+
7): Usadoparamantener
un hervor lento para
grandescantidadesde
I[quidoy parala mayoffa
de las frituras.
{Elestilodel controlvaffasegOnelmodelo}
'Nigh' {Alto}{10): Seusapara
hacerhervir un I[quido. Siempre
reduzcael ajustea un calorm_s
bajocuandolosliquidos
comiencena herviro cuandolos
alimentoscomiencena
cooinarse.
+
(MedianoAlto}
(8o9}: Seusa
}ara dorar
came,cabntar
aceiteparafrdr
en una sart6n
hondao para
saltear.
Tambi6npara
mantenerun
hervorr@ido
}ara cant+dades
grandesde
I[quidos.
ANTESDE COCmNAR DESPUESDE COCINAR
• SLempre coloque un utensfllo en el elemento superior antes de + Asegurese oe que los ebmemos superiores esten apagados.
encenderlo.ParaevltardJlos a laestufa,nuncaenciendaun
Nemen(osuperiorsmtenet un utensfliosobre61.
, NUNOA aselacub_ertade laestufacomoun _reapara guarda+
alimentosc utensi+ios.
NItENTRASCOCINA
+AsegQresedesabercure perillacontrolacads elemento.
AsegQresedehaberencendidoel eiemen[ocorrecto.
• Comlencea coc+narenun ajustede caloralto luegoreduzcaa un
ajustemasbNOparacompbtar lacocc+On.Nunca useun ajuste
de calor alto paracocmarcuran[eunbempoprolongado.
+NUNOApermitaqueuna ofla h+ervahastasecarse. Estopodria
da+harlao+la_el electrodomestico.
+NUNOAtoque lasuperficb de ta estufahasmque nose haya
enfnado.Esposibb quealgunas_ireasde la superficie
espec+a+mentealrededorde +osetemen_os,se entibien o calien_en
mientrasest,1cocinando. Usetomaollas parapro_egersus
rnanos.
, Limp_ecualquLerderrametan pron[o comoseapos_ble
OTROSCONSEJOS
, Siexistenarmanosdlrectamentesobre ia cubie+tade la estufa.
coloqueeneltosart[culosde usopocofrecuenteque puedanset
guardadoscon segur+_ad en un areaqueestarasujeta al calor.
AIgunastemperaturaspuedenno set seguraspsra articuiostrees
como liqu+dosvoBtibs, iimpiado[sso rocmdoresen aetasoL
+NUNOAueje nlng6n articulo,especialmenteart[culosde pl_stico,
sobrela cubiertade laestufa. Elairecalienteprovenlentedel
respiraderopueueencender losarticulos+nflamables.derretiro
abBndar los pkistbos o aumentarla presiOnen los conteneuores
cerradosPmci6ndolosrevenmr.
o NUNCA perm+taqueel papel dealuminb, los term6me[rosde came
scualquierotto objeto de metal a excepciOnde una olla sobreun
elementosuperior,tengacontacto con los ebmentos caletactores.
58
Page 60

Superficie de los
Ele entos Tubulares
• LimpieIacubie_a de laestufadespu_sde cadauso.
• Limpielosderrames_cidoso azucaradostanprontocomo la
cubiertasehayaenfriadopuesestosderramespueden
descoloraro marcarla porcelana.
Para proteger el acabade de los platilles
protectores:
• A fin dereducirIadescoloraci6ny fisurassuperficiales,evite
usarcalor altopor per[odosdetiempo prelongados.
• Nouseutensiliosdemasiadograndes. Los utensHiosno
debenextenderse2,5- 5 cm (1 - 2 pulgadas)m_sall_ del
elemento.
• Cuandoprepareconservaso cocineconoliasgrandes,usee!
Elementopara Ollasde Conservas[ModetoCE1).POngaseen
contactoconsudistdbuidor paraobtenerdetalleso Ilameal
1-877-232-6771enEE.-UU.oal 1-800-688-8808enCanad_
parahacerun pedido.
• Umpielosconfrecuencia. [Verp_gina71.)
Dementos Tubu ares
Cuandoun elementoseenciende,pasapor ciclos de encendidoy
apagadopara mantenerel ajustede calorseleccionado.
Loselementostubularessonautotimpiables.No los sumeriaen
agua.
Para sacar: Cuandoestdfifo,
levanteel etemento.
Cuidadosamentetire de 61hacia
afueray s_quelodel recept_culo.
Para velvet a ¢olocar: Inserte
losterminalesdel elementoen la
toma.Gu[eelelementohastaque
quedeen su lugar. Oprimahaciaabajoen el
bordeexteriordel elementohastadejado
niveladosobreel platilloprotector.
T_.RfVili_'ALf:_
PRatiHos Protectores
Losplatillos protectoresdebaiode cadaelementosuperior recogen
losderramesy debenser _Jsadossiempre. Sino usan los platillos
protectorescuando est6cocinandosepuededaSarel cableado.
Paraevitarel riesgode choqueel6ctricoo de un incendio,nunca
forre losplatiliospretectorescon papeIde aluminio.
Losplatillos protectoressedescoloraran(manchasazules/doradas)o
adquirir_nfisurasconel tiempo,si se sobrecalientan. Esta
descoloraci6nofisurassonpermanentes.Estono afectala eficacia
al cocinar.
59
Page 61

Contromes del Homo de Limpieza Manual
(modelos selectos)
........ ++ _at%t% ¸
BAKE
BROIL
.....J---t%% ¸,¸¸¸¸¸"¸¸¸¸¸¸¸¸¸;;¸¸¸¸¸¸¸¸¸¸¸¸¸¸¸¸¸¸+¸"¸¸%¸%¸¸
TIMER CLOCK CANCEL ...........
A 8
NOTA:Elindicadorvisuaidespliega12:00cuandoseconectael electrodom6sticopor primeravezo si se interrumpeel suministroel6ctrico.
Laslucesindicadoras'Bake'y 'Doff' se despliegancuandoseactivalafunciOncorrespondiente.
'Bake'(Hornea0
'Broil'(Asa0
C
'ThTler'_Temporizador]
D
'Clock'(Reloj]
E
'CANCEL'[Cancelar]
F
AoV
{M_so Menos]
Seusapara hornearyasar.
Seusaparaasara [aparrillay dorarlos
alimentos.
Programael tempodzador.
Seusaparaprogramar[a horadel dia.
Cancelatodas[asfuncionesaexcepciOn
de[temporizadory del reioj.
Seusanparaseleccionarocambiarel
tiempoy Ia temperaturade[homo.
Seleccionalosajustesdeasado'Hi'(Alto}
o 'LO'[Bajo].
Use de las Teeias
+ Optima latecla deseada.
+ Optima latecia A o '_' paraseleccionarel tiempoo la
temperatura
o Seescuchar_unaserialsonoracada vezque oprimaunatecla.
Noseescuchardunaserialsonora cuandoseoprimanlasteclas
Ao_'.
o Seescuchar_ndosse6alessonorassi ocurre un erroren la
programaciOn.
Nora: Cuatrosegundosdespuesdeoprimir Iatecia A o V, el
tiempoo iatemperaturaque se despliegaseprogramar8
autom_ticamente.Sitranscurrenm_sde 30segundosdespu6sde
haberoprimidouna teclade funciOny latecia A oV, lafunci6n
ser_canceiaday el indicadorvisuaivolver_al despiiegueanterior.
Programaci6n del ReHoj
1. Optima latecia 'Clock'.
• Lahoradel reloj no sepuedeprogramarsiel control ha sido
programadoparahornearo asaro parausareltemporizador.
C D E F
2. ProgrameIahoracorrectade[d[ausandoIasteclas A o V. SiIa
tecla A o V noseoprimeen 30segundos,IaprogramaciOndei
reioj serdcanceiada.Oprima[atecia 'Clock'paracomenzarde
nuevo.
Programad6n demTempor+zador
EItemporizadorpuedeserprogramadodeun minuto 001] hasta99
horasy 59 minutos(99:59[.Eltiemposedespiegar_enminutosy no
ensegundos,Et TEMPORIZADORNO CONTROtAEL HORNO.
1. Optima latecD 'Timer'. .........
o Enel indicadorvisualdesplegar_0:00yIosdos TIMER
puntos [:) destelIarSnenel indicadorvisual .................
2. Oprimalatecla A o '_' hastaque sedespliegueel
tiempodeseado.
o Eltemporizadorcomenzar_afuncionarcuandose
programeeI tiempo.
o Losdospuntosdestellantesindicanquetin conteo de!
temporizadorest_en progreso.(Losdospuntosno destellansi
el indicadorvisualmuestrala horadel d[ao la temperaturadel
homo.]
+ AIfinal de[tiempoprogramado,seescucharSndosse6ales
sonoras.Elindicadorvisualdesplegar_"0:00".
o Si as{Io desea,oprimala tecla'Clock' duranteel
funcionamientodeItemporizadorparadespiegarbrevemente
[a horadeldia.
o Si as{Io desea,optimala tecla'Bake'o 'Broil'duranteel
funcionamientodeItempoHzadorparadespiegarbrevemente
el ajusteactualde temperatura.
Para cancelar ei temporizador:
Optimay mantengaoprimidalatecla 'Timer'durantevariossegundoa
6O
Page 62

Homeado, Asado y Asado
3. CoJoqueeJaJimentoel en horno.VerifiqueeJprogresodeJa
a [a Parriiia
Paraobtenermayorinformacidnsobrelostiemposy [assugerencias
de horneado,asadoy asadoa laparriih, consuiteel foileto "La
CocinaF4cil".
Ajuste de los Controles para Homeado y
Asado:
1. OprJma[atecia 'Bake'.
BAKE
+ +000'sedesplegar4y Ja[uzindicadora'Bake'
destellar4en el indicadorvisual+ ........
+ Si oprimelateda 'Bake'y no plograma latemperaturaen 30
segundos,elprogramase cancelar4autom4t[camentey [a
horade[d[ase despiegar4nuevamenteenel indicador visual.
2. Oprima[atecia A o Y hastaque [atemperatura ........................
deseadase despiiegueene[indicadorvisual
• Latemperaturade[homopuedeset programadade
75°a 285°C [170°a 550°F). V
+ '175°' {350°]sedespJegar4cuandooprima latecIa ........................
A o V pot pnmeravez.
+ OprhTmlateciaA o 'V'repetidamenteparacambiar
latemperaturaenincrementosde3° C{5° F),u opffmaiay
mantengalaoprimida paracambiar[atemperaturaen
hlcrementosde 6°C {10°F}.
+ Enel indicadorvisualse desplegar438° {100°) o la
temperaturareal de[hornosi es que essuperiora 38°C
{100°F[cuando se enciendeel horno.
+ Latemperaturaaumentar4en incrementosde3° C {5° F[hasta
liegara [atemperatura programada.Cuandoel hornose haya
precaientado,seescuchar_unaseffalsonora.
• Esperea que el homo se precalientedurante10-15minutos.
+ Paravedficar[a temperaturaprogramadaduranteel
precaientamientodel horno,oprimalatecia 'Bake'.La
temperaturase desplegar4durantetres segundos.
+ Paracambiarlatemperaturade[horno durante [acocciOn,
oprima[a tecla 'Bake'y luego [atecia A o '_ hasta
quesedespiieguelatemperaturadeseada.
4. Ai t6rmino de [acoccidn,optima JatecJa'Cancel'paraapagareJ
Ajuste de los Controies para Asar a [a ParrilJa:
ParaobtenermejoresresuRados,useun utensJiiodiseSado
especiaimenteparaasara [aparrilla=
1. Co[oque[aasaderadeasara [a pard[[aen [aposJciOn
2. Optima [atecia 'Broil'.
3. Oprimalatech A paraprogramarel asadoenel
4. Precalienteel elementode asara [aparriliadurante 3 minutos.
5. Cuandoterminede asara [aparrilla,optima[atecia
cocciOncuandohayatranscurridoe[tiempo m[nimo
recomendado.
homoyretireeJaJimentode[ horno.
+ Elhornocuentacon unafunci6n de apagadoautom4tico.SJse
deja encendidodurante12horas,el hornose apagar4
autom4ticamentey eJindicadorvisualdesplegar4
'000'.OprimaJatecJa'Cancel'y [a horadeJaliase
despJegar4nuevamenteenel indicador visual
recomendada.O/er[atabIa en [a p4gina69.)
• 'SEt'sedespiegardy [a [uz indicadora'Broil'
deste[[ar4en e[indicadorvisual
ajuste'HI' [alto) o '_ parael ajuste'LO'{bajo}.
+ Selecc[oneelajuste'HI' [alto) paraasadoa la
parrJ[[anormal
SeJeccioneetajuste'LO' {bajo] paraasadoa [aparriJJaabajas
temperaturasparaevitare[doradoexcesivoenaiimentosque
requierenmayorestiemposde cocciOntaJescomo[acame de
ave.
, Si no se[eccionaun ajustede Asado{'HI' o 'LO')en30
segundos,e[programase cancelardautom_ticamentey [ahora
de[dia se desp[egar4nuevarnenteen el indicadorvisual
Deje[a puerta abierta hastae[ primer tope,aproximadamente10
cm {4pu[gadas}.
'Cancel'paraapagarel hornoy retiree[ utensiiiode[
horno.La horadel d[avo[ver_a desp[egarseen e[
indicadorvisual
¢
/¸¸¸:¸¸¸¸¸¸¸%¸
61
Page 63

Perilla del Homo
(modelos selectos)
PerH_a de RaTemperatura
BroiI
del Homo
La periJ+a'OvenTemp'(Temperaturadel
Homo} se usaparaseleccionary
mantenerlatemperaturade!homo+
Siempregireestaperillajusto HASTAla
temperaturadeseada.No gire a una
temperaturam4saJtay luego retroceda.
Ajuste dei Homo para Homeado y asado:
1. Oprimay gire Iaperilla'OvenTemp'a latemperaturadeseada.
Espere10a 15minutos parael precalentamiento.
2. ColoqueeIalimentoen el centrodel homo.Vedfiquesi el
aJimentosecocin6en eItiempo minimo indicadoparaJareceta.
Cocinepor m4stiemposi es necesario.
3. Saqueelalimentodel hornoygire laperiiJa'OvenTemp'a Ja
posJciOn"OFF".
500
45_
400
OFF
350 300
Warm
250
Ajuste de los ControJes para Asado a la
ParriHa (moddos sdectos}:
1, Paraobtenermejoresresultados,use un utensiIiod+se¢+ado
especiaImenteparaasara Iaparrilla.Coloquela asaderaenIa
posici6nde la parrilla recomendado.07erIatablaen p4gina693
2. Gire Iaperilla 'OvenTemp'a 'Broil' paraasadoa la parrillaa
temperaturasm_sbajas,a 232°C (450° F}.
+ EIasadoa la parrillaa temperaturasm4sbajasevitael dorado
excesivode Josalimentosquesecocinanpor m4stiempo,
tales comoIascarnesde ave.
3= Precalienteel elementodeasara Ia parrflladurante3 minutos.
DejeIa puerta abiertaaproximadamente10cm (cuatropulgadas}
{elprimertope}.
4. VerifiqueeI t6rmino de cocciOnhaciendoun corteen la carne
cercadeIcentro paravedficareIcolor.
5. Despuesdeasara Iaparrilla,coloqueIa perilla'OvenTemp'en la
posiciOn"Off". SaqueIaasaderadeIhorno.
horno,asardoy asadoa la parrilla,consulteel folleto "La Cocina
Nora: Parasugerenciasadicionalessobre comohorneadodel
F_cil".
62
Page 64

Controles del Horno Automi piante (modelosselecto@
A B
BAKE
BROIL, ...................... ..............................
................................................HOLD CLEAN DELAY CLOCK WA/@_4
COOK& ....................................................................................KEEP
C
V
D
]IMER
, <x,,o ¸ .
E F G H J
Elpanelde control hasidodisefiadoparasu f4cil programaci6n.Elindicadorvisualen et panelde control muestrala horadel dfa,el
temponzadory tasfuncionesdeI horno. Etpanerde control mostradoarriba incluyelas caracteristicasespecificasdel modelo. :EIestilodel
paneldecontrol variasegOnel modelo.}
'Broil'[Asara
Ax
Is Parrilla}
ill_ii
'Bake'(Hornear}
C
Ao'V
(M4s/Menos}
i i
'Timer'_emporizado0
D
E i
'Cook& Hold'(Cocci6n
_ s
yMantenerCaliente}
F¸
'Char!'(Limpieza}
'Delay'(Diferido}
'Clock'[Reloj}
I
'KeepWarm'
(MantenerCaliente}
'CANCEL'(CANCELAR}
Seusaparaasara lapaMIlaydorarlos
alJmentos.
Seusaparahornearyasar.
Programao cambialahora,la
temperaturadelhorno.Programaasara
lapanilla'HI'o'LO'.
Programae!temporizador.
Seusaparahornearduranteuntiempo
seleccionado,luegomantienee!alimento
calbnteduranteunahora.
Seusaparaprogramarunciclode
autolimpieza.
Programael homoparacomenzara
homearo limpiarsea unahoraposterior.
Seusaparaprograraarlaheradeldfa.
Seusaparamantenercalienteenet
homoelalimentococinado.
Cancelatodaslasfuncionesaexcepci6n
dettemporizadory etreloj.
Nora: Cuatrosegundosdespu6sde haberoprimidolatecla A o
'V eItiempoo latemperaturase@autom@bamenteprogramada.
Si transcurrenm_sde 30segundosdespu@de haberoprJmido
unatecla defunciOny antesdeopdmir lastecIasA o V, la
funci6n se@canceladay el indicador visualvolve@al despliegue
anterior.
'Clock' (Reloj)
Elre!oipuedeseraiustadoparadesplegarla horayaseaen formate
de 12horaso24 betas.Elrelojha sideprogramadoen laf_brJca
parael formatode 12horas.
Para cambiar el reloj a formate de 26 horas:
1. Oprimay mantengaopdrnJdasIasteclas ...........................
'CANCEL'y 'Delay' durantetres segundos.
2. OptimaA o V paraprogramarel formato
de 12 horaso 24horas.
3. ProgmmeIahoradel dFasiguiendo las
instruccionesindicadasabaio.
DELAY
Programaci6n del Reloj:
1, Oprimala tecla 'Clock'.
CLOCK
Use de las Teclas
• Optimalatecla deseada.
• OptimaA o V paraprogramareltiempo o Iatemperatura.
• Seescucha@unaserialsonora cadavezqueoprJmaunatecla.
• Seescucha@ndossefiatessonorassi ocurreun erroren la
programaciOn.
• La horadel d[aydospuntosdestellanen el
indicador.
2. OptimaA o '_ pare programarla heradel dia.
, Losdos puntoscontin_andestellando.
3. Oprimala tecla 'CIock'nuevamenteo espere
cuatrosegundos.
......xs%hh
63
cont°
Page 65

Cuandose conectaenergiae!6ctricaal homoo despu6sdeuna
interrupci6nde la energ[aei6ctrica,Ia_ltima horadel reloj previaa
la intermpciOndestellar4en el indicador.
Paradesplegarla horadet dia cuandoe!indicadorest6 mostrando
otrafunciOndetiempo,oprimalatech 'Clock'.
La horadel reJojno puedeser cambiadacuandoel hornohayasido
programaticpara'DelayCook','DelayClean'o 'Cook& Hold'.
Para canceJar el temporizador:
1. Optimay mantengaoprimJdalatecla'Timer'durantetres
segundos.
U
2. Optima latecla 'Timer'y coloque lahora a 00:00.
Para canceJar eJdespJiegue deJ reJoj:
Si nodeseaque e!indicadorvisualmuestrelahora del alia:
Oprimay mantengaoprimidaIasteclas
'CANCEL'y 'Clock' durantetres segundos.La
horadel dia desaparecer4delindicador.
Cuandose cancelael desplieguedei reloj, ..............
oprimaIatecla 'Clock' paradesplegar -- C_+OCK
brevementeIahoradel dim .........
Para restaurar eJ despJiegue deJ reJoj:
Oprimay mantengaoprimidaIasteclas'CANCEL'y 'Clock'durante
tres segundos.LahoradeJd[areaparecer4enel indicador.
'Timer' dremporizador}
Eltemponzadorpuedeser programaticde un minuto {00:01}hasta
99 horasy59 minutos{99:59}.
Eltemporizadorpuedeserusado independientementedecualquier
otraactMdaddel horno.Adem4spuedeser pmgramadocuando otra
funciOndel homo est6en funcionamiento.
Eltemporizadornocontrolael horno,soIamentecontmla una serial
So[_ora.
Para programar el temporizador: ...........
1. Optimalatecla 'Timer'[Temporizado0. T+ME_
+ '0:00'seiluminaen el indicadorvisual. .......
+ Losdos puntosdeste[[aran.
2. Oprima[atecla A o V hastaquee[tiempo correcto
parezcaen el indicadorvisua[.
B oqueo de Jos ControJes
Eltecladopuedenset bloqueadosparaseguridad,limpiezao evitar
el uso no autorizado.Loscontrolesno funcionarancuandoest6n
bloqueados.
Siel hornoest_en uso,los controlespuedenbloquearse.
La horaactualdel d[apermanecer4en el indicadorcuandolos
controlesest6nbloqueados.
Para bJoquear:
Oprimay mantengaoprimidaslasteclas
'CANCEL'y 'Cook& Hold'durantetres
segundos.
'LOCK'desteliaenel indicadorvisual COOK&
t',_OLD
Para tesbJoquear: ...............................
Oprimay mantengaoprimidaslastecJas'CANCEL'y 'Cook& Hold'
durantetres segundos.
'LOCK'desaparecedel indicadorvisual
C6diges de £rreres
'BAKE'o 'LOCK'puedendestellarr@idamenteparaadvertirleque
hayun error o un problema.Si'BAKE'o 'LOCK'destetlanen el
indicadorvisual,optima le tecla 'CANCEL'.Si'BAKE'o 'LOCK'
contin_andestellando,desconectelacorrienteel6ctricadel
artefacto.Espereunospocosn'linutosyvuelvaa conectarla
corrienteelSctrica.SiIaspalabrasa0n contin0andeste+Jando,
desconecteIacordenteel6ctdcadel artefactoy Jlamea unt6cnico
de servicioautorizado.
+ Losdos puntoscontinOandestellando.
3. Oprimanuevamentelatecla 'Timer'o esperecuatm segundos.
+ Losdos puntoscontint_andesteJlandoy comienza[acuenta
regresJvadel tiempo.
+ El_iltimominutode [acuentaregresivadel temporizadorse
desplegar4ensegundos.
4. AI finalde[tiempo programatic,seescuchar4unasefia[sonora
larga.
64
Page 66

'Bake' (Horneado]
Para programar 'Bake' (Homeado):
1. Oprima[atecla 'Bake'.
• 'BAKE'desteitar&
• '000'desteHar4en el indicadorvisual
BAKE
Diferencias deJ homeado entre su homo
ant+guo y su homo nuevo
Esnormal observaraIgunasdiferenciasen el tiempode horneadode
suhomo antiguoy su homo nuevo.Vea"Ajustede laTemperatura
del Horno"en la p%ina 68.
2. SeIeccioneIatemperaturade[ horno. Latemperatura
deJhornopuedeset programadade 75°a285° C
070°a 550° F].Oprimau oprimay mantenga
oprimidaIa tecla A oV.
, Cuandocualquieradeestasdostechs seoprimepot
primeravez,175° (350°] se ituminar&
• Optima[atecta_¶aumentar[atemperatura.
• Optima[atectaV paradisminuir[atemperatura.
3. Optimalatec+a'Bake' nuevamenteo esperecuatrosegundos.
• 'BAKE'dejar4de @stellary seihminar4 en el indicadorvisual.
• 38° (100°] o Ja temperaturaactualdel hornosedespiegar&
Latemperaturase eievar_enincrementosde3° (5°}hastaque
se aicancelatemperaturaprogramada.
4. Espereaque el homo seprecalientedurante8-15minutos.
• Cuandoe[ hornoiieguea ia temperaturaprogramadase
escuchar_unaseffal sonoraiarga.
• Paravedficaria temperaturaprogramadaduranteel
precalentamientodel horno,oprimalatecIa'Bake'.
5. CoioqueeiaIimentoen el centrodel horno, dejandoun m[nimode
dospuIgadasentre el utensiJioy ias paredesdel homo.
6. Vedfiqueel progresode ia cocciOncuando hayatranscurddoel
tiempo minimorecomendado.Contin8elacocci6nsiesnecesario.
7. AIt@minode ia cocciOn,optimala tecla 'CANCEL'.
8. Retireel aIimentodel homo.
'Cook & _oJd' (Coccion y
Mantener Caliente]
'Cook & Hold' ie permitehorneardurante unacant+dad
determinadadetiempo,seguidode un cicIo'KeepWarm'de una
hora.
Para programar 'Cook & HoJd':
1.
Optima [atec[a'Cook& Hold'. COOK&
• 'BAKE'y'HOLD' desteIIan. .......
• '000'seihmina en el indicadorvisual.
2. Seleccionelatemperaturade[ horno.La temperatura "
dei horno puedeset programadade75° a 285° C070°
a 550°F}.Optimau optimay mantengaoprimidala
tecIa a, o 'V.
• OprimalatecIa_¶ aumentarla temperatura. ......
• OprimalatecIa'_ para disminuirla temperatura.
3. OprimalatecIa'Cook& Hold' nuevamenteoesperecuatro
segundos.
• 'HOLD'desteIIa.
• '00:00'destellaen ei indicadorvisual
4. Programeiacantidadde tiempo durantelacual usteddesea
hornearoprimiendoiatecia A o '_, Eltiempode horneado
puede programarsedesde10minutos{00:10}hasta11betas,59
Painutos(11:59).
• 'BAKE'y'HOLD'se iiuminanen eIindicadorvisual
• Eltiempo de horneadose iIuminar_enei indicadorvisual.
• Comenzar4lacuenta regresivade[tiempode horneado.
Cuando haya expirado e[ tiempo de cocck_m
• Seescuchar4ncuatro seSa[essonoraa
HOLD
Notas sobre Nomeado:
, Paracambiar[atemperatu+adeIhomo durante e[ horneado,
optima iatecia A o 'V'hastaque lieguea latemperatura
deseada.
• SioMda apagare[horno,seapagar4autom4ticamentedespues
de transcurrir 12horas.Si deseadesactivarestacaracteristica,
vea[a p4gina68.
• ParasugerenciasadicionaJessobrehorneadoy asado,consulte
eIfoJJeto"LaCocinaFacii".
• 'BAKE'seapagar&
• 'HOLD'y 'WARM'se i[uminar4n.
• Enel indicadorsedespIegar_75°070°}.
coat,
65
Page 67

Despu6s de una hora en 'HOLD WARM' (Mantener
Caliente):
. +End'se desplegar&
. Lahorade[ d[a volver_a despbgarseen el indicadorvisual+
Para cancelar 'Cook & Hold' en cnalquier memento:
Optimala tecla 'CANCEL'.Retireel a/mento de[ homo+
Cuando el tempo dlerido ha expirado:
'Demay Bake' (HorneadoDiferido)
Para programar nn tiempo diferido cuando
ya se ha programatic 'Cook & Hold':
1+ OptimalatecIa'Delay'+
Nousehomeadodffeddopara ai[ment0sdec0rta dura#i6ntabs
comoproductos[@teos,cerdo,camede aveo mariscos.
Cuandousa'Delay', el hornocomienzaa cocinar m£star@ en el
d[a+Programe[acantidadde tbmpo queusted@seadifenr antes
de que seenciendael homo y cu_ntotiempo @seacocinarel
a/mento+Elhomo comienzaa cabntar en la horaseleccionaday
cocina durante e[tiempo especificado,y luegomantieneel aIimento
caIientedurante una hora.
Eltiempo diferido puede pmgramarsede10minutos (00:10}hasta
11horas,59 minutos(11:59}.
Para programar un cido de homeado diferido:
1. Oprimalatecia 'Delay'. .............
. 'DELAY'desteJla. DELAY
. '00:00'desteIIaen el indicadorvisual. +............
2. Oprima[atecJaA o V paraprogramarel tiempo
diferido.
Cuando'DELAY'est6todav[adeste/ando: ,_
3. Optima [atecJa'Cook& Hold'. .......................
. '000'se/umina en e[ indicadorvisual.............................
. 'BAKE'y 'HOLD'deste/an.
4. OprimaA paraprogramarlatemperaturade horneado..........................
, '00:00'y'HOLD' destellan.
. 'BAKE'permaneceihminado.
5. OprimaA paraprogramareltiempo de horneado.
. Enel indicadorvisualse iIuminan'DELAY','BAKE',y 'HOLD'.
COOl{&,
HOLD
2. OptimalatecIaA o_' paraprogramarel tiempo
Cuando ha expirado el tiempo diferido y el homo
comienza a fnncionar:
Para canceJar:
Optima [atecta 'CANCEL'.
. 'DELAY'se apagar&
. Sedespibga el tbmpo de horneado+
. Sedespliegan'BAKE'y 'HOLD'.
DE_Y
. 'DELAY'deste/a+
. '00:00+sedespliegaen el indicadorvisual+
diferido+
. Despu@decuatrosegundos, 'DELAY'
permaneceraiiluminadopara recordariequese
ha programaticun ciclo de horneadodiferJdo.
. SedespJegar£e[tbmpo de horneado.
. 'DELAY'se apagar&
. 'BAKE'y 'HOLD'permanecer_niJuminados.
. Todas [asfunciones de horneado controladas o
no pot e[temporizador ser_n cance[adas.
. La horade[ diavo[ver_adespbgarseen el indicadorvisual.
Notas."
. Nousehorneadodiferidopara los articulosque necesitan
precalentambntode[horno,ta[como paste[es,gaiietasy panes.
. Nousehorneadodiferidosi e[hornoya est_caliente.
V
66
Page 68

Keep Warm' (Mantener Caliente]
Paramantenereatientesen forma seguraalimentosealienteso para
calentarpanesyphtos.
Para pregramar 'Keep Warm': .................
1. OptimaIatecia'KeepWarm'. WAf_M
+ 'WARM'destella.
• '000'sedespliegaenet indicadorvisual
2. SeteccioneIatemperaturade 'KeepWarm'.La
temperaturapara 'KeepWarm'puedeser programada
de63° a 90°C 045° a 190°F].Oprimau optimay
mantengaoprimida[atecia A oV. , ......
• Cuandocuaiquierade estasdos teclasseoprime
por primeravez,75° (170°}seiiuminar&
• Optimalatecla A paraaumentarlatemperatura.
• Optimalatecla '_' paradisminuirla temperatura.
'WARM'y [atemperaturase desplegar_nen el indicadorcuando
e[ciclo'KeepWarm'est6activo.
KEEP
Notas sobre 'Keep Warm':
o ParamantenerIa catidad6ptimade losalimentos,los
alimentoscocinadosen el hornodebensermantenidos
calientespor no m_sde 1a 2 horas.
o Paraevitarque losalimentossesequen,cQbraloslevemente
con papelde aluminioo unatapa.
+ Para eamentarpaneciHos:
- cubra Ievementelos panecilloscon papelde ahminio y
colOquelosenel homo.
- optima Iasteclas'KeepWarm'y A para programar
75°C (I70° F].
- calientedurante 12a 15minutos.
o Pam ¢amentarpmatos:
- coloque 2 pilasdecuatro ptatoscadaunaen el horno.
- optima Iasteclas'KeepWarm'y A para programar
75°C (170° F].
- caliente losplatosdurantecinco minutos,apagueel homoy
deje los platosen el hornodurante 15minutosm_s.
- use solamenteplatos resistentesal horno,verifique con el
fabricante.
- nocoloque los platoscalientessobreuna superficiefr{a
puesel cambiorSpidode temperaturapuedecausarfisuras
superficialeso rotura.
Para gaBgemar 'Keep Warm':
1. Oprimalatecla 'CANCEL'.
2. Retireel alimentodel horno.
67
Page 69

Cierre Auto tico/Modo Ajuste de [a Te peratura de[
Elhomo seapagar_autom_ticamentedespu6sde 12horassl usted
todeja accidentalmenteencendido. Estacaracteffstlcadeseguridad
puedeset desactivada.
Para eancelar el cierre autem_tice de 12 betas y
dejar que el home funciene centinuamente durante
72 heras:
1= Programeel homopara hornear[verp_gina65}= .........
2= Oprimay mantengaoprimida la tecIa'Clock'durante CLOCK
tres segundos.
o 'SAb'sedespIegar_y desteIiar_durantecinco segundos=
o 'SAb'sedespIegar_continuamentehastaquesedesactiveo
hastaque transcurrae[ limitede 72 horas=
o 'BAKE'tambi@sedespIegar_si se est_ usandoun cicio de
horneadocuandoel homo est_en Modo Sab_tico=
TodaslasotrasfuncionesEXCEPTO'BAKE'['Timer','KeepWarm',
'Cban',etc.}est_nbIoqueadasduranteel ModoSabBtico.
Para cancemar 'Bake' cuande e[ Mode Sab_tice est_
active:
Optima'CANCEL'.
o 'BAKE'seapagar8en el indicadorvisual
o Noseoir_ ningunaserialsonora.
Para cancemar e[ Medo Sab_tice:
1. Oprima[atecla 'Clock'durantetres segundos.
O
Despu6sde72horas,el Modo Sab_ticoterminar_.
o 'SAb'desteilar8durante5 segundos.
o Lahora de[d[areaparecer_en e[indicadorvisual.
La exactitudde [astemperaturasde[ homo es cuidadosamente
probadaen [af_brica. Esnormalnotar aigunadiferenciaentrela
temperaturade horneadoentreun horno nuevoy un hornoantiguo.
Conel correrdel tbmpo, [atemperaturade[homo puedecambiar.
Ustedpuedeajustar[atemperaturadel homo s[ consideraque su
homo noest_ horneandoo dorandoenforma correcta. Paradecidir
cu_ntodebecambiar[a temperatura,programelatemperaturade[
homoa 15° C (25° F}m_salta o m_sbajaque latemperatura
indicadaen sus recetas,luegohornee. LosresuItadosde la
"prueba"puedendarIeuna ideade cu_ntoajustar[atemperatura.
Ajuste de [a temperatura de[ home:
1. Oprima'Bake'. BAKE
2. Pmgrame285°[550°) opdmiendo[atec[aA.
3. Optimay mantengaoprimida la tecla'Bake'durante ,
variossegundoso hastaque 0° aparezcaenel
indicadorvisual
Si la temperaturade[homo hasido previamenteajustada,el
cambioaparecer_enel indicadorvisual Poreiemplo,si la
temperaturade[ hornofue reducidaen 8°C (15°F}el indicador
mostrar_i- 8° (-15°}.
Optima latecia A o V paraajustarla temperatura.
Cadavezquese oprimeuna tecia,latemperaturacambiaen3° C
[5°F}. Latemperaturadethomo puedeser aumentadao
disminuidaen 3°a 20°C[5° a 35°F}.
Lahorade[d{areaparecer_autopa_ticapaenteene[ indicador
visual
Nonecesitareajustar[a temperaturadethomosi hayuna faHao
intermpci6nde energ[aei@trica. Lastemperaturasdeasara la
parrilia y limpiezano puedenset ajustadas.
Notas Sobre e[ Mode Sab tico:
• ElModo Sab_iticopuedeseractivadoencuaIquiermomento,
est6o no el horno encendido.
• ElModo Sab_ticonosepuedeactivar si [asteciasest_n
bloqueadasocuando[apuertaest_bioqueada.
• S[ethomo est_homeandocuandoseprogramaelModo
Sab_tico,'BAKE'se apagar_a[ final de[ciclode horneado.No
seemitir_nsefiaiessonoras.
• CuandocomienzaelModoSab_tico,noseemitir_ [aserial
sonorade precalentapaiento.
o CuandoelModoSabBticoest_activo,todos losavisos,
mensajesysefiaIessonorasest_ndesactivados.
o Siopnme la tecIa'CANCEL'se canceiar_un ciclo'Bake',sin
embargoe] control permanecer_en Modo Sab_tico.
o SifaIIa[acorrienteei@trica,cuandovueiva[aenerg[ael horno
seactivar_enModo Sab_ticocon72 horasrestantesy ningOn
ciclo activo.
68
Page 70

'Broiming' (Asar a la Pardlla)
Para programar 'Broil': ........
1. OptimaHatecHa'Broil'.
o 'BROHL'destetla. '. ...........
o 'SET'sedespliegaenel indicador.
2. OprimaHatecHaA paraprogramarasara Iaparriila 'HH'u optima
latecHaVpara programarasarla parriHa'LO'.
o EneHindicadorvisualse despHegar_'HH'o 'LO'.
o SeHeccione'HHbroil' 285° C (550° F)paraasadoa Haparrilla
normal Seleccione'LObroil' 230°C (450° F}paraasara Ha
parriHacontemperaturabajaaHmentosquedebenser
cocinadospor m_stiempo,tal como lacame de ave.
3. Despu6sdecuatrosegundos,elhomo comenzar_a funcionar.
o 'BROHL'continuar_iluminado.
4. Paraun dorado6ptimo, precalienteel eiementode asara la
parrilladurante3 a 4 minutosantesde colocarel alimento.
5. Coloqueel alimentoen el horno. Dejela puertaabierta
aproximadamente10cm (_-uatropulgadas}(el primertope}.
6. D6vuelta a [acarneuna vezaproximadamentea mitadde la
cocciOn.
7. Cuandoelalimentoest6cocinado,oprimalatecla
'CANCEL'.Retireel aiimentoy la asaderade[homo. C:f_NCEI[o,
¢
o La horadel d[avoiver_adespiegarseene[
indicadorvisual
Notas Sobce Asade a UaPacciHa:
o ParamejoresresuItadoscuandoasea la parrilla,use una
asaderadise_adaparaasara la parriila.
o Lostiemposdeasara Iaparrilla aumentar_nyetdoradoser8
m_sclarosise instalaelelectrodomesticoen un circuito de
208voltios.
o 'HH'se usapara Iamayor[adeIosasadosa Iaparrilla. Use'LO
broil' cuandoasea la parrillaalimentosque necesitancocci6n
prolongada. Latemperaturainferiorpermiteque eIalimento
secocine hastaquedarbien asadosindorarsedemasiado.
o Lostiemposdeasadoa la parrilla puedenserm_sIargos
cuandoseseleccionalatemperaturarossbajadeasara la
parrilla.
o Parasugerenciasytemperaturasadicionalessobreasara la
parrilia,consulteel folleto "LaCocinaF_ci[".
Tab[a de Asar a [a Parri[[a
POSICiON DE
AMMENTOS
Came de Res
Biftec, 2,5 cm (1"}
Hamburguesas,1,9cm (3/4"} degrosor
Came de Cerdo
Tocino
Chuletas,2,5 cm (1"}
Jam6n- Rebanadasprecocidas,1,3cm (1/2"] de grosor
Came de Ave
Presasde polio 3 o 4 Bienasado
_at'isco$
Bistecsde pescado,con mantequilla,2,5cm [1"}de grosor
Fiietesdepescado
Laposicidnde la parrillasuperiores#5
Nora: Estatabla es solo una gu[a. Lostiempospuedenvariarcon eltipo de alimentoqueseest4cocinando.
4 A medioasar 15- 18miNutos
4 Bienasado 19- 23 minutos
4 Bienasado 15- 18mJnutos
4
4
4
4
4
TERMINO DE TIEMPO TOTAL DE
COCCWON COCC_ON (M_NUTOS)
Bienasado
Bienasado
Tibio
Desmenuzado
Desmenuzado
6 - 10 minutos
22 - 26 minutos
8 - 12 minutos
'LO Broir
28 - 38 minutos
10 - 15 minutos
8 - 12 minutos
69
Page 71

Respiradero de[ Homo
Cuandoemhomoest6 en uso, em_reacercademrespiraderopuede
sentirse camientebastante pot causa quemaraso Nunca Noquee
la abertura dei respiradero.
RESPIRADERODELHORNO
o Aseg[irese de que e! platiilo protector en la
ubicaci6ndelrespiraderotengaunagujeroen e!
centro=Nocubraelpiatiiloprotectorconpapelde ABERTURADEL
ahminio= DELHORNO
Optimael interruptorde [ahz delhornoen el panelde
'Oven Light' (Luz del Homo] (_
control paraencendery apagarla hz de[homo.
Panel inferior del Homo
Protejae[panelinferiordel homo contraderrames,especiaImente
azucaradoso acidicos,puespuedendescolorarla porceiana
esmaitad&Usee[utensiliodetamaffo correctoa fin de evitar
derrames.No coioque utensiiios ni papei de aluminio
directamente en maparte inferiordemborne°
ParriHas de[ Homo
RESPIRADERO
oven light
Para reinstamar[a parrimia:
1= Coloquelaparriila ene[ soportede [aparrilla en el homo.
2= hlcIine[evementehacia arribael extremodeIantero;desIice[a
parriIIahaciaatr_shastaque pasesobrelostopesde enganche=
3= Baieelfrente de [a parriilay desIiceIahaciaadentrodel homo.
Nocubra una parriiiacompietanon papeideamuminionicoioque
papemde amuminioen maparteinferiordemhomo, Se afentar_n mos
resumtadosdemhomeado y se puede da_ar maparteinferior dem
homo.
Posicior|es de [a ParriHa
PAflfl&LA 5 0a posiciOn --
m_saita):Se usapara
tostarpan o asara [a
parriJIaaJimentos -- _
deigadosno grasosos= __ 4
PARR&LA4: Seusapara ___
la mayoriade losasadosa
[apard[h. --_
PAflfl[LLA3: Seusapara
hornearalimentosenuna
bandeiade homearga[[etaso un moldepara ro[[ode merme[ada,
parapasteIes,paysdefrutaso a[imentosconge[ados.
PARRiLLA 2: Seusaparaasarcortesde camepeque_os,caceroias,
hornearbaguetasde pan,pastetesenmoIdesdetubo o flanes.
PARR&LA 1:Seusaparaasar pedazosgrandesde camey came
de ave,paysconge[ados,sufl6sde postreo pastelesespon]osos.
HORNEADOCONVAR[AS PARR&LAS:
Dos parriiias:Use[asposiciones2y 4, o 1y4=
--3
°NO USee[homopara guardaraliment0sn!utensH!0s_
E[hornotiene dosparri[[as=Todas[asparri[[astienen unbordecon
tope de enganche=
Para retirar [a parri[[a:
1=Tirede [aparri[[aderechohacia
afuerahastaquesedetengaen
[aposiciOnde[topede
enganche=
2= Levantee[frente de [aparriiiay
tire de [aparrii[ahaciaafuera=
Media Parri[[a
Sedispone,comoaccesodo,de unamedia
parri[[aparaaumentar[acapacidadde[
homo. Seinsta[aen [asecc[Onsuperior
de[[ado[zqu[erdodelhomoyofrece
espaciopara unaplatode verduras
cuandosehaco[ocadounaasadera
grandeen [aparr[Hainferior. P6ngaseen
contactoconsudistdbuidor paraobtener
e[accesodo"HALFRACK"oparaso[icitar, --
[lamea[1-877-232-6771.
7O
Page 72

Homo Automimpiante
(modelos selectos)
Nota: Parala limpiezamanual,ver p%ina 74.
Esnormal que laspiezasdel homosecalientendummeel ciclo
de autol_mpLeza
Afin de ewtaruna lesi6n personalydafioa la puertadel homo.
no trate de abrir la puertacuandoest6despiegadalapalabra
'LOCK" (Bloqueada),
Evitetocar la cubierta,la puerta,laventanao el _readel
resplraderodel homoduranteun ciclo deHmHeza.
No useiimpiadoresde hornos comercialesenel acabadodel
homo ni alrededorde ningunapiezadel homo pues puede
daiiar el acabadoo las plezas.
Elciclo de autolimpiezausatemperaturassuperioresalas
temperaturasnormalesde coccidnpara limpiarautom_ticamenteel
interiordel homo. Nofuerce Ia puertadeIhomo ni la palancade
bloqueoparaabrirla=EstopuedecausarexposiciOnalas
temperaturasaltasy constituir un desgode quemadura=asnormales
para limpiarautom_ticamentetodo el interiordel homo.
Esnormalque ocurranIlamaradas,humoo llamasdurantela limpieza
si el homoest4demasiadosucio.Esmeior IimpiareIhomo
regularmenteenvezde esperarhastaquese hayaacumulado
demasiadasuciedad.
Duranteel procesode Iimpieza,lacocinadebeestarbien ventilada
para eJJminarlos olores normalesasociadosconla limpieza.
Antes de la Auto impieza
1=Apague IaIuzdei homoantesde la Iimpieza=La luzdel horno
puedefundirse duranteel cicio de limpiez&
2= Retirelaasadera,todosIosutensiiiosy las parriIIasdel homo.Las
parrillasde! homo se descolorardny no sedestizar_nf_cilmente
despu6sde unciclo de autoiimpiezasi no sonretiradasdeIhomo.
3= LimpieeI marcodel homo,el marcode Ia puerta,el _reafuera de
laiunta de la puertay alrededorde laaberturaen Iajunta de la
puerta,con un agentede Iimpiezanoabrasivotal como'Bon
Ami'_o con detergentey agua=El
procesode autolimpiezano Iimpia
estas_reas=Eliasdebenser limpiadas
paraevitarque lasuciedadse hornee
duranteel ciclo de autolimpieza=(La
junta esel selloalrededorde la puerta
y ventanadel horno=)
4= ParaevitardaSonoIimpie ni frote Ia
junta situadaalrededorde la puertade!homo.Lajunta est_
diseSadaparasellar herm6ticamenteel calorduranteel ciclo de
[impieza,
Limpieel excesode grasao derramesde la parteinferiordel
homo. Estoevita humoexcesivoo liamaradasduranteel cicio de
limpieza.
LimpieIosderramesazucaradoso dcidostalescomo papadulce
(camote),tomatesosalsasabasede leche.Laporcelana
esmaltadaesresistenteal _cidopero noa pruebade dcidos. Et
acabadode porcelanapuededescolorarsesilosderramesdcidos
o azucaradosnoson limpiadosantesde un cicio de autolimpieza.
Para programar 'Self-Clean' (Autolimpieza):
Nora: Latemperaturadel hornodebeserinferiora 205°C
(400°F)para programarun ciclo de limpieza=
]=
Cierrela puertadel homo.
2=
MuevaIapalancadebloqueode la puertaa laderechaa la
posiciOnbloqueada=
3. OprJmaIa tecla 'Clean'. CLEAN
• 'CLEAN'destellaenel indicadorvisuai. ............................
Si[apuertano secierra,seoirdnseffalessonorasy [apalabra
'DOOR'sedespiegar8enel indicadorvisual Si [a puerta no se
cierradentrode45 segundos,laoperaciOnde autoiimpiezaser_
canceladay e[indicadorvolver_a desplegar[ahoradel dia=
4. Oprima[a tec[a A o V= .....
• Sedespliega'CL-M (SuciedadMedian&
3 horas]=
5= OprimaIa tecIa A o V paradesplazarlos ajustesde
autolimpiez&
'CL-H'[Suciedadh_tensa,4 horas]
'CL-M' (SuciedadMedian&3 horas]
'CL-L' [SuciedadLeve,2horas]
AIseleccionarelnivelde suciedadde! homoseprograma
autom_ticamenteel tiempode limpieza=
6= Despudsdecuatrosegundos,el homocomenzar_a limpiar=
Eltiempode limpiezacomenzardlacuenta regresivaenel
indicador.
• 'LOCK'sedespiegar_enel indicadorvisual.
• 'CLEAN'sedesplegar_en el indicadorvisuai=
Para diferir un cido de autoiimpieza:
1= Optimala tecia 'Delay',
• 'DELAY'destella=
• '00:00'sedesplegar4ene[[ndicadorvisual=
DELAY
cont,
_Loshombresdelosproductosson marcasregistradasde sus respectivosfabricantes=
71
Page 73

2+ OprimaIatecia A o V paraprogramar lacantidadde .......................
tiempo que usteddeseadifedr eIciclo.Eltiempo A_
difeddopuedeserprogramadode 10minutes (00:10)a
11horas,59 minutos(11:59]......................
3. OprimaIatecla 'Clean'. C_.EAN
• 'CLEAN'destellar_i. ................................
4. OprimaIatecla ,A o V.
• 'CL-M' [SuciedadMediana,3horas]se
despliegaenel indicador.
V
5. OprimaIatecia ,A o V paradesplazarlosajustesde ......................
autolimpieza.
'CL-H'[SuciedadIntensa,4 horas]
'CL-M' (SuciedadMediana,3horas]
'CL-L' (SuciedadLeve,2 horas]
Durante e_ Cido de Auto_impieza
Cuandoal)arece'LOCK'eneI ind+cador,Ia i)uerta no sepuedeabrir.
Paraevitardafio a la puerta,nofuerce la puertapara abdrtacuando
Iapalabra'LOCK'est_desplegadaen el indicadorvisual.
Humo y OIores
Ustedpuedevet humoy sentirolor Iasprimerasvecesqueel homo
eslimpiado. Estoesnormalydisminuir_conel tiempo.
Tambi6npuedehaberhumosi elhornoest_demasiadosucio o sise
ha dejadounaasaderaenel homo.
Sonidos
A medidaque el hornosecalienta,ustedpuedeo[rsonidosde
piezasmet_licasquese expandenycontraen. Estoesnormaly no
dafiar_el borne.
Despu6s de_ Cido de Auto_impieza
AI seleccionarelnivelde suciedadde!homose programa
autom_ticamenteeltiempo de limpieza.
6.
Despu6sdecuatmsegundos,'CLEAN','DELAY'y 'LOCK'se
desplegar4nen el indicadorvisualparaindicar que el borne esta
programadoparaun ciclo de limpiezadiferido. Eltiempodiferido
tambi@nse despliegaen el indicadorvisual.
Si el homo ya ha sido programado para un cido de
limpieza y usted desea programar un tiempo
diferido:
1. Oprimalatecla 'Delay'. DELAY
+ 'DELAY'destelia. ..............................
+ '00:00'se desplegar4eneIindicadorvisual
2. OprimaIatecla A o 'V'paraprogramarlacantidad
detiempo queusted deseadiferir el ciclo.
Despuesdecuatrosegundos,'CLEAN','DELAY'y V
'LOCK'sedesplegar_nen el indicadorvisualpara ........................
indicarqueel homo estaprogramadopara un ciclo de
limpiezadiferido.Eltiempodifeddo tambi6nsedespliega
enel indicadorvisual
Cuando comienza el tide de autoiimpieza:
+ 'DELAY'se apagar&
+ Eltiempo de [[mpiezasedesplegar_en el indicadorvisual
Para cancemar emcido de automimpieza:
Oprimala tecla 'CANCEL'.
+ Elindicadorvisualquedaen blanco.
• TodasIasfuncionesson canceladas.
Aproximadamenteunahora despuesdeIfin deI ciclo de limpieza,
'LOCK'desaparecer& Lapuertaahorapuedeset abierta.MuevaIa
palancade bloqueode la puertaa la izquierdaparadesbioquearia.
Algana suciedad paede quedar como lma mereeeniza gHs ripe
polvo. Ret[relaconun pa5o hOmedo.Si Iasuciedadpermanece
despuesde Iimpiarla,significaque e! ciclode IimpiezanorueIo
suficientementelargo. Lasuciedadser_eiiminada duranteel
proximociclo de limpieza.
Si losparrimmasdemhomo fueron dejadas en el homo y no se
desiizan saavemente despa_s de ml cicio de iimpieza, Iimpie
Iasparrillasy lossoportesde lasparr+llasconuna peque5acantidad
de acekevegetalpara hacerlasdeslizarcon m_sfacilidad.
P_eden apareeer i_neasdeigadas en ia poreeianaampasarpot
ciemosde camentamientoy enfriamiento. Estoesnormaly no
afectar_e! rendimiento.
Una deseemoraei6nbmancapaede apareeer desp_Ss demeiemo
de limpieza si los alime_tos _cidos o azaearados no faero_
limpiados antes del cido de aatolimpieza. EstadescoloraciOnes
normaly no afectar8el rendimiento.
+ Si sedejaabierta [a puertade[ horno,[apaJabra'DOOR'
+ Lapuertadel homo se daiiar4 si se fuerzaparaabrirJacuando
destellar4enel indicadorvisualyseescuchar_unase_al
sonorahastaque [apuertasea cerraday la tecla'Clean'sea
oprimidanuevamente.
la palabra'LOCK'contin0adespJegadaen e[ indicador.
• Lahora deldia sedespliegaen el indicadorvisual
?2
Page 74

Procedi ientos de Limpieza
fr_as antes de tocarie o limpiarlo. De este modQse evitar_n da_os y
posibiesquemaduras, * Loshombresde los prod_Jctossonmarcas
, Paraevitar manchaso dec0!oraci6n[imp!ee[ homodespu6sde cadauso.
• Sise ret[raaIgunapieza,aseg6resedeque sea reinstaladaenforma correcta: EE=UU=o 1-800-688-8408onCanad&
P[EZA PROCED[M[ENTO DE LiMP[EZA
registradasdesusrespectivosfabricantes=
•* Parahacer pedidos,[lamea[1-877-232-6771en
ProteeterTrasere
y Cabierta-
Perceiana
Esmaltada
Bandeja de Asar
e [nserto
Area del Relejy
demasTecmas
de Control
Periiiasde
Control
Pmatimmos
Prnteetnres,
Pnrceiana
(mndeios
selectos}
Laporcelanaesmaltadaesvidriofundidoen metaly puedeagrietarseopicarsesi noseusacorrectamente.Esresistentea
los_cidos,noapruebade_cidos.Todoslosderrames,especialmentelosderramesazucaradosoaddicosdebenset limpiados
inmediatarnenteconunpaf_oseco.
° Cuandoseenfr[e,laveconaguajabonosa,enjuaguey seque.
° Nuncalimpieunasuperficietibiao calientecon un patioh[_medo.Estopuedecausaragrietamientoo picaduras.
• Nuncauselimpiadoresdehomo,agentesdelimpiezaabrasivosoc_usticosenel acabadoexleriordelaestufa.
Nunca cubra el inserte con papel de afuminJepues esto evJtaque la grasa se escurm a & bandeja inferior.
• Co!oqueunpahoenjabonadosobreel irlsertoy labandeja;dejeremojarparasoltarlasuciedad.
• Laveenaguajabonosatibia.Useunaesponjadefregarparaquitarlasuciedadpersistente.
• La bandejade asaryel insertopuedensetlavadosenel lavavajiIIas.
° Paraactivar'ControlLock'(Bloqueodeloscontroles}paralalimpieza,verp4gina64.
° Limpieconun paBohOmedoy seque.Nouseagentesdelimpiezaabrasivespuespuedenrayarlasuperficie.
° Sepuedenusar[Jmpiavidriossiserodan ene[pafioprimero.NOretie dJrectamenteel_elpaneL
, Retire las perillas cuando est6n en [a posiciOn'OFF'tir_ndolas hacia adelante=
, Lave, enjuague y seque=No use agentes de limpieza abrasivos pues pueden rayar la superficie=
, Encienda cadaquernador para asegurarse de que las perilIas hayan sido correctarnente reinstaladas=
Laporcelanapuededesco!orarseo adquirirfisurassuperficialessi se sobrecalienta.Estoesnormaly no afectardel
rendim[entode la cocciOn.
• Cuandoest_nfrfos,lavedespu_sde cadauso,enjuaguey sequeparaevitarmanchasy deco!oracidn.Pueden[avarseen
el [avavajillas.
• Para[impiarsuciedadexcesiva,remojeenaguacaIienteconjabOn,[uegouseun limpiadorabrasivosuaveta[comoSoft
Scrub*yuna esponjadefregarde pidstico=
° Parasuciedadquemada,retiree[phtillo de laestufa,co!Oque[osobreperiOdicosy rode cuidadosamentecon limpiador
de homo comerciaL(No rocfe[assuperficiesadyacentes=)Coloqueen unabolsade pIdsticoy deje remojardurante
variashoras=Useguantesde gomaparasacarlode [a boIsa,lave,enjuaguey seque=
Pmatimmos
prnteetnres,
Cremo/Esmaite
Pintado (medeins
seiectos}
Ventana y
Paerta dei
Homo =Vidrio
(medeios
seientos}
• Cuandoest6nfrfos,lavedespudsde cadause,enjuaguey sequeparaevitarmanchasy decoloracidn.
• Para[impiarsuciedadexcesiva,remojeen aguacalienteconjabOn,[uegouseun limpiadorabrasivosuaveta[comoSoft
Scrub*yuna esponjadefregarde pldstico. No useagentesde[impiezaabrasivos.
• Eviteusarcantidadesexcesivasde aguapuespuedeescurrirsedebajoodetrdsdelvidriocausandomanchas=
• Lavecon aguayjabOn=Enjuaguecon agua[impiay seque=E[[impiadordevidrio puedeusarsesi se roda en un paiio
primero=
° No usemateriaIesabrasivostalescomoesponjasderestregar,[impiadoresenpoIvoo esponjasde lanadeaceropues
puedenrayare!vidrio=
73
Page 75

P_EZA ' PROCEDmMIENTO DE L_MP_EZA
Parriiiasdei ° Limpiecenaguaconjab6n,
Homo ,. %que lasman@asdificilesconjab6nenpolvoocon unaesponjaliensconjabdn. En)uaguey seque.
,° Lasparrillasse descolorar4npermanentementeypuedenno deslizarsecon suavidadsisondejadasenel homodurante
unciclode autolimpieza.Siestosucede,limpielaparrillaylossoportesen relieveconunapeque_acantidaddeaceite
vegetalparsrestaurarlafacilJdaddemovimiento,luegoIJmpieelexcesode aceite=
Acere lno×idaMe
[medeios
seiectos}
Puerta dei Home
(medeles
seiectos),
Gaveta de
Almacenamiento,
Manija de ia
Puelta, Paneies
Lateraies -
Esmaite Pintado
" NO USENINGUNPBODUCTODELIMPIEZAQUECONTENGABLANQUEADOBA BASEDECLOBO.
," NO USELIMPIADOBES"ORANGE"NtMMPtADORESABRASIVES.
" StEMPRELIMPIELASSUPERFICIESDEACEBOA fAVOR DELGRANO.
,. Limpieza Diaria/Suciedad Leve- Limpieconunode lossiguientes- aguaconjab0n,unasoluciOndevinagrebhnco
conagua,limpiadorparssuperficiesyvidrio'Formula409'_o un limpiavidriossimihr - usandounaesponjao un pafio
suave.Enjuagueyseque=Parspuliry evitarmarcasde @dos,useelproducto'StainlessSteelMagicSpray'_
(PiezaNo=20000008]_*=
,oSuciedad JVJediana/intensa=Limpieconuric delossiguientes- 'BenAmi'_,'Sma!tCleanser'_o 'SoftScrub'_- usando
unaesponjahome@oun patiosuave.Enjuagueyseque=Lasmanchasdificilespuedensetquitadasconunaesponja
multi-use'Scotch-Brite'_home@;froteafavordel grano=Enjuaguey seque=Parsrestaurarel lustrey sacarlasvetas,
aplique'StainlessSteelMagicSpray'*=
,. Desnoieraci6n= Useunaesponjamojadaoun patiosuave,limpiecon limpiadorde acero'CameoStainlessSteel
Cleaner'*.Enjuagueinmediatamentey seque=Parseliminarlasestr[asy restaurarellustre,usedespu6srociadorpars acero
inoxidable'StainlessSteelMagicSpray'*.
HerneauteJiinpiante:
,. Siga lasinstruccionesen lasp4ginas71-72pars programa!un cic!ode autolimpieza=
Liinpieza Manual:
,* Lhnpiefrecuentementeusandolimpiadoresabrasivessuavesy unaesponjade pl_stico=
,* Nouseesponjasde fregarmet41icasporquepuedenrayarlasuperficie=
,* Cuandoutilicelimpiadoresdehomocomercialessigalasinstruccionesde!fabricante=
,. Limpielosderrames_cidos[alimentosabasedetomateso deleche]tan prontocomeseaposibleconaguayjab0n=
Si el derramenoeslimpiadosepuededescolorarlaporcelana=
Parshater m_s f_cii ia iimpieza, saque ia puella dei Berne,si ie deseao _ler lasecci6nMantenimientoenp_g=76=)
Cuandoest6frFa,laveconaguatibiajabonosa,enjuaguey seque=NuncalimpJeunasuperfic]etibiao calienteconunpa_o
h0medopuesestopuede@Barlasuperficieycausarunaquemaduraa causadelvapor.
Parsmanchasrebeldes,useagentesde Iimpiezalevementeabrasivestal comepastadebicarbonateo'BenAmi'_=No use
agentesdelimpiezaabrasives,c4usticoso_sperostal comeesponjasdelanadeaceroo limpiadoresdehomes=Estos
productospuedenrayarodaF_arpermanentementelasuperficie=
NOTA:Useuna tealla e un pade sece pars limpiar les derrame& especialmente los derrames acldices e
azucarades.La superfide sepuede descelerar eperder el bdHesi d derrame no sefimpiainmediatamente. Este
es especialmente impertante el_las superficies blancas.
_LosnombresdeIosproductosson marcasregistradasde sus respectivosfabricantes=
_ Parshacerpedidos,Ilameal 1-877-232-6771en EEUU=o1-800-688-8408enCanad4=
74
Page 76

Puerta deJ Homo
• No coJoque peso exceslvo mse pare en la puerta del homo.
Esto poona hacer vobar Jaestufa, quebrar la puerta o lesiona
al usuario.
o No mtenteabrir o cerrar la puertani hacerflmcionarel homu
hastaque Eapuertano hasidodebidamen[ereerraJazada.
• Nunca coJoquelosdedosentre Jabmagray el marcodelanterc
del hornc Los brazosde articuBci@ sonmontadosa resorte.
SisegolpeaaccLdentaJmentela bisagrasecerrarai
bruscamentecontrael marcodel homoy puede lesionarsus
dodos.
Ventana deJ Homo (modelos
seJectos}
Para proteger la ventana de la puerta dei homo:
1. Nouseagentesde limpiezaabrasivostabs comoesponiasde
restregarde lanade aceroo limpiadoresenpolvopuespueden
rayarelviddo.
2. Nogolpeeelvidrio con ollas,sartenes,muebles,iuguetesu otros
objetos.
3. Nocbrre IapuertadeIhornohastaque las parrfllasdel horno no
est@en suIugar.
AIgolpear,rayar,hacervibrar o esforzarelvidrio puededebilitarsu
estructuracausandoun mayorriesgode rotura en unafecha
posterior.
Para saoar:
1.Cuandoest6fr[a,abra [a puerta de[ hornohasta[aposiciOntope
de asara [aparri[la[abbrta aproximadamente10cm {cuatro
pulgadas}].
2.Suietela puertadecada lado. Nouse[a _:z:_Z_ ....
manijade la puertapara levantaria, fif/f-- -] /
3.Levanteuniformementehastaque Ia puerta
sesalgade losbrazosde articulaci6n.
Para voiver a comocar:
I.Sujete la puerta de cada lad&
2. Alinee las ranuras de la puerta con los brazos de articuIaciOn de la
estufa.
3.Deslicela puertahaciaIosbmzosde articuiaci6nhastaqueest6
completamenteasentadaen Iasbisagras. Empuiehaciaabaiolas
esquinassuperioresde la puertaparaasentarlacompbtamenteen
lasbisagras. Lapuerta no debequedartorcida.
"esponiosa"cuandosecierra. Estoesnormaly disminuir_con el
Nora: La puertadei homoen unaestufanuevapuedesentirse
USO.
Luz deJ Norno
i Desconectelaenergiaa la estufaantesde reemplazare!foo0.
, use un t0maollasSecopara evitar p0sibledaho a Susmanes
Cuand0este [eemp!azand0elfocol
, Aseg_resede qiie el foc0 est6frio antesdetogado.
o Notoquee! fOC0 caiienteconun pa_ohhmedopuesestopuede
quebrare!rote,
Para reempiazar el foco dei homo:
1.Cuandoel homoest6frfo,sujetela tapade Ia bombillaen suhgar,
luegodesliceel ret@de alambrefuerade la cubierta.
Nora: Lacubiertade la bombilIase caer_si noessujetaen sulugarj
_cuandoest_sacandoe ret@de a ambre. 1
2.SaqueIacubiertadei foco y el foco.
3.Coloqueun foco de 40 watts para #oco
electrodom@ticos.
4.WmlvaacolocarIacubbrta de Ia
bombillayaseg_irelaconel ret@l
de alambre.
5.Vuelva a enchufar la estufa. RETf::WDEALAMBRE
Vuelvaacolocarlahoracorrect&
CUBIERTA DEL
75
Page 77

Tomillos Niveladores
Ver!%ueque e!soporteantivue!c_esteasegurand0al piso une
de lostorrfi!!Os[!Lve!ado[estraseros, EsteSOPOrteevitaque la
estu[a sevuelqueaccidenta!rnente_
Para volver a coiocar:
1. Insertelos extremosde lascorrederasde la gavetaen losrbles
de la estufa.
2. LevanteIapartedeBnterade Iagavetay suavementeempOiela
hastaIapnmeraposiciOndetope.
3. LevanteIagavetanuevamentey empqela hastaque quede
completamentecerrad&
La estufadebeset niveladacuandose instaB. Si Ia II]](3
est_Jfanoest_niveBda,gire lostornillos nivetadores I[[I _
de pI_sticoubicadosen cadaesquinade B estufa Jl_
hastaque quedeniveBda. _/,,_
_ ANTIVUELCO
TORNILLO NIVELADOR
Gaveta de Almacenamiento
Nog Jardeproductosde papelo de pBstico,alimen[osn
materialesinfiamabbs en _s_agaveta.Lagave_apuede
cale"ltarsedemasiadoparaestosart[culoscuandose est,1usando
e!horno.
La gavetade almacenamientopuedeset retiradaparaque usted
puedalimpiardebajode la estufa.
Para sacar:
1. Vade la gavetay deslicelahaciaafuera hastala primeraposiciOn
detope.
2. Levantelapartedelanterade la gaveta.
3. TirelahastaIasegundaposiciOndetope.
4. Sujetelosladosy levantela gavetapara retirarla.
Tomacorriente para
Emeetrodo sticos Peque os
(Modelos Canadiensessolamente}
Eltomacorrienteparaelectrodom@ticospequeiiosest_ubicadoen
el Iado inferior izquierdodel protectortrasero.Aseg_Sresedeque Ios
cordonese!@tricosno descansensob_eloselementossuperioreso
cercade ellos. Siel elementosuperior
est_encendido,el cordony el
ebctrodom@ticopuedendariarse.
EldisyuntordeItomacorrientepara
ebctrodom@ticospeque_ospuede
dispararsesi el artefactopequ@o
enchufadoen 61esde m_sde 10amps.
Parareporterel disyuntor,optima eI
interruptorsituadoen el borde inferior
del protectortrasero.
'DISYUNTOR'
76
Page 78

PROBLEMA SOLUC_ON
1
Parsmsmayor,s de mosprobmemss, • Revisesi Ioscontrolesde]homoest_ndebidamenteajustsdos.
verifiqueprirnero mesiguiente, • Verifiquesiei enchufeest_firmementeinsertadoenel tsmacsrriente.
• Verifiqueo vuelvsa repsnereldisyuntor,Verifiques reemplaceel fusible,
• VerMqueelsuministrodeenerg[ael_ctrica,
Tods msestufs o parle de elmsno • RevisesiIa superficiey/s Isscsntrslesdel hornsestandebidsmenteajustadss, Vet p_ginss
funcions, 58y G5,
• Verifiquesi lapuertadel hornsseha desblsqueadsdespu6sdelciclode autslimpieza,Ver
p_gina72,
• Revisesiel barnsest_ajustadsparahsmeadsdiferidss prsgramade limpieza,Verp%inss 6G
y 72,
• Verifiquesi'ControlLock'(BIoquesde Contrs[)est_activads, Vet p%, 64,
• VerMquesiel contrslest_en Msds Sab_tico,Vetp%, GS,
El reloj, las palsbrss en el indicsdor • Elhsrnopuedeestarprsgramsdsparaunafunci6n de'Cook& Hold'o unsfunci6ndiferida,
visualy/e las luces funcionsn pete , Puedeestsractivadslacarscteristicadebisquesdelos contrslesdel barns,(Vetp%, 64,)
el homono se nslienta,
Los resultsdos del hornesde no • Aseg0resedequeel respirsdersdelbornenoest_b!oqueads.Vetp%ina 70psra la ubicaci6n,
son come se esperaban o son • VerifiqueparsasegurarsedequeIaestufaest_nivelada.
diferentes s los del homo anterior, • Lastempersturssa menudsvarFanentreun bornenuevsy unoantiguo, A medidaquepasa
eltiemps,latempersturadel barnscambiaypuedehacersemJscalientes m_sfrFa,Vet
p%ins G8paralas instruccionescameajustarIatemperatursdelhomo (modelssselectss],
BIOTA;NoserecomiendaaiustarIatemperaturasihatenidoproblemasconsolounas dssrecetas,
• Consulteelfsllets "La CocinaF_cil"parsmayorinformaci6nsobreIssutensiliosde hsrnear,
Los smimentosno se sssn s ms • VerifiqueIssposicionesde lasparrillasdelhorns,Elalimentopuedeestarmuycercadel
parrimmaen forms debids o same elements,
demssisdo humo. • Elelementode asar ns rue precalentads,
• Elpapelde aJumJnioseus6de maneraincorrecta, Nuncafsrre el insertsdel assdsrconpapel
dealuminio,
• Lapuerta deI borneestabacerrads mientrssse assbas Is pardlla, DejeJapuertasbierta en Ja
primeraposici6n (alrededorde 10cm [4pulgadas]],
• Recsrteelexcesodegrasade Jacsrneantesde psnerlaaasara laparrilla,
• Se us6unaasaderasucia,
• Elvsltaje del hsgarpuedeset bajs,
Emhomo no se autemimpia , Verifiqueparaasegurarsedequeel ciclono est6a]ustadopsraun csmienzodiferids.Ver
(modemossementos), p_gina72,
• VerMquesi lapuertaest_cerrads,
• Verifiquesiel controlest_en MealsSsb_tics,Verp_g,68,
• Elhsrno puedeestara m_sde 205°C (400° F], Latempersturadelhornsdebeserinferior a
205°C (400°F] paraprsgramaruncicls deIimpieza,
El homo no se limpiden forms • Puedequeseanecesariountiempode Iimpiezam4slargo,
debida [modelos semectos), • Losderramesexcesivss,especialmentedeafimentssazucaradssy/s 4cidssns fuersn Jimpiadss
antesdelciclo de autolimpieza,
Ls pserts del homo no se • Elinteriordel hornstodsv[aest_caliente, Dejequepaseaprsximadamenteunahsraparaque
desbloqses desps@sdel title el hornose enfr[eantesdequesecompleteuncicls de autslimpieza,Lapuertapuedeset
de autolimpieza (modelos selectos), abiertacuandodesaparezcaIapslabrs'LOCK'deJindJcadorvisual,
• Elcontrsly la puertspuedenestarblsqueadss,Vetp4g,64,
77
Page 79

PROBLEMA SOLUC_ON
Sejunta humedad en maventana ° Estoesnormalcuandose cocinanalimentoscon alto contenidode humedad,
demheine osamevaporper ° Seus0humedadexcesJvacuandose limpi6laventana.
emrespiradero demhomo,
Hay un omorfaerte o hamo mere
cuando se enciende emhomo°
CSdigos de Errores
Se esnuchan ruidoso
NO se escuchan sesames sonoras
y el indicador visual no se activao
, Estoes normal en una estufanuevaydesaparecer_despu6sde unos pocosuses.
AIiniciar un cicIodeautoiimpiezase "quemarU' los oloresm4s r4pidamente.
o Siseenciendeel ventihdor ayudar4aeliminarel humoy/o el clot.
o Haysuciedadexcesivadealimentosenelpanelinferiordel homo=Useunciclodeautolimpieza
(modelosseJectos:l.
, 'BAKE'o 'LOCK'puedendestellarr4pidamenteenel indicadorparaavJsarieque hayun error
oun problema.Si'BAKE'o 'LOCK'aparecenenelindicadorvisual,oprimaIatecla'CANCEL'.
Si'BAKE'o 'LOCK'continOandestellando,desconecteJaenerg[ael6ctricaalelectrodom@stico.
Espereunospocosminutesyvuelvaareconectarlaenerg[ael6ctrica.Sicontimiandestellando,
desconectelaenerg[ael6ctricadeIelectrodom6sticoyIlameal t6cnicodesewJcioautorizado.
o Siel borneest4demasiadosucio,puedenocurrir demasiadasIlamaradasIo cual resuJtar4en
un c6digodeerrordurante IaIimpieza.OprimaIatecla'CANCEL'ydejequeel hornose enfr[e
completamente,limpieelexcesodesuciedadyluegovuelvaa programarelciclode JimpJeza.
Siel c6digode error reaparece,Ilamea un t6cnicoautorizado.
° Elhornoemitevariessonidosbaios. Ustedpuedeoir [osrelesde[hornocuandoseencienden
yseapagan.Estoes normal.
• A medidaqueetbornesecalientayse enfr[a,ustedpuedeoirsonidosdepiezasmet41icasque
seexpandeny contraen. Estoesnormaly no daffar4su electrodomestico.
° Elborne puedeestaren ModeSab_tico(modelosselectos}.Ver p4g.68.
78
Page 80

#
Gatant_a Completa de Un ASo - Piezas
y Mane de Obta
Duranteun (1} a_e desdelafechaoriginalde
compraal par menoEserepararao reemp_azara
gratuitamentecualquierp_ezaquefaIledurantesu
usanormalenel hogar.
Residentes Canadienses
Lasgarant[a_antedatescubrensolamente
aqueLIoselectrodomesticosinstaladosenCanada
quebansidocertificadosoaprobadosparlas
agenciasde prueDascorrespondientespara
cumplimientoconla NormaNacionalde Canad_a
menosqueel electrodom6sticohayasidotra[doa
Canadadesdelos EEUU.debidoa un cambiode
resLdencla.
Gatantia Limitada Fuera de rues
Estados Unities y Canad_ = Piezas
Somameate
Duranteun [JJalia desde]afechadecompra
originalal par menor,cualquierplezaquetalle
duranteusanormaten el hogarserareemplazaua
o reparadagratultamenteen _oque respectaa _a
piezayel propietariodeber_pagartodoslos a[ros
cosmosincluyendomariade obra.kilometraje_
millaje,transporte,costadelviajeycostadel
diagn0sttco,sifuesenecesano
Lasgarantfasespecfficasexpresadasanrenormen[e
sot;/asUNICASgarantfasprovistasper d
fabricante.EstascJarantLas/eotorcjandereehos
legalesespecfficosy ustedpuede tenetademas
OtYOSderecY_osquevaffande unestadoa otro.
Lo que No Cubten Estas Gatantm'as:
1. Situacionesy daSosresultantesde cuaiquierade Iassiguienteseventualidades:
a. InstalaciOn,entregao mantenimientoinapropiados.
b. CualquierreparaciOn,modificaci0n,aiteraci6no ajustenoautorizadoper
el fabricanteo par un centrode servicioautorizado.
c. Mal usa,abuso,accidenteso usairrazonable.
d. Corrienteel6ctrica,voltajeo suministroincorrecto.
e. ProgramaciOnincorrectade cualquierade ioscontroles.
2. Lasgarant[asquedannuIassi iosntimerosde serieoriginaleshan sidoretirados,
alteradoso no sonf_cilmente legibles.
3. Focos.
4. Productoscompradospara usocomercialo industrial.
5. Elcostodel servicioo Jlamadadeserviciopara:
a. Corregirerroresde instataci6n.
b. Instruir al usuariosobreel uso correctodel artefacto.
c. TransportedeIartefactoal establecimientodeservicio.
& LosdaBosconsecuenteso incidentalessufddospor eualquierpersonaeomo
resultadode eualquierincumplimientode estasgarantias.Enalgunosestadosno
se permiteIaexclusi6no limitaciOndelosdaBosconsecuentesoincidentales,por
Jotanto laexchsiOnanteriorpuedeque no seapJiqueensu caso.
Si Necesita Setvicio
o LlameaIdistribuidor dondecomp_ suelectrodom6sticoo Ilamea Maytag
ServicessM,Servicioa losClientesIlamandoal 1-800-688-1120en EE.UU.y Canada.
paraubicara unt6cnicoautodzado.
• Aseg0resede conservarel comprobantede compraparavenficarelestadode la
garant[a. Consultelasecci6nsabreIaGARANTIAparamayorinformaciOnsabrelas
responsabilidadesde!propietariopararecibir servicio bajoIagarant[a.
• Siel distribuidoro la compaS[ade serviciono puedenresolvere! problema,escriba
a Maytag Services"sM,Attn: CAIR_ Center,P.O.Box2370,Cleveland,TN37320-2370
o Ilameal 1_8ee_688_112een EE.UU.y Canada.
• Lasgu[asdel usuario,manualesde servicioe informaci6nsabre las piezaspueden
solicitarsea Maytag SewicessM,Servicioa losClientes.
CuandoIlameo escribaacercade un problemade servicio,parfavor incluyala
siguienteinformaciOn.
a.Su hombre,direcci0nyn_merodeteldono;
b.NOmerodemodeloy nLimerode serie;
c. NombreydirecciOndesu distribuidoro t6cnico de servicio:
d.Unadescripci6nclara del problemaqueest_experimentando;
e.Comprobantedecompra(recibodecompra).
Form No A/06/04 Part No. 8113P446-60 _::2004 Maytag Appliances Sales Co. Litho U.S.A
c
 Loading...