

Page 1

All about the
Use & Care
of your Freezer
TABLE OF CONTENTS
Product Registration ..........................................2
Important Safety Instructions ..............................2
First Steps ........................................................4
Setting the Temperature Control.................... ......5
Optional Features....................................6
USA 1-800-944-9044 Canada 1-800-265-8352
Energy-Saving Tips ..........................................6
Care and Cleaning ............................................6
Power/Freezer Failure .................................7
Before You Call .................................................8
Major Appliance Warranty .................................11
A11102201 (April 2017)
Page 2
PRODUCT REGISTRATION
Read and Save These Instructions
This Owner’s Guide provides specic operating
instructions for your model. Use your appliance
only as instructed in this guide. These
instructions are not meant to cover every
possible condition and situation that may occur.
Common sense and caution must be practiced
when installing, operating, and maintaining
any appliance.
Record Your Model and
Serial Numbers
Record the model and serial numbers in the
space provided below.
Model Number:
Serial Number:
Purchase Date:
Register Your
Product
The self-addressed
PRODUCT
REGISTRATION CARD
should be lled in completely,
signed and returned to the address provided.
IMPORTANT SAFETY
INSTRUCTIONS
WARNING
WARNING indicates a potentially hazardous
situation which, if not avoided, could result
in death or serious injury.
CAUTION
CAUTION indicates a potentially hazardous
situation which, if not avoided, may result in
minor or moderate injury.
IMPORTANT
IMPORTANT indicates installation, operation
or maintenance information which is
important but not hazard-related.
WARNING
For Your Safety
• Do not store or use gasoline or other
ammable vapors and liquids in the vicinity of this unit or any other appliance.
Read product labels for ammability and
other warnings.
• Do not operate the unit in the presence of
explosive fumes.
• Remove and discard any spacers used to
secure the shelves during shipping. Small
objects are a choke hazard to children.
• Remove all staples from the carton.
Staples can cause severe cuts, and also
destroy nishes if they come in contact
with other appliances or furniture.
WARNING
Please read all instructions before using
this unit.
Denitions
This is the safety alert symbol. It is used to
alert you to potential personal injury hazards.
Obey all safety messages that follow this
symbol to avoid possible injury or death.
DANGER
DANGER indicates an imminently hazardous
situation which, if not avoided, will result in
death or serious injury.
2
WARNING
Child Safety
• Destroy carton, plastic bags, and any exterior wrapping material immediately after the
unit is unpacked. Children should never use
these items for play. Cartons covered with
rugs, bedspreads, plastic sheets or stretch
wrap may become airtight chambers and
can quickly cause suffocation.
• An empty, discarded appliance is a very
dangerous attraction to children.
• Remove the door(s) of any appliance that
is not in use, even if it is being discarded.
Page 3
IMPORTANT SAFETY INSTRUCTIONS
WARNING
Proper Disposal of Your Appliance
Risk of child entrapment
Child entrapment and suffocation are not
problems of the past. Junked or abandoned
appliances are still dangerous – even if they
will sit for “just a few days”. If you are getting
rid of your old appliance, please follow the
instructions below to help prevent accidents.
We strongly encourage responsible
appliance recycling/disposal methods. Check
with your utility company or visit www.
recyclemyoldfridge.com for more information
on recycling your old appliance.
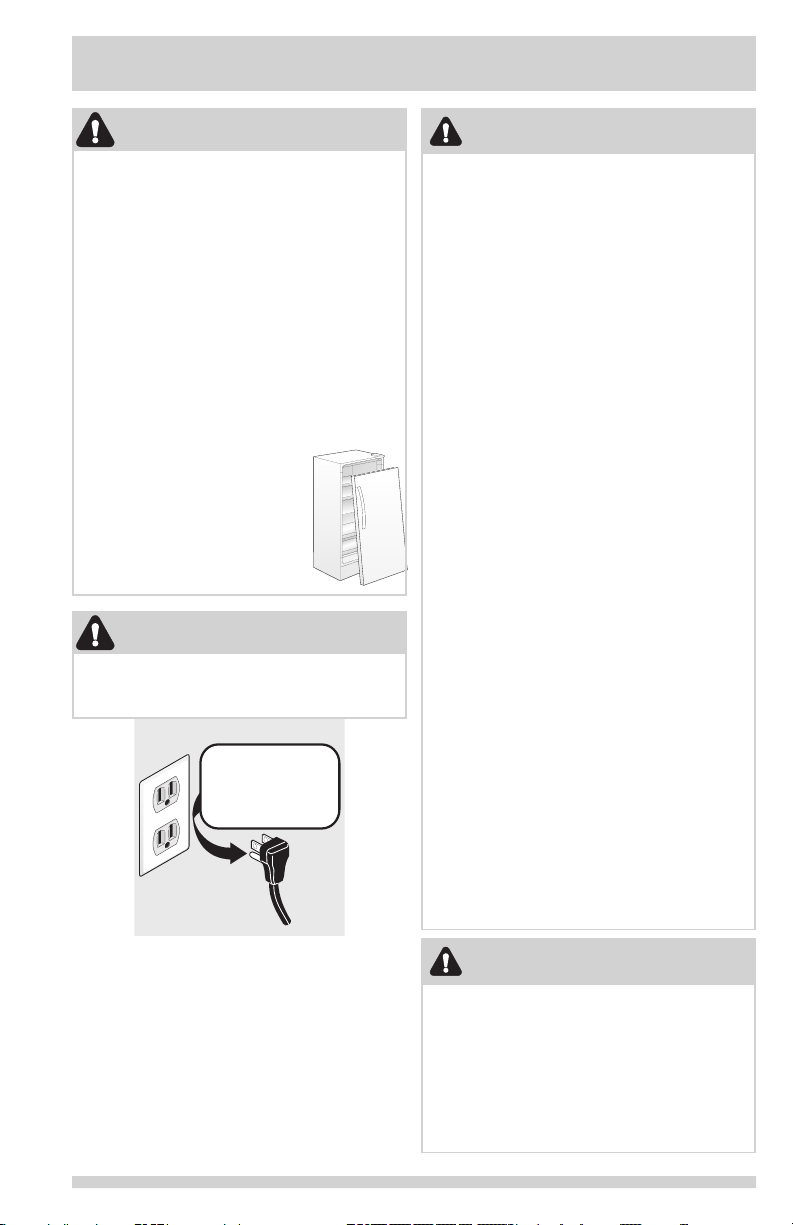
Before you throw away
your old appliance:
• Remove door.
• Leave shelves in place so
children may not easily
climb inside.
• Have the refrigerant removed
by a qualied technician.
WARNING
Avoid re hazard or electric shock. Do not
use an extension cord or an adapter plug.
Do not remove any prong from power cord.
Grounding type wall receptacle
Do not, under
any circumstances,
cut, remove,
or bypass the
grounding prong.
Power cord with
3-prong grounded plug
WARNING
Electrical Information
These guidelines must be followed to ensure
that safety mechanisms in the design of this
appliance will operate properly.
• Refer to the serial plate for correct electrical rating. The power cord of the appliance
is equipped with a three-prong grounding
plug for your protection against electrical
shock hazards. It must be plugged directly
into a properly grounded three-prong
receptacle, protected with a 15-amp time
delay fuse or circuit breaker. The receptacle must be installed in accordance with
the local codes and ordinances. Consult a
qualied electrician. Receptacles protected
by Ground Fault Circuit Interrupters (GFCI)
are NOT RECOMMENDED. Do NOT use an
extension cord or adapter plug.
• If the power cord is damaged, it should be
replaced by an authorized service technician to prevent any risk.
• Never unplug the appliance by pulling on
the power cord. Always grip the plug rmly, and pull straight out from the receptacle
to prevent damaging the power cord.
• Unplug the appliance before cleaning
and before replacing a light bulb to avoid
electrical shock.
• If voltage varies by 10% or more, appliance
performance may be affected. Operating
the unit with insufcient power can damage the motor. Such damage is not covered
under the warranty. If you suspect your
household voltage is high or low, consult
your power company for testing.
• To prevent the appliance from being turned
off accidentally, do not plug unit into an outlet controlled by a wall switch or pull cord.
• Do not pinch, knot, or bend power cord in
any manner.
WARNING
Other Precautions
• To defrost appliance, always unplug unit rst.
• Never unplug the unit by pulling on the
power cord. Always grip the plug rmly
and pull straight out from the receptacle.
• Turning the control to OFF turns off the
compressor, but does not disconnect
power to other electrical components.
3
Page 4

3” (75 mm)
FIRST STEPS
This Use & Care Guide provides general operating
instructions for your model. Use the unit only
as instructed in this Use & Care Guide. Before
starting the unit, follow these important
rst steps.
Location
Choose a place that is near a grounded
electrical outlet.
For the most efcient operation, the appliance
should be located where surrounding
temperatures will not exceed 110°F (43°C).
Temperatures of 32°F (0°C) and below will
NOT affect operation. Additional compressor
heaters are not recommended.
Allow space around the unit for good air
circulation. Leave a 3 inch (75 mm) space on
all sides of the unit for adequate circulation.
3” (75 mm) Air Space
3” (75 mm)
3” (75 mm)
NOTE
It is VERY IMPORTANT for your appliance
to be level in order to function properly. If the
unit is not leveled during installation, the door/
lid may be misaligned and not close or seal
properly, causing cooling, frost or moisture
problems.
To level Upright Units:
After discarding crating screws, use a
carpenter’s level to level the appliance from
front to back. Adjust the plastic leveling feet in
front, ½ bubble higher, so that the door closes
easily when left halfway open.
CAUTION
To allow door to close and seal properly, DO
NOT let food packages extend past the front
of shelves.
NOTE
The exterior walls of the unit may become
quite warm as the compressor works to
transfer heat from the inside. Temperatures
as much as 30° F warmer than room
temperature can be expected. For this reason
it is particularly important in hotter climates
to allow enough space for air circulation
around your appliance.
Leveling
The appliance must have all bottom corners
resting rmly on a solid oor. The oor must be
strong enough to support a fully loaded unit.
4
Page 5

FIRST STEPS
SETTING THE
TEMPERATURE CONTROL
Door Removal (upright models)
If door must be removed, unplug the unit.
1. Gently lay the unit on its back, on a rug
or blanket.
2. Remove 2 base screws and base panel.
3. Unplug connector, if required, by holding
the cabinet connector in place, and
pulling door connector out. If equipped,
pull Harness Retainer from Cabinet.
4. Remove 4 bottom hinge screws.
5. Remove plastic top hinge cover.
6. Remove 2 screws from top hinge.
7. Remove top hinge from cabinet.
8. Remove door and bottom hinge
from cabinet.
9. To replace door, reverse the above
order and securely tighten all screws to
prevent hinge slippage. Ensure the door
harness is routed as shown and that the
restraint clip is snapped into the cabinet.
Base Screw
Harness
Restraint
Hinge
Screws
Cool Down Period
• For safe food storage, allow 4 hours for
the appliance to cool down completely.
The unit will run continuously for the rst
several hours. Foods that are already
frozen may be placed in the unit after the
rst few hours of operation. Unfrozen foods
should NOT be loaded into freezer until
freezer has operated for 4 hours.
• When loading freezer, freeze only 3 pounds
of fresh food per cubic foot of freezer
space at one time. Distribute packages to
be frozen evenly throughout the freezer. It
is not necessary to turn control knob to a
colder setting while freezing food.
Electromechanical Temperature
Control
The temperature control is located inside the
freezer. The temperature is factory preset to
provide satisfactory food storage temperatures.
However, the temperature control is adjustable
to provide a range of temperatures for your
personal satisfaction. If a colder temperature
is desired, turn the temperature control knob
toward COLDEST and allow several hours for
temperatures to stabalize between adjustments.
Wire
Door
Connector
Cabinet
Connector
NOTE
Your freezer may have some, or all of the
features listed below. Become familiar with
these features, and their use and care.
5
Page 6

OPTIONAL FEATURES
CARE AND CLEANING
Power On Light
The Power On Light indicates that the
appliance is properly connected to electrical
power. The light glows even when the
temperature control is turned to OFF. If the
light goes out, refer to “Appliance does not
run” in the Before You Call section.
Fast Freezing Shelves
(manual defrost models)
These shelves contain cooling coils to freeze
foods quickly and allow cold air to constantly
circulate throughout the freezer. Do not
use sharp metal objects such as ice picks
or scrapers to clean the shelves. This could
damage the shelves and reduce their cooling
ability. These shelves are not adjustable.
ENERGY-SAVING TIPS
• The appliance should
be located in the
coolest area of the
room, away from heat
producing appliances
or heating ducts, and
out of direct sunlight.
• Let hot foods cool to room temperature
before placing in the unit. Overloading the
appliance forces the compressor to run
longer. Foods that freeze too slowly may
lose quality or spoil.
• Be sure to wrap foods properly and wipe
containers dry before placing them in the
unit. This cuts down on frost build-up
inside the unit.
• Shelves and baskets should not be lined
with aluminum foil, wax paper, or paper
toweling. Liners interfere with cold air
circulation, making the freezer less efcient.
• Organize and label food to reduce door
openings and extended searches. Remove
as many items as needed at one time, and
close door as soon as possible.
CAUTION
Damp objects stick to cold metal surfaces.
Do not touch interior metal surfaces with
wet or damp hands.
Between Defrosting
To avoid frequent defrosting, occasionally use
a plastic scraper to remove frost. Scrape with
a pulling motion. Never use a metal instrument
to remove frost.
CAUTION
Freezer must be unplugged (to avoid
electrical hazard) from power source when
defrosting unit.
Defrosting
It is important to defrost and clean freezer
when ¼ to ½ inch of frost has accumulated.
Frost may tend to accumulate faster on upper
part of the freezer due to warm, moist air
entering the freezer when the door is opened.
Remove food and leave the door open when
defrosting the freezer.
• On upright models with a defrost
drain (Figure 1), remove drain plug on
the inside oor of the freezer by pulling
straight out. To access external drain tube
on models with a base panel, rst remove
the 2 screws from the base panel. Locate
the drain tube near the left center under
the freezer. Place a shallow pan under
the drain tube. Defrost water will drain
out. Check pan occasionally so water
does not overow. A ½ inch garden hose
adapter can be used to drain the freezer
directly into a oor drain. If your model
is not equipped with an adapter, one can
be purchased at most hardware stores.
Replace the drain plug when defrosting and
cleaning are completed. If the drain is left
open, warm air may enter freezer.
Drain Tube
Drain Pan
Figure 1
6
Page 7

CARE AND CLEANING
CARE AND CLEANING
• On models without a defrost drain, place
towels or newspapers on the freezer bottom
to catch the frost. The frost will loosen and
fall. Remove towels and/or newspapers.
• If the frost is soft, remove it by using a
plastic scraper. If the frost is glazed and
hard, ll deep pans with hot water and
place them on the freezer bottom. Close the
freezer door. Frost should soften in about 15
minutes. Repeat this procedure if necessary.
Cleaning the Inside
After defrosting, wash inside surfaces of the
unit with a solution of 2 tbsp. (25 g) of baking
soda in 1 qt. (1 l) warm water. Rinse and dry.
Wring excess water out of the sponge or cloth
when cleaning in the area of the controls, or
any electrical parts.
Wash the removable parts with the baking soda
solution mentioned above, or mild detergent
and warm water. Rinse and dry. Never use
metallic scouring pads, brushes, abrasive
cleaners, or alkaline solutions on any surface.
Do not wash removable parts in a dishwasher.
Cleaning the Outside
Wash the cabinet with warm water and mild
liquid detergent. Rinse well and wipe dry with
a clean soft cloth. Replace parts and food.
Do not use razor blades or other sharp
instruments, which can scratch the appliance
surface when removing adhesive labels. Any
glue left from the tape can be removed with
a mixture of warm water and mild detergent,
or touch the residue with the sticky side of the
tape already removed. DO NOT REMOVE THE
SERIAL PLATE.
WARNING
If leaving door open while on vacation, make
certain that children cannot get into the
appliance and become entrapped.
WARNING
Do not open door unnecessarily if unit is off
for several hours.
Vacation and Moving Tips
Short Vacations: Leave the appliance
operating during vacations of less than 3
weeks.
Long Vacations: If the unit will not be
used for several months, remove all food and
unplug the power cord. Clean and dry the
interior thoroughly. Leave the freezer door
open slightly, blocking it open if necessary, to
prevent odor and mold growth.
Moving: Disconnect the power cord plug
from the wall outlet. Remove food, defrost,
and then clean the appliance. Secure all loose
items such as base panel, baskets, and shelves
by taping them securely in place to prevent
damage. In the moving vehicle, secure the unit
in an upright position, and secure to prevent
movement. Also protect outside of unit with a
blanket, or similar item.
POWER/
FREEZER FAILURE
If a power failure occurs, frozen foods
will stay frozen for over 2 days (upright/
convertible) if the appliance is kept closed*. If
the power failure continues, pack seven or eight
pounds of dry ice into the unit every 24 hours.
Look in the Yellow Pages under "Dry Ice,"
"Dairies," or "Ice Cream Manufacturers" for local
dry ice suppliers. Always wear gloves and use
caution when handling dry ice.
If the appliance has stopped operating,
see "Appliance does not run" in the BEFORE
YOU CALL section of this manual. If you
cannot solve the problem, call an authorized
servicer immediately.
If the appliance remains off for several
hours, follow the directions above for the use
of dry ice during a power failure. If necessary,
take the food to a local locker plant until the
unit is ready to operate. Look in the Yellow
Pages under "Frozen Food Locker Plants."
*Average cabinet temperature as tested per AHAM
standard HRF-1-2007 Section 7.9 at 70º with door
remaining closed.
7
Page 8

BEFORE YOU CALL
USA 1-800-944-9044 Canada 1-800-265-8352
Before calling for service, review this list. It may save you time and expense. This list includes common occurrences that are not the result of defective workmanship or materials in this appliance.
PROBLEM CAUSE CORRECTION
APPLIANCE OPERATION
Appliance
does not run.
Appliance
runs too much
or too long.
APPLIANCE TEMPERATURES
Interior tem-
perature is
too cold.
Temperature
inside appliance is
too warm.
External temperature is
too warm.
• Appliance is plugged into a
circuit that has a ground
fault interrupt.
• Temperature Control is in
the OFF position or POWER
OFF position.
• Appliance may not be
plugged in or plug is loose.
• Hose fuse blown or tripped
circuit breaker.
• Power outage
• Room or outside weather
is hot.
• Appliance has recently
been disconnected for a
period of time.
• Large amounts of warm
or hot food have been
stored recently.
• Door is opened too frequently or too long.
• Door may be slightly open.
• Temperature control is set
too low.
• Gasket is dirty, worn,
cracked, or poorly tted.
• Control is set too low. • Set control to a warmer setting. Allow sev-
• Control is set too warm.
• Door is opened too frequently or too long.
• Door may not be
seating properly.
• Large amounts of warm
or hot food has been
stored recently.
• Appliance has recently
been disconnected for a
period of time.
• The external walls can be
as much as 30ºF warmer
than room temperature.
• Use another circuit. If you are unsure
about the outlet, have it checked by a
certied technician.
• See Setting the Temperature
Control section.
• Ensure plug is tightly pushed into outlet.
• Check/replace fuse with a 15-amp timedelay fuse. Reset circuit breaker.
• Check house lights. Call local electric company.
• It’s normal for the appliance to work longer under these conditions.
• It takes 4 hours for the appliance to cool
down completely.
• Warm food will cause appliance to run
more until the desired temperature is
reached.
• Warm air entering the appliance causes it
to run more. Open door less often.
• Ensure door is tightly closed.
• Turn control knob to a warmer setting. Allow
several hours for the temperature to stabilize.
• Clean or change gasket. Leaks in door seal
will cause appliance to run longer in order
to maintain desired temperatures.
eral hours for temperature to stabilize.
• Set fresh food control to a colder setting. Allow several hours for temperature to stabilize.
• Warm air entering the appliance causes it
to run more Open door less often.
• See “DOOR PROBLEMS” section.
• Warm food will cause appliance to run
more until the desired temperature is
reached.
• Appliance requires 4 hours to cool
down completely.
• This is normal while the compressor works
to transfer heat from inside the cabinet.
8
Page 9

BEFORE YOU CALL
PROBLEM CAUSE CORRECTION
SOUND AND NOISE
Louder sound
levels when
appliance is on.
Longer sound
levels when
compressor
comes on.
Popping or
cracking sound
when compres-
sor comes on.
Bubbling
or gurgling
sound, like
water boiling.
Vibrating or
rattling noise.
WATER/MOISTURE/FROST INSIDE APPLIANCE
Moisture forms
on inside walls.
WATER/MOISTURE/FROST OUTSIDE APPLIANCE
Moisture forms
on outside.
ODOR IN APPLIANCE
Odor in
appliance.
DOOR PROBLEMS
Door will
not close.
• Modern appliances have
increased storage capacity
and more stable temperatures. They require a high
efciency compressor.
• Appliance operates at
higher pressures during
the start of the ON cycle.
• Metal parts undergo expansion and contraction, as
in hot water pipes.
• Refrigerant (used to cool
the appliance) is circulating
throughout the system.
• Appliance is not level. It
rocks on the oor when it
is moved slightly.
• Floor is uneven or weak.
Appliance rocks on oor
when it is moved slightly.
• Appliance is touching
the wall.
• Weather is hot and humid.
• Door may not be
seating properly.
• Door is opened too often
or too long.
• Door may not be seating
properly, causing cold air
from inside to meet warm
air from outside.
• Interior needs to be cleaned.
• Foods with strong odors
are in the appliance.
• Appliance is not level. It
rocks on the oor when it
is moved slightly.
• Floor is uneven or weak.
Appliance rocks on oor
when it is moved slightly.
• This is normal. When the surrounding
noise is low, you might hear the compressor running while it cools the interior.
• This is normal. Sound will level off or disappear as appliance continues to run.
• This is normal. Sound will level off or disappear as the appliance continues to run.
• This is normal.
• Level the unit. Refer to ”Leveling” in the
FIRST STEPS Section.
• Ensure oor can adequately support the appliance. Level the appliance by putting wood
or metal shims under part of the appliance.
• Re-level or move the appliance slightly. Refer
to “Leveling” in the FIRST STEPS Section.
• The rate of frost buildup and internal
sweating increases. This is normal.
• See “DOOR PROBLEMS”.
• Open door less often.
• See “DOOR PROBLEMS”.
• Clean interior with sponge, warm water,
and baking soda.
• Cover the food tightly.
• This condition can force the cabinet out
of square and misalign the door. Refer to
“Leveling” in the FIRST STEPS Section.
• Level the oor by using wood or metal
shims under the appliance or brace oor
supporting the appliance.
9
Page 10

BEFORE YOU CALL
PROBLEM CAUSE CORRECTION
LIGHT BULB IS NOT ON
Power Avail-
able Light is
not on
• LED may be burned out.
• No electric current is
reaching the appliance.
• The door has been left open
for more than 5 minutes.
• Contact a qualied service dealer.
• See “Appliance does not run” in
APPLIANCE OPERATION.
• Close the door.
10
Page 11

MAJOR APPLIANCE WARRANTY
MAJOR APPLIANCE WARRANTY
Your appliance is covered by a one year limited warranty. For one year from your original date of
purchase, Electrolux will pay all costs for repairing or replacing any parts of this appliance that prove
to be defective in materials or workmanship when such appliance is installed, used and maintained in
accordance with the provided instructions.
Exclusions
If You Need Service
This warranty does not cover the following:
1. Products with original serial numbers that have been removed, altered or cannot be readily determined.
2. Product that has been transferred from its original owner to another party or removed outside
the USA or Canada.
3. Rust on the interior or exterior of the unit.
4. Products purchased “as-is” are not covered by this warranty.
5. Food loss due to any refrigerator or freezer failures.
6. Products used in a commercial setting.
7. Service calls which do not involve malfunction or defects in materials or workmanship, or for appliances
not in ordinary household use or used other than in accordance with the provided instructions.
8. Service calls to correct the installation of your appliance or to instruct you how to use your appliance.
9. Expenses for making the appliance accessible for servicing, such as removal of trim, cupboards,
shelves, etc., which are not a part of the appliance when it is shipped from the factory.
10. Servicecallstorepairorreplaceappliancelightbulbs,airlters,waterlters,other
consumables, or knobs, handles, or other cosmetic parts.
11. Surcharges including, but not limited to, any after hour, weekend, or holiday service calls, tolls, ferry
trip charges, or mileage expense for service calls to remote areas, including the state of Alaska.
12.Damagestothenishofapplianceorhomeincurredduringinstallation,includingbutnot
limitedtooors,cabinets,walls,etc.
13. Damages caused by: services performed by unauthorized service companies; use of parts other than
genuine Electrolux parts or parts obtained from persons other than authorized service companies; or
externalcausessuchasabuse,misuse,inadequatepowersupply,accidents,res,oractsofGod.
DISCLAIMER OF IMPLIED WARRANTIES; LIMITATION OF REMEDIES
CUSTOMER’S SOLE AND EXCLUSIVE REMEDY UNDER THIS LIMITED WARRANTY SHALL BE PRODUCT
REPAIR OR REPLACEMENT AS PROVIDED HEREIN. CLAIMS BASED ON IMPLIED WARRANTIES,
INCLUDINGWARRANTIESOFMERCHANTABILITYORFITNESSFORAPARTICULARPURPOSE,ARE
LIMITED TO ONE YEAR OR THE SHORTEST PERIOD ALLOWED BY LAW, BUT NOT LESS THAN ONE
YEAR.ELECTROLUXSHALLNOTBELIABLEFORCONSEQUENTIALORINCIDENTALDAMAGESSUCH
ASPROPERTYDAMAGEANDINCIDENTALEXPENSESRESULTINGFROMANYBREACHOFTHIS
WRITTEN LIMITED WARRANTY OR ANY IMPLIED WARRANTY. SOME STATES AND PROVINCES DO
NOTALLOWTHEEXCLUSIONORLIMITATIONOFINCIDENTALORCONSEQUENTIALDAMAGES,
OR LIMITATIONS ON THE DURATION OF IMPLIED WARRANTIES, SO THESE LIMITATIONS OR
EXCLUSIONSMAYNOTAPPLYTOYOU.THISWRITTENWARRANTYGIVESYOUSPECIFICLEGAL
RIGHTS.YOUMAYALSOHAVEOTHERRIGHTSTHATVARYFROMSTATETOSTATE.
This warranty only applies in the USA and Canada. In the USA, your appliance is warranted by
Electrolux Major Appliances North America, a division of Electrolux Home Products, Inc. In Canada,
your appliance is warranted by Electrolux Canada Corp. Electrolux authorizes no person to change
or add to any obligations under this warranty. Obligations for service and parts under this warranty
mustbeperformedbyElectroluxoranauthorizedservicecompany.Productfeaturesorspecications
as described or illustrated are subject to change without notice.
Keep your receipt, delivery slip, or some other appropriate payment record to establish the warranty
period should service be required. If service is performed, it is in your best interest to obtain and
keep all receipts. Service under this warranty must be obtained by contacting Electrolux at the
addresses or phone numbers below.
Canada
1.800.265.8352
Electrolux Canada Corp.
5855 Terry Fox Way
Mississauga, Ontario, Canada
11
 Loading...