

Cricut Explore User Manual

User Manual
Cricut Explore™ design-and-cut system
From inspiration to creation in just a few clicks!

Cricut Explore® User Manual Index
1. Machine Setup
A. Set Up Mac
B. Set Up PC
C. First Project
2. Smart Set™ Dial
A. Smart Set™ Dial
B. Custom Settings
3. Cartridge Linking
4. Image Library
A. Search/Insert Images
B. Search for Image Sets/Cartridges
C. Using Image Filters
5. Make It Now™ Projects
6. Cutting Your Own Images
A. Basic Upload
B. Vector Upload (.svg or .dxf files)
9. Layers Panel
A. Determine the Line Type (Cut, Write, Score)
B. Change Color on Image Layers
C. Group/Ungroup Images and Layers
D. Duplicate/Delete an Image or Image Group
E. Hide/Unhide an Image Layer
F. Weld Tool
G. Contour Tool
H. Attach Tool
10. Sync Panel
11. Canvas Panel
12. Mat Preview
13. Purchasing Images
A. Single Image
B. Image Sets
C. Subscription
D. Upgrade Your Purchase
Working with Images/Edit Panel
7.
A. Selecting an Image
B. Sizing Images
C. Rotate/Mirror/Position
8. Working with Text/Edit Panel
A. Adding Text
B. Editing Text, Selecting Text
C. Ungrouping Fonts
Section 1A
Machine Setup - Set up MAC users
Machine Setup
Set up MAC users
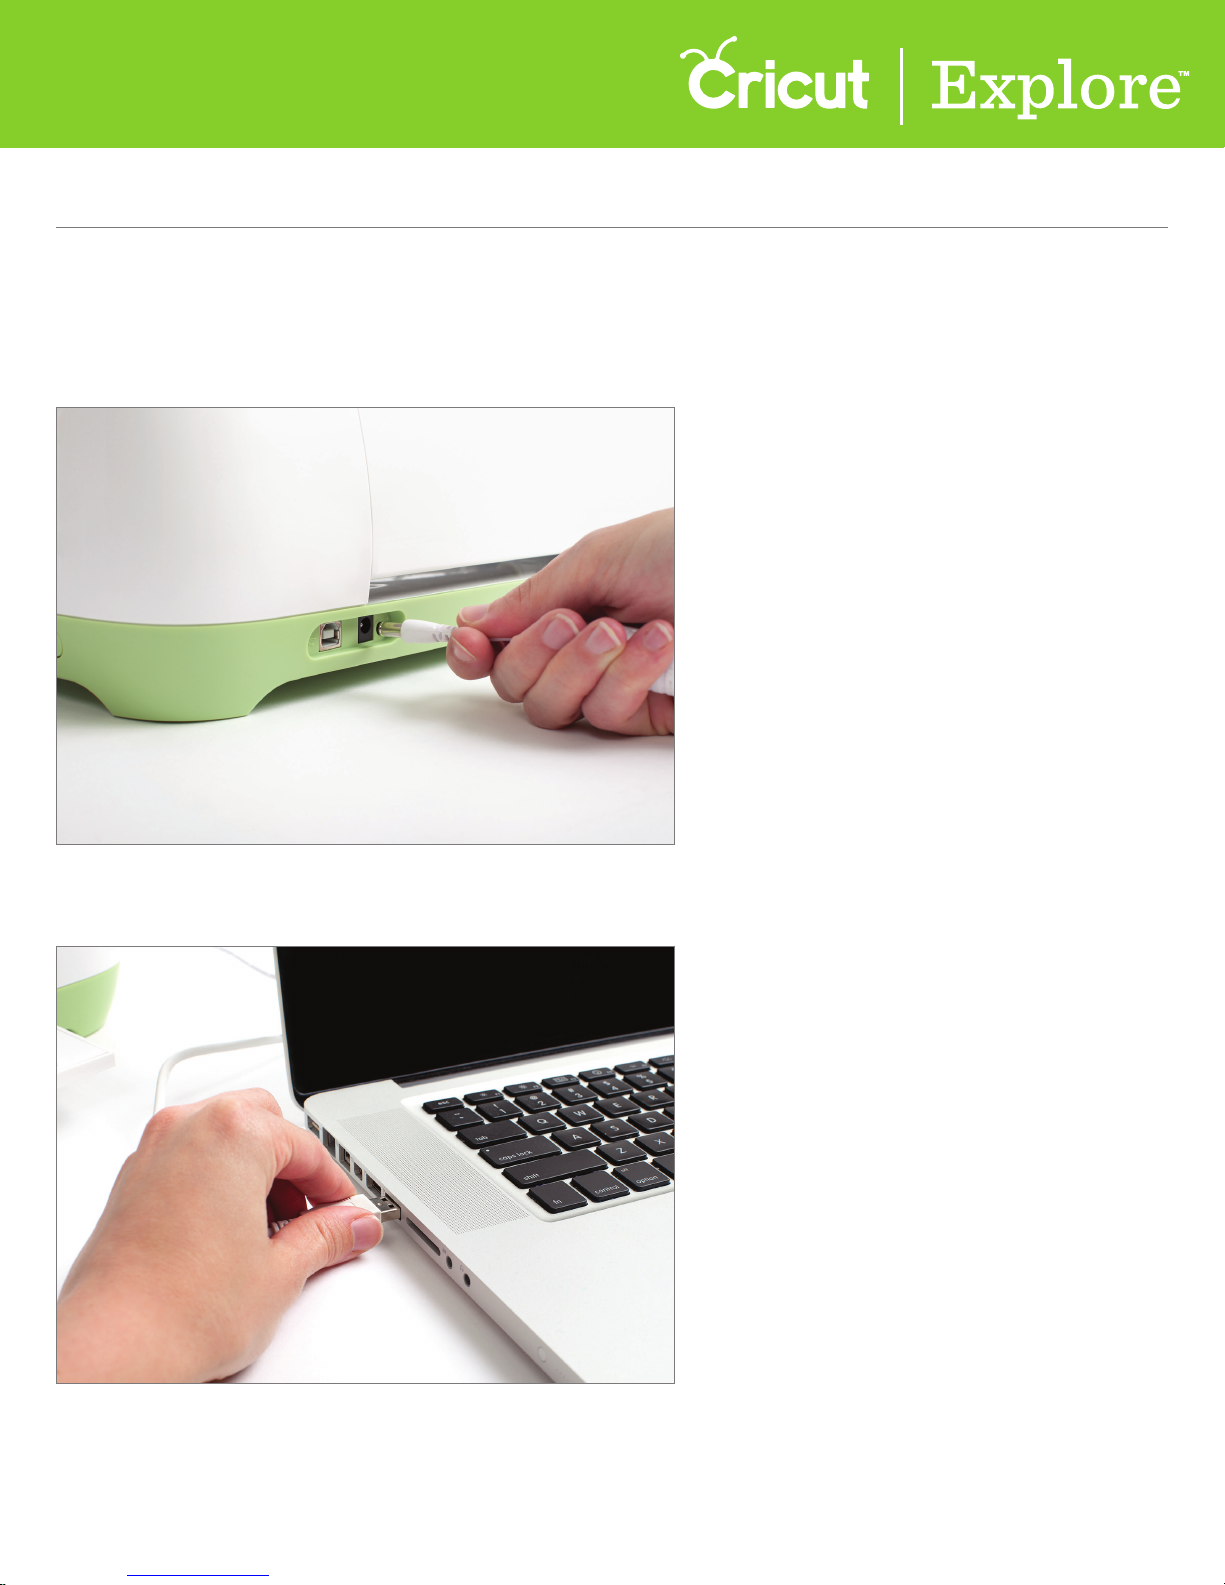
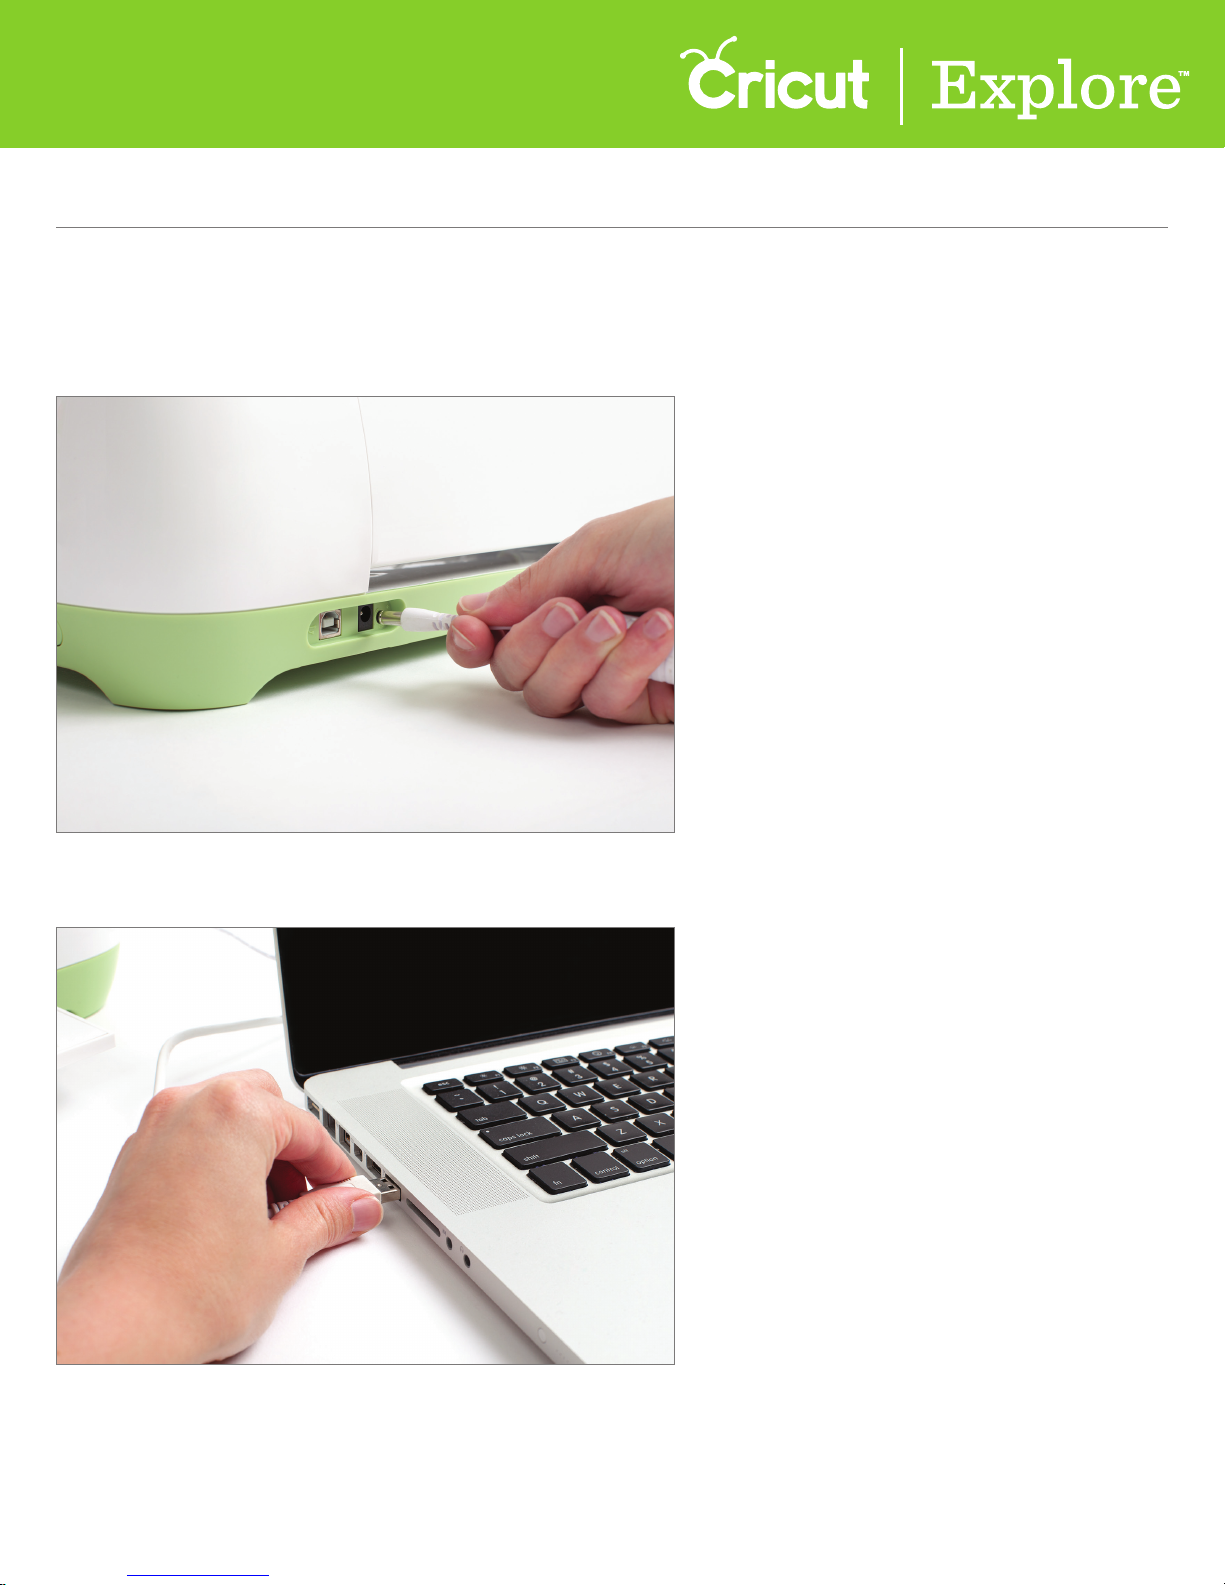
Step 1 Plug in your Cricut Explore® machine and power it on.
Step 2 Connect your Cricut Explore® machine to your computer using the USB cord.
Section 1A Page 1
Section 1A
Machine Setup - Set up MAC users
Machine Setup (cont.)
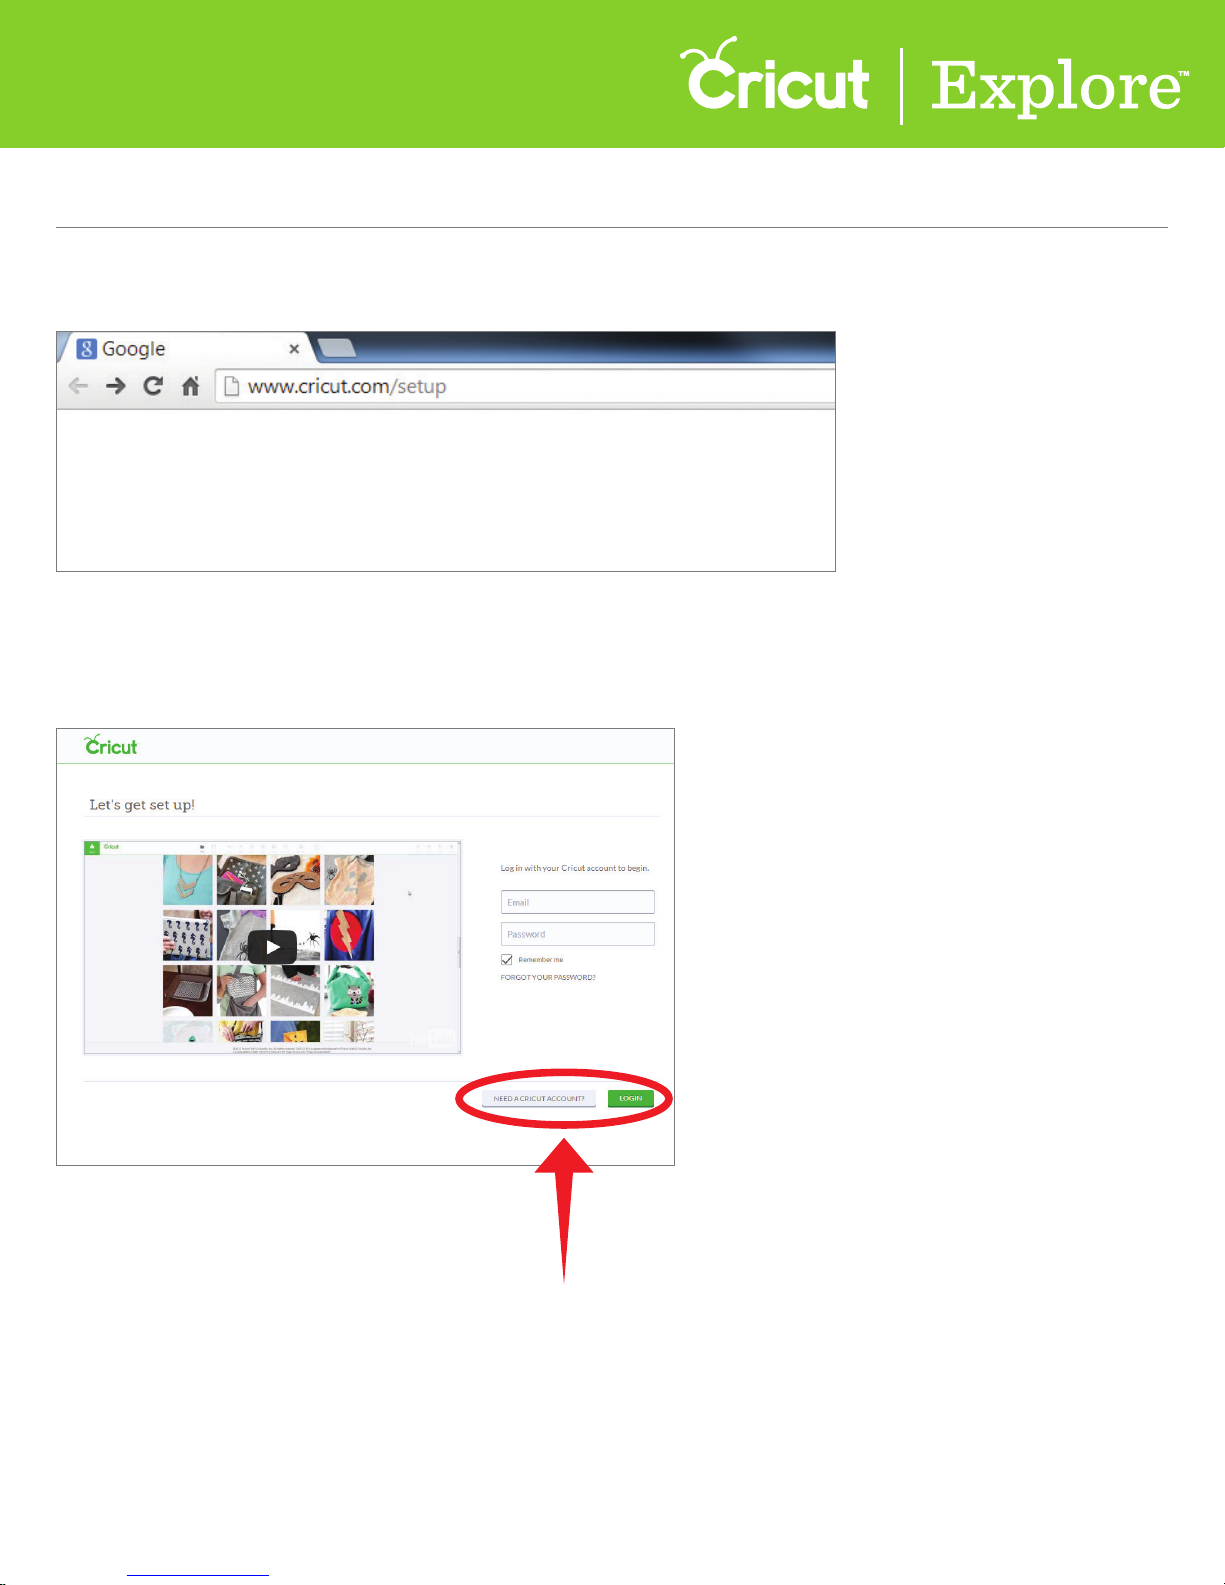
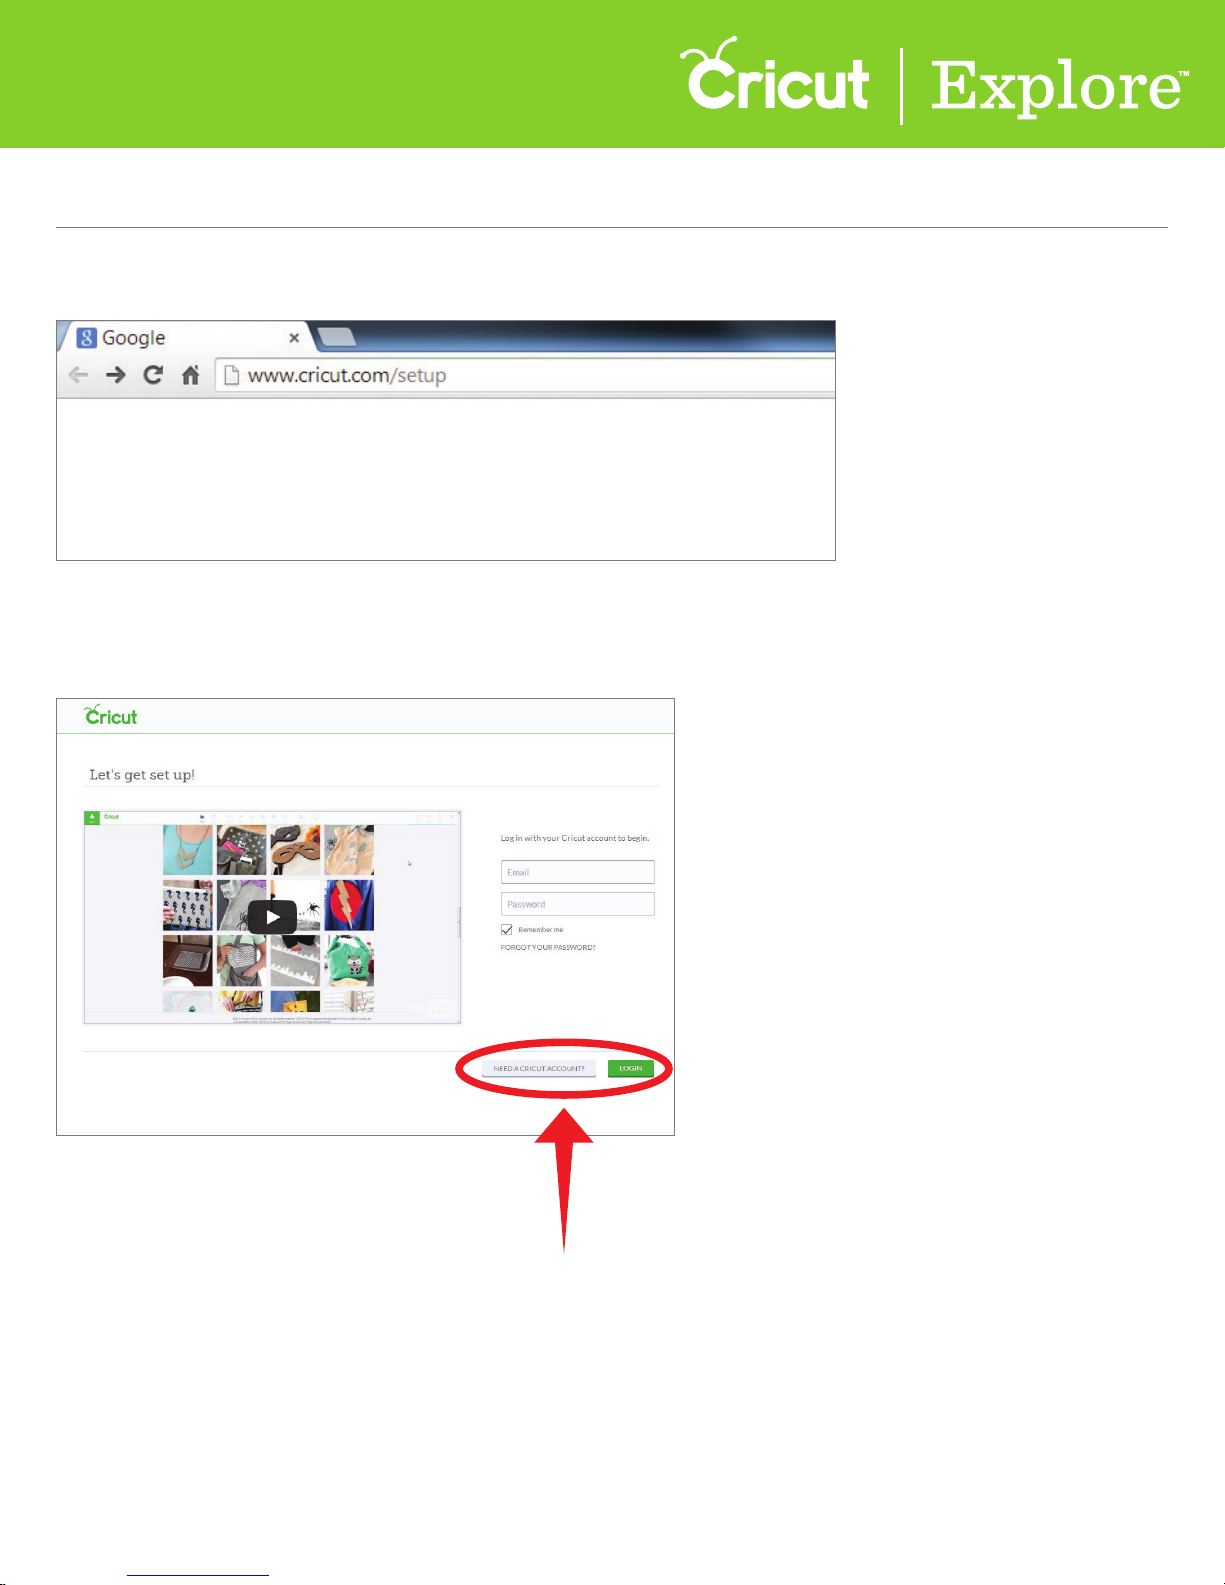
Step 3 Open your web browser and go to www.cricut.com/setup
Step 4 Log in to your Cricut.com account. If you are new to Cricut.com,
click “Need a Cricut Account” to set up an account.
Section 1A Page 2
Section 1A
Machine Setup - Set up MAC users
Machine Setup (cont.)
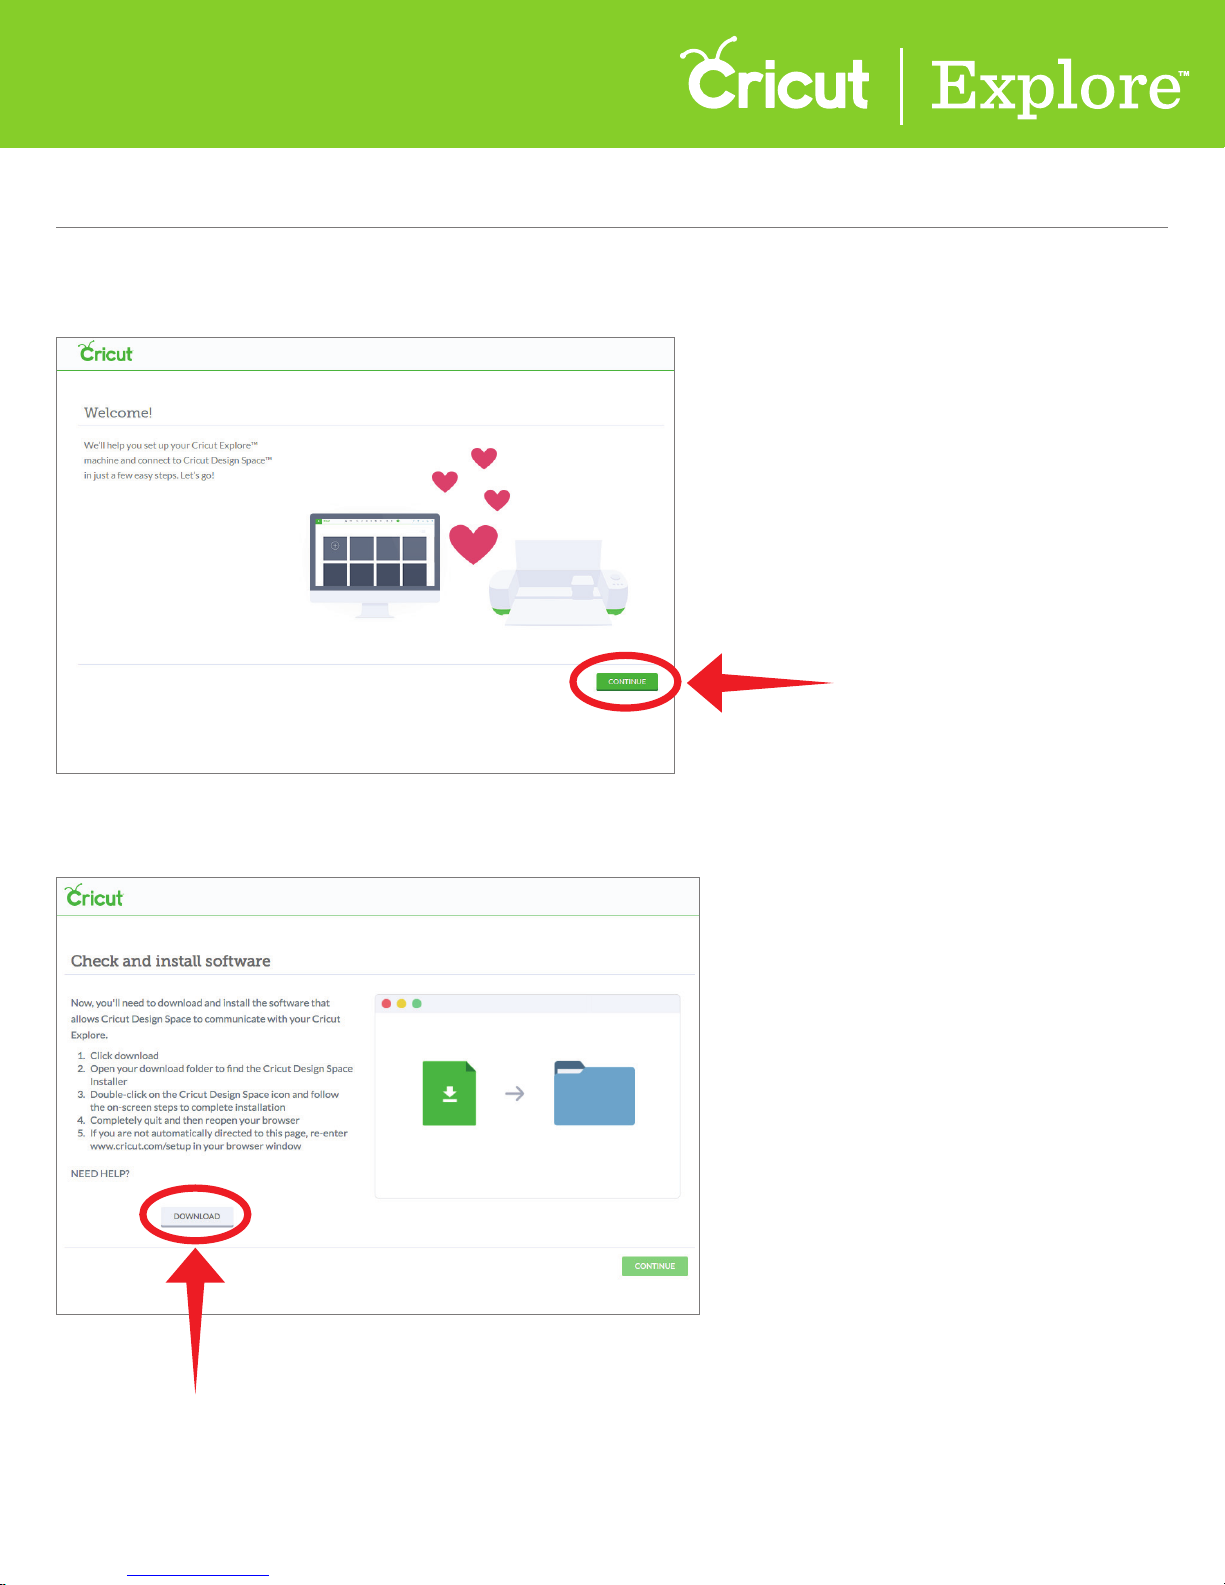
Step 5 You are now ready to set up your Cricut Explore® machine and connect to Cricut Design Space™.
Click “Continue” to begin the set-up process.
Step 6 Click “Download.”
Section 1A Page 3
Section 1A
Machine Setup - Set up MAC users
Machine Setup (cont.)
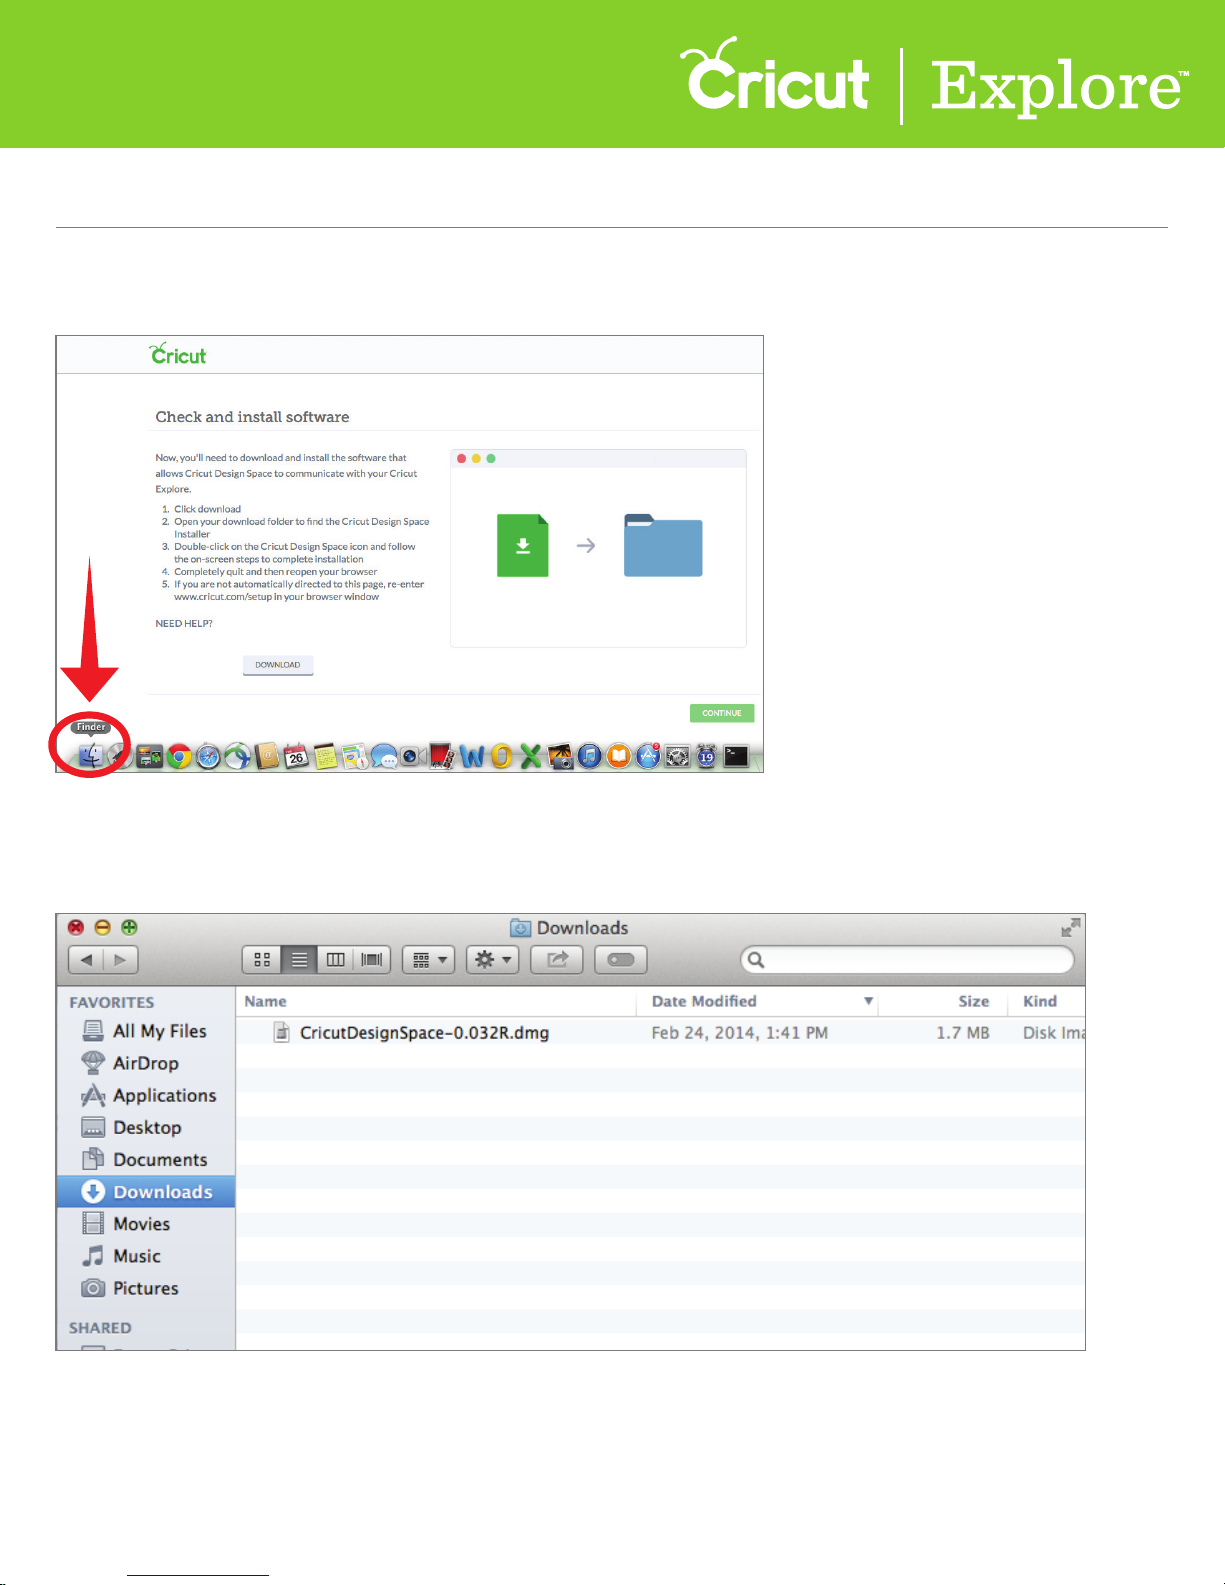
Step 7 Open Finder in the Mac toolbar.
Step 8 Go to the Downloads folder on your computer and double-click the CricutDesignSpace file.
Section 1A Page 4
Section 1A
Machine Setup - Set up MAC users
Machine Setup (cont.)
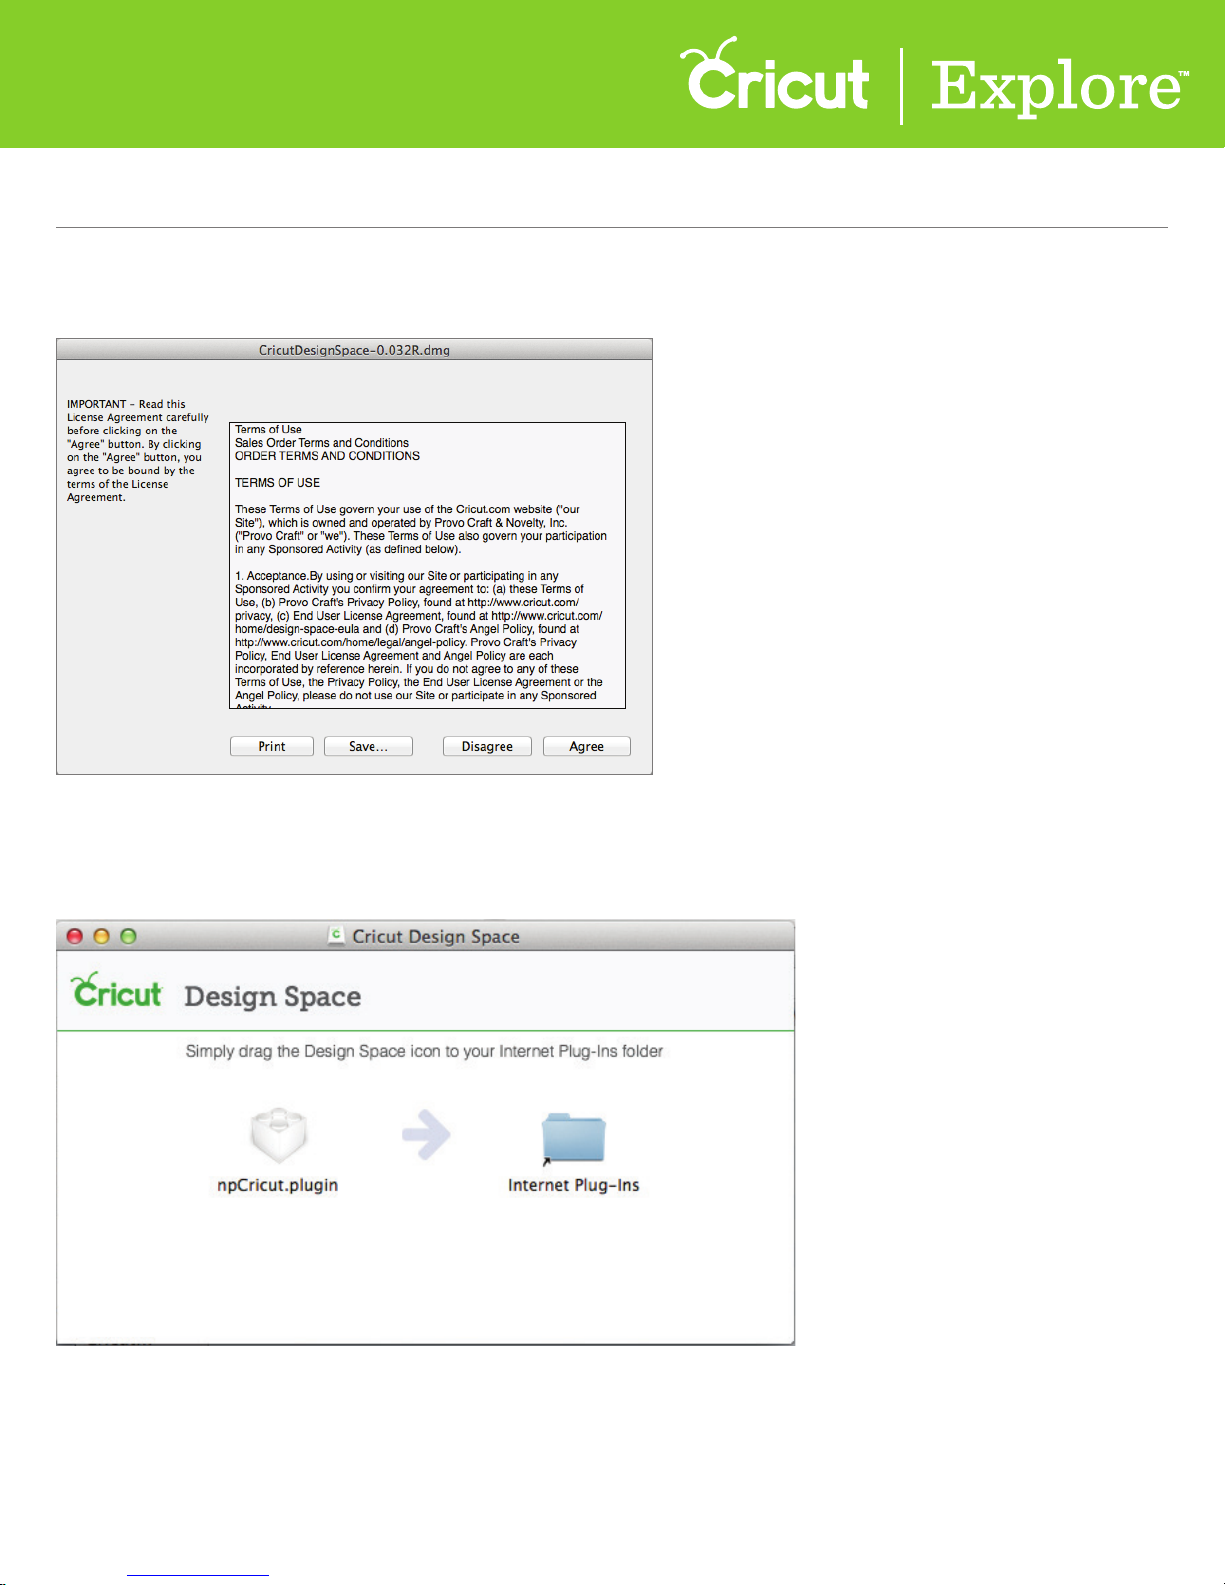
Step 9 Review and agree to the Terms & Conditions.
Step 10 Drag the npCricut.plugin icon to the Internet Plug-Ins folder.
Section 1A Page 5
Section 1A
Machine Setup - Set up MAC users
Machine Setup (cont.)
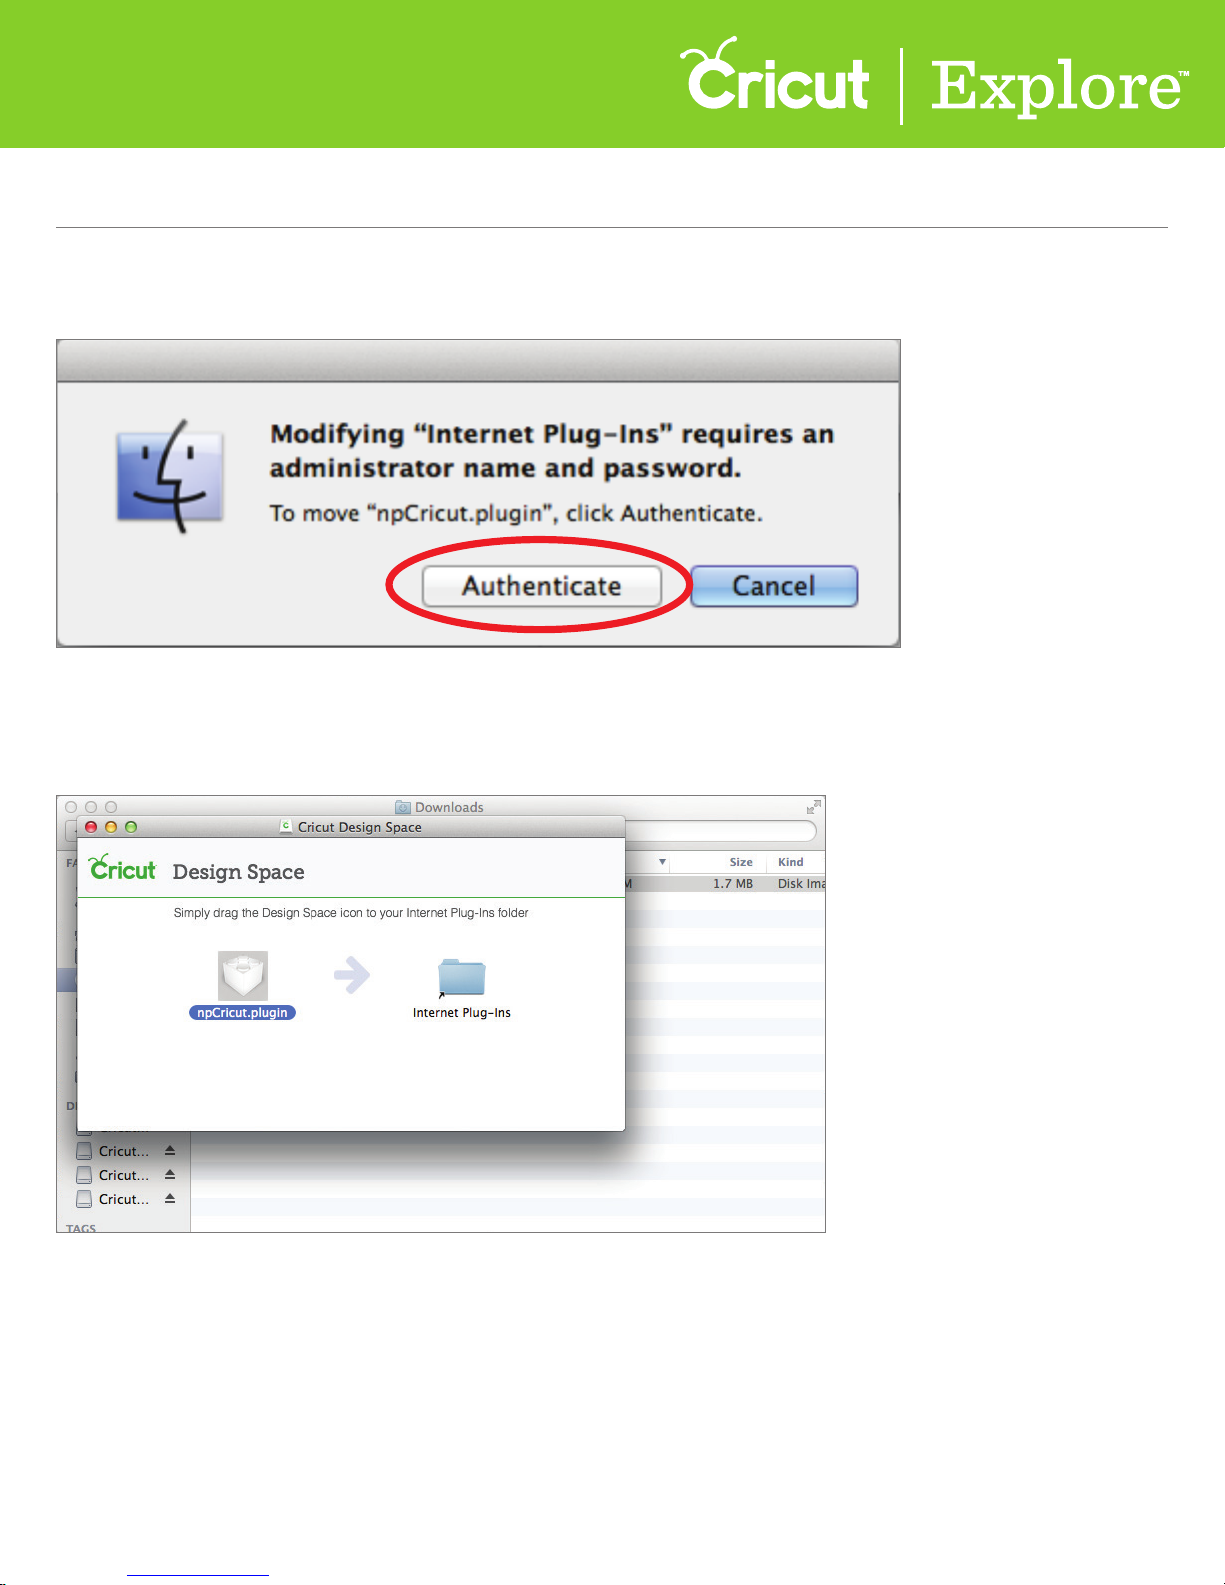
Step 11 Click “Authenticate.” Depending on your computer settings,
you may be prompted to enter your administrator name and password.
Step 12 Close the Cricut Design Space™ and Downloads windows to return to your browser.
Section 1A Page 6
Section 1A
Machine Setup - Set up MAC users
Machine Setup (cont.)
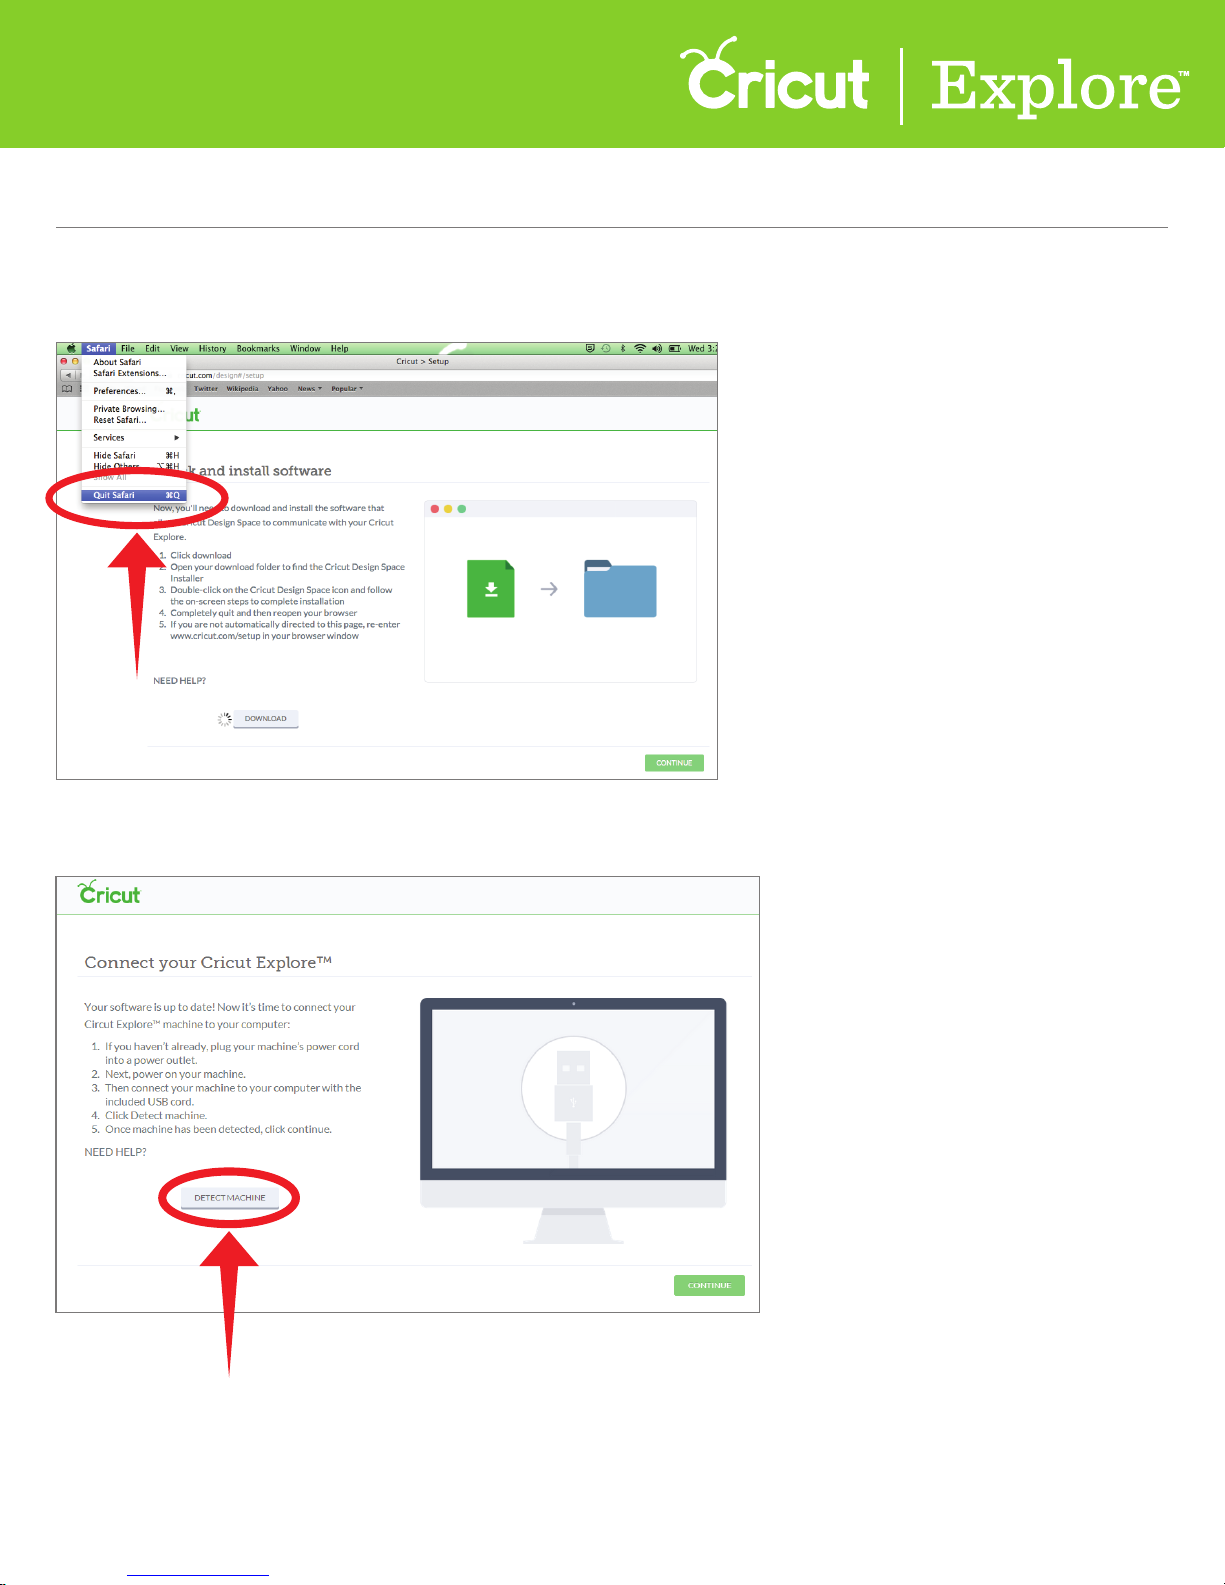
Step 13 Completely quit your browser; then reopen it and return to
www.cricut.com/setup to continue the set-up process.
Step 14 Click “Detect Machine.” When your machine has been detected, click “Continue.”
Section 1A Page 7

Section 1A
Machine Setup - Set up MAC users
Machine Setup (cont.)
Step 15 Check the box to accept your trial subscription, and then click “Continue”.
Your free trial subscription to the Cricut Image Library gives you access to over 25,000 images
and 200 fonts. There are no strings attached and no credit cards required—just enjoy your access to all
non-licensed images in the Cricut Library, over 25,000 images during your free subscription trail.
Get more information including a list of all images and image sets included in the subscription, at
us.cricut.com/subscriptionlist
Tip: To gain access to your free trial subscription, please make sure the check box is marked before
clicking “Continue.”
Step 16 Your Cricut Explore® machine is all set up and you’re ready to write and cut your first project!
Section 1A Page 8
Section 1B
Machine Setup - Set up PC users
Machine Setup (cont.)
Set up PC users
Step 1 Plug in your Cricut Explore® machine and power it on.
Step 2 Connect your Cricut Explore® machine to your computer using the USB cord.
Section 1B Page 1
Section 1B
Machine Setup - Set up PC users
Machine Setup (cont.)
Step 3 Open your web browser and go to www.cricut.com/setup
Step 4 Log in to your Cricut.com account. If you are new to Cricut.com,
click “Need a Cricut Account” to set up an account.
Section 1B Page 2
Section 1B
Machine Setup - Set up PC users
Machine Setup (cont.)
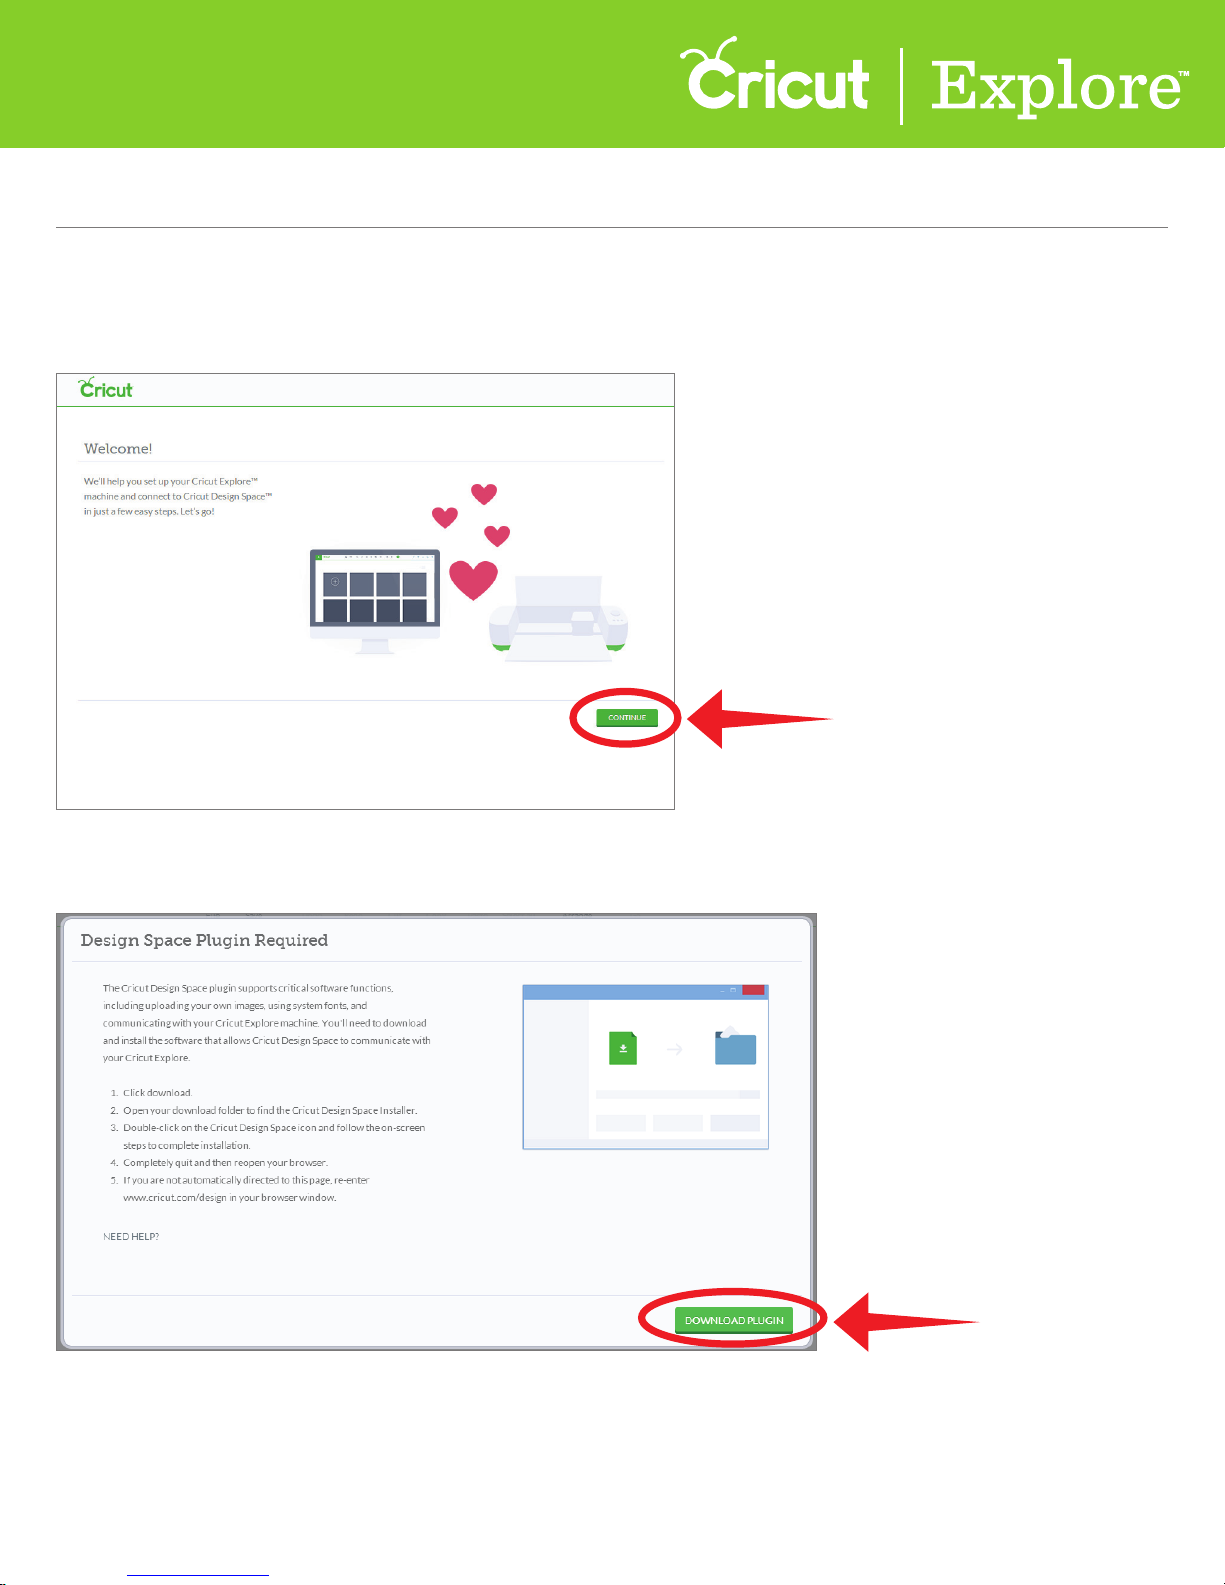
Step 5 You are now ready to set up your Cricut Explore® machine and connect to
Cricut Design Space™. Click “Continue” to begin the set-up process.
Step 6 Click “Download Plugin.”
Section 1B Page 3
Section 1B
Machine Setup - Set up PC users
Machine Setup (cont.)
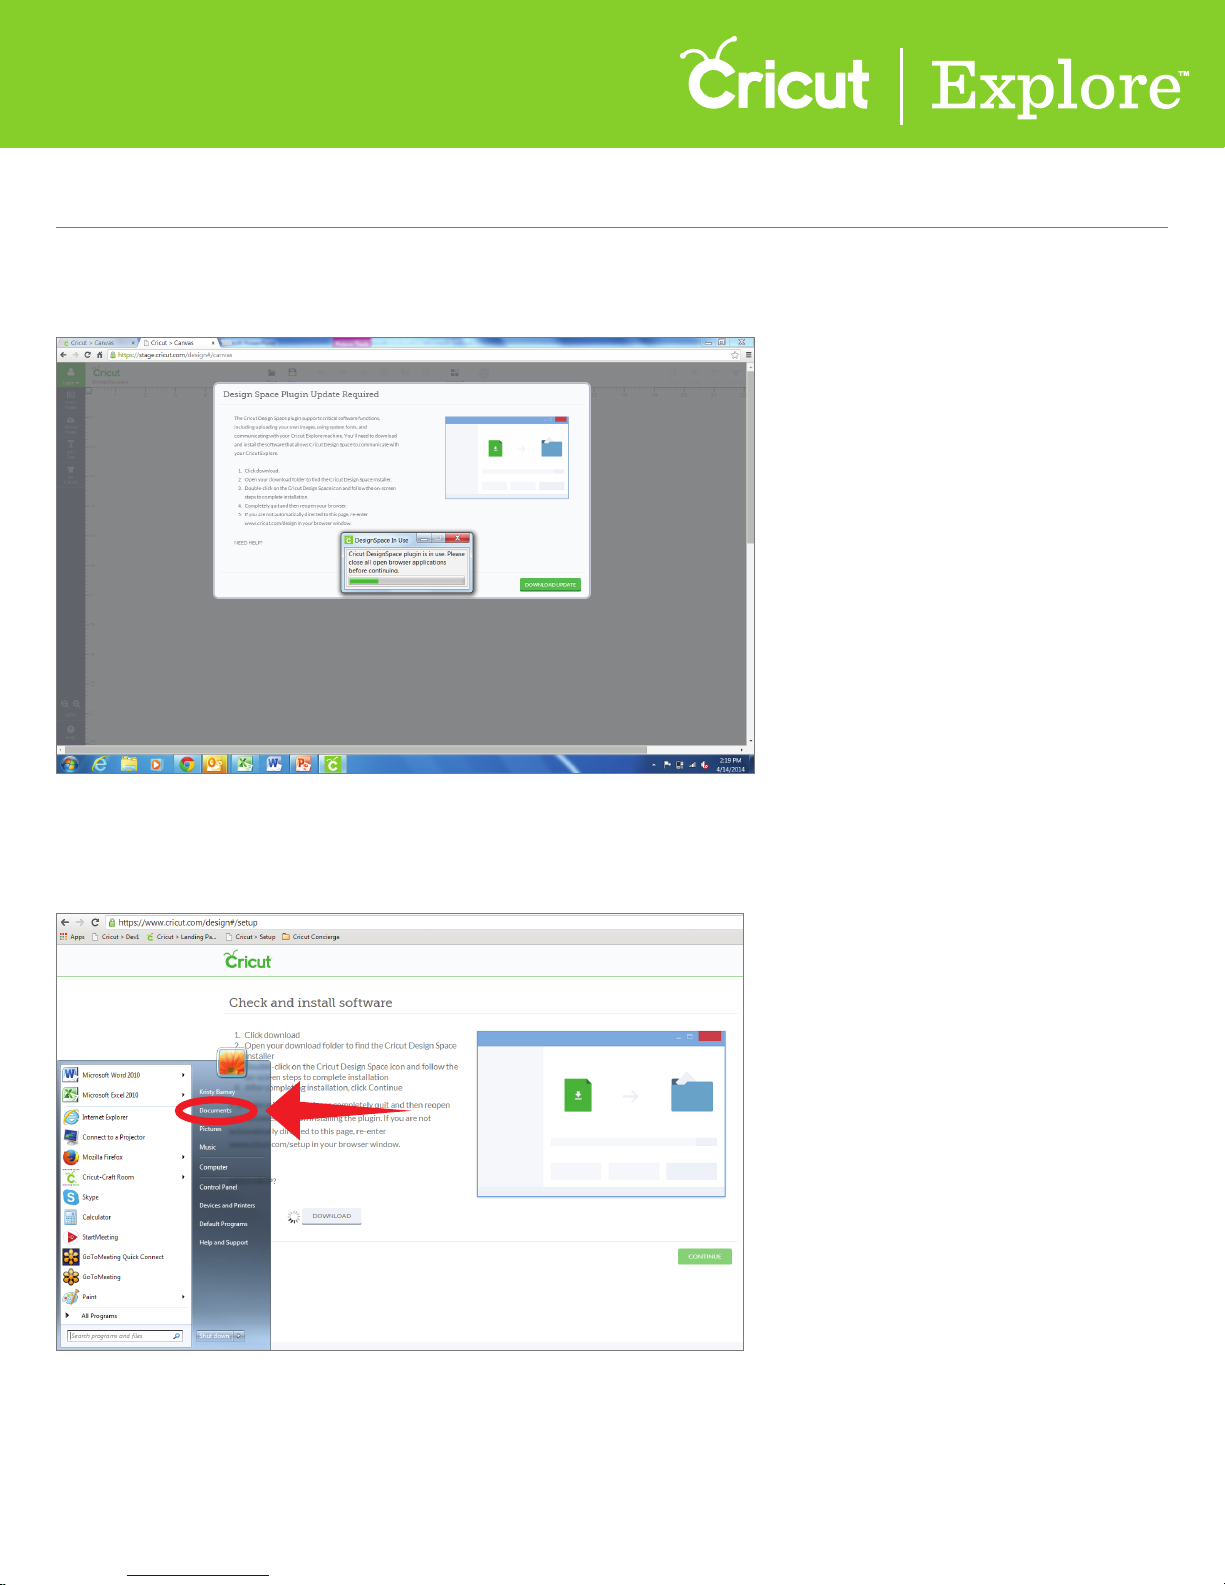
Step 7 Close your browser.
Step 8 Click the Start menu and then open your Documents folder.
Section 1B Page 4
Section 1B
Machine Setup - Set up PC users
Machine Setup (cont.)
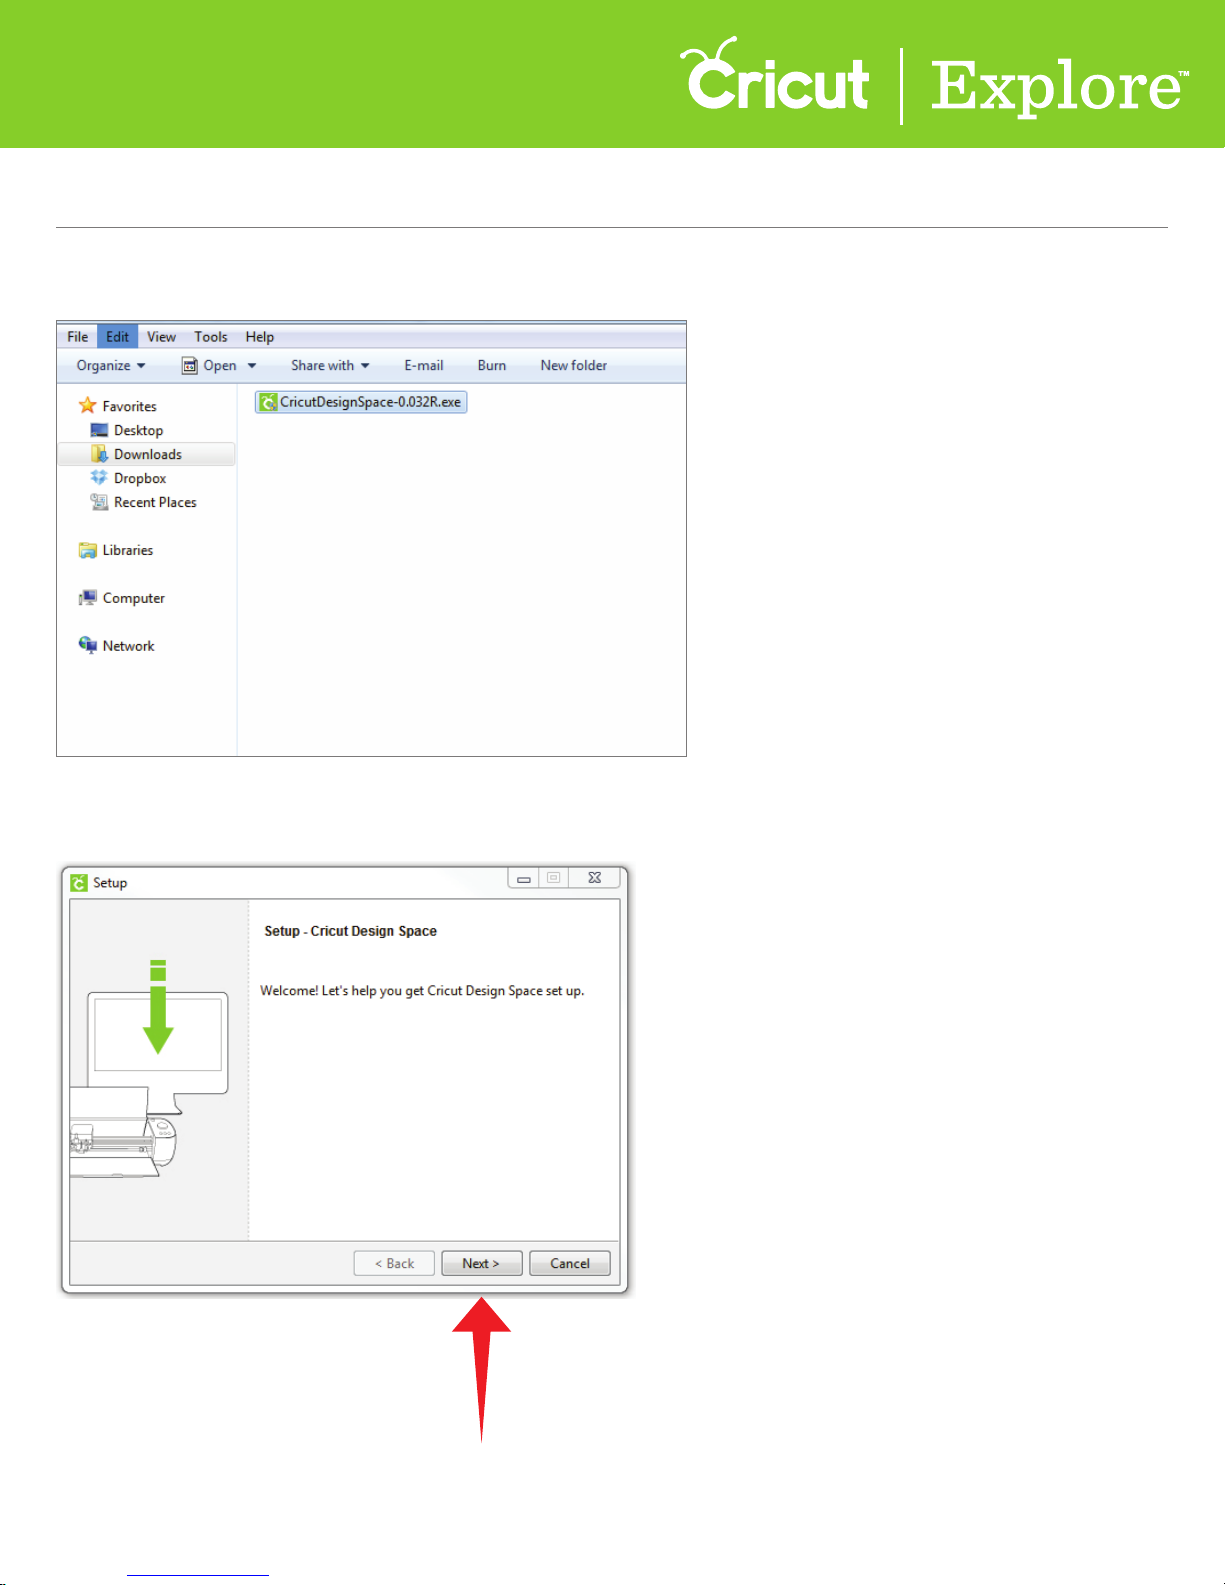
Step 9 Select the Downloads folder and then double-click on the CricutDesignSpace file.
Step 10 The Setup Cricut Design Space™ window will open. Click “Next” to continue.
Section 1B Page 5
Section 1B
Machine Setup - Set up PC users
Machine Setup (cont.)
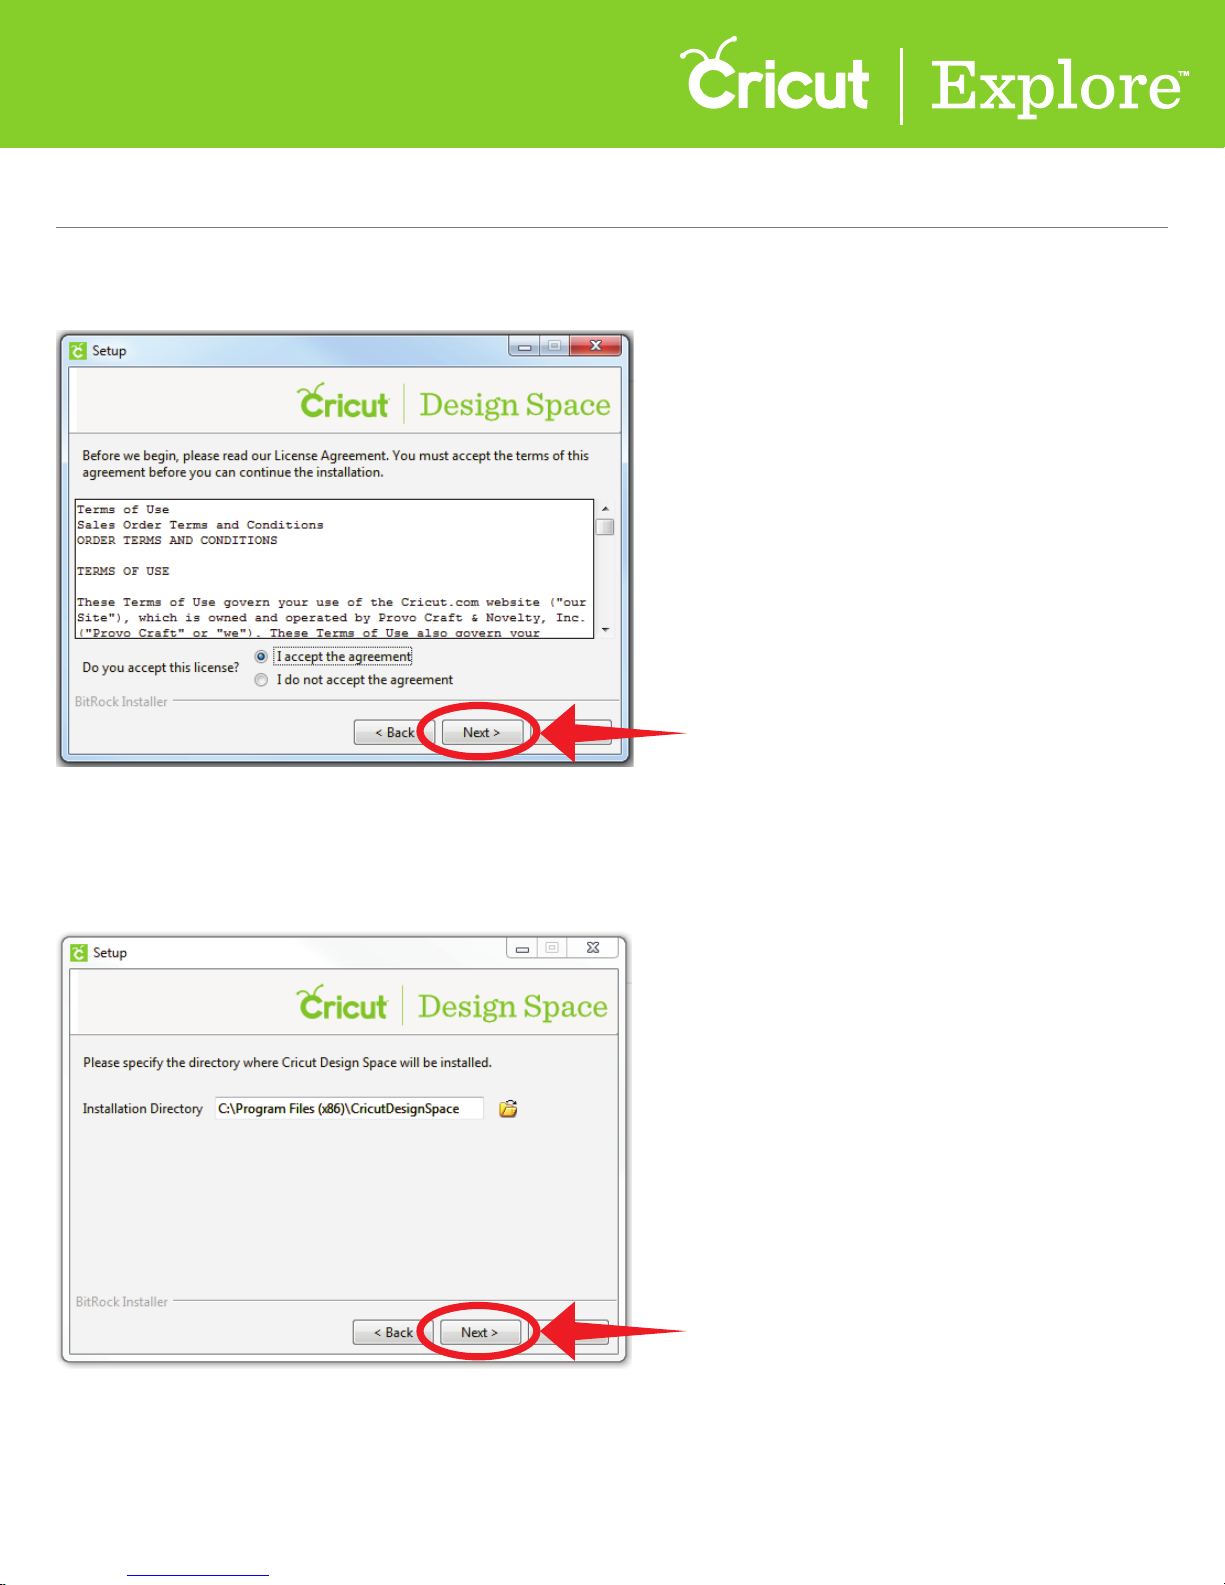
Step 11 Review and accept the Terms and Conditions. Click “Next” to continue.
Step 12 Decide where you would like the file to be installed
(it will default to the Program Files folder). Click “Next” to continue.
Section 1B Page 6
Section 1B
Machine Setup - Set up PC users
Machine Setup (cont.)
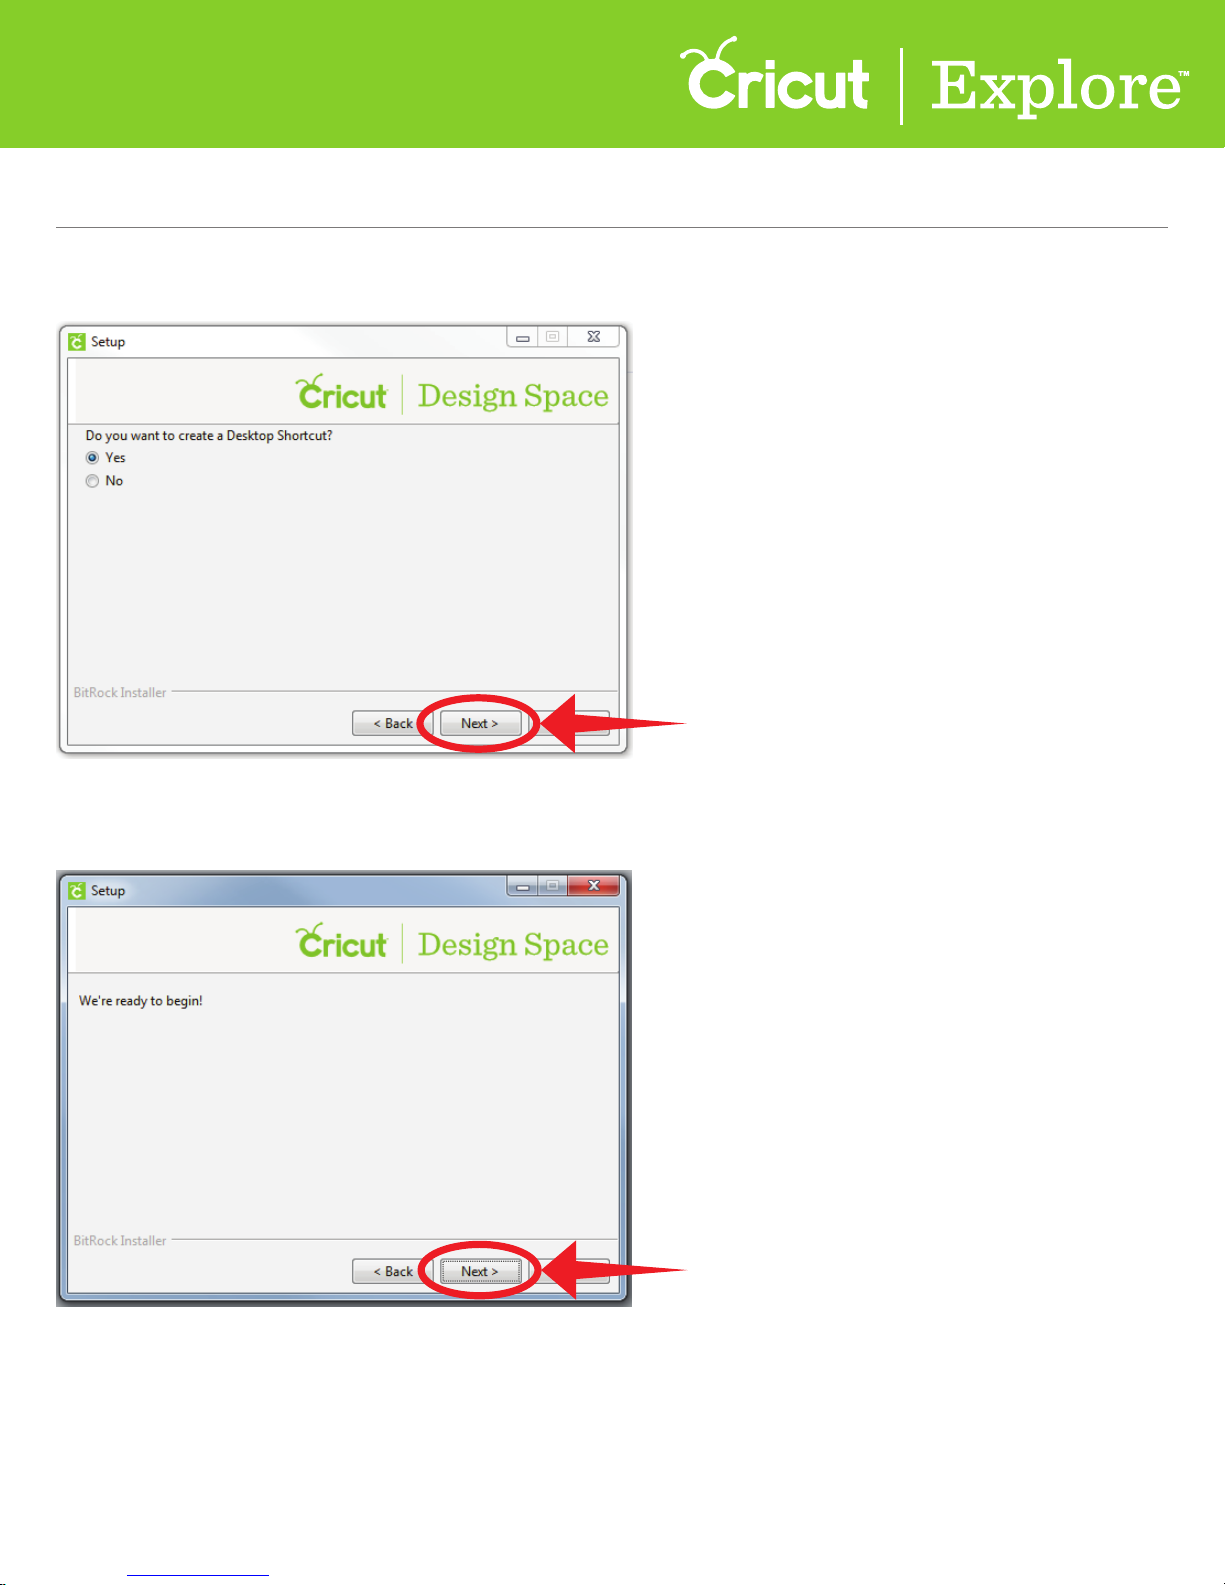
Step 13 Decide if you would like a Desktop shortcut. Click “Next” to continue.
Step 14 Click “Next” to install the Internet plug in.
Section 1B Page 7
Section 1B
Machine Setup - Set up PC users
Machine Setup (cont.)
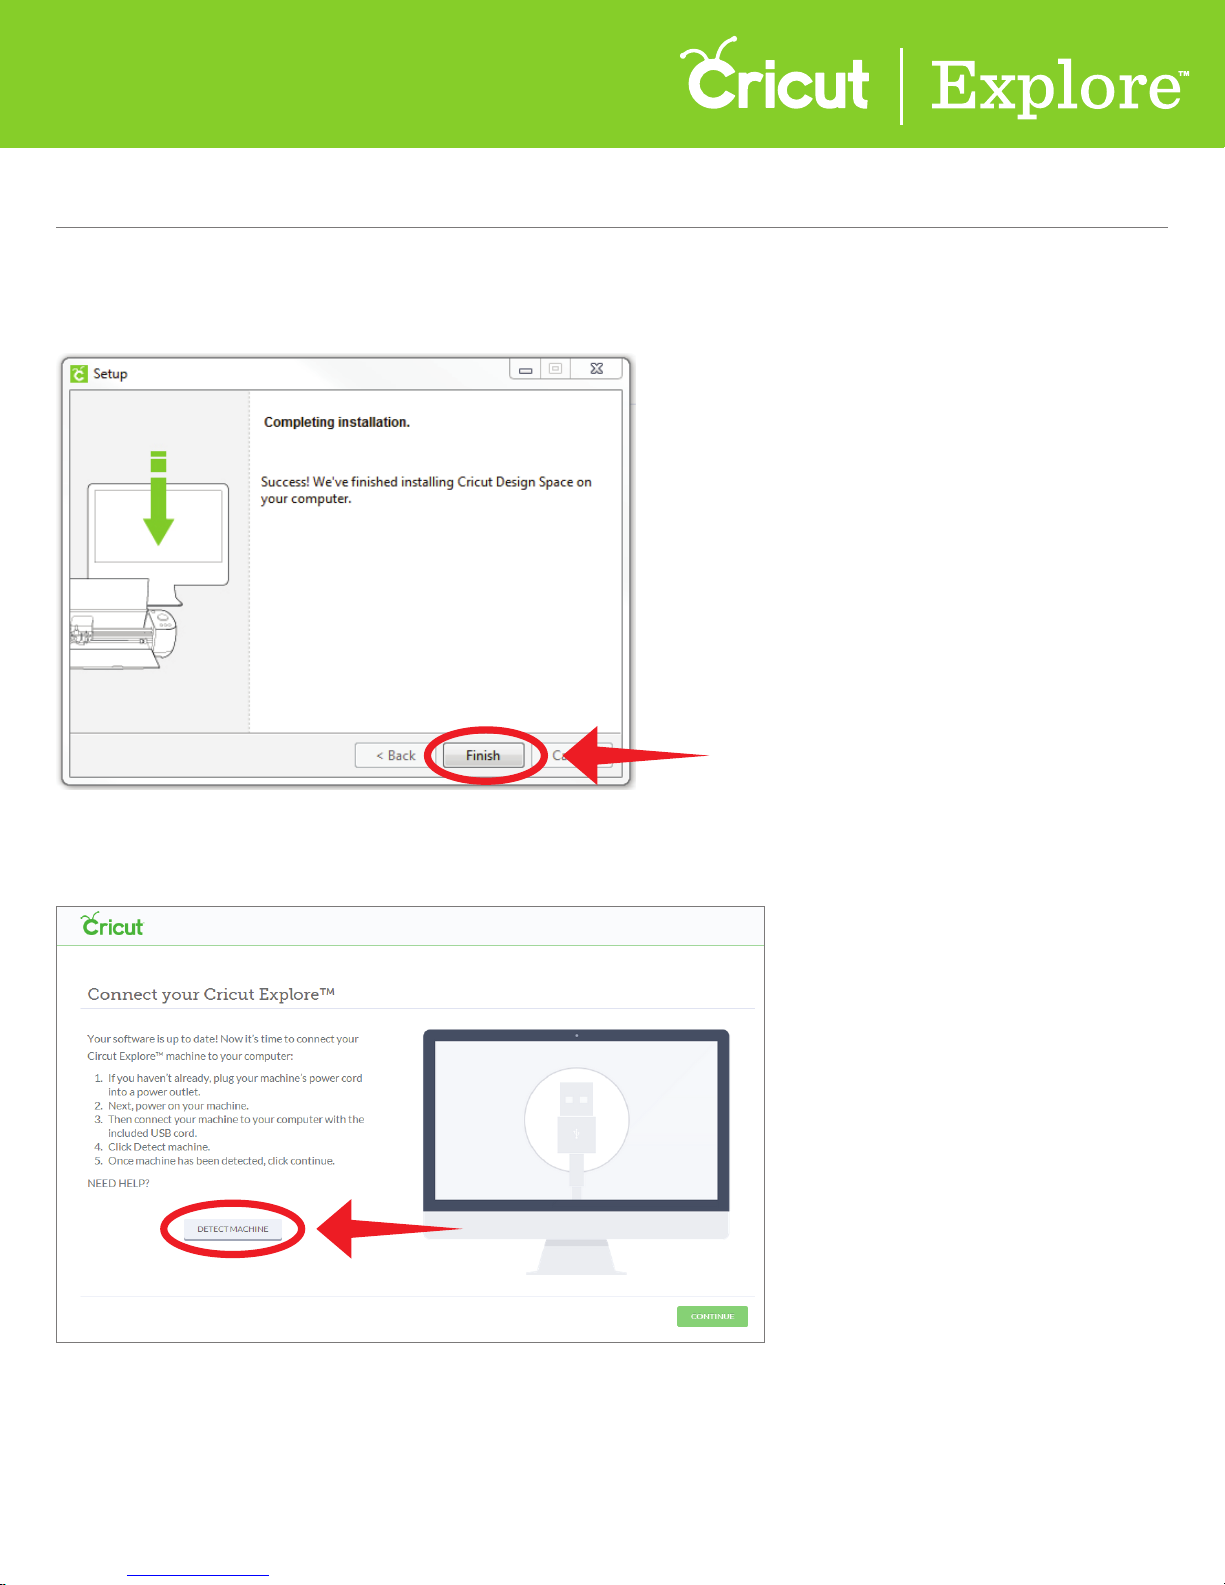
Step 15 Cricut Design Space™ has been successfully installed. Click “Finish,”
open your browser, and return to www.cricut.com/setup.
Step 16 Click “Detect Machine.” When your machine has been detected, click “Continue.”
Section 1B Page 8

Section 4B
Section 1B
Image library - Insert/Search for images
Machine Setup - Set up PC users
Machine Setup (cont.)
Step 17 Check the box to accept your trial subscription, and then click “Continue.”
Your free trial subscription to the Cricut Image Library gives you access to over 25,000 images
and 200 fonts. There are no strings attached and no credit cards required—just enjoy your access to all
non-licensed images in the Cricut Library—over 25,000 images—during your free subscription trial.
Get more information including a list of all images and image sets included in the subscription, at
us.cricut.com/subscriptionlist
Tip: To gain access to your free trial subscription, please make sure the check box is marked before
clicking “Continue.”
Step 18 Your Cricut Explore® machine is all set up and you’re ready to write and cut your first project!
Section 1B Page 9
Section 1C
Machine setup - First Project
Machine Setup (cont.)
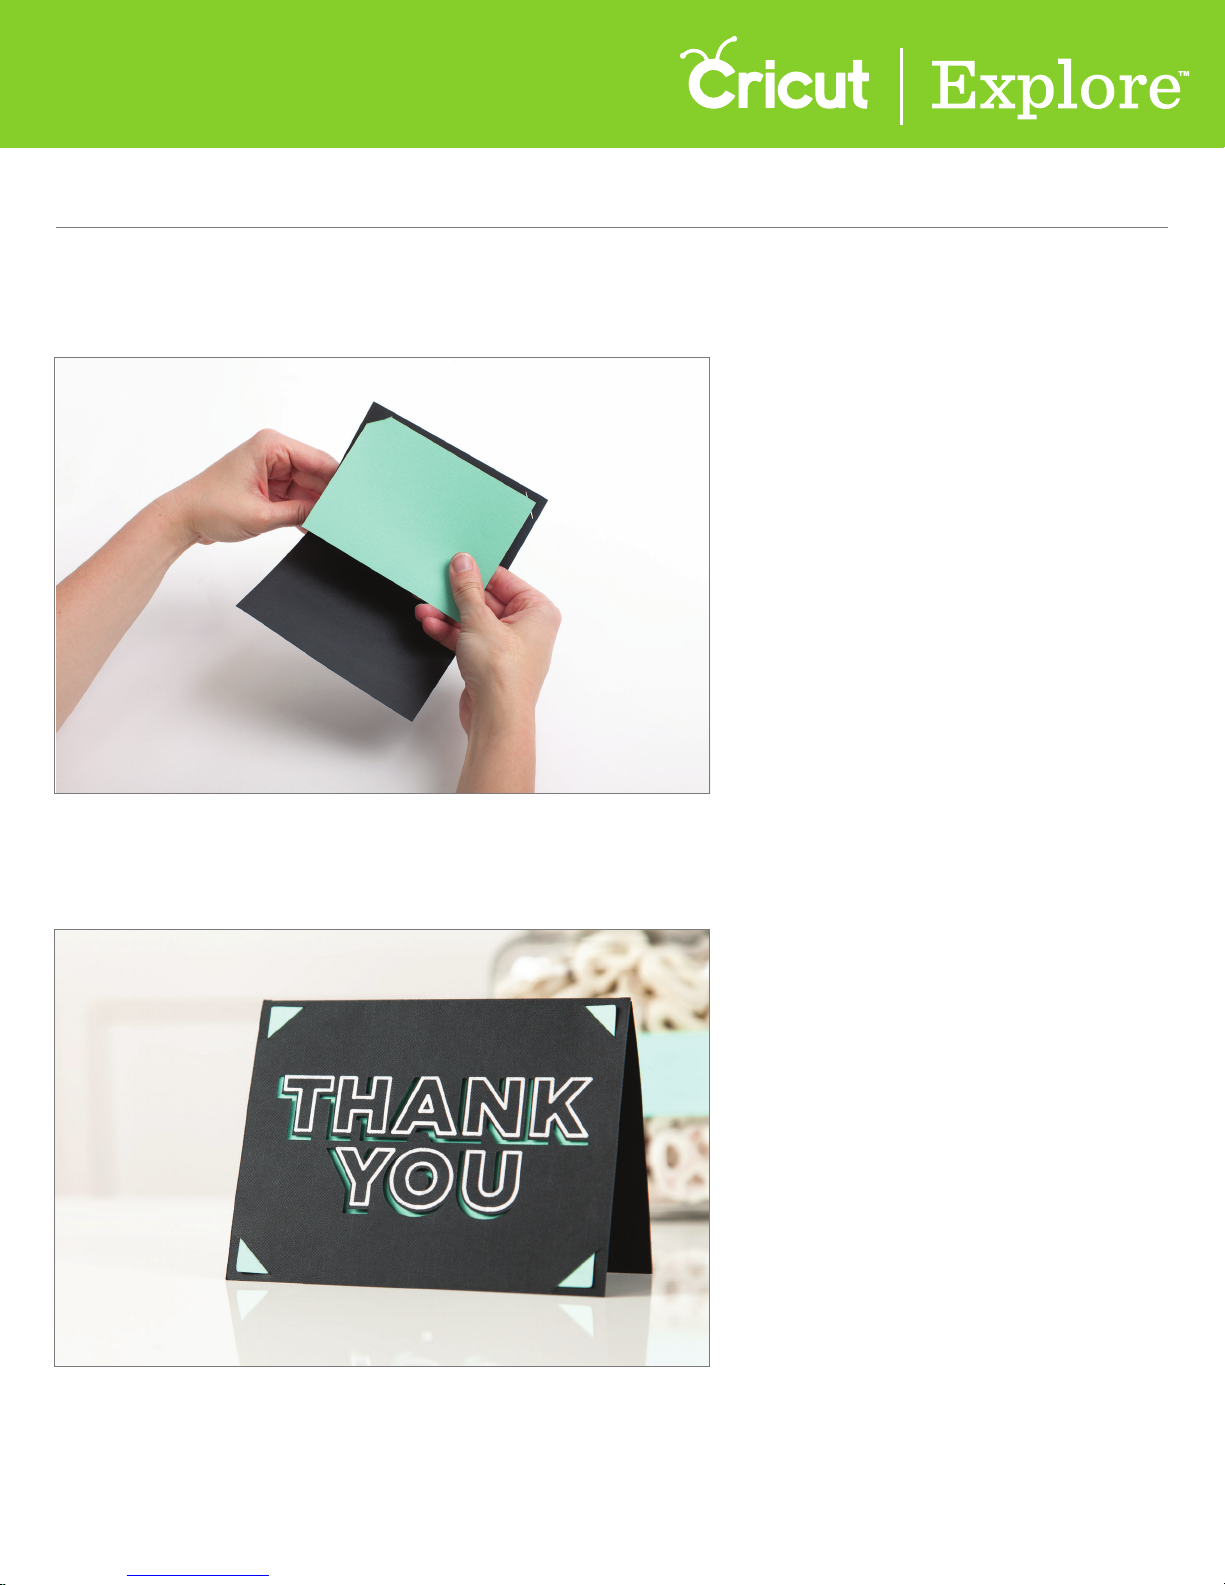
Use the materials found in the box to complete a “Thank you” card and watch as your Cricut Explore®
machine writes and cuts all in one step.
First Project
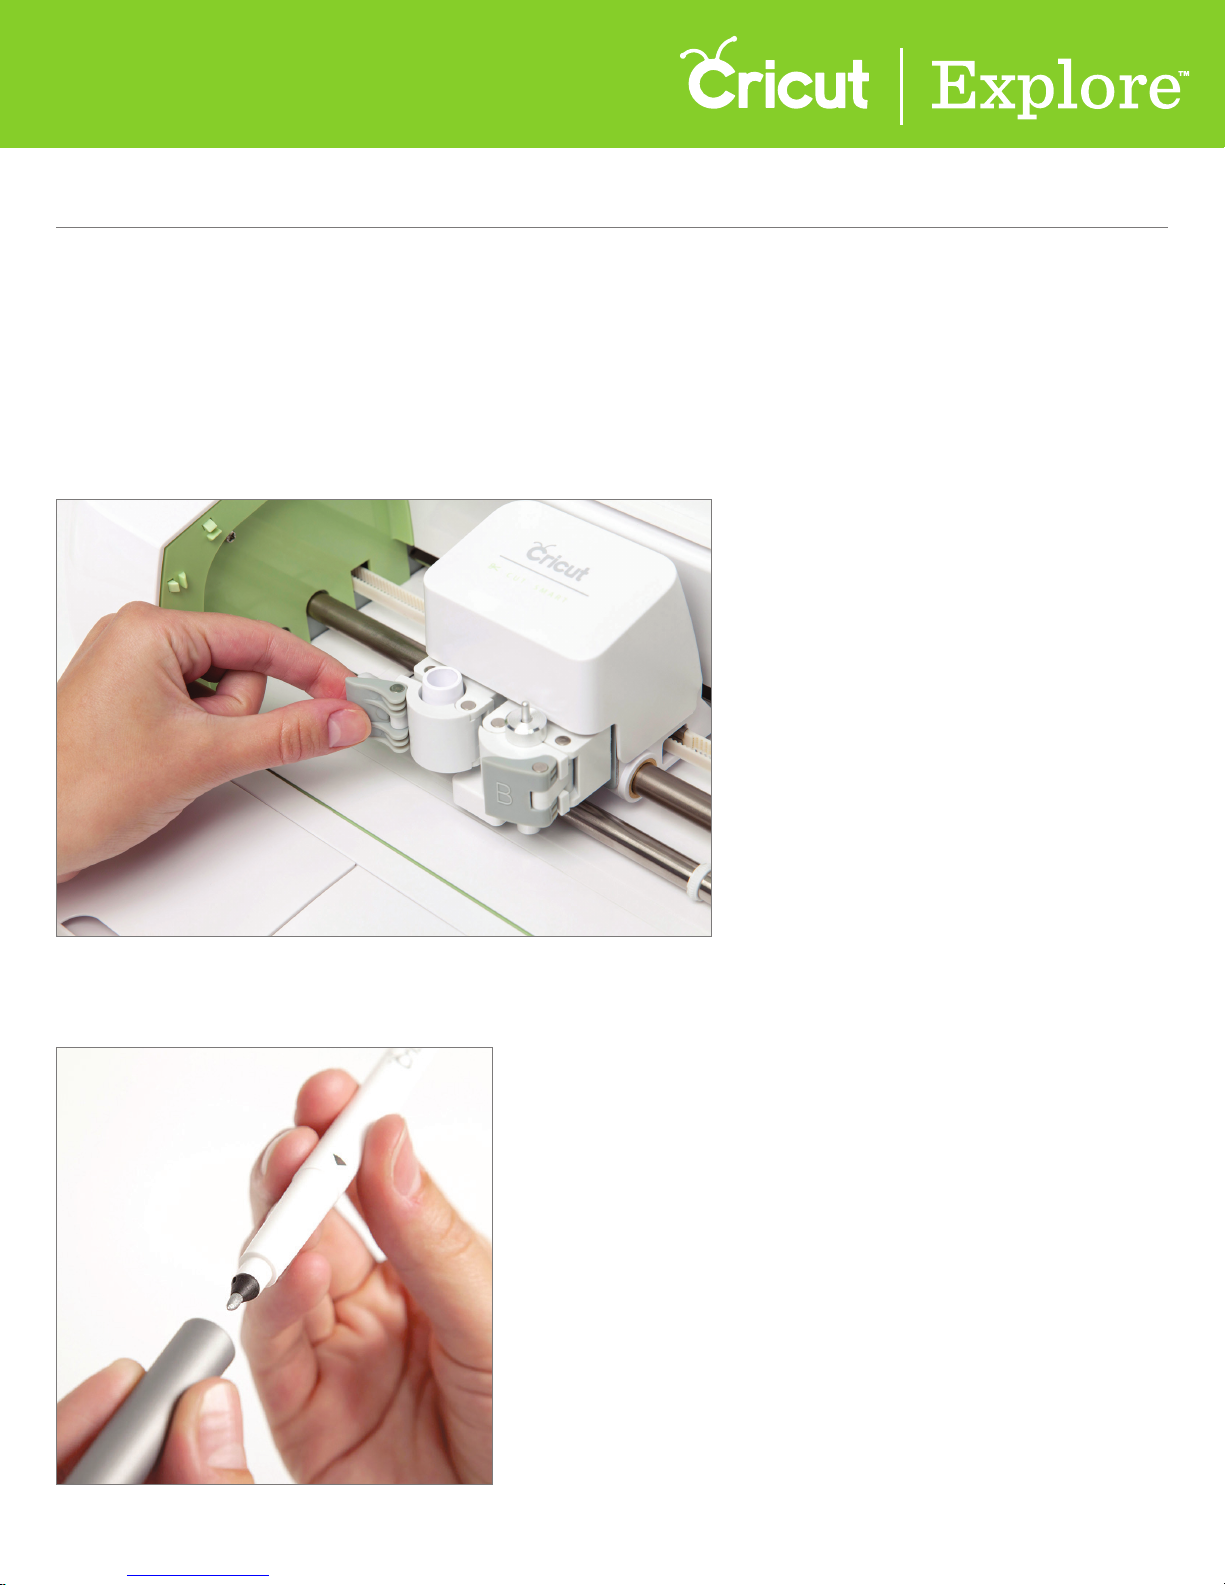
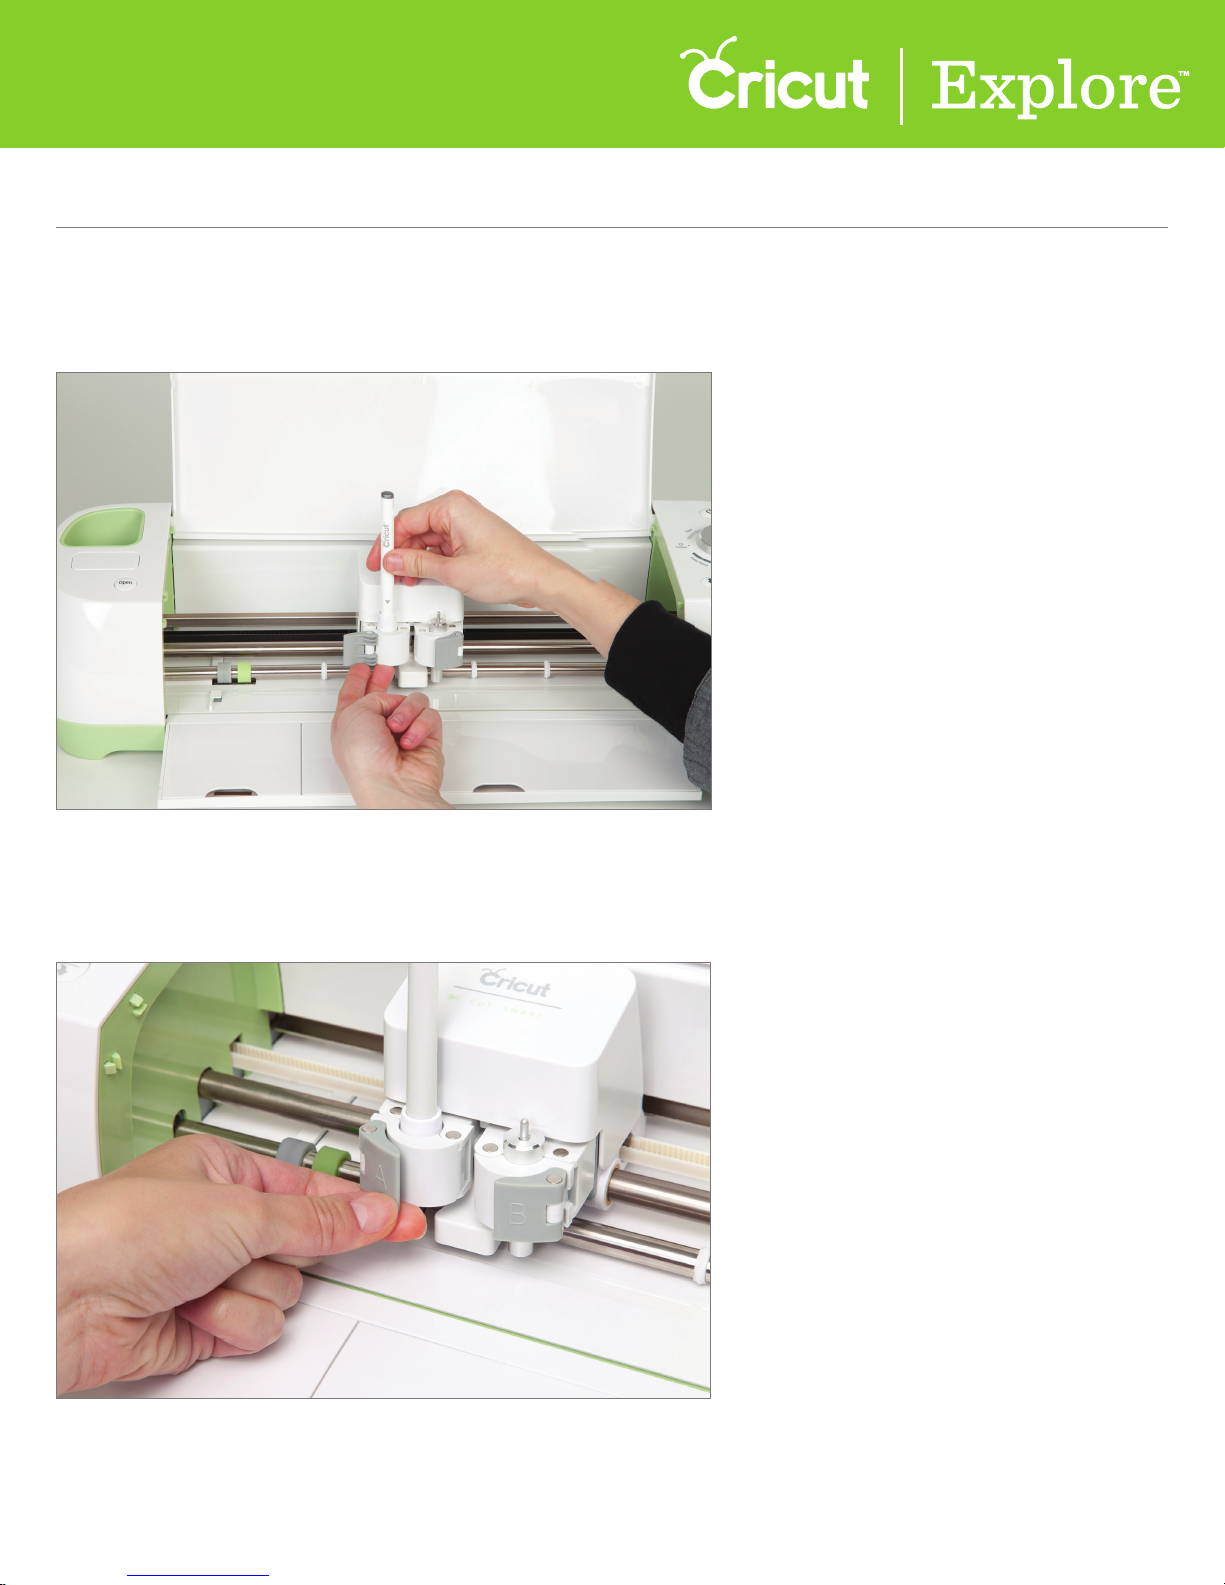
Step 1 To insert the pen, start by first opening accessory clamp A.
Step 2 Remove the cap from the pen.
Section 1C Page 1
Section 1C
Machine setup - First Project
Machine Setup (cont.)
Step 3 Position the pen so the gray arrow is facing towards you. Hold the accessory clamp in place
while pushing the pen down into the housing until the arrow disappears.
Step 4 Close the latch.
Section 1C Page 2
Section 1C
Machine setup - First Project
Machine Setup (cont.)
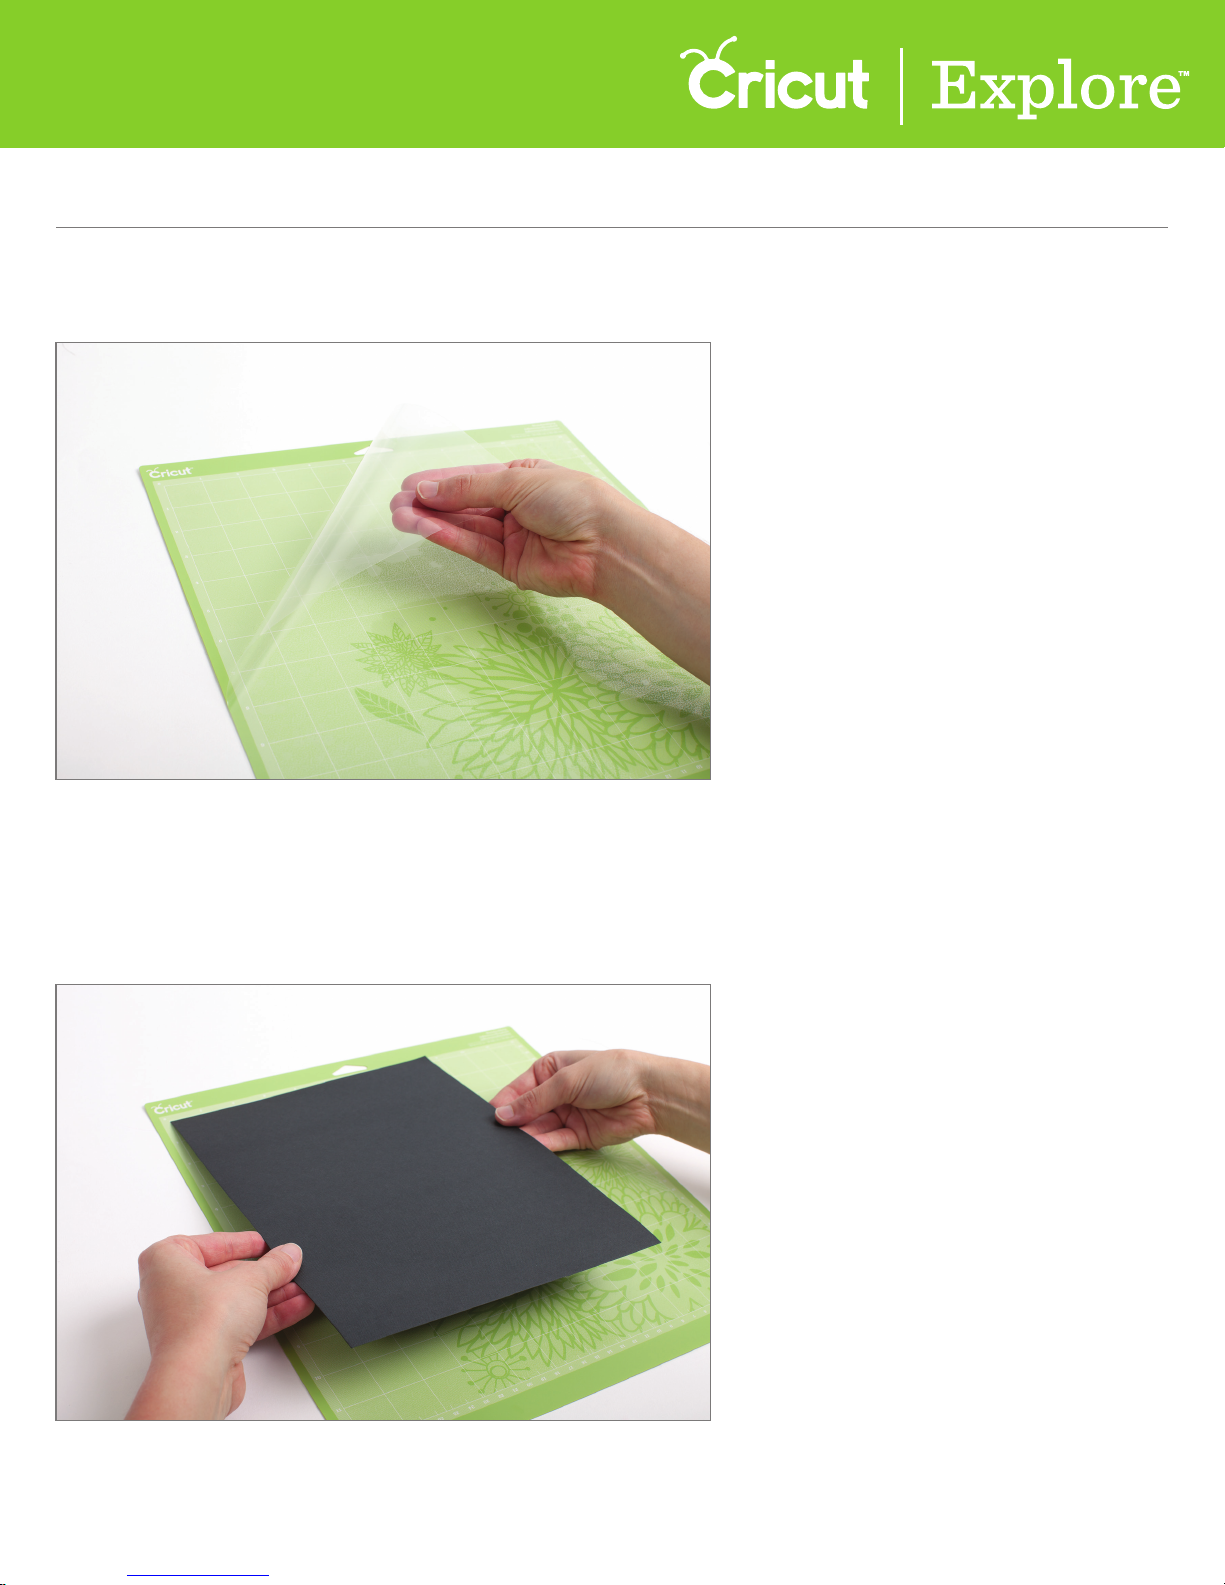
Step 5 Next, load the black paper found in your starter materials packet onto your mat.
Start by removing the protective cover from your mat.
Tip: Set this cover aside while you cut but be sure to replace to protect the mat’s adhesive
during the times it is not in use.
Step 6 Align your paper to the gridlines in the top left corner your mat and smooth
the paper onto the surface.
Section 1C Page 3
Section 1C
Machine setup - First Project
Machine Setup (cont.)
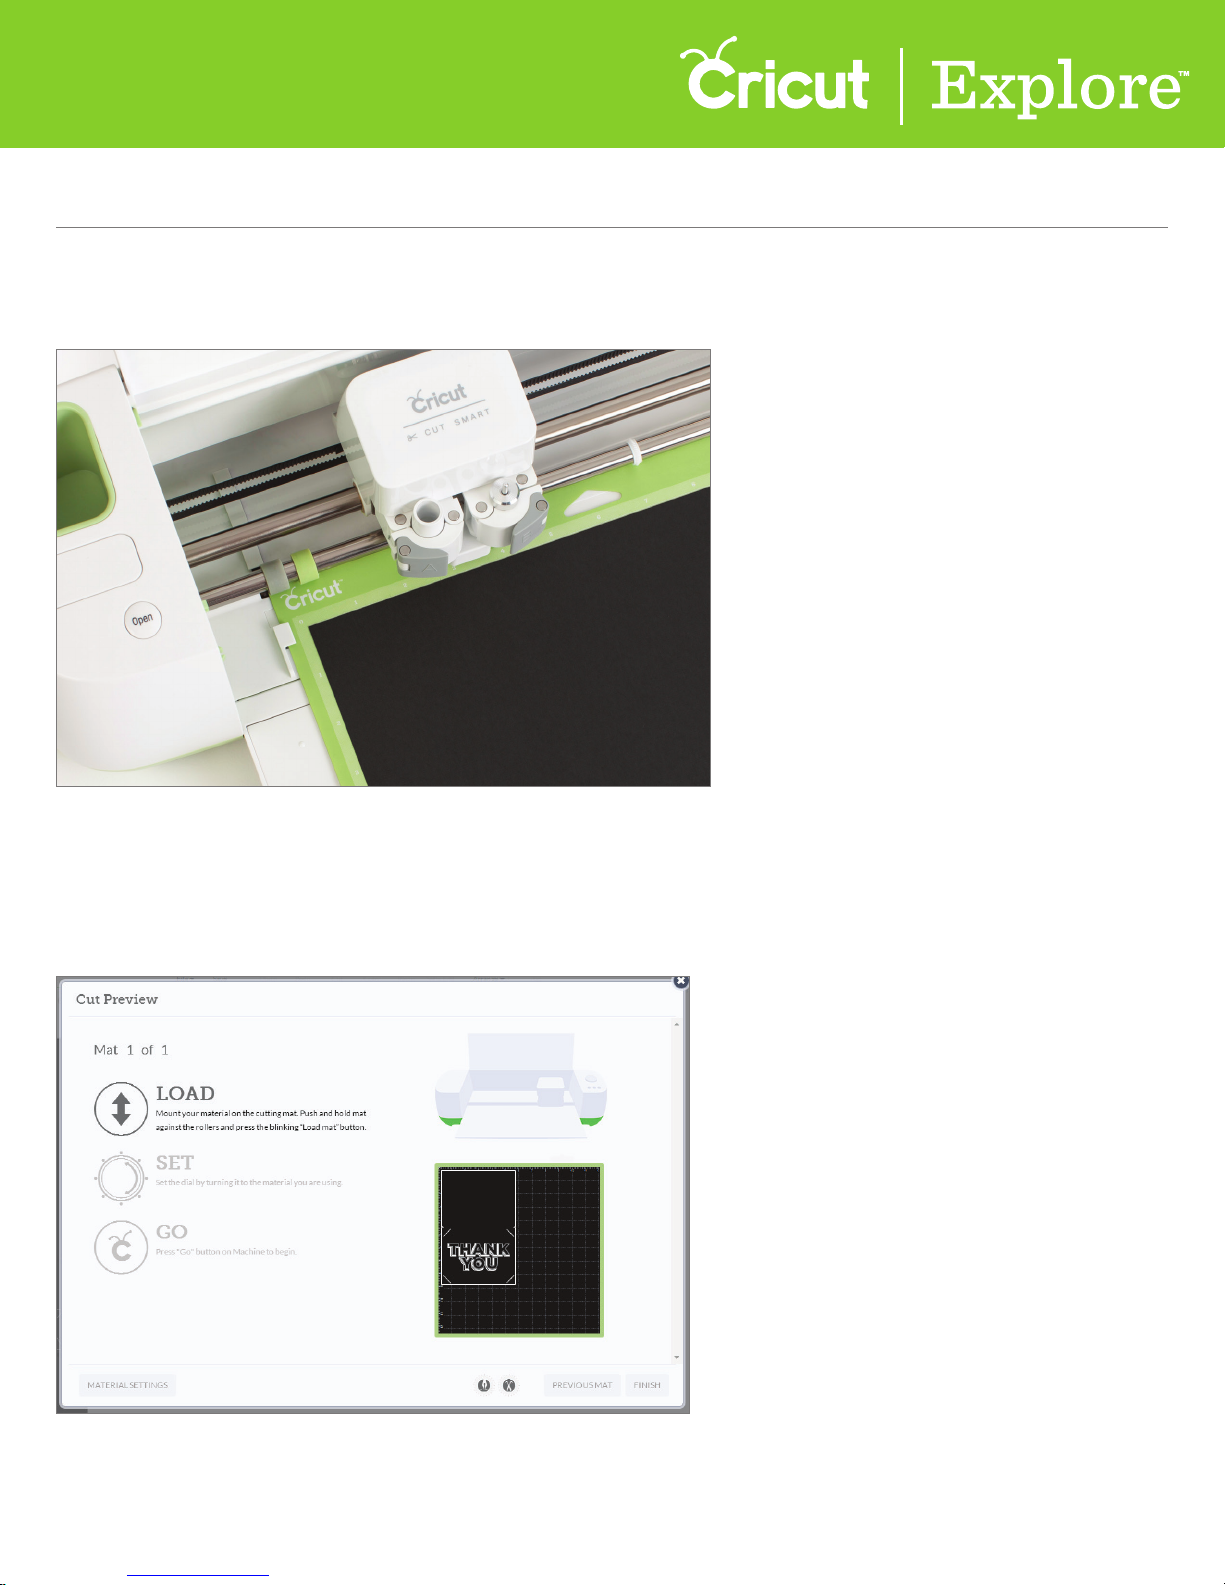
Step 7 Load the mat into your Cricut Explore® machine by positioning the mat underneath the mat
guides and pressing the blinking Load/Unload button.
Tip: You will know the mat is loaded correctly when the Cricut logo on the mat is directly under the
machine rollers.
Step 8 Follow the prompts on the computer to cut and write your “Thank You” card all in one step.
Section 1C Page 4
Section 1C
Machine setup - First Project
Machine Setup (cont.)
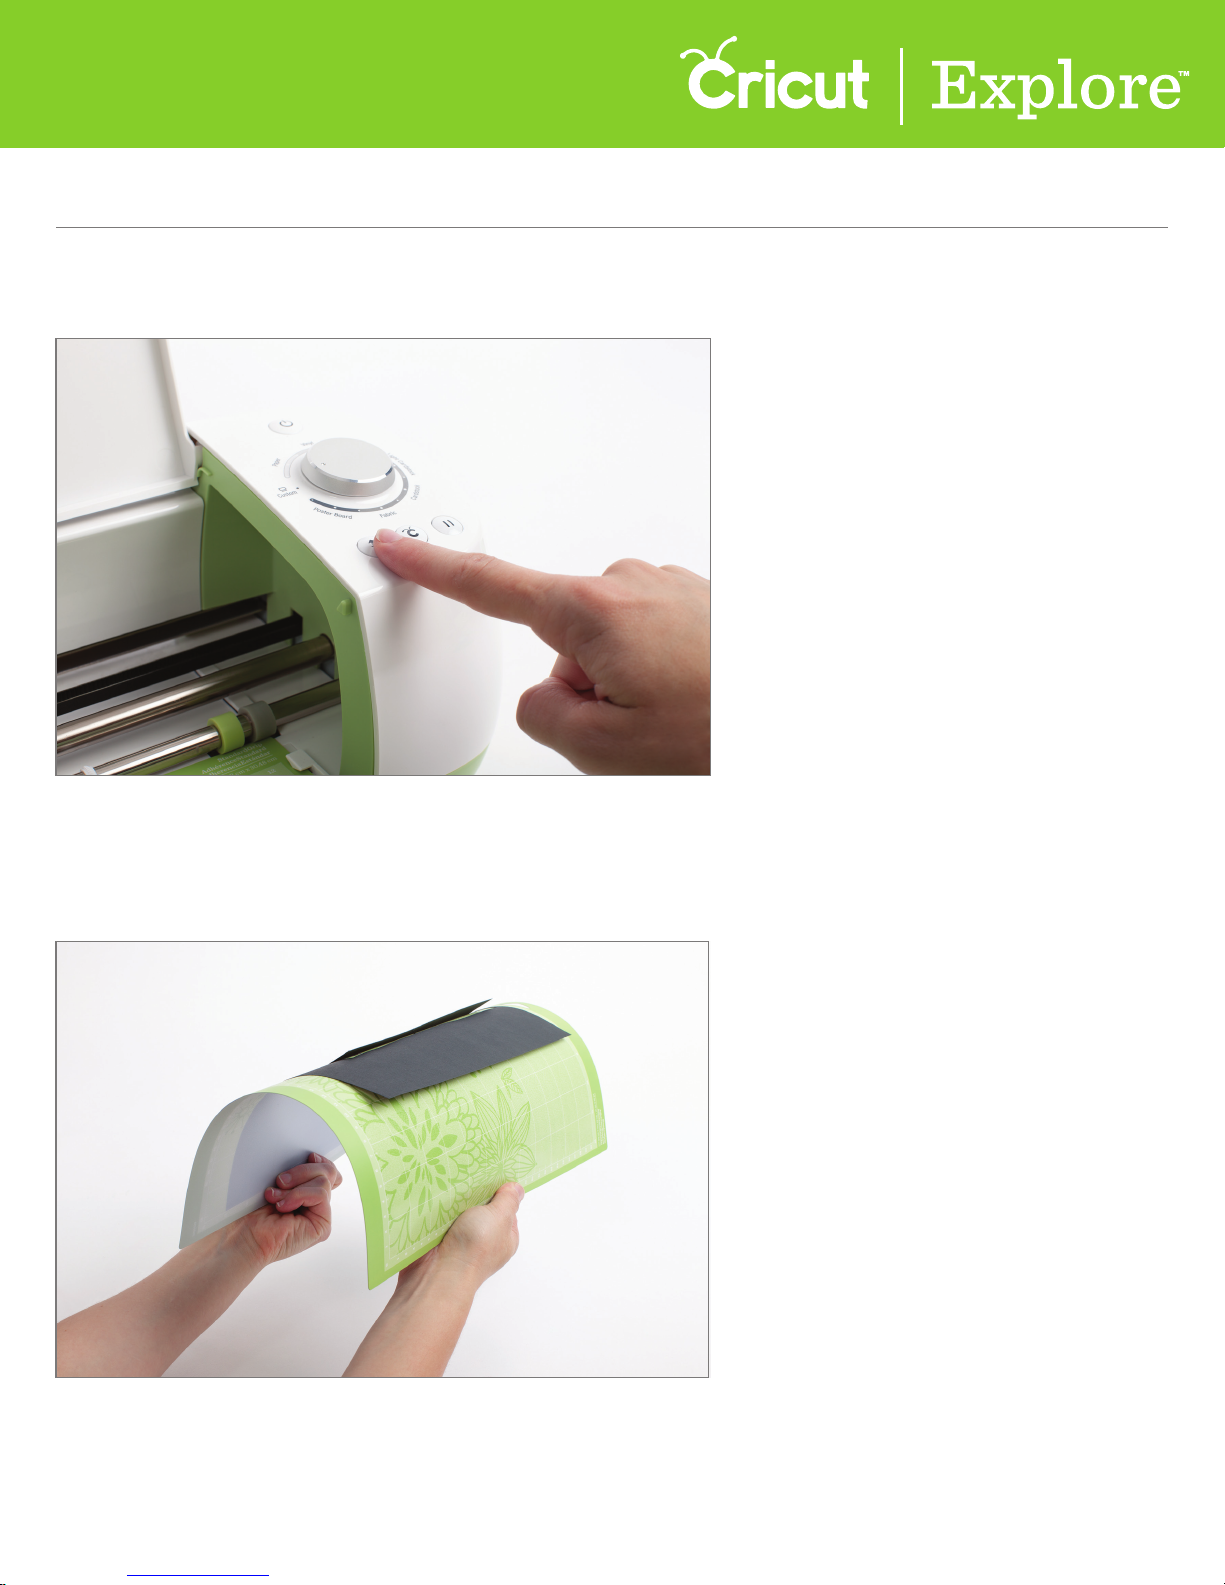
Step 9 Once your Cricut Explore® machine has finished cutting and writing, unload the your mat
by pressing the blinking Load/Unload button.
Tip: Be sure to remove your pen—just open accessory clamp A and pull the pen straight up.
Don’t forget to cap the pen!
Step 10 Remove your card by gently bending the mat until one edge of the card releases.
Section 1C Page 5

Section 1C
Machine setup - First Project
Machine Setup (cont.)
Step 11 Turn the mat over onto a flat surface and then slowly pull the mat
away from your material until the card releases.
Tip: A Cricut® scraper can be used to easily remove excess material from the cutting mat.
Step 12 Line up the corners of the card and fold it in half horizontally.
Section 1C Page 6
Section 1C
Machine setup - First Project
Machine Setup (cont.)
Step 13 Take the jade cardstock from your starter materials packet
and fit it into the slits in the four corners of the card.
Section 1C Page 7
Section 2A
Smart Set™ Dial
Smart Set™ Dial
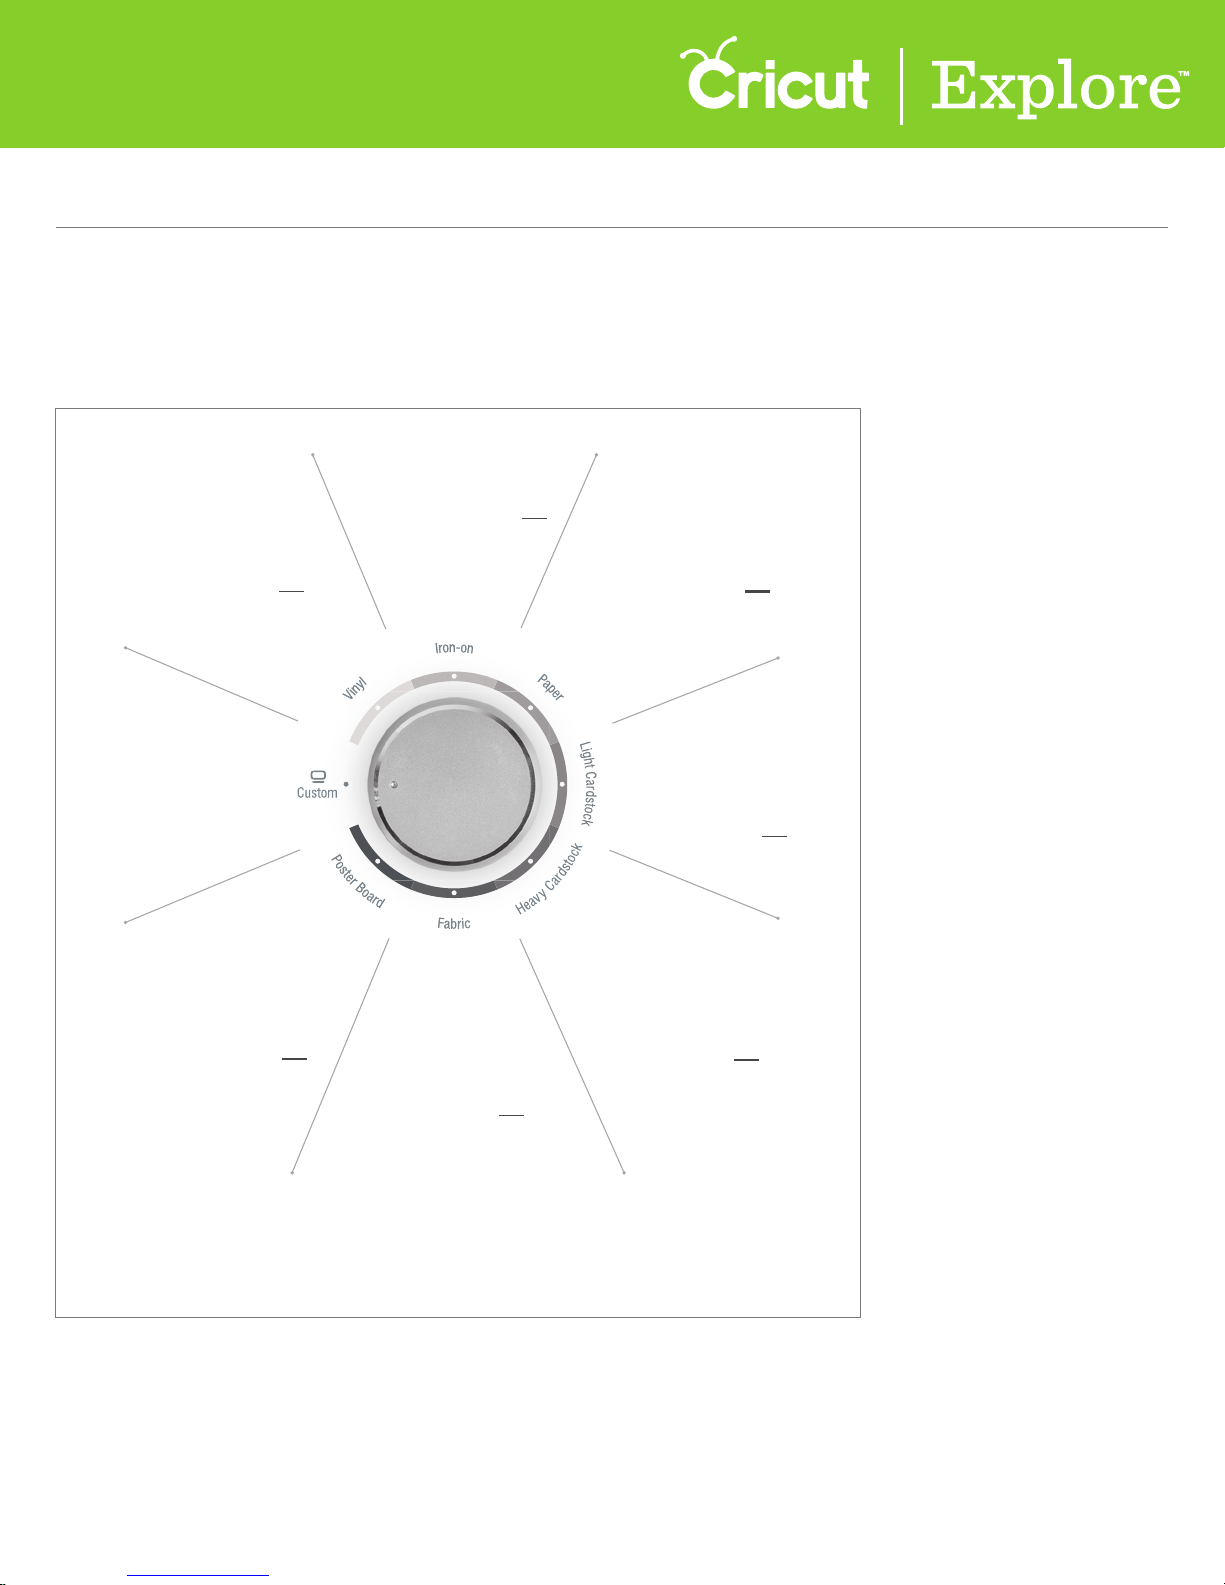
The Smart Set™ dial is a material selection dial that oers pre-defined settings to get the best results
on paper, vinyl, iron-on, cardstock, fabric, poster board and more. The Smart Set™ dial eliminates the
need to make manual pressure, depth and speed adjustments. Additional materials can be found
under the Custom setting.
Blade: Standard
Mat: StandardGrip
Material
Blade: Standard
Mat: LightGrip*
Material
thickness: 0.10 mm
thickness: 0.20 mm
Blade: Standard
Mat: StandardGrip
Material
thickness: 0.20 mm
Create your own
cut settings.**
Blade: Standard**
Mat: StrongGrip*
Material
thickness: 0.50 mm
*Not included.
**For an optimal cutting experience, we recommend using the Deep Cut Blade when cutting thicker materials such
as heavy fabric, poster board, chipboard, magnet board, and leather. The Cricut Deep Cut Blade can cut most
materials up to 1mm in thickness using the multi-cut feature.
Blade: Standard**
Mat: StrongGrip*
Material
thickness: 0.30 mm
Note: Set for lightweight fabric
with stablizer*
Blade: Standard
Mat: StandardGrip
Material
thickness: 0.21 mm
Blade: Standard
Mat: StandardGrip
Material
thickness: 0.30 mm
™
Tip: The Smart Set
dial has been calibrated to work best with Cricut® branded products. If settings
either don’t cut all the way through the material or the blade is cutting too deeply into your mat, use the
half settings located between the material markings on the dial which will increase or decrease
the pressure.
Section 2A Page 1

Section 2A
Smart Set™ Dial
Smart Set Dial (cont.)
Smart Set™ dial material settings
Paper: Use for text-weight papers such as common computer paper.
Vinyl: Use for home décor vinyl. Produces a kiss cut. (A kiss cut is when the blade just cuts the top layer
of material and leaves the backing sheet uncut. This makes it easier to weed out leftover pieces after
the cut, and then use transfer tape to apply.)
Iron-on: Use for heat transfer vinyl. Produces a kiss cut. (A kiss cut is when the blade just cuts the top
layer of material and leaves the backing sheet uncut.)
Light Cardstock: Use for paper rated at 60 – 65 lb. weights, a little heavier than text-weight papers
often found in patterned, printed or decorative papers.
Cardstock: Use for paper rated at 80 – 90 lb. weights, such as playing cards or most solid-colored
crafting papers.
Fabric: Use for light-weight cotton or cotton/polyester fabrics which have been backed with an iron-on
adhesive interfacing. (Fabric backing required to cut fabrics.)
Fabric +: Use for mid-weight fabrics which have been backed with an iron-on adhesive interfacing. The
setting will perform a multi-cut, meaning it will cut twice along the same lines. (Fabric backing
required to cut fabrics.)
Poster board: Use for heavier materials such as display board used for signs or school projects.
Poster board +: Use for heavier display boards. The setting will perform a multi-cut, meaning it will
cut twice along the same lines.
®
Tip: For an optimal cutting experience, we recommend using the Cricut
thicker materials such as heavy fabric, poster board, chipboard, magnet board, and leather. The Deep
Cut Blade can cut most materials up to 2mm in thickness using the multi-cut feature.
Deep Cut Blade when cutting
Section 2A Page 2
Section 2A
Smart Set™ Dial
Smart Set™ Dial (cont.)
Custom Settings
Besides using the seven preset material settings, you can also take advantage of the Custom setting for
even greater flexibility when working with various materials. Under the Custom setting in
Cricut Design Space
Using preset custom materials
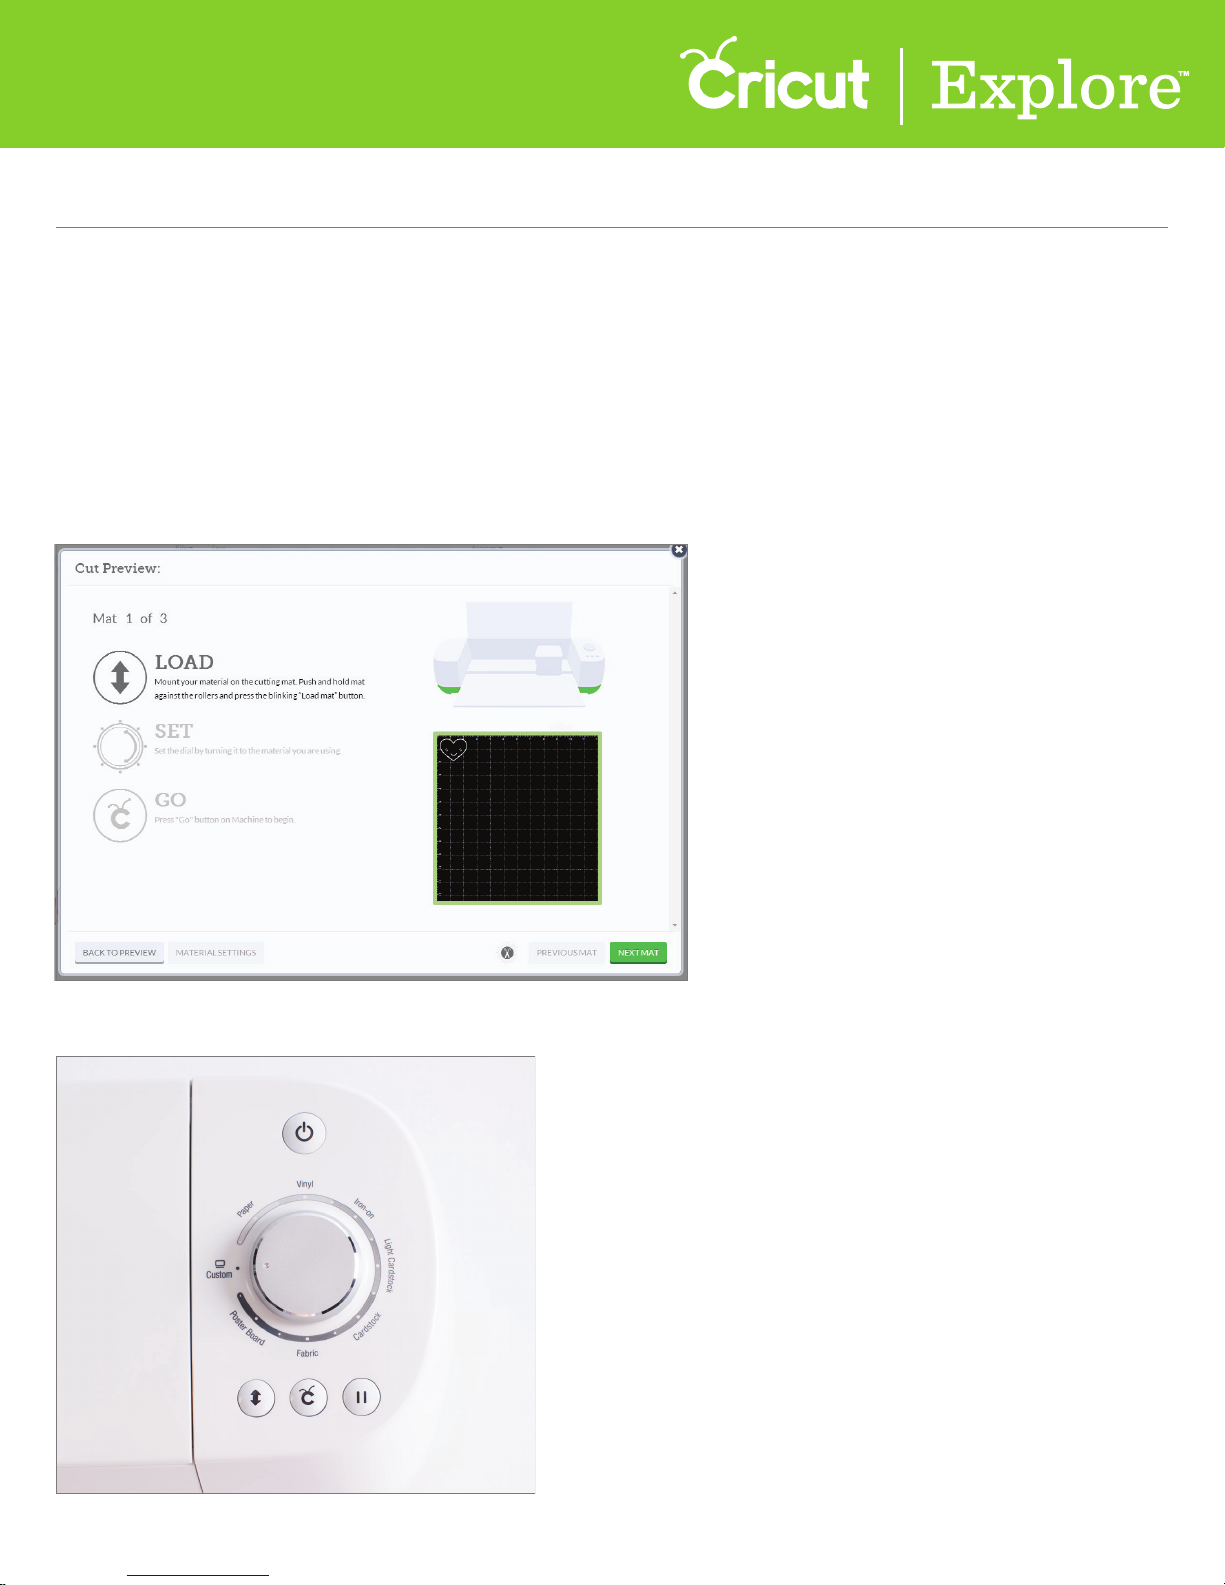
Step 1 Once your project in Cricut Design Space
window, follow the prompts to load your cutting mat into the machine.
™
, you can select from predefined settings or create your own.
™
is ready to cut, click “Go.” From the Cut Preview
Step 2 Turn the Smart Set™ dial on the Cricut Explore® machine to the Custom setting.
Section 2A Page 3
Section 2B
Smart Set™ Dial - Custom Settings
Smart Set™ Dial (cont.)
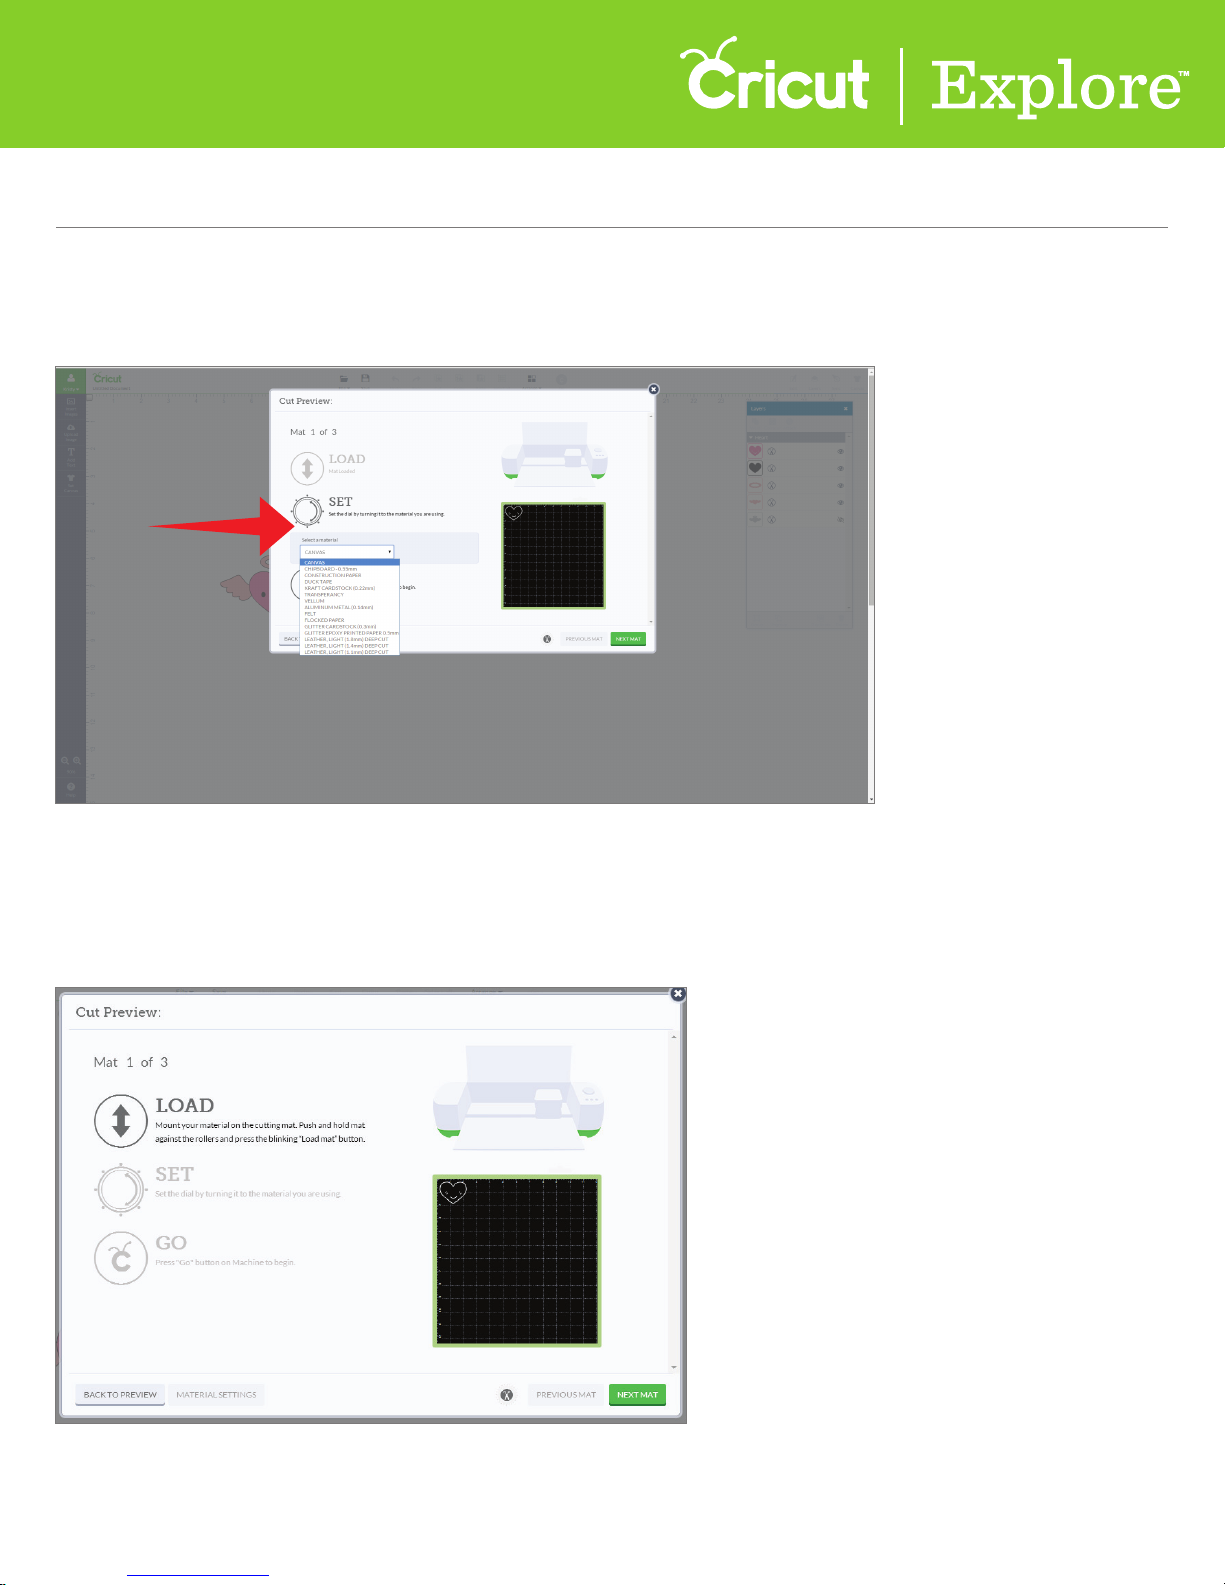
Step 3 In Cricut Design Space™, use the Select a Material drop-down menu to see a list of preloaded
custom materials. If your material is on the list, select it and then press “Go” on your
®
Cricut Explore
machine.
Adding new custom materials
™
Step 1 Once your project is in the Cricut Design Space
window, follow the prompts to load your cutting mat into the machine.
ready to cut, click “Go.” From the Cut Preview
Section 2B Page 1
 Loading...