

User Manual
Manual d’Utilisateur


Welcome and Introduction . . . . . . . . . . . . . . . . . . . . . . . . . . . . . . . . . . . 4
Setup for Installation. . . . . . . . . . . . . . . . . . . . . . . . . . . . . . . . . . . . . . . . . . . . . 4
Installation . . . . . . . . . . . . . . . . . . . . . . . . . . . . . . . . . . . . . . . . . . . . . . . . . . . . . . . . . 4
Connecting Cricut Machine and Computer . . . . . . . . . . . . . . . . . . . . . 5
Launching the Cricut DesignStudio . . . . . . . . . . . . . . . . . . . . . . . . . . . 6
Software Activation . . . . . . . . . . . . . . . . . . . . . . . . . . . . . . . . . . . . . . . . . . . . . . . . . . 6
Updating. . . . . . . . . . . . . . . . . . . . . . . . . . . . . . . . . . . . . . . . . . . . . . . . . . . . . . . . . . . . 7
Customer Support, Troubleshooting, and FAQ . . . . . . . . . . . . . . . . . . . . . . . . . 7
Uninstalling. . . . . . . . . . . . . . . . . . . . . . . . . . . . . . . . . . . . . . . . . . . . . . . . . . . . . . . . . . 7
Getting Started. . . . . . . . . . . . . . . . . . . . . . . . . . . . . . . . . . . . . . . . . . . . . . . . . . . . . . . 7
User Interface. . . . . . . . . . . . . . . . . . . . . . . . . . . . . . . . . . . . . . . . . . . . . . . . . . . . . . . . 8
Cricut Cartridge Library. . . . . . . . . . . . . . . . . . . . . . . . . . . . . . . . . . . . . . . 8
Virtual Keypad Overlay . . . . . . . . . . . . . . . . . . . . . . . . . . . . . . . . . . . . . . . . . . 9
Shape Properties . . . . . . . . . . . . . . . . . . . . . . . . . . . . . . . . . . . . . . . . . 11
Welding . . . . . . . . . . . . . . . . . . . . . . . . . . . . . . . . . . . . . . . . . . 13
Flip Shapes . . . . . . . . . . . . . . . . . . . . . . . . . . . . . . . . . . . . . . 13
Kerning . . . . . . . . . . . . . . . . . . . . . . . . . . . . . . . . . . . . . . . . . 13
Nudge Arrows . . . . . . . . . . . . . . . . . . . . . . . . . . . . . . . . . . . . . . . . . 14
Turn 90 Degrees . . . . . . . . . . . . . . . . . . . . . . . . . . . . . . . . . . . . . . . . . 14
Revert . . . . . . . . . . . . . . . . . . . . . . . . . . . . . . . . . . . . . . . . . 14
Buttons . . . . . . . . . . . . . . . . . . . . . . . . . . . . . . . . . . . . . . . . . . . . . . . 14
Pages . . . . . . . . . . . . . . . . . . . . . . . . . . . . . . . . . . . . . . . . . . . . . 17
On-Screen Virtual Cutting Mat . . . . . . . . . . . . . . . . . . . . . . . . 17
Show Cartridges . . . . . . . . . . . . . . . . . . . . . . . . . . . . . . . . . . . 18
Handles . . . . . . . . . . . . . . . . . . . . . . . . . . . . . . . . . . . . . . . . . 19
File Menu . . . . . . . . . . . . . . . . . . . . . . . . . . . . . . . . . . . . . 20
Edit Menu . . . . . . . . . . . . . . . . . . . . . . . . . . . . . . . . . . . . . 21
View Menu . . . . . . . . . . . . . . . . . . . . . . . . . . . . . . . . . . . . . 22
Features Menu . . . . . . . . . . . . . . . . . . . . . . . . . . . . . . . . . . . . . 23
Preferences Menu . . . . . . . . . . . . . . . . . . . . . . . . . . . . . . . . . . . . . 24
Help Menu . . . . . . . . . . . . . . . . . . . . . . . . . . . . . . . . . . . . . 24
Tips and Tricks . . . . . . . . . . . . . . . . . . . . . . . . . . . . . . . . . . . . . . . . . . . . 25
Working with Cartridge Sets . . . . . . . . . . . . . . . . . . . . . . . . . . . . . . . . 25
Working with Images . . . . . . . . . . . . . . . . . . . . . . . . . . . . . . . . . . . . . 25
Sizing and Positioning . . . . . . . . . . . . . . . . . . . . . . . . . . . . . . . . . . . . . 26
Intricate Designs . . . . . . . . . . . . . . . . . . . . . . . . . . . . . . . . 26
Saving and Loading . . . . . . . . . . . . . . . . . . . . . . . . . . . . . . . . 26
Welding . . . . . . . . . . . . . . . . . . . . . . . . . . . . . . . . . . . . . . 26
Maximizing Paper Usage . . . . . . . . . . . . . . . . . . . . . . . . . . . . . 26
Community/Feedback. . . . . . . . . . . . . . . . . . . . . . . . . . . . . 26
Technical Support . . . . . . . . . . . . . . . . . . . . . . . . . . . . . 26
Conclusion . . . . . . . . . . . . . . . . . . . . . . . . . . . . . . . . . . . . . . . . . . . 26
Cricut DesignStudio™ • www.cricut.com 3
Welcome and Introduction
We here at Provo Craft offer a great, heart-felt thank you for purchasing the Cricut Design-
Studio™ software! Congratulations! The program you now own will help you enhance your
Cricut creativity. Enjoy!
What is the Cricut DesignStudio?
The Cricut DesignStudio is many things. It’s a streamlined virtual workbench, a digital
content walk-in closet, a mad-scientist laboratory of image creation, a shimmering portal
to the worldwide Cricut brain-share, and even a glowing crystal ball from which the future
of your Cricut adventures can be divined.
With the Cricut DesignStudio software, you can create digital layouts of any and all
desired images from the Cricut DesignStudio Library before you cut them. What You See
Is What You Cut! You can weld images together to make new combinations or letters together to make words and phrases. You can change image properties, rotate, ip, shear,
duplicate, or multi cut to your heart’s content. You can preview cartridge sets you don’t
have yet. You can more easily explore the cartridge sets you do have in various modes of
organization. You can use keyword descriptors to quickly locate just the right image. You
can save your progress on the layouts you’re creating, and reload them to pick up where
you left off. The Cricut DesignStudio is a powerful tool to help you explore, design, and cut
your way to the perfect project, the way you want it.
Setup for Installation
You can use the Cricut DesignStudio software with the Cricut™ Personal Electronic
Cutter™ or the Cricut Expression™ 24" Personal Electronic Cutter™.
IMPORTANT: Install the Cricut DesignStudio BEFORE connecting your Cricut to your computer. This ensures the proper drivers are installed.
Installation
Be sure to close all applications before beginning the installation or setup.
1. Insert the Cricut DesignStudio CD into the disk drive.
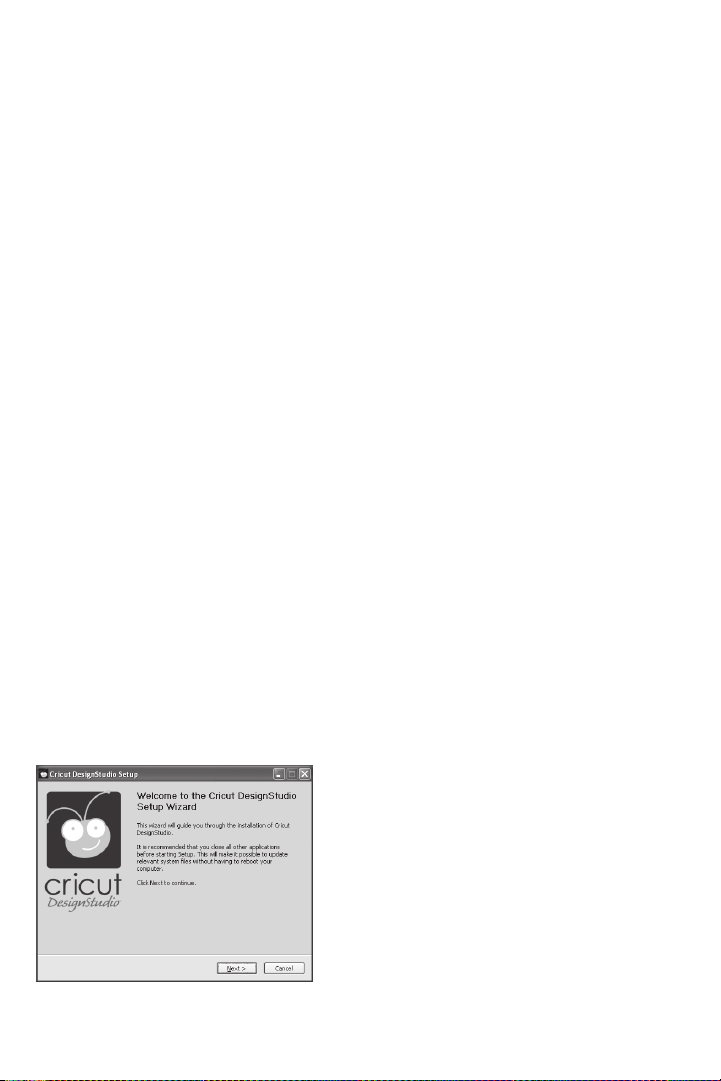
2. When the Setup Wizard appears, follow the instructions. The Setup Wizard will present
the End User License Agreement, then have you choose an installation location. The
default location it will show should work just ne. After choosing the installation location,
the program will perform the install and let you know when it’s done. Just click on “Finish”
to complete the installation.
4 Cricut DesignStudio™ • www.cricut.com
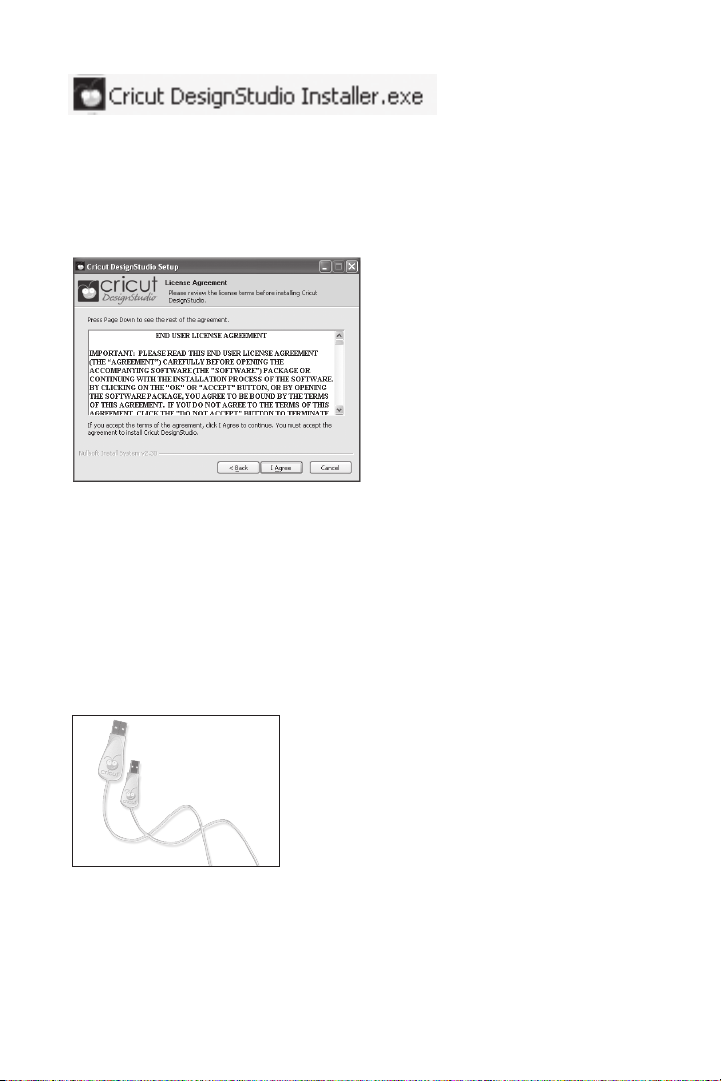
Note: If the Setup Wizard does not start automatically, you can start it manually by exploring
the contents on the disk and double-clicking on the “CDSInstaller.exe” le.
End User License Agreement
Please read the End User License Agreement as it applies to you in regards to your use of
the Cricut DesignStudio software. We promise it isn’t a very exciting read, but a small part
of you deep down inside will glow warmly at having participated in the act of being a
responsible consumer. Also, you can’t continue the installation process until you agree to
the stipulations the license puts forth.
.NET 2.0 Installation (if needed)
If at any time during the install or launch process you get a message referring to the
need for .NET 2.0 to be installed before proceeding it means that your current Windows
setup does not have this framework onboard. We included the install le for this on the
Cricut DesignStudio CD. You can access the contents of the CD from a Windows Explorer
window and double click the dotnetfx.exe le. Once completed, continue launching and
running the software.
Connecting Cricut Machine and Computer
IMPORTANT: Make sure you have installed the Cricut DesignStudio BEFORE connecting
your Cricut machine to your computer. This ensures the proper drivers are installed.
Locate the USB cable that came with your Cricut DesignStudio Bonus Pack. Then locate
the USB port on the back of your Cricut machine, next to the A/C adapter port. Notice its
unique shape and plug in the corresponding end of the Cricut USB cable. Finish the
connection by plugging in the standard end of the Cricut USB cable to an open USB port
on your computer. Make sure that you plug the USB cable into both the computer and
Cricut DesignStudio™ • www.cricut.com 5
the Cricut before turning the Cricut machine on. Your computer should automatically
sense and install the drivers required to run the Cricut system once it is turned on the rst
time. This may take a minute or two. You will see Windows popup balloons indicating the
status until complete.
Launching the Cricut DesignStudio
Start the Cricut DesignStudio software by double-clicking the icon that was placed on
your desktop during installation OR via the Start / All Programs / Cricut DesignStudio link.
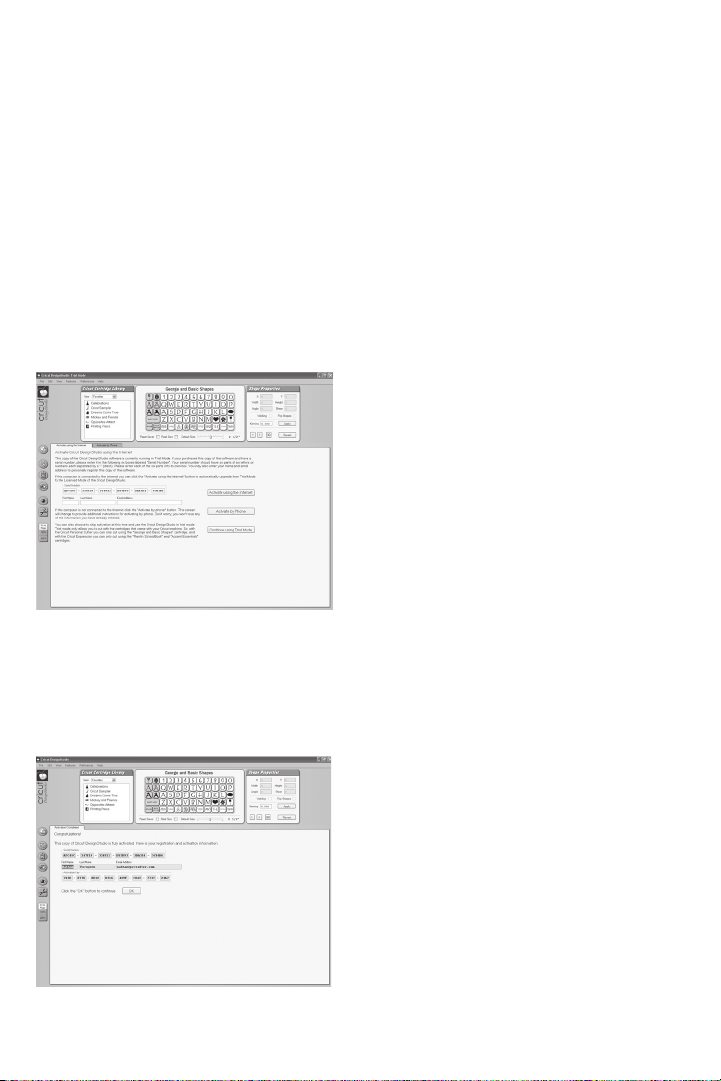
Software Activation
When you launch the Cricut DesignStudio software for the rst time, you will be asked to
authenticate your software product to gain access to the full range of features. Until activated the software can only run in a “trial” mode where your cutting options are limited
to the following: While operating on the Cricut V1, you can only cut from the George and
Basic Shapes cartridge. While operating on the Cricut Expression, you can only cut from the
Plantin SchoolBook and Accent Essentials cartridges. Verifying legitimate software ownership helps us protect your investment and promotes a brighter Cricut future for all of us.
The easiest way to activate your software is by choosing the “Activate using the Internet”
option during this stage of the installation process. If you nd yourself without Internet
access at the time of installation, you can also activate your software by phone by clicking the tab to the immediate right of the “Activate using the Internet” tab. As the phone
method is a bit more complicated than the online method, please pay close attention
to the instructions provided during the process. You can take comfort in the fact that
software activation only happens once per install.
6 Cricut DesignStudio™ • www.cricut.com
Updating
Periodically, Provo Craft will release updates to the Cricut DesignStudio. Also, as Provo
Craft releases new content, updating will automatically add this new content to your
Cricut DesignStudio cartridge library so you can preview it, design with it, and love it. If you
want to see the newest stuff, update often! To update, use the Check for Updates options
in the Help menu (see page 24), or check the Cricut Support webpage on Cricut.com. An
active Internet connection is required for this option.
Updating the Cricut Firmware
Before you cut for the rst time from the Cricut DesignStudio, you will be required to update
the Cricut rmware on the machine itself. Do this by selecting “Update Cricut Firmware” under the Help menu. Be sure your Cricut machine is connected to your computer before performing the update. After selecting the Update Cricut Firmware option, follow the instructions that come up. This updating process can take around 5 to 10 minutes to complete.
Customer Support, Troubleshooting, and FAQ
For assistance in troubleshooting any problems or issues that involve program installation,
program functionality, or use of the Cricut DesignStudio program, or to see a list of the
most frequently asked questions, please check out our Cricut Support webpage at Cricut.
com. You can also email us at support@cricut.com or call our great Customer Support line
at 877-7CRICUT (or 877-727-4288) Monday–Friday 7:00 a.m.–6:00 p.m. (MST).
Uninstalling
If you ever have the need to uninstall the Cricut DesignStudio software, follow these steps:
1. Go to “Start,” select “Control Panels” and then “Add or Remove Programs.”
2. Select Cricut DesignStudio from the list, then click “Remove.”
3. Choose “Uninstall” and follow the instructions. All done.
or
1. Go to "Start", then "All Programs", then "Cricut DesignStudio".
2. Choose “Uninstall” from the menu. This will start the Uninstall Wizard.
Getting Started
Enough chatter about the Cricut DesignStudio software, let’s take a good look at it! Feel
free to open up the program and follow along. Your success and enjoyment using this
program will be greatly enhanced if you are familiar with the all the nooks and crannies.
If this is your rst time operating the Cricut DesignStudio software, we recommend actively
following along with the descriptions and experimenting with the functions as you go.
Cricut DesignStudio™ • www.cricut.com 7
User Interface
Let’s take a look at the features and functions of the Cricut DesignStudio software. The
following is a list of the functional elements you’ll nd in the program along with a brief
description of what each function does.
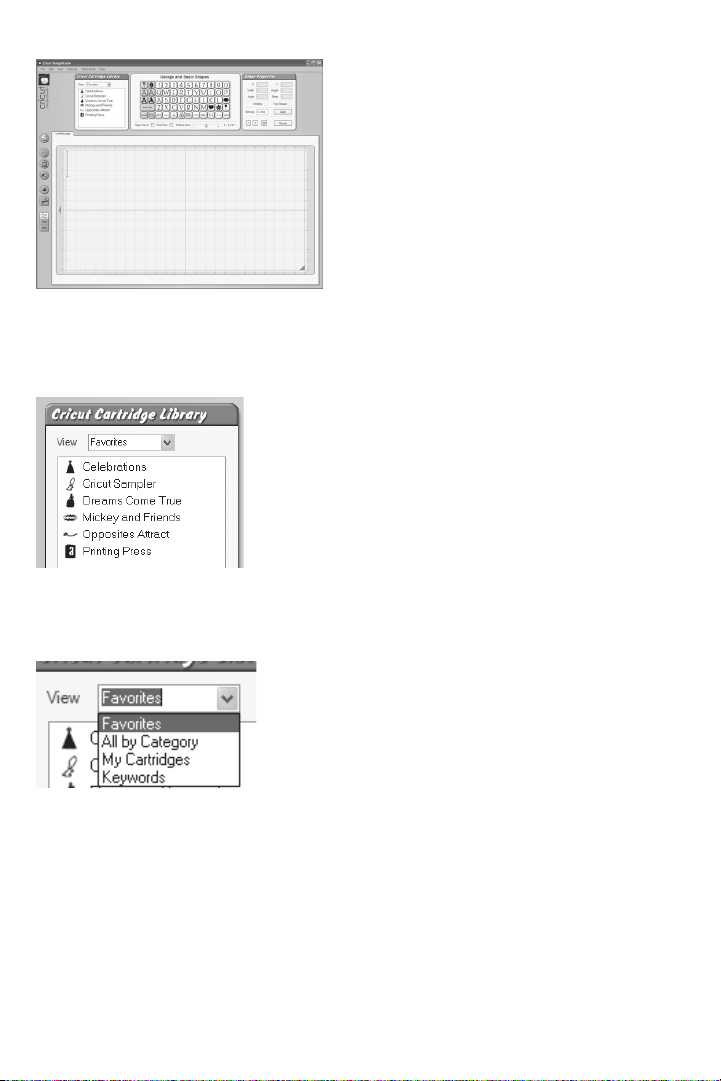
Cricut Cartridge Library
In this window, you’ll be able to browse through all available Cricut content, and access
any cartridge sets you own. This feature allows you to preview whatever you like, but
remember that you can cut only the content you have purchased.
View
Use the View drop-down menu to choose how you organize your content for browsing.
Your content can be organized in the following ways:
Favorites
Any cartridge you ag as a favorite appears in this category (see page 24 for
more information).
All by Category
Cricut content can be organized by general category type. These are Font sets, Image
(Shape) sets, Educational sets, and Seasonal sets.
8 Cricut DesignStudio™ • www.cricut.com

My Cartridges
Any cartridge you ag as your own appears in this category (see page 24 for more information).
Keywords
Cricut content can be organized by character type, and browsed one by one.
Key 1 and Key 2
Enter search criteria in these elds to look for specic image types. For example, dog, star,
tag, etc.
Show Key Shape Buttons
Use these arrow buttons to view the “previous” or “next” character in the keyword
search results.
Cartridge List Window
Content will be listed in this window according to the chosen view method. Double-click
on the content name to select it.
Virtual Keypad Overlay
As you select content from the Cricut Cartridge Library, the keypad overlay will update
itself to represent the content you have chosen. Use these buttons just as you would on
the Cricut machine to input the images you want to work with or cut. Click on an image
button with the pointer to select that image and add it to the on-screen cutting mat.
Cricut DesignStudio™ • www.cricut.com 9
Creative Feature Keys
On the left side of the overlay are six gray keys for creative feature selection. Each of
these keys has a symbol that summarizes the theme of a particular creative feature. Click
on these keys to switch to the creative feature of your choice. Click on the button again
to de-activate the creative feature and return the keypad overlay to the base images.
You can also select creative features from the Features Menu (see page 23).
SHIFT LOCK
After clicking on the SHIFT LOCK key, any image selected will be a shifted image. Click on
the SHIFT LOCK key again to switch back to non-shift images. All shifting must be done with
this key. The Shift key on your computer’s keyboard will not work in its place.
SPACE
Just like with the Cricut machine, clicking the SPACE key will add a space after the image
currently selected.
BACK SPACE
Clicking the BACK SPACE key will remove the image or space currently selected.
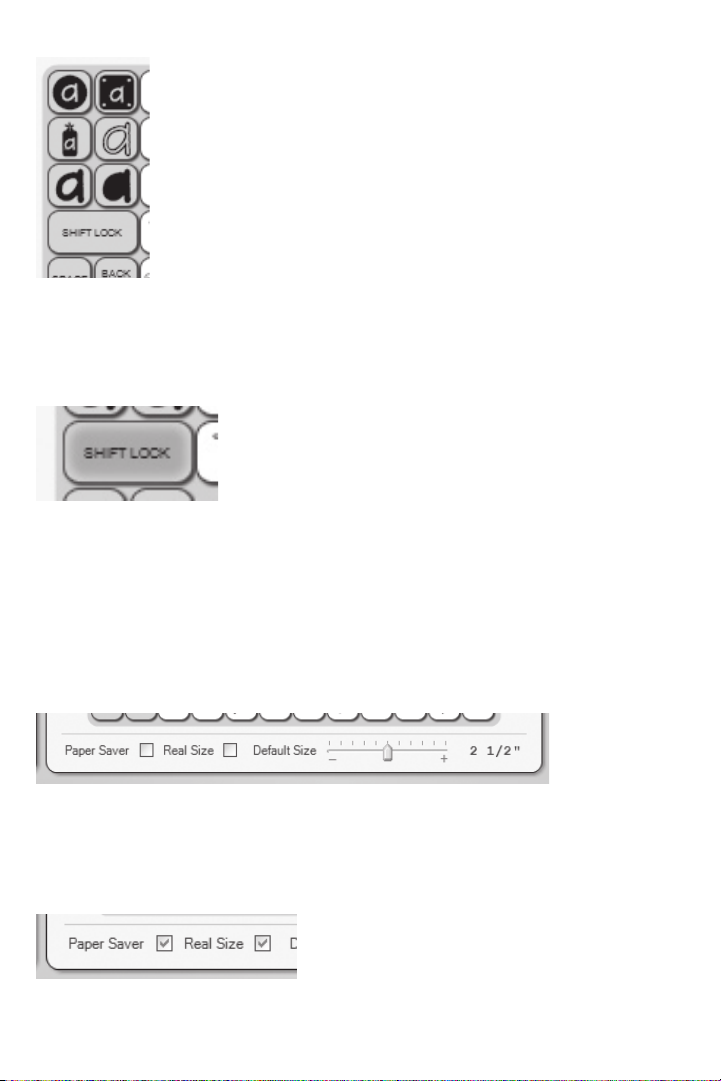
Paper Saver
Select the Paper Saver mode by clicking the box. Paper Saver mode realigns images to
conserve as much paper space as possible.
Real Size
Select Real Size mode by clicking the box. Real Size mode, like Real Dial Size on your
Cricut machine, disregards a character’s proportionate size and causes images to be
shown and cut at the actual size you have chosen.
10 Cricut DesignStudio™ • www.cricut.com
Default Size
Use the Default Size slider to choose the size of the next selected character. This size only
refers to character height or how tall a character is. Use the mouse pointer and then click
and hold on the slider bar to grab the slider arrow. Move it right to increase size and left to
decrease it. You can also click on the “plus” or “minus” symbols to do the same.
Tip: For quick size changing, click near the ends of the size slider to jump up or down in
larger increments.
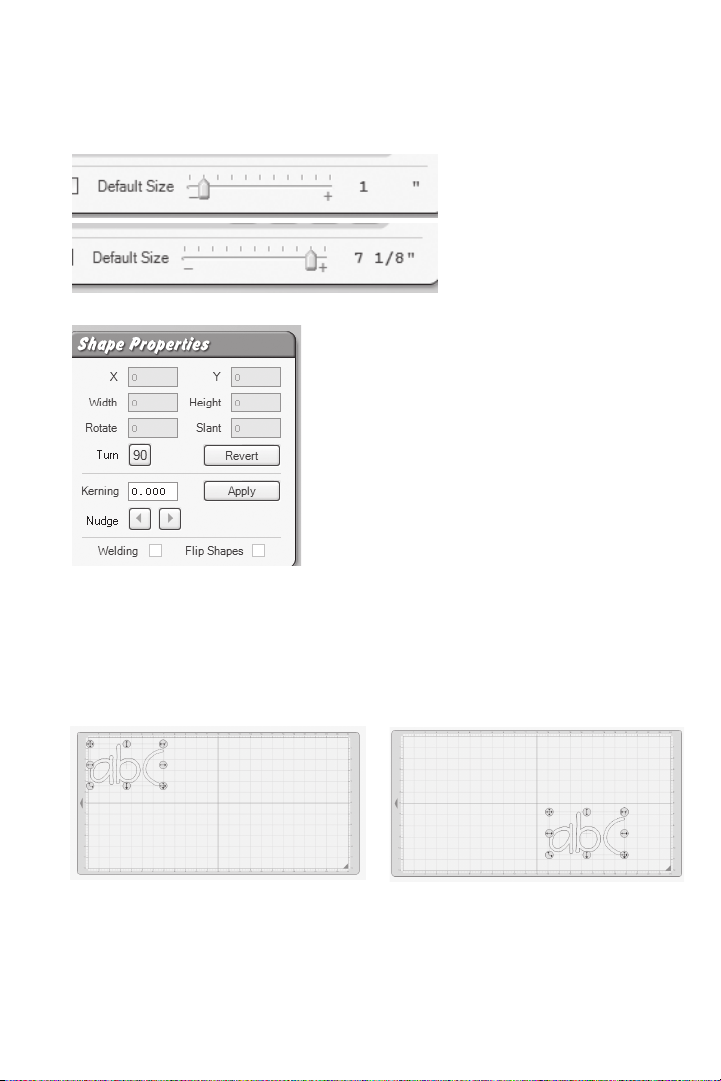
Shape Properties
This window contains options for modifying image properties, such as position on the
mat, character dimension, and others. Simply enter in the desired data and press your
keyboard Enter key.
The controls in this window are just one way of manipulating shape properties. You can
also change shape properties directly with selection handles (see pages 19 and 20).
X-Axis
This option determines where a character or selection sits on the horizontal X-axis of the
mat, or how far left or right the image is.
Cricut DesignStudio™ • www.cricut.com 11

Y-Axis
This option determines where an image or selection sits on the vertical Y-axis of the mat, or
how far up or down the image is.
Width
This option alters the width of an image or selection.
Height
This option alters the height of an image or selection.
Rotate
Measured in circular degrees, this option alters the image angle and can be used to
rotate an image or selection to a specic degree.
Slant
This option alters the slant of the image or selection by slanting (skewing) it right or left.
12 Cricut DesignStudio™ • www.cricut.com
Welding
This powerful option allows for the seamless combination of unassociated images into
welded groups. Welding causes multiple images, which have been moved close enough
together to overlap, to become one image. It does this by joining images together wherever an overlap occurs. With this tool, individual letters can easily be welded into words
and phrases. Check the Welding box when choosing images you want to weld.
There are two ways to position images for welding. You can use kerning and nudging to
bring images together within a selection (typing a word, then nudging each letter closer
together in that word) or you can use the selection handles to drag and drop separate
image groups together (putting two or three separate words next to each other).
Tip: When welding multiple images, apply a negative kerning number (see Kerning below)
to bring your selected images close enough to overlap.
Flip Shapes
Check the Flip Shapes box to face each image or selection in the opposite direction, effectively
reversing image orientation.
Kerning
This option alters the space between characters as they are placed on the mat. A negative
number shrinks the margin while a positive number enlarges it.
Tip: Kerning can also help you t a few extra characters on the mat when working at a small
character size.
Cricut DesignStudio™ • www.cricut.com 13
Apply
To activate the Kerning amount you’ve entered click the Apply button. Note: The Apply
button is specically for the Kerning window, not for all of the other areas within the Shape
Properties box. To set those areas just press the Enter key on your keyboard.
Nudge Arrows
Using the Nudge Arrows makes for easy adjustment of character placement. Clicking on
the Nudge Arrows causes a slight kerning shift and moves any character or selection
right or left a small distance.
Tip: If you only need to move your image over a small distance, using the Nudge Arrows
takes the guesswork out of trying to nd the right Kerning setting.
Turn 90 Degrees
Clicking the 90 button will rotate an image or selection counter-clockwise 90 degrees.
Click twice to rotate 180 degrees.
Tip: Use this feature in conjunction with the Rotate option to more quickly nd the perfect
rotation angle.
Revert
Click the Revert button to reset all the options in the Shape Properties menu. This sets the
X, Y, Width, Height, Rotate, Slant, and Turn 90 elds back to the original settings.
Buttons
Down the left side of the Cricut DesignStudio user interface you’ll see a series of buttons.
These buttons perform some of the most useful functions and are placed close to the
on-screen cutting mat for your convenience.
New Page
Clicking the New Page button will create a new on-screen cutting mat on which you can
continue your current project, or begin a new one.
Note: Multiple mat pages stack on top of each other and are tabbed for easy navigation.
Copy Shapes
Want to repeat the last image selection you adjusted without having to redo all the
changes by hand? Click the Copy Shapes button to copy any image selection. This is
especially useful when you want to repeat an image arrangement you have spent time
creating. The Copy Shapes function is identical to the Copy command in the Edit menu.
Note: When copying images, only the most recent copy selection can be pasted.
14 Cricut DesignStudio™ • www.cricut.com
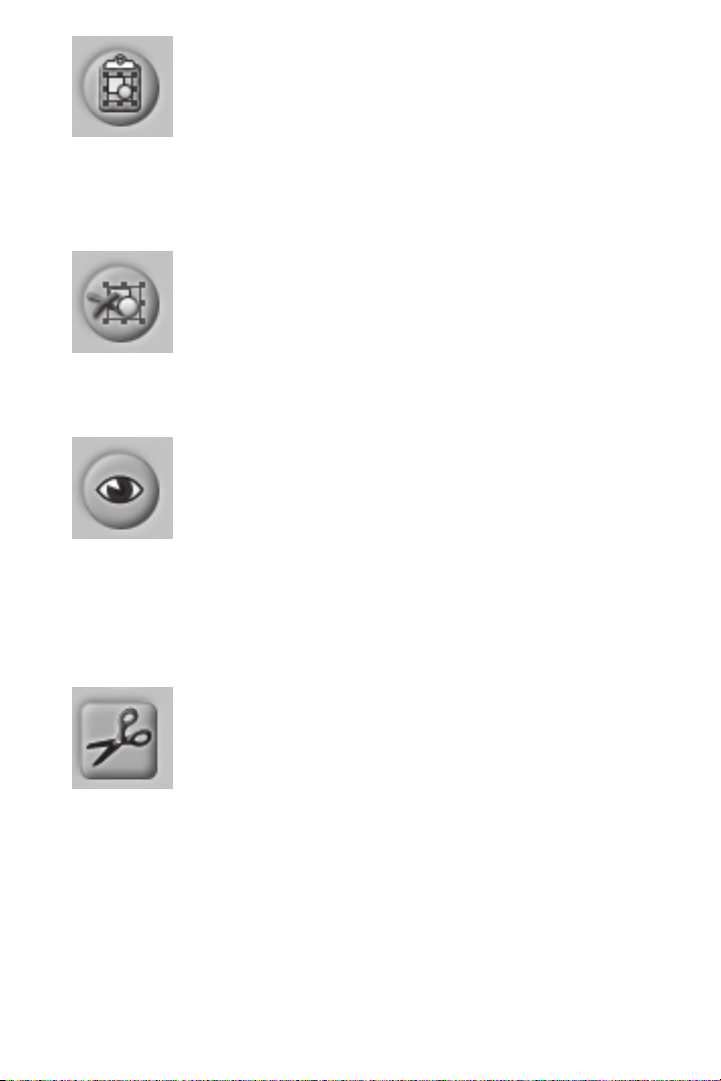
Paste Shapes
Clicking the Paste Shapes button will paste any image selection you just copied into the
mat area you have chosen. Use the cursor to determine mat placement when pasting.
The Paste Shapes function is identical to the Paste command in the Edit menu.
Tip: You can continue to paste the most recent copy selection. This is one way to make
mass production easier.
Delete Shapes
Clicking the Delete Shapes button will remove any selected characters from the mat. The
Delete Shapes function is identical to the Delete Shapes command in the Edit menu.
Tip: You can undo an accidental deletion. (Whew!)
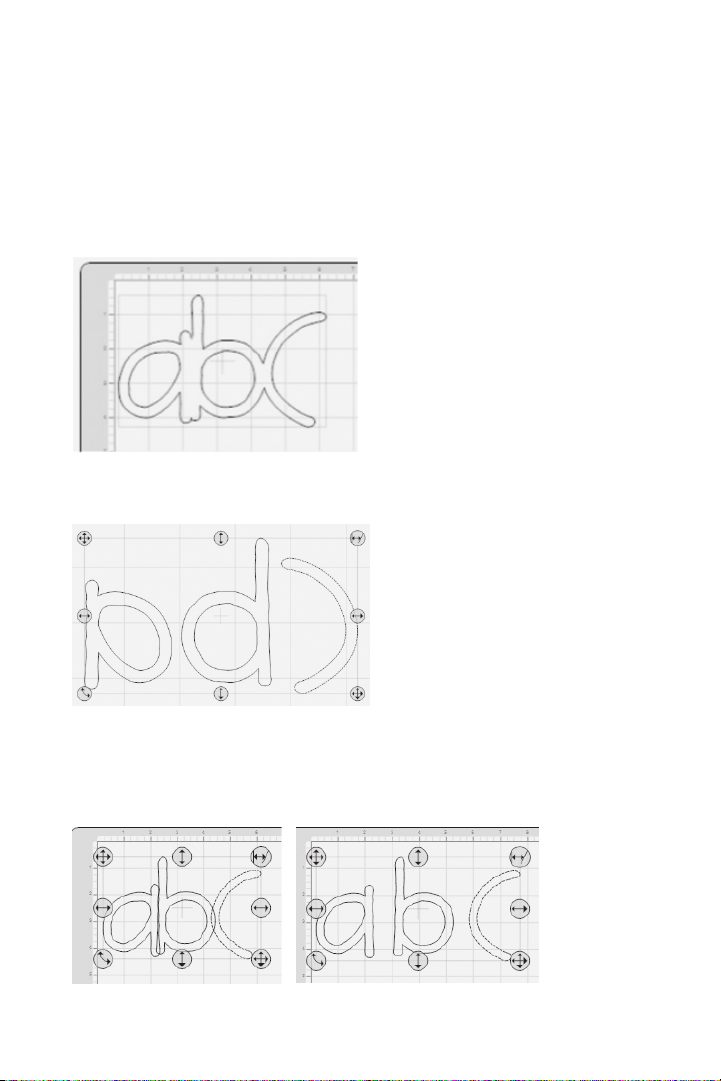
Preview
Clicking the Preview button will bring up a temporary preview outline that shows you what your
selected characters will look like once they’re cut. Preview displays all shape property changes
you have applied such as welds, ips, and rotations. Using the Preview function is a great way
to survey your arranged characters and determine if any nal changes need to be made
before cutting. The Preview function is identical to the Preview command in the View menu.
Tip: When using the Preview, the joined cutting lines of welded shapes will be bolded and
any non-welded shapes will be shaded.
Cut With Cricut
Clicking the Cut With Cricut button sends all the images on your current mat page to the
Cricut machine and begins the cutting process. Be sure to have the right paper loaded
into the Cricut before clicking this button. The Cut With Cricut function is identical to the
Cut With Cricut command in the File menu.
Cricut DesignStudio™ • www.cricut.com 15
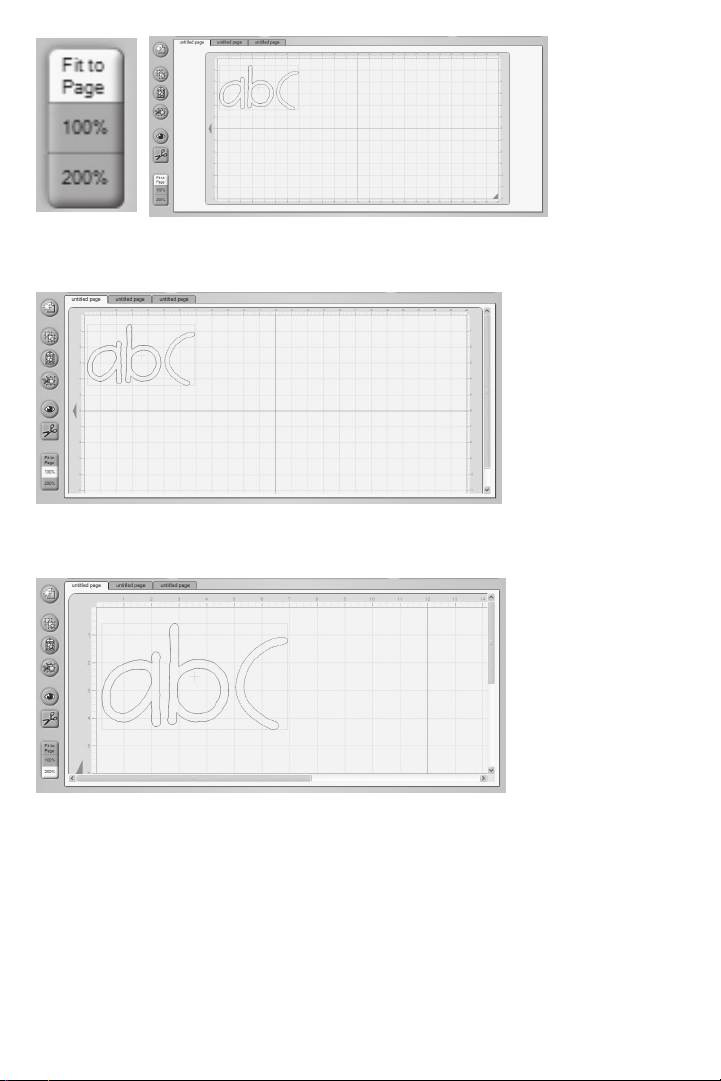
Fit to Page
Clicking the Fit to Page button will reset the mat zoom level so that the entire mat can be
seen. This is a great way to survey everything you’ve selected and how it’s all arranged.
100% View
Clicking the 100% button will reset the mat zoom level so that you will see your selected characters at 100% of their natural size. This is great way to compare characters to each other.
200% View
Clicking on the 200% button will reset the mat zoom level so that you will see your selected
characters at 200% of their natural size. This is a great way to take a closer look at character details.
Tip: To view an individual character without the handles (see page 19), select the character
and then hold down Alt. This will temporarily remove the handles to give you a clearer view.
16 Cricut DesignStudio™ • www.cricut.com

Pages
Pages in the Cricut DesignStudio are essentially virtual cutting mats. Multiple pages can be
saved as one project.
Tip: Naming each individual page in a multi-page project makes it easier to navigate to
any desired page. To change the name of the currently selected page, right-click
anywhere on the mat to bring up page options. See Page Options below.
On-Screen Virtual Cutting Mat
In the Cricut DesignStudio software, the mat page is your workspace. The on-screen cutting mat, in its three sizes (6" x 12", 12" x 12", 12" x 24"), is identical to the real Cricut cutting
mat. One of the powerful benets of using the Cricut DesignStudio software is being able
to see all your character selections laid out on the mat all at once, and having the ability
to adjust and alter character properties before actually cutting anything. With the onscreen cutting mat, What You See Is What You Cut!
Page Options
You can use Page Options to customize the way you access and organize your layouts
and projects. To bring up page options, right-click anywhere on the mat.
Change Page Name
Use this eld to enter in a name for your currently selected page, then hit the Enter key or
click on Change Page Name to make it stick.
Cricut DesignStudio™ • www.cricut.com 17

Show Cartridge
This feature is tailored for those of us without photographic memories. Which set did that
cute little letter come from? Can’t remember? No worries. Just select the image in question, choose Show Cartridge, and the Cartridge Library and Virtual Overlay will show you
exactly where that beauty lives, cartridge name and feature. Look for the highlighted key.
Page Order
They’re your pages, put them in any order you want. You can bring the currently selected
page to the front, send it to the back, jump it one page forward, or send it back one
jump. The page tabs show which page is where.
Include Page in Preview
Use this feature to decide which of your pages you want to be affected by the Preview
function. It might not be necessary to apply a preview to all your pages when all you want
to see is the change you just made on one page. Any page that has this feature checked
will be included in previews.
Set Preview Color
Selecting Set Preview Color will bring up a color palette window. In this window you can
choose the color your previewed images will take on when applying the Preview feature.
If you don’t like the colors offered, you can create your own custom color to be applied.
Choose something nice on the eyes.
18 Cricut DesignStudio™ • www.cricut.com

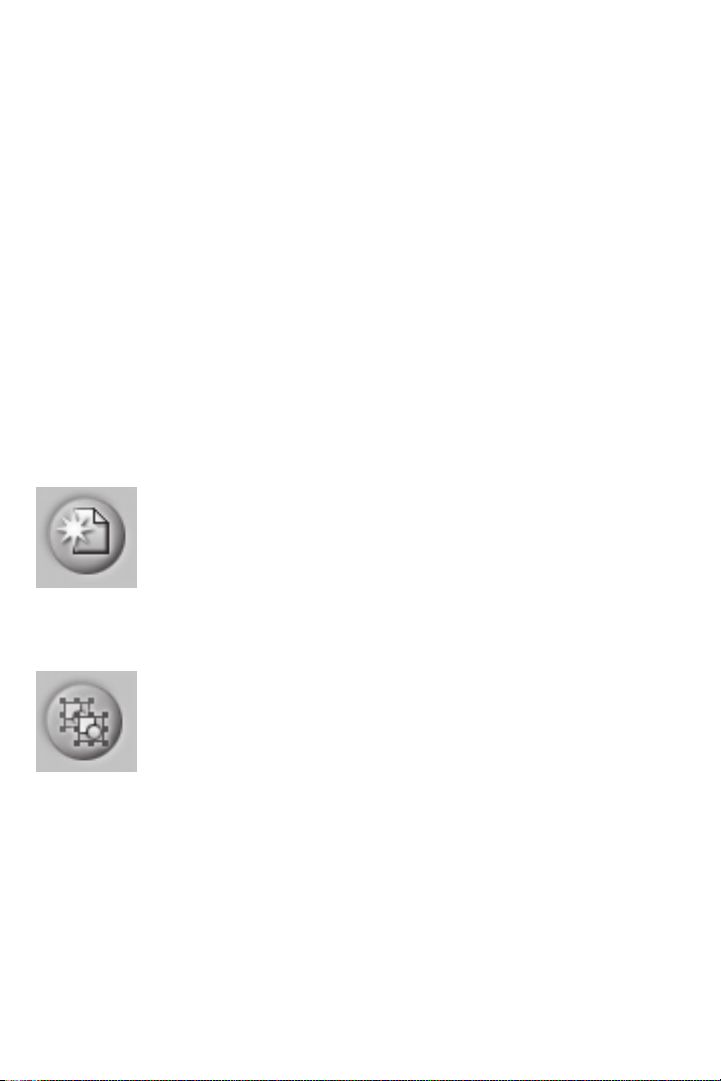
Handles
As you select images on the on-screen virtual cutting mat, you will see your selections in a
box with eight handles, one on every side and one at every corner. Each of these handles
performs a unique function. Getting well acquainted with these handles will transform you
into an image-tweaking expert! To use these selection handles, just click and drag.
Free Move
The handle on the top-left corner of the selection box is used to move your
selection anywhere on the on-screen mat.
Vertical Move
The handle in the top-middle of the selection box is used to move your
selection up or down on the on-screen mat. While using this handle, there is no
horizontal movement.
Slant
The handle in the top-right corner of the selection box is used to slant (skew)
your selection to the right or left.
Horizontal Move
The handle in the middle-left of the selection box is used to move your selec tion right or left on the virtual mat. While using this handle, there is no
vertical movement.
Horizontal Stretch
The handle in the middle-right of the selection box is used to stretch your selec tion horizontally.
Rotate
The handle on the bottom-left corner of the selection box is used to rotate your
selection to any desired angle.
Vertical Stretch
The handle in the bottom-middle of the selection box is used to stretch your
selection vertically.
Scale
The handle on the bottom-right corner of the selection box is used to scale your
selection to any desired size. While scaling, image proportions remain the same.
Cricut DesignStudio™ • www.cricut.com 19

Shortcut Keys
There are a few keystrokes available to you that can enhance your designing experience.
Arrow Keys: Moves the cursor or selected shape group around the on-screen cutting mat.
Use this while pressing the CTRL key down and each move goes from 1/8" to 1/32".
Shift Key and the Up/Down Arrow Keys: Adjusts the default size.
Enter Key: As you are typing in characters, you can hit the Enter key to close the current
shape group and start another.
File Menu
The File menu options are as follows:
New
Use New to open a new project.
Open
Use Open to open any saved project.
Close
Use Close to close any open project.
Note; Simply closing a project does not save it.
Save
Use Save to save any progress, updates, or adjustments you have made to your project. The rst time you save your project, you will be asked to name your project le and
choose where you’re going to save it on your computer. Remember to save your work
often. The shortcut key for Save is Ctrl+S.
Note: Using Save overwrites your original project with the current, modied project. If you
don’t want to lose the project in its original state, use Save As instead of Save and give the
modied project a different le name.
Save As
Use Save As whenever you want to choose the le name for your project and the location
you want to save it in.
20 Cricut DesignStudio™ • www.cricut.com

Cut With Cricut
This option is identical to the Cut With Cricut button (see page 15). All the images on the
selected mat page will be sent to the Cricut machine and the cutting process will begin.
Exit
Use Exit to close the Cricut DesignStudio program.
Note: Exiting the program does not save your work. Remember to save before exiting.
Edit Menu
The Edit menu options are as follows:
Undo
Use Undo to undo the most recent series of actions taken. You can step back up to 20
times. This little saving grace steps you back to the moment before you ruined all your
hard work with that accidental deletion. A good time to use Undo is any time you don’t
like the change you just made. The shortcut key for Undo is Ctrl+Z.
Redo
Use Redo to re-implement the last action that was undone. Basically, it’s an undo for
Undo. The shortcut key for Redo is Ctrl+Y.
Tip: Toggling back and forth between Undo and Redo is a great way to compare the
effects of your changes.
Copy
Use Copy to copy any image selection. This option is identical to the Copy Shapes button (see
page 14). The shortcut key for Copy is Ctrl+C.
Paste
Use Paste to paste in any copied image selection. This option is identical to the Paste
Shapes button (see page 15). The shortcut key for Paste is Ctrl+V.
Cricut DesignStudio™ • www.cricut.com 21

Delete Shapes
Use Delete Shapes to delete any selected images. This option is identical to the Delete
Shapes button (see page 15). The shortcut key for Delete Shapes is Delete.
Delete All
Use Delete All to delete every image on the selected page. There is no shortcut key for
Delete All.
Revert All
Use Revert All to return all your images back to their original state. There is no shortcut key
for Revert All.
View Menu
The View menu options are as follows:
New Page
Use New Page to add a new page to your current project. There is no shortcut key for
New Page.
Delete Page
Use Delete Page to remove the currently selected page from your project. The shortcut
key for Delete Page is Ctrl+D.
Preview
Use Preview to see what all the images on the mat will look like when cut. This option is
handy when seeing how well your welding is coming along. It’s also identical to the
Preview button (see page 15). The shortcut key for Preview is Ctrl+A.
Clear Preview
Use Clear Preview to return to working mode. The shortcut key for Clear Preview is Ctrl+L
22 Cricut DesignStudio™ • www.cricut.com

Keep Preview as Mat Background
Use Keep Preview as Mat Background to create a watermark, or template, from your
current images to use as a background for the next page of images you arrange. Basically, the images youarranged on the rst page can become the guide for arranging
images on the next page. This can be helpful when you’re working with image layers and
shadows, and especially helpful when you’re cutting for negative space rather than positive
space (wanting the page that the letters were cut out of rather than the letters themselves).
Show Ruler
Use Show Ruler to bring up the ruler guide on the virtual cutting mat. The ruler guide displays
one-inch increments and quarter-inch marks.
Tip: You can see the quarter-inch markings best in 200% view mode.
Mat Size
Use Mat Size to change the size of the virtual mat into the same size as the real mat you’re cutting on. The three cutting mat sizes are 6" x 12", 12" x 12", and 12" x 24".
Mat View
Use Mat View to change the mat zoom level. This option is identical to the Fit to Page, 100%,
and 200% buttons (see page 16).
Features Menu
Cricut DesignStudio™ • www.cricut.com 23

The Features menu lists all the creative features available in the current cartridge set and
changes according to which cartridge set you have selected. It also allows you to select
the creative feature of your choice. This option is identical to using the creative feature
keys on the virtual keypad overlay.
Preferences Menu
The Preferences menu options are as follows:
My Cartridge
Use My Cartridge to ag (or mark) the sets you currently own. To do so, select (doubleclick) a cartridge set you own from the Cricut Cartridge Library list. Once selected, choose
the My Cartridge option in the Preferences menu. Doing this adds the agged content to
your My Cartridges list in the Cricut Cartridge Library.
Favorite Cartridge
Use Favorite Cartridge to ag (or mark) the sets you currently love. These aren’t your
kids, so go ahead and pick your favorites. To do so, select (double-click) a cartridge set
you adore (or maybe just merely admire) from the Cartridge Library list. Once selected,
choose the Favorite Cartridge option in the Preferences menu. Doing this adds the
agged content to your Favorites list in the Cricut Cartridge Library.
Multi Cut
Use Multi Cut to set the amount of times you want the Cricut machine to re-cut the same
cut over again in the same spot. This is useful for cutting through materials thicker than paper. You can direct the Cricut machine to re-cut the same image in the same place up to
4 times.
Tip: If you’re cutting a material thicker than paper, remember to also increase blade
depth and blade pressure for better results.
Help Menu
The Help menu options are as follows:
24 Cricut DesignStudio™ • www.cricut.com

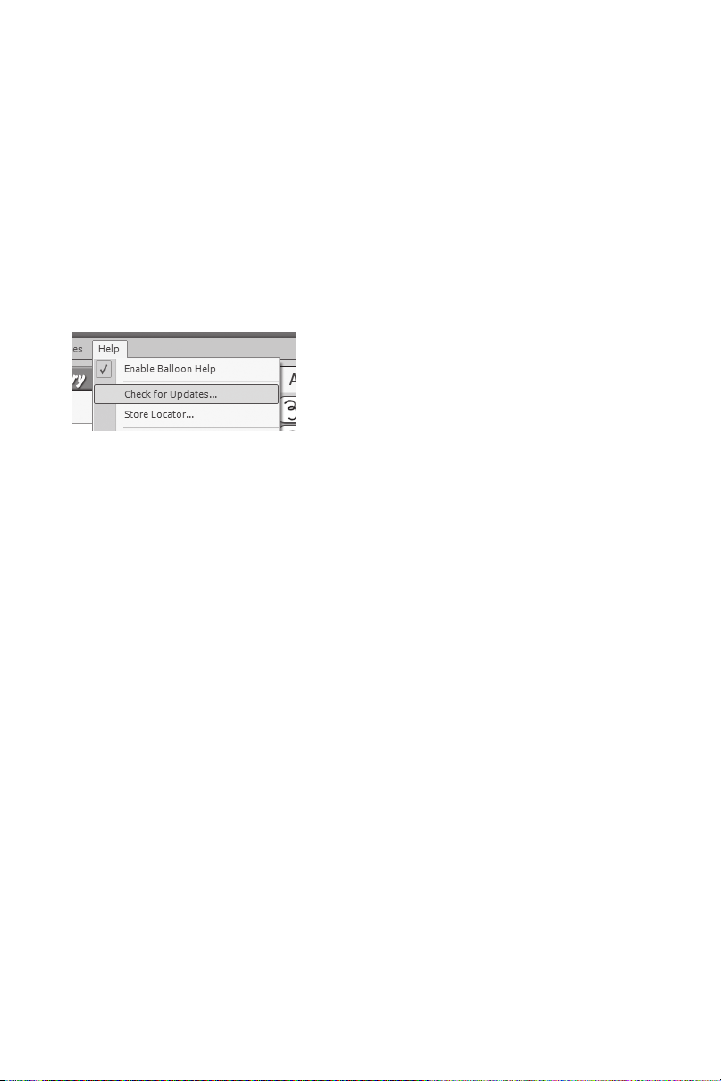
Enable Balloon Help
Use Enable Balloon Help to toggle context-sensitive balloon hints off or on. While this
option is turned on, you can learn the name of any functioning button by resting the
pointer over the button for a second without clicking on it.
Check For Updates
Use Check For Updates to connect directly to the Cricut webpage to upload new fonts
and software updates. An active Internet connection is required for this option.
Store Locator
Use Store Locator to connect directly to the Cricut Store Locator webpage. An active
Internet connection is required for this option.
Update Cricut Firmware
Use Update Cricut Firmware to have the Cricut DesignStudio automatically update
your Cricut machine’s rmware to the most recent version. Be sure to have your Cricut
machine connected to your computer before performing the update. After selecting the
Update Cricut Firmware option, follow the instructions that come up. This updating process
can take around 5 to 10 minutes to complete.
Help
Use Help to nd links to resources and information that can answer that burning Cricut
DesignStudio question you might have.
About
Use About to see information about your current version of the Cricut DesignStudio program.
Tips and Tricks
In an attempt to be helpful, let’s run through some basic Cricut DesignStudio functions and
see if we aren’t all the better for it once we emerge, older and wiser, on the other side.
Working with Cartridge Sets
Remember, you can view all content, and even design layouts with all content, but you can
only cut characters from the cartridges you own. Hopefully, this feature will be useful when
you want to identify your favorite chracters, or when you’re shopping for particular content.
Working with Images
The on-screen cutting mat is your palette. The only limitation to the imagery you can
concoct is the size of the mat. Letters can be mixed with numbers, fonts sets with shape
sets, sizes with positions, welds with ips, and chaos with order. Layouts can be devised
with robotic laser-like precision, each page more orderly and balanced than the last,
or they can be stumbled-upon through playful practice, with unre lated images splashing together to create unexpected treasure-troves of style and beauty. Mix it up. You’ll
discover more.
Cricut DesignStudio™ • www.cricut.com 25

Sizing and Positioning
Using the selection handles simplies the sizing and positioning process, but the shape
properties options allow you greater control when making precise adjustments.
Intricate Designs
As you design keep in mind that some overly intricate or complex designs will be difcult
for your Cricut machine to cut.
Saving and Loading
When you save your project, the default le location will be “MyDocuments/Cricut/Projects”, and the le type is “.cut.” Also, it might have been Confucius who said, “Save your
work often.”
Welding
This long-awaited feature is the belle of the ball! Welding isn’t limited to simply combining letters to make words or phrases. You can use welding to combine any image with
any other, in any position or combination, and the resulting image combination can be
welded yet again. Combine your favorite ower images to make the ultimate bouquet.
Turn familiar shapes into fresh new ones. The uses and possibilities are endless.
Note: Complicated projects may require more time for the computer to gure all the weld
connections out. Please be patient with projects that include a lot of characters.
Maximizing Paper Usage
You can use kerning, sizing, rotation, and precise image placement to pack all your images close together, to ll gaps and holes, and to get the most out of that valuable paper
space. Some layouts can end up looking like dizzying puzzles, but a lot can be squeezed
out of a little when you use the right tools, and the Cricut DesignStudio software enables
you to use every square inch to its upmost.
Community/Feedback
The great Cricut adventure has generated legions of active, talented paper crafting
acionados, many of whom generously share their Cricut-wielding insights and experiences with whoever takes the time to look. The Cricut Community is a rich and wonderful
resource for anyone just starting on this creative journey, for experts looking for new tips or
fresh ideas, or for anyone in between. We highly recommend that you tap into this impressive knowledge base by actively participating in Cricut feedback forums, by peer-rating
posted projects, and even by posting some of your own creations for others to see. Visit
the Cricut Community webpage at Cricut.com for more information.
Technical Support
If you’re having problems getting everything up and running, or if you hit any technical
snags while using this program, please contact our Technical Support experts and see if
they can’t get everything smoothed out and running proper. We are at your beck and
call. To get technical support, please go to www.cricut.com, email support@cricut.com
or call our Customer Support line at 877-7CRICUT (or 877-727-4288).
Conclusion
The only thing concluding here is this manual. There is so much more in store for you to
discover and create! We can’t wait to see what you come up with! Your odyssey is just
beginning. So go now, with our gratitude and appreciation, and claim what is yours.
26 Cricut DesignStudio™ • www.cricut.com

Bienvenue et Introduction . . . . . . . . . . . . . . . . . . . . . . . . . . . . . . . . . . . 28
Conguration de l’Installation . . . . . . . . . . . . . . . . . . . . . . . . . . . . . . . . . . . . . 28
Installation . . . . . . . . . . . . . . . . . . . . . . . . . . . . . . . . . . . . . . . . . . . . . . . . . . . . . . . . . 28
Pour Relier la Machine Cricut à l’Ordinateur . . . . . . . . . . . . . . . . . . . . . 29
Pour Lancer le Cricut DesignStudio . . . . . . . . . . . . . . . . . . . . . . . . . . . 30
Activation du Logiciel . . . . . . . . . . . . . . . . . . . . . . . . . . . . . . . . . . . . . . . . . . . . . . 31
Mise à Jour . . . . . . . . . . . . . . . . . . . . . . . . . . . . . . . . . . . . . . . . . . . . . . . . . . . . . . . . 31
Support Technique, Détection et Solution de Problèmes, et FAQ
(Questions Fréquentes)
. . . . . . . . . . . . . . . . . . . . . . . . . . . . . . . . . . . . . . . . . . . . . 31
Désinstallation . . . . . . . . . . . . . . . . . . . . . . . . . . . . . . . . . . . . . . . . . . . . . . . . . . . . . . . . . . 32
Les Premiers Pas . . . . . . . . . . . . . . . . . . . . . . . . . . . . . . . . . . . . . . . . . . . . . . . . . . . 32
L’Interface Utilisateur . . . . . . . . . . . . . . . . . . . . . . . . . . . . . . . . . . . . . . . . . . . . . 32
Bibliothèque de Cartouches Cricut . . . . . . . . . . . . . . . . . . . . . . . . . . . . . . 32
Panneau Virtuel de Superposition du Clavier . . . . . . . . . . . . . . . . . . . . . . . 34
Propriétés des Formes . . . . . . . . . . . . . . . . . . . . . . . . . . . . . . . . . . . . . . . 35
Welding (Fusionner). . . . . . . . . . . . . . . . . . . . . . . . . . . . . . . . . . . . . . . 37
Flip Shapes (Formes Renversées). . . . . . . . . . . . . . . . . . . . . . . . . . . . . . . 38
Kerning (Crénage) . . . . . . . . . . . . . . . . . . . . . . . . . . . . . . . . . . . 38
Nudge Arrows (Flèches de Transformation) . . . . . . . . . . . . . . . . . . . 38
Tour de 90 Degrés . . . . . . . . . . . . . . . . . . . . . . . . . . . . . . . . . . . . . 38
Revert (Revenir). . . . . . . . . . . . . . . . . . . . . . . . . . . . . . . . . . . . . . . . . 38
Boutons . . . . . . . . . . . . . . . . . . . . . . . . . . . . . . . . . . . . . . . . . . . . . . . 39
Pages . . . . . . . . . . . . . . . . . . . . . . . . . . . . . . . . . . . . . . . . . . . . . 41
On-Screen Virtual Cutting Mat (Tapis de Découpe Virtuel) . . . 41
Montrer la Cartouche . . . . . . . . . . . . . . . . . . . . . . . . . . . . . . . . . 42
Poignées . . . . . . . . . . . . . . . . . . . . . . . . . . . . . . . . . . . . . . . . . 43
Menu Fichier . . . . . . . . . . . . . . . . . . . . . . . . . . . . . . . . . . . . . 44
Menu Édition . . . . . . . . . . . . . . . . . . . . . . . . . . . . . . . . . . . . . 45
Menu Afchage . . . . . . . . . . . . . . . . . . . . . . . . . . . . . . . . . . . . . 46
Menu de Fonctions . . . . . . . . . . . . . . . . . . . . . . . . . . . . . . . . . . . . . 47
Menu Préférences . . . . . . . . . . . . . . . . . . . . . . . . . . . . . . . . . . . . . 48
Menu Aide . . . . . . . . . . . . . . . . . . . . . . . . . . . . . . . . . . . . . 48
Conseils Pratiques et Trucs . . . . . . . . . . . . . . . . . . . . . . . . . . . . . . . . . 49
Pour Travailler avec des Jeux de Cartouches . . . . . . . . . . . . . . . . . . . . 49
Pour Travailler avec des Images . . . . . . . . . . . . . . . . . . . . . . . . . . 49
Dénition de Tailles et de Positions . . . . . . . . . . . . . . . . . . . . . . . . . . 50
Intricate Designs (Designs Élaborés) . . . . . . . . . . . . . . . . . . . . . . . . . 50
Sauvegarder et Charger . . . . . . . . . . . . . . . . . . . . . . . . . . . . . . . . 50
Welding (Fusionner) . . . . . . . . . . . . . . . . . . . . . . . . . . . . . . . . . . . . . . 50
Pour Maximaliser L’Utilisation du Papier . . . . . . . . . . . . . . . . . . . . . . . . . 50
Communauté/Commentaires et Suggestions . . . . . . . . . . . . . . . . . . . 50
Support Technique . . . . . . . . . . . . . . . . . . . . . . . . . . . . . 50
Conclusion . . . . . . . . . . . . . . . . . . . . . . . . . . . . . . . . . . . . . . . . . . . 50
Cricut DesignStudio™ • www.cricut.com 27

Bienvenue et Introduction
Au nom de toute l’équipe de Provo Craft, nous tenons à vous remercier très sincèrement
pour votre achat du logiciel Cricut DesignStudio™! Félicitations! Le programme qui maintenant vous appartient vous aidera à augmenter votre créativité Cricut. Délectez-vous
avec votre logiciel!
Qu’est-ce que c’est le Cricut DesignStudio™?
Le Cricut DesignStudio est beaucoup de choses. C’est une table de travail virtuel de
dernière génération, une penderie de contenu numérique, un laboratoire de création
d’images d’un savant fou, un portail éblouissant pour le groupe de cerveaux Cricut du
monde complet, et même une éclatante boule de cristal dont le futur de vos aventures
Cricut peut être deviné.
Avec le logiciel Cricut DesignStudio, vous pouvez créer des dessins numériques de chacune des images souhaitées se trouvant dans la Bibliothèque Cricut DesignStudio, avant de
les couper. Ce Que Vous Voyez Est Ce Que Vous Coupez! Vous pouvez fusionner des images pour créer de nouvelles combinaisons, ou vous pouvez réunir des lettres pour créer
des mots et des phrases. Vous pouvez changer les propriétés des images, les faire pivoter,
les renverser, les incliner, les reproduire, ou leur faire des coupes multiples à votre goût.
Vous pouvez faire une prévisualisation des jeux de cartouches qui ne vous appartiennent
pas encore. Vous pouvez examiner avec une plus grande facilité vos propres jeux de cartouches dans des diverses modes d’organisation. Vous pouvez employer des descripteurs
de mot-clé pour localiser rapidement juste l’image appropriée. Vous pouvez sauvegarder
votre progrès dans les dessins que vous êtes en train de créer, et les charger à nouveau
pour reprendre là où vous aviez cessé. Le Cricut DesignStudio est un outil supérieur pour
vous aider à examiner, créer, et couper, en suivant vos propres idées du projet parfait, de
la manière dont vous le souhaitez.
Conguration de l’Installation
Vous pouvez employer le logiciel Cricut DesignStudio avec la machine Cricut™ Personal
Electronic Cutter™ ou Cricut Expression™ 24" Personal Electronic Cutter™.
NOTE IMPORTANTE: Installez le Cricut DesignStudio AVANT de relier votre Cricut à votre
ordinateur. Ceci permet d’assurer que les pilotes approprié sont installés.
Installation
Assurez-vous de fermer toutes les applications avant de commencer l’installation ou la
conguration.
1. Insérez le CD Cricut DesignStudio dans l’unité de disque.
2. Quand l’Assistant d’Installation apparaît, suivez les instructions. L’Assistant d’Installation
vous présentera le Contrat de Licence Utilisateur Final, et vous demandera un emplacement pour l’installation. L’emplacement par défaut qu’il montrera devrait fonctionner
parfaitement. Apres avoir choisi l’emplacement de l’installation, le programme exécutera
l’installation et vous fera savoir quand il est ni. Cliquez simplement sur “Finish” (“Finir”)
pour compléter l’installation.
28 Cricut DesignStudio™ • www.cricut.com

Note: Si l’Assistant d’Installation ne commence pas automatiquement, vous pouvez le
lancer manuellement en examinant les contenus du disque, et en faisant un double-clic sur
le chier “CDSInstaller.exe”.
Contrat de Licence Utilisateurs Finaux
Nous vous prions de lire l’End User License Agreement (Contrat de Licence Utilisateurs
Finaux) puisqu’il a une relation avec vous en ce qui concerne votre utilisation du logiciel
Cricut DesignStudio. Nous pouvons vous assurer que ce n’est pas une lecture la plus
stimulante, mais une petite partie dans votre intérieur brillera chaudement à avoir pris part
à un acte qui vous qualie comme un consommateur responsable. D’autre part, vous ne
pourrez pas continuer avec le processus d’installation jusqu’à ce que vous ayez accepté
les conditions établies par la licence.
Installation .NET 2.0 (si nécessaire)
Si à tout moment pendant l’installation ou le processus de lancement, vous recevez un
message se référant au besoin d’installer le .NET 2.0 avant de continuer, cela signie que
votre installation actuelle de Windows n’a pas ce cadre d’applications intégré. Nous
avons inclus le chier d’installation pour ceci sur le CD DesignStudio. Vous pouvez accéder
aux contenus du CD d’une fenêtre de l’Explorateur Windows et faire un double-clic sur le
chier dotnetfx.exe. Une fois accompli, continuez en lançant et en exécutant le logiciel.
Pour Relier la Machine Cricut à l’Ordinateur
NOTE IMPORTANTE: Assurez-vous d’avoir installé le Cricut DesignStudio AVANT de
relier votre Cricut à votre ordinateur. Ceci permet d’assurer que les pilotes appropriés
sont installés.
Localisez le câble USB qui est venu avec votre Paquet en Cadeau Bonus Cricut DesignStudio. Localisez alors le port USB dans la partie postérieure de votre machine Cricut, proche
au port de l’adaptateur courant alternatif (CA). Veuillez noter sa forme singulière, et puis
branchez l’extrémité appropriée du câble USB Cricut. Finissez la connexion en branchant
Cricut DesignStudio™ • www.cricut.com 29

l’extrémité standard du câble USB Cricut à un port USB disponible sur votre machine.
Assurez-vous d’avoir relié le câble USB à votre ordinateur et à votre machine Cricut
avant d’allumer la machine Cricut. Votre ordinateur devrait automatiquement détecter
et installer les pilotes requis pour exécuter la machine Cricut dès qu’il est allumé pour
la première fois. Ceci peut prendre une minute ou deux. Vous verrez des bulles d’aide
automatiques Windows signalant l’état jusqu’à ce qu’il est complété.
Pour Lancer le Cricut DesignStudio
Lancez le logiciel Cricut DesignStudio en faisant un double-clic sur l’icône placée sur votre
bureau pendant l’installation OU via Start (Lancer)/All Programs (Toutes les Programmes)/
Cricut DesignStudio link (lien Cricut DesignStudio).
Activation du Logiciel
Quand vous lancez le logiciel Cricut DesignStudio pour la première fois, vous serez invité
à établir l’authenticité de votre logiciel pour obtenir accès à la gamme complète de
fonctions. Jusqu’à ce que le logiciel soit activé, il peut seulement fonctionner en mode
“d’essai”, dont vos options de découpage seront limité à ce qui suit: Tout en opérant
avec le Cricut V1, vous pouvez seulement couper à partir de la cartouche George and
Basic Shapes. Si vous êtes en train d’employer la Cricut Expression, vous pouvez seulement
couper à partir des cartouches Plantin SchoolBook et Accent Essentials. La vérication de
la propriété légitime du logiciel nous aide à protéger votre investissement, et favorise un
futur Cricut plus lumineux pour nous tous.
La manière la plus facile d’activer votre logiciel c’est en choisissant l’option “Activate
using the Internet” (Activer en utilisant l’Internet) pendant cette étape du processus
d’installation. Si vous vous trouvez sans accès à l’Internet à l’heure de l’installation, vous
pouvez également activer votre logiciel par le téléphone, en cliquant sur l’onglet situé
immédiatement à droite de l’onglet “Activate using the Internet” (“Activer en utilisant
l’Internet”). Comme la méthode téléphonique est un peu plus complexe que la méthode
en ligne, nous vous prions de prêter une attention particulière aux instructions fournies
pendant le processus. À ce sujet, il peut être réconfortant pour vous de savoir que
l’activation du logiciel est effectuée seulement une fois par installation.
30 Cricut DesignStudio™ • www.cricut.com

.
Mise à jour du logiciel
Périodiquement, Provo Craft émettra des mises à jour du Cricut DesignStudio. Aussi, au
fur et à mesure que Provo Craft émet de nouveau contenu, le processus de mise à jour
ajoutera automatiquement ce nouveau contenu à votre bibliothèque de cartouches
Cricut DesignStudio pour que vous puissiez le prévisualiser, créer en l’utilisant, et simplement vous y enchanter. Si vous voulez voir les incorporations les plus récentes, mettez à
jour fréquemment! Pour mettre à jour, employez les options Check for Updates (Vérication de Mises à Jour) sur le Help menu (Menu d’Aide) (voir page 48), ou vériez la page
Web de Support Cricut sur Cricut.com. On requiert une connexion Internet active pour
cette option.
Updating the Cricut Firmware (Mise à Jour du Microprogramme Cricut)
Avant de couper pour la première fois au moyen du DesignStudio, vous serez sollicité de
mettre à jour le Microprogramme Cricut dans la machine même. Pour faire ceci sélectionnez “Update Cricut Firmware” (“Mettre à jour le Microprogramme Cricut”). Assurez-vous
d’avoir relié votre Cricut à votre ordinateur avant d’exécuter la mise à jour. Apres avoir
sélectionné l’option Update Cricut Firmware (Mettre à Jour le Microprogramme Cricut),
suivez les instructions qui apparaissent. Ce processus de mise à jour peut prendre environ 5
à 10 minutes à accomplir.
Support Technique, Détection et Solution de Problèmes, et FAQ—
Questions Fréquentes
Pour obtenir de l’assistance avec la détection et la solution de tout problème, ou de matières
en rapport avec l’installation du programme, la fonctionnalité du programme, ou l’utilisation
du programme Cricut DesignStudio ; ou bien pour voir une liste des questions les plus fréquentes, nous vous prions de vous adresser à la page web de Support Cricut sur Cricut.com.
Cricut DesignStudio™ • www.cricut.com 31

Désinstallation
S’il vous arrivait d’avoir besoin de désinstaller le Cricut DesignStudio, suivez ces pas :
1. Allez sur “Start” (“Lancer”), sélectionnez “Control Panels” (“Panneaux de Commande”),
et puis “Add or Remove Programs” (“Ajouter ou Supprimer des Programmes”).
2. Sélectionnez le Cricut DesignStudio de la liste, et puis cliquez sur “Remove” (“Supprimer”).
3.Choisissez “Uninstall” (“Désinstaller”) et suivez les instructions. Tout fait.
Ou
1. Allez sur “Start”(“Lancer”), puis “All Programs” (“Tous les Programmes”), et puis Cricut
DesignStudio.
2. Choisissez “Uninstall” (“Désinstaller”) du menu. Ceci lancera l’Assistant de Désinstallation.
Les Premiers Pas
Nous avons déjà parlé sufsamment sur le logiciel Cricut DesignStudio, voyons-le maintenant en action! Sentez-vous libre d’ouvrir le programme et de continuer à avancer.
Votre succès et plaisir en employant ce programme seront considérablement augmentés
si vous êtes familiarisé avec tous les coins et recoins. Si celle-ci est votre première fois en
actionnant le logiciel Cricut DesignStudio, nous vous recommandons de suivre activement
les descriptions, et d’expérimenter avec les
L’Interface Utilisateur
Observons maintenant les caractéristiques et les fonctions du logiciel Cricut DesignStudio.
Ce qui suit est une liste des éléments fonctionnels que vous trouverez dans le programme
avec une brève description de ce que chaque fonction effectue.
Bibliothèque de Cartouches Cricut
Dans cette fenêtre, vous pourrez examiner tout le contenu disponible Cricut, et accéder
à tous les jeux de cartouches qui vous appartiennent. Cette fonction vous permet de faire
une prévisualisation de ce que vous voulez, mais rappelez-vous que vous pourrez seulement couper le contenu que vous avez acheté.
32 Cricut DesignStudio™ • www.cricut.com

Vue
Employez le menu déroulant Vue pour choisir comment organiser le contenu pour
l’examiner. Votre contenu peut être organisé des manières suivantes:
Favoris
Toute cartouche que vous marquez comme favori apparaîtra sur cette catégorie (voir
page 48 pour des informations supplémentaires).
Tout par Catégorie
Le contenu Cricut peut être organisé par type de catégorie générale. Ces catégories
sont: Jeux de Police de caractères, jeux d’Images (Formes), jeux Éducationnels, et
jeux Saisonnières.
Mes Cartouches
Toute cartouche que vous marquez comme le votre apparaîtra sur cette catégorie (voir
page 48 pour des informations supplémentaires).
Mots-clés
Le contenu Cricut peut être organisé par type de caractère, et on peut les examiner un
par un.
Key 1 et Key 2
Introduisez les critères de recherche dans ces domaines pour chercher des types
d’images spéciques. Par exemple, chien, étoile, étiquette, etc.
Show Key Shape Buttons (Montrer des Mots-Clés des Boutons de Formes) Utilisez ces boutons èches pour voir le caractère “previous” (“précédent”) ou “next” (“suivant”) dans les
résultats de la recherche par mot-clé.
Fenêtre de Liste de Cartouches
Le contenu sera organisé dans cette fenêtre en accord avec la méthode de vue choisie.
Faites un double-clic sur le nom du contenu pour le sélectionner.
Cricut DesignStudio™ • www.cricut.com 33

Panneau Virtuel de Superposition du Clavier
Au fur et à mesure que vous sélectionnez le contenu de la Bibliothèque de Cartouches
Cricut, le panneau de superposition du clavier sera mis à jour pour reéter le contenu
que vous avez choisi. Utilisez ces boutons comme vous le feriez sur la machine Cricut pour
entrer les images avec lesquelles vous voulez travailler ou que vous voulez couper. Cliquez
sur un bouton d’image avec le curseur pour sélectionner cette image, et pour l’ajouter au
tapis de découpe virtuel.
Touches de Fonctions Créatives
Sur le côté gauche du panneau il y a six touches gris destinées à la sélection de fonctions
créatives. Chacune de ces touches a un symbole qui représente le thème d’une fonction
créative en particulier. Cliquez sur ces touches pour passer à la fonction créative de votre
élection. Cliquez sur le bouton à nouveau pour désactiver la fonction créative et retourner le panneau de superposition du clavier aux images base. Vous pouvez de même
sélectionner les fonctions créatives à partir du menu Fonctions.
SHIFT LOCK (TOUCHE DE VERROUILLAGE)
Après avoir cliqué sur la touche SHIFT LOCK (TOUCHE DE VERROUILLAGE), toute image
choisie se transformera en l’image qui apparaît avec la touche majuscule enfoncée
(touche shift activée). Cliquez à nouveau sur la touche SHIFT LOCK (TOUCHE DE VERROUILLAGE) pour retourner aux images correspondant à la touche shift non activée. Toutes les
actions impliquant les majuscules doivent être faites avec cette touche. Le Shift button
(Bouton de Majuscule) sur le clavier de votre ordinateur ne fonctionnera pas à sa place.
SPACE (ESPACE)
Tout comme avec la machine Cricut, en cliquant sur SPACE (ESPACE) on ajoutera un
espace après l’image actuellement choisie.
34 Cricut DesignStudio™ • www.cricut.com

BACK SPACE (TOUCHE D’EFFACEMENT ARRIÉRE)
En cliquant sur la touche BACK SPACE (Touche d’Effacement Arrière) on supprimera
l’image ou l’espace actuellement choisi.
La Touche Paper Saver (Pour Economiser du Papier)
Sélectionnez le mode Paper Saver (Pour Economiser du Papier) en cliquant sur cette
case. Le mode Paper Saver (Pour Economiser du Papier) réorganise les images pour
conserver autant espace de papier comme possible.
Real Size (Taille Réelle)
Sélectionnez le mode Real Size (Taille Réelle) en cliquant sur cette case. Le mode Real
Size (Taille Réelle), tout comme le Real Dial Size (Disque de Dénition de la Taille Réelle) de
votre machine Cricut, ne considère pas la taille proportionnelle d’un caractère et il fait
que les images soient montrées et coupés de la taille réelle que vous avez choisie.
Default Size (Taille Par Défaut)
Utilisez la case de délement du Default Size (Taille Par Défaut) pour choisir la taille du
prochain caractère choisi. Cette taille se rapporte seulement à la hauteur d’un caractère. Utilisez le pointeur de la souris, faites un clic et soutenez la barre de délement
pour capturer la èche du délement. Déplacez-la à droite pour augmenter la taille, et à
gauche pour la diminuer. Vous pouvez aussi cliquer sur les symboles “plus” ou “minus” pour
obtenir les mêmes résultats.
Conseil Pratique: Pour changer rapidement la taille, cliquez près des extrémités de la case
de délement de la taille pour augmenter ou diminuer dans des dimensions plus grandes.
Propriétés des Formes
Cricut DesignStudio™ • www.cricut.com 35

Cette fenêtre contient des options pour modier les propriétés des images, telles que leur
position sur le tapis, la dimension du caractère, et d’autres. Entrez simplement les données
désirées et pressez la touche Enter (Retour) de votre clavier.
Les commandes dans cette fenêtre sont seulement une des manières de manipuler les
propriétés des formes. Vous pouvez aussi changer les propriétés des formes directement
avec les poignées de sélection (voir pages 43 et 44).
Axe des X
Cette option détermine où l’on place un caractère ou sélection sur l’axe horizontal X du
tapis, ou l’emplacement à gauche ou à droite de l’image.
Axe des Y
Cette option détermine où l’on place un caractère ou sélection sur l’axe vertical X du
tapis, ou l’emplacement vers le haut ou vers le bas de l’image.
Width (Largeur)
Cette option modie la largeur d’une image ou d’une sélection.
Height (Hauteur)
Cette option modie la hauteur d’une image ou d’une sélection.
Rotate (Pivoter)
Mesuré en degrés circulaires, cette option modie l’angle de l’image et peut être employée pour faire pivoter une image ou une sélection jusqu’à un degré spécique.
36 Cricut DesignStudio™ • www.cricut.com

Slant (Inclination)
Cette option modie l’inclination de l’image ou sélection en l’inclinant (de façon oblique)
vers la droite ou vers la gauche.
Welding (Fusionner)
Cette option magnique permet l’association parfaitement intégré des images qui
auparavant étaient désunis, dans des groupes fusionnés. Le processus de Welding (Fusion)
permet que des images multiples, qui ont été rapprochées assez étroitement pour qu’elles
se recouvrent, deviennent une seule image. Ceci se produit en unissant les images dans
tous les points où elles sont superposées. Avec cet outil, les lettres individuelles peuvent
facilement se fusionner jusqu’à devenir des mots ou des phrases. Marquez la case Welding (Fusion) quand vous êtes en train de choisir des images que vous voulez fusionner.
Il y a deux manières de positionner les images pour les fusionner. Vous pouvez employer
le kerning (crénage) ou le nudging (poignées de transformation) pour réunir des images
à l’intérieur d’une sélection (en écrivant un mot, et puis en rapprochant chaque lettre du
mot au moyen des poignées de transformation) ou vous pouvez utiliser les poignées de
transformation pour faire glisser et déplacer des groupes d’images séparées en les rassemblant (mettant deux ou trois mots séparés l’un à côté de l’autre).
Conseil Pratique: Si vous êtes en train de fusionner des images multiples, appliquez un
numéro kerning négatif (voir Kerning ci-dessous) pour rapprocher vos images choisies
jusqu’à ce qu’elles se superposent.
Cricut DesignStudio™ • www.cricut.com 37

Flip Shapes (Formes Renversées)
Marquez la case Flip Shapes (Formes Renversées) pour orienter chaque image ou sélection dans
la direction opposée, invertissant totalement l’orientation de l’image.
Kerning (Crénage)
Cette option modie l’espace entre les caractères au fur et à mesure qu’ils sont placés sur
le tapis. Un numéro négatif réduit la marge, tandis qu’un numéro positif l’augmente.
Conseil Pratique: Le Kerning (Crénage) peut aussi vous aider à introduire quelques caractères supplémentaires sur le tapis quand vous êtes en train de travailler avec une taille
petite de caractères.
Apply (Appliquer)
Pour activer la quantité Kerning (Crénage) que vous avez entrée, cliquez sur le bouton
Apply (Appliquer). Note: Le bouton Apply (Appliquer) est spéciquement pour la fenêtre
de Kern, n’incluant pas toutes les autres secteurs à l’intérieur de la boîte de Propriétés
des Formes. Pour déterminer ces secteurs, simplement pressez la touche Enter (Retour) sur
votre clavier.
Nudge Arrows (Flèches de Transformation)
Les Nudge Arrows (Flèches de Transformation) permettent d’ajuster facilement
l’emplacement d’un caractère. En cliquant sur les Nudge Arrows (Flèches de Transformation), il se produit un léger changement de Kerning (Crénage), et le caractère ou la
sélection se déplace une petite distance vers la droite ou vers la gauche.
Conseil Pratique: Si vous avez besoin de déplacer votre image seulement une petite
distance, vous pouvez utiliser les Nudge Arrows (Flèches de Transformation) et ceci supprimera la nécessité de deviner le réglage Kerning (Crénage) adéquat.
Tour de 90 Degrés
Si vous cliquez sur le bouton 90, l’image ou la sélection tournera de 90 degrés dans le sens
inverse des aiguilles d’une montre. Cliquez deux fois pour faire pivoter l’image de 180 degrés.
Conseil Pratique: Utilisez cette fonction avec l’option Rotate (Pivoter) pour trouver plus
rapidement l’angle de rotation parfait.
Revert (Revenir)
Cliquez sur le bouton Revert (Revenir) pour reconstituer toutes les options dans le menu de
Propriétés des Formes. Ceci reconstituera les champs X, Y, Width (Largeur), Height (Hauteur), Rotate (Pivoter), Slant (Incliner), et Turn 90 (Tour 90) à la conguration originale.
38 Cricut DesignStudio™ • www.cricut.com

Boutons
Sur la partie inférieure du côté gauche de l’interface utilisateur Cricut DesignStudio, vous
verrez une série de boutons. Ces boutons exécutent certaines des fonctions les plus utiles,
et sont placés près du tapis de découpe virtuel pour votre convenance.
Page Nouvelle
En cliquant sur le bouton New Page (Page nouvelle) on créera un nouveau tapis de découpe virtuel sur lequel vous pourrez continuer avec votre projet en cours, ou commencer
un nouveau projet.
Note: Les pages multiples de tapis sont empilés l’une sur l’autre, et elles ont des onglets
pour faciliter la navigation.
Copy Shapes (Copier des Formes)
Voulez vous répéter la dernière sélection d’image que vous avez modiée sans devoir
refaire tous les changements manuellement? Cliquez sur le bouton Copy Shapes (Copier
des Formes) pour copier toute sélection d’image. Ceci est particulièrement utile quand
vous voulez répéter un ajustement d’une image auquel vous avez consacré beaucoup
de temps de création. La fonction Copy Shapes (Copier des Formes) est identique à la
commande Copy (Copier) de l’Edit menu (Menu d’Édition)
Note: Lorsque vous êtes en train de copier des images, on peut seulement coller la
dernière sélection de copie.
Paste Shapes (Coller des Formes)
Cliquez sur le bouton Paste Shapes (Coller des Formes) pour coller toute sélection
d’image que vous venez de copier sur le secteur du tapis que vous avez choisi. Pour coller l’image, utilisez le curseur pour déterminer l’emplacement de l’image sur le tapis. La
fonction Paste Shapes (Coller des Formes) est identique à la commande Paste (Coller) de
l’Edit menu (Menu d’Édition).
Conseil Pratique: Vous pouvez continuer à coller la sélection de copie la plus récente.
Celle-ci est une façon de faciliter la production en série.
Delete Shapes (Supprimer des Formes)
Si vous cliquez sur le bouton Delete Shapes (Supprimer des Formes), tout caractère sélectionné du tapis sera supprimé. La fonction Delete Shapes (Supprimer des Formes) est
Cricut DesignStudio™ • www.cricut.com 39

identique à la commande Delete (Supprimer) de l’Edit menu (Menu d’Édition).
Conseil Pratique: Vous pouvez annuler une suppression accidentelle. (Ouf ! Quel soulagement!)
Preview (Prévisualisation)
En cliquant sur le bouton Preview (Prévisualisation) un schéma temporaire de prévisualisation
s’ouvrira en vous montrant comment vous verrez les caractères que vous avez choisis une fois
ils sont coupés. La fonction Preview (Prévisualisation) afche tous les changements aux propriétés des formes pour lesquels vous avez donné l’instruction Apply (Appliquer), telles que les
fusions, les renversements, et les rotations. Utiliser la fonction Preview (Prévisualisation) est une
façon magnique d’examiner les caractères que vous avez modiés et de déterminer si vous
avez besoin d’effectuer tout autre changement nal avant de couper. La fonction Preview
(Prévisualisation) est identique à la commande Preview (Prévisualisation) du View menu
(Menu Afchage).
Conseil Pratique: Si vous êtes en train d’utiliser le Preview (Prévisualisation), les lignes de découpe qui ont été unies des formes fusionnées apparaîtront en caractères gras, et les formes
qui n’ont pas été fusionnées apparaîtront en caractères ombragés.
Couper avec Cricut
Si vous cliquez sur le bouton Cut With Cricut (Couper avec Cricut) toutes les images sur votre
page du tapis actuel seront envoyées à la machine Cricut et le processus de découpe
commencera. Assurez-vous d’avoir chargé le papier correct dans la machine Cricut avant
de cliquer sur ce bouton. La fonction Cut With Cricut (Couper avec Cricut) est identique à
la commande Cut With Cricut (Couper avec Cricut) du File menu (Menu Fichier).
Fit to Page (Ajustement à la Page)
Si vous cliquez sur le bouton Fit to Page (Ajustement à la Page) le niveau du zoom du tapis
se reconstituera de sorte que vous pourrez voir le tapis complète. Celle-ci est une manière
excellente d’examiner tout ce que vous avez choisi et la manière dont tout a été organisé.
Vue à 100%
Si vous cliquez sur le bouton 100% le niveau du zoom du tapis se reconstituera, de sorte que
vous pourrez voir vos caractères choisis à 100% de leur taille normale. Celle-ci est une façon
excellente de comparer les caractères entre eux.
40 Cricut DesignStudio™ • www.cricut.com

Vue à 200%
Si vous cliquez sur le bouton 200% le niveau du zoom du tapis se reconstituera de sorte
que vous pourrez voir vos caractères choisis à 200% de leur taille normale. Celle-ci est une
façon excellente d’examiner plus en détail les caractères.
Conseil Pratique: Pour visualiser un caractère individuel sans utiliser les poignées (voir page
43), sélectionnez le caractère, et ensuite maintenez pressée la touche Alt. Ceci supprimera provisoirement les poignées pour vous accorder une vue plus claire.
Pages
Dans le Cricut DesignStudio les pages sont rien d’autre que des tapis de découpe virtuels.
Des pages multiples peuvent être sauvegardées en tant qu’un seul projet.
Conseil Pratique: Mettre un nom à chaque page individuelle dans un projet multipage
facilite la navigation vers toute page désirée. Pour changer le nom de la page actuellement choisie, cliquez à droite n’importe où sur le tapis pour faire apparaître les options de
page. Voir Options de Pages ci-dessous.
On-Screen Virtual Cutting Mat (Tapis de Découpe Virtuel)
Dans le logiciel Cricut DesignStudio, la page du tapis est votre zone de travail. Le tapis
de découpe virtuel, dans ses trois tailles (6" x 12", 12" x 12", 12" x 24") est identique au tapis
de découpe Cricut réel. Un des bénéces les plus signicatifs d’utiliser le logiciel Cricut
DesignStudio est de pouvoir voir toutes vos sélections de caractères, distribuées d’une
Cricut DesignStudio™ • www.cricut.com 41

seule fois sur le tapis, et d’avoir la possibilité d’adapter et de modier les propriétés des
caractères avant de couper un certain projet. Avec le tapis de découpe virtuel, Ce Que
Vous Voyez Est Ce Que Vous Coupez!
Options de Page
Vous pouvez utiliser les Options de Page pour personnaliser la manière dont vous accédez
et organisez vos dessins et vos projets. Pour faire apparaître les options de page, cliquez à
droite n’ importe où sur le tapis.
Pour Changer le Nom des Pages
Employez ce champ pour entrer un nom pour la page que vous venez de sélectionner,
puis pressez la touche retour, ou cliquez sur Pour Changer le Nom de Pages de sorte que
le nom s’afche.
Montrer la Cartouche
Cette fonction a été conçue spécialement pour ceux d’entre nous qui n’ont pas
mémoire photographique. Dans quel jeu venait cette mignonne petite lettre? Vous ne
pouvez pas vous rappeler? Ça ne fait rien. Sélectionnez simplement l’image en question, choisissez Montrer la Cartouche, et la Bibliothèque des Cartouches et le Panneau
de Superposition Virtuel vous montreront exactement où cette beauté vit, le nom de la
cartouche et la fonction. Cherchez la touche en surbrillance.
L’Ordre de la Page
Celles-ci sont vos pages; vous pouvez leur mettre dans l’ordre que vous désirez. Vous pouvez apporter la page que vous venez de sélectionner à l’avant, l’envoyer en arrière, la
sauter une page en avant, ou la renvoyer un saut. Les onglets de la page vous montrent
quelle page est où.
Inclure Page dans la Prévisualisation
Utilisez cette fonction pour décider lesquelles de vos pages vous voulez être affecté par
la fonction Prévisualisation. Il pourrait ne pas être nécessaire d’appliquer une prévisualisation à toutes vos pages quand tout ce que vous voulez voir c’est le changement vous
venez de faire sur une page. Toute page qui a cette fonction cochée sera incluse dans
les prévisualisations.
Set Preview Color (Établir la Couleur de la Prévisualisation)
Si vous sélectionnez Établir la Couleur de la Prévisualisation une
fenêtre avec une table des couleurs s’ouvrira. Dans cette fenêtre
vous pouvez choisir la couleur que vos images prévisualisées pren
dront quand vous appliquerez la fonction Prévisualisation.
Si vous n’aimez pas les couleurs offertes, vous pouvez créer la
couleur de votre goût pour l’appliquer. Choisissez quelque chose
agréable à la vue.
42 Cricut DesignStudio™ • www.cricut.com

Poignées
Au fur et à mesure que vous sélectionnez des images sur le tapis virtuel de découpe, vous
verrez vos sélections dans une boîte avec huit poignées, une de chaque côté et une à
chaque coin. Chacune de ces poignées exécute une fonction exclusive. En vous familiarisant avec ces poignées, vous deviendrez un véritable expert de la retouche d’images.
Pour utiliser ces poignées de sélection, simplement cliquez et faites les glisser.
Free Move (Mouvement Libre)
La poignée du coin supérieur gauche de la case de sélection est utilisée pour
déplacer votre sélection n’ importe où sur le tapis virtuel.
Vertical Move (Mouvement Vertical)
La poignée de la partie supérieure moyenne de la case de sélection est
utilisée pour déplacer votre sélection vers le haut ou vers le bas sur le tapis
virtuel. En tant que vous utiliserez cette poignée, aucun mouvement horizontal
ne se produira.
Slant (Inclination)
La poignée sur le coin supérieur droit de la case de sélection est utilisée pour
incliner (de façon oblique) votre sélection, en l’inclinant vers la droite ou vers
la gauche.
Horizontal Move (Mouvement horizontal)
La poignée de la partie moyenne gauche de la case de sélection est utilisée
pour déplacer votre sélection vers la droite ou vers la gauche sur le tapis
virtuel. En tant que vous utiliserez cette poignée, aucun mouvement vertical ne
se produira.
Horizontal Stretch (Allongement Horizontal)
La poignée sur la section moyenne droite de la case de sélection est utilisée
pour allonger votre sélection horizontalement.
Rotate (Pivoter)
La poignée sur le coin inférieur gauche de la case de sélection est utilisée pour
faire pivoter votre sélection vers n’importe quel angle.
Vertical Stretch (Allongement Vertical)
La poignée sur la section moyenne droite inferieure de la case de sélection est
utilisée pour allonger votre sélection verticalement.
Cricut DesignStudio™ • www.cricut.com 43

Scale (Ajustement à l’échelle)
La poignée sur le coin inférieur droit de la case de sélection est utilisée pour
ajuster à l’échelle votre sélection en accord avec la taille souhaitée. Si vous
êtes en train d’utiliser l’ajustement à l’échelle, les proportions de l’image de
meurent les mêmes.
Shortcut Keys (Les Touches de Raccourci)
Il y a quelques frappes de touche raccourci disponibles pour augmenter votre expérience
comme designer.
Les Touches Fléchées: Elles mouveront le curseur ou le group de formes sélectionnées à
travers le tapis virtuel. Utilisez ces touches pendant vous pressez la touche CTRL et chaque
mouvement ira de 1/8" à 1/32".
Shift Key (Touche de Majuscule) et Up/Down Arrow Keys (Touches Fléchées de Déplacement vers le Haut/vers le Bas): Pour ajuster la taille par défaut.
La Touche Retour: Quand vous êtes en train d’écrire les caractères, vous pouvez frapper
la touche retour pour fermer l’actuel groupe de formes et lancer un autre.
Menu Fichier
Les options du File Menu (Menu Fichier) sont les suivantes:
New (Fichier Nouveau)
Utilisez l’option New (Fichier Nouveau) pour ouvrir un nouveau projet.
Open (Ouvrir)
Utilisez l’option Open (Ouvrir) pour ouvrir tout projet sauvegardé.
Close (Fermer)
Utilisez l’option Close (Fermer) pour fermer tout projet ouvert.
Note: Le simple fait de fermer un projet ne le sauvegarde pas.
Save (Sauvegarder)
Utilisez l’option Save (Sauvegarder) pour sauvegarder tous les progrès, mises à jour, ou
ajustements faits à votre projet. Quand vous êtes en train de sauvegarder votre projet
pour la première fois, on vous demandera d’assigner un nom de chier à votre projet,
et de choisir où vous souhaitez le sauvegarder sur votre ordinateur. Rappelez-vous de
sauvegarder votre travail fréquemment. La touche de raccourci pour Save (Sauvegarder)
est Ctrl+S.
44 Cricut DesignStudio™ • www.cricut.com

Note: Quand vous utilisez l’option Save (Sauvegarder), le projet modié recouvrira votre
projet original, en le remplaçant. Si vous ne voulez pas perdre le projet dans son état
original, employez Save As (Sauvegarder Sous) au lieu de Save (Sauvegarder) et donnez
au projet modié un nom de chier différent.
Save As (Sauvegarder Sous)
Utilisez Save As (Sauvegarder Sous) chaque fois que vous vouliez choisir le nom de chier
pour votre projet et l’emplacement où vous voulez le sauvegarder.
Cut With Cricut (Couper avec Cricut)
Cette option est identique à celle du bouton Cut With Cricut (Couper avec Cricut) (voir
page 40). Toutes les images sur la page du tapis sélectionnée seront envoyées à la machine
Cricut et le processus de découpe commencera.
Exit (Sortir)
Utilisez l’option Exit (Sortir) pour fermer le programme Cricut DesignStudio.
Note: Le fait de sortir du programme ne sauvegarde pas votre travail. Rappelez-vous de
sauvegarder avant de sortir.
Menu Édition
Les options de l’Edit Menu (Menu Édition) sont les suivantes:
Undo (Annuler)
Utilisez l’option Undo (Annuler) pour annuler les séries d’actions les plus récentes que vous
avez faite. Vous pouvez revenir en arrière jusqu’à 20 fois. Cette option exceptionnelle vous
permet de revenir au moment juste avant de ruiner tout votre travail dur avec cette action involontaire de suppression. Une bonne occasion pour utiliser l’option Undo (Annuler)
c’est quand vous n’aimez pas un certain changement vous venez d’effectuer. La touche
de raccourci pour Undo (Annuler) est Ctrl+Z.
Redo (Rétablir)
Utilisez l’option Redo (Rétablir) pour exécuter à nouveau la dernière action que vous avez
annulée. En fait, il s’agit d’une instruction d’annuler pour la fonction Undo (Annuler). La
touche de raccourci pour Redo (Rétablir) est Ctrl+Y.
Conseil Pratique: Basculer entre Annuler et Rétablir est une manière excellente de comparer les effets de vos changements.
Copy (Copier)
Utilisez l’option Copy pour copier toute sélection d’image. Cette option est identique à celle
du bouton Copy Shapes (Copier Formes) (voir page 39). La touche de raccourci pour Copy
(Copier) est Ctrl+C.
Cricut DesignStudio™ • www.cricut.com 45

Paste (Coller)
Utilisez l’option Paste pour coller toute sélection d’image copiée. Cette option est identique à celle du bouton Paste Shapes (Coller des Formes) (voir page 39). La touche de
raccourci pour Paste (Coller) est Ctrl+V.
Delete Shapes (Supprimer des Formes)
Utilisez l’option Delete Shapes (Supprimer des Formes) pour supprimer toute image
sélectionnée. Cette option est identique à celle du bouton Delete Shapes (Supprimer
des Formes) (voir page 39). La touche de raccourci pour Delete Shapes (Supprimer des
Formes) est Delete (Supprimer).
Delete All (Supprimer Tout)
Utilisez l’option Delete All (Supprimer tout) pour supprimer toutes les images de la page
sélectionnée. Il n’existe pas de touches de raccourci pour Delete All (Supprimer Tout).
Revert All (Revenir Tout)
Utilisez l’option Revert All (Revenir Tout) pour restituer toutes vos images de retour à leur
état original. Il n’existe pas de touches de raccourci pour Revert All (Revenir Tout).
Menu Afchage
Les options du View Menu (Menu Afchage) sont les suivantes:
Page Nouvelle
Utilisez l’option New Page pour ajouter une nouvelle page à votre projet actuel. Il n’existe
pas de touches de raccourci pour New Page (Page Nouvelle).
Delete Page (Supprimer Page)
Utilisez l’option Delete Page pour supprimer la page actuellement sélectionnée de votre
projet. La touche de raccourci pour Delete Page (Supprimer Page) est Ctrl+D.
Preview (Prévisualisation)
Utilisez l’option Preview (Prévisualisation) pour voir comment on verra toutes les images du
tapis quand on les coupe. Cette option est pratique pour voir si votre processus de fusion
des images est bien. Elle est aussi identique au bouton Preview (Prévisualisation) (voir
page 40). La touche de raccourci pour Preview (Prévisualisation) est Ctrl+A.
Clear Preview (Effacer Prévisualisation)
Utilisez l’option Clear Preview (Effacer Prévisualisation) pour retourner au mode de travail.
La touche de raccourci pour Clear Preview (Effacer Prévisualisation) est Ctrl+L.
46 Cricut DesignStudio™ • www.cricut.com

Keep Preview as Mat Background (Maintenir Prévisualisation comme Fonds du Tapis)
Utilisez l’option Keep Preview as Mat Background (Maintenir Prévisualisation comme
Fonds du Tapis) pour créer un ligrane ou un modèle de vos images actuelles, an de les
utiliser comme fonds pour la suivante page d’images que vous créez. En fait, les images
que vous avez disposées sur la première page peuvent devenir un guide pour disposer
des images sur la page suivante. Ceci peut s’avérer utile quand vous travaillez avec des
couches et des ombrages d’images, et particulièrement pratique quand vous coupez
des espaces négatifs au lieu d’espaces positifs (c’est-à-dire quand vous êtes plus intéressé
à la page où vous avez coupé les lettres, qu’aux lettres elles-mêmes).
Show Ruler (Montrer Règle)
Utilisez l’option Show Ruler (Montrer Règle) de manière à faire apparaître le guide de la
règle sur le tapis de découpe virtuel. Le guide de la règle montre les incréments d’un
pouce et les marques de 0.25 pouce.
Conseil Pratique: Vous pouvez voir mieux les inscriptions de 0.25 pouce en mode de vue
à 200%.
Mat Size (La Taille du Tapis)
Utilisez l’option Mat Size (Taille du Tapis) pour changer la taille du tapis virtuel à la même taille
du tapis réel dont vous êtes en train de couper. Les trois tailles de tapis de découpe sont 6" x
12", 12" x 12", et 12" x 24".
Mat View (Vue du Tapis)
Utilisez Mat View (Vue du Tapis) pour changer le niveau de zoom du tapis. Cette option est
identique aux boutons Fit to Page (Ajustement à la Page), 100%, et 200% (voir page 40).
Menu de Fonctions
Cricut DesignStudio™ • www.cricut.com 47

Le menu de Fonctions énumère toutes les fonctions créatives disponibles dans l’actuel
jeu de cartouches et change d’accord avec le jeu de cartouches que vous avez choisi.
Il vous permet aussi de sélectionner la fonction créative de votre élection. Cette option
est identique à celle d’utiliser les touches de fonctions créatives sur le panneau virtuel de
superposition du clavier.
Menu Préférences
Les options du Menu Préférences sont les suivantes:
Ma Cartouche
Utilisez l’option My Cartridge (Ma Cartouche) pour marquer les jeux qui vous appartiennent en ce moment. Pour faire ainsi, sélectionnez (faites un double-clic sur) un jeu de
cartouches qui vous appartient de la liste de la Bibliothèque de Cartouches Cricut. Une
fois vous l’avez sélectionné, choisissez l’option My Cartridge (Ma Cartouche) sur le Menu
Préférences. En faisant ceci on ajoute le contenu marqué à votre liste de My Cartridges
(Mes Cartouches) sur la Bibliothèque de Cartouches Cricut.
Favorite Cartridge (Cartouche Favoris)
Utilisez l’option Favorite Cartridge (Cartouche Favoris) pour marquer les jeux que vous
aimez le plus. Il ne s’agit pas ici de vos enfants, donc allez-y et sélectionnez vos favoris.
Pour faire ainsi, sélectionnez (faites un double-clic sur) un jeu de cartouches qui vous
adorez (ou peut être qui vous simplement admirez) de la liste de la Bibliothèque de
Cartouches Cricut. Une fois vous l’avez sélectionné, choisissez l’option Cartouche Favoris
sur le Menu Préférences. En faisant ceci on ajoute le contenu marqué à votre liste de
Favorites (Favoris) sur la Bibliothèque de Cartouches Cricut.
Multi Cut (Multi Coupe)
Utilisez l’option Multi Cut (Multi Coupe) pour établir combien de fois vous voulez que votre
machine Cricut effectue la même coupe sur le même endroit. Cette option est utile pour
couper des matériels d’une plus grande épaisseur que le papier. Vous pouvez donner des
instructions à la machine Cricut pour qu’elle coupe la même image sur le même endroit
jusqu’à 4 fois.
Conseil Pratique: Si vous êtes en train de couper un matériel d’une plus grande épaisseur
que le papier, rappelez-vous d’augmenter aussi la profondeur et la pression de la lame
pour obtenir de meilleurs résultats.
Menu Aide
48 Cricut DesignStudio™ • www.cricut.com

Les options du Help Menu (Menu Aide) sont les suivantes :
Enable Balloon Help (Activer les Bulles d’Aide)
Utilisez l’option Enable Balloon Help (Activer les Bulles d’Aide) pour activer ou désactiver
des conseils dans des bulles d’aide sensibles au contexte. Quand cette option sera activée, vous pouvez apprendre le nom de tout bouton de fonctionnement en laissant par
un second le curseur sur le bouton, sans avoir besoin de le cliquer.
Check For Updates (Vérication de Mises à jour)
Utilisez l’option Check for Updates (Vérication de Mises à jour) pour vous connecter directement à la Page Web de Cricut an de téléverser de nouveaux police de caractères
et de nouvelles mises à jour de logiciels. On requiert une connexion Internet active pour
cette option.
Store Locator (Localisateur de Magasins)
Utilisez l’option Store Locator (Localisateur de Magasins) pour vous connecter directement
à la page web Localisateur de Magasins Cricut. On requiert une connexion Internet active pour cette option.
Update Cricut Firmware (Mise à Jour du Microprogramme Cricut)
Utilisez Update Cricut Firmware (Mise à Jour du Microprogramme Cricut) pour que le
logiciel Cricut DesignStudio mette à jour automatiquement le microprogramme de votre
machine Cricut à la version la plus récente. Assurez-vous d’avoir relié votre Cricut à votre
ordinateur avant d’exécuter la mise à jour. Apres avoir sélectionné l’option Mettre à Jour
le Microprogramme Cricut, suivez les instructions qui apparaissent. Ce processus de mise à
jour peut prendre environ 5 à 10 minutes à accomplir.
Help (Aide)
Utilisez l’option Help (Aide) pour trouver des liens aux ressources et à l’information qui peuvent répondre cette brûlante question sur le Cricut DesignStudio que vous pourriez avoir.
About (À propos de)
Utilisez l’option About (À propos de) pour examiner l’information sur votre version actuelle
du programme Cricut DesignStudio.
Conseils Pratiques et Trucs
An de pouvoir être plus utile, nous réviserons quelques fonctions de base du software
Cricut DesignStudio.
Pour Travailler avec des Jeux de Cartouches
Rappelez-vous que, vous pouvez examiner tout le contenu, et même créer des designs
avec tout le contenu, mais vous pourrez couper seulement des caractères des cartouches qui vous appartiennent. Nous conons que cette fonction sera utile lorsque
vous souhaiterez identier vos caractères favoris, ou quand vous chercherez un contenu
en particulier.
Pour Travailler avec des Images
Le tapis de découpe virtuel est votre palette. La seule restriction aux images virtuelles
que vous pourriez affronter c’est la taille du tapis. Les lettres peuvent se mélanger avec
les nombres, les jeux de police de caractères avec les jeux de formes, les tailles avec
les positions, les fusions avec les renversements, et le chaos avec l’ordre. On peut créer
des dessins avec une précision-laser presque robotique, une page plus ordonnée et plus
équilibrée que la précédente; ou on peut entasser un design sur l’autre dans des badins
répétitions, avec des images sans rapport s’étalant dans toutes les directions, pour donner
la vie à des trésors occultes pleins de style et de beauté. Mélangez-les. Vous découvrirez
davantage de choses.
Cricut DesignStudio™ • www.cricut.com 49

Dénition des Tailles et des Positions
Utiliser les poignées de sélection simplie le processus de dénition des tailles et des positions; cependant, les options des propriétés des formes vous permettent un plus grand
contrôle pour faire des ajustements précis.
Intricate Designs (Designs Élaborées)
Au fur et à mesure que vous créez, il ne faut pas perdre de vue que certaines designs trop
complexes ou élaborés seront difciles à couper pour votre machine Cricut.
Sauvegarder et Charger
Quand vous sauvegardez votre, l’emplacement par défaut du chier sera “MyDocuments/Cricut/Projects”, et le type de chier sera “.cut”. En outre, c’était peut-être Confucius qui a dit, “Sauvegardez fréquemment votre travail”.
Welding (Fusionner)
Cette fonction longuement attendue c’est la belle du bal! La fonction de fusion ne se
limite pas simplement à combiner des lettres pour former des mots ou des phrases. Vous
pouvez utiliser la fonction de fusion pour combiner une image avec une autre, dans
n’importe quelle position ou combinaison, et l’image résultant de cette combinaison
peut être fusionné à nouveau une autre fois. Combinez des images de vos eurs favorites
pour créer un bouquet exceptionnel. Convertissez des formes connues dans des formes
nouvelles et rafraîchissantes. Les utilisations et les possibilités sont innies.
Note: Les projets complexes peuvent requérir plus de temps de l’ordinateur an de calculer les connections des fusions. Veuillez avoir de la patience pour des projets dont vous
avez ajoutez beaucoup de formes.
Pour Maximaliser L’Utilisation du Papier
Vous pouvez utiliser les fonctions de Kerning (Crénage), de dénition de la taille, de rotation, et d’emplacement précise de l’image pour grouper étroitement toutes vos images,
pour remplir des trous et des blancs, et pour proter au maximum de ce précieux espace
de papier. Quelques dessins peuvent nir par devenir complexes puzzles, mais on peut
extraire beaucoup d’un espace minimal quand on utilise les outils appropriés, et le logiciel
Cricut DesignStudio vous permet d’utiliser au maximum chaque pouce carré.
Communauté/Commentaires et Suggestions
L’aventure singulière Cricut a produit des légions d’amateurs actifs et talentueux du
travail artisanal en papier, dont beaucoup partagent généreusement leurs connaissances
profondes de la fusion Cricut avec tous ceux qui s’intéressent. La Communauté Cricut
est une ressource riche et merveilleuse pour toute personne qui commence ce voyage
créatif, pour des experts qui cherchent de nouvelles pistes ou des idées rafraichissantes,
ou pour toute personne qui est entre ces deux extrémités. Nous vous recommandons vivement d’utiliser cette impressionnante base de connaissances, bien en prenant part activement aux forums Commentaires et Suggestions Cricut (Cricut feedback), en évaluant
les projets publiés par vos pairs, ou même en publiant certaines de vos créations propres
pour que les autres personnes puissent les voir. Pour des informations supplémentaires,
visitez la page web de la Communauté Cricut (Cricut Community) à Cricut.com.
Support Technique
Si vous avez de problèmes pour commencer à travailler, ou si vous affrontez n’importe
quel défaut technique tout en utilisant ce programme, veuillez contacter nos spécialistes
du Support Technique, et vous pouvez être sur qu’ils s’occuperont de xer tout pour un
fonctionnement correct. Nous sommes à vos ordres. Pour obtenir du support technique,
veuillez aller à www.cricut.com.
Conclusion
La seule chose qui conclut ici c’est ce manuel. Il y a tant de choses à découvrir et à
créer! Nous sommes réellement impatients de voir vos créations! Votre odyssée ne fait que
commencer. Alors, allez y, avec notre gratitude et notre remerciement, et obtenez ce qui
vous appartient.


Expression and related logos and graphics are trademarks and copyrighted works of Provo Craft and
Novelty, Inc. and may not be used or reproduced without permission. © 2005-2007 All rights reserved.
The trademarks Cricut, Cricut DesignStudio, Cricut Essentials, Cricut
Copyright ©2007 Provo Craft and Novelty, Inc.
52 Cricut DesignStudio™ • www.cricut.com
Spanish Fork, UT 84663
All Rights Reserved. Printed in China.
090707

DO NOT PRINT THIS PAGE
Cricut DesignStudio™ • www.cricut.com 53
 Loading...