

Cres Cor H137SUA12D2K Operators Manual
Insulated
Hot Cabinet
FL-2354
5925 Heisley Road • Mentor, OH 44060-1833
Rev. 2 (5/12) Page 1 of 5
OPERATING and MAINTENANCE INSTRUCTIONS
Models: H137UA...D & H13818...D Series Hot Cabinets (Aluminum)
H137SUA...D & H138S18...D Series Hot Cabinets (Stainless)
ELECTRICAL SPECIFICATIONS:
Model No. Volts Watts Amps Hertz Phase NEMA
H137SUA12D2K
H137UA12D2K
H138S1834D2K
H1381834D2K
H137SUA12D208
H137UA12D208
H138S1834D208
H1381834D208
H137SUA12D240
H137UA12D240
H138S1834D240
H1381834D240
H137SUA12D
H137UA12D
H137SUA9D
H137UA9D
H138S1834D
H1381834D
H137SUA9D208
H137UA9D208
H137SUA9D240
H137UA9D240
H137SUA6D
H137SUA5D
H138S1816D
H138S185D
H137SUA6D208
H138S1816D208
H137SUA5D208
H138S185D208
H137SUA6D240
H138S1816D240
H137SUA5D240
H138S185D240
NOTE: The above model numbers are basic models. They may be followed by letters: M,
E, V, L or ending with S, Z, U, and/or HT.
120 2000 16.7 60 1 5-20P
208 2000 9.6 60 1 6-15P
240 2000 8.3 60 1 6-15P
120 1500 12.5 60 1 5-15P
208 1500 7.2 60 1 6-15P
240 1500 6.2 60 1 6-15P
120 1000 8.3 60 1 5-15P
208 1000 4.8 60 1 6-15P
240 1000 4.2 60 1 6-15P
WARNING
RISK OF FIRE OR ELECTRIC SHOCK
DO NOT OPEN
WARNING: TO REDUCE THE RISK OF FIRE OR ELECTRIC SHOCK,
DO NOT REMOVE COVER (OR BACK)
NO USER-SERVICEABLE PARTS INSIDE
REPAIR SHOULD BE DONE BY AUTHORIZED SERVICE
Call Toll-free: 877-CRES COR (273-7267) • Fax: 800-822-0393 • www.crescor.com
PERSONNEL ONLY
Insulated
Hot Cabinet
FL-2354
Rev. 2 (5/12) Page 2 of 5
5925 Heisley Road • Mentor, OH 44060-1833
OPERATING and MAINTENANCE INSTRUCTIONS
Models: H137UA...D & H13818...D Series Hot Cabinets (Aluminum)
H137SUA...D & H138S18...D Series Hot Cabinets (Stainless)
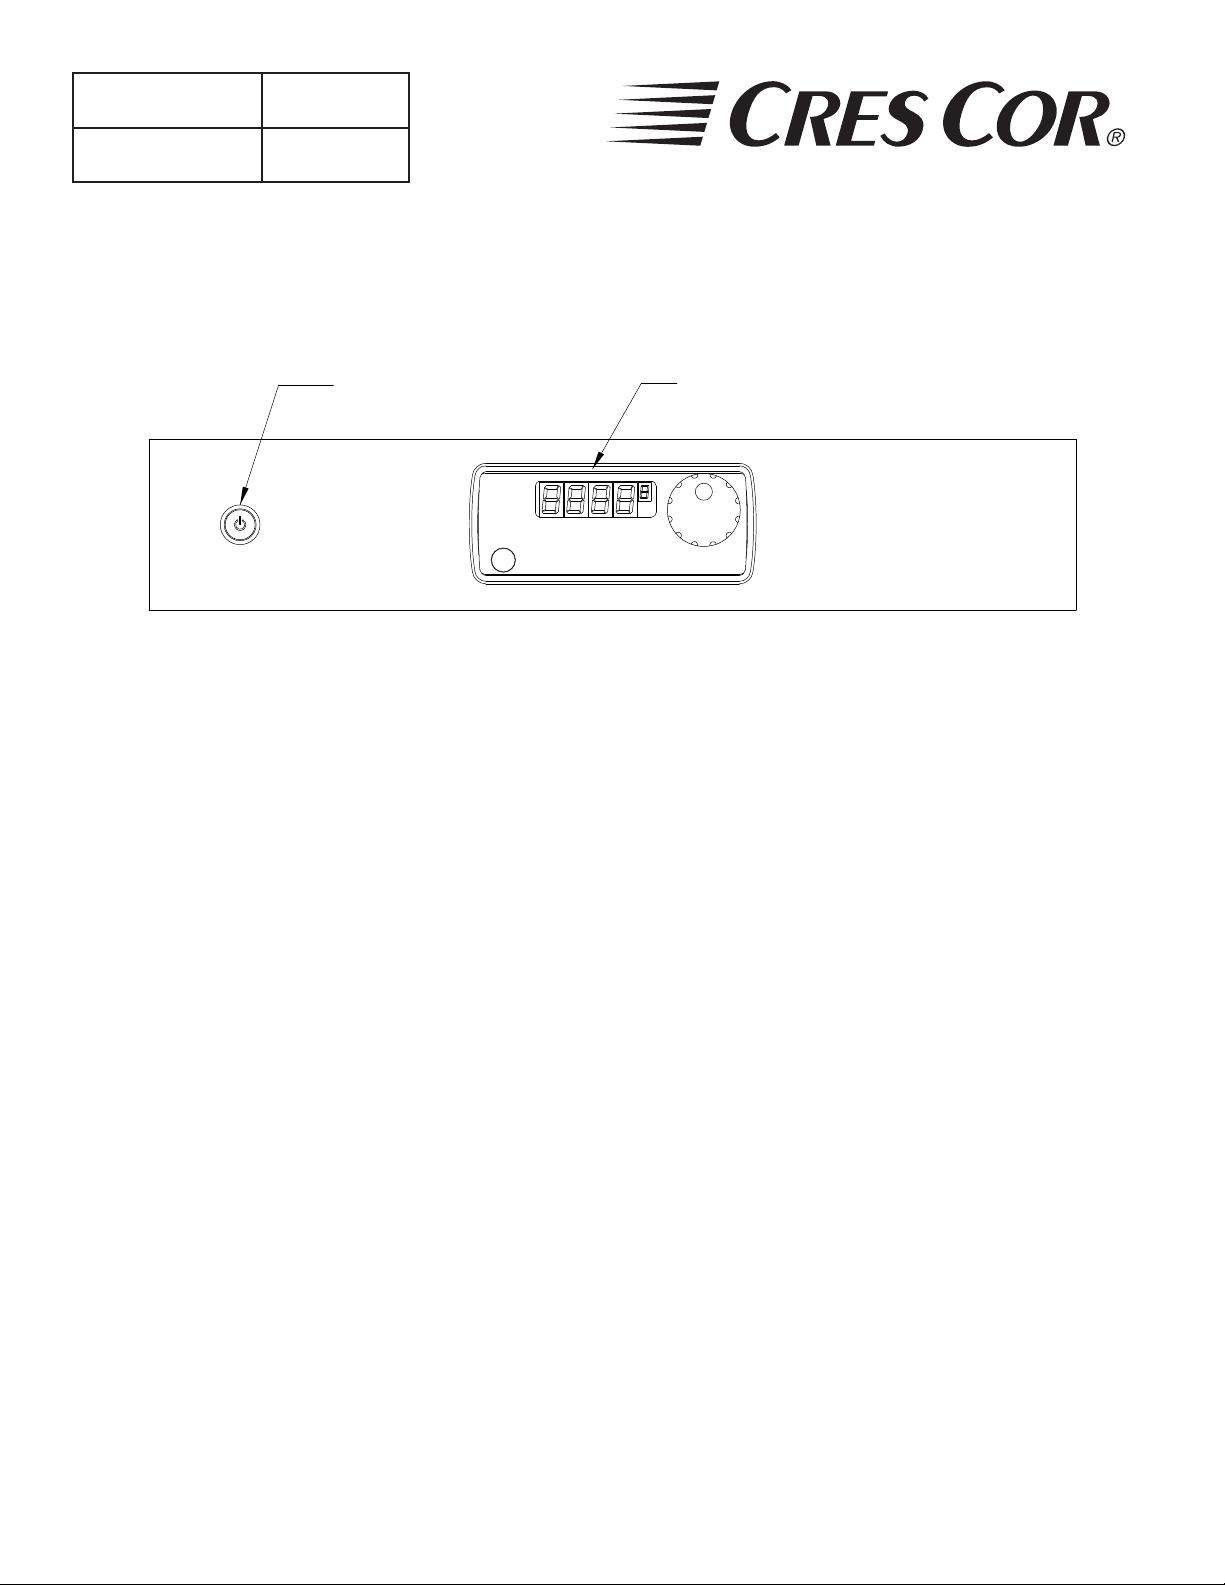
"ON-OFF" SWITCH
DISPLAY
HOW TO INSTALL UNIT:
1. Place cabinet on level oor, in a well ventilated area.
2. Unpack and install inner pan slides parts.
3. Plug cord end into proper wall outlet.
FIRST TIME OPERATION (continued):
1. Push the switch on; the light will come on.
NOTE: The letters “LOTPR” (Low Temperature)
"HOT HOLDING"
DIGITAL CONTROL
will show on the control panel until it reaches
140°F (60°C).
HOW TO CHANGE FROM °C TO °F (if needed)
1. Push the switch on; the light will come on.
2. Push and hold the “SET” button and the button in
the lower left hand corner together for 5 seconds.
You are now entered into the menu.
3. Scroll over the”Unit” and change it to “C” , then
scroll to the “END”.
FIRST TIME OPERATION:
NOTE: A new oven needs to “bur n off” manufacturing
oils and excess adhesive before its rst use.
Do NOT load food into oven until this has
been done!
2. Turn the control knob to show 200°F (93°C).
Push the knob to set the temperature.
Run the unit for one (1) hour.
3. Push the switch off and let cool.
4. Wipe the inside clean with detergent and hot water.
HOW TO START UNIT:
1. Push the switch on; the light will come on.
NOTE: The letters “LOTPR’ will show on the
control panel until it reaches 140°F (60°C).
2. Turn the “Hot Holding” control knob to a temperature
between 140°F (60°C) to 220°F (104°C). Push the
knob to set the temperature.
3. Preheat the cabinet for one (1) hour.
4. Put the food into the cabinet.
NOTE: Press the “Display” button to see the actual
temperature inside the cabinet.
TO TURN OFF UNIT:
Push the POWER switch off; the light will go out.
Call Toll-free: 877-CRES COR (273-7267) • Fax: 800-822-0393 • www.crescor.com
 Loading...