

Page 1
Zen Vision Mini PM3.book Page i Friday, October 21, 2005 11:39 AM
English . . . . . . . . . . . . . . . . . . . . . . . . . . . . . . . 1
Français . . . . . . . . . . . . . . . . . . . . . . . . . . . . . 31
Nederlands . . . . . . . . . . . . . . . . . . . . . . . . . . 61
Español . . . . . . . . . . . . . . . . . . . . . . . . . . . . . 91
Italiano . . . . . . . . . . . . . . . . . . . . . . . . . . . . . 121
Ellinika . . . . . . . . . . . . . . . . . . . . . . . . . . . . . 151
Português . . . . . . . . . . . . . . . . . . . . . . . . . . 183
i
Page 2

Zen Vision Mini PM3.book Page ii Friday, October 21, 2005 11:39 AM
ii
Page 3
Zen Vision Mini PM3.book Page 1 Friday, October 21, 2005 11:39 AM
Congratulations
Zen Vision:M™ is the new digital player from Creative. Read on to learn how to
get started with your new player!
Contents
About Your Player ................................................................................... 2
Using the Navigation Controls ............................................................... 3
Getting Started ....................................................................................... 4
Managing Music and Data...................................................................... 10
Understanding your Player.................................................................... 11
Managing Your Player .......................................................................... 12
Personalizing Your Player .................................................................... 21
Connecting Your Player to a TV (Optional) ........................................... 24
FAQ ....................................................................................................... 25
Information Diagrams .......................................................................... 26
General Specifications ........................................................................ 28
Copyright and License .......................................................................... 30
1
Page 4
Zen Vision Mini PM3.book Page 2 Friday, October 21, 2005 11:39 AM
2 About Your Player
About Your Player
Unfold the last page of this booklet, and reference the image there against the
names and descriptions below.
1Power switch
2 Screensaver LED
3Lock
Push toward the Lock icon to
lock the player and prevent
functions from being accidentally
activated.
4Headphone jack
5Vertical Touch Pad
See “Using the Navigation
Controls” on page 3.
6 Microphone
7Play/Pause button
8 Next/Fast Forward button
Press to go to the next track or
menu option.
Press and hold to move forward
within a track.
9 Options button
Press to display more options.
10 Dock connector
Connect the USB synchronization
adapter to this connector.
11 Reset hole
See “How do I reset Zen
Vision:M?” on page 25.
12 Menu/Back button
Press to return to the previous
screen or menu.
Press and hold to return to the
main menu.
13 Previous/Rewind button
Press to go to the previous track
or menu option.
Press and hold to move back
within a track.
14 My Shortcut button
See “To assign a menu shortcut
to My Shortcut button” on
page 21.
15 Liquid Crystal Display (LCD)
Page 5
Zen Vision Mini PM3.book Page 3 Friday, October 21, 2005 11:39 AM
Using the Navigation Controls 3
Using the Navigation Controls
We use the term “Navigation controls” to mean the following:
Vertical Touch Pad
Previous/Rewind button
Next/Fast Forward button.
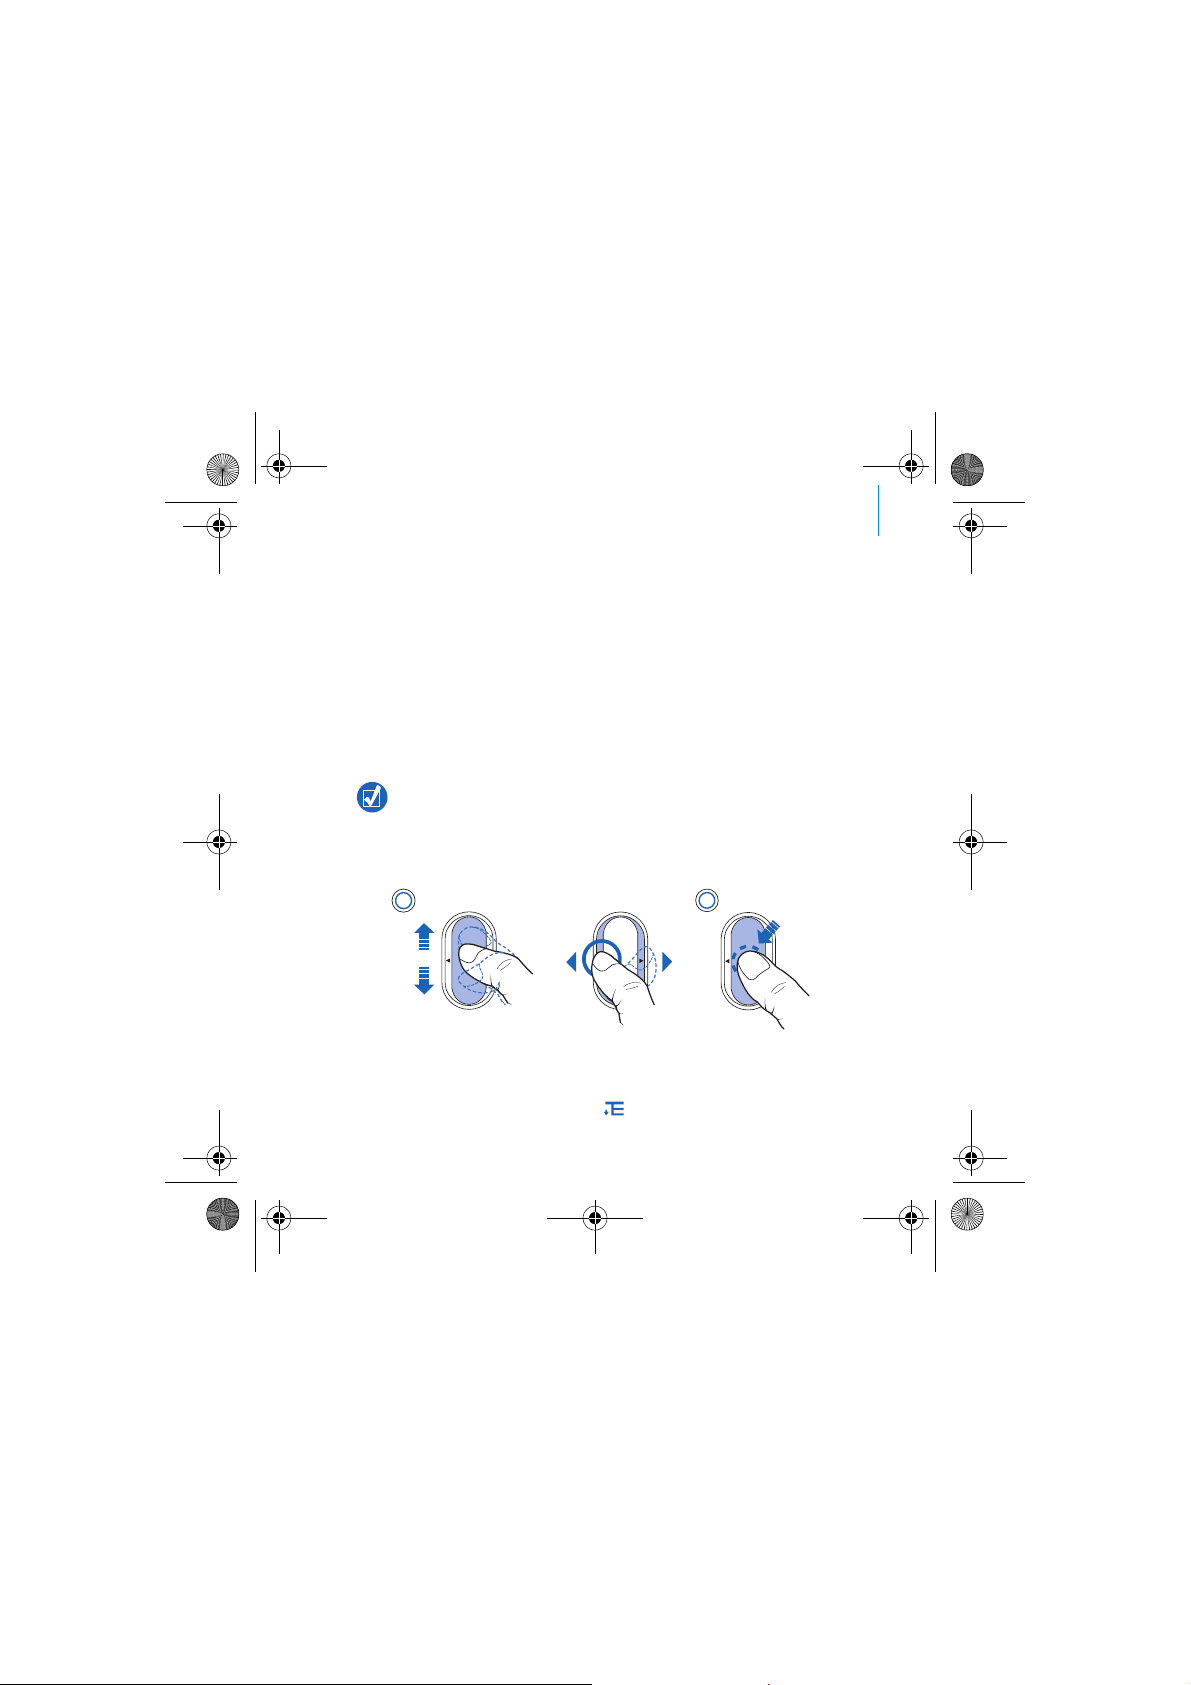
We use the term “Select” to mean the following actions:
1 Move your thumb up and down the Vertical Touch Pad to move vertically in a
menu OR press the Previous/Rewind or Next/Fast Forward button to move
horizontally in a menu.
Press the top or bottom edge of the Vertical Touch Pad to move up or down one
menu option.
Press and hold the top or bottom edge of the Vertical Touch Pad to rapidly scroll
through menu options.
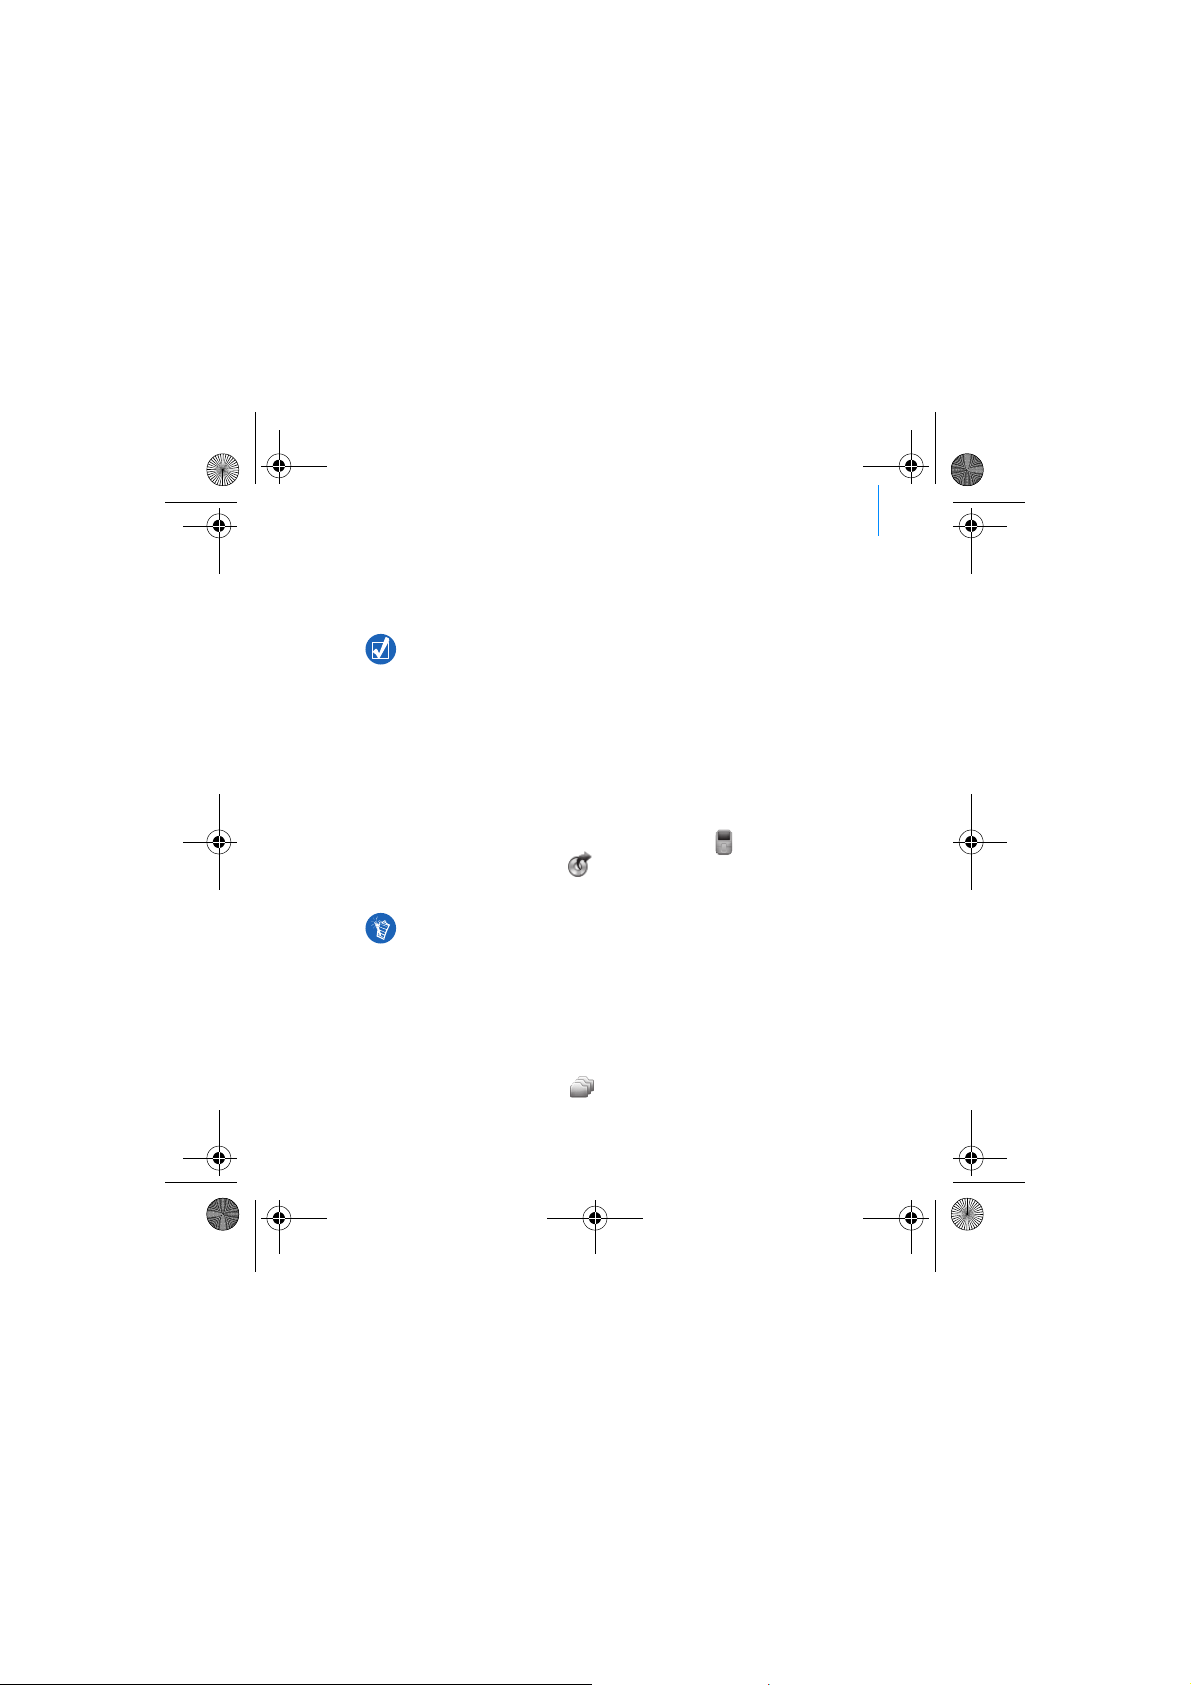
2 Firmly tap the Vertical Touch Pad to select the highlighted option.
1
OR
2
To adjust volume with the Vertical Touch Pad
Depending on the menu you are in, move your thumb up and down the Vertical
Touch Pad OR press the Options button and select Volume.
Page 6

Zen Vision Mini PM3.book Page 4 Friday, October 21, 2005 11:39 AM
4 Getting Started
Getting Started
Step 1: Charge Your Player
The high performance Lithium Ion battery supplied with your player needs to
be fully charged before you use it. The battery is fully charged in approximately
two hours. To charge your player's battery, connect the power adapter to your
player and wall outlet as shown in the diagram below.
3
1
2
While charging your player, you can proceed to "Step 2: Turn On Your Player".
Page 7
Zen Vision Mini PM3.book Page 5 Friday, October 21, 2005 11:39 AM
Getting Started 5
Step 2: Turn On Your Player
1 Slide the Power switch towards the Power icon and hold it there until the
LCD lights up.
2 When you turn on your player for the first time, the menu is in English. To
change the language:
i. Press and hold the Menu/Back button . The main menu appears.
ii. Select System
→ Language → language that you want.
3 After you have finished using your player, slide the Power switch towards
the Power icon until the Shutting down message appears.
Step 3: Set Up Software
1 Turn on your computer. You must log in as an administrator in Windows®
before you can set up the software. For more information, refer to your
operating system’s online Help.
2 Insert the Installation CD into your CD-ROM/DVD-ROM drive. Your CD
should start automatically. If it does not, follow the steps below:
i. Double-click the My Computer icon.
Alternatively, click Start → My Computer.
ii. Right-click the CD-ROM/DVD-ROM drive icon, and then click Autoplay.
3 Follow the instructions on the screen and when prompted, restart your
computer.
4 When your computer restarts, follow the product registration instructions
on the screen.
You will require an Internet connection to register your product.
Page 8

Zen Vision Mini PM3.book Page 6 Friday, October 21, 2005 11:39 AM
6 Getting Started
5 When prompted, connect your player to your computer’s USB port as
shown.
Connect to a computer USB port only; avoid connecting to a USB hub.
Page 9
Zen Vision Mini PM3.book Page 7 Friday, October 21, 2005 11:39 AM
Getting Started 7
Step 4: Transfer Content
Transfer music and other files from your CD collection or computer. For more
details, see “Managing Music and Data” on page 10
You can acquire content from many legal sources. Here are some suggestions:
Audio tracks - ripped from personal audio CDs, home studio recordings or
purchased from online music stores.
Videos - purchased from online movie stores or digitized home video
footage.
Photos - encoded from your personal digital camera or scanned from
printed photos.
To transfer or ‘rip’ music from your CD collection
1 Make sure your player is connected to your computer as shown on page 6.
2 Double-click the Zen Vision:M Media Explorer icon on the desktop.
3 Click the Rip Audio CDs button .
4 Follow the instructions on the screen.
Creative Media Explorer uses MusicID
track, credits, and other information about the CDs you play. This service is
FREE and automatic. You must be connected to the Internet when using this
service. For more information, refer to the Creative Audio CD Ripper online
Help.
To transfer audio files, videos or pictures from your computer
1 Repeat steps 1 and 2 in "To transfer or ‘rip’ music from your CD collection".
2 Click the Browse Media button .
SM
from Gracenote® to get artist, title,
Page 10
Zen Vision Mini PM3.book Page 8 Friday, October 21, 2005 11:39 AM
8 Getting Started
3 Locate your media files and copy them to your player using the
drag-and-drop method.
To transfer data files
1 Repeat steps 1 and 2 in "To transfer or ‘rip’ music from your CD collection".
2 Click the Browse Documents button .
3 Locate your data files and transfer them to your player using the
drag-and-drop method. You can also transfer audio files and photos using
the Browse Documents button .
Make sure files are transferred to the correct folder, for example pictures are
transferred to Media → Pictures and music to Media → Music.
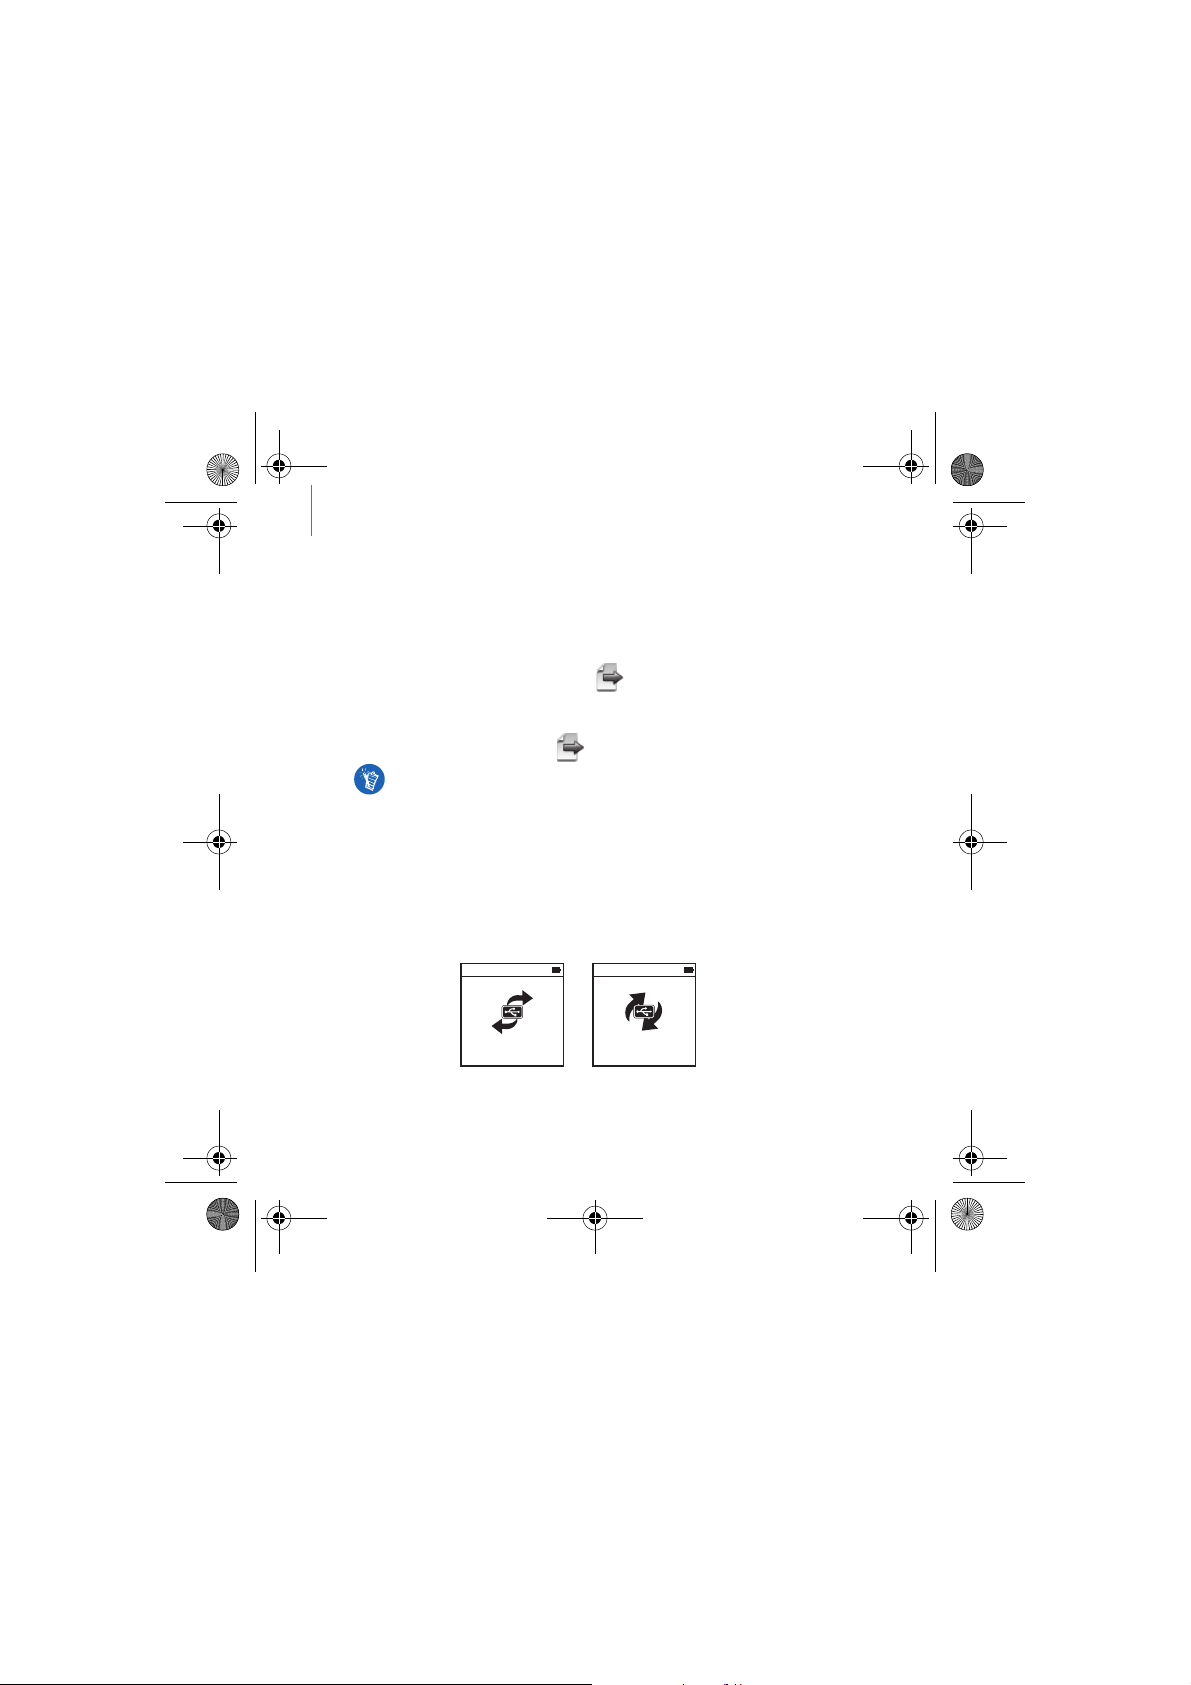
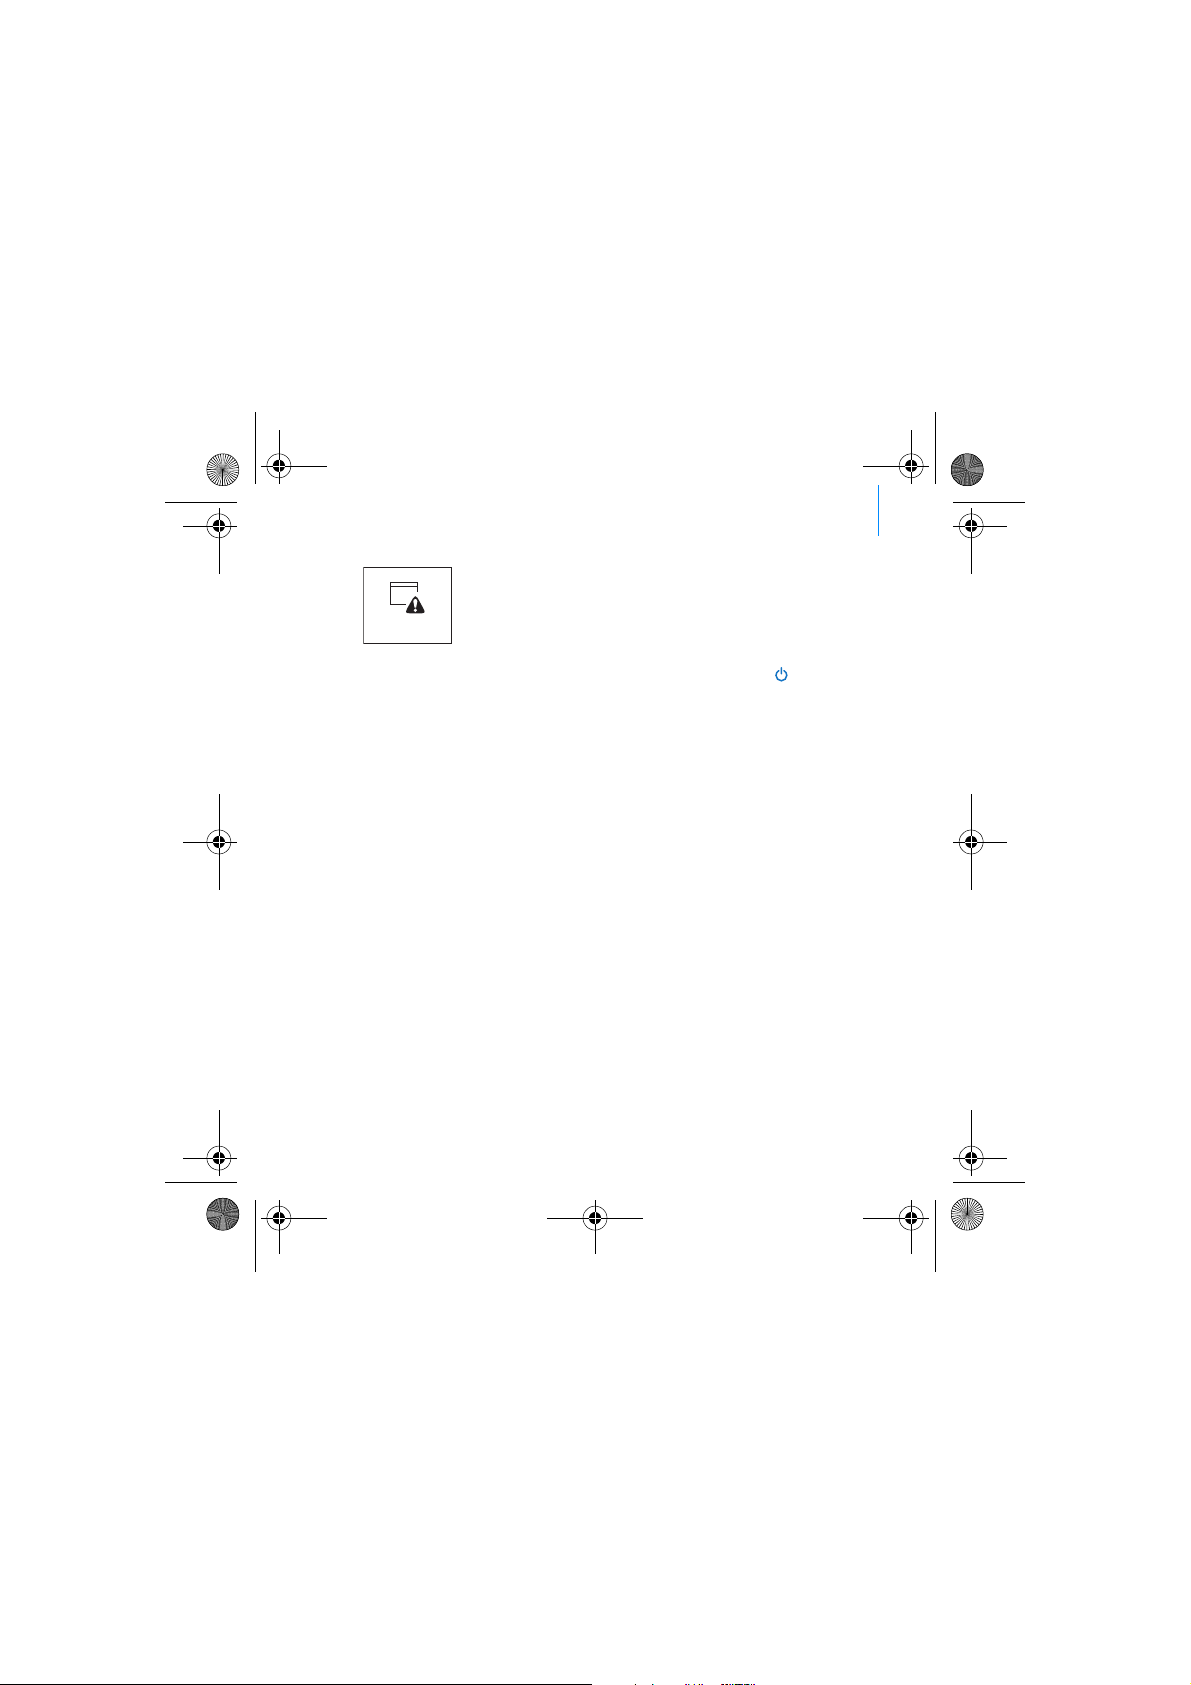
Step 5: Disconnect Your Player
When you have finished transferring files, disconnect Zen Vision:M.
DO NOT disconnect your player if you see the left picture below on the display.
Track or data file transfer is in progress and disconnecting your player may
damage the content being transferred. Wait until you see the right picture
below on the display before disconnecting your player.
Docked
Docked
Page 11
Zen Vision Mini PM3.book Page 9 Friday, October 21, 2005 11:39 AM
Getting Started 9
Step 6: Play Music or View Files
You are now ready to play music that you have ripped, and view files you have
transferred!
At any time, press the Options button for more options.
Files in your player are sorted alphabetically for quicker searches.
To play music
1 Connect your earphones to the Headphone jack.
2 In the main menu, select Music Library → category that you want.
3 Select a track and select Play.
4 Move your thumb up and down the Vertical Touch Pad to adjust the volume.
To play videos
In the main menu, select Videos → Video → video that you want.
To view pictures
1 In the main menu, select Photos → Pictures → picture that you want.
2 Press the Options button
If you select the zoom option, use the Navigation controls to pan horizontally
and vertically in four different directions.
to select rotate and zoom options.
Page 12

Zen Vision Mini PM3.book Page 10 Friday, October 21, 2005 11:39 AM
10 Managing Music and Data
Managing Music and Data
Creative Media Explorer and Creative MediaSource™ are included with your
player. Try out both applications to decide which one is more suitable for your
needs.
Creative Media Explorer
Use Creative Media Explorer if:
you are new to digital music and want to transfer music from your CDs to your
player
you prefer to manage your player in the familiar “Windows Explorer” environment.
To start Creative Media Explorer, double-click the Zen Vision:M Media
Explorer icon under My Computer or on the desktop. For more information
about using Creative Media Explorer, refer to its online Help.
Creative MediaSource
Use Creative MediaSource, a full-featured media organizer/player, if:
you require additional features such as recording, automatic playlist generation and
audio format conversion
you want to manage a music library on your computer.
To start Creative MediaSource, double-click the Creative MediaSource icon
on your desktop. For more information about using Creative MediaSource, refer
to its online Help.
Page 13

Zen Vision Mini PM3.book Page 11 Friday, October 21, 2005 11:39 AM
Understanding Your Player 11
Understanding Your Player
Navigate through the different menus to find out what your player can do!
These are the main menu options on your player:
Music Library
Photos
Videos
FM Radio
Microphone
Extras
System
Your player’s menu interface, features and operations are controlled by your
player’s firmware. Sometimes, improvements are made to your player’s
firmware and these firmware upgrades are placed on Creative’s web site for
you. To check for upgrades, go to www.creative.com/support/ and click
Downloads.
select to play music and recordings, or to use the DJ function
select to view pictures
select to play videos
select to scan for and listen to FM radio stations
select to make instant recordings
select to use additional features including Organizer and
Removable Disk
select to view and customize your player’s settings
Page 14
Zen Vision Mini PM3.book Page 12 Friday, October 21, 2005 11:39 AM
12 Managing Your Player
Managing Your Player
You are now equipped to use your player’s more advanced features! Read on to
get the most out of your player.
“Managing Audio” on page 12
“Managing Videos” on page 15
“Managing Pictures” on page 16
“Managing Recordings” on page 17
“Managing Data” on page 18
“Managing Organizer Features” on page 19.
Managing Audio
To create playlists
You can select any combination of tracks you want from your player’s Music
Library to create playlists for convenient playback.
1 To add a track or category of tracks to the Now Playing folder:
i. Select Music Library → track or category of tracks that you want.
ii. Press the Options button , and select Add to Selected.
iii. Repeat steps i) and ii) to add another track or category of tracks.
iv. Select Music Library → Now Playing.
2 Press the Options button , and select Save As Playlist.
3 Use the Navigation controls to create a name for your playlist and select the
check mark to confirm the name.
4 To play a playlist, select Music Library → Playlists → playlist that you want.
Page 15
Zen Vision Mini PM3.book Page 13 Friday, October 21, 2005 11:39 AM
Managing Your Player 13
To select tracks with Zen Vision:M’s DJ
In the main menu, select Music Library → DJ → option that you want:
Album of the Day: plays a randomly selected album
Random Play All: plays all tracks randomly
Most Popular: plays the most played tracks
Rarely Heard: plays rarely played tracks.
To enhance your audio experience
In the main menu, select System → Audio Settings → option/s that you want:
Play Mode: shuffles, repeats or plays your audio tracks in sequential order
Bass Boost: enhances the bass in your track during playback
Smart Volume: sets playback at a constant volume. You no longer need to adjust the
volume when you play different tracks.
EQ: enhances your music depending on its genre or style. You can also customize
your own EQ setting. See “To create a customized equalizer setting” on page 23.
To set up FM Radio
1 In the main menu, select FM Radio.
2 To automatically scan and save radio stations, press the Options button
and select Autoscan.
At the end of the autoscan, Zen Vision:M automatically saves all stations as
preset channels and tunes in to the first preset.
,
Page 16
Zen Vision Mini PM3.book Page 14 Friday, October 21, 2005 11:39 AM
14 Managing Your Player
3 To select a different preset, firmly tap the Vertical Touch Pad to display the
list of presets, and then move your thumb up and down the Vertical Touch
Pad to select the preset that you want.
Hold down the Next/Fast Forward button or Previous/Rewind button for
one second to scan for the next available radio station.
Page 17

Zen Vision Mini PM3.book Page 15 Friday, October 21, 2005 11:39 AM
Managing Your Player 15
Managing Videos
To convert your videos to a format supported by your player, launch Creative
Media Explorer and click Convert Video. For information about Creative Media
Explorer, see “Managing Music and Data” on page 10.
To go forward or backward in a video
1 In the main menu, select Videos → Video → video that you want.
2 Press the Options button , and select Seek To.
3 Use the Navigation controls to go forward or backward in a video.
To delete a video
1 In the main menu, select Videos → Video, and highlight the video that you
want.
2 Press the Options button , and select Delete Video.
To display the last viewed video
In the main menu, select Videos → Recently browsed videos.
To display or hide video folders
See “To display or hide video or picture folders” on page 22.
To set a password when displaying or hiding video folders
See “To set a password when displaying or hiding video or picture folders” on
page 22.
Page 18

Zen Vision Mini PM3.book Page 16 Friday, October 21, 2005 11:39 AM
16 Managing Your Player
Managing Pictures
To view your pictures in a slideshow
1 In the main menu, select Photos → Pictures.
2 Press the Options button , and select Start Slideshow.
3 To customize your own slideshows, launch Creative Media Explorer.
4 To change the slideshow interval duration, select System → Photo/Video
Settings.
To rate and view your favorite pictures
1 In the main menu, select Photos → Pictures → picture that you want.
2 Press the Options button to select rating and viewing options.
To display or hide picture folders
See “To display or hide video or picture folders” on page 22.
To set a password when displaying or hiding picture folders
See “To set a password when displaying or hiding video or picture folders” on
page 22.
Page 19

Zen Vision Mini PM3.book Page 17 Friday, October 21, 2005 11:39 AM
Managing Your Player 17
Managing Recordings
To record audio
1 In the main menu, select Microphone.
2 Press the Options button , and select Start Recording.
3 While recording, you can press the Options button
following:
Pause: pauses the recording
Resume: resumes the paused recording
Stop: stops and saves the recording
Split: starts a new recording.
To record radio broadcasts
1 In the main menu, select FM Radio.
2 While listening to a radio broadcast, press the Options button , and
select Record Radio to start recording.
To listen to recorded audio
In the main menu, select Music Library → Recordings → recording that you
want.
to do one of the
Page 20
Zen Vision Mini PM3.book Page 18 Friday, October 21, 2005 11:39 AM
18 Managing Your Player
Managing Data
You can use Zen Vision:M to store backup copies of your computer’s data files,
or use it to transfer files from one computer to another.
To use Zen Vision:M as a Removable Disk
1 In the main menu, select Extras → Removable Disk.
2 Press the Options button
Alternatively, connect Zen Vision:M to your computer and use Creative
Removable Disk Manager to increase or decrease the amount of hard disk
space in Removable Disk mode.
To start Creative Removable Disk Manager, click Start → Programs or All
Programs → Creative → Creative Removable Disk Manager → Creative
Removable Disk Manager.
3 When you see Removable Disk on Zen Vision:M’s LCD, you are ready to
transfer data files to and from any computer.
4 Connect Zen Vision:M to your computer. Zen Vision:M appears as a
Removable Disk under My Computer.
5 Use the drag-and-drop method to copy files to and from Zen Vision:M.
6 When you have finished copying files, click the Safely Remove Hardware
icon on the Taskbar, click Safely remove USB Mass Storage Device, and
disconnect your player when you are prompted to do so.
To delete all the data files in the Removable Disk hard disk space, press the
Options button , and select Forma t. Go to My Computer if you want to
delete individual data files stored in Removable Disk mode.
, and select the capacity that you want.
Page 21
Zen Vision Mini PM3.book Page 19 Friday, October 21, 2005 11:39 AM
Managing Your Player 19
Managing Organizer Features
You can use Zen Vision:M to store and display contacts, calendar events and
tasks from Microsoft
To synchronize with Microsoft Outlook
1 Make sure your player is connected to your computer as shown on page 6.
2 Start Sync Manager. You can start Sync Manager from Creative Media
Explorer or Creative MediaSource Player/Organizer. See “Managing Music
and Data” on page 10.
3 Select My Computer and Zen Vision:M as the devices you want to
synchronize.
4 Select the Organizer data check box, and then click the Next button.
5 Select the information you want to import from Microsoft Outlook, and then
click the Next button.
6 Follow the instructions on the screen.
7 Click the Finish button.
®
Outlook®.
If you do not have Microsoft Outlook installed, you can use Creative Media
Explorer to edit your calendar, "to do" tasks and contact information using
the Personal Information Manager editor. In Creative Media Explorer, click
Manage Organizer Data.
You can also use Sync Manager to synchronize music, pictures and videos
between Zen Vision:M and your computer.
Page 22

Zen Vision Mini PM3.book Page 20 Friday, October 21, 2005 11:39 AM
20 Managing Your Player
To view the calendar
1 In the main menu, select Extras → Organizer → Calendar.
2 To go to a specific month, press the Options button , and select the
month that you want.
3 Firmly tap the Vertical Touch Pad to view the events and tasks of the
selected day.
To view today’s tasks
In the main menu, select Extras → Organizer → Tas ks .
To view contacts
In the main menu, select Extras → Organizer → Contacts.
Page 23
Zen Vision Mini PM3.book Page 21 Friday, October 21, 2005 11:39 AM
Personalizing Your Player 21
Personalizing Your Player
To assign a menu shortcut to My Shortcut button
In the main menu, select System → Player Settings → My Shortcut Button →
menu shortcut that you want.
To assign a user name
1 In the main menu, select System → Player Settings → Owner.
2 Use the Navigation controls to create a user name.
To select a picture as wallpaper
1 In the main menu, select Photos → Pictures.
2 Select the picture that you want.
3 Press the Options button , and select Set as Wallpaper.
To configure screen and display settings
In the main menu, select System → Display Settings → setting that you want:
Theme: specifies your player’s display design
Backlight Time: specifies the backlight duration
Brightness: adjusts screen brightness
Configure Menu: adds or removes main menu options.
To configure the Vertical Touch Pad
In the main menu, select System → Player Settings → To uch Pa d to select
sensitivity and clicker options.
Page 24

Zen Vision Mini PM3.book Page 22 Friday, October 21, 2005 11:39 AM
22 Personalizing Your Player
To configure power conservation settings
In the main menu, select System → Player Settings → setting that you want:
Idle Shutdown: specifies how long Zen Vision:M remains inactive before it
automatically shuts down
Sleep Timer: specifies a fixed period of time before Zen Vision:M automatically
turns off.
To configure date and time settings
1 In the main menu, select Extras → Date & Time.
2 Press the Options button to select date, time and alarm options.
3 To display the clock in the menu bar, select System → Clock Settings →
Clock in Title.
To display or hide video or picture folders
1 In the main menu, select Videos → Video → video folder that you want OR
select Photos → Pictures → picture folder that you want.
2 Press the Options button , and select the protect option. You can only
protect folders and not individual files.
3 In the main menu, select System → Player Settings and select whether to
show or hide the protected folder.
To set a password when displaying or hiding video or picture folders
1 In the main menu, select System → Player Settings and select the
password option.
2 Use the Navigation controls to create a password.
Page 25

Zen Vision Mini PM3.book Page 23 Friday, October 21, 2005 11:39 AM
Personalizing Your Player 23
3 Firmly tap the Vertical Touch Pad and select the check mark to confirm
the password. You will be prompted for this password when you select
System → Player Settings and select whether to show or hide the protected
folder.
4 To disable the password feature or change your password, select System →
Player Settings and select the password option.
5 If you forget your password, see “Step 1: Clean Up Your Player’s Firmware”
on page 27.
To create a customized equalizer setting
1 In the main menu, select System → Audio Settings → EQ.
Each slider on the Custom EQ screen represents successively higher
frequencies that can be adjusted.
80: controls bass frequency
250: adjusts the low mid-range frequency
1k: adjusts the mid-range frequency
4k: adjusts the upper mid-range frequency
13k: adjusts the treble frequency.
2 Select a slider, and move your thumb up and down the Vertical Touch Pad to
boost or reduce the selected frequency range.
3 Select the check mark to save and enable the Custom EQ settings.
To reset Zen Vision:M to its original firmware settings
In the main menu, select System → Reset Settings → Yes .
When you reset your player’s firmware settings, all your player’s personalized
settings will be replaced with default settings.
Page 26

Zen Vision Mini PM3.book Page 24 Friday, October 21, 2005 11:39 AM
24 Connecting Your Player to a TV (Optional)
Connecting Your Player to a TV (Optional)
To view your player’s content on a larger screen, purchase the Zen Vision:M
Video Kit to connect your player to a TV.
1
2 3 4
8
67
5
1 Video In jack -
Yel lo w
2 Audio In (Left) jack -
White
3 Audi o In (Right) jack -
Red
4 A/V Out jack
5 Video cable
6 Red connector
7 White connector
8 Yellow connector
1 In the main menu, select System → Photo/Video Settings → Video Out.
2 Select Auto (NTSC) or Auto (PAL). See the User’s Guide for your TV if you
are not sure about your TV’s display format.
3 Connect your player to a TV with the supplied video cable, as shown above.
DO NOT use a standard video cable. The USB synchronization adapter works
only with the proprietary Creative Video cable included with the Zen Vision:M
Video Kit.
Page 27

Zen Vision Mini PM3.book Page 25 Friday, October 21, 2005 11:39 AM
FAQ
This section covers questions you might have while using your player. For
further assistance, you may wish to consult our self-help tool "Knowledge
Base". Go to www.creative.com, select your region and then select Support.
Can I transfer Digital Rights Management (DRM) protected WMA files to my
player?
Yes. To transfer DRM protected WMA files to Zen Vision:M, you can use Creative
Media Explorer, Creative MediaSource Player/Organizer or Windows Media
Player 10.
Zen Vision:M does not turn on or stops responding. What do I do?
Do one or more of the following:
Make sure the Power switch is not in the Lock position.
If you are using the Zen Vision:M wired remote control (available separately), make
sure the wired remote control’s Lock switch is not is the Lock position.
Your battery may need to be recharged. See “Step 1: Charge Your Player” on page 4.
Should I leave the power adapter plugged in to the wall outlet?
No, you should not. After charging the battery or using Zen Vision:M,
disconnect your power adapter from the wall outlet. Leaving it plugged in leads
to heat buildup, which is not good for your power adapter.
How do I reset Zen Vision:M?
If your player stops responding, reset the player. This should not cause you to
lose any data or audio tracks, unless you were in the middle of transferring an
audio track.
Insert and remove a thin object (for example, a straightened paperclip) from
the Reset hole.
FAQ 2 5
Page 28

Zen Vision Mini PM3.book Page 26 Friday, October 21, 2005 11:39 AM
26 Information Diagrams
Information Diagrams
Use your player only after this library rebuilding is completed.
Re-building Library
See “Step 1: Clean Up Your Player’s Firmware” on page 27.
Hardware Problem
See “Step 1: Clean Up Your Player’s Firmware” on page 27.
Harddisk Problem
Your player will be automatically reset for the firmware to take
effect. In the rare event that your player does not reset itself, see
“How do I reset Zen Vision:M?” on page 25.
Please reset player
Page 29
Zen Vision Mini PM3.book Page 27 Friday, October 21, 2005 11:39 AM
Refer to the following information before contacting Customer
Support Services. For more information about Customer
Support Services, see your Product Information Guide.
Firmware Problem
Step 1: Clean Up Your Player’s Firmware
1. Do the following to enter Recovery mode:
i. Slide the Power switch toward the Power icon
the switch in the Power On position.
ii. Insert and remove a thin object (for example, a straightened
paperclip) from the Reset hole.
iii. Release the Power switch when the Creative logo appears.
The Recovery Mode screen appears.
2. Select Clean Up → Reboot.
3.
If this does not work, proceed to "Step 2: Update Your
Player’s Firmware".
Step 2: Update Your Player’s Firmware
1. Download from the Creative website any firmware update that is
available for your player.
2. Enter Recovery mode (see step 1 in "Step 1: Clean Up Your
Player’s Firmware").
3. Select Reload Firmware and reinstall your player’s firmware.
If this does not work, proceed to "Step 3: Format Your
4.
Player".
Step 3: Format Your Player
WARNING: This step deletes all your player’s content. If
possible, back up all your player’s content on your computer
before proceeding.
1. Enter Recovery mode (see step 1 in "Step 1: Clean Up Your
Player’s Firmware").
Select Format All → Reboot.
2.
Information Diagrams 27
and hold
Page 30

Zen Vision Mini PM3.book Page 28 Friday, October 21, 2005 11:39 AM
28 General Specifications
General Specifications
Power Source
Playback Formats
MP3 Playback
Performance
Recording
Formats
Connectors
Firmware Support
Battery: 1 x Rechargeable Lithium Ion battery
DC IN 5V when connected to a power outlet
USB bus powered when connected to a powered USB port on
a computer
Audio playback formats: MP3: Up to 320 kbps, WMA: Up to 320
kbps, WMA with PlaysForSure Digital Rights Management
(DRM) 10 or later, WAV
Video playback formats: MPEG-1, MPEG-2, MPEG-4-SP,
Windows Media™ Video (WMV) 9, MJPEG
Picture format: JPEG Baseline: Up to 16 MegaPixels, JPEG
Progressive: Up to 4 MegaPixels
Signal-to-Noise Ratio: Up to 97 dB
Channel Separation: Up to -70 dB (Line Out)
Frequency Response: 20 Hz ~ 20 kHz
Harmonic Distortion Output: <0.1%
Voice (via built-in microphone): IMA ADPCM (16 kHz, Mono)
FM Radio: IMA ADPCM (22 kHz, Stereo)
Headphone jack: 3.5 mm (1/8") stereo minijack, 25 mW per
channel
Docking connector
USB 2.0 (High speed)
USB 1.1 (Full speed)
Upgradable via USB
Page 31

Zen Vision Mini PM3.book Page 29 Friday, October 21, 2005 11:39 AM
General Specifications 29
FM Radio
FM region support
Earphone
Specifications
LCD
Stereo and Mono
Up to 32 preset stations
International: 87.5 MHz ~ 108.0 MHz, 100 kHz intervals
Frequency Range: 20 Hz ~ 20 KHz
Sensitivity: 113 dB ± 5 dB (I/P Level:1 mW)
Impedance: 32 Ω ± 15%
Plug: 3.5 mm (1/8") stereo minijack
Large 63.50 mm or 2.5" 320 x 240 pixel resolution backlit
display (262144 colors)
In the process of LCD manufacturing, instances of one or
more pixels appearing in a dark or fixed color, or in an
unchanging state, may occur.
In line with industry standards and based on Creative's screen
manufacturer's technical specifications, occurrences of fixed
spots may appear and are considered acceptable if they do not
impair display quality.
If, however, you notice fixed spots on your player’s LCD display
interfering with your use, contact Customer Support Services.
Page 32

Zen Vision Mini PM3.book Page 30 Friday, October 21, 2005 11:39 AM
30 Copyright and License
Copyright and License
Information in this document is subject to change without notice and does not
represent a commitment on the part of Creative Technology Ltd. No part of this
manual may be reproduced or transmitted in any form or by any means,
electronic or mechanical, including photocopying and recording, for any
purpose without the written permission of Creative Technology Ltd.
Copyright © 2005 Creative Technology Ltd. All rights reserved. The Creative
logo, Zen Vision:M and Creative MediaSource are trademarks or registered
trademarks of Creative Technology Ltd. in the United States and/or other
countries. Microsoft, Windows, Windows Media, Outlook and the Windows logo
are registered trademarks of Microsoft Corporation. Intel and Pentium are
registered trademarks of Intel Corporation.
The Software License Agreement can be found on the Installation CD.
Version 1.0
November 2005
Page 33

Zen Vision Mini PM3.book Page 31 Friday, October 21, 2005 11:39 AM
Félicitations
Zen Vision:M™ est le dernier lecteur numérique de Creative. Lisez la suite pour
savoir comment utiliser votre nouveau lecteur.
Table des matières
A propos de ce lecteur ......................................................................... 32
Utilisation des commandes de navigation ........................................... 33
Prise en main ....................................................................................... 34
Utilisation du lecteur ............................................................................ 41
Personnalisation du lecteur ................................................................. 50
Raccordement du lecteur à un poste de télévision (facultatif) ........... 54
FAQ ....................................................................................................... 55
Pictogrammes ...................................................................................... 56
Caractéristiques générales ................................................................. 58
Copyright et licence ............................................................................. 60
31
Page 34

Zen Vision Mini PM3.book Page 32 Friday, October 21, 2005 11:39 AM
32 A propos de ce lecteur
A propos de ce lecteur
Dépliez la dernière page de cette brochure et référencez l’illustration à l’aide
des noms et descriptions ci-après.
1 Interrupteur d’alimentation
2 Voyant de l’économiseur d’écran
3Verrouillage
Activez l’icône de verrouillage
pour verrouiller le lecteur et
éviter l’activation involontaire de
ses fonctions.
4Prise des écouteurs
5 Pavé tactile vertical
Reportez-vous à la section
« Utilisation des commandes de
navigation » à la page 33.
6 Microphone
7 Bouton Lecture/Pause
8 Bouton Suivant/Avance rapide
Appuyez sur ce bouton pour
passer à la piste suivante ou
accéder à l’option de menu.
Appuyez sur ce bouton et
maintenez-le enfoncé pour
avancer dans une piste.
9 Bouton Options
Appuyez sur ce bouton pour
afficher d’autres options.
10 Connecteur de la station
d’accueil
Branchez l’adaptateur de
synchronisation USB fourni à ce
connecteur.
11 Orifice de réinitialisation
Reportez-vous à la section
« Comment réinitialiser le Zen
Vision:M ? » à la page 55.
12 Bouton Menu/Retour
Appuyez sur ce bouton pour
revenir au menu ou à l’écran
précédent.
Appuyez sur ce bouton et
maintenez-le enfoncé pour
revenir au menu principal.
13 Bouton Précédent/Retour rapide
Appuyez sur ce bouton pour
revenir à la piste précédente ou
accéder à l’option de menu.
Appuyez sur ce bouton et
maintenez-le enfoncé pour
reculer dans une piste.
14 Mon bouton de raccourci
Reportez-vous à la section
« Attribution d’un raccourci de
menu pour Mon bouton de
raccourci » à la page 50.
15 Ecran à cristaux liquides (LCD)
Page 35

Zen Vision Mini PM3.book Page 33 Friday, October 21, 2005 11:39 AM
Utilisation des commandes de navigation 33
Utilisation des commandes de navigation
L’expression « commandes de navigation » regroupe les éléments suivants :
Pavé tactile vertical
Bouton Précédent/Retour rapide
Bouton Suivant/Avance rapide
Le terme « Sélectionner » regroupe les actions suivantes :
1 Déplacer votre pouce vers le haut ou vers le bas sur le pavé tactile vertical
pour faire défiler verticalement un menu OU appuyer sur le bouton
Précédent/Retour ou Suivant/Avance rapide pour faire défiler un menu
horizontalement.
Appuyez sur le bord supérieur ou inférieur du pavé tactile vertical pour accéder
aux options de menu suivantes ou précédentes.
Appuyez sur le bord supérieur ou inférieur du pavé tactile vertical et
maintenez-le enfoncé pour faire défiler rapidement des options de menu.
2 Appuyez fermement sur le pavé tactile vertical pour sélectionner l’option en
surbrillance.
1
OR
Réglage du volume à l’aide du pavé tactile vertical
En fonction du menu où vous vous trouvez, déplacez votre pouce vers le haut ou
le bas du pavé tactile vertical OU appuyez sur le bouton Options et
sélectionnez Volume.
2
Page 36

Zen Vision Mini PM3.book Page 34 Friday, October 21, 2005 11:39 AM
34 Prise en main
Prise en main
Etape 1 : Chargement du lecteur
La pile lithium-ion hautes performances fournie avec le lecteur doit être
totalement chargée pour que vous puissiez l’utiliser. Le temps de charge est
d’approximativement deux heures. Pour recharger la pile du lecteur, branchez
l’adaptateur secteur sur le lecteur et la prise de courant, comme indiqué dans
le schéma ci-dessous.
3
1
2
Pendant le chargement du lecteur, vous pouvez passer à l’« Etape 2 : Mise du
lecteur sous tension ».
Page 37

Zen Vision Mini PM3.book Page 35 Friday, October 21, 2005 11:39 AM
Prise en main 35
Etape 2 : Mise du lecteur sous tension
1 Faites glisser l’interrupteur d’alimentation vers l’icône d’alimentation et
maintenez-le dans cette position jusqu’à ce que l’écran LCD s’allume.
2 Lorsque vous mettez le lecteur sous tension pour la première fois, le menu
s’affiche en anglais. Pour modifier la langue :
i. Appuyez sur le bouton Menu/Retour et maintenez-le enfoncé. Le menu principal
s’affiche.
ii. Sélectionnez System
→ Language → langue souhaitée.
3 Lorsque vous avez terminé d’utiliser le lecteur, faites glisser l’interrupteur
d’alimentation vers l’icône d’alimentation jusqu’à ce que le message
Arrêt en cours apparaisse.
Etape 3 : Configuration du logiciel
1 Allumez l’ordinateur. Pour installer le logiciel, vous devez être connecté en
tant qu’administrateur sous Windows
l’aide en ligne du système d’exploitation.
2 Insérez le CD d’installation dans le lecteur de CD-ROM/DVD-ROM. Il doit
démarrer automatiquement. Si tel n’est pas le cas, procédez comme suit :
i. Double-cliquez sur l’icône Poste de travail.
Vous pouvez également cliquer sur Démarrer → Poste de travail.
ii. A l’aide du bouton droit de la souris, cliquez sur l’icône du lecteur de CD-ROM/DVD-ROM,
puis cliquez sur Lecture automatique.
3 Suivez les instructions qui s’affichent à l’écran et, à l’invite, redémarrez
l’ordinateur.
®
. Pour plus d’informations, consultez
Page 38

Zen Vision Mini PM3.book Page 36 Friday, October 21, 2005 11:39 AM
36 Prise en main
4 Une fois l’ordinateur redémarré, suivez les instructions d’enregistrement
du produit.
Vous devez être connecté à Internet pour enregistrer le produit.
5 Lorsque vous y êtes invité, raccordez le lecteur au port USB de votre
ordinateur, comme illustré.
Ne raccordez le lecteur que sur le port USB d’un ordinateur ; évitez de le
connecter à un hub USB.
Page 39

Zen Vision Mini PM3.book Page 37 Friday, October 21, 2005 11:39 AM
Prise en main 37
Etape 4 : Transfert de contenu
Transférez de la musique ou d’autres fichiers de votre collection de CD ou de
votre ordinateur.
Vous pouvez acheter du contenu auprès de nombreuses sources autorisées.
Voici quelques suggestions :
Pistes audio extraites de CD audio personnels, enregistrements de studio
personnels ou achetés auprès de magasins de musique en ligne.
Vidéos achetées à des vidéothèques en ligne ou vidéos personnelles
numérisées.
Photos créées par votre appareil photo numérique ou numérisées à partir
de photos imprimées.
Transfert ou « extraction » de musique de votre collection de CD
1 Assurez-vous que le lecteur est raccordé à votre ordinateur, comme illustré
page 36.
2 Cliquez deux fois sur l’icône Zen Vision:M Media Explorer (Explorateur
multimédia) sur le bureau.
3 Cliquez sur le bouton Extraire des CD audio .
4 Suivez ensuite les instructions qui s’affichent à l’écran.
SM
Creative Media Explorer utilise MusicID
le titre, la piste, la source et d’autres informations sur les CD lus. Ce service
est GRATUIT et automatique. Vous devez être connecté à Internet lorsque vous
utilisez ce service. Pour plus d’informations, consultez l’aide en ligne de
Creative Audio CD Ripper.
de Gracenote® pour obtenir l’artiste,
Page 40

Zen Vision Mini PM3.book Page 38 Friday, October 21, 2005 11:39 AM
38 Prise en main
Copie de fichiers audio, de vidéos ou de photos à partir de
l’ordinateur
1 Répétez les étapes 1 et 2 décrites à la section « Transfert ou « extraction »
de musique de votre collection de CD ».
2 Cliquez sur le bouton Parcourir les média .
3 Recherchez les fichiers multimédia et copiez-les sur le lecteur à l’aide de la
fonctionnalité « glisser-déplacer ».
Transfert de fichiers de données
1 Répétez les étapes 1 et 2 décrites à la section « Transfert ou « extraction »
de musique de votre collection de CD ».
2 Cliquez sur le bouton Parcourir les documents .
Recherchez les fichiers de données et transférez-les sur le lecteur à l’aide
3
de la fonctionnalité « glisser-déplacer ». Vous pouvez également
transférer des fichiers audio et des photos à l’aide du bouton
documents
.
Assurez-vous que les fichiers sont transférés dans le dossier approprié, par
exemple que les images sont transférées dans Média → Images et la musique
dans Média → Musique.
Parcourir les
Page 41

Zen Vision Mini PM3.book Page 39 Friday, October 21, 2005 11:39 AM
Prise en main 39
Etape 5 : Déconnexion de votre lecteur
Lorsque vous avez terminé le transfert de fichiers, déconnectez Zen Vision:M.
NE DECONNECTEZ PAS votre lecteur si vous voyez la première icône
ci-dessous s’afficher sur l’écran. Un transfert de fichier de données ou de
pistes est en cours et la déconnexion du lecteur pourrait endommager les
éléments transférés. Attendez que la deuxième icône ci-dessous s’affiche
avant de déconnecter votre lecteur.
Docked
Docked
Page 42

Zen Vision Mini PM3.book Page 40 Friday, October 21, 2005 11:39 AM
40 Prise en main
Etape 6 : Lecture de musique ou de fichiers
Vous pouvez désormais lire la musique que vous avez extraite ou les fichiers
que vous avez transférés !
A tout moment, vous pouvez appuyer sur le bouton Options pour obtenir
plus d’options.
Les fichiers stockés sur le lecteur sont triés par ordre alphabétique pour
faciliter les recherches.
Lecture de musique
1 Raccordez vos écouteurs à la prise casque.
2 Dans le menu principal, sélectionnez la catégorie de Bibl. de musique →
qui vous intéresse.
3 Sélectionnez une piste, puis Lire.
4 Déplacez votre pouce vers le haut ou le bas du pavé tactile vertical pour
régler le volume.
Lecture de vidéos
Dans le menu principal, sélectionnez Vidéos → Vidéo → vidéo souhaitée.
Affichage d’images
1 Dans le menu principal, sélectionnez Photos → Images → image souhaitée.
2 Appuyez sur le bouton Options
et de zoom.
Si vous sélectionnez l’option de zoom, utilisez les commandes de navigation
pour faire un panoramique vertical ou horizontal dans les quatre différentes
directions.
pour sélectionner les options de rotation
Page 43

Zen Vision Mini PM3.book Page 41 Friday, October 21, 2005 11:39 AM
Utilisation du lecteur 41
Utilisation du lecteur
Vous êtes désormais prêt à utiliser les fonctions plus avancées de votre lecteur !
Lisez cette section pour tirer le meilleur parti de votre lecteur.
« Gestion de contenus audio » à la page 41
« Gestion des vidéos » à la page 44
« Gestion des images » à la page 45
« Gestion des enregistrements » à la page 46
« Gestion des données » à la page 47
« Gestion des fonctions de l’organiseur » à la page 48.
Gestion de contenus audio
Création de compilations
Pour profiter d’une lecture conviviale, vous pouvez sélectionner n’importe
quelle combinaison de pistes depuis la bibliothèque de musique du lecteur
pour créer des compilations.
1 Pour ajouter une piste ou une catégorie de pistes au dossier Lecture en
cours :
i. Sélectionnez Bibl. de musique → piste ou catégorie de pistes souhaitée.
ii. Appuyez sur le bouton Options et sélectionnez Ajouter à sél..
iii. Répétez les étapes i) et ii) pour ajouter une autre piste ou catégorie de pistes.
iv. Sélectionnez Bibl. de musique → Lecture en cours.
2 Appuyez sur le bouton Options et sélectionnez Enr comme compil.
3 Utilisez les commandes de navigation pour attribuer un nom à la
compilation et sélectionnez la coche pour le valider.
4 Pour lire une compilation, sélectionnez Bibl. de musique → Liste de
compilations → compilation souhaitée.
Page 44

Zen Vision Mini PM3.book Page 42 Friday, October 21, 2005 11:39 AM
42 Utilisation du lecteur
Sélection de pistes avec le DJ de Zen Vision:M
Dans le menu principal, sélectionnez Bibl. de musique → DJ → option
souhaitée :
Album du jour : lecture aléatoire de l’album sélectionné.
Lire tout aléatoire : lecture aléatoire de toutes les pistes.
Le plus célèbre : lecture des pistes les plus lues.
Peu connu : lecture des pistes les moins souvent lues.
Optimisation des performances audio
Dans le menu principal, sélectionnez Système → Paramètres audio →
option(s) souhaitée(s) :
Mode de lecture : parcourt, répète ou lit les pistes audio dans l’ordre séquentiel.
Ampl. Basse : optimise la basse de la piste pendant la lecture.
Vol. intelli. : règle la lecture à un volume constant. Il n’est plus nécessaire de régler
le volume lorsque vous lisez des pistes différentes.
EQ : optimise la musique en fonction de son genre ou de son style. Vous pouvez
personnaliser votre propre paramètre d’EQ. Reportez-vous à la section « Pour créer
un paramètre d’égaliseur personnalisé » à la page 52.
Réglage d’une radio FM
1 Dans le menu principal, sélectionnez Radio FM.
2 Pour rechercher et enregistrer automatiquement des stations de radio,
appuyez sur le bouton Options et sélectionnez Recherche auto.
A la fin de la recherche automatique, Zen Vision:M sauvegarde
automatiquement toutes les stations comme des présélections et se règle
sur la première présélection.
Page 45

Zen Vision Mini PM3.book Page 43 Friday, October 21, 2005 11:39 AM
Utilisation du lecteur 43
3 Pour sélectionner un autre réglage prédéfini, appuyez fermement sur le
pavé tactile vertical pour afficher la liste des réglages prédéfinis, puis
déplacez votre pouce vers le haut ou le bas du pavé tactile vertical pour
sélectionner le réglage prédéfini souhaité.
Appuyez sur le bouton Suivant/Avance rapide ou Précédent/Retour rapide
et maintenez-le enfoncé pendant une seconde pour rechercher la prochaine
station de radio disponible.
Page 46

Zen Vision Mini PM3.book Page 44 Friday, October 21, 2005 11:39 AM
44 Utilisation du lecteur
Gestion des vidéos
Pour convertir vos vidéos dans un format pris en charge par votre lecteur,
lancez Creative Media Explorer et cliquez sur Convert Video (Convertir vidéo).
Avance/retour dans une vidéo
1 Dans le menu principal, sélectionnez Vidéos → Vidéo → vidéo souhaitée.
2 Appuyez sur le bouton Options et sélectionnez Chercher à.
3 Utilisez les commandes de navigation pour avancer ou reculer dans une
vidéo.
Suppression d’une vidéo
1 Dans le menu principal, sélectionnez Vidéos → Vidéo, puis la vidéo
souhaitée.
2 Appuyez sur le bouton Options et sélectionnez Suppr. vidéo.
Affichage de la dernière vidéo lue
Dans le menu principal, sélectionnez Vidéos → Vidéos récemment visionnées.
Affichage ou masquage des dossiers vidéo
Reportez-vous à la section « Affichage ou masquage des dossiers vidéo ou
image » à la page 51.
Définition d’un mot de passe lors de l’affichage ou du masquage des
dossiers vidéo
Reportez-vous à la section « Définition d’un mot de passe lors de l’affichage ou
du masquage des dossiers vidéo ou image » à la page 52.
Page 47

Zen Vision Mini PM3.book Page 45 Friday, October 21, 2005 11:39 AM
Utilisation du lecteur 45
Gestion des images
Affichage des images dans un diaporama
1 Dans le menu principal, sélectionnez Photos → Images.
2 Appuyez sur le bouton Options et sélectionnez Démarrer diaporama.
3 Pour personnaliser vos propres diaporamas, lancez Creative Media
Explorer.
4 Pour modifier la durée de l’intervalle des diaporamas, sélectionnez
Système → Paramètres photo/vidéo.
Classement et affichage de vos images préférées
1 Dans le menu principal, sélectionnez Photos → Images→ image souhaitée.
2 Appuyez sur le bouton Options pour sélectionner les options de
classement et d’affichage.
Affichage ou masquage des dossiers image
Reportez-vous à la section « Affichage ou masquage des dossiers vidéo ou
image » à la page 51.
Définition d’un mot de passe lors de l’affichage ou du masquage des
dossiers image
Reportez-vous à la section « Définition d’un mot de passe lors de l’affichage ou
du masquage des dossiers vidéo ou image » à la page 52.
Page 48

Zen Vision Mini PM3.book Page 46 Friday, October 21, 2005 11:39 AM
46 Utilisation du lecteur
Gestion des enregistrements
Enregistrement audio
1 Dans le menu principal, sélectionnez Microphone.
2 Appuyez sur le bouton Options et sélectionnez Démarrer enr..
3 En cours d’enregistrement, vous pouvez appuyer sur le bouton Options
et exécuter l’une des actions suivantes :
Pause : interrompt l’enregistrement.
Reprise : reprend l’enregistrement là où il a été interrompu.
Arrêt : arrête et sauvegarde l’enregistrement.
Scinder : lance un nouvel enregistrement.
Enregistrement d’émissions de radio
1 Dans le menu principal, sélectionnez Radio FM.
2 Lorsque vous écoutez une émission de radio, appuyez sur le bouton Options
et sélectionnez Enr. radio pour lancer l’enregistrement.
Ecoute d’un enregistrement audio
Dans le menu principal, sélectionnez Bibl. de musique → Enregistrements →
enregistrement souhaité.
Page 49

Zen Vision Mini PM3.book Page 47 Friday, October 21, 2005 11:39 AM
Utilisation du lecteur 47
Gestion des données
Vous pouvez utiliser Zen Vision:M pour stocker des copies de sauvegarde des
fichiers de données de l’ordinateur ou pour transférer des fichiers d’un
ordinateur à un autre.
Utilisation du Zen Vision:M comme disque amovible
1 Dans le menu principal, sélectionnez Extras → Disque amovible.
2 Appuyez sur le bouton Options
Vous pouvez aussi connecter le Zen Vision:M à l’ordinateur et utiliser le
Gestionnaire de disque amovible Creative pour augmenter ou réduire la
quantité d’espace disque dur en mode Disque amovible.
Pour lancer le Gestionnaire de disque amovible Creative, cliquez sur
Démarrer → Programmes ou Tous les programmes → Creative →
Gestionnaire de disque amovible Creative → Gestionnaire de disque
amovible Creative.
3 Lorsque Disque amovible s’affiche sur l’écran LCD du Zen Vision:M, vous
pouvez transférer des fichiers de données depuis/vers un ordinateur.
4 Raccordez le Zen Vision:M à votre ordinateur. Zen Vision:M apparaît en tant
que Disque amovible sous Poste de travail.
5 Utilisez la méthode « glisser-déposer » pour copier des fichiers depuis/vers
le Zen Vision:M.
et sélectionnez la capacité souhaitée.
Page 50

Zen Vision Mini PM3.book Page 48 Friday, October 21, 2005 11:39 AM
48 Utilisation du lecteur
6 Une fois la copie des fichiers terminée, cliquez sur l’icône Supprimer le
périphérique en toute sécurité sur la barre des tâches et sur
Supprimer le périphérique de stockage USB en toute sécurité, puis
déconnectez votre lecteur lorsque vous y êtes invité.
Pour supprimer tous les fichiers de données de l’espace de disque dur du
mode Disque amovible, appuyez sur le bouton Options et sélectionnez
Form at. Utilisez Poste de travail si vous souhaitez supprimer certains
fichiers de données stockés en mode Disque amovible.
Gestion des fonctions de l’organiseur
Vous pouvez utiliser le Zen Vision:M pour enregistrer et afficher des contacts,
des événements dans le calendrier et des tâches à partir de Microsoft
®
Outlook
.
Si Microsoft Outlook n’est pas installé sur votre ordinateur, utilisez Creative
Media Explorer pour modifier votre calendrier, vos tâches et vos contacts à
l’aide de l’éditeur Gestionnaire d’informations personnelles. Dans Creative
Media Explorer, cliquez sur le bouton de gestion des données de l’organiseur.
Synchronisation avec Microsoft Outlook
1 Assurez-vous que le lecteur est raccordé à votre ordinateur, comme illustré
page 36.
2 Lancez le Gestionnaire de synchronisation. Vous pouvez lancer le
Gestionnaire de synchronisation à partir de Creative Media Explorer ou de
Creative MediaSource Player/Organizer.
3 Sélectionnez Poste de travail et Zen Vision:M comme périphériques à
synchroniser.
®
Page 51

Zen Vision Mini PM3.book Page 49 Friday, October 21, 2005 11:39 AM
Utilisation du lecteur 49
4 Cochez la case Données organiseur puis cliquez sur le bouton Suivant.
5 Sélectionnez les informations à importer depuis Microsoft Outlook, puis
cliquez sur le bouton Suivant.
6 Suivez ensuite les instructions qui s’affichent à l’écran.
7 Cliquez sur le bouton Ter min er.
Vous pouvez également utiliser le Gestionnaire de synchronisation pour
synchroniser de la musique, des images et des vidéos entre le Zen Vision:M
et l’ordinateur.
Affichage du calendrier
1 Dans le menu principal, sélectionnez Extras → Organiseur → Calendrier.
2 Pour changer de mois, appuyez sur le bouton Options et sélectionnez le
mois désiré.
3 Appuyez fermement sur le pavé tactile vertical pour afficher les
événements et les tâches du jour sélectionné.
Affichage des tâches du jour
Dans le menu principal, sélectionnez Extras → Organiseur → Tâches.
Affichage des contacts
Dans le menu principal, sélectionnez Extras → Organiseur→ Contacts.
Page 52

Zen Vision Mini PM3.book Page 50 Friday, October 21, 2005 11:39 AM
50 Personnalisation du lecteur
Personnalisation du lecteur
Attribution d’un raccourci de menu pour Mon bouton de raccourci
Dans le menu principal, sélectionnez Système → Paramètres lecteur→ Mon
bouton de raccourci → raccourci de menu souhaité.
Attribution d’un nom d’utilisateur
1 Dans le menu principal, sélectionnez Système → Paramètres lecteur →
Propriétaire.
2 Utilisez les commandes de navigation pour créer un nom d’utilisateur.
Définition d’une image en tant que papier peint
1 Dans le menu principal, sélectionnez Photos → Images.
2 Sélectionnez l’image souhaitée.
3 Appuyez sur le bouton Options et sélectionnez Déf. pap. peint.
Configuration des paramètres d’écran et d’affichage
Dans le menu principal, sélectionnez Système → Paramètres d’affichage →
paramètre souhaité :
Thème : indique la conception d’affichage du lecteur
Tps éclair. : indique la durée du rétroéclairage.
Luminosité : ajuste la luminosité de l’écran.
Menu Configurer : ajoute ou supprime les options du menu principal.
Page 53

Zen Vision Mini PM3.book Page 51 Friday, October 21, 2005 11:39 AM
Personnalisation du lecteur 51
Configuration du pavé tactile vertical
Dans le menu principal, sélectionnez Système → Paramètres lecteur →
Tou ch Pad pour sélectionner les options de sensibilité et de télécommande.
Configuration des paramètres d’économie d’énergie
Dans le menu principal, sélectionnez Système → Paramètres lecteur →
paramètre souhaité :
Arrêt inac. : spécifie la durée d’inactivité de Zen Vision:M avant sa mise hors tension
automatique.
Veil le : spécifie une période de temps fixe avant que Zen Vision:M ne se mette
automatiquement hors tension.
Configuration de la date et de l’heure
1 Dans le menu principal, sélectionnez Extras → Date & Heure.
2 Appuyez sur le bouton Options pour sélectionner les options de date,
heure et alarme.
3 Pour afficher l’heure dans la barre de menu, sélectionnez Système →
Réglage heure → Format Horl.
Affichage ou masquage des dossiers vidéo ou image
1 Dans le menu principal, sélectionnez Vidéos → Vidéo → dossier vidéo
souhaité OU sélectionnez Photos → Images → dossier image souhaité.
2 Appuyez sur le bouton Options et sélectionnez l’option de protection.
Vous ne pouvez protéger que des dossiers et non des fichiers individuels.
3 Dans le menu principal, sélectionnez Système → Paramètres lecteur et
choisissez d’afficher ou de masquer le dossier protégé.
Page 54

Zen Vision Mini PM3.book Page 52 Friday, October 21, 2005 11:39 AM
52 Personnalisation du lecteur
Définition d’un mot de passe lors de l’affichage ou du masquage des
dossiers vidéo ou image
1 Dans le menu principal, sélectionnez Système → Paramètres lecteur, puis
l’option de mot de passe.
2 Utilisez les commandes de navigation pour créer un mot de passe.
3 Appuyez fermement sur le pavé tactile vertical et sélectionnez la coche
pour valider le mot de passe. Vous êtes invité à mentionner ce mot de passe
lorsque vous sélectionnez Système → Paramètres lecteur, puis choisissez
d’afficher ou de masquer le dossier protégé.
4 Pour désactiver la fonction de mot de passe ou modifier votre mot de passe,
sélectionnez Système → Paramètres lecteur, puis l’option de mot de
passe.
5 Si vous avez oublié votre mot de passe, reportez-vous à la section
« Etape 1 : Suppression du microprogramme du lecteur » à la page 57.
Pour créer un paramètre d’égaliseur personnalisé
1 Dans le menu principal, sélectionnez Système → Paramètres audio → EQ.
Chaque curseur de cet écran représente des fréquences croissantes qui
peuvent être réglées.
80 : commande la fréquence des basses.
250 : règle la fréquence intermédiaire basse.
1k : règle la fréquence intermédiaire.
4k : règle la fréquence intermédiaire haute.
13k : règle la fréquence des aigus.
2 Sélectionnez un curseur et déplacez votre pouce vers le haut ou le bas du
pavé tactile vertical pour augmenter ou réduire la plage de fréquences
sélectionnée.
Page 55

Zen Vision Mini PM3.book Page 53 Friday, October 21, 2005 11:39 AM
Personnalisation du lecteur 53
3 Sélectionnez la coche pour enregistrer et activer les paramètres
d’égaliseur personnalisé.
Réinitialisation des paramètres de microprocesseur initiaux de Zen
Vision:M
Dans le menu principal, sélectionnez Système → Réinit. param. → Oui.
Lorsque vous réinitialisez les paramètres de microprocesseur du lecteur, tous
les paramètres personnalisés sont remplacés par les paramètres par défaut.
Page 56

Zen Vision Mini PM3.book Page 54 Friday, October 21, 2005 11:39 AM
54 Raccordement du lecteur à un poste de télévision (facultatif)
Raccordement du lecteur à un poste de
télévision (facultatif)
Pour afficher le contenu du lecteur sur un écran plus grand, connectez le
lecteurZen Vision:M à une télévision.
1
2 3 4
8
67
5
1 Prise d’entrée vidéo -
Jaune
2 Prise d’entrée audio
(gauche) - Blanche
3 Prise d’entrée audio
(droite) - Rouge
4 Prise de sortie A/V
5 Câble vidéo
6 Connecteur rouge
7 Connecteur blanc
8 Connecteur jaune
1 Dans le menu principal, sélectionnez Système → Paramètres photo/vidéo
→ Sortie vidéo.
2 Sélectionnez Auto (NTSC) ou Auto (PAL). Si vous n’êtes par sûr du format
d’affichage, consultez le mode d’emploi votre télévision.
3 Connectez le lecteur à une télévision à l’aide du câble vidéo fourni, comme
indiqué ci-dessus.
N’UTILISEZ PAS de câble vidéo standard. L’adaptateur de synchronisation
USB fonctionne uniquement avec le câble Creative Video propriétaire fourni
avec le lecteur Zen Vision:M.
Page 57

Zen Vision Mini PM3.book Page 55 Friday, October 21, 2005 11:39 AM
FAQ
Cette section couvre des questions que vous pouvez vous poser sur l’utilisation
du lecteur. Si vous avez besoin d’une aide plus spécifique, consultez notre Base
de connaissances. Rendez-vous sur le site www.creative.com, sélectionnez
votre pays puis la rubrique Support.
Puis-je transférer des fichiers WMA protégés par la technologie DRM (Digital
Rights Management) sur mon lecteur ?
Oui. Pour transférer des fichiers WMA protégés par la technologie DRM sur le
Zen Vision:M, utilisez Creative MediaSource Player/Organizer ou Windows
Media Player 10.
Le Zen Vision:M ne se met pas sous tension ou cesse de répondre. Que
puis-je faire ?
Effectuez l’une ou plusieurs des opérations suivantes :
Vérifiez que l’interrupteur d’alimentation n’est pas en position Verrouillé.
Si vous utilisez la télécommande filaire (disponible séparément) du Zen Vision:M,
vérifiez que le bouton de verrouillage de la télécommande n’est pas en position
Verro uillé.
La pile a peut-être besoin d’être rechargée. Reportez-vous à la section
« Etape 1 : Chargement du lecteur » à la page 34.
Dois-je laisser l’adaptateur branché à la prise de courant ?
Non. Une fois la pile rechargée ou après avoir utilisé le Zen Vision:M,
débranchez l’adaptateur de la prise de courant. Laisser le lecteur branché peut
entraîner une surchauffe, ce qui n’est pas bon pour l’adaptateur.
Comment réinitialiser le Zen Vision:M ?
Si le lecteur ne répond plus, vous devez le réinitialiser. Cette opération ne
devrait entraîner aucune perte de données ni de pistes audio, sauf si vous
effectuez la réinitialisation pendant le transfert d’une piste audio.
Insérez brièvement un objet fin (comme un trombone) dans l’orifice de
réinitialisation.
FAQ 5 5
Page 58

Zen Vision Mini PM3.book Page 56 Friday, October 21, 2005 11:39 AM
56 Pictogrammes
Pictogrammes
Utilisez uniquement le lecteur une fois que la bibliothèque a été
recréée.
Re-building Library
Reportez-vous à la section « Etape 1 : Suppression du
microprogramme du lecteur » à la page 57.
Hardware Problem
Reportez-vous à la section « Etape 1 : Suppression du
microprogramme du lecteur » à la page 57.
Harddisk Problem
Le lecteur est automatiquement réinitialisé pour que le
microprogramme soit pris en compte. Si, exceptionnellement, le
lecteur ne se réinitialise pas lui-même, reportez-vous à la
Please reset player
section « Comment réinitialiser le Zen Vision:M ? » à la page 55.
Page 59

Zen Vision Mini PM3.book Page 57 Friday, October 21, 2005 11:39 AM
Lisez les informations suivantes avant de contacter les services
d’assistance client. Pour plus d’informations sur les services
d’assistance client, reportez-vous au manuel d’information sur
Firmware Problem
le produit.
Etape 1 : Suppression du microprogramme du lecteur
1. Procédez comme suit pour entrer en mode de récupération :
i. Faites glisser l’interrupteur d’alimentation vers l’icône
d’alimentation
Marche.
ii. Insérez brièvement un objet fin (comme un trombone) dans
l’orifice de réinitialisation.
iii. Relâchez l’interrupteur d’alimentation lorsque le logo de
Creative apparaît.
L’ é c r a n Recovery Mode (Mode de récupération) apparaît.
2. Sélectionnez Clean Up (Supprimer) → Reboot (Réinitialiser).
En cas d’échec, passez à l’« Etape 2 : Mise à jour du
3.
microprogramme du lecteur ».
et maintenez-le enfoncé en position
Etape 2 : Mise à jour du microprogramme du lecteur
1. Téléchargez à partir du site Web de Creative le
microprogramme disponible pour votre lecteur.
2. Activez le mode de récupération (étape 1 - « Etape 1 :
Suppression du microprogramme du lecteur »).
3. Sélectionnez Reload Firmware (Recharger microprog.) et
réinstallez le microprogramme du lecteur.
4. En cas d’échec, passez à l’« Etape 3 : Formatage du lecteur ».
Etape 3 : Formatage du lecteur
ATTENTION : cette étape supprime tout le contenu du lecteur.
Faites, si possible, une copie du contenu du lecteur sur votre
ordinateur, avant de continuer.
1. Activez le mode de récupération (étape 1 « Etape 1 : Suppression du microprogramme du lecteur »).
Sélectionnez Format All (Tout formater) → Reboot
2.
(Réinitialiser).
Pictogrammes 57
Page 60

Zen Vision Mini PM3.book Page 58 Friday, October 21, 2005 11:39 AM
58 Caractéristiques générales
Caractéristiques générales
Alimentation
Formats de
lecture
Performances de
lecture MP3
Formats
d’enregistrement
Connecteurs
Pile : 1 pile lithium-ion rechargeable
Alimentation en CC 5 V en cas de connexion à une prise de
courant
Bus USB alimenté lors de la connexion au port USB sous
tension d’un ordinateur
Formats de lecture audio : MP3 : jusqu’à 320 Kbits/s ; WMA :
jusqu’à 320Kbits/s, WMA avec DRM (PlaysForSure Digital
Rights Management) 10 ou version ultérieure, WAV
Formats de lecture vidéo : MPEG-1, MPEG-2, MPEG-4-SP,
Windows Media™ Video (WMV) 9, MJPEG
Format d’image : JPEG de base : jusqu’à 16 MégaPixels, JPEG
progressif : jusqu’à 4 MégaPixels
Rapport signal/bruit : Jusqu’à 97 dB
Séparation des canaux : jusqu’à -70 dB (sortie ligne)
Réponse en fréquence : 20 Hz ~ 20 kHz
Distorsion harmonique en sortie : <0,1 %
Voix (via le microphone intégré) : IMA ADPCM (à 16 kHz,
mono)
Radio FM : IMA ADPCM (à 22 kHz, stéréo)
Prise des écouteurs : mini-prise stéréo 3,5 mm, 25 mW par
canal
Connecteur de station d’accueil
USB 2.0 (grande vitesse)
USB 1.1 (vitesse complète)
Page 61

Zen Vision Mini PM3.book Page 59 Friday, October 21, 2005 11:39 AM
Caractéristiques générales 59
Assistance du
micrologiciel
Radio FM
Prise en charge de
la région FM
Caractéristiques
des écouteurs
Ecran LCD
Mise à niveau possible via USB
Stéréo et Mono
Jusqu’à 32 stations présélectionnées
International : 87,5 MHz ~ 108 MHz, intervalles de 100 kHz
Gamme de fréquences : 20 Hz ~ 20 kHz
Sensibilité : 113 dB ±5 dB (Niveau I/P : 1 mW)
Impédance : 32
Prise : Mini-prise stéréo 3,5 mm
Affichage éclairé de 63,50 mm (2,5 pouces) avec résolution de
320 x 240 pixels (262144 couleurs)
Lors de la fabrication de l’écran LCD, un ou plusieurs pixels
peuvent apparaître dans une couleur sombre, une couleur
donnée ou ne pas changer de couleur.
Conformément aux standards de l’industrie et aux
spécifications techniques du fabricant d’écran de Creative,
des points fixes peuvent s’afficher. Ce défaut est considéré
comme acceptable si ces points ne nuisent pas à la qualité
d’affichage.
Toutefois, si vous constatez que des points fixes vous
empêchent d’utiliser normalement l’écran LCD, contactez le
service d’assistance client.
Ω ±15 %
Page 62

Zen Vision Mini PM3.book Page 60 Friday, October 21, 2005 11:39 AM
60 Copyright et licence
Copyright et licence
Les informations contenues dans ce document sont susceptibles d’être
modifiées sans préavis et ne représentent pas un engagement de la part de
Creative Technology Ltd. Aucune partie de ce manuel ne peut être reproduite
ou transmise sous aucune forme et par aucun moyen, électronique ou
mécanique, notamment la photocopie et l’enregistrement pour aucun but sans
l’autorisation écrite de Creative Technology Ltd.
Copyright © 2005 Creative Technology Ltd. Tous droits réservés. Le logo
Creative, Creative MediaSource et Zen Vision:M sont des marques
commerciales ou des marques déposées de Creative Technology Ltd. aux
Etats-Unis et/ou dans d’autres pays. Microsoft, Windows, Windows Media,
Outlook et le logo Windows sont des marques déposées de Microsoft
Corporation. Intel et Pentium sont des marques déposées d’Intel Corporation.
Le contrat de licence se trouve sur le CD d’installation.
Version 1.0
Novembre 2005
Page 63

Zen Vision Mini PM3.book Page 61 Friday, October 21, 2005 11:39 AM
Gefeliciteerd
Zen Vision:M™ is de nieuwe digitale speler van Creative. Lees deze informatie
om meer te weten te komen over het in gebruik nemen van uw nieuwe speler!
Inhoudsopgave
Info over de speler ............................................................................... 62
Gebruik van de navigatiemiddelen ....................................................... 63
Aan de slag ........................................................................................... 64
Beheer van de speler ........................................................................... 71
Aanpassen van de speler ..................................................................... 80
De speler aansluiten op een tv (optioneel) ........................................... 84
Veelgestelde vragen ............................................................................. 85
Informatiediagrammen ........................................................................ 86
Algemene specificaties ........................................................................ 88
Copyright en licentie ............................................................................ 90
61
Page 64

Zen Vision Mini PM3.book Page 62 Friday, October 21, 2005 11:39 AM
62 Info over de speler
Info over de speler
Vouw de laatste pagina van dit boekje uit en gebruik de afbeelding op deze
pagina als verwijzing voor de onderstaande termen en beschrijvingen.
1Aan/uit-knop
2 Schermbeveiligings-LED-lampje
3 Vergrendeling
Druk in de richting van het
pictogram Vergrendeling om
de speler te vergrendelen en om
zo te voorkomen dat functies per
abuis worden geactiveerd.
4 Hoofdtelefoonaansluiting
5 Verticaal touchpad
Zie “Gebruik van de
navigatiemiddelen” op pagina 63.
6 Microfoon
7 Knop Afspelen/Onderbreken
8 Knop Volgende/Vooruitspoelen
Druk hierop om naar de volgende
track of menuoptie te gaan.
Houd deze knop ingedrukt om in
een track vooruit te spoelen.
9Knop Opties
Druk hierop om meer opties weer
te geven.
10 Verbindingsconnector
Sluit de
USB-synchronisatieadapter aan
op deze connector.
11 Reset-opening
Zie “Hoe kan ik de Zen Vision:M
opnieuw instellen?” op pagina 85.
12 Knop Menu/Vorige
Druk hierop om naar het vorige
scherm of menu terug te gaan.
Houd deze knop ingedrukt om
terug te gaan naar het
hoofdmenu.
13 Knop Vorige/Achteruitspoelen
Druk hierop om naar de vorige
track of menuoptie te gaan.
Houd deze knop ingedrukt om in
een track achteruit te spoelen.
14 Knop Mijn snelkoppeling
Zie “Een snelkoppeling voor een
menu toevoegen aan de knop
Mijn snelkoppeling” op pagina 80.
15 LCD-scherm (Liquid Crystal
Display)
Page 65

Zen Vision Mini PM3.book Page 63 Friday, October 21, 2005 11:39 AM
Gebruik van de navigatiemiddelen 63
Gebruik van de navigatiemiddelen
De term “navigatiemiddelen” heeft betrekking op het volgende:
Verticaal touchpad
Knop Vorige/Achteruitspoelen
Knop Volgende/Vooruitspoelen.
De term “selecteren” heeft betrekking op de volgende acties:
1 Beweeg uw duim op en neer over het Verticale touch-pad om verticaal door
een menu te gaan OF druk op de knop Vorige/Achteruitspoelen of Volgende/
Vooruitspoelen om horizontaal door een menu te gaan.
Druk op de bovenste of onderste rand van het Verticale touchpad om één
menuoptie omhoog of omlaag te gaan.
Houd de bovenste of onderste rand van het Verticale touchpad ingedrukt om snel
door de menuopties te bladeren.
2 Geef een ferme tik op het Verticale touchpad om de gemarkeerde optie te
selecteren.
1
OR
Volume aanpassen met het Verticale touchpad
Afhankelijk van het menu dat werd geopend, kunt u uw duim naar boven of
naar beneden over het Verticale touchpad bewegen OF kunt u op de toets
Opties drukken en Volume selecteren.
2
Page 66

Zen Vision Mini PM3.book Page 64 Friday, October 21, 2005 11:39 AM
64 Aan de slag
Aan de slag
Stap 1: De speler opladen
De hoogwaardige lithium-ionbatterij die bij uw speler wordt geleverd, moet
voor gebruik volledig worden opgeladen. De batterij is na ongeveer twee uur
volledig opgeladen. Om de batterij van de speler op te laden, sluit u de
stroomadapter van de speler aan op de speler en op het stopcontact zoals in
onderstaande afbeelding wordt getoond.
3
1
2
Tijdens het opladen van de speler kunt u doorgaan naar "Stap 2: De speler
inschakelen".
Page 67

Zen Vision Mini PM3.book Page 65 Friday, October 21, 2005 11:39 AM
Aan de slag 65
Stap 2: De speler inschakelen
1 Schuif de aan/uit-knop naar het stroompictogram Aan/uit toe en houd de
knop in die positie tot het LCD-scherm verlicht is.
2 Wanneer u de speler voor het eerst inschakelt, krijgt u een Engelstalig
menu te zien. U kunt als volgt de taal wijzigen:
i. Druk op de knop Menu/Vorige en houd deze ingedrukt. Het hoofdmenu verschijnt.
ii. Selecteer System
→ Language → en vervolgens de gewenste taal.
3 Als u klaar bent met de speler, schuift u de Aan/uit-knop naar het
pictogram Aan/uit totdat het bericht Afsluiten... wordt weergegeven.
Stap 3: Software installeren
1 Schakel de computer in. U moet zich als beheerder aanmelden bij
Windows
Help van het besturingssysteem voor meer informatie.
2 Plaats de installatie-cd in uw cd-rom-/dvd-rom-station. Als het goed is,
wordt de cd automatisch gestart. Anders volgt u de onderstaande stappen:
i. Dubbelklik op het pictogram Deze computer.
ii. Klik met de rechtermuisknop op het pictogram van het cd-rom-/dvd-rom-station en klik
3 Volg de instructies op het scherm en start de computer opnieuw als u
daarom wordt gevraagd.
4 Nadat de computer opnieuw is gestart, volgt u de
productregistratie-instructies op het scherm.
®
voordat u de software kunt installeren. Raadpleeg de on-line
U kunt ook gewoon klikken op Start → Deze computer.
vervolgens op Automatisch afspelen.
Voor het registreren van het product hebt u een Internetverbinding nodig.
Page 68

Zen Vision Mini PM3.book Page 66 Friday, October 21, 2005 11:39 AM
66 Aan de slag
5 Wanneer u hierom gevraagd wordt, sluit u de speler volgens onderstaande
afbeelding aan op de USB-poort van de computer.
Sluit de speler alleen aan op een USB-poort van een computer. Vermijd
aansluitingen op een USB-hub.
Page 69

Zen Vision Mini PM3.book Page 67 Friday, October 21, 2005 11:39 AM
Aan de slag 67
Stap 4: Inhoud overbrengen
Breng muziek en andere bestanden over vanaf uw cd-collectie of computer.
Uit vele legale bronnen kunt u inhoud voor de speler verzamelen. Hier volgen
enkele suggesties:
Audiotracks - geript vanaf uw eigen audio-cd’s en uit eigen opnames of
aangeschaft via on-line muziekwinkels.
Video’s die u aangeschaft hebt bij on-line filmwinkels, of gedigitaliseerde
homevideobeelden.
Foto’s, geïmporteerd vanaf uw digitale camera of gescand van afgedrukte
foto’s.
Muziek van uw cd-verzameling overbrengen of ‘rippen’
1 Zorg ervoor dat de speler is aangesloten op de computer, zoals is afgebeeld
op pagina 66.
2 Dubbelklik op het pictogram Zen Vision:M Media Explorer icon op het
bureaublad.
3 Klik op de knop Audio-cd’s rippen .
4 Volg de instructies op het scherm.
SM
Creative Media Explorer gebruikt MusicID
titel, het tracknummer, de auteursgegevens en andere informatie over de cd’s
die u afspeelt, op te halen. Dit is een GRATIS en automatische service. Bij het
gebruik van deze service moet u echter wel over een Internet-verbinbding
beschikken. Raadpleeg de on-line Help van Creative Audio CD Ripper voor
meer informatie.
van Gracenote® om de artiest, de
Page 70

Zen Vision Mini PM3.book Page 68 Friday, October 21, 2005 11:39 AM
68 Aan de slag
Audiobestanden, video’s en foto’s vanaf de computer overbrengen
1 Herhaal stap 1 en 2 in "Muziek van uw cd-verzameling overbrengen of
‘rippen’".
2 Klik op de knop Bladeren in media .
3 Zoek de mediabestanden en kopieer deze via slepen-en-neerzetten naar de
speler.
Gegevensbestanden overbrengen
1 Herhaal stap 1 en 2 in "Muziek van uw cd-verzameling overbrengen of
‘rippen’".
2 Klik op de knop Bladeren in documenten .
3 Zoek de gegevensbestanden en breng deze via slepen-en-neerzetten over
naar de speler. U kunt ook audiobestanden en foto’s overbrengen met de
knop Bladeren in documenten .
Zorg ervoor dat de bestanden worden overgebracht naar de juiste map; zo
worden foto’s overgebracht naar Media → Foto’s en gaat muziek naar Media →
Muziek.
Page 71

Zen Vision Mini PM3.book Page 69 Friday, October 21, 2005 11:39 AM
Aan de slag 69
Stap 5: De speler loskoppelen
Wanneer u klaar bent met de overdracht van bestanden, koppelt u de Zen
Vision:M los.
Koppel de speler NIET los wanneer op het scherm het linker pictogram
hieronder is weergegeven. De overdracht van tracks of gegevensbestanden is
dan nog niet voltooid. Als u de speler nu loskoppelt, kan de inhoud die u
overbrengt, beschadigd raken. Wacht tot het rechter pictogram hieronder op
het scherm verschijnt, voordat u de speler loskoppelt.
Docked
Docked
Page 72

Zen Vision Mini PM3.book Page 70 Friday, October 21, 2005 11:39 AM
70 Aan de slag
Stap 6: Muziek afspelen of bestanden bekijken
U bent nu zo ver dat u de muziek die u hebt geript, kunt afspelen of de
bestanden die u hebt overgebracht, kunt bekijken!
Daarbij kunt u op elk gewenst moment op de knop Opties drukken voor
meer opties.
Voor snellere zoekresultaten worden de bestanden op de speler alfabetisch
gesorteerd.
Muziek afspelen
1 Sluit de oortelefoon aan op de hoofdtelefoonaansluiting.
2 Selecteer in het hoofdmenu via Muziekbibliotheek → de gewenste
categorie.
3 Selecteer eerst een nummer en vervolgens Afspelen.
4 Plaats u uw duim op het Verticale touchpad en beweeg deze omhoog of
omlaag om het volume te regelen.
Video’s afspelen
Selecteer in het hoofdmenu via Video’s → Video → de gewenste video.
Foto’s bekijken
1 Selecteer in het hoofdmenu via Foto’s → Foto’s → de gewenste foto.
2 Druk op de knop Opties
selecteren.
Als u de zoomoptie selecteert, gebruikt u de navigatiemiddelen voor
horizontaal en verticaal pannen in vier verschillende richtingen.
om opties voor roteren en zoomen te
Page 73

Zen Vision Mini PM3.book Page 71 Friday, October 21, 2005 11:39 AM
Beheer van de speler 71
Beheer van de speler
U weet nu voldoende om de meer geavanceerde voorzieningen van de speler te
gaan gebruiken! Lees hier meer om de speler optimaal te gebruiken.
“Audio beheren” op pagina 71
“Video’s beheren” op pagina 73
“Foto’s beheren” op pagina 74
“Opnamen beheren” op pagina 75
“Gegevens beheren” op pagina 76
“Voorzieningen van de Organizer beheren” op pagina 78.
Audio beheren
Afspeellijsten samenstellen
Voor het samenstellen van afspeellijsten voor gemakkelijker afspelen kunt u
elke gewenste combinatie van tracks uit uw Muziekbibliotheek gebruiken.
1 Zo voegt u een track of categorie van tracks toe aan de map Bezig m.
afspelen:
i. Selecteer via Muziekbibliotheek → de gewenste track of categorie van tracks.
ii. Druk op de knop Opties en selecteer Toevoegen aan selectie.
iii. Herhaal stap i) en ii) om nog een track of categorie van tracks toe te voegen.
iv. Selecteer Muziekbibliotheek → Bezig m. afspelen.
2 Druk op de knop Opties en selecteer Opslaan als afspeellijst.
3 Gebruik de navigatiemiddelen om een naam voor uw afspeellijst te maken
en selecteer het vinkje om de naam te bevestigen.
4 Als u een afspeellijst wilt afspelen, selecteer u via Muziekbibliotheek →
Afspeellijsten → de gewenste afspeellijst.
Page 74

Zen Vision Mini PM3.book Page 72 Friday, October 21, 2005 11:39 AM
72 Beheer van de speler
Tracks selecteren met de DJ van de Zen Vision:M
Selecteer in het hoofdmenu via Muziekbibliotheek → DJ → de gewenste optie:
Album van de dag: hiermee speelt u een willekeurig geselecteerd album af
Alles willekeurig afspelen: hiermee speelt u alle tracks in willekeurige volgorde af
Meest populair: hier speelt u alleen de meest afgespeelde tracks af
Nauwelijks beluisterd: hiermee speelt u nauwelijks afgespeelde tracks af.
Uw ervaring met audio verbeteren
Selecteer in het hoofdmenu via Systeem → Audio-instellingen → de gewenste
optie(s):
Play Mode: hiermee shufflet u, herhaalt u of speelt u audiotracks in sequentiële
volgorde af
Bass Boost: hiermee versterkt u tijdens het afspelen de bastonen in de track
Smart Volume: hiermee stelt u het afspelen in op een constant volume. U hoeft bij
het afspelen van verschillende tracks niet telkens het volume aan te passen.
EQ: hiermee verbetert u de muziekweergave, afhankelijk van het genre of de stijl
ervan. Ook kunt u uw eigen EQ-instellingen aanpassen. Zie “Een aangepaste
equalizerinstelling maken” op pagina 82.
Page 75

Zen Vision Mini PM3.book Page 73 Friday, October 21, 2005 11:39 AM
Beheer van de speler 73
FM-radio instellen
1 Selecteer in het hoofdmenu FM-radio.
2 Als u automatisch radiostations wilt zoeken en opslaan, drukt u op de knop
Opties
en selecteert u AutoScannen.
Aan het einde van het automatisch scannen slaat de Zen Vision:M alle
stations automatisch als presets op en wordt afgestemd op de eerste
preset.
3 Voor het selecteren van een andere preset geeft u een stevige tik op het
Verticale touchpad om een lijst van presets weer t geven en gaat u met de
duim verticaal over het Verticale touchpad om de gewenste preset te
selecteren.
Houd de knop Volgende/Vooruitspoelen of Vorige/Achteruitspoelen
gedurende één seconde ingedrukt om naar het volgende beschikbare
radiostation te scannen.
Video’s beheren
Als u uw video’s wilt omzetten naar een door de speler ondersteunde indeling,
start u Creative Media Explorer en klikt u op Video converteren.
Vooruit- of achteruitgaan in een video
1 Selecteer in het hoofdmenu via Video’s → Video → de gewenste video.
2 Druk op de knop Opties en selecteer Zoeken naar.
3 Gebruik de navigatiemiddelen om vooruit of achteruit in een video te gaan.
Page 76

Zen Vision Mini PM3.book Page 74 Friday, October 21, 2005 11:39 AM
74 Beheer van de speler
Een video verwijderen
1 Selecteer in het hoofdmenu Video’s → Video en markeer de gewenste
video.
2 Druk op de knop Opties en selecteer Video verwijderen.
De laatst bekeken video weergeven
Selecteer in het hoofdmenu Video’s → Recentelijk bekeken video’s.
Videomappen weergeven of verbergen
Zie “Video- of fotomappen weergeven of verbergen” op pagina 81.
Wachtwoord instellen bij het weergeven of verbergen van
videomappen
Zie “Wachtwoord instellen bij het weergeven of verbergen van video- of
fotomappen” op pagina 82.
Foto’s beheren
De foto’s bekijken in een diashow
1 Selecteer in het hoofdmenu Foto’s → Fot o’s.
2 Druk op de knop Opties en selecteer Diashow starten.
3 Voor het aanpassen van uw diashows start u Creative Media Explorer.
4 Als u de duur van het interval van de diashow wilt wijzigen, selecteert u
Systeem → Foto-/video-instellingen.
Page 77

Zen Vision Mini PM3.book Page 75 Friday, October 21, 2005 11:39 AM
Beheer van de speler 75
Favoriete foto’s beoordelen en bekijken
1 Selecteer in het hoofdmenu via Foto’s → Foto’s → de gewenste foto.
2 Druk op de knop Opties om de opties voor beoordelen en bekijken te
selecteren.
Fotomappen weergeven of verbergen
Zie “Video- of fotomappen weergeven of verbergen” op pagina 81.
Wachtwoord instellen bij het weergeven of verbergen van
fotomappen
Zie “Wachtwoord instellen bij het weergeven of verbergen van video- of
fotomappen” op pagina 82.
Opnamen beheren
Audio opnemen
1 Selecteer in het hoofdmenu Microfoon.
2 Druk op de knop Opties en selecteer Start opname.
3 Tijdens de opname kunt u op de knop Opties
volgende handelingen uitvoeren:
Onderbreken: hiermee onderbreekt u de opname.
Hervatten: hiermee hervat u de onderbroken opname.
Stoppen: hiermee wordt de opname beëindigd en opgeslagen.
Splitsen: hiermee start u een nieuwe opname.
drukken en een van de
Page 78

Zen Vision Mini PM3.book Page 76 Friday, October 21, 2005 11:39 AM
76 Beheer van de speler
Radio-uitzendingen opnemen
1 Selecteer in het hoofdmenu FM-radio.
2 Wanneer u een radio-uitzending beluistert, druk u op de knop Opties en
selecteert u Radio opnemen om een radio-opname te starten.
Opgenomen audio beluisteren
Selecteer in het hoofdmenu via Muziekbibliotheek → Opnamen → de
gewenste opname.
Gegevens beheren
U kunt de Zen Vision:M gebruiken om reservekopieën op te slaan van de
gegevensbestanden van uw computer, of om bestanden tussen twee
computers over te brengen.
Page 79

Zen Vision Mini PM3.book Page 77 Friday, October 21, 2005 11:39 AM
Beheer van de speler 77
De Zen Vision:M gebruiken als een verwisselbare schijf
1 Selecteer in het hoofdmenu Extra’s → Verwisselbare schijf.
2 Druk op de knop Opties
U kunt de Zen Vision:M ook aansluiten op uw computer en Creative
Removable Disk Manager gebruiken om de hoeveelheid ruimte op de vaste
schijf in de modus Verwisselbare schijf te verhogen of te verlagen.
Als u Creative Removable Disk Manager wilt starten, klikt u op Start →
Programma’s of Alle programma’s → Creative → Creative Removable Disk
Manager → Creative Removable Disk Manager.
3 Wanneer op het LCD-scherm van de Zen Vision:M de tekst Verwisselbare
schijf verschijnt, bent u klaar om gegevensbestanden over te brengen van of
naar een computer.
4 Sluit de Zen Vision:M aan op de computer. De Zen Vision:M wordt nu
weergegeven als een Verwisselbare schijf onder Deze computer.
5 Gebruik de methode slepen-en-neerzetten om bestanden van en naar de
Zen Vision:M te kopiëren.
6 Wanneer u klaar bent met kopiëren, klikt u eerst op het pictogram
Hardware veilig verwijderen op de Taakbalk, vervolgens op
USB-apparaat voor massaopslag veilig verwijderen en ontkoppelt u
daarna de speler, nadat u hierom wordt gevraagd.
Als u alle gegevensbestanden in de ruimte op de vaste schijf voor de modus
Verwisselbare schijf wilt verwijderen, drukt u op de knop Opties en
selecteert u Formatteren. Ga naar Deze computer als u afzonderlijke
gegevensbestanden die in de modus Verwisselbare schijf zijn opgeslagen,
wilt verwijderen.
en selecteer de gewenste capaciteit.
Page 80

Zen Vision Mini PM3.book Page 78 Friday, October 21, 2005 11:39 AM
78 Beheer van de speler
Voorzieningen van de Organizer beheren
U kunt de Zen Vision:M gebruiken voor de opslag en weergave van
contactpersonen, kalendergebeurtenissen en taken uit Microsoft
Als Microsoft Outlook niet op uw computer is geïnstalleerd, kunt u met
behulp van Creative Media Explorer uw kalender, taken en
contactpersoongegevens bewerken in het bewerkingsprogramma Personal
Information Manager. Klik in Creative Media Explorer op Organizer Data
beheren.
Synchroniseren met Microsoft Outlook
1 Zorg ervoor dat de speler is aangesloten op de computer, zoals is afgebeeld
op pagina 66.
2 Start Sync Manager. U kunt Sync Manager starten vanuit Creative Media
Explorer of vanuit Creative MediaSource Player/Organizer.
3 Selecteer Deze computer en de Zen Vision:M als de apparaten die u wilt
synchroniseren.
4 Schakel het selectievakje Organizer data in en klik daarna op de knop
Volg ende.
5 Selecteer de informatie die u wilt importeren vanuit Microsoft Outlook en
klik daarna op de knop Volgende.
6 Volg de instructies op het scherm.
7 Klik op de knop Voltooien.
U kunt Sync Manager ook gebruiken om muziek, foto’s en video’s te
synchroniseren tussen de Zen Vision:M en uw computer.
®
Outlook®.
Page 81

Zen Vision Mini PM3.book Page 79 Friday, October 21, 2005 11:39 AM
Beheer van de speler 79
De kalender weergeven
1 Selecteer in het hoofdmenu Extra’s → Organizer → Kalender.
2 Als u naar een bepaalde maand wilt gaan, drukt u op de knop Opties en
selecteert u de gewenste maand.
3 Geef met uw duim een stevige tik op het Verticale touchpad om de
gebeurtenissen en taken van de geselecteerde dag weer te geven.
Taken voor vandaag weergeven
Selecteer in het hoofdmenu Extra’s → Organizer → Take n.
Contactpersonen weergeven
Selecteer in het hoofdmenu Extra’s → Organizer → Contactpersonen.
Page 82

Zen Vision Mini PM3.book Page 80 Friday, October 21, 2005 11:39 AM
80 Aanpassen van de speler
Aanpassen van de speler
Een snelkoppeling voor een menu toevoegen aan de knop Mijn
snelkoppeling
Selecteer in het hoofdmenu via Systeem → Scherminstellingen → Knop Mijn
snelkoppeling → de gewenste menusnelkoppeling.
Een gebruikersnaam toewijzen
1 Selecteer in het hoofdmenu Systeem → Scherminstellingen → Eigenaar.
2 Gebruik de navigatiemiddelen om een gebruikersnaam te maken.
Een foto als achtergrond selecteren
1 Selecteer in het hoofdmenu Foto’s → Fot o’s.
2 Selecteer de gewenste foto.
3 Druk op de knop Opties en selecteer Inst. als achtergr..
Scherm- en weergave-instellingen aanpassen
Selecteer in het hoofdmenu via Systeem → Scherminstellingen → de
gewenste instelling:
Thema: hiermee geeft u het ontwerp voor het scherm van de speler op
Verlichting: hiermee geeft u de duur van de achtergrondverlichting op
Helderheid: hiermee past u de helderheid van het scherm aan
Menu aanpassen: hiermee voegt u menuopties toe of verwijdert u deze.
Page 83

Zen Vision Mini PM3.book Page 81 Friday, October 21, 2005 11:39 AM
Aanpassen van de speler 81
Het Verticale touchpad aanpassen
Selecteer in het hoofdmenu Systeem → Scherminstellingen → TouchPad om
de gevoeligheids- en klikkeropties te selecteren.
Energiebesparingsinstellingen aanpassen
Selecteer in het hoofdmenu via Systeem → Scherminstellingen → de
gewenste instelling:
Afsluiten bij inactiviteit: hiermee geeft u aan hoelang de Zen Vision:M inactief blijft
voordat deze automatisch wordt afgesloten
Slaaptimer: hiermee geeft u een vaste tijdsperiode op voordat de Zen Vision:M
automatisch wordt afgesloten.
Instellingen voor datum en tijd aanpassen
1 Selecteer in het hoofdmenu Extra’s → Datum en tijd.
2 Druk op de knop Opties om de datum-, tijd- en wekkeropties te
selecteren.
3 Voor de weergave van de klok op de menubalk selecteert u Systeem →
Klokinstellingen → Klok in titel.
Video- of fotomappen weergeven of verbergen
1 Selecteer in het hoofdmenu via Video’s → Video → de gewenste videomap
OF selecteer via Foto’s → Foto’s → de gewenste fotomap.
2 Druk op de knop Opties en selecteer de beschermingsoptie. U kunt wel
mappen, maar geen afzonderlijke bestanden beschermen.
3 Selecteer in het hoofdmenu Systeem → Scherminstellingen en kies of u de
beschermde map wilt weergeven of verbergen.
Page 84

Zen Vision Mini PM3.book Page 82 Friday, October 21, 2005 11:39 AM
82 Aanpassen van de speler
Wachtwoord instellen bij het weergeven of verbergen van video- of
fotomappen
1 Selecteer in het hoofdmenu Systeem → Scherminstellingen en selecteer
de wachtwoordoptie.
2 Gebruik de navigatiemiddelen om een wachtwoord te maken.
3 Geef een stevige tik op het Verticale touchpad en selecteer het vinkje
om het wachtwoord te bevestigen. Er wordt naar dit wachtwoord gevraagd
bij de selectie van Systeem → Scherminstellingen, wanneer u selecteert of
de beschermde map moet worden weergegeven of verborgen.
4 Als u de wachtwoordvoorziening wilt uitschakelen of als u het wachtwoord
wilt wijzigen, selecteert u Systeem → Scherminstellingen en vervolgens de
wachtwoordoptie.
5 Als u uw wachtwoord vergeet, raadpleegt u “Stap 1: De firmware van de
speler opschonen” op pagina 87.
Een aangepaste equalizerinstelling maken
1 Selecteer in het hoofdmenu Systeem → Audio-instellingen → EQ.
De schuifregelaars in het scherm Eigen EQ vertegenwoordigen een reeks
opeenvolgende hogere frequenties die kunnen worden aangepast.
80: hiermee regelt u de basfrequentie
250 : hiermee past u de frequenties uit het onderste middenbereik aan
1k: hiermee past u de frequenties uit het middenbereik aan
4k: hiermee past u de frequenties uit het bovenste middenbereik aan
13k: hiermee past u de frequentie van de hoge tonen aan.
2 Selecteer een schuifregelaar en ga met uw duim op en neer over het
Verticale touchpad om het geselecteerde frequentiebereik te vergroten of te
verkleinen.
Page 85

Zen Vision Mini PM3.book Page 83 Friday, October 21, 2005 11:39 AM
Aanpassen van de speler 83
3 Selecteer het vinkje om de eigen EQ-instellingen op te slaan en te
activeren.
De oorspronkelijke firmware-instellingen van de Zen Vision:M
herstellen
Selecteer in het hoofdmenu Systeem → Instellingen herstellen → Ja.
Wanneer u de instellingen van de firmware van de speler herstelt, worden alle
aangepaste instellingen van de speler vervangen door de
standaardinstellingen.
Page 86

Zen Vision Mini PM3.book Page 84 Friday, October 21, 2005 11:39 AM
84 De speler aansluiten op een tv (optioneel)
De speler aansluiten op een tv (optioneel)
Als u de inhoud van de speler wilt weergeven op een groter scherm, schaft u de
Zen Vision:M Video Kit aan, waarmee u de speler aansluit op een tv.
1
2 3 4
8
67
5
1 Selecteer in het hoofdmenu Systeem → Foto-/video-instellingen → Video
Uit.
2 Selecteer (Auto) NTSC of (Auto) PAL. Raadpleeg de gebruikershandleiding
bij uw tv als u niet precies weet welke weergavestandaard voor uw tv
gebruikt wordt.
3 Sluit de speler met behulp van de meegeleverde videokabel op een tv aan
zoals hierboven wordt getoond.
Gebruik NOOIT een standaard videokabel. De USB-synchronisatieadapter
werkt alleen in combinatie met de eigen Creative Video-kabel die met de Zen
Vision:M Video Kit wordt meegeleverd.
1 Video In-aansluiting -
Geel
2 Audio In
(Links)-aansluiting Wit
3 Audio In
(Rechts)-aansluiting
- Rood
4 A/V Out-aansluiting
5 Videokabel
6 Rode connector
7 Witte connector
8 Gele connector
Page 87

Zen Vision Mini PM3.book Page 85 Friday, October 21, 2005 11:39 AM
Veelgestelde vragen 85
Veelgestelde vragen
In dit hoofdstuk vindt u antwoorden op vragen die u wellicht over het gebruik
van de speler hebt. Als u meer hulp nodig hebt, kunt u onze "Knowledge Base"
raadplegen waar u zelf oplossingen voor technische problemen kunt zoeken.
Ga naar www.creative.com, selecteer uw regio en selecteer daarna Support.
Kan ik met DRM beveiligde WMA-bestanden naar mijn speler overbrengen?
Ja. Als u met DRM beveiligde WMA-bestanden naar de Zen Vision:M wilt
overbrengen, gebruikt u Creative MediaSource Player/Organizer of Windows
Media Player 10.
Ik kan de Zen Vision:M niet inschakelen of de speler reageert niet meer. Wat
kan ik doen?
Voer een of meer van de volgende handelingen uit:
Controleer of de Aan/uit-knop zich niet in de vergrendelde stand bevindt.
Als u de afstandsbediening met kabel van de Zen Vision:M (afzonderlijk
verkrijgbaar) gebruikt, controleert u of de vergrendelingsschakelaar van de deze
afstandsbediening zich niet in de vergrendelde stand bevindt.
Mogelijk dient uw batterij te worden opgeladen. Zie “Stap 1: De speler opladen” op
pagina 64.
Moet de stroomadapter op het stopcontact aangesloten blijven?
Nee, dat wordt afgeraden. Nadat u de batterij hebt opgeladen of de Zen
Vision:M hebt gebruikt, dient u de stroomadapter van de speler los te koppelen.
Als u de stroomadapter aangesloten laat, treedt hittevorming op. Dit is niet
goed voor de stroomadapter, noch voor de batterij.
Hoe kan ik de Zen Vision:M opnieuw instellen?
Als de speler niet meer reageert, dient u deze opnieuw in te stellen. Hierbij
gaan normaal geen gegevensbestanden of audiotracks verloren, tenzij u net
bezig was met de overdracht van een audiotrack.
Neem een dun voorwerp (bijvoorbeeld een rechtgetrokken paperclip) en steek
deze heel even in de Reset-opening.
Page 88

Zen Vision Mini PM3.book Page 86 Friday, October 21, 2005 11:39 AM
86 Informatiediagrammen
Informatiediagrammen
Gebruik uw speler pas nadat deze bibliotheek opnieuw is opgebouwd.
Re-building Library
Zie “Stap 1: De firmware van de speler opschonen” op pagina 87.
Hardware Problem
Zie “Stap 1: De firmware van de speler opschonen” op pagina 87.
Harddisk Problem
De speler wordt nu automatisch hersteld, zodat de instellingen van de
firmware van kracht kunnen worden. In het zeldzame geval dat de
speler niet zelf overgaat tot een reset, raadpleegt u “Hoe kan ik de
Please reset player
Zen Vision:M opnieuw instellen?” op pagina 85.
Page 89

Zen Vision Mini PM3.book Page 87 Friday, October 21, 2005 11:39 AM
Raadpleeg de volgende informatie voordat u contact opneemt met
Customer Support Services. Zie voor meer informatie over Customer
Support Services de documentatie met productinformatie.
Firmware Problem
Stap 1: De firmware van de speler opschonen
1. Ga als volgt te werk om over te schakelen naar Recovery Mode:
i. Schuif de aan/uit-knop naar het stroompictogram Aan/uit
en houd de knop vast in de stand voor inschakelen.
ii. Neem een dun voorwerp (bijvoorbeeld een rechtgetrokken
paperclip) en steek deze heel even in de Reset-opening.
iii. Laat de aan/uit-knop los wanneer het logo van Creative verschijnt.
Het scherm Recovery Mode verschijnt.
2. Selecteer Clean Up (Opschonen) → Reboot (Opnieuw starten).
3.
Als deze oplossing niet werkt, gaat u door met "Stap 2: De
firmware van de speler bijwerken".
Stap 2: De firmware van de speler bijwerken
1. Ga naar de website van Creative en downloadt de update van de
firmware die voor uw speler beschikbaar is.
2. Schakel over op Recovery M ode (zie stap 1 in "Stap 1 : De firmware van
de speler opschonen").
3. Selecteer Reload Firmware (Firmware opnieuw laden) en installeer
de firmware van de speler opnieuw.
4. Als deze oplossing niet werkt, gaat u door met "Stap 3: De speler
formatteren".
Stap 3: De speler formatteren
WAARSCHUWING: Bij uitvoering van deze stap wordt alle inhoud in de
speler verwijderd. Maak indien mogelijk een reservekopie van alle
inhoud in de speler en zet deze over op uw computer, voordat u
doorgaat.
1. Schakel over op Recovery M ode (zie stap 1 in "Stap 1 : De firmware van
de speler opschonen").
2.
Selecteer Format All (Alles formatteren) → Reboot (Opnieuw
starten).
Informatiediagrammen 87
toe
Page 90

Zen Vision Mini PM3.book Page 88 Friday, October 21, 2005 11:39 AM
88 Algemene specificaties
Algemene specificaties
Stroombron
Bestandsindeling
en voor afspelen
Afspeelprestaties
voor MP3
Bestandsindeling
en voor opnamen
Connectoren
Batterij: 1 x oplaadbare lithium-ionbatterij
DC (gelijkstroom) IN 5V wanneer het apparaat wordt
aangesloten op een stopcontact
USB-bus wordt voorzien van stroom wanneer deze wordt
aangesloten op een USB-poort met externe voeding van een
computer
Bestandsindelingen voor afspelen van audio: MP3: Maximaal
320 kbps, WMA: Maximaal 320 kbps, WMA met PlaysForSure
Digital Rights Management (DRM) 10 of later, WAV
Bestandsindelingen voor afspelen van video: MPEG-1,
MPEG-2, MPEG-4-SP, Windows Media™ Video (WMV) 9,
MJPEG
Foto-indeling: JPEG Baseline: Maximaal 16 MegaPixels, JPEG
Progressive: Maximaal 4 MegaPixels
Signaal-ruisverhouding: Maximaal 97 dB
Kanaalscheiding: Maximaal -70 dB (Line Out (Lijn Uit))
Frequentiebereik: 20 Hz ~ 20 kHz
Harmonische vervormingsuitvoer: <0.1%
Spraak (via ingebouwde microfoon): IMA ADPCM (16 kHz,
mono)
FM-radio: IMA ADPCM (22 kHz, stereo)
Hoofdtelefoonaansluiting: stereominiconnector van 3,5 mm
(1/8 inch), 25 mW per kanaal
Verbindingsconnector
USB 2.0 (High speed)
USB 1.1 (Full speed)
Page 91

Zen Vision Mini PM3.book Page 89 Friday, October 21, 2005 11:39 AM
Algemene specificaties 89
Firmwareondersteuning
FM-radio
Ondersteuning
voor FM-regio
Specificaties
oortelefoon
LCD-scherm
Upgrades bruikbaar via USB
Stereo en mono
Maximaal 32 presetstations
Internationaal: 87,5 MHz ~ 108,0 MHz, intervallen van 100 kHz
Frequentiebereik: 20 Hz ~ 20 kHz
Gevoeligheid: 113 dB ±5 dB (I/P-niveau:1 mW)
Impedantie: 32
Stekker: stereominiconnector van 3,5 mm (1/8 inch)
Grote display van 63,50 mm (2,5") met achtergrondverlichting
en pixelresolutie van 320 x 240 (262144 kleuren)
Tijdens de vervaardiging van LCD-schermen kan het
voorkomen dat één of meerdere pixels in een donkere of vaste
kleur verschijnen, of in een ongewijzigde toestand blijven.
Overeenkomstig de in de branche gebruikte standaarden en
uitgaande van de technische specificaties van de fabrikant van
de Creative-schermen, kunnen er dode pixels voorkomen en
worden deze beschouwd als zijnde acceptabel mits de
weergavekwaliteit hierdoor niet negatief wordt beïnvloed.
Als u echter dode pixels op uw LCD-scherm opmerkt die het
gebruik van het scherm bemoeilijken, kunt u contact
opnemen met Customer Support Services.
Ω ±15%
Page 92

Zen Vision Mini PM3.book Page 90 Friday, October 21, 2005 11:39 AM
90 Copyright en licentie
Copyright en licentie
De informatie in deze handleiding kan zonder voorafgaande kennisgeving
worden gewijzigd en houdt geen verbintenis aan de zijde van Creative
Technology Ltd. in. Het is zonder de schriftelijke toestemming van Creative
Technology Ltd. niet toegestaan deze handleiding of enig deel daarvan voor
welk doel dan ook te verveelvoudigen of te verzenden, in welke vorm en op
welke wijze dan ook, elektronisch dan wel mechanisch, daaronder begrepen
door middel van het maken van fotokopieën of opnamen.
Copyright © 2005 Creative Technology Ltd. Alle rechten voorbehouden. Het
Creative-logo, Zen Vision:M en Creative MediaSource zijn handelsmerken of
gedeponeerde handelsmerken van Creative Technology Ltd. in de Verenigde
Staten en/of andere landen. Microsoft, Windows, Windows Media, Outlook en
het Windows-logo zijn gedeponeerde handelsmerken van Microsoft
Corporation. Intel en Pentium zijn gedeponeerde handelsmerken van Intel
Corporation.
De softwarelicentieovereenkomst bevindt zich op de installatie-cd.
Versie 1.0
November 2005
Page 93

Zen Vision Mini PM3.book Page 91 Friday, October 21, 2005 11:39 AM
Felicidades
Zen Vision:M™ es el nuevo reproductor digital de Creative. Siga leyendo para
saber cómo empezar a utilizar el reproductor.
Contenido
Acerca del reproductor ........................................................................ 92
Uso de los controles de navegación .................................................... 93
Primeros pasos .................................................................................... 94
Administración del reproductor ........................................................ 101
Cómo personalizar el reproductor .................................................... 109
Conexión del reproductor a un televisor (opcional) .......................... 113
Preguntas más frecuentes ................................................................ 114
Diagramas de información ................................................................. 116
Especificaciones generales ............................................................... 118
Licencia y copyright ............................................................................ 120
91
Page 94

Zen Vision Mini PM3.book Page 92 Friday, October 21, 2005 11:39 AM
92 Acerca del reproductor
Acerca del reproductor
Desdoble la última página de este folleto y compare la imagen que se muestra
con los nombres y descripciones que se indican a continuación.
1 Interruptor de encendido
2 Indicador del protector de
pantalla
3Bloqueo
Deslice hacia el icono para
bloquear el reproductor y evitar
que las funciones se activen de
forma accidental.
4 Conector para auriculares
5 Panel táctil vertical
Consulte el apartado “Uso de los
controles de navegación” en la
página 93.
6 Micrófono
7 Botón Reproducir/Pausa
8 Botón Siguiente/Avance rápido
Púlselo para ir a la pista o la
opción de menú siguiente.
Manténgalo pulsado para avanzar
dentro de una pista.
9 Botón Opciones
Púlselo para ver más opciones.
10 Conector de acoplamiento
Conecte el adaptador de
sincronización USB a este
conector.
11 Orificio para restablecer
Consulte el apartado “¿Cómo
reinicio Zen Vision:M?” en la
página 115.
12 Botón Menú/Atrás
Púlselo para volver a la pantalla o
menú anterior.
Manténgalo pulsado para volver
al menú principal.
13 Botón Anterior/Rebobinar
Púlselo para ir a la pista o la
opción de menú anterior.
Manténgalo pulsado para
retroceder dentro de una pista.
14 Botón Mi acceso directo
Consulte el apartado “Para
asignar un acceso directo del
menú al botón Mi acceso directo”
en la página 109.
15 Pantalla de cristal líquido (LCD)
Page 95

Zen Vision Mini PM3.book Page 93 Friday, October 21, 2005 11:39 AM
Uso de los controles de navegación 93
Uso de los controles de navegación
Se utiliza el término “controles de navegación” para los elementos
siguientes:
Panel táctil vertical
Botón Anterior/Rebobinar
Botón Siguiente/Avance rápido
Se utiliza el término “seleccionar” para las acciones siguientes:
1 Mover el dedo pulgar hacia arriba y hacia abajo en el panel táctil vertical
para desplazarse verticalmente en el menú O pulsar el botón Anterior/
Rebobinar o Siguiente/Avance rápido para desplazarse en éste de forma
horizontal.
Pulse la parte superior o inferior del panel táctil vertical para moverse un paso
arriba o abajo en una opción del menú.
Mantenga pulsada la parte superior o inferior del panel táctil vertical para
desplazarse con rapidez por las opciones del menú.
2 Dar un toque firme en el panel táctil vertical para seleccionar la opción
resaltada.
1
OR
Para ajustar el volumen con el panel táctil vertical
Según el menú en el que se encuentre, deberá mover el pulgar hacia arriba y
hacia abajo en el panel táctil vertical O pulsar el botón Opciones y
seleccionar Volumen.
2
Page 96

Zen Vision Mini PM3.book Page 94 Friday, October 21, 2005 11:39 AM
94 Primeros pasos
Primeros pasos
Paso 1: Carga del reproductor
Es necesario cargar por completo la pila de iones de litio de alto rendimiento
que acompaña el reproductor antes de utilizar éste. La pila tardará unas dos
horas en cargarse por completo. Para cargar la pila del reproductor, conecte el
adaptador de alimentación al reproductor y a la toma de corriente, tal y como
se muestra en el siguiente diagrama.
3
1
2
Mientras realiza la carga del reproductor, puede realizar el "Paso 2: Encendido del
reprod uctor".
Page 97

Zen Vision Mini PM3.book Page 95 Friday, October 21, 2005 11:39 AM
Primeros pasos 95
Paso 2: Encendido del reproductor
1 Deslice el interruptor de encendido hacia el icono de encendido y
mantenga esta posición hasta que se encienda la pantalla.
2 Cuando encienda el reproductor por primera vez, los menús aparecerán en
inglés. Para cambiar el idioma:
i. Mantenga pulsado el botón Menú/Atrás . Aparecerá el menú principal.
ii. Seleccione System
→ Language → idioma que desee.
3 Cuando acabe de utilizar el reproductor, deslice el interruptor hacia el
icono de encendido hasta que aparezca el mensaje Cerrando.
Paso 3: Configuración del software
1 Encienda el ordenador. Para poder instalar el software, primero debe iniciar
sesión como administrador en Windows
consulte la ayuda en línea de su sistema operativo.
2 Inserte el CD de instalación en la unidad de CD-ROM/DVD-ROM. El CD
debería iniciarse automáticamente. Si no es así, siga los pasos que se
indican a continuación:
i. Haga doble clic en el icono Mi PC.
También puede hacer clic en Inicio → Mi PC.
ii. Haga clic con el botón derecho del ratón en el icono de la unidad de CD-ROM/DVD-ROM y,
a continuación, haga clic en Reproducción automática.
3 Siga las instrucciones de la pantalla y, cuando el sistema lo solicite, reinicie
el PC.
4 Cuando el ordenador se reinicie, siga las instrucciones que aparecen en la
pantalla para registrar el producto.
Necesitará una conexión a Internet para registrar el producto.
®
. Para obtener más información,
Page 98

Zen Vision Mini PM3.book Page 96 Friday, October 21, 2005 11:39 AM
96 Primeros pasos
5 Cuando se le pida, conecte el reproductor al puerto USB del ordenador,
como se muestra en la imagen.
Conéctelo únicamente al puerto USB de un ordenador; procure no conectarlo a
un concentrador USB.
Page 99

Zen Vision Mini PM3.book Page 97 Friday, October 21, 2005 11:39 AM
Primeros pasos 97
Paso 4: Transferencia de contenido
Transfiera música y otro tipo de archivos desde su colección de CD o el
ordenador.
Puede adquirir contenido de muchas fuentes legales. A continuación se
incluyen algunas sugerencias:
Pistas de audio: extraídas de CD de audio personales, grabaciones caseras
o adquiridas en tiendas de música en línea.
Vídeos: adquiridos en tiendas de películas en línea o secuencias de vídeo
doméstico digitalizadas.
Fotos: codificadas desde la cámara digital personal o escaneadas a partir de
fotos impresas.
Para transferir o extraer música de su colección de CD
1 Asegúrese de que el reproductor está conectado al ordenador como se
muestra en la página 96.
2 Haga doble clic en el icono Zen Vision:M Media Explorer situado en el
escritorio.
3 Haga clic en el botón Extraer CD de audio .
4 Siga las instrucciones que aparecen en pantalla.
SM
Creative Media Explorer utiliza MusicID
información acerca del CD que se está reproduciendo como el nombre del
intérprete, el título, la pista o el reparto. Este servicio es GRATUITO y
automático. Para utilizarlo, deberá estar conectado a Internet. Para obtener
más información, consulte la ayuda en línea de Creative Audio CD Ripper.
de Gracenote® para obtener
Page 100

Zen Vision Mini PM3.book Page 98 Friday, October 21, 2005 11:39 AM
98 Primeros pasos
Para transferir archivos de sonido, vídeos o fotos desde el
ordenador
1 Repita los pasos 1 y 2 indicados en el apartado "Para transferir o extraer
música de su colección de CD".
2 Haga clic en el botón Buscar archivos multimedia .
3 Busque los archivos multimedia y cópielos en el reproductor mediante el
método de arrastrar y soltar.
Para transferir archivos de datos
1 Repita los pasos 1 y 2 indicados en el apartado "Para transferir o extraer
música de su colección de CD".
2 Haga clic en el botón Agregar archivos .
3 Busque los archivos de datos y transfiéralos al reproductor mediante el
método de arrastrar y soltar. También puede transferir archivos de sonido y
fotografías mediante el botón Agregar archivos .
Asegúrese de que los archivos se transfieren a la carpeta adecuada, es decir,
que las imágenes se transfieren a Imágenes → multimedia y la música a
Música → multimedia.
 Loading...