

Page 1

How to use this manual
This document has been designed to provide you with complete product knowledge. You can resize the
document window, print this document, access linked web sites and get information from specially
prepared graphics.
To jump to a linked topic or a web site, click the underlined blue text, or the hand symbol
whenever it appears.
To show a short description (tooltip) of an object, move your mouse cursor over it. A tooltip
appears after a few seconds.
You can choose to print portions of this document:
On the Contents tabbed page to your left, click a topic heading.
1.
On the menu, click the Print button.
2.
In the dialog box that appears, click the option to print one topic only, or all topics under a
3.
heading.
Page 1
Page 2

Introduction
After completing the setup instructions in the Quick Start, take some time to read this User's Guide to
learn how to get the most out of your player.
The Creative ZENTM V Series player is compact but is filled with features normally found on larger
players! With line-in encoding, album art, Audible
, ZENcast, video playback support, and FM radio, it is no surprise that this feature-rich and
value-for-money player outshines even its closest competitors.
Note
FM radio and video functions are available on selected ZEN V Series player models only.
Audible files are currently available to selected regions only.
®
Page 2
Page 3

Your Player at a Glance
Button/Connector
What It Does
1.
Power switch
Slide the Power switch towards
the Power icon and hold it there
to turn your player on and off.
2.
Lock
Slide the Power switch to the
Lock position to disable your
player's controls.
3.
Microphone
Make instant recordings with this
built-in microphone.
4.
LINE IN jack
Connect external stereo sources,
such as cassette players, CD
players and MiniDisc players, to
this jack.
5.
Headphone jack
Connect your player's earphones
to this jack.
6.
USB port
To charge your player's battery
or transfer files, connect one end
of the supplied USB cable to this
port, and the other end of the
USB cable to your computer's
USB port.
To charge your player without
using the computer, purchase the
ZEN USB Power Adapter. For
more information on this and
Note
Product specifications may vary, depending on model purchased.
Page 3
Page 4

other ZEN V Series accessories,
visit www.creative.com.
7.
Volume Increase button
Press to increase the volume.
8.
Volume Decrease button
Press to decrease the volume.
9.
Record button
Select Extras Microphone,
then press to record. Press again
to stop.
10.
Play/Pause button
Starts, pauses and resumes
playback.
11.
Back/Options button
Press and hold this button to
display the Options menu.
When scrolling through menu
items, press this button to return
to the previous menu.
12.
5-way Navigation Joystick
· Push this joystick left or right to
go to the previous or next track.
· Push this joystick up or down
to scroll to an item.
· Press to select menu items.
· Push and hold this joystick right
or left to move forward or
backward within a track.
For more information, see Using
the 5-Way Navigation Joystick.
13.
Reset button
Use a pin to press this button if
the player does not respond.
Note
FM radio and video functions are available on selected ZEN V Series player models only.
In the process of Organic Light Emitting Diode (OLED) display manufacturing, there may be
instances of one or more pixels appearing in a dark or fixed color, or in an unchanging state.
In line with industry standards and based on the Creative screen manufacturer's technical
specifications, there may be occurrences of fixed spots and these occurrences are considered
acceptable if they do not impair display quality.
If, however, you notice fixed spots on your player's OLED display interfering with your use,
contact Customer Support Services. You can find Customer Support Services information in the
Installation and Applications CD. Go to d:\support\<region>\<language>\support.chm.
(replace d:\ with the drive letter of your CD-ROM/DVD-ROM drive, <region> with the region
that you are in, and <language> with the language that your document is in)
Page 4
Page 5

Turning Your Player On and Off
To turn on your player, slide the Power switch towards the Power icon and hold it there until
1.
the OLED display lights up.
To turn off your player, slide the Power switch towards the Power icon and hold it there until
2.
the Shutting down message appears.
2.
Page 5
Page 6

Reactivating the Player's Screen
When the screen turns off, press any button on your player to reactivate the screen. For more information
about setting the display timer, see Setting the display duration
.
Page 6
Page 7

Locking Your Player
Locking your player disables all of its controls and turns off the screen. Lock your player when you want
to prevent buttons from being accidentally pressed.
You can lock your player with its Power switch. To lock your player's wired remote control (available
separately), use the Lock switch on the wired remote control.
To lock your player
Slide the Power switch towards the Lock icon. The Locked
icon appears on the Now Playing screen.
Page 7
Page 8

Using the 5-Way Navigation Joystick
The 5-way Navigation Joystick is one of the most important features of your player. In this document, we
will use the term "Select" to mean that you should push the 5-way Navigation Joystick up or down to
browse through menu items, and then select the menu item by pressing down the 5-way Navigation
Joystick.
When playing music, you can do the following:
push the joystick left or right to go to the previous or next track.
push and hold the joystick right or left to move forward or backward within a track.
Page 9

Main and Options Menus
To return to the main menu
Press the Back/Options button. You may need to do this more than once. Select an option. For more
information, see Using the 5-Way Navigation Joystick
.
To access an Options menu
In any menu, press and hold the Back/Options button. Select an option. Press the Back/Options
button to return to the previous menu or screen.
Note
FM radio and video functions are available on selected ZEN V Series player models only.
Page 9
Page 10
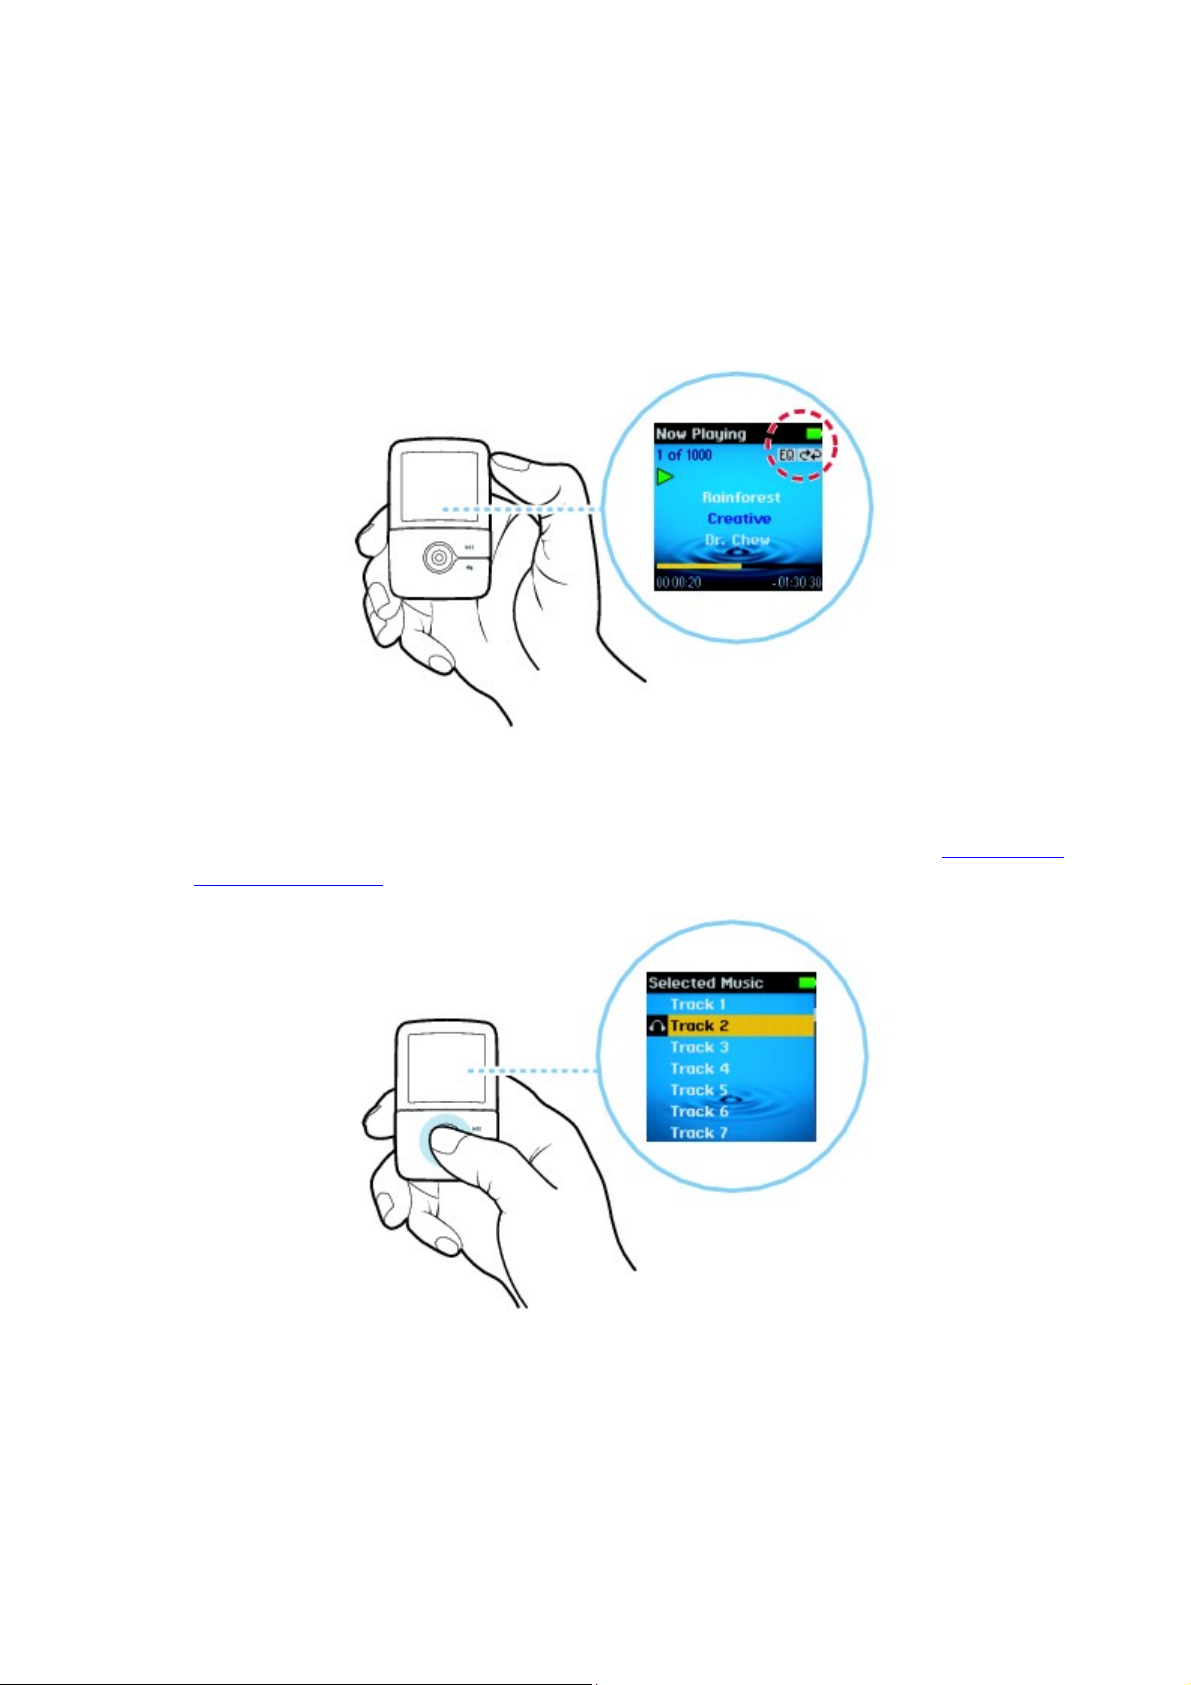
Now Playing Screen
The Now Playing screen appears when you turn on your player, or when you select
Now Playing from the main menu.
In this screen, you can:
view your player's settings and battery status icons.
access the Selected Music screen when you press the 5-way Navigation Joystick. The Selected
Music screen displays a preselected list of music tracks. For more information, see Managing the
list of selected tracks.
Page 11

Managing Media and Data Files
ZENcast Organizer, Creative Media Explorer and Creative MediaSourceTM Player/Organizer are
included with your player. For updated information about your player's support for ZENcast media files,
visit www.zencast.com
.
Creative ZENcast Organizer
With Creative ZENcast Organizer, you can subscribe to your favorite ZENcast channels, and download
and transfer ZENcast audio files to your player. For updated information about your player's support for
ZENcast media files, visit www.zencast.com
.
Creative ZENcast Organizer is your center for playing, managing, and subscribing to your favorite
ZENcast channels. With ZENcast Organizer, you can:
quickly access ZENcast channels of your favorite topics from ZENcast Directory and
ZENcast.com
subscribe to your favorite ZENcast channels
schedule regular updates of your ZENcast channel subscriptions
transfer downloaded ZENcast audio files to your player
synchronize ZENcast content with your player
Page 11
Page 12

Creative ZENcast Organizer
With Creative ZENcast Organizer, you can subscribe to your favorite ZENcast channels, and download
and transfer ZENcast audio files to your player. For updated information about your player's support for
ZENcast media files, visit www.zencast.com
.
Creative ZENcast Organizer is your center for playing, managing, and subscribing to your favorite
ZENcast channels. With ZENcast Organizer, you can:
quickly access ZENcast channels of your favorite topics from ZENcast Directory and
ZENcast.com
subscribe to your favorite ZENcast channels
schedule regular updates of your ZENcast channel subscriptions
transfer downloaded ZENcast audio files to your player
synchronize ZENcast content with your player
Page 12
Page 13

Creative Media Explorer
Use Creative Media Explorer if:
you are new to digital music and videos, and want to transfer them from your CDs or computer
to your player
you want to convert, synchronize, and organize audio and video files
you prefer to manage your player in the familiar "Windows Explorer" environment.
Note
The video function is available on selected ZEN V Series player models only.
To start Creative Media Explorer, double-click the ZEN V Series Media Explorer icon under
My Computer or on the desktop. For more information about using Creative Media Explorer, refer to its
online Help.
Page 13
Page 14

Creative MediaSource Player/Organizer
Use the full-featured Creative MediaSource Player/Organizer if:
you require additional features such as recording, automatic playlist generation, and audio format
conversion
you want to manage a music library on your computer.
To start Creative MediaSource Player/Organizer, double-click the Creative MediaSource
Player/Organizer
icon on your desktop.
Creative MediaSource Player/Organizer has a Home page from which you can access common tasks.
For more information about using Creative MediaSource Player/Organizer, refer to its online Help.
Page 14
Page 15
Accessories
Your player comes with some of the accessories described below. Accessories that are not included with
your player are available from your Creative Labs dealer or at our online store at www.creative.com
.
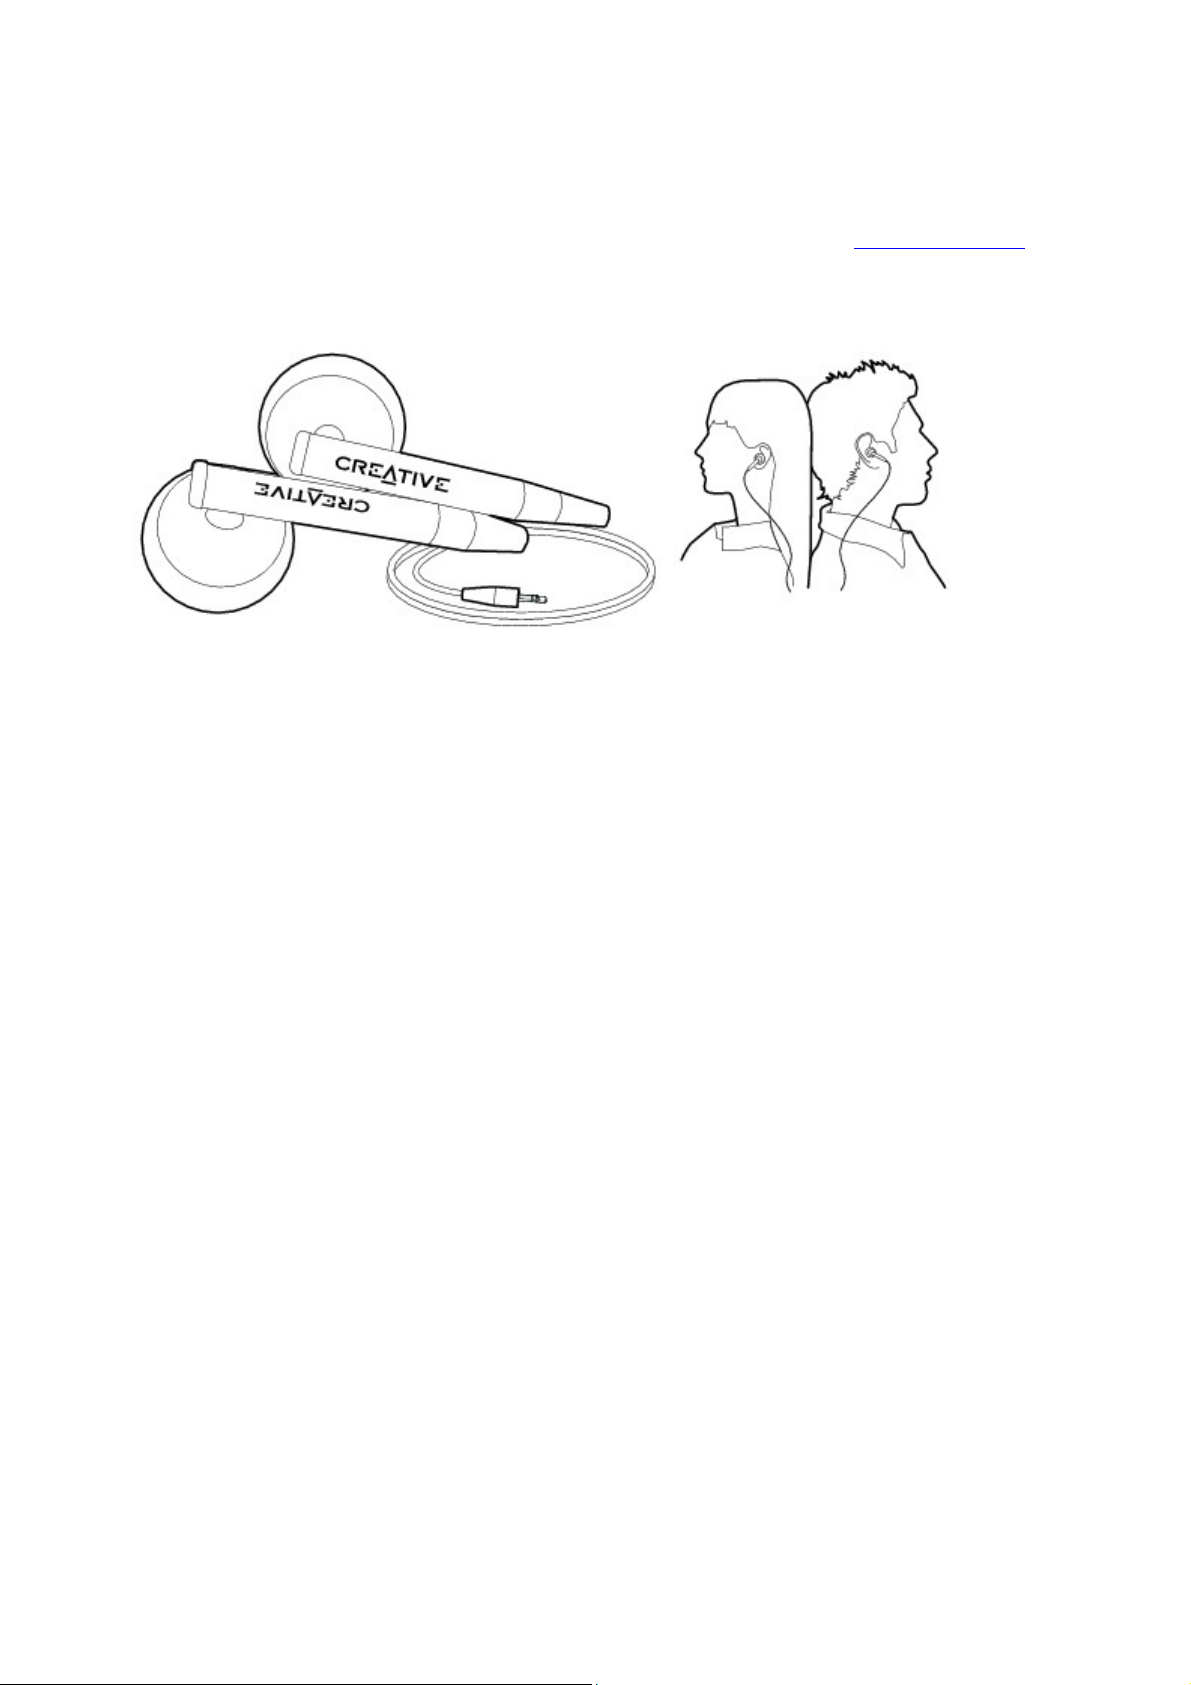
Earphones
Your player's earphones feature dynamic bass response and enhanced audio clarity.
Warning!
For your safety and the safety of others, do not use your earphones while driving, cycling or
during any other activity that requires your full attention.
Page 15
Page 16

Earphones
Your player's earphones feature dynamic bass response and enhanced audio clarity.
Warning!
For your safety and the safety of others, do not use your earphones while driving, cycling or
during any other activity that requires your full attention.
Page 16
Page 17

Pouch
Your player's protective pouch keeps it snug and safe.
Page 17
Page 18

Neckstrap
With your player's neckstrap, your music collection goes wherever you go.
Note
The player's neckstrap is available only in selected countries.
Page 18
Page 19

Line-in Cable
With your player's line-in cable, you can directly encode or "rip" music to your player (see Encoding
using the LINE IN jack
), instead of ripping music on your computer first and then transferring it to your player.
Page 19
Page 20

About Content Types
Your player is capable of playing different types of content, including audio tracks in the MP3, WAV or
WMA formats, pictures in the JPEG (JPG) format, and videos.
Note
The video function is available on selected ZEN V Series player models only.
Page 20
Page 21

Getting Content
You can acquire content from many legal sources. Here are some suggestions:
Audio tracks - ripped from personal audio CDs and home studio recordings, or purchased from
online music stores.
Pictures - encoded from digital cameras, webcams or scanned from printed photos.
ZENcast audio files - downloaded from the Internet using ZENcast Organizer.
Videos - downloaded from the Internet or captured from your digital camera.
Note
The video function is available on selected ZEN V Series player models only.
For updated information about your player's support for ZENcast media files, visit
www.zencast.com
Page 21
Page 22

Transferring Media and Data Files
Transfer music, picture, video and other files from your computer to your player. Before ripping or
copying files, make sure your player is connected to your computer as shown below.
It is recommended that your fully charge your player before transferring files.
Note
The video function is available on selected ZEN V Series player models only.
To transfer or 'rip' music from your CD collection
Double-click the ZEN V Series Media Explorer icon on the desktop.
1.
Click the Rip Audio CDs button.
2.
Follow the instructions on the screen.
3.
If you are connected to the Internet, album information is automatically retrieved.
3.
Note
Creative Media Explorer uses MusicIDSM from Gracenote® to get artist, title, track, credits, and
other information about the CDs you play. This service is FREE and automatic. You must be
connected to the Internet when using this service. For more information, refer to the Creative
Audio CD Ripper online Help. Creative Audio CD Ripper is found in Creative Media Explorer.
To transfer music, pictures or videos from your computer
Double-click the ZEN V Series Media Explorer icon on the desktop.
1.
Click the Browse Media button.
2.
Locate your media files and using the drag-and-drop method, copy them to the following folders
3.
in your player:
Media Library\Music folder for audio files
o
Media Library\Videos folder for videos
o
Media Library\Pictures for pictures
o
Note
Use Creative Media Explorer, Creative MediaSource Player/Organizer or Windows Media
Player 10 (and above) to transfer your Digital Rights Management (DRM) protected files.
The video function is available on ZEN V Series player models with video support only. All
video formats require conversion before they can be played on your player. Use Creative Media
Explorer or Creative MediaSource Player/Organizer only to convert your videos. Note that if
you choose to skip a video file, it will not be transferred to your player.
To transfer ZENcast audio files
Double-click the ZENcast Organizer icon on the desktop.
1.
Click the Transfer button.
2.
Page 22
Page 23

Follow the instructions on the screen.
3.
Click the Done button.
4.
Note
For updated information about your player's support for ZENcast media files, visit
www.zencast.com
To transfer data files from your computer
Double-click the ZEN V Series Media Explorer icon on the desktop.
1.
Click the Browse Documents button.
2.
Locate your data files and using the drag-and-drop method, transfer them to the Data folder in
3.
your player.
Note
Do not transfer audio files, pictures and videos using the Browse Documents button.
Page 23
Page 24

Creating and Transferring Playlists
With Creative MediaSource Player/Organizer, organizing music tracks into playlists (tracks you have
organized into lists) has never been easier. You can create as many playlists as you like and transfer these
to your player.
You can compile playlists using the drag-and-drop method, or automatically generate playlists based on
your preferences using the Smart Playlist feature.
Tip
For more information about using Creative MediaSource Player/Organizer, refer to its online
Help.
You can also directly create playlists on your player. For more information, see Managing the list
of selected tracks.
Page 24
Page 25

Synchronizing Content with Your Computer
You can use Sync Manager to update and synchronize music, pictures, videos, contacts, calendar and
tasks between your player and your computer.
Connect your player to your computer.
1.
Start Sync Manager.
2.
You can start Sync Manager by clicking the Sync Manager icon on your computer's system
2.
tray, and then clicking Start Synchronize.
Follow the instructions on the screen.
3.
Note
The video function is available on selected ZEN V Series player models only.
To launch Sync Manager in Creative MediaSource Player/Organizer, click Sync Manager.
To launch Sync Manager in Creative Media Explorer, click Synchronize Media and Outlook
Data.
To configure the synchronization settings, click the Sync Manager icon on your computer's
system tray, and then click Player Settings <your player name>.
Page 25
Page 26

Disconnecting Your Player
When you have finished transferring files, disconnect your player.
DO NOT disconnect your player if you see the left picture below on the display. Track or data file
transfer is in progress and disconnecting your player may damage the content being transferred. Wait until
you see the right picture below on the display before disconnecting your player.
Page 26
Page 27

Selecting and playing music tracks
You can search for music tracks by album, artist, genre or title. If you have created playlists (tracks you
have organized into lists) on your player, or transferred playlists from Creative MediaSource
Player/Organizer, you can search for music tracks in playlists as well. The steps below also apply if you
want to search for Audible and ZENcast files.
Press the Back/Options button.
1.
You may need to do this more than once until the main menu appears.
1.
Select Music Library and select a music category, such as Albums or Genres. Select All Tracks
2.
if you want to search by track title.
Continue searching with the 5-way Navigation Joystick until you find what you want.
3.
At any time, press and hold the Back/Options button for more search and playback options.
3.
To start playing a music track or a category of music tracks (like an album), scroll to the item and
4.
press the Play/Pause button.
The currently playing track appears on the Now Playing screen. See Now Playing Screen.
4.
Note
To manage Audible files, you need to install AudibleManager®.
Audible files are currently available to selected regions only.
You can also get your player's DJ to select and play songs according to criteria set by you. See
Selecting tracks with your player's DJ.
Page 27
Page 28

Adding a music track to the list of selected tracks
Press the Back/Options button.
1.
You may need to do this more than once until the main menu appears.
1.
Select Music Library and select a music category, such as Albums or Genres. Select All Tracks
2.
if you want to search by track title.
Select an album, artist, genre or track.
3.
Press and hold the Back/Options button.
4.
Select Add to Selected.
5.
Note
For more information about creating playlists on your player, see Managing the list of selected
tracks.
Page 28
Page 29

Searching for tracks by the same artist
If you like the artist of the song you are playing now, you can do a quick search for other titles by the
same person.
During playback, press the Back/Options button.
1.
You may need to do this more than once until the main menu appears.
1.
Select Now Playing.
2.
The Now Playing screen appears.
2.
Press and hold the Back/Options button.
3.
Select Lookup Artist to display albums or tracks from the same artist.
4.
Note
The Lookup Artist option is also available in the Options menu in the Selected Music screen. To
access the Selected Music screen, see Now Playing Screen.
Page 29
Page 30

Selecting tracks with your player's DJ
Instead of selecting tracks yourself, you can let your player's DJ pick out tracks for you.
Press the Back/Options button.
1.
You may need to do this more than once until the main menu appears.
1.
Select Music Library DJ and select one of the following options from the menu:
2.
Album of the Day
o
Let your player's DJ play an album of music tracks.
o
Random Play All
o
Let your player's DJ randomly play all tracks, including your recorded tracks.
o
Most Popular
o
Let your player's DJ play frequently played tracks.
o
Rarely Heard
o
Let your player's DJ play rarely played tracks.
o
Page 30
Page 31

Managing the list of selected tracks
Tracks you have selected for playback can be viewed and managed from the Selected Music screen.
Press the Back/Options button.
1.
You may need to do this more than once until the main menu appears.
1.
Select Now Playing.
2.
The Now Playing screen appears.
2.
Press and hold the Back/Options button.
3.
Select one of the following playlist management options from the menu:
4.
Remove... Remove Track
o
Removes the current track from the list.
o
Remove... Remove All
o
Clears the list.
o
Save As Playlist
o
Saves the list as a playlist. Name the playlist using the characters in the list box that appears,
o
and then select Ok.
Tip
These playlist management options are also available in the Options menu in the Selected Music
screen. To access the Selected Music screen, see Now Playing Screen.
Page 31
Page 32

Shuffling and repeating the list of selected tracks
You can shuffle or repeat your list of selected tracks by selecting a different play mode.
Press the Back/Options button.
1.
You may need to do this more than once until the main menu appears.
1.
Select System Audio Settings Play Mode.
2.
Select one of the following items in the Play Mode screen:
3.
Normal
o
Plays your selected tracks in sequential order.
o
Repeat Track
o
Repeats the current track. When you select this play mode, appears on the Now Playing
o
screen.
Repeat All
o
Repeats all selected tracks. When you select this play mode, appears on the Now Playing
o
screen.
Shuffle
o
Plays all selected tracks in random order, once only. When you select this play mode,
o
appears on the Now Playing screen.
Shuffle Repeat
o
Plays and repeats all selected tracks, in random order. When you select this play mode,
o
appears on the Now Playing screen.
Track Once
o
Stops playing after the current track ends. When you select this play mode, appears on
o
the Now Playing screen.
Tip
To change the play mode in the Now Playing or Selected Music screen during playback, press
and hold the Back/Options button and select Play Mode.
Page 32
Page 33

Searching within a track
You can search for a particular point within a track and start playing from there. For example, if you want
to start playback one minute into a music track, you can pinpoint or
seek to the one minute position and then play from there.
In the Now Playing screen, press and hold the Back/Options button and select Seek To.
1.
Push the 5-way Navigation Joystick right or left to scroll to any point within the current track.
2.
Press the 5-way Navigation Joystick to start playing from the selected position.
3.
Page 33
Page 34

Using bookmarks
You can insert bookmarks during playback. A bookmark helps you mark a point within a track, so you
can return to it at a later time.
For example, if you are listening to your recording of an interview, insert a bookmark if you need to stop
halfway through. When you want to continue listening from where you left off, go to this bookmark.
You can use up to 10 bookmarks at any one time.
To insert a bookmark
In the Now Playing screen, press and hold the Back/Options button and select Set
1.
Bookmark. Playback pauses and the Set Bookmark screen appears.
Select a bookmark number.
2.
Your bookmark is assigned to the selected bookmark number. If all 10 bookmark numbers have
2.
been assigned, you can replace an existing bookmark with the new bookmark.
To go to a bookmark
Press the Back/Options button.
1.
You may need to do this more than once until the main menu appears.
1.
Select Music Library Bookmarks.
2.
Select the bookmark that you want.
3.
Page 34
Page 35

Playing Audible Files
After downloading Audible files to your player, search for Audible content by album, artist, genre or title.
See Selecting and playing music tracks
.
You can also skip sections within an Audible file.
Note
Audible files are currently available to selected regions only.
Skipping sections within a track
In the Now Playing screen, press the 5-way Navigation Joystick.
1.
Push the 5-way Navigation Joystick right or left to skip sections within the track.
2.
To go back to the Now Playing screen, push the 5-way Navigation Joystick twice.
3.
Page 35
Page 36

Skipping sections within a track
In the Now Playing screen, press the 5-way Navigation Joystick.
1.
Push the 5-way Navigation Joystick right or left to skip sections within the track.
2.
To go back to the Now Playing screen, push the 5-way Navigation Joystick twice.
3.
Page 36
Page 37

Playing ZENcast Audio Files
After transferring ZENcast audio files to your player, search for ZENcast audio files by album, artist,
genre or title. See Selecting and playing music tracks
.
Note
Use ZENcast Organizer to subscribe to your favorite ZENcast channels, and download and
transfer ZENcast audio files to your Creative portable media player. For more information, refer
to the Creative ZENcast Organizer online Help.
For updated information about your player's support for ZENcast media files, visit
www.zencast.com
Page 37
Page 38

Viewing and Managing Pictures
You can store thousands of pictures in your player, and even set up a slideshow, so that you can share
memories with friends and family. Your player displays pictures that are in the JPEG (JPG) format only
and sorts them alphabetically.
Use your computer to sort pictures by date or alphabetically for quicker searches.
You can also view album art on your player. When you play an album or music track that supports this
feature, the album art is displayed automatically.
Page 38
Page 39

Viewing album art in full screen
If available with a music track, album art will be displayed on your player.
To view the album art in full screen, press the 5-way Navigation Joystick in the Now Playing screen.
Page 39
Page 40

Viewing pictures
Press the Back/Options button.
1.
You may need to do this more than once until the main menu appears.
1.
Select Photos, and select the picture you want to view. To view the picture in full screen, press
2.
the 5-way Navigation Joystick.
Press and hold the Back/Options button to select display and wallpaper options.
3.
If you select Zoom In, use the 5-way Navigation Joystick to move your picture up, down, left or
3.
right.
To change the display setting, select System Photo Settings View As and select one of the
4.
following items:
Fit Screen
o
Resizes your picture to best fit your player's screen.
o
Full Screen
o
Resizes your picture to fill your player's screen.
o
Your player's default display setting is Full Screen.
o
Page 40
Page 41

Viewing pictures in a slideshow
Press the Back/Options button.
1.
You may need to do this more than once until the main menu appears.
1.
Select Photos and highlight the picture or folder that you want.
2.
Press the Play/Pause button to start a slideshow.
3.
To stop the slideshow, press the Back/Options button.
4.
To change the slideshow interval duration, select System Photo Settings Slide Timer.
5.
Page 41
Page 42

Deleting a picture or folder
Press the Back/Options button.
1.
You may need to do this more than once until the main menu appears.
1.
Select Photos, and select the picture or folder that you want to delete.
2.
Press and hold the Back/Options button.
3.
Select Delete Picture or Delete Folder.
4.
Select Yes.
5.
Page 42
Page 43

Setting a picture as wallpaper
Press the Back/Options button.
1.
You may need to do this more than once until the main menu appears.
1.
Select Photos, and select the picture that you want.
2.
Press and hold the Back/Options button.
3.
Select Set as wallpaper.
4.
Select a wallpaper brightness or color.
5.
Page 43
Page 44

Using Your Radio
Listening to the radio
The FM frequency range on your player is set to "International" by default. Most regions in the world
receive FM broadcasts in this range.
Note
The FM radio function is available on selected ZEN V Series player models only.
If you are using your player in Japan, make sure you have selected "Japanese" as your player's
default language before selecting your FM region.
In the main menu, select FM Radio.
i.
Press and hold the Back/Options button, and select Set Region.
ii.
Select the FM Region that you want.
iii.
Page 44
Page 45

Listening to the radio
The FM frequency range on your player is set to "International" by default. Most regions in the world
receive FM broadcasts in this range.
Note
The FM radio function is available on selected ZEN V Series player models only.
If you are using your player in Japan, make sure you have selected "Japanese" as your player's
default language before selecting your FM region.
In the main menu, select FM Radio.
i.
Press and hold the Back/Options button, and select Set Region.
ii.
Select the FM Region that you want.
iii.
Page 45
Page 46

Performing an autoscan and autosave
Press the Back/Options button.
1.
You may need to do this more than once until the main menu appears.
1.
Select FM Radio.
2.
To automatically scan and save radio stations, press and hold the Back/Options button and
3.
select Autoscan. At the end of the autoscan, your player saves all stations as preset channels and
tunes in to the first preset.
Page 46
Page 47

Performing a manual scan
Press the Back/Options button.
1.
You may need to do this more than once until the main menu appears.
1.
Select FM Radio.
2.
To fine tune or manually scan for a radio station, press the Play/Pause button to switch to the
3.
manual tuning view.
3.
Push the 5-way Navigation Joystick right or left to fine tune the radio frequency.
4.
Push and hold the 5-way Navigation Joystick right or left for one second to scan for the next
5.
available radio station.
To save a radio station as a preset, press and hold the Back/Options button, select Save As
6.
Preset, and then select a preset number.
Page 47
Page 48

Deleting radio presets
Press the Back/Options button.
1.
You may need to do this more than once until the main menu appears.
1.
Select FM Radio.
2.
Push the 5-way Navigation Joystick right or left to select the preset you want to delete.
3.
Press and hold the Back/Options button and select Delete Preset.
4.
Page 48
Page 49

Recording and Encoding
Recording with the built-in microphone
Press and hold the Record button to start a voice recording.
1.
While recording, you can press and hold the Back/Options button and select one of the
2.
following options:
Pause
o
Pauses the recording. You can also pause the recording by pressing the Play/Pause
o
button.
Stop
o
Stops and saves the recording. You can also stop the recording by pressing the Record
o
button.
Split
o
Ends and saves current recording session, and begins a new one.
o
Press the Record button to end the voice recording.
3.
The recorded track is named MIC followed by the date and time of the recording (MIC
3.
YYYY-MM-DD HH:MM:SS). For example, if you record a track on March 15, 2004 at 2:57
pm, the track is named MIC 2004-03-15 14:57:00.
To preview your new recording, press the Play/Pause button. To delete it, select Delete
4.
Recording.
Tip
For a better quality recording, make sure you place your player as close as possible to the
source.
Page 49
Page 50

Recording with the built-in microphone
Press and hold the Record button to start a voice recording.
1.
While recording, you can press and hold the Back/Options button and select one of the
2.
following options:
Pause
o
Pauses the recording. You can also pause the recording by pressing the Play/Pause
o
button.
Stop
o
Stops and saves the recording. You can also stop the recording by pressing the Record
o
button.
Split
o
Ends and saves current recording session, and begins a new one.
o
Press the Record button to end the voice recording.
3.
The recorded track is named MIC followed by the date and time of the recording (MIC
3.
YYYY-MM-DD HH:MM:SS). For example, if you record a track on March 15, 2004 at 2:57
pm, the track is named MIC 2004-03-15 14:57:00.
To preview your new recording, press the Play/Pause button. To delete it, select Delete
4.
Recording.
Tip
For a better quality recording, make sure you place your player as close as possible to the
source.
Page 50
Page 51

Encoding using the LINE IN jack
You can directly encode or "rip" music to your player, instead of ripping music on your computer first
and then transferring it to your player.
Connect the LINE IN jack on your player to the line output of an external stereo source, such as
1.
a CD or MiniDisc player, using the supplied line-in cable.
1.
2.
2.
3.
4.
5.
6.
7.
7.
8.
Note
Press the Back/Options button.
You may need to do this more than once until the main menu appears.
Select Extras Line-in Recording.
Press the Record button to start a line-in encoding.
On your external stereo source, start playing the song you want to encode.
While encoding, you can press and hold the Back/Options button and select one of the
following items:
Pause
o
Pauses the encoding. You can also pause the encoding by pressing the Play/Pause
o
button.
Stop
o
Stops and saves the encoding. You can also stop the encoding by pressing the Record
o
button.
Split
o
Ends and saves current recording session, and begins a new one.
o
Press the Record button to end the line-in recording.
The recorded track is named LINE followed by the date and time of the recording (LINE
YYYY-MM-DD HH:MM:SS). For example, if you record a track on March 15, 2004 at 2:57
pm, the track is named LINE 2004-03-15 14:57:00.
To view and play back encoded tracks, see Playing recorded or encoded tracks.
Enable Sync Track ("SYNC") to encode the songs from your source as separate tracks. For
more information, see Synchronizing encoding.
It may be illegal to encode files for trade or sale unless you have the express or explicit
Page 51
Page 52

permission of the copyright holder(s).
Page 52
Page 53

Synchronizing encoding
If you are encoding songs from a CD or MiniDisc, enable Sync Track ("SYNC") so that your player will
properly encode the songs from your source as separate tracks. Your player will automatically stop when
the last song is played. Sync Track is enabled by default.
Press the Back/Options button.
1.
You may need to do this more than once until the main menu appears.
1.
Select Extras Line-in Recording.
2.
Press and hold the Back/Options button and select Sync Track.
3.
To enable or disable the Sync Track feature, select On or Off. When Sync Track is turned on,
4.
SYNC appears on the Line-in Recording screen.
Page 53
Page 54

Adjusting sound quality of the encoding
You can adjust the sound quality of encoded tracks by changing the encoding bitrate.
Press the Back/Options button.
1.
You may need to do this more than once until the main menu appears.
1.
Select Extras Line-in Recording.
2.
Press and hold the Back/Options button and select Rec. Bitrate.
3.
Select the bitrate you want.
4.
Note
Higher bitrates offer better sound quality but take up more storage space.
Page 54
Page 55

Playing recorded or encoded tracks
Press the Back/Options button.
1.
You may need to do this more than once until the main menu appears.
1.
Select Music Library Recordings, and scroll to the recorded or encoded track you want to
2.
play.
Press the Play/Pause button.
3.
Page 55
Page 56

Playing and Managing Videos
To play videos, you must first convert and transfer them to your player. For more information on
transferring videos, see Transferring Media and Data Files
. Transferred videos are categorized by name and duration in your player's Video Library.
Note
The video function is available on selected ZEN V Series player models only.
Page 56
Page 57

Converting a video
To convert your videos to a format supported by your player, launch Creative Media Explorer and click
Convert Video. You can also use the drag-and-drop method in Creative Media Explorer to transfer and
convert a video automatically. See Transferring Media and Data Files
.
For more information, refer to the Creative Media Explorer online Help or the Creative Video Converter
online Help.
Page 57
Page 58

Playing a video
Press the Back/Options button.
1.
You may need to do this more than once until the main menu appears.
1.
Select Videos Video.
2.
Select the video you want.
3.
To play the video, press the Play/Pause button.
4.
To pause the video, press the Play/Pause button again.
5.
Page 58
Page 59

Going forward or backward in a video
Push the 5-way Navigation Joystick right or left to go forward or backward in a video.
Page 59
Page 60

Deleting a video
Press the Back/Options button.
1.
You may need to do this more than once until the main menu appears.
1.
Select Videos Video.
2.
Select the video you want.
3.
Press and hold the Back/Options button.
4.
Select Delete Video.
5.
Page 60
Page 61

Displaying the last viewed video
Press the Back/Options button.
1.
You may need to do this more than once until the main menu appears.
1.
Select Videos Recently browsed.
2.
Page 61
Page 62

Deleting Tracks
Press the Back/Options button.
1.
You may need to do this more than once until the main menu appears.
1.
Select Music Library and select a music category, such as Albums or Genres. Select All Tracks
2.
if you want to search by track title.
Continue searching with the 5-way Navigation Joystick until you find the track or category of
3.
tracks that you want to delete.
Press and hold the Back/Options button and select Delete Playlist, Delete Album, Delete
4.
Artist, Delete Genre or Delete Track.
For more song management tasks, connect your player to your computer and use Creative
4.
MediaSource Player/Organizer.
Page 62
Page 63

Viewing Track Information
To view detailed information about a track, such as its duration, scroll to the track, press and hold the
Back/Options button, and select
View Details.
Page 63
Page 64

Viewing Player Information
You can view player information, such as disk space and the total number of tracks, in the Information
screen.
Press the Back/Options button.
1.
You may need to do this more than once until the main menu appears.
1.
Select System Information.
2.
Page 64
Page 65

Storing Media and Data Files in Your Player
You can use your player to store music, pictures and data files, or to transfer files from one computer to
another.
Use Creative Media Explorer if you need to transfer data files between your player and your computer.
Creative Media Explorer offers you the ease of managing data files (as well as music, pictures and
videos) in your player, in a Windows Explorer environment. Creative Media Explorer is automatically
installed when you set up your player's software on your computer. For more information, refer to the
Creative Media Explorer online Help.
Use your player's Removable Disk mode if you need to transfer and manage data between your player
and computers that do not have Creative Media Explorer. See Using Your Player as a Removable Disk
.
Page 65
Page 66

Using Your Player as a Removable Disk
Press the Back/Options button.
1.
You may need to do this more than once until the main menu appears.
1.
Select Extras Removable Disk.
2.
When you select this menu item for the first time, you must select the amount of disk space you
2.
want to use for the Removable Disk mode.
Press and hold the Back/Options button, and select the capacity that you want.
o
When you see Removable Disk on the player's OLED display, you are ready to transfer data
3.
files.
Connect your player to your computer using the supplied USB cable.
4.
4.
4.
4.
5.
6.
Note
Your player appears as a Removable Disk under My Computer in Windows Explorer.
Use the drag-and-drop method in Windows Explorer to copy files to and from your player.
When you have finished copying files, safely disconnect your player using the Safely Remove
Hardware icon on the Taskbar. To safely disconnect your player, see Stopping Your Player
Properly.
Data files saved in the Removable Disk mode disk space cannot be viewed or managed with
Page 66
Page 67

Creative Media Explorer.
Similarly, data files transferred to your player using Creative Media Explorer cannot be viewed
or managed in Removable Disk mode.
Page 67
Page 68

Changing the Amount of Disk Space in Removable Disk Mode
You can change the amount of disk space in Removable Disk mode at any time.
Press the Back/Options button.
1.
You may need to do this more than once until the main menu appears.
1.
Select Extras Removable Disk.
2.
Press and hold the Back/Options button, select Set Capacity, and select the capacity that
3.
you want.
Before you can decrease the amount of disk space, the existing data files stored in Removable
3.
Disk mode must be able to fit into the decreased space.
Alternatively, connect your player to your computer and use Creative Removable Disk Manager
4.
to increase or decrease the amount of disk space in Removable Disk mode.
Note
To delete all the data files in the Removable Disk disk space, press and hold the Back/Options
button and select Format.
Use Windows Explorer if you want to delete individual data files stored in Removable Disk
mode.
Tip
Creative Removable Disk Manager is included with your player and is automatically installed
when you set up the ZEN V Series software on your computer.
To start Creative Removable Disk Manager, click Start Programs or All Programs Creative
Creative Removable Disk Manager Creative Removable Disk Manager.
Page 68
Page 69

Stopping Your Player Properly
To prevent data loss when in Removable Disk mode, ensure that:
you have stopped your player properly in Windows before unplugging it from the USB port on
your computer (refer to the steps for your respective operating system).
you do not unplug your player from the USB port on your computer when transferring files to or
from the device, or when files stored in your player are in use.
Caution!
Only disconnect your player after the Do not Disconnect message disappears from the OLED
display. If not, your player may not be able to function normally.
To stop your player properly, click the Safely Remove Hardware icon on the Taskbar, click
Safely remove USB Mass Storage Device, and disconnect your player when you are prompted to do so.
Page 69
Page 70

Using Your Player's Organizer Features
Your player stores your contacts, calendar events and tasks from Microsoft Outlook
. Read on to learn how to use these organizer features.
If you do not have Microsoft Outlook installed, you can use the Personal Information Manager (PIM)
editor in Creative Media Explorer to edit your calendar, "to do" tasks and contact information. In
Creative Media Explorer, click the
Manage Organizer Data button.
®
Page 70
Page 71

Synchronizing with Microsoft Outlook
Connect your player to your computer.
1.
Start Sync Manager.
2.
You can start Sync Manager from Creative Media Explorer or Creative MediaSource
2.
Player/Organizer.
Select My Computer and your ZEN V Series player as the devices you want to synchronize, and
3.
then click Sync Now.
Select the information you want to import from Microsoft Outlook, and then click the Next
4.
button.
Follow the instructions on the screen.
5.
Click the Finish button.
6.
Tip
You can also use Sync Manager to synchronize music, pictures, videos, contacts, calendar and
tasks between your player and your computer. For more information, see Synchronizing Content
with Your Computer.
Note
The video function is available on selected ZEN V Series player models only.
Page 71
Page 72

Viewing the Calendar
Press the Back/Options button.
1.
You may need to do this more than once until the main menu appears.
1.
Select Extras Organizer Calendar.
2.
Push the 5-way Navigation Joystick right or left to scroll through the various months, and up and
3.
down to scroll through the days in a month.
Press the 5-way Navigation Joystick to view the events and task list in a day.
4.
Page 72
Page 73

Viewing Today's Tasks
Press the Back/Options button.
1.
You may need to do this more than once until the main menu appears.
1.
Select Extras Organizer Tasks.
2.
Page 73
Page 74

Viewing Contacts
Press the Back/Options button.
1.
You may need to do this more than once until the main menu appears.
1.
Select Extras Organizer Contacts.
2.
Select a name in your contact list to view details about the contact.
3.
Page 74
Page 75

Changing Audio Settings
Using equalizer (EQ)
EQ is the player's collection of equalizer settings, which you can use to enhance your music. You can
select preset equalizer or customized settings to suit the genre or style of your music, or customize your
own setting.
Press the Back/Options button.
1.
You may need to do this more than once until the main menu appears.
1.
Select System Audio Settings EQ.
2.
Select one of the EQ menu items.
3.
When an EQ setting is selected, appears on the Now Playing screen.
3.
To customize an equalizer setting
In the EQ screen, select Custom EQ.
1.
Each slider on the Custom EQ screen represents successively higher frequencies that can be
1.
adjusted.
80 controls bass frequency
o
250 adjusts the low mid-range frequency
o
1k adjusts the mid-range frequency
o
4k adjusts the upper mid-range frequency
o
13k adjusts the treble frequency.
o
Select a slider, and push the 5-way Navigation Joystick up and down to move the control knob
2.
up or down to vary the amount of boost or reduction in the selected frequency range.
Push the 5-way Navigation Joystick right or left to select the remaining sliders, and repeat step 2.
3.
Select the check mark to save and enable the Custom EQ settings.
4.
Page 75
Page 76

Using equalizer (EQ)
EQ is the player's collection of equalizer settings, which you can use to enhance your music. You can
select preset equalizer or customized settings to suit the genre or style of your music, or customize your
own setting.
Press the Back/Options button.
1.
You may need to do this more than once until the main menu appears.
1.
Select System Audio Settings EQ.
2.
Select one of the EQ menu items.
3.
When an EQ setting is selected, appears on the Now Playing screen.
3.
To customize an equalizer setting
In the EQ screen, select Custom EQ.
1.
Each slider on the Custom EQ screen represents successively higher frequencies that can be
1.
adjusted.
80 controls bass frequency
o
250 adjusts the low mid-range frequency
o
1k adjusts the mid-range frequency
o
4k adjusts the upper mid-range frequency
o
13k adjusts the treble frequency.
o
Select a slider, and push the 5-way Navigation Joystick up and down to move the control knob
2.
up or down to vary the amount of boost or reduction in the selected frequency range.
Push the 5-way Navigation Joystick right or left to select the remaining sliders, and repeat step 2.
3.
Select the check mark to save and enable the Custom EQ settings.
4.
Page 76
Page 77

Enabling Smart Volume
You can limit the volume range of playback with Smart Volume. When enabled, Smart Volume sets
playback at a constant volume, so you do not have to continually adjust the volume when you play back
different tracks.
Press the Back/Options button.
1.
You may need to do this more than once until the main menu appears.
1.
Select System Audio Settings Smart Volume.
2.
Page 77
Page 78

Enabling Volume Restriction
Listening to audio at high levels for prolonged periods may damage your hearing. To protect your
hearing, you can control your player's maximum playback volume.
To enable volume restriction
Press the Back/Options button.
1.
You may need to do this more than once until the main menu appears.
1.
Select System Audio Settings Restrict Volume. The volume bar appears.
2.
Select the maximum volume that you want. You will be prompted to set a password.
3.
Set a password. To disable password control for this feature, enter 0000.
4.
Press the 5-way Navigation Joystick to save your password and enable volume restriction.
5.
To disable volume restriction
Stop audio playback on your player before disabling this feature.
1.
Your player will play back audio at maximum levels when you increase the volume to the
1.
maximum of 25. Listening to audio at high levels may damage your hearing.
Press the Back/Options button.
2.
You may need to do this more than once until the main menu appears.
2.
Select System Audio Settings Restrict Volume. You will be prompted for your password.
3.
Enter your password. The volume bar appears.
4.
Select your player's maximum volume of 25.
5.
Press the 5-way Navigation Joystick. The Restrict Volume setting turns off.
6.
To remove the password
If you forget your password, clean up your player's storage drive to delete the password.
Turn off your player.
1.
Press and hold the Power and Play buttons simultaneously.
2.
The Recovery Mode screen appears when your player turns on. Four menu items are available in
3.
the Recovery Mode screen: Clean Up, Format All, Reload Firmware and Reboot. To clean up
your player's hard disk drive, select Clean Up.
When the clean up is complete, select Reboot. Your player restarts and starts rebuilding its
4.
Music Library.
Note
For more information about volume restriction, see www.creative.com/volume_restriction.
Page 78
Page 79

Enabling Bass Boost
Enabling the bass boost feature enhances the bass in your audio during playback.
Press the Back/Options button.
1.
You may need to do this more than once until the main menu appears.
1.
Select System Audio Settings Bass Boost.
2.
Page 79
Page 80

Setting the date and time
To adjust date and time settings
Press the Back/Options button.
1.
You may need to do this more than once until the main menu appears.
1.
Select System Clock Settings Set Clock.
2.
Alternatively:
2.
Select Extras Date & Time.
i.
Press and hold the Back/Options button.
ii.
Select Set Time or Set Date.
iii.
Change the date and time settings and press the 5-way Navigation Joystick to save your settings.
3.
To adjust the date and time display formats
Press the Back/Options button.
1.
You may need to do this more than once until the main menu appears.
1.
Select Extras Date & Time Date Separator, Date Format or Time Format.
2.
Page 80
Page 81

Setting the alarm
Press the Back/Options button.
1.
You may need to do this more than once until the main menu appears.
1.
Select Extras Date & Time. The current date and time are displayed.
2.
Press and hold the Back/Options button and select Set Alarm to adjust alarm settings.
3.
Select the setting you want, and use the 5-way Navigation Joystick to make the changes.
4.
Page 81
Page 82

Changing the theme
You can change your player's display color by selecting a different theme.
Press the Back/Options button.
1.
You may need to do this more than once until the main menu appears.
1.
Select System Player Settings Theme. The current theme is displayed.
2.
Select the theme that you want.
3.
Page 82
Page 83

Personalizing the player with your name
Press the Back/Options button.
1.
You may need to do this more than once until the main menu appears.
1.
Select System Player Settings Owner.
2.
Use the 5-way Navigation Joystick to spell out your name using the characters in the list box that
3.
appears, and then select Ok.
Page 83
Page 84

Setting the display duration
Press the Back/Options button.
1.
You may need to do this more than once until the main menu appears.
1.
Select System Player Settings Display Timer.
2.
Select the setting that you want before your player's screen turns off.
3.
Page 84
Page 85

Setting the display contrast
Press the Back/Options button.
1.
You may need to do this more than once until the main menu appears.
1.
Select System Player Settings Contrast.
2.
Select the setting that you want.
3.
Page 85
Page 86

Rotating the display
Press the Back/Options button.
1.
You may need to do this more than once until the main menu appears.
1.
Select System Player Settings Orientation.
2.
Select the orientation that you want.
3.
Page 86
Page 87

Setting the Idle Sleep time
You can specify how long your player remains inactive before it automatically shuts down. This feature
helps you conserve battery power.
Press the Back/Options button.
1.
You may need to do this more than once until the main menu appears.
1.
Select System Player Settings Idle Sleep.
2.
Select the setting that you want.
3.
Page 87
Page 88

Enabling the snooze timer
You can specify a period of time before your player automatically turns off. This feature helps you
conserve battery power.
Press the Back/Options button.
1.
You may need to do this more than once until the main menu appears.
1.
Select System Player Settings Snooze Timer.
2.
Select the setting that you want.
3.
Page 88
Page 89

Changing the Menu Language
Press the Back/Options button.
1.
You may need to do this more than once until the main menu appears.
1.
Select System Language, and select the language that you want.
2.
Page 89
Page 90

Resetting your player
You can reset your player to its original settings.
Press the Back/Options button.
1.
You may need to do this more than once until the main menu appears.
1.
Select System Reset Settings.
2.
Page 90
Page 91

Adding and Removing Main Menu Items
You can personalize the main menu by adding and removing menu items. For example, if you usually
search for songs by album, you can add Albums to the main menu so you can access the Albums screen
more easily.
Press the Back/Options button.
1.
You may need to do this more than once until the main menu appears.
1.
Press and hold the Back/Options button and select Configure Menu.
2.
To add menu items, select the check boxes.
3.
To remove these menu items from the main menu, clear the check boxes.
4.
To change the order of the menu items, press and hold the Back/Options button and select
5.
Change Order.
Use the 5-way Navigation Joystick to change the position of the highlighted menu item.
6.
To revert to the default menu settings, press and hold the Back/Options button and select
7.
Default Menu.
Page 91
Page 92

Frequently Asked Questions
This section covers questions you might have while using your player. For further assistance, you may
wish to consult our self-help tool "Knowledge Base". Go to www.creative.com, select your region and
then select
Support.
For the latest firmware updates to improve the player's functionality, go to www.creative.com, select
your region and then select Support
Downloads.
What are the minimum system requirements for setting up the player's software?
Microsoft® Windows Vista™, Windows® XP Professional x64 Edition, Windows XP Service
Pack 2 or later
CD-ROM/DVD-ROM drive with digital audio extraction support
USB port
170 MB free hard disk space (more for audio content storage)
Internet connection for Internet content downloading and CDDB2™ support (any charges
incurred are the responsibility of the user)
Note
The software applications on the Creative ZEN V Series CD may have higher requirements for
basic functionality. Refer to each application's documentation for details.
Can I transfer Digital Rights Management (DRM) protected WMA files to my player?
Yes. To transfer DRM-protected WMA files to your player, you can use Creative MediaSource
Player/Organizer, Creative Media Explorer, or Windows Media Player 10 (and above).
I cannot play DRM-protected WMA files on my player. What do I do?
The files may have become corrupt during transfer or the DRM license may have expired.
If the DRM license is still valid, try transferring the files again, and make sure you do so with Creative
Media Explorer, Creative MediaSource Player/Organizer, or Windows Media Player 10 (and above)
only.
Can I use Windows Media Player 10 (and above) to transfer videos?
Yes, but before your videos are transferred, they must first be converted into a format recognized by
ZEN V Series player models with video support. Only Creative Media Explorer and Creative
MediaSource Player/Organizer can convert your videos.
After a video is converted in Creative Media Explorer or Creative MediaSource Player/Organizer, why
does its file size increase?
For playback on ZEN V Series player models with video support, all videos are converted into an
uncompressed format. This format, though it results in larger file sizes, provides you with the best possible
viewing quality on your player.
Can I use the player for portable data storage?
Yes, you can. For more information, see Storing Media and Data Files in Your Player
.
I have to recharge the player's battery quite often. Is there anything I can do to make it last longer?
Some operations consume more battery power:
a long display duration setting. A shorter display duration setting conserves battery power.
a high contrast setting. Position the player so that you can read the display without using a high
contrast setting.
fast forwarding or rewinding.
turning the player on and off too many times.
prolonged use at high volumes.
One of the following diagrams appears on the OLED display. What does it mean?
Page 92
Page 93

Your computer is actively managing your
player. Warning: DO NOT disconnect
your player while your computer is still
actively managing it.
Your computer is not actively managing
your player. To use your player,
disconnect it from your computer.
You are upgrading your player's
firmware.
The firmware upgrade is complete. Reset
your player for the new firmware to take
effect. For more information, see How do
I reset my player when it does not
respond?.
There was an unexpected power loss
during audio file transfer. Use your player
only after this library rebuilding is
completed.
Your player is updating its tracks. This
occurs after transferring tracks to your
player and unplugging it.
There was an unexpected power loss
while saving settings. Reload the
firmware, download a newer firmware
version or contact Customer Support
Services.
The firmware is corrupted. Reload the
firmware, download a newer firmware
version or contact Customer Support
Services.
How do I reset my player when it does not respond?
Page 93
Page 94

You can solve most issues with your player by resetting it. To reset the player, use a pin to press the
Reset button.
My player does not turn on or stops responding. What do I do?
Make sure the Power switch is not in the Lock position.
If you're using the wired remote control (available separately), make sure the wired remote
control's Lock switch is not is the Lock position.
Your battery may need to be recharged. Connect your player to your computer's USB port with
the supplied USB cable.
If all else fails, reset your player. See the FAQ above.
My wired remote control (available separately) is not working. What do I do?
Make sure the wired remote control's Lock switch is not in the Lock position.
Make sure the wired remote control is properly connected to your player, and the earphones are
properly connected to the wired remote control.
What is PC Music Library?
PC Music Library is your collection of digital audio tracks in Creative MediaSource Player/Organizer. In
Creative MediaSource Player/Organizer, you can have more than one PC Music Library. When sharing
the same computer, multiple users can each have their own music library, each with its own settings.
However, only one music library can be active at one time.
Can PC Music Library be automatically updated?
Yes. You can use the Media Sniffer tool in Creative MediaSource Player/Organizer to monitor or 'watch'
folders in your computer. With Media Sniffer enabled, PC Music Library is updated when tracks in
monitored folders are added, deleted or moved. This helps to prevent broken links in PC Music Library.
For more information about using Creative MediaSource Player/Organizer, refer to its online help.
Where can I get more information on Creative products?
See www.creative.com
and select your region or country for updates and downloads relating to all Creative products.
Page 94
Page 95

Disclaimer
As with any digital media-based storage device, data should be backed up regularly. We strongly
recommend that you observe the usage precautions, and also back up the data in your player regularly.
In no event will Creative be liable for any indirect, incidental, special or consequential damages to any
persons caused by Creative's negligence, or for any lost profits, lost savings, loss of use, lost revenues or
lost data arising from or relating to this device, even if Creative has been advised of the possibility of such
damages. In no event will Creative’s liability or damages to you or any other person ever exceed the
amount paid by you for the device, regardless of the form of the claim. Some countries/states do not
allow the limitation or exclusion of liability for incidental or consequential damages, so the above limitation
or exclusion may not apply to you.
Page 95
Page 96

General Specifications
Size (WxHxD)
43.5 mm (1 7/10") x 67.5 mm (2 7/10") x 15.9 mm (3/5")
Weight (approximate)
43.5 g (1 1/2 ounce) with battery
Power Source
Battery: 1 x Rechargeable Lithium Ion battery
USB bus powered when connected to a power outlet or powered USB port on a computer
Playback Formats
Audio playback formats: MP3 (Up to 320 kbps), WMA (Up to 320 kbps), WMA with Digital
Rights Management (DRM) 9 or later, WAV (PCM and IMA ADPCM)
Picture format: JPEG
Supports transcoded video format (for selected ZEN V Series player models only)
Recording Formats
Voice (via built-in microphone): IMA ADPCM (8 kHz, Mono)
Line-in Recording: WMA (128 kbps and 160 kbps)
FM Radio (for selected ZEN V Series player models only)
Stereo and Mono
Up to 32 preset stations
FM region support
International: 87.5 MHz ~ 108.0 MHz, 100 kHz intervals
Japan: 76.0 MHz ~ 90.0 MHz, 100 kHz intervals
MP3 Playback Performance
Signal-to-Noise Ratio: Up to 90 dB
Channel Separation: Up to 65 dB
Frequency Response: 20 Hz ~ 20 kHz
Harmonic Distortion Output: <0.05%
Line-in Input
2.5 mm (1/10") stereo minijack
Input Voltage (max)
850 mVrms
Connectors
Headphone jack: 3.5 mm (1/8") stereo minijack, 5 ~ 7 mW per channel
USB port: Standard USB mini-B receptacle
Firmware Support
Upgradable via USB (firmware upgrades are available from www.creative.com)
Earphone Specifications
Frequency Range: 20 Hz ~ 20 KHz
Sensitivity: 112 dB ± 3 dB (I/P Level:1 mW)
Impedance: 32 ohm ± 15%
Plug: 3.5 mm (1/8") stereo minijack
Page 96
Page 97

License and Copyright
Information in this document is subject to change without notice and does not represent a commitment on
the part of Creative Technology Ltd. No part of this manual may be reproduced or transmitted in any
form or by any means, electronic or mechanical, including photocopying and recording, for any purpose
without the written permission of Creative Technology Ltd. The software described in this document is
furnished under a license agreement and may be used or copied only in accordance with the terms of the
license agreement. It is against the law to copy the software on any other medium except as specifically
allowed in the license agreement. The licensee may make one copy of the software for backup purposes
only.
The Software License Agreement is found in a separate folder on the Installation and Applications CD.
This product is not intended for the unauthorized recording or distribution of copyrighted material.
ZEN, Creative MediaSource, and the Creative logo are trademarks or registered trademarks of Creative
Technology Ltd. in the United States and/or other countries. Microsoft and Windows are registered
trademarks of Microsoft Corporation. All rights reserved.
Intel and Pentium are trademarks of Intel Corporation in the U.S. and other countries.
Audible and AudibleManager are registered trademarks of Audible, Inc. in the U.S. and/or other
countries.
Gracenote is CDDB, Inc. d/b/a ""Gracenote."" CD and music-related data from Gracenote CDDB®
Music Recognition Service
© 2000, 2001, 2002 Gracenote. Gracenote CDDB Client Software © 2000, 2001, 2002 Gracenote.
U.S. Patents Number #5,987,525; #6,061,680; #6,154,773, and other patents issued or pending.
CDDB is a registered trademark of Gracenote. The Gracenote logo and logotype, the Gracenote CDDB
logo and logotype, and the "Powered by Gracenote CDDB" logo are trademarks of Gracenote. Music
Recognition Service and MRS are service marks of Gracenote.
All other products are trademarks or registered trademarks of their respective owners.
Copyright © 2006 by Creative Technology Ltd. All rights reserved.
Version 1.2
July 2007
SM
Page 97
 Loading...