

Page 1

User’s Guide
Creative NOMAD Jukebox 3
Information in this document is subject to change without notice and does not represent a commitment on the part of Creative Technology Ltd. No part of this manual may be
reproduced or transmitted in any form or by any means, electronic or mechanical, including photocopying and recording, for any purpose without the written permission of
Creative Technology Ltd. The software described in this documen t is furnished under a license agreement and may be used or copied only in accordance with the terms of the
license agreement. It is against the law to copy the software on any other medium except as specifically allowed in the license agreement. The licensee may make one copy of
the software for backup purposes.
Copyright © 1998-2002 by Creative Technology Ltd. All rights reserved.
Version 1.3
April 2002
Sound Blaster, EAX, the Sound Blaster Live! logo, Blaster and the Creative Logo are registered trademarks, and the Sound Blaster Audigy lo go, the So und Blaster Extigy logo,
SB1394, the EAX logo, Live!, PlayCenter, Inspire, AudioSync and ADVANCED HD, are trademarks of Creative Technology Ltd. in the United States and/or other countries.
Adobe, Acrobat and Reader are either registered trademarks or trademarks of Adobe Systems Incorporated in the United States and /or other countries. Microsoft and Windo ws
are either registered trademarks or trademarks of Microsoft Corporation in the United States and/or other countries. Intel and Pentium are trademarks or registered trademarks
of Intel Corporation or its subsidiaries in the United States and other countries. AMD and AMD-K6-2 are registered trademarks of Advanced Micro Devices, Inc. CDDB2 is a
registered trademark of Gracenote. Music Recognition Service is a service mark of Gracenote. Real Player and RealOne are trademarks or registered trademarks of
RealNetworks, Inc. Apple and FireWire are trademarks of Apple Computer, Inc., registered in the U.S. and other countries. All rights reserved. All other pr oducts are trademarks
or registered trademarks of their respective owners.
This product is covered by one or more of the following U.S. patents:
4,506,579; 4,699,038; 4,987,600; 5,013,1 05; 5,072,645; 5,111,727; 5,144,676; 5,170,369; 5,248,845; 5,298,671; 5,303,309; 5,317,1 04; 5,342,990; 5,430,244; 5,524,074;
5,698,803; 5,698,807; 5,748,747; 5,763,800; 5,790,837.
Page 2

Creative End-User Software License Agreement
Version 2.5, July 2001
PLEASE READ THIS DOCUMENT CAREFULLY BEFORE INSTALLING THE SOFTWARE. BY INSTALLING AND USING THE SOFTWARE, YOU AGREE TO BE BOUND BY THE TERMS OF THIS
AGREEMENT. IF YOU DO NOT AGREE TO THE TERMS OF THE AGREEMENT, DO NOT INSTALL OR USE THE SOFTWARE. PROMPTLY RETURN, WITHIN 15 DAYS, THE SOFTWARE, ALL RELATED
DOCUMENTATION AND ACCOMPANYING ITEMS TO THE PLACE OF ACQUISITION FOR A REFUND.
This is a legal agreement between you and Creative Technology Ltd. and its
subsidiaries (“Creative”). This Agreement states the terms and conditions
upon which Creative offers to license the software sealed in the disk package
together with all related documentation and accompanying items including,
but not limited to, the executable programs, drivers, libraries and data files
associated with such programs (collectively, the “Software”).
LICENSE
1. Grant of License
The Software is licensed, not sold, to you for use only under the terms of
this Agreement. You own the disk or other media on which the Software
is originally or subsequently recorded or fixed; but, as between you and
Creative (and, to the extent applicable, its licensors), Creative retains all
title to and ownership of the Software and reserves all rights not expressly
granted to you.
The license under this Section 1 is conditioned upon your compliance with
all of your obligations under this Agreement. Creative grants to you the
right to use all or a portion of this Software provided that
(a) the Software is not distributed for profit;
(b) the Software is used only in conjunction with Creative's family of
products;
(c) the Software may NOT be modified;
(d) all copyright notices are maintained on the Software; and
(e) the licensee/end-user agrees to be bound by the terms of this
Agreement.
2. For Use on a Single Computer
The Software may be used only on a single computer by a single user at
any time. You may transfer the machine-readable portion of the Soft ware
from one computer to another computer, provided that (a) the Software
(including any portion or copy thereof) is erased from the first computer
and (b) there is no possibility that the Software will be used on more than
one computer at a time.
3. Stand-Alone Basis
You may use the Software only on a stand-alone basis, such that the
Software and the functions it provides are accessible only to persons who
are physically present at the location of the computer on which the
Software is loaded. Y ou may not allo w the Softw are or its functions to be
accessed remotely, or transmit all or any portion of the Software through
any network or communication line.
4. Copyright
The Software is owned by Creative and/or its licensees and is protected by
United States copyright laws and international treaty provisions. You may
not remove the copyright notice from any copy of the Software or any
copy of the written materials, if any, accompanying the Software.
5. One Archival Copy
You may make one (1) archival copy of the machine-readable portion of
the Software for backup purposes only in support of your use of the
Software on a single computer, provided that you reproduce on the copy
all copyright and other proprietary rights notices included on the originals
of the Software.
6. No Merger or Integration
You may not merge any portion of the Software into, or integrate any
portion of the Software with, any other program, except to the extent
expressly permitted by the laws of the jurisdiction where you are located.
Any portion of the Software merged into or integrated with another
program, if any, will continue to be subject to the terms and conditions of
this Agreement, and you must reproduce on the merged or integrated
portion all copyright and other proprietary rights notices included in the
originals of the Software.
7. Network Version
If you have purchased a “network” version of the Software, this
Agreement applies to the installation of the Software on a single “file
server”. It may not be copied onto multiple systems. Each “node”
connected to the “file server” must also have its own license of a “node
copy” of the Software, which becomes a license only for that specific
“node”.
8. Transfer of License
You may transfer your license of the Software, provided that (a) you
transfer all portions of the Software or copies thereof, (b) you do not retain
any portion of the Software or any copy thereof, and (c) the transferee
reads and agrees to be bound by the terms and conditions of this
Agreement.
9. Limitations on Using, Copying, and Modifying the Software
Except to the extent expressly permitted by this Agreeme nt or by the la ws
of the jurisdiction where you acquired the Software, you may not use,
copy or modify the Software. Nor may you sub-license any of your rights
under this Agreement. You may use the Software for your personal use
only, and not for public performance or for the creation of publicly
displayed videotapes.
10.Decompiling, Disassembling, or Reverse Engineering
You acknowledge that the Software contains trade secrets and other
proprietary information of Creative and its licensors. Except to the extent
expressly permitted by this Agreement or by the laws of the jurisdiction
where you are located, you may not decompile, disassemble or otherwise
reverse engineer the Software, or engage in any other activities to obtain
underlying information that is not visible to the user in connection with
normal use of the Software.
In particular, you agree not for any purpose to transmit the Software or
display the Software's object code on any computer screen or to make any
hardcopy memory dumps of the Software's object code. If you believe you
require information related to the interoperability of the Software with
other programs, you shall not decompile or disassemble the Software to
obtain such information, and you agree to request such information from
Creative at the address listed below. Upon receiving such a request,
Creative shall determine whether you require such information for a
legitimate purpose and, if so, Creative will provide such information to
you within a reasonable time and on reasonable conditions.
In any event, you will notify Creative of any information derived from
reverse engineering or such other activities, and the results thereof will
constitute the confidential information of Creative that may be used only
in connection with the Software.
11.For Software with CDDB features
This package includes applications which may contain software from
CDDB, Inc.of Berkeley California ("CDDB"). The software from CDDB
(the "CDDB Client") enables the application to do online disc
identification and obtain music-related information, including name,
artist, track and title information ("CDDB Data") from online servers
("CDDB Servers") and to perform other functions.
You agree that you will use CDDB Data, the CDDB Client and CDDB
Servers for your own personal non-commercial use only. You agree not to
assign, copy, transfer or transmit the CDDB Client or an y CDDB Data to
any third party. YOU AGREE NOT TO USE OR EXPLOIT CDDB
DATA, THE CDDB CLIENT,OR CDDB SERVERS, EXCEPT AS
EXPRESSLY PERMITTED HEREIN.
You agree that your non-exclusive license to use the CDDB Data, the
CDDB Client and CDDB Servers will terminate if you violate these
restrictions. If your license terminates, you agree to cease any and all use
of the CDDB Data, the CDDB Client and CDDB Servers. CDDB reserves
all rights in CDDB Data, the CDDB Client and the CDDB Servers,
including all ownership rights. Y ou agree that CDDB, Inc. may enforce its
rights under this Agreement against you directly in its own name.
The CDDB Client and each item of CDDB Data are licensed to you "ASIS." CDDB makes no representations or warranties, express or implied,
regarding the accuracy of any CDDB Data from in the CDDB Servers.
CDDB reserves the right to delete data from the CDDB Servers or to
change data categories for any cause that CDDB deems sufficient. No
warranty is made that the CDDB Client or CDDB Servers are error-free or
that functioning of CDDB Client or CDDB Servers will be uninterrupted.
CDDB is not obligated to provide you with any new enhanced or
additional data types or categories that CDDB may choose to provide in
the future.
CDDB DISCLAIMS ALL WARRANTIES EXPRESS OR IMPLIED,
INCLUDING, BUT NOT LIMITED TO, IMPLIED WARRANTIES OF
MERCHANTABILITY, FITNESS FOR A PARTICULAR PURPOSE,
TITLE AND NON-INFRINGEMENT. CDDB does not warrant the
results that will be obtained by your use of the CDDB Client or any CDDB
Server. IN NO CASE WILL CDDB BE LIABLE FOR ANY
CONSEQUENTIAL OR INCIDENTIAL DAMAGES, OR FOR ANY
LOST PROFITS, OR LOST REVENUES.
Page 3

TERMINATION
The license granted to you is effectiv e until terminated. You may terminate it
at any time by returning the Software (including any portions or copies
thereof) to Creative. The license will also terminate automatically without
any notice from Creative if you fail to comply with any t erm or condition of
this Agreement. You agree upon such termination to return the Software
(including any portions or copies thereof) to Creative. Upon termination,
Creative may also enforce any rights provided by law . The provisions of this
Agreement that protect the proprietary rights of Creative will continue in
force after termination.
LIMITED WARRANTY
Creative warrants, as the sole warranty, that the disks on which the Soft ware
is furnished will be free of defects, as set forth in the Warra nty Card or printed
manual included with the Software. No distributor, dealer or any other entity
or person is authorized to expand or alter this warranty or any other
provisions of this Agreement. Any representation, other than the warranties
set forth in this Agreement, will not bind Creative.
Creative does not warrant that the functions contained in the Software will
meet your requirements or that the operation of the Software will be
uninterrupted, error-free or free from malicious code. For purposes of this
paragraph, “malicious code” means any program code designed to
contaminate other computer programs or computer data, consume computer
resources, modify, destroy, record, or transmit data, or in some other f ashion
usurp the normal operation of the computer, computer system, or computer
network, including viruses, Trojan horses, droppers, worms, logic bombs,
and the like.
INDEMNIFICATION BY YOU
If you distribute the Software in violation of this Agreement, you hereby
indemnify, hold harmless and defend Creative from and against any and all
claims or lawsuits, including attorney's fees and costs that arise, result from
or are connected with the use or distribution of the Software in violation of
this Agreement.
EXCEPT AS STATED ABOVE IN THIS AGREEMENT, THE SOFTWARE
IS PROVIDED AS-IS WITHOUT W ARRANTY OF ANY KIND, EITHER
EXPRESS OR IMPLIED, INCLUDING, BUT NOT LIMITED TO, ANY
IMPLIED WARRANTIES OF MERCHANTABILITY OR FITNESS FOR
A PARTICULAR PURPOSE. CREATIVE IS NOT OBLIGATED TO
PROVIDE ANY UPDATES, UPGRADES OR TECHNICAL SUPPORT
FOR THE SOFTWARE.
Further, Creative shall not be liable for the accuracy of any information
provided by Creative or third party technical support personnel, or any
damages caused, either directly or indirectly, by acts taken or omissions made
by you as a result of such technical support.
You assume full responsibility for the selection of the Software to achieve
your intended results, and for the installation, use and results obtained from
the Software. You also assume the entire risk as it applies to the quality and
performance of the Software. Should the Software prove defective, you (and
not Creative, or its distributors or dealers) assume the entire cost of any and
all necessary servicing, repair or correction.
This warranty gives you specific legal rights, and you may also have other
rights which vary from country/state to country/state. Some countries/states
do not allow the exclusion of implied warranties, so the above exclusion may
not apply to you. Creative disclaims all warranties of any kind if the Software
was customized, repackaged or altered in any way by any third party other
than Creative.
LIMITATION OF REMEDIES AND DAMAGES
THE ONLY REMEDY FOR BREACH OF WARRANTY WILL BE THAT
SET FORTH IN THE WARRANTY CARD OR PRINTED MANUAL
INCLUDED WITH THE SOFTWARE. IN NO EVENT WILL CREATIVE
OR ITS LICENSORS BE LIABLE FOR ANY INDIRECT, INCIDENTAL,
SPECIAL OR CONSEQUENTIAL DAMAGES OR FOR ANY LOST
PROFITS, LOST SAVINGS, LOSS OF USE, LOST REVENUES OR LOST
DATA ARISING FROM OR RELATING TO THE SOFTWARE OR THIS
AGREEMENT, EVEN IF CREATIVE OR ITS LICENSORS HAVE BEEN
ADVISED OF THE POSSIBILITY OF SUCH DAMAGES. IN NO EVENT
WILL CREATIVE’S LIABILITY OR DAMAGES TO YOU OR ANY
OTHER PERSON EVER EXCEED THE AMOUNT PAID BY YOU TO
USE THE SOFTWARE, REGARDLESS OF THE FORM OF THE CLAIM.
Some countries/states do not allow the limitation or exclusion of liability for
incidental or consequential damages, so the above limitation or exclusion
may not apply to you.
PRODUCT RETURNS
If you must ship the softw are to Creative or an authorized Creative distributor
or dealer, you must prepay shipping and either insure the Software or assume
all risk of loss or damage in transit.
U.S. GOVERNMENT RESTRICTED RIGHTS
All Software and related documentation are provided with restricted rights.
Use, duplication or disclosure by the U.S. Government is subject to
restrictions as set forth in subdivision (b)(3)(ii) of the Rights in Technical
Data and Computer Software Clause at 252.227-7013. If you are sublicensing or using the Software outside of the United States, you will comply
with the applicable local laws of your country, U.S. export control law, and
the English version of this Agreement.
CONTRACTOR/MANUFACTURER
The Contractor/Manufacturer for the Software is:
GENERAL
This Agreement is binding on you as well as your employees, employers,
contractors and agents, and on any successors and assignees. Neither the
Software nor any information derived therefrom may be exported except in
accordance with the laws of the U.S. or other applicable provisions. This
Agreement is governed by the laws of the State of California (except to the
extent federal law governs copyrights and federally registered trademarks).
This Agreement is the entire agreement between us and you agree that
Creative Technology Ltd
31, International Business Park
Creative Resource
Singapore 609921
Creative will not hav e any liability for any untrue statem ent or representation
made by it, its agents or anyone else (whether innocently or negligently) upon
which you relied upon entering this Agreement, unless such untrue statement
or representation was made fraudulently. This Agreement supersedes any
other understandings or agreements, including, but not limited to,
advertising, with respect to the Software. If any provision of this Agreement
is deemed invalid or unenforceable by any country or government agency
having jurisdiction, that particular provision will be deemed modified to t he
extent necessary to make the provision valid and enforceable, and the
remaining provisions will remain in full force and effect.
For questions concerning this Agreement, please contact Creative at the
address stated above. For questions on product or technical matters, contact
the Creative technical support center nearest you.
ADDENDUM TO THE MICROSOFT SOFTWARE LICENSE
AGREEMENT
IMPORTANT: By using the Microsoft software files (the “Microsoft
Software”) provided with this Addendum, you are agreeing to be bound by
the following terms. If you do not agree to be bound by these terms, you may
not use the Microsoft Software.
The Microsoft Software is provided for the sole purpose of replacing the
corresponding files provided with a previously licensed copy of the
Microsoft software product (“ORIGINAL PRODUCT”). Upon installation,
the Microsoft Software files become part of the ORIGINAL PRODUCT and
are subject to the same warranty and license terms and conditions as the
ORIGINAL PRODUCT. If you do not have a valid license to use the
ORIGINAL PRODUCT , you may not use the Microsoft Software. Any other
use of the Microsoft Software is prohibited.
Nothing in this Agreement shall be construed on the part of Creative as
advocating or authorising the infringement of local and/or international laws
applicable to your jurisdiction.
SPECIAL PROVISIONS APPLICABLE TO THE EUROPEAN
UNION
IF YOU ACQUIRED THE SOFTWARE IN THE EUROPEAN UNION
(EU), THE FOLLOWING PROVISIONS ALSO APPLY TO YOU. IF
THERE IS ANY INCONSISTENCY BETWEEN THE TERMS OF THE
SOFTWARE LICENSE AGREEMENT SET OUT EARLIER AND IN THE
FOLLOWING PROVISIONS, THE FOLLOWING PROVISIONS SHALL
TAKE PRECEDENCE.
DECOMPILATION
You agree not for any purpose to transmit the Software or display the
Software’s object code on any computer screen or to make any hard copy
memory dumps of the Software’s object code. If you believe you require
information related to the interoperability of the Software with other
programs, you shall not decompile or disassemble the Software to obtain
such information, and you agree to request such information from Creative at
the address listed earlier. Upon receiving such a request, Creative shall
determine whether you require such information for a legitimate purpose and,
if so, Creative will provide such information to you within a reasonable time
and on reasonable conditions.
Page 4

LIMITED WARRANTY
EXCEPT AS STATED EARLIER IN THIS AGREEMENT, AND AS
PROVIDED UNDER THE HEADING “STATUTORY RIGHTS”, THE
SOFTWARE IS PROVIDED AS-IS WITHOUT WARRANTY OF ANY
KIND, EITHER EXPRESS OR IMPLIED, INCLUDING, BUT NOT
LIMITED TO, ANY IMPLIED WARRANTIES OR CONDITIONS OF
MERCHANTABILITY, QUALITY OR FITNESS FOR A PARTICULAR
PURPOSE.
LIMITATION OF REMEDY AND DAMAGES
THE LIMITATIONS OF REMEDIES AND DAMAGES IN THE
SOFTWARE LICENSE AGREEMENT SHALL NOT APPLY TO
PERSONAL INJURY (INCLUDING DEATH) TO ANY PERSON
CAUSED BY CREATIVE’S NEGLIGENCE AND ARE SUBJECT TO
THE PROVISION SET OUT UNDER THE HEADING “STATUTORY
RIGHTS”.
STATUTORY RIGHTS
Irish law provides that certain conditions and warranties may be implied in
contracts for the sale of goods and in contracts for the supply of services.
Such conditions and warranties are hereby excluded, to the extent such
exclusion, in the context of this transaction, is lawful under Irish law.
Conversely, such conditions and warranties, insofar as they may not be
lawfully excluded, shall apply.
Accordingly nothing in this Agreement shall prejudice any rights that you
may enjoy by virtue of Sections 12, 13, 14 or 15 of the Irish Sale of Goods
Act 1893 (as amended).
GENERAL
This Agreement is governed by the laws of the Republic of Ireland. The local
language version of this agreement shall apply to Software acquired in the
EU. This Agreement is the entire agreement between us, and you agree that
Creative will not have any liability for an y untrue statement or representation
made by it, its agents or anyone else (whether innocently or negligently) upon
which you relied upon entering this Agreement, unless such untrue statement
or representation was made fraudulently.
Safety & Regulatory Information
The following sections contain notices for various countries:
CAUTION: This device is intended to be connected by the user to a CSA/
TUV/UL certified/listed IBM AT or compatible personal computer in the
manufacturer’s defined operator access area. Check the equipment operating/
installation manual and/or with the equipment manufacturer to verify/
confirm if your equipment is suitable for devices.
ATTENTION: Ce périphérique est destiné à être connecté par l’utilisateur à
un ordinateur IBM AT certifié ou listé CSA/TUV/UL ou compatible, à
l’intérieur de la zone d'accès définie par le fabricant. Consulter le mode
d’emploi/guide d'installation et/ou le fabricant de l’appareil pour vérifier ou
confirmer qu'il est possible de connecter d'autres périphériques à votre
sytème.
Notice for the USA
FCC Part 15: This equipment has been tested and found to comply with the
limits for a Class B digital device, pursuant to Part 15 of the FCC Rules.
These limits are designed to provide reasonable protection against harmful
interference in a residential installation. This equipment generates, uses, and
can radiate radio frequency energy and, if not installed and used in
accordance with the instructions, may cause harmful interference to radio
communications. However, this notice is not a guarantee that interference
will not occur in a particular installation. If this equipment does cause
harmful interference to radio or television reception, which can be
determined by turning the equipment off and on, the user is encouraged to try
one or more of the following measures:
❑ Reorient or relocate the receiving antenna.
❑ Increase the distance between the equipment and receiver.
❑ Connect the equipment to an outlet on a circuit different from that to
which the receiver is connected.
❑ Consult the dealer or an experienced radio/TV technician.
CAUTION: To comply with the limits for the Class B digital device,
pursuant to Part 15 of the FCC Rules, this device must be installed in
computer equipment certified to comply with the Class B limits.
All cables used to connect the computer and peripherals must be shielded and
grounded. Operation with non-certified computers or non-shielded cables
may result in interference to radio or television reception.
Any changes or modifications not expressly approved by the manufacturer of
this device could void the user’s authority to operate the device.
Modifications
Notice for Canada
This apparatus complies with the Class “B” limits for radio interference as
specified in the Canadian Department of Communications Radio
Interference Regulations.
Cet appareil est conforme aux normes de CLASSE “B” d’interférence radio
tel que spécifié par le Ministère Canadien des Communications dans les
règlements d’interférence radio.
Compliance
This product conforms to the following Council Directive:
❑ Directive 89/336/EEC, 92/31/EEC (EMC), 73/23/EEC (LVD), as
amended by directive 93/68/EEC.
Copyright Information for users of Creative products
Certain Creative products are designed to assist you in reproducing material
for which you own the copyright or are authorized to copy by the copyright
owner or by exemption in applicable law. Unless you own the copyright or
have such authorization, you may be violating copyright law and may be
subject to payment of damages and other remedies. If you are uncertain about
your rights, you should contact your legal advisor.
It is your responsibility when using a Creative product to ensure there is no
infringement of applicable laws on copyright whereby the copying of certain
materials may require the prior consent of the copyright owners. Creative
disclaims any liability with regard to any illegal use of the Creative product
and Creative shall in no event be liable with regard to the origin of any data
stored in a compressed audio file.
You acknowledge and agree that the use of MP3 Codecs in real-time
broadcasting (terrestrial, satellite, cable or other media) or broadcasting via
Internet or other networks, such as but not limited to intranets etc., in payaudio or pay-on-demand applications, is not authorised and/or licensed
(http://www.iis.fhg.de/amm/).
Declaration of Conformity
According to the FCC96 208 and ET95-19,
Manufacturer/Importer’s Name: Creative Labs, Inc.
Manufacturer/Importer’s Address: 1901 McCarthy Boulevard,
Milipitas, CA. 95035,
United States
Tel: (408) 428-6600
declares under its sole responsibility that the product
Trade Name: Creative Labs
Model Numbers: DAP-HD0003
has been tested according to the FCC / CISPR22/85 requirement for Class
B devices and found compliant with the following standards:
EMI/EMC: ANSI C63.4 1992, FCC Part 15 Subpart B
This device complies with part 15 of the FCC Rules.
Operation is subject to the following two conditions:
1. This device may not cause harmful interference, and
2. This device must accept any interference received, including
Ce matériel est conforme à la section 15 des régles FCC.
Son Fonctionnement est soumis aux deux conditions suivantes:
1. Le matériel ne peut étre source D’interférences et
2. Doit accepter toutes les interférences reques, Y compris celles
Compliance Manager
Creative Labs, Inc.
January 18, 2002
Complies with Canadian ICES-003 Class B.
interference that may cause undesirable operation.
pouvant provoquer un fonctionnement indésirable.
Page 5

Contents
Introduction
Creative NOMAD Jukebox 3....................................................................................................................ii
Supplied Software .........................................................................................................................ii
Interactive T utorial........................................................................................................................iii
T erminology..................................................................................................................................iii
System Requirements................................................................................................................... iv
Using this document................................................................................................................................. i v
Handling the player .................................................................................................................................. vi
Handling the Battery................................................................................................................................vii
W ebsite Information...............................................................................................................................viii
More Help...................................................................................................................................viii
T echnical Support.......................................................................................................................viii
1 About NOMAD Jukebox 3
External views.........................................................................................................................................1-2
T op view......................................................................................................................................1-2
Side views...................................................................................................................................1-3
Back view....................................................................................................................................1-3
Bottom view................................................................................................................................1-4
Player Buttons.........................................................................................................................................1-5
NOMAD Jukebox 3 Connectors............................................................................................................1-7
Using the Scroller ..................................................................................................................................1-9
Selecting menu options..............................................................................................................1-9
Selecting list and confirmation box options............................................................................1-10
Player Accessories................................................................................................................................1-11
Page 6

2 Setting Up Your Player
Inserting the battery ...............................................................................................................................2-2
Powering your player .............................................................................................................................2-3
Charging the battery................................................................................................................................2-3
How to charge the battery..........................................................................................................2-3
Battery charge status...................................................................................................................2-4
Installing Software .................................................................................................................................2-5
Connecting your player .........................................................................................................................2-6
Interactive T utorial......................................................................................................................2-6
Turning the player on or off....................................................................................................................2-6
T o turn your player on................................................................................................................2-7
T o turn your player of f................................................................................................................2-7
Resetting the player.................................................................................................................................2-7
Locking and unlocking your NOMAD Jukebox 3................................................................................2-8
T o lock the player.......................................................................................................................2-8
T o unlock the player...................................................................................................................2-8
Changing the faceplate ...........................................................................................................................2-9
Checking Jukebox information............................................................................................................2-10
Configuring your player.......................................................................................................................2-10
Personalization ...................................... .... ... ... ...... .... ... ...... ... ... .... ...... ... ... ....... ... ... ...... ... ..........2-11
Power Settings..........................................................................................................................2-12
Language...................................................................................................................................2-12
T esting your player ..............................................................................................................................2-13
3 Using Your Player
Playing Audio ........................................................................................................................................3-3
Basic audio playback..................................................................................................................3-3
Managing Audio.....................................................................................................................................3-5
Using the Music Library............................................................................................................3-5
Using the Playing List..............................................................................................................3-11
Using Playlists..........................................................................................................................3-16
Enhancing Audio..................................................................................................................................3-17
Using Play Modes ....................................................................................................................3-17
Page 7

Using EAX................................................................................................................................3-22
Recording Audio...................................................................................................................................3-23
Wired Remote microphone recording.....................................................................................3-24
Analog line-in recording..........................................................................................................3-25
Digital/optical line-in recording...............................................................................................3-27
4 Using Applications
Using PlayCenter....................................................................................................................................4-3
Ripping tracks from an audio CD..............................................................................................4-4
Transferring tracks......................................................................................................................4-4
Editing audio file information....................................................................................................4-6
Creating and editing playlists with PlayCenter.........................................................................4-7
Using File Manager................................................................................................................................4-8
Transferring data files.................................................................................................................4-9
AGlossary
Useful terms to know.............................................................................................................................A-2
B Primers and Information
About MP3 ............................................................................................................................................B-2
Where to get MP3 files ............................................................................................................. B-3
About EAX ............................................................................................................................................B-3
About USB............................................................................................................................................. B-4
About IEEE1394....................................................................................................................................B-4
List of Scroller operations.....................................................................................................................B-5
Information Diagram.............................................................................................................................B-8
Playback Icons....................................................................................................................................... B-9
Playing List Icons ..................................................................................................................................B-9
Audio Enhancement Icons ..................................................................................................................B-10
Navigational Icons...............................................................................................................................B-11
Page 8

C Handling Instructions
Battery handling ...................................................................................................................................C-2
Player handling .....................................................................................................................................C-3
D Technical Specifications & Error Diagrams
T echnical Specifications for your NOMAD Jukebox 3.......................................................................D-2
UnderstandingError Diagrams..............................................................................................................D-4
E FAQs and Troubleshooting
Frequently Asked Questions (F AQs) .................................................................................................... E-2
F Technical Support
Knowledgebase.......................................................................................................................................F-2
W ebchat*.................................................................................................................................................F-2
eMail†......................................................................................................................................................F-2
Telephone*† ...................................... ....................................................... ..............................................F-3
Download Drivers# ................................................................................................................................F-3
Download Manuals ................................................................................................................................F-3
If You Have a Problem ...........................................................................................................................F-3
Returning a product for repair....................................................................................................F-4
Operating Hours......................................................................................................................................F-5
Limited W arranty....................................................................................................................................F-5
Creative European Contact Centre
Page 9
Introduction
Page 10

Introduction
Creative NOMAD Jukebox 3
Supplied Software
Creative
PlayCenter 3
Congratulations on making an excellent decision in purchasing the Creative NOMAD Jukebox 3!
Your new multi-format portable player is lightweight, just about 10 ounces or 289 grams, without
batteries. Even though it is no bigger than a normal CD player, you can store thousands of songs in the
player’s music library. You can create crystal clear MP3, WAV recordings using the Line-In or optical
connector, all without using a PC. Your player also comes equipped with an SB1394™
can transfer audio files and data quickly and easily. It also has two Line Out connectors, which are ideal
for connecting to external speakers, like a Creative Inspire 4.1 speaker system.
Unlike other hardware-based players, the NOMAD Jukebox 3 features an onboard real-time digital
signal processor (DSP) and a real-time effects processor for superior audio playback and customisation.
Your player also supports EAX so that you can enhance your audio with Advanced EQ presets,
headphone spatialisation, environments and effects. Your portable digital audio player supports multiple
audio file formats, including MP3, WMA and WAV.
The package comes with:
• Creative PlayCenter™ 3
• Creative File Manager
• Creative Audio Stream Recorder
• an interactive tutorial for your NOMAD Jukebox 3
• Adobe Acrobat Reader™
Creative Playcenter 3 is the only digital music player that you need for the ultimate, digital music
experience. You can use PlayCenter to create, organize and listen to digital music with EAX™.
PlayCenter has many new features that will help you get more out of your NOMAD Jukebox 3:
• unlimited MP3 and WMA encoding
• drag-and-drop functionality
• music library management
• flexible music library synchronisation with AudioSync™
connector, so you
Introduction ii
Page 11

Creative File
Manager
Creative File Manager is a dedicated data file manager for your player. You can use File Manager to
efficiently manage the transfer and storage of data files between your computer and player. With
Creative File Manager, your player doubles as a portable data storage device.
Creative Audio
Stream Recorder
Interactive Tutorial
Terminology
The Creative Audio Stream Recorder (ASR) is a software application that enables you to record
streaming audio content from the Internet, and then play it back on your computer or transfer it to your
player.
The ASR helps you to record Internet radio programs, sports events, company earning calls, hourly news
updates — most of the audio content you can find online. You can specify the URL of the streaming
content or select it from the ASR content directory. ASR can also be scheduled.
We have included a tutorial designed to guide you step by step around your new player. The tutorial is
useful for both new and experienced owners.
If you are not familiar with technology or terms used in this document, you can refer to the “Glossary”
on page A-2. Refer to this section to help increase your understanding of your player and the
technologies used in its creation.
Introduction iii
Page 12

System Requirements
The applications (software) on the installation CD may have higher requirements for basic functionality.
Refer to each application’s documentation for details.
• Microsoft
•Intel
• Sound Blaster Live!™, Sound Blaster Audigy™ or Sound Blaster Extigy™ for EAX enhanced MP3
encoding
• CD-ROM drive with digital audio extraction support
• USB, 1394 or SB1394 (found on Sound Blaster Audigy series of audio cards) port
• 64 Megabytes RAM (128 Megabytes recommended)
• 30 Megabytes free hard disk space (more needed for storing audio)
• Internet connection for Internet content downloading and CDDB2 support (any charges incurred are
the responsibility of the user)
• Installed mouse
• SVGA graphics adapter (256 colours, 800 x 600 resolution or better)
®
Windows® 98, Windows 98 SE, Windows 2000, Windows ME or Windows XP
®
Pentium® II 266 MHz, AMD® K6-2 200 MHz or better processor
Using this document
Capital letters are used to refer to buttons on the player or on an application, for example, “Press the
MENU button to get to the Jukebox Settings screen.”
Introduction iv
Page 13
We also use icons to highlight useful or urgent information for you:
Tip. This tells you about shortcuts or hints relating to a feature.
❍
Note. This highlights additional or important information about a feature.
❍
Caution! This highlights proper usage of your player. Use this information to
❍
avoid situations involving risk.
Warning! This warns you of possible hazards to yourself or your player, which
❍
may result in injury or damage.
Introduction v
Page 14
Handling the player
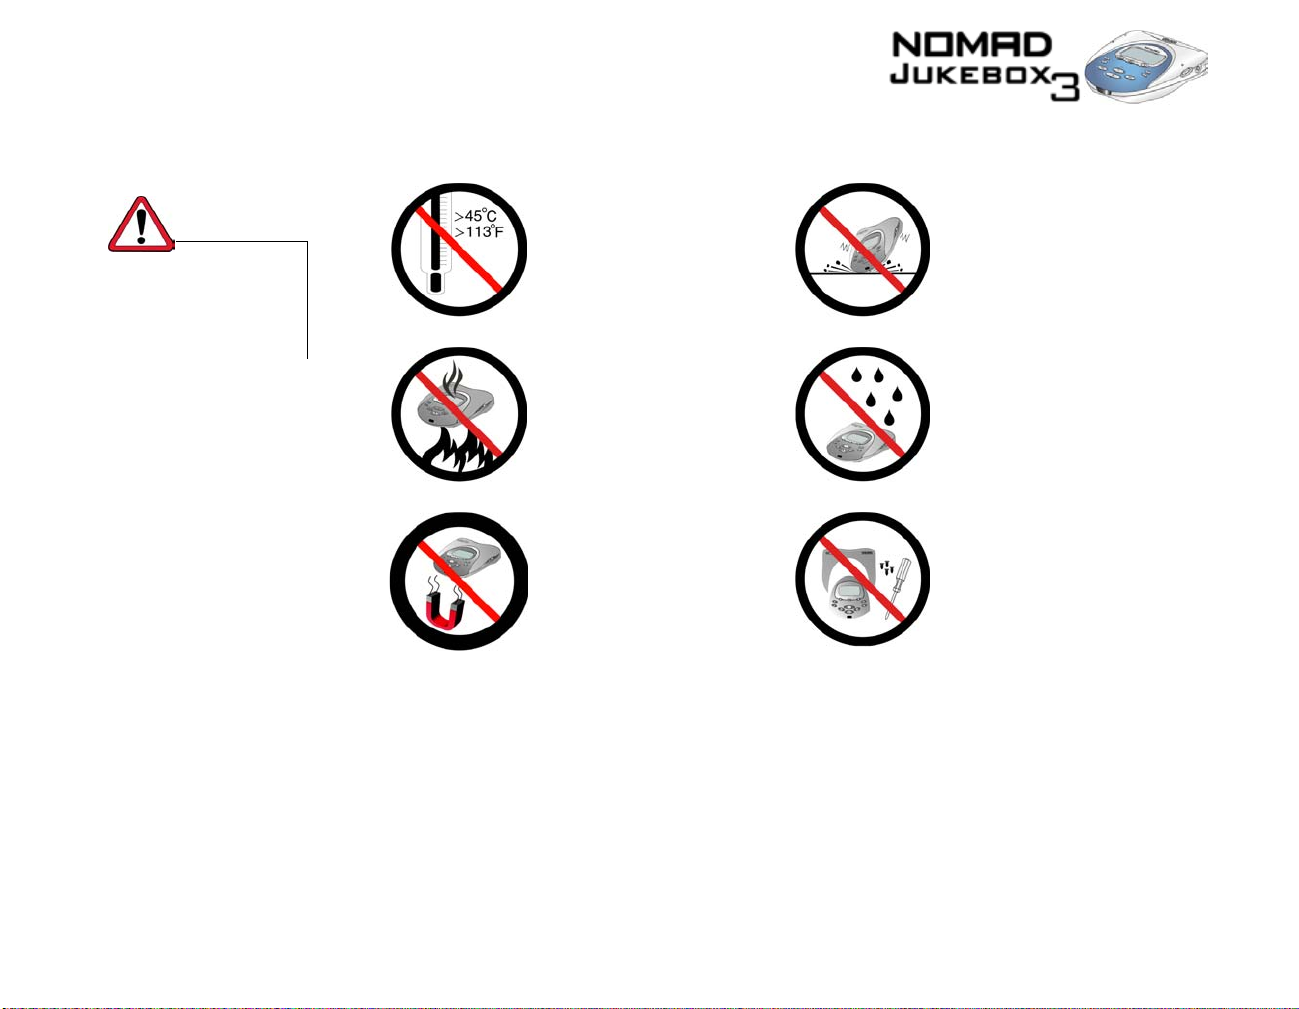
While your player is quite robust, you should observe a few handling procedures to prolong its life.
This section contains
cautionary information
that you should take note
of.
Do not store or use
❍
in areas exceeding
45ºC or 113ºF.
Do not expose to
❍
heat or incinerate.
Keep away from
❍
strong magnetic
fields.
To get more detailed information, see “Player handling” on page C-3.
Do not subject to
❍
excessive force or
impact.
Keep away from
❍
excessive moisture.
Do not dismantle.
❍
Introduction vi
Page 15

Handling the Battery
Never modify or
disassemble the battery. If
there is leakage, stench,
discoloration or
deformation during
charging or use, remove
the battery and do not use
it again. Clean your hands
well before handling food
or touching sensitive areas
of your body, for example,
your eyes.
When charging or handling your player’s battery, take note of these precautions:
Do not expose to
❍
❍
heat or fire.
Do not pierce or
❍
❍
crush.
Avoid contact with
❍
❍
moisture.
To get more detailed information, see “Battery handling” on page C-2.
A void contact with
metal objects like
keys or necklaces.
Store away from
direct sunlight.
Do not store or use
in areas exceeding
45ºC or 113ºF.
Introduction vii
Page 16

Website Information
Visit www.NOMADworld.co m regularl y for updates and information on:
• firmware upgrades
• NOMAD accessories
• tips and tricks
•FAQs
• troubleshooting
• documentation updates
• software upgrades or purchases
More Help
Technical Support
View the contents of the NOMAD Jukebox 3 Installation CD for additional demonstrations, libraries and
other software. Visit the www.europe.creative.com site for the latest Sound Blaster news and products.
The site also includes information on making purchases, technical help, and updates.
Visit www.europe.creative.com/support/kb for general help.
Introduction viii
Page 17
1
About NOMAD Jukebox 3
Page 18
About NOMAD Jukebox 3
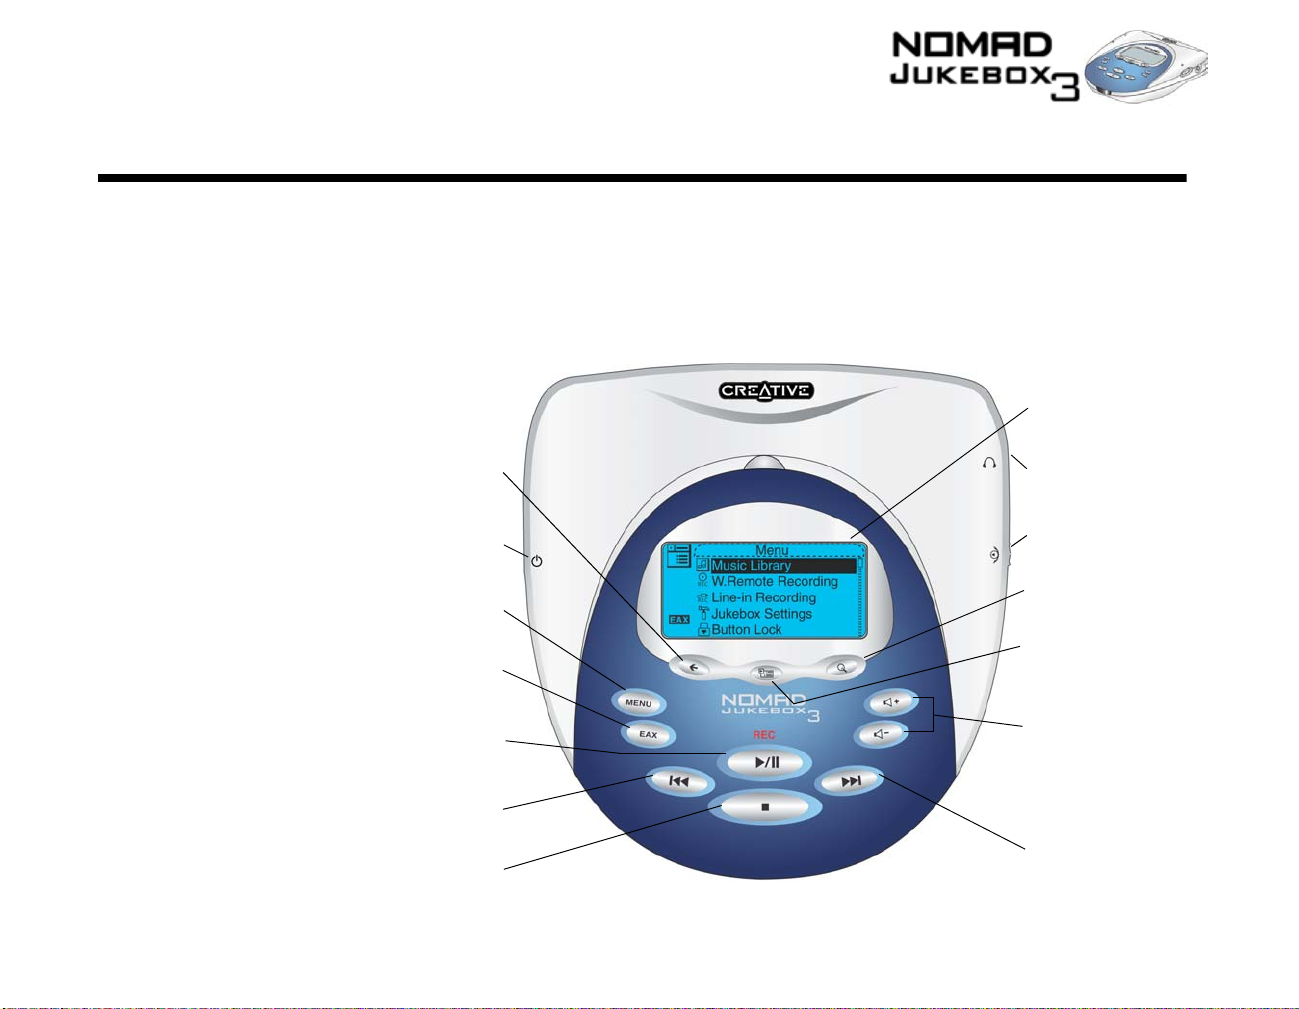
In this chapter, you can read about your player’s exterior features and accessories. We will show and
explain your player’s buttons, controls and exterior connectors.
External views
Top view
Screen
Back
button
Power On/Off
button
Menu
button
EAX
button
Play/Pause/
Record
button
Reverse
button
Stop
button
Figure 1-1: Top view of your NOMAD Jukebox 3
Headphones
connector
Scroller
Findbutton
Now Playing
button
Volume Up/
Down
buttons
Forward
button
About NOMAD Jukebox 3 1-2
Page 19
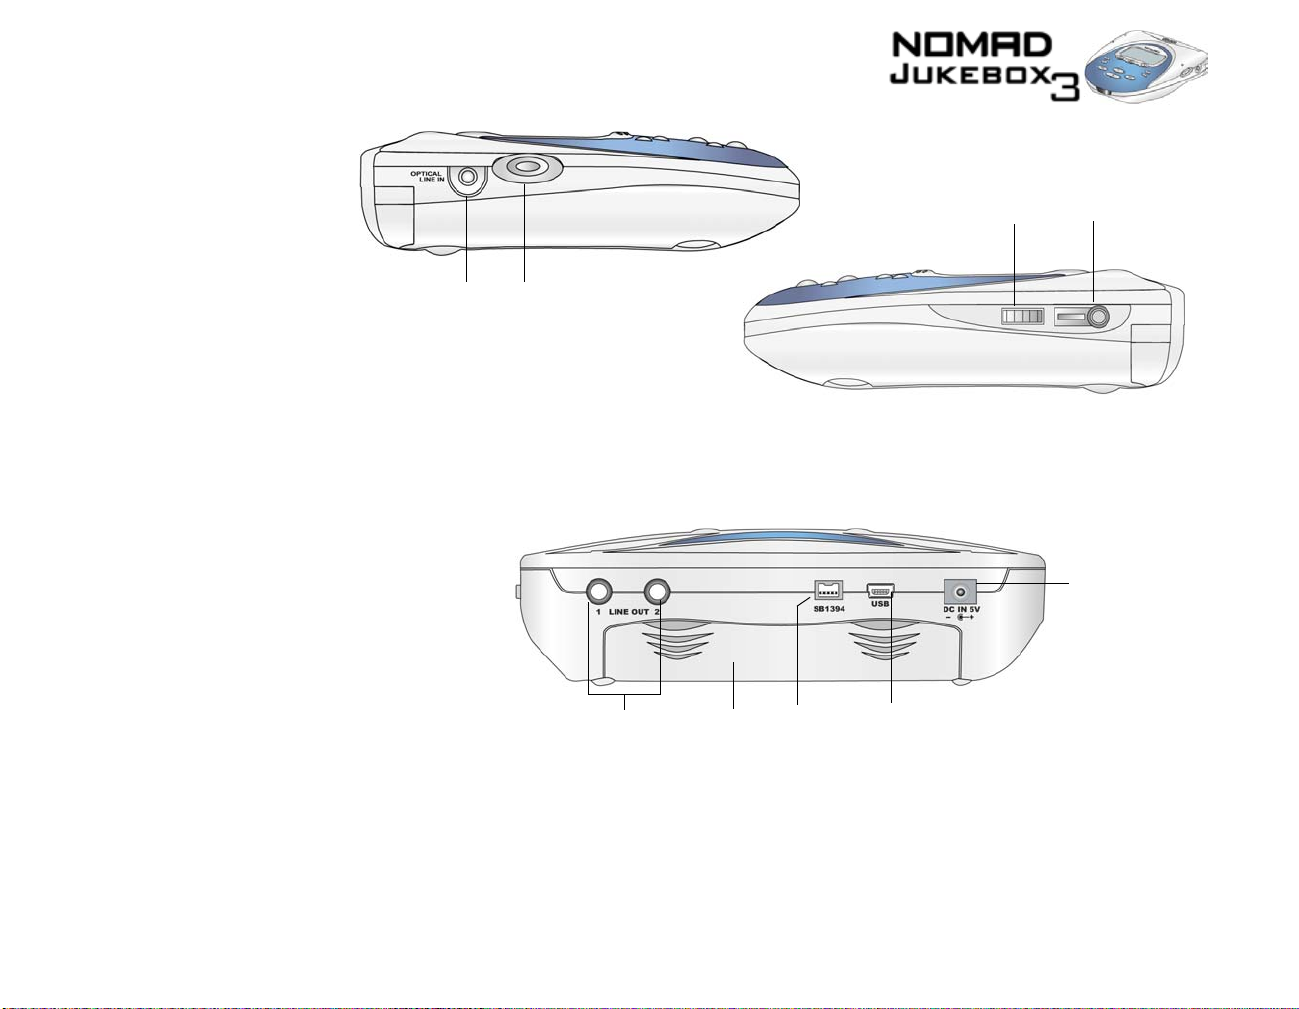
Side views
Back view
Optical/
Line In
connector
Power On/Off
button
Figure 1-2: Side views of your NOMAD Jukebox 3
Line Out connectors
1 and 2
Battery
compartment
SB1394
connector
USB
connector
Scroller
Headphones
connector
DC Adapter
connector
Figure 1-3: Back view of your NOMAD Jukebox 3
About NOMAD Jukebox 3 1-3
Page 20
Bottom view
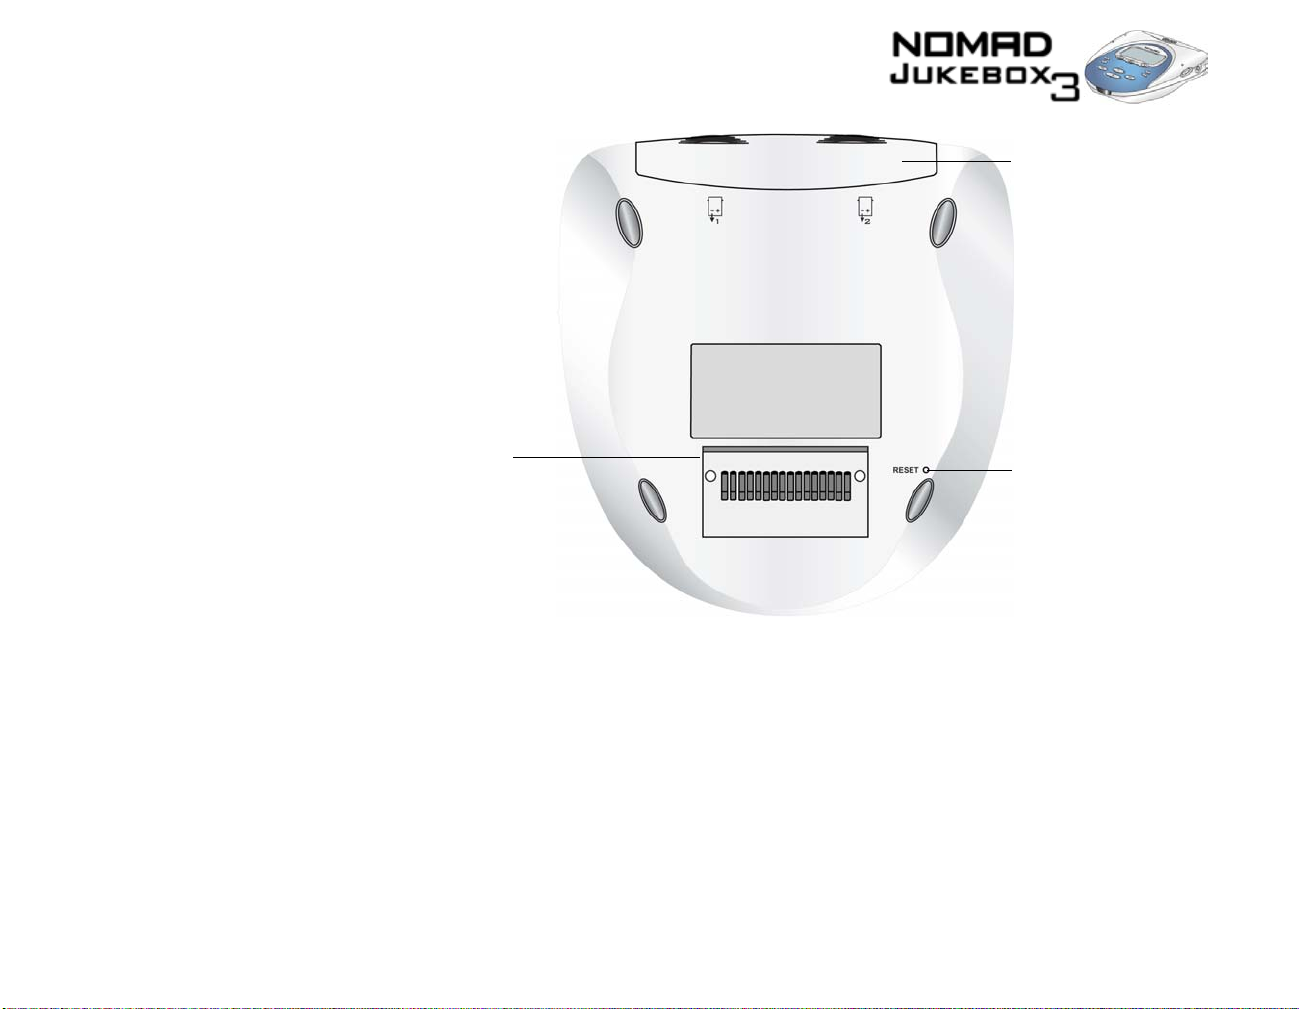
Battery
compartment
CreativeLink
Reset hole
Figure 1-4: Bottom view of your NOMAD Jukebox 3
About NOMAD Jukebox 3 1-4
Page 21
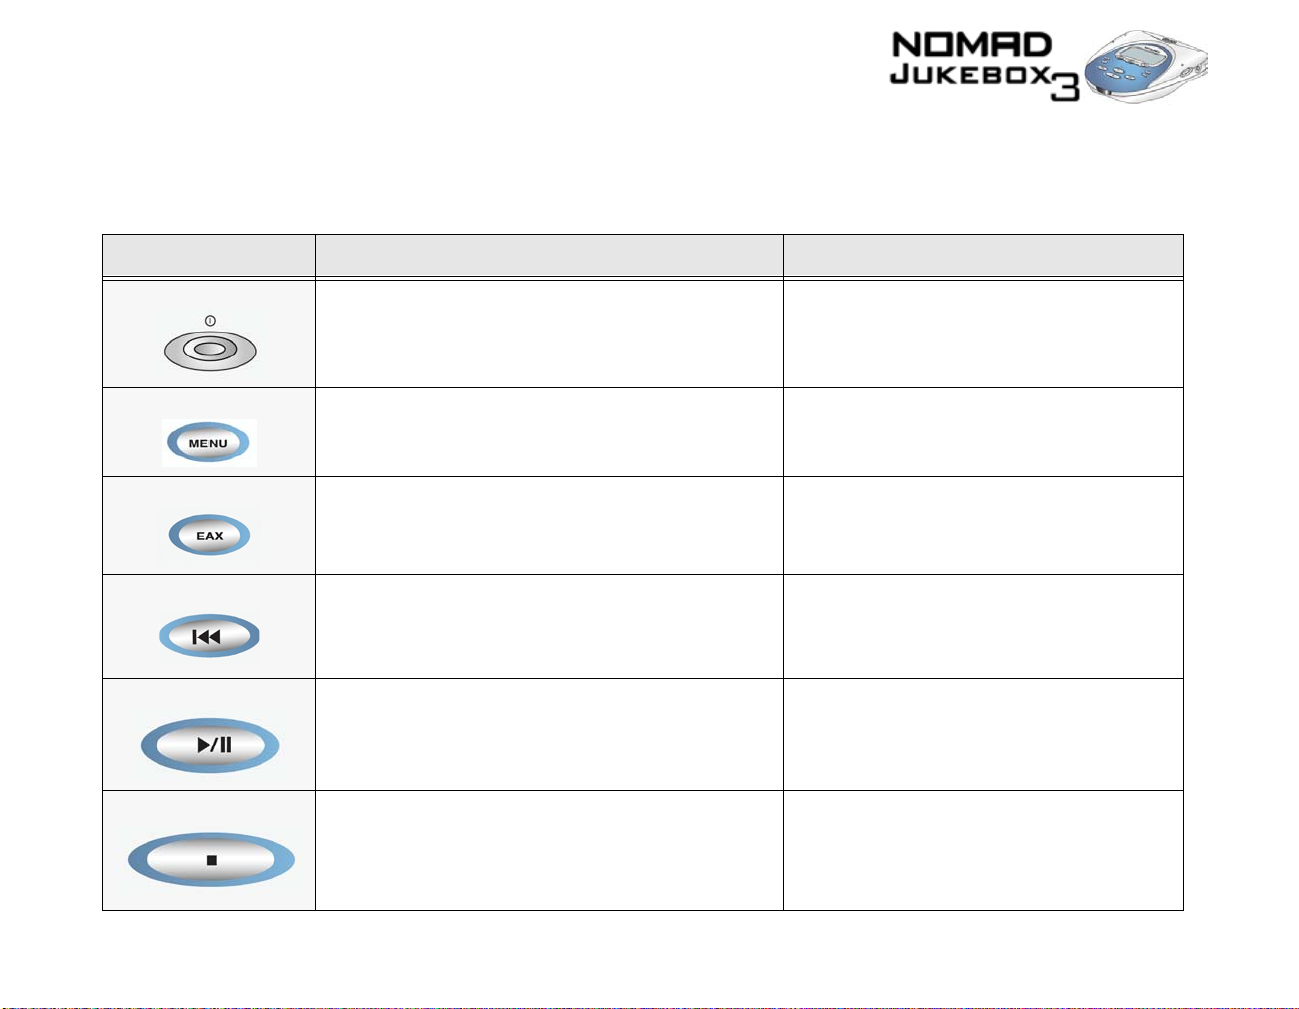
Player Buttons
Button Function Notes
P
OWER
M
ENU
EAX
The buttons on your NOMAD Jukebox 3 help you access many of your player’s features. The table
below describes each button and its function.
❍ turns the player on and off
❍ activates LCD backlig ht
’s features
❍ accesses most of your
❍ accesses EAX features ❍ use this button to enable or disable EAX
player
❍ press and hold until player turns on or off
❍ press to turn LCD backlight on
R
EVERSE
P
LAY/PAUSE/RECORD
S
TOP
❍ skips to the beginning of the current track, or to the
previous track
❍ skips to previous portions of a track when you press and
hold the button
❍ starts, pauses or continues playback/recording
❍ halts playback
❍ halts recording
❍ to skip to earlier tracks, press the Now Playing
button to get to the Playing List screen. Use the
Scroller and select the track to skip to.
❍ use your player’s Optical/Line-In connector or
the optional Wired Remote to record
❍ to queue a track for playback, press and hold
this button in the Music Library screens
About NOMAD Jukebox 3 1-5
Page 22
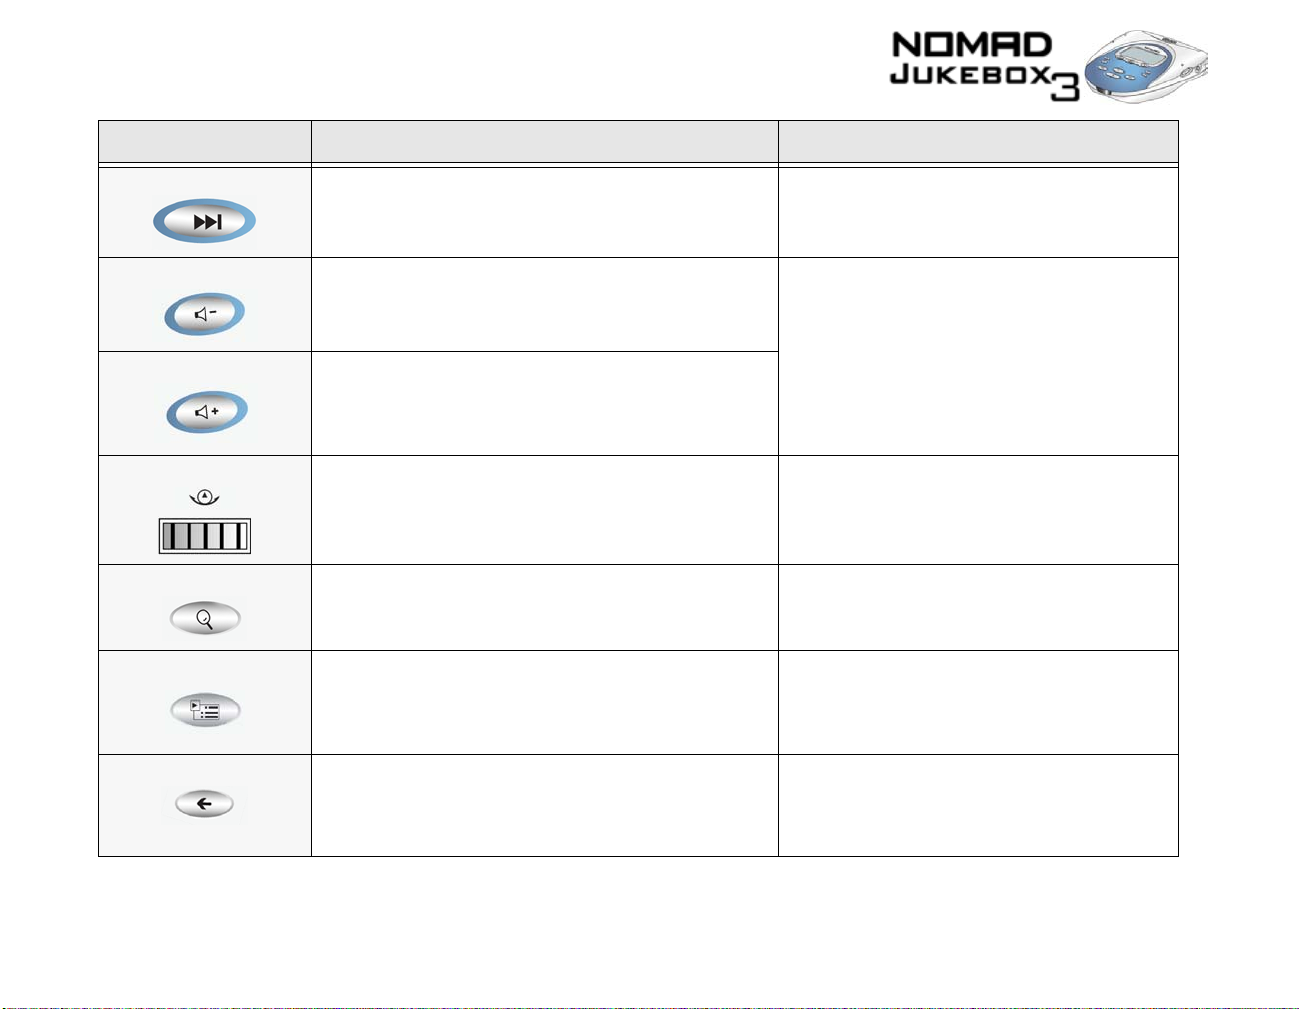
Button Function Notes
F
ORWARD
❍ skips to the next track
❍ skips forward to portions of a track when you press and
hold the button
❍ to skip ahead to a track, press the No w Playing
button to get to the Playing List screen. Use the
Scroller and select the track to skip to.
VOL -
VOL +
S
CROLLER
F
NOW P
B
IND
LAYING
ACK
❍ decreases the volume. Press and hold to decrease the
volume quickly.
❍ adjusts the volume level
❍ to adjust playback volume on speakers
connected to Line Out 1 or 2, use the speakers’
❍ increases the volume. Press and hold to increase the
volume control
volume quickly
❍ scrolls up and down menus
❍ selects menu options
❍ finds albums, tracks, playlists and genres
❍ toggles between Playing Track and Playing List screens
❍ turn the Scroller to scroll through menu options
and press the Scroller to select them. This
action is also referred to as “Scroll Select”.
❍ the Find operation starts after you enter the first
letter, for example “D” of “DJ playlist”
❍ the Playing Track screen shows details about
the track being played.
❍ the Playing List screen shows the contents of
the Playing List.
❍ stops current operation and returns to the previous screen
❍ from the current screen, you can only go back
up to 10 screens
About NOMAD Jukebox 3 1-6
Page 23
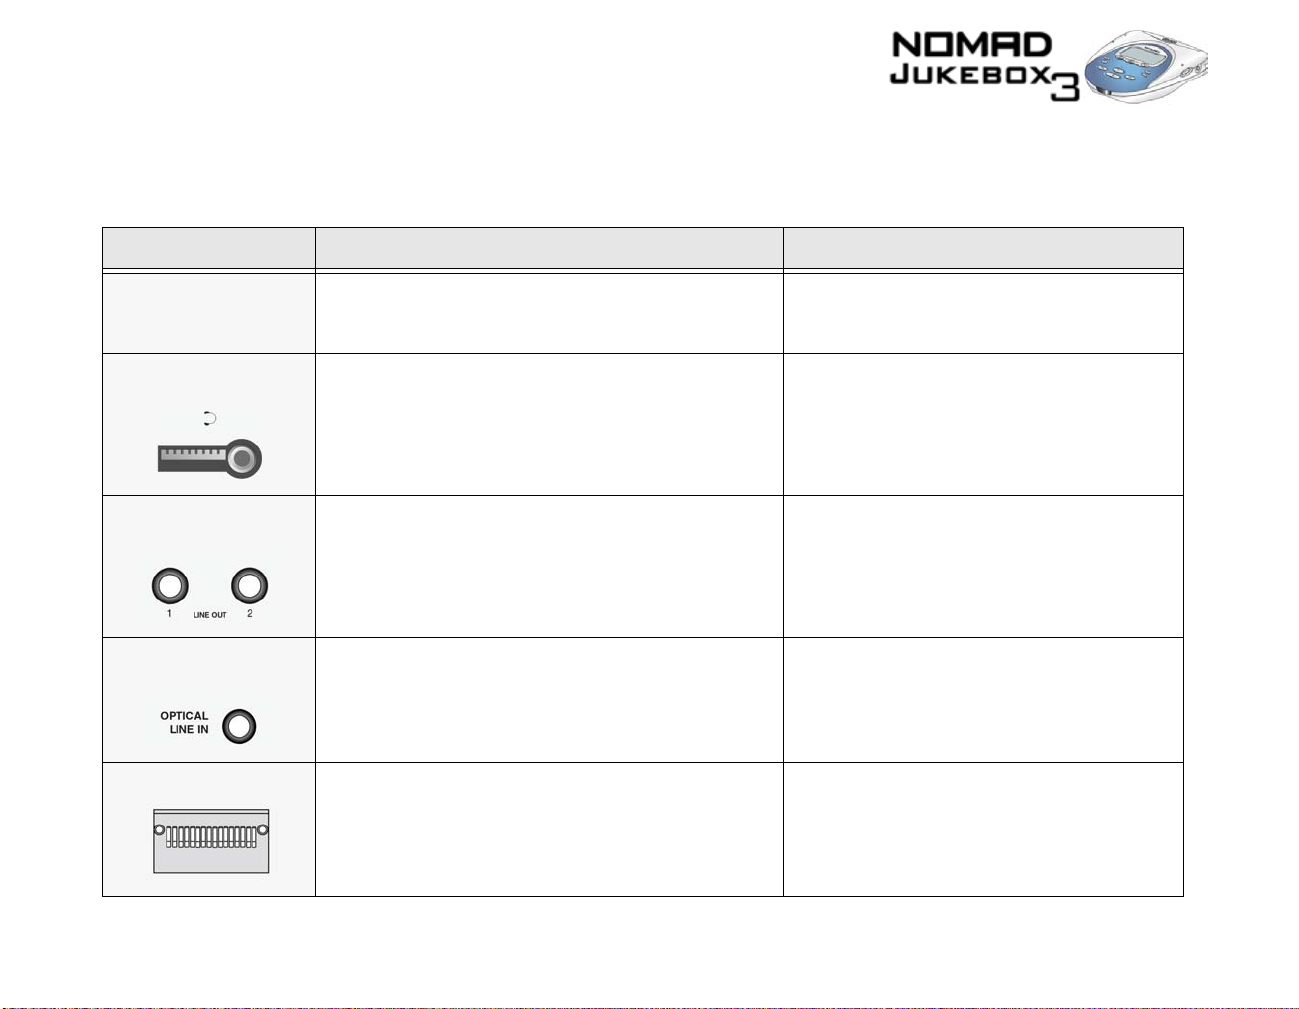
NOMAD Jukebox 3 Connectors
Part Function Notes
Your NOMAD Jukebox 3 has external connectors that can connect the player to other devices. The table
below explains what those connectors are.
B
COMPARTMENT
H
EADPHONES
CONNECTOR
L
INE OUT CONNECTORS
O
PTICAL/LINE IN
CONNECTOR
C
REATIVELINK
ATTERY
1 & 2
❍ use another battery to extend the playback time
❍ holds the player’s battery
❍ connects to your headphones ❍ use the Wired Remote, if you have one
❍ connects to a two or four speaker system, for enhanced
audio effects
❍ Line-In recording from a digital or analog source
❍ connects your player to a docking device
❍ use only the same type of battery as the one
supplied
❍ Line Out 1 is for front speakers
❍ Line Out 2 is for rear speakers
❍ use an analog cable for an analog source
❍ use a digital cable for a digital source. The
player automatically detects the type of
connector used.
About NOMAD Jukebox 3 1-7
Page 24
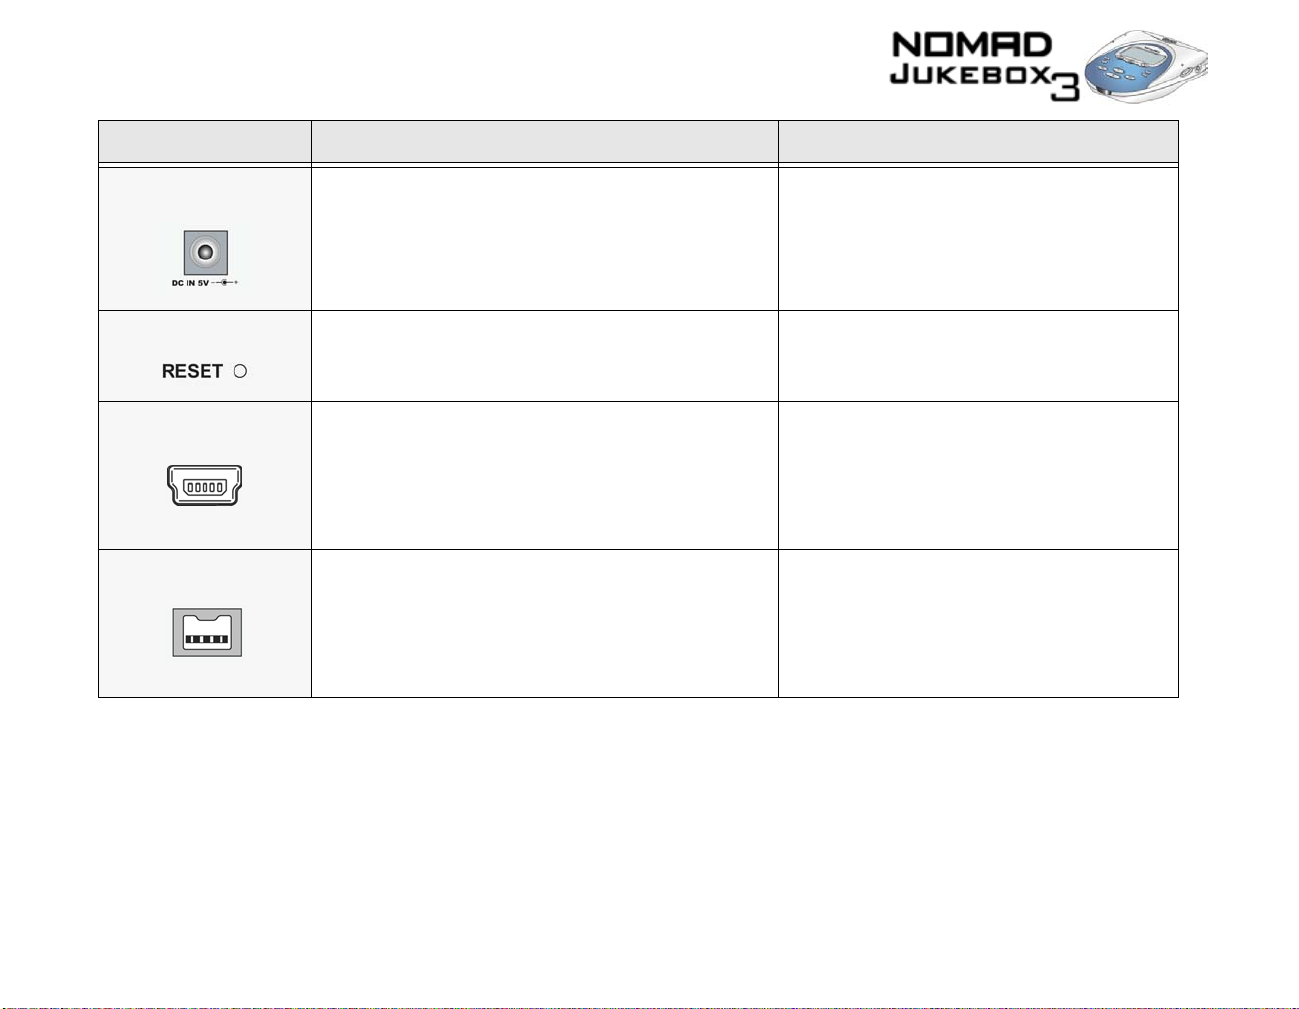
Part Function Notes
DC ADAPTER
CONNECTOR
❍ connects to your player’s DC Adapter ❍ use only the supplied DC Adapter.
R
ESET HOLE
USB
SB1394
CONNECTOR
CONNECTOR
❍ resets your player if it stops responding
❍ connects your player to your computer
❍ connects your player to your computer . Connect it to the
Sound Blaster Audigy audio card’s SB1394 jack or an
IEEE 1394 connector, if you have one.
❍ insert the end of a thin object, like a
straightened paperclip into the hole
❍ connect a USB cable from your player to your
computer to transfer data/audio or to upgrade
your player’s f ir mware
❍ when your player is connected to your
computer, use PlayCenter to control your
player
❍ connect an SB1394 or IEEE 1394 cable from
your player to your computer to transfer data/
audio or to upgrade your player’s firmware
❍ when your player is connected to your
computer, use PlayCenter to control your
player
About NOMAD Jukebox 3 1-8
Page 25
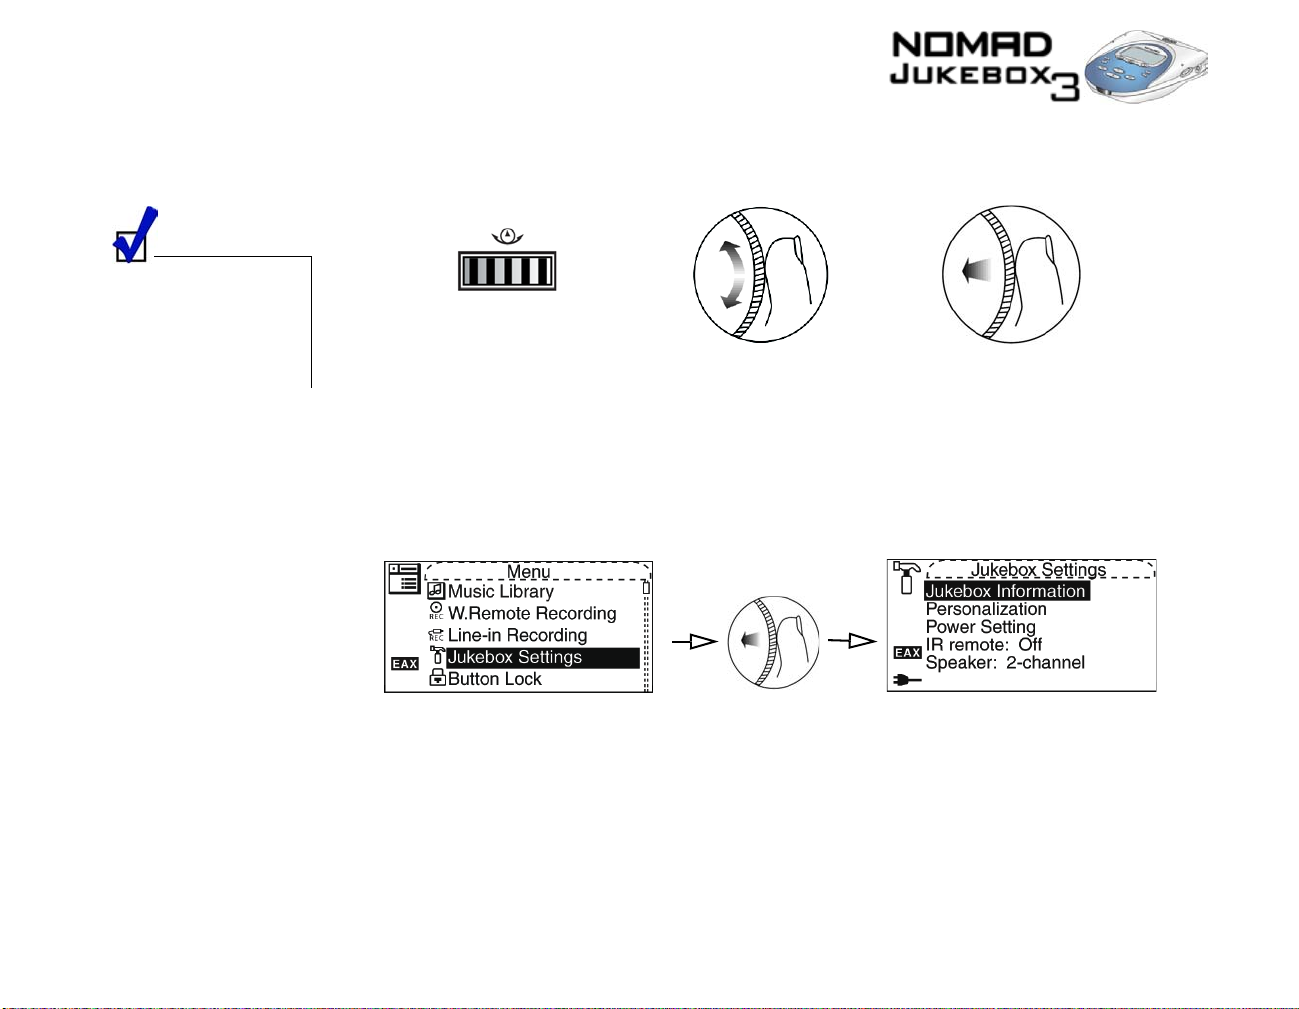
Using the Scroller
To “Scroll Select”, use the
Scroller to scroll to the
option you want, and
select the option by
pressing the Scroller.
The Scroller is one of the most important features of your NOMAD Jukebox 3. In this document, we
will use a new term, “Scroll Select”, to indicate that you should use the Scroller to scroll through options
and then select the option by pressing the Scroller.
the Scroller (side view)
Depending on the screen you are in, you can have different menu options. You can also choose options
from a list or a confirmation box.
Use the Scroller to scroll through
options
Press the Scroller to select an
option
Selecting menu options
You can use the Scroller to make selections in menus. For example, if you are looking at the Menu
screen:
Figure 1-5: From the Menu screen to the Jukebox Settings screen
1. Use the Scroller to scroll up and down in the menu.
2. Press the Scroller to select the menu item.
About NOMAD Jukebox 3 1-9
Page 26
Selecting list and confirmation box options
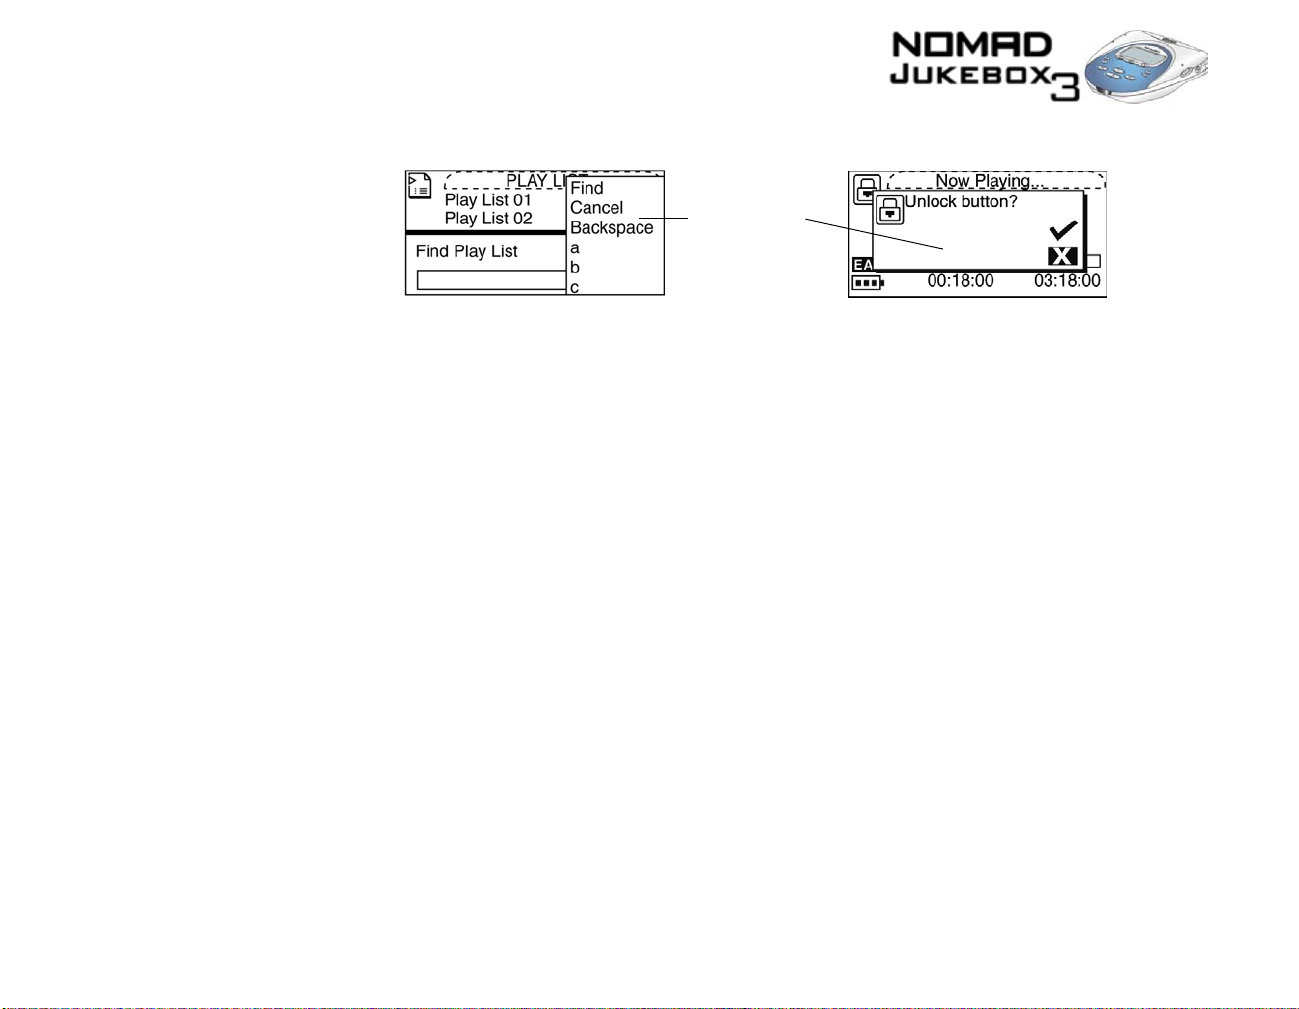
You can also use the Scroller to select options in lists and confirmation boxes.
Scroller options
Figure 1-6: Constructing a title from a list
1. Move the Scroller to scroll through the options.
2. Press the Scroller to select the option.
Figure 1-7: Unlocking the player
About NOMAD Jukebox 3 1-10
Page 27
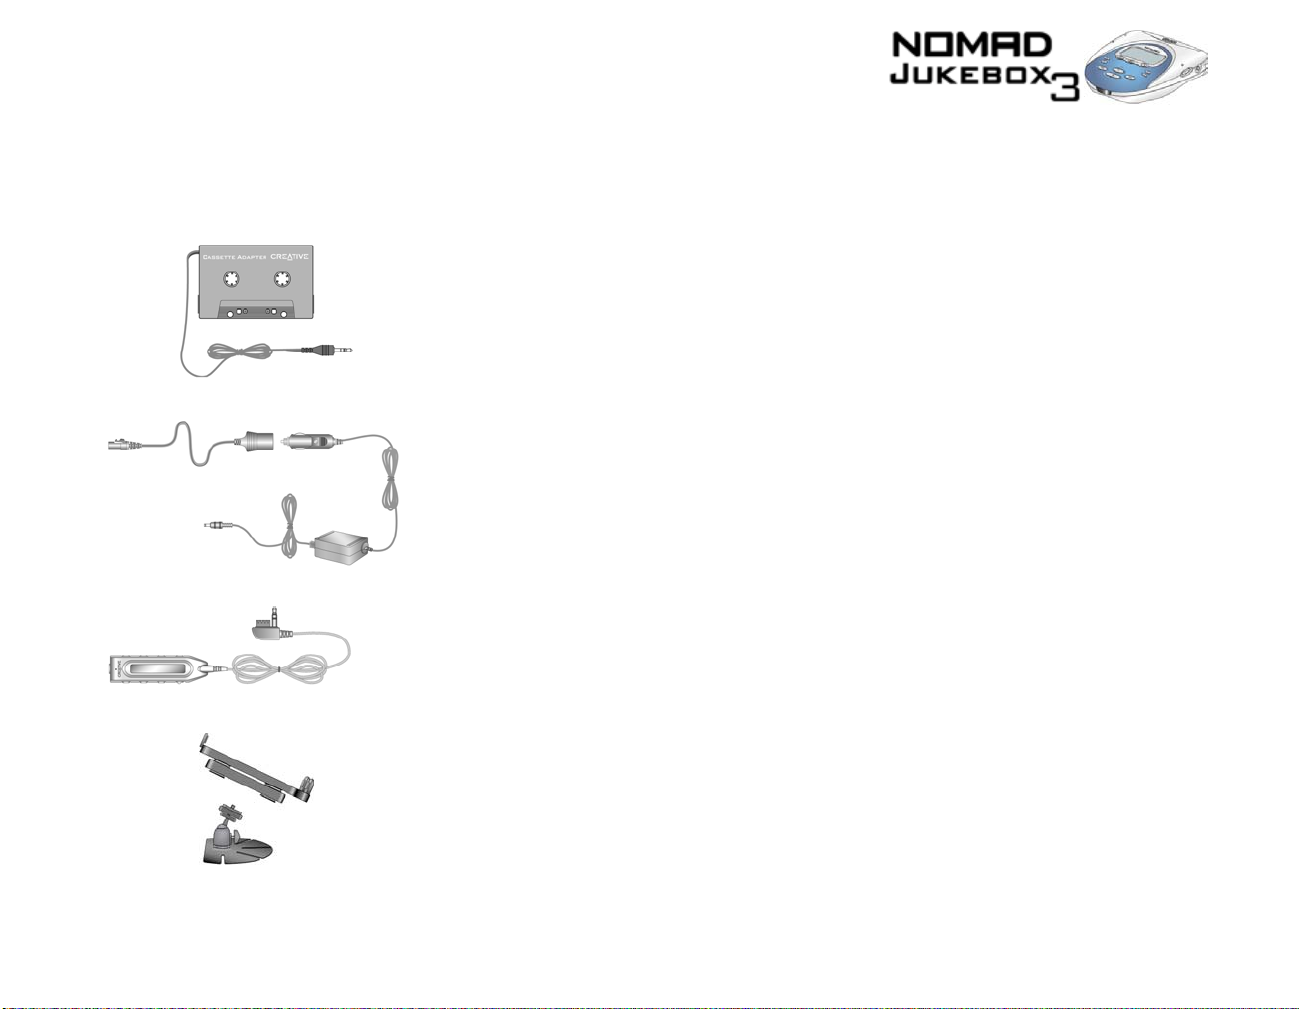
Player Accessories
Cassette
adapter
You have many devices to use with your NOMAD Jukebox 3 to enhance your audio experience. These
accessories are available separately, and can be purchased online from NOMADworld. Some of these
accessories may not be available in all regions.
❍ Connects your player to a car cassette player .
Plane Kit
Car Power
Adaptor
LCD Wired
Remote
Car
Mounting Kit
❍ Powers your player when in a car or on an airplane.
❍ In a car, connect the Car Power Adapter to your car’s cigarette lighter.
❍ On an airplane, connect the Plane kit and Car Power Adapter to the AC/DC connector on your
seat.
❍ Allows you to access your player’s controls without taking your player out of your bag or carrier.
❍ Allows you to make voice, music or ambient sound recordings through the microphone.
❍ Stabilises your player when in your car.
About NOMAD Jukebox 3 1-11
Page 28
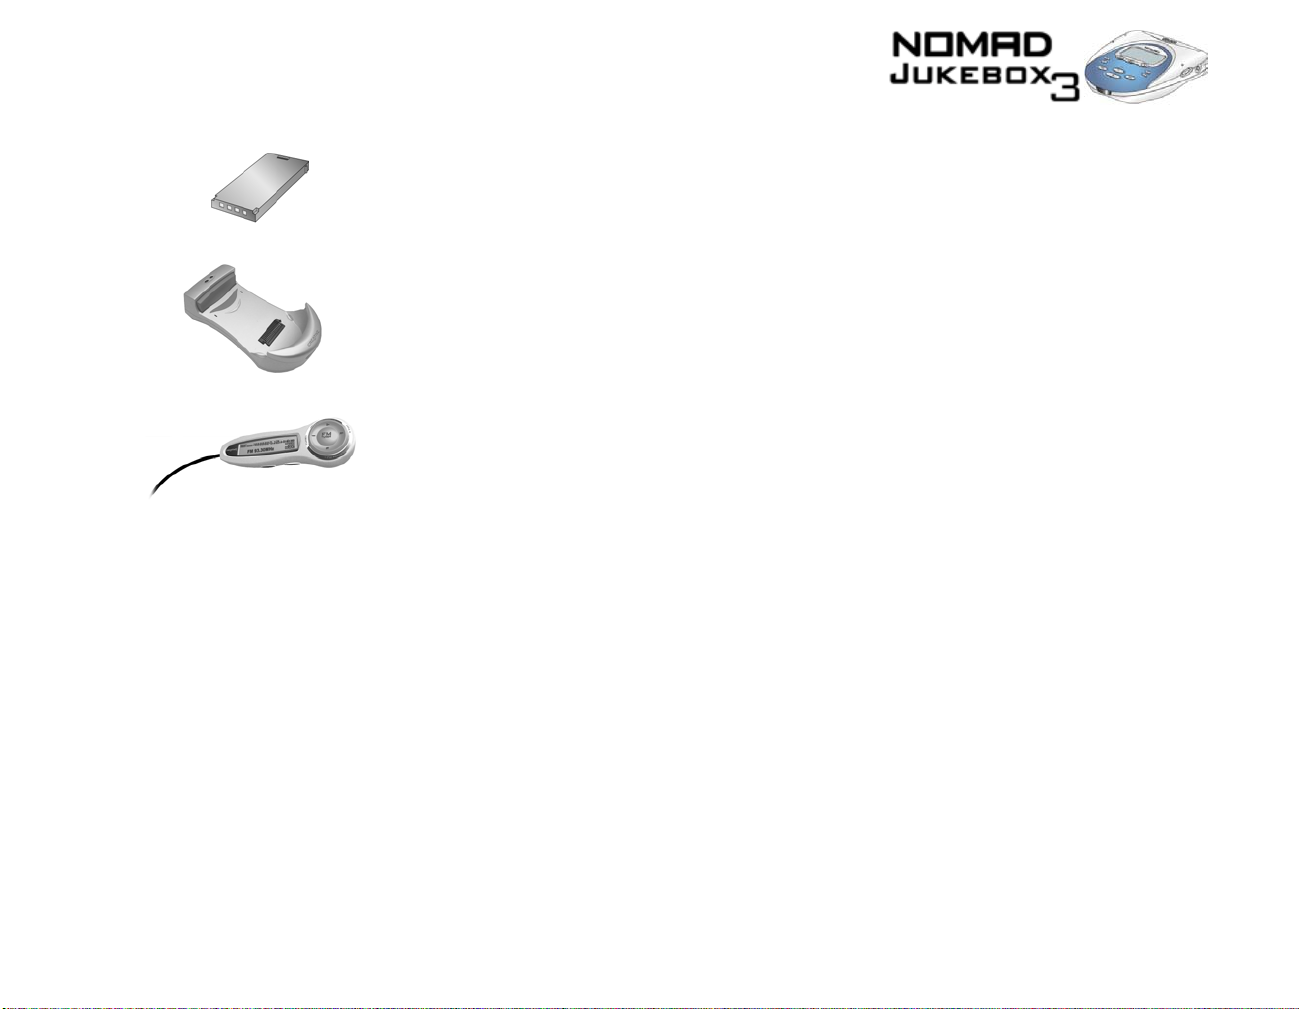
Extra battery
PC Dock
❍ Doubles playback time.
❍ A docking station for conv eniently connecting your player to the PC, speakers and po wer supplies,
without having to constantly connect the various cables o your player.
FM Wired
Remote
❍ Gives you the same functions as the Wired Remote, except that it also allows you to tune-in to
local FM radio broadcasts.
About NOMAD Jukebox 3 1-12
Page 29
2
Setting Up Your Player
Page 30
Setting up your player
This chapter will guide you on setting up your player, after which you should be able to start playing
back audio on your player.
Inserting the battery
Although your player
comes with one battery,
you can purchase a second
battery to enjoy double the
playing time.
1
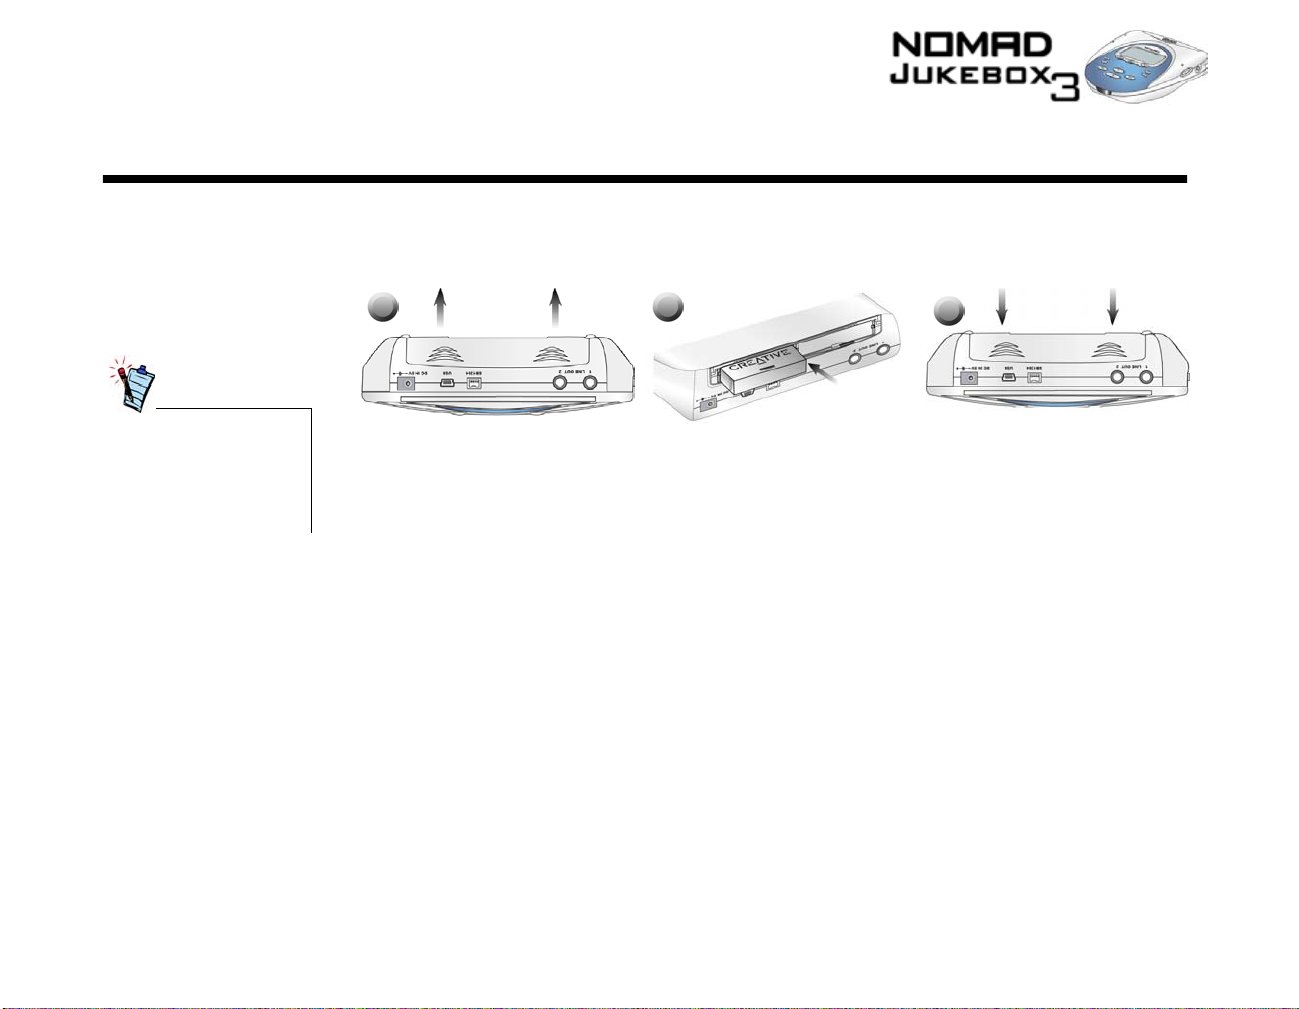
Figure 2-1: Inserting the battery in your NOMAD Jukebox 3
The diagram above shows you how to insert one battery. You can acquire and optional second Creative
battery from http://www.europe.creative.com
1. Open the battery compartment in the direction of the arrows.
2. Insert the battery or batteries as shown.
3. Close the battery compartment.
2
3
Setting up your player 2-2
Page 31
Powering your player
Remember to use only the
accessories packaged for
you. Substitute accessories
may damage your player,
or worse yet, hurt you.
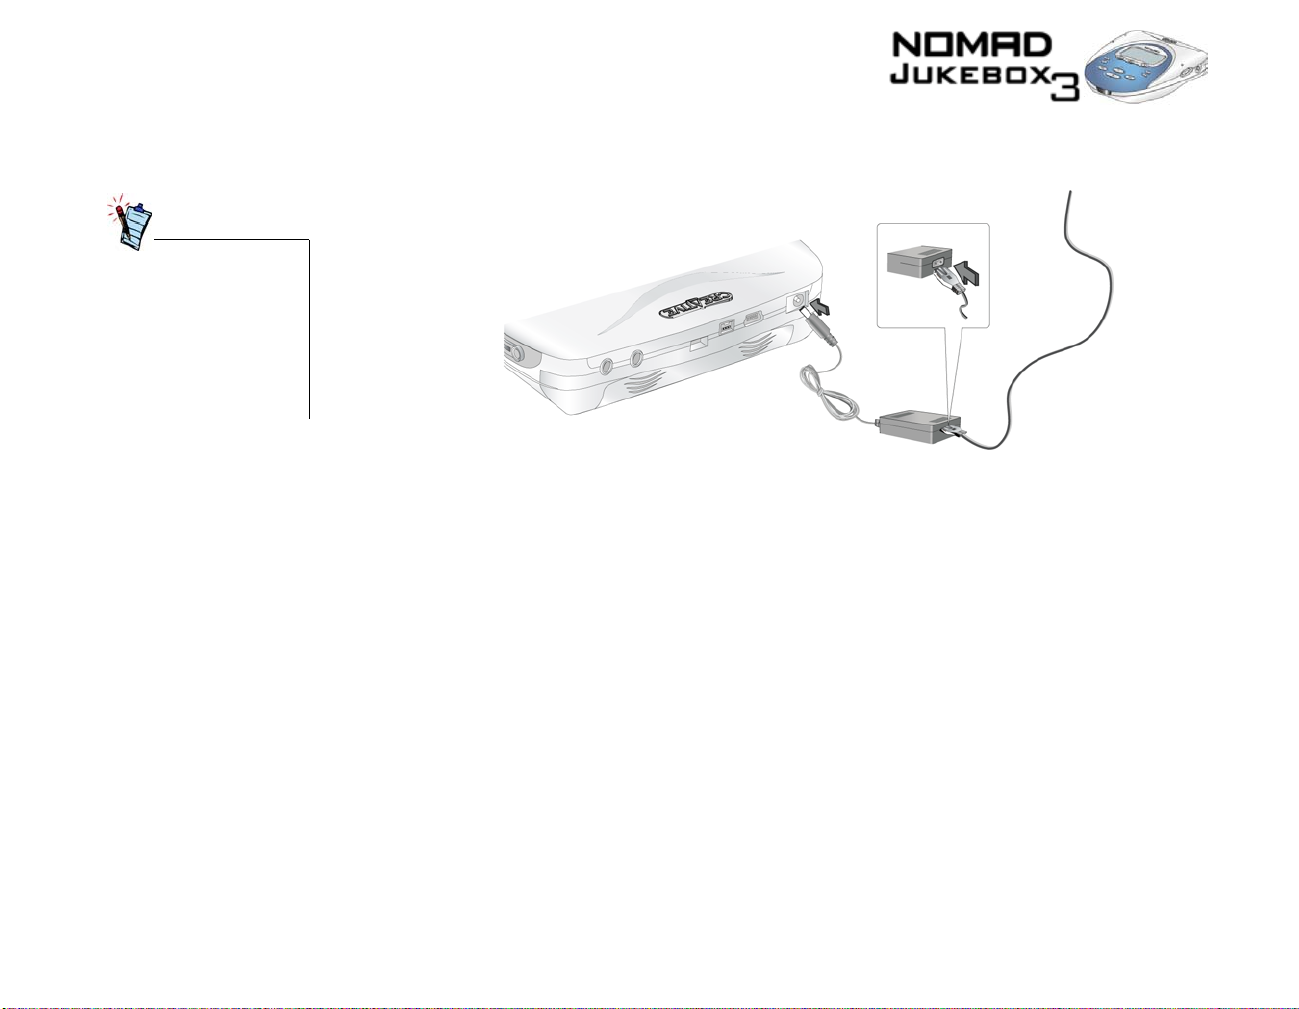
1. Connect the DC Adapter as shown in the diagram.
2. Turn on the power from the power source.
Figure 2-2: Powering your NOMAD Jukebox 3
Charging the battery
How to charge the battery
The high performance lithium battery supplied with your player needs to be fully charged before you use
it. Your player’s built-in battery charger should charge the battery in 4 hours to obtain the maximum
playback time. If you are using two batteries, both batteries should be fully charged in 8 hours.
To charge your player’s battery, you should:
1. Insert the uncharged battery as shown in “Inserting the battery” on page 2-2.
2. Connect your player to an AC power outlet as shown in “Powering your player” on page 2-3.
Your player will turn itself on.
Check the battery icon to see when the battery is fully charged.
Setting up your player 2-3
Page 32
Battery charge status
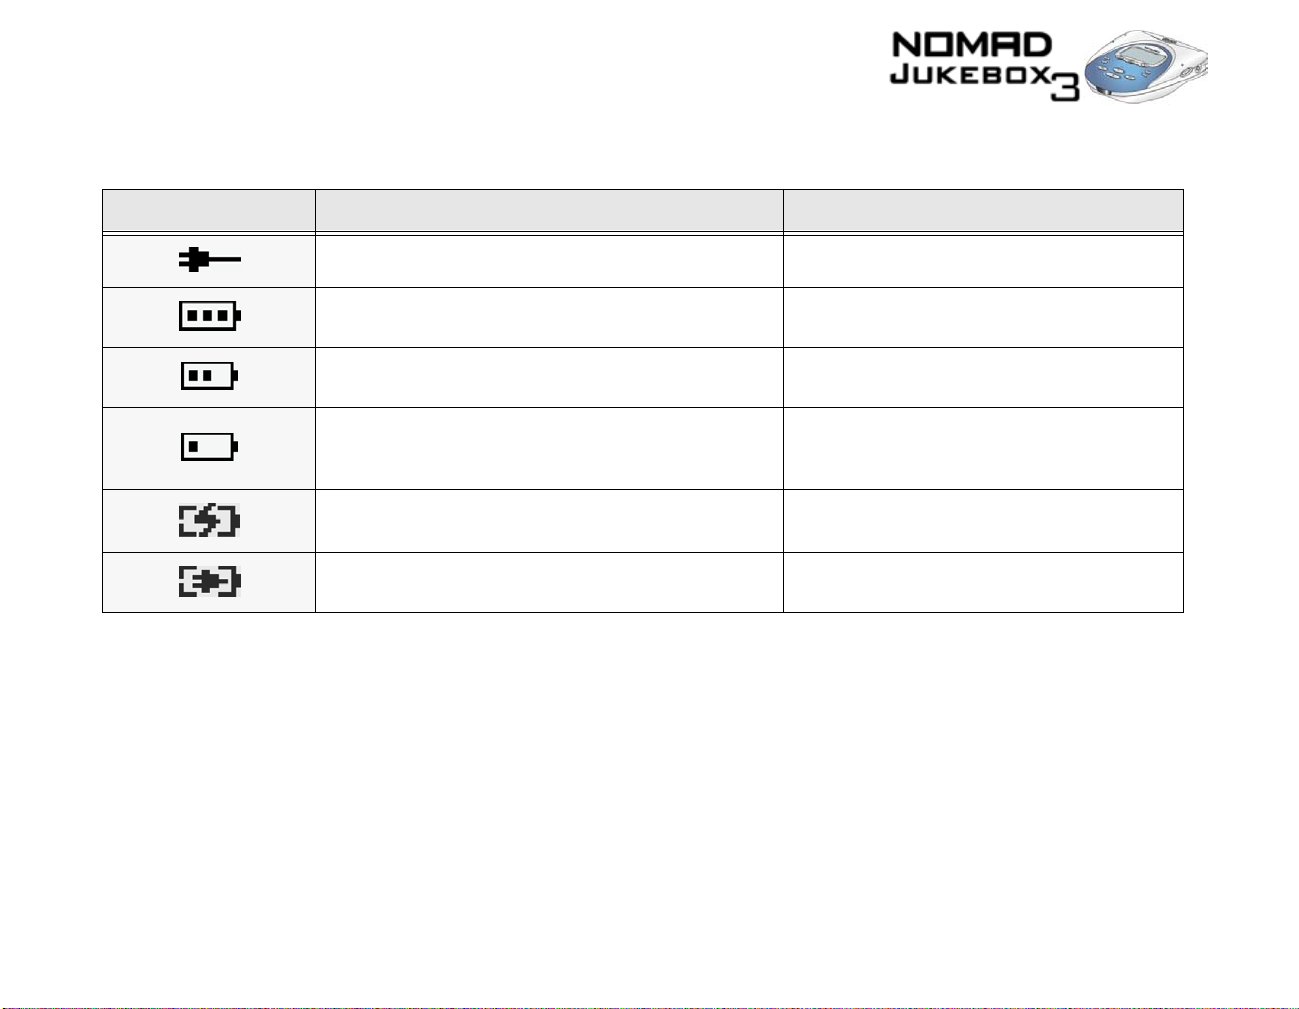
Icon Power State Notes
Your player displays one of the following icons, depending on the battery’s charged status or the power
source (battery or AC power).
❍ your player is running from AC power only
❍ your player is running from battery power only
❍ your player’s battery is good for approximately 6 hours
of continuous playback
❍ your player’s battery is good for approximately 3 hours
of continuous playback
❍ your player is running from AC power and is charging
the battery
❍ your player is running from AC power and has finished
charging the battery
❍ this battery state icon shows that the battery is
❍ if using two batteries, approximately 12 hours
❍ recharge the battery at the earliest opportunity
❍ if using two batteries, approximately 6 hours of
❍ charge the battery fully before disconnecting
❍ to use battery power, discon nect the player
For detailed information, refer to “Battery handling” on page C-2.
fully charged
of continuous playback are available
continuous playback are available
the player from the AC power outlet
from the AC power outlet
Setting up your player 2-4
Page 33

Installing Software
You must restart your
computer before trying out
any of the installed
applications.
Your NOMAD Jukebox 3 comes with software that helps you create audio files, manage your music
library and use your player.
1. Make sure your player is not connected to your computer.
2. Insert the Installation CD into your CD-ROM drive.
The disc supports Windows Autoplay mode and starts running automatically. If not, you need to
enable your CD-ROM drives onto insert notification features.
3. Select your preferred language.
4. Select “Install software for Nomad Jukebox 3”.
5. Click “OK”.
6. Click “Next” to register with Creative, so that you will be updated on new developments for your
Jukebox.
7. Follow the instructions on the screen.
8. When prompted to rest art your computer, leave the CD in the CD-ROM drive.
9. Select “Yes, I want to restart my computer now”.
10. Click “Finish”.
11. Restart your computer.
Setting up your player 2-5
Page 34
Connecting your player
You can also use a USB
cable to connect your
NOMAD Jukebox 3 to
your computer.
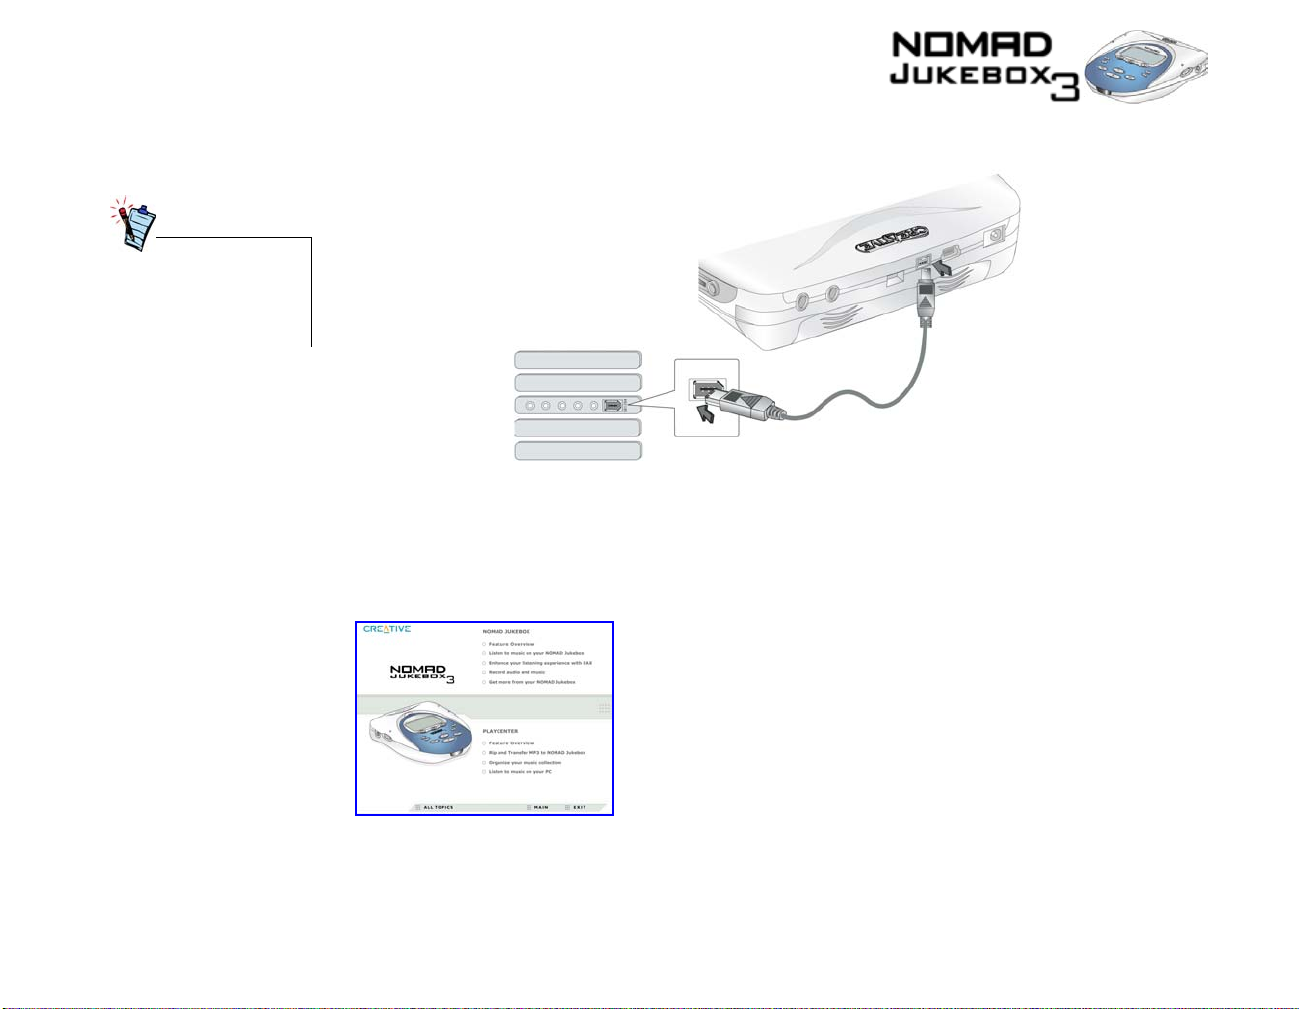
Your NOMAD Jukebox 3 comes with an SB1394 cable for fast data transfers to and from your
computer. Be sure that you have installed PlayCenter before connecting your player.
Figure 2-3: Connecting your NOMAD Jukebox 3 to your computer
Connect the SB1394 cable to your player and your computer.
Interactive Tutorial
Tu rn i n g t h e player on or off
Yo u can now go through the Interactive Tutorial.
Your player must be unlocked before you can turn it off. To unlock your player, see “Locking and
unlocking your NOMAD Jukeb ox 3” on page 2-8.
Setting up your player 2-6
Page 35

To turn your player on
1. Press and hold down the POWER button.
2. Keep on holding the POWE R button until the startup screen appears.
The Now Playing screen appears. Otherwise, check that your player and the DC Adapter are
properly connected.
To turn your player off
Resetting the player
If your player is locked, you must unlock your player.
1. Press any button.
2. In the popup that appears, Scroll Select “the tick”.
3. Press and hold the POWER button for at least 5 seconds.
The player should turn off.
If your player stops responding, reset the player. This should not cause you to lose
any data or audio files, unless you were in the middle of recording or transferring an
audio file. You can check for the audio file in your music library later. See “Using
the Music Library” on page 3-5.
To reset the player:
the Reset Hole.
Insert the end of a thin object (like a straightened paperclip) into
Setting up your player 2-7
Page 36
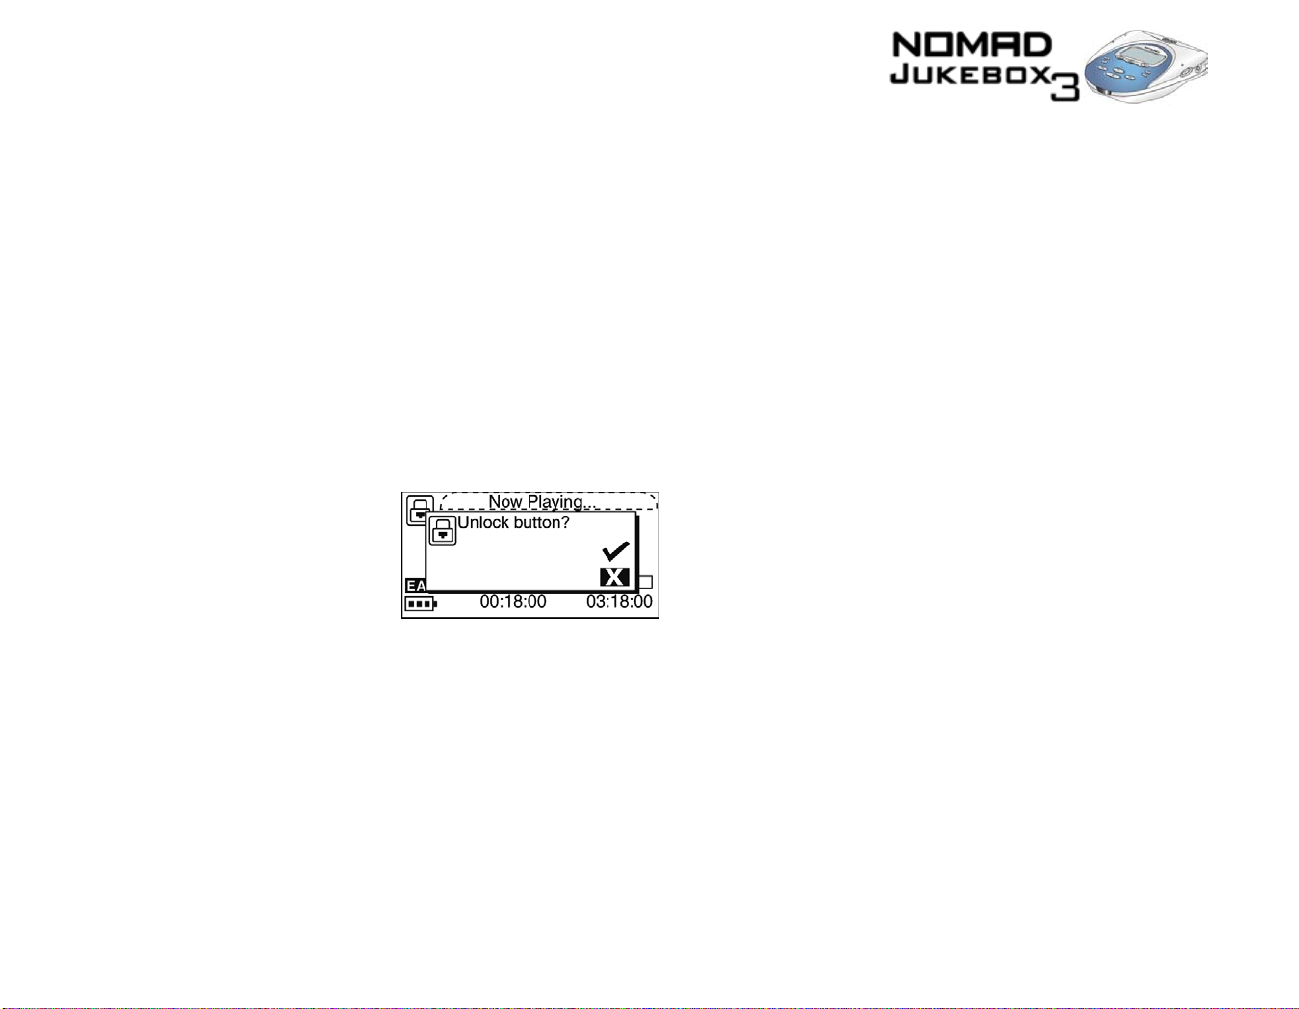
Locking and unlocking your NOMAD Jukebox 3
Locking your NOMAD Jukebox 3 will disable all buttons on the player except for the Scroller. This
feature is useful when you don’t want any buttons, like STOP, pressed accidentally .
If you press a button while the player is locked, a popup window appears for you to unlock the player.
This popup disappears if you don’t use the Scroller to make a selection within a few seconds.
To lock the player
To unlock the player
1. Press the MENU button.
2. Scroll Select BUTTON LOCK.
3. Scroll Select “the tick”.
The player is locked.
1. Press any button.
A popup appears.
2. Scroll Select “the tick”.
The player is unlocked.
Setting up your player 2-8
Page 37
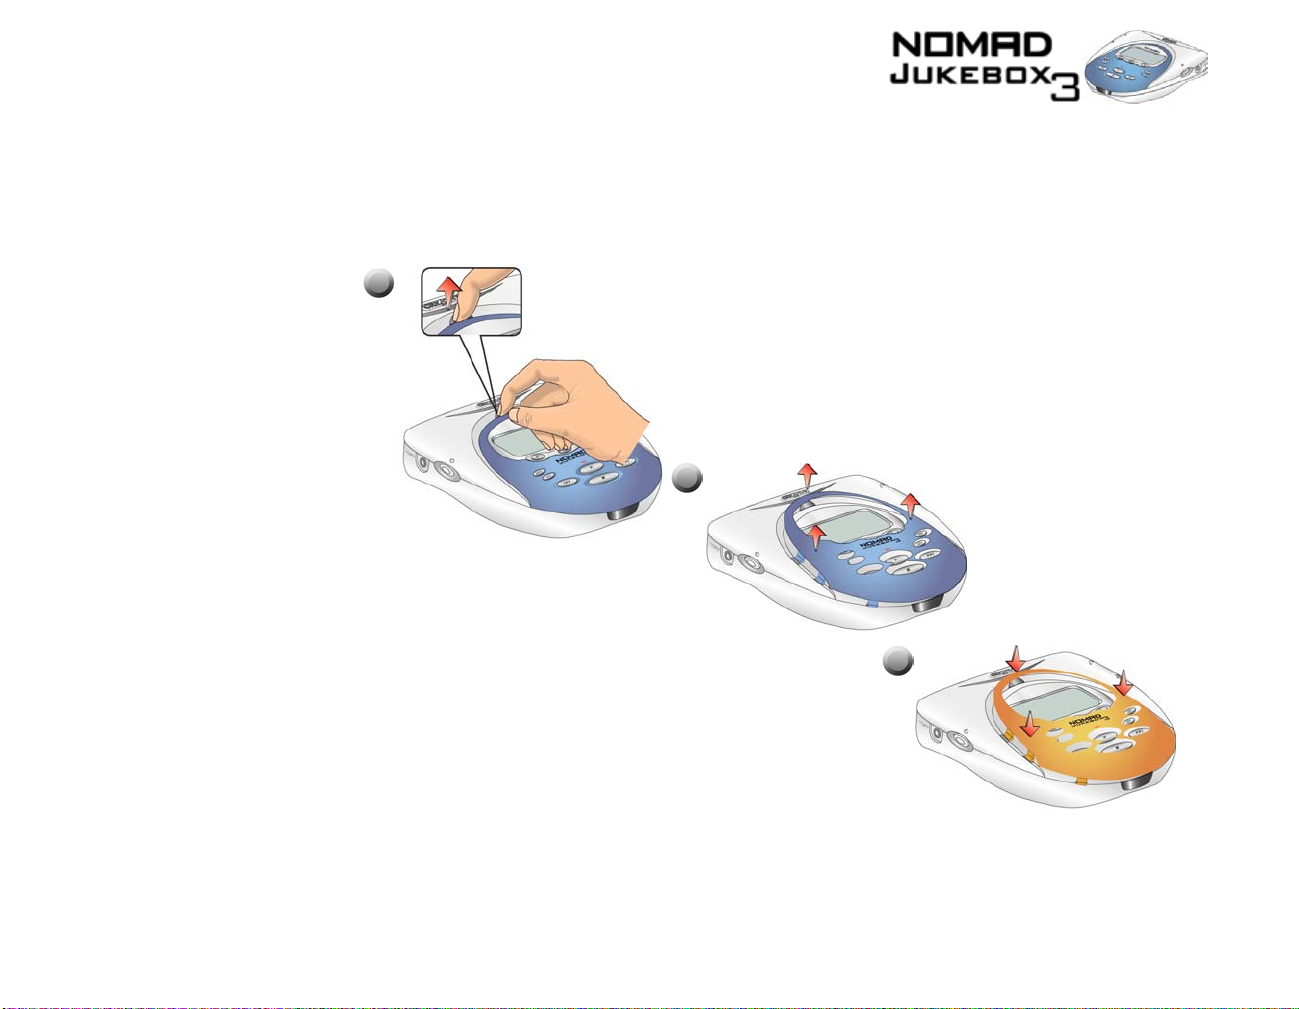
Changing the faceplate
If you want to change the look of your player, you can purchase a set of differently coloured faceplates.
Avoid using sharp-tipped objects to detach the faceplate to prevent surface damage to your player.
1. Detach the faceplate as shown below.
2. Position the new faceplate and snap it into place.
1
2
3
Setting up your player 2-9
Page 38
Checking Jukebox information
To “Scroll Select”, use the
Scroller to scroll to the
option you want, and select
the option by pressing the
Scroller. F or more
information, refer to
“Using the Scroller” on
page 1-9.
The JUKEBOX INFORMATION screen shows you
• the player’s firmware version — so that you know if you can upgrade the firmware
• the total amount of space in your player for storing music or data
• the available space in your player for storing music or data
• the number of tracks stored in your player
• the number of albums stored in your player
• the number of playlists stored in your player
To see this screen
1. Press the MENU button.
2. "Scroll Select" JUKEBOX SETTINGS.
3. "Scroll Select" JUKEBOX INFORMATION.
Configuring your player
Your player offers you many configuration options. You can:
• personalize your Jukebox, see “Personalization” on page 2-11.
• specify power settings, see “Power Settings” on page 2-12.
• set the default language, see “Language” on page 2-12.
You can also change your startup screen.
To configure your player:
1. Press the MENU button.
2. Scroll Select JUKEBOX SETTINGS.
Setting up your player 2-10
Page 39
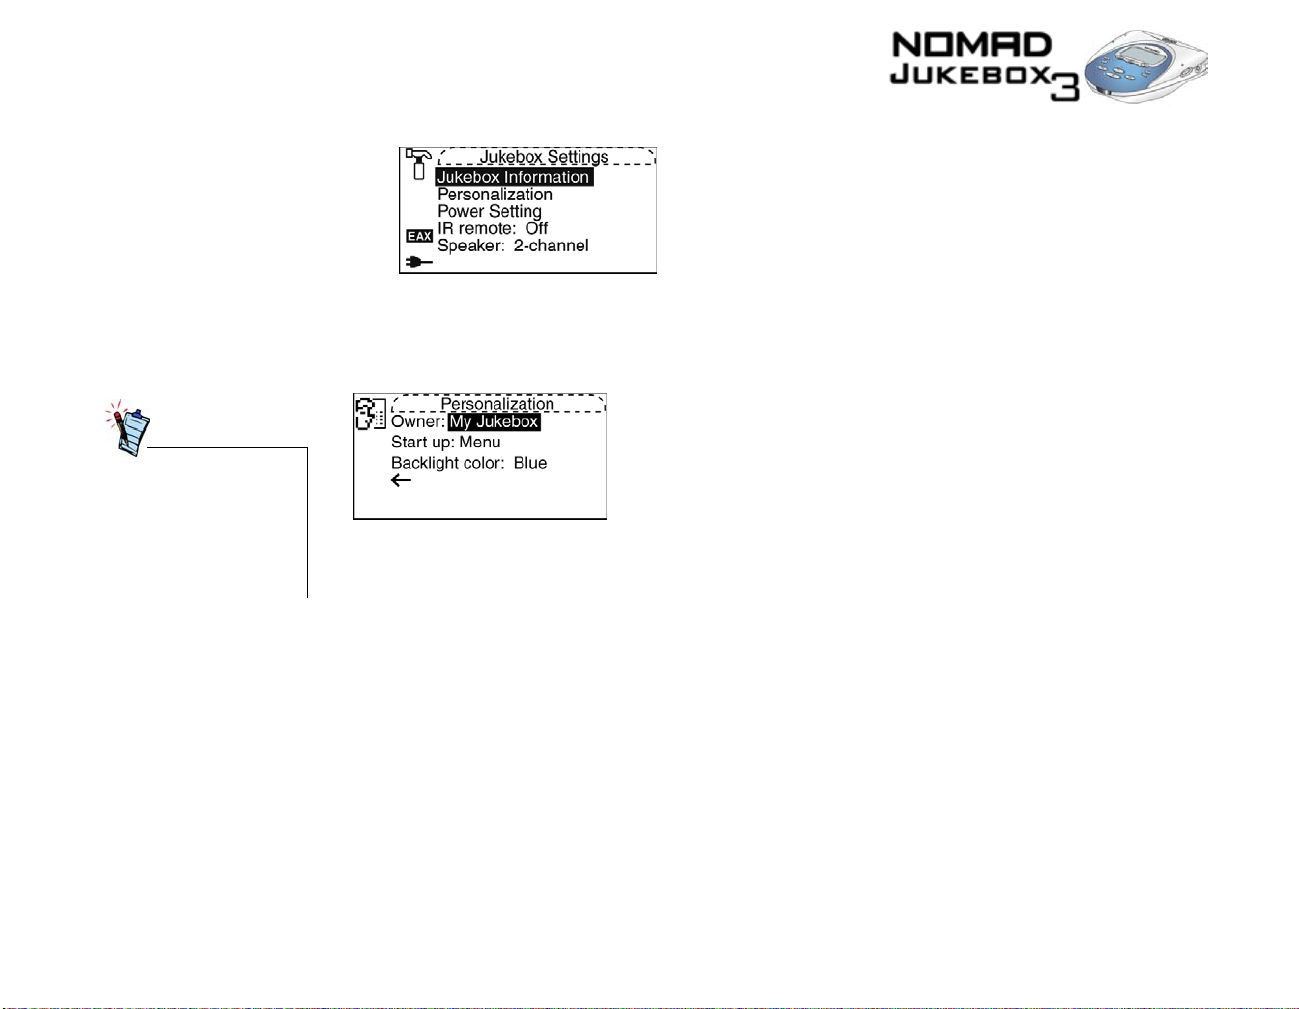
Personalization
T o construct a name, Scroll
Select the letters and
numbers to form the name.
Each letter and number
selected is entered into the
entry area.
3. Scroll Select an option from the menu that appears:
Go to the relevant section in the pages that follow.
In this screen you can:
• set the owner’s name
• specify the default start screen
• set the default backlight color, Blue or Green
• return to the previous screen
1. From the JUKEBOX SETTINGS screen, Scroll Select “Personalization”.
2. Scroll Select one of the options.
3. From the menu, Scroll Select a setting or construct a name.
Setting up your player 2-11
Page 40
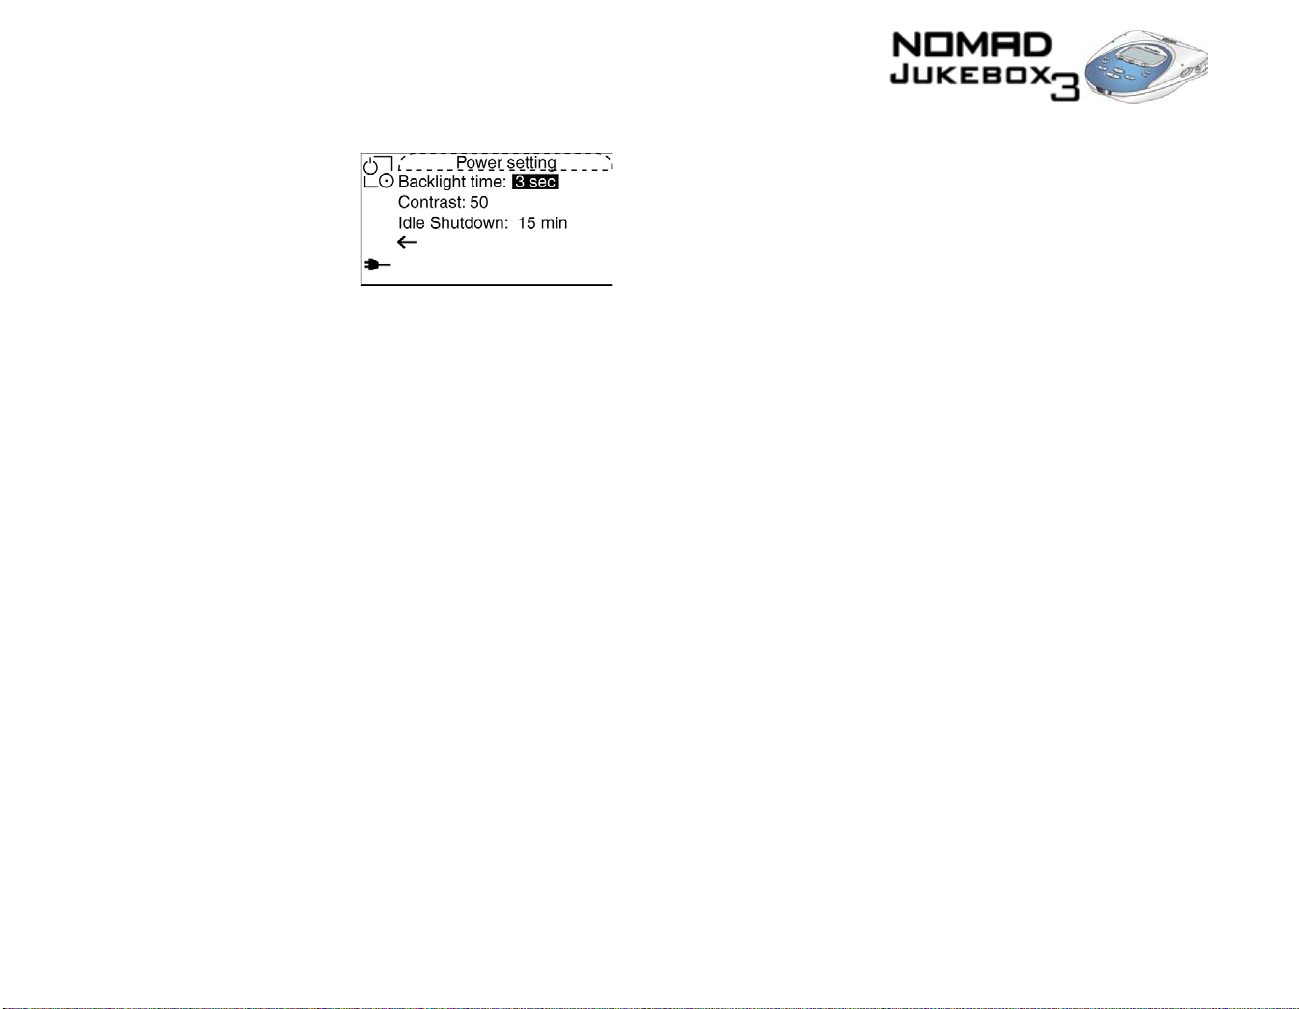
Power Settings
In this screen, you can:
• adjust the screen backlight duration. A lower number setting conserves battery power for longer
playback time.
• set the contrast level for your player’s screen. The lower the number, the lower the contrast.
• specify how long the player remains inactive before it automatically shuts down.
1. From the JUKEBOX SETTINGS screen, Scroll Select “Pow er Settings”.
2. Scroll Select one of the options.
3. From the menu, Scroll Select a setting.
Language
Menu Language
Input Language
You can change the default language used on your player’s screens and input boxes.
This option controls the language in which your player’s menus are displayed.
1. From the Jukebox Settings screen, Scroll Select "Menu" under "Language".
2. From the menu, Scroll Select a language.
This option controls the language in which you input letters or characters in input boxes, for example,
when you search for a track or rename a playlist.
1. From the Jukebox Settings screen, Scroll Select "Input" under "Language".
2. From the menu, Scroll Select a language.
Setting up your player 2-12
Page 41

Te s t in g y o u r player
Your player comes with
preloaded audio.
After setting up your NOMAD Jukebox 3, you can do a test run to make sure that it is in working order.
1. Make sure that your NOMAD Jukebox 3 is properly connected to the DC Adapter and AC power
outlet.
2. Connect the headphones or speakers to the player.
3. Turn on the AC power.
4. Press and hold the POWER button on your player.
5. Press the PLAY button.
You should hear some audio playing.
6. Using the Volume control buttons, adjust the volume to a comfortable level.
7. Press the FORWARD button.
The next track in the Playing List should play.
8. Press the REVERSE button.
You should hear the beginning of the current track.
9. Press the REVERSE button twice.
The previous track in the Playing List should play.
10. Press and hold the FORWARD button.
Yo u should be skipping forward to other portions of the current track.
11. Press and hold the REVERSE button.
You should be skipping backward to previous portions of the current track.
12. Press the PAUSE button.
The audio playback should be paused.
13. Press the PLAY button again to continue playback.
14. Press the STOP button.
This ends the test run. You can now download and enjoy songs on your player. Have fun!
Setting up your player 2-13
Page 42
3
Using Your Player
Page 43
Using Your Player
After setting up your player, you can use it to play, manage, enhance and record audio.
Instructions on how to perform these functions are provided in the following sections:
When instructed to Scroll
Select, use the Scroller to
scroll to the option you
want, and select the option
by pressing the Scroller . For
more information, refer to
“Using the Scroller” on
page 1-9.
Move back to previous
firmware screens or cancel
operations by pressing the
BACK button or Scroll
Selecting the Back arrow,
which appears at the bottom
of screens and lists.
• “Playing Audio” on page 3-3
• “Managing Audio” on page 3-5
• “Enhancing Audio” on page 3-17
• “Recording Audio” on page 3-23
The software in your player that allows you to perform these functions is called the
visually represented on the screen displays. The firmware can be used together with the supplied
applications, described in “Using Applications” on page 4-2.
Navigational icons have been created to help you identify the different firmware sections. These icons
appear on your display when you navigate to the associated firmware section. A useful table of these,
and other icons that appear onscreen, is available for reference in “Na v i g at i ona l Ic on s” on page B-1 1.
firmware
and is
Using Your Player 3-2
Page 44
Playing Audio
Buttons you can use while
playing audio are listed in
“Player Buttons” on page
1-5. The associated icons
that appear onscreen
(“Playback Icons”) when
these buttons are used are
described in the “Primers
and Information” chapter,
along with a table of
Playing List icons.
To play audio, you must first transfer supported audio files to your player. These files, in MP3, WMA or
WAV formats, are played back in your player as “tracks” and further categorized into “albums”, “artists”
or “genres”.
Audio files can be “ripped” from audio CDs to your computer or downloaded from Internet music sites
such as those listed in “Where to get MP3 files” on page B-3. They must, however, be encoded into the
supported formats, then transferred to your player with the Creative PlayCenter application.
Basic instructions on how to use PlayCenter are provided in “Using PlayCenter” on page 4-3.
Data files can also be transferred and stored in your player, useful if, for example, you want to transfer a
large movie file from one computer to another. Data can be transferred to your player with the Creative
File Manager application, which is a dedicated data file manager for your player.
Basic audio playback
To play audio in the
Playing List one track at a
time, enable the “Play
Track Once” mode, as
instructed in “Playing a
track once” on page 3-21.
To play audio, you can either add audio selections from the NOMAD Jukebox 3's Music Library to the
player’s Playing List as described in “Adding audio selections to the Playing List” on page 3-7, then play
back the whole Playing List, or you can preview individual tracks directly from the Music Library.
Audio selections have been preloaded to the Playing List to get you started quickly.
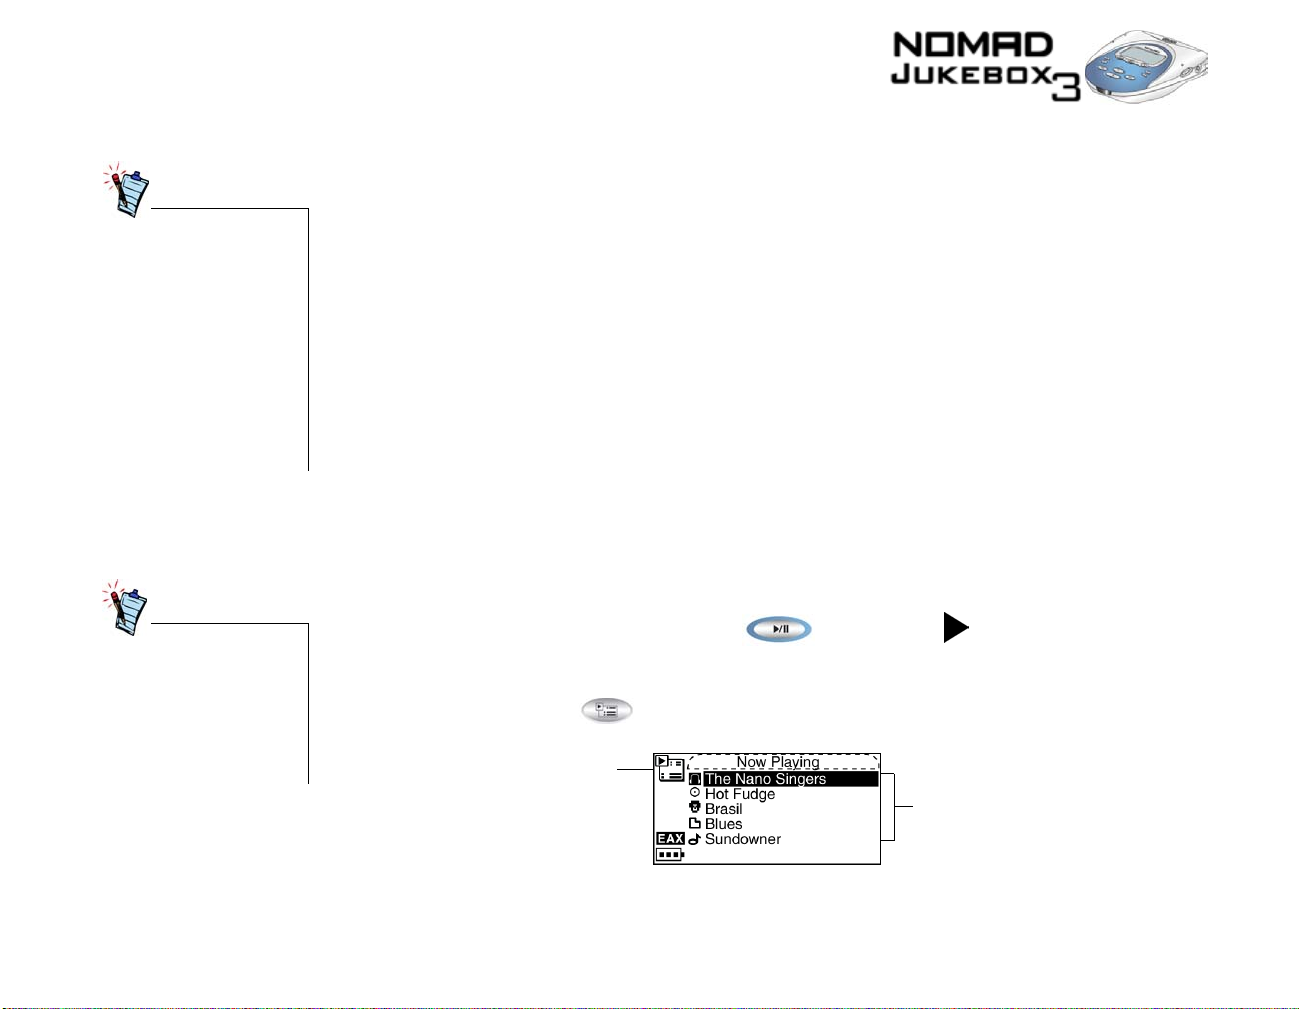
To play the Playing List:
Press the PLAY button . The Play icon appears onscreen and the
Playing List is played back, from the first track to the last.
Note: The Playing List screen is not automatically displayed when you play a track. To access it, press
the NOW PLAYING button . The upper-left corner of the screen will display the Playing List
icon.
Playing List Icon
Audio Selections
Using Your Player 3-3
Page 45
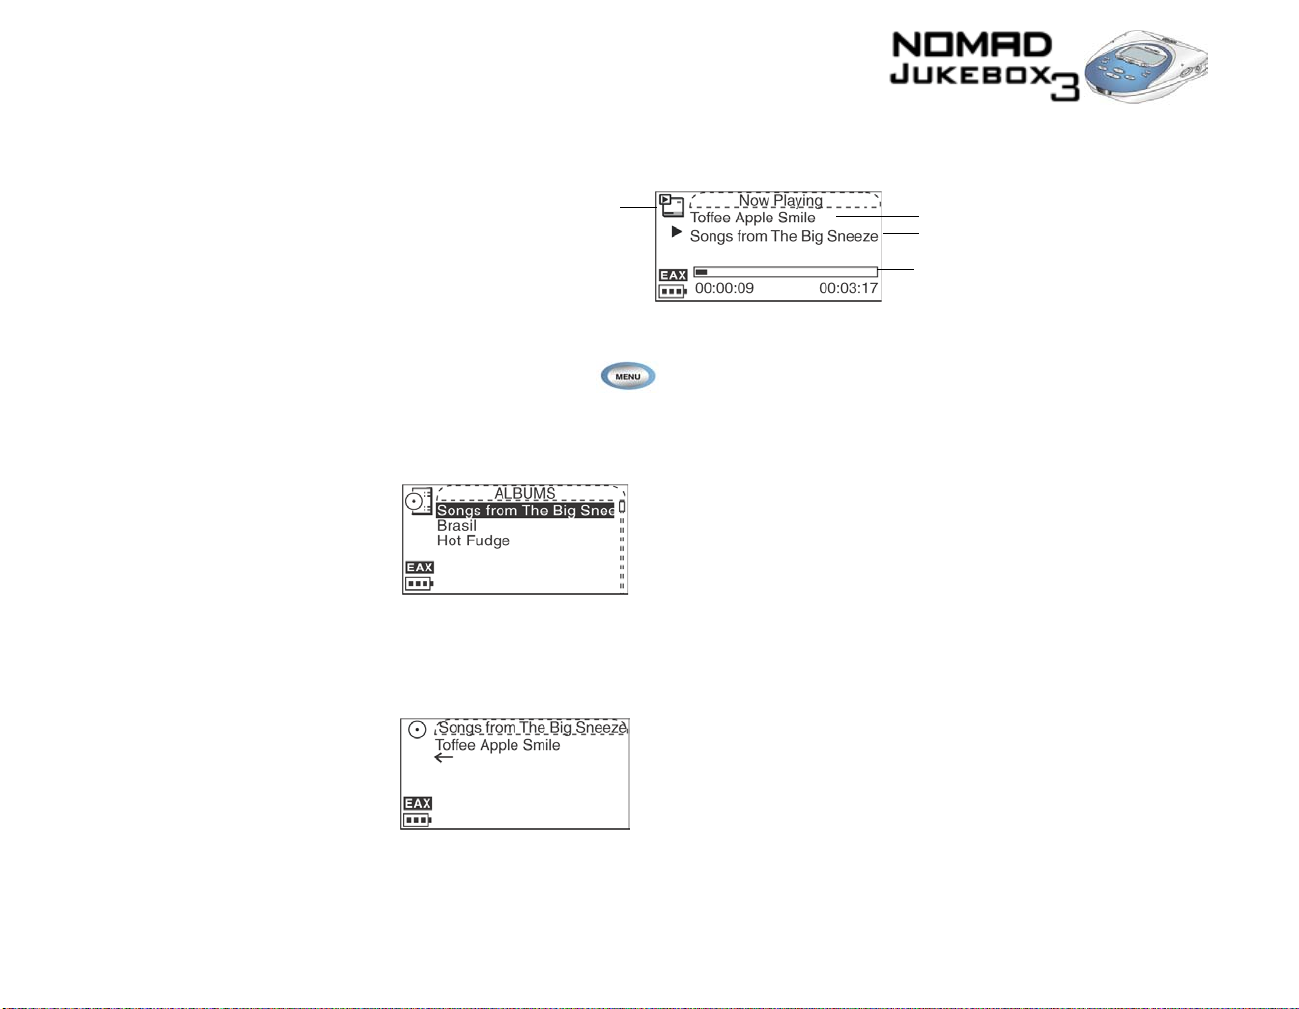
Pressing the NOW PLAYING button again will display the Playing Track screen, which shows the track
that is being played back or the track that has been selected. The upper-left corner of the screen will
display the Playing Track icon.
Playing Track Icon
Track Title
Album Title
Elapsed Time Bar
To preview a track
1. Press the MENU button .
2. Scroll Select “Music Library”.
3. Scroll Select an audio category. For example, if you want to preview a track in a particular album,
Scroll Select “Albums”.
Note: If Scroll Selecting “All Tracks” or “Recordings”, skip to Step 6.
4. Scroll Select the sub-category that the track is categorized under. For example, if you selected
“Albums”, Scroll Select the album where your track is in. A list appears.
5. Scroll Select “Open”. The tracks within the sub-category appear.
6. Scroll Select the track you want to preview. A list appears.
Using Your Player 3-4
Page 46
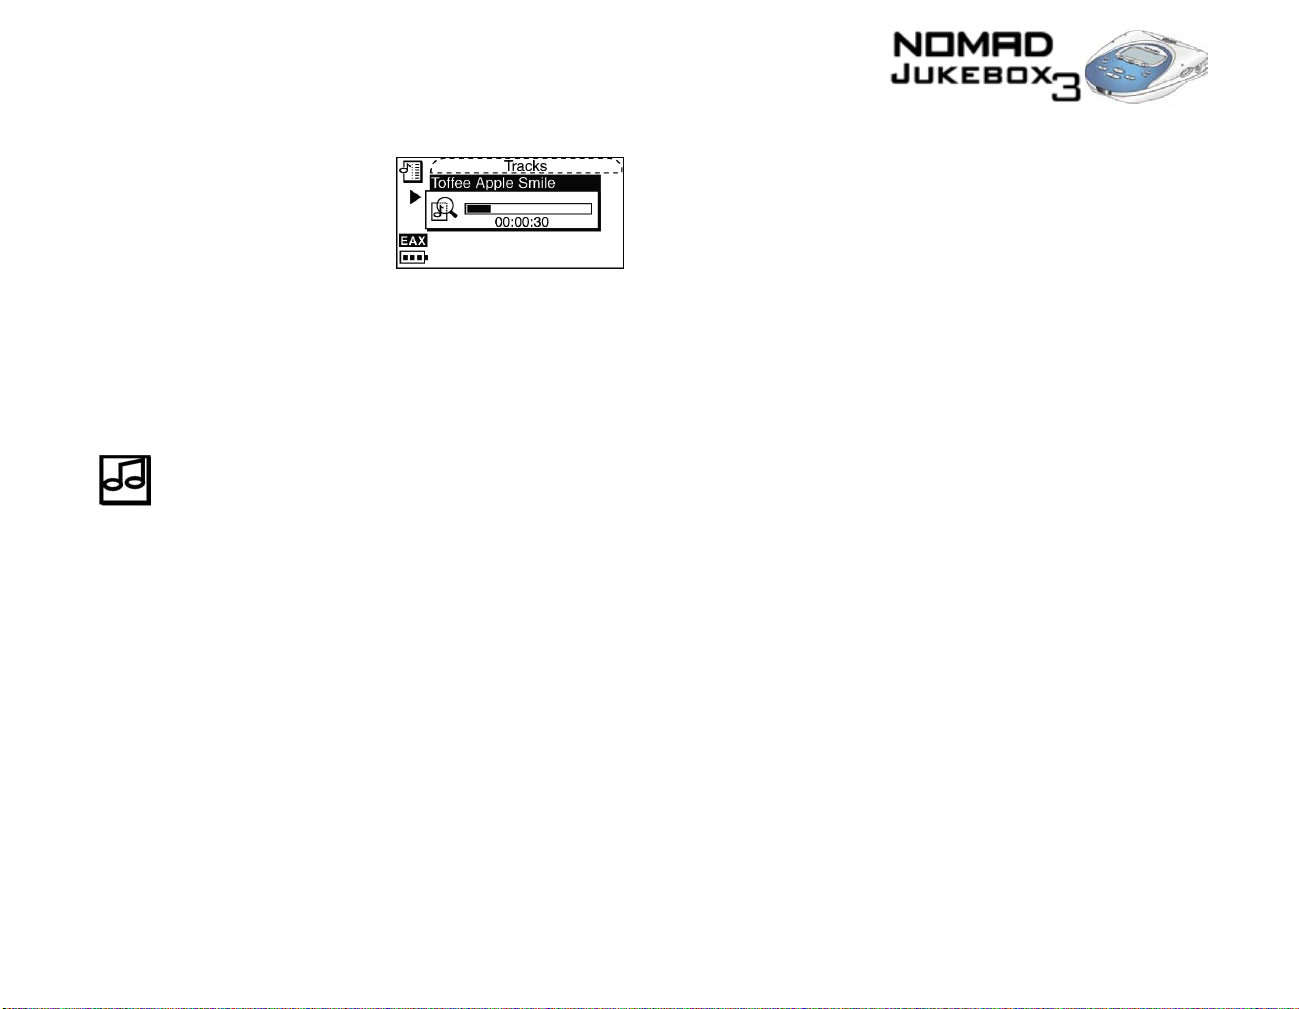
7. Scroll Select “Preview”. The track is previewed once.
Managing Audio
Using the Music Library
To effectively manage the many audio in your player, you should be familiar with the Music Library,
Playing List and Playlists. These will be described extensively in the following sections:
• “Using the Music Library” on page 3-5
• “Using the Playing List” on page 3-11
• “Using Playlists” on page 3-16
When audio files are transferred to your player, they are considered as “tracks” and are org anized into the
following Music Library categories:
• Playlists
•Albums
•Artists
•Genres
• All Tracks, and
• Recordings
All transferred tracks can be found in the “All Tracks” category, but depending on your PlayCenter
settings, tracks can also be found in other categories. For example, take a fictitious track called “Toffee
Apple Smile”, performed by “The Nano Singers”, from the soundtrack to the "The Big Sneeze" movie.
Besides “ All Tracks”, the “Toffee Apple Smile” song would also be found in the "Soundtrack" genre, the
"Songs from The Big Sneeze" album, and the “The Nano Singers” artist category.
Tracks not belonging to any album, artist or genre, can only be found in “All Tracks”.
Recordings made with your player automatically become “tracks” and can be found in “All Tracks” as
well as the “Recordings” category. For the instructions that follow, recordings will be known as “tracks”.
Using Your Player 3-5
Page 47
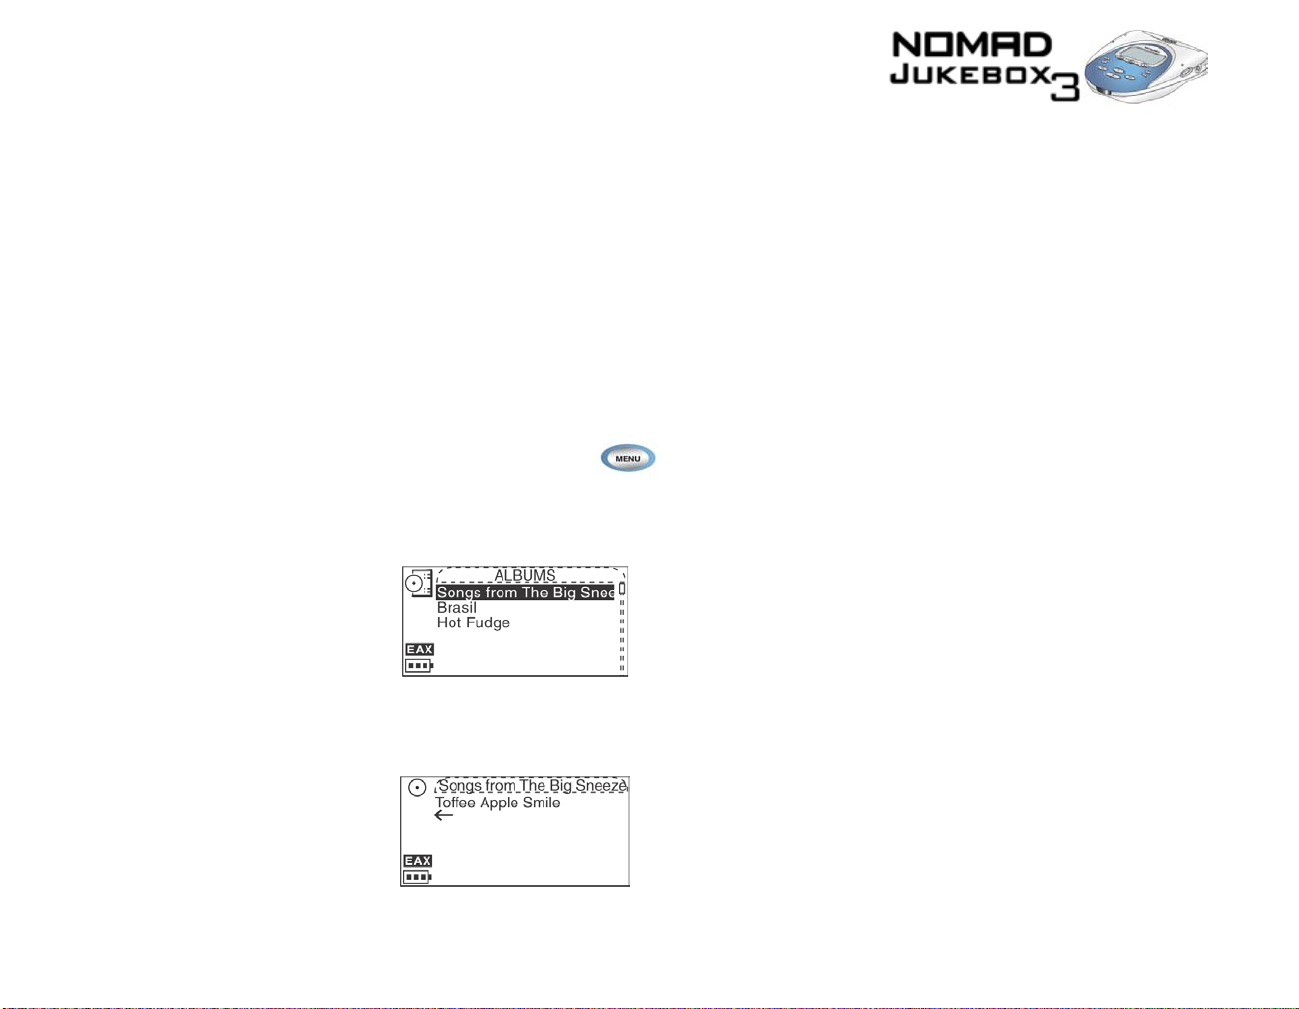
Besides previewing tracks described earlier, you can also use the Music Library to:
• Add audio selections to the Playing List
• Find tracks, playlists, albums, artists or genres in your player
• View track information
• Delete tracks, playlists, albums, artists or genres in your player
Note that modifying or renaming albums, artists or genres, including renaming, must be done in Creative
PlayCenter. Playlists can also be renamed in the player, as described in “Using Playlists” on page 3-16.
Exploring the Music
Library
In the following example, we will show you how to find a track by navigating through your Music
Library. A quicker way of finding audio in your player is to use the Find featu re, descri b ed in “To find
audio with the “Find” feature” on page 3-8.
To find a track in the Music Library
1. Press the MENU button .
2. Scroll Select “Music Library”.
3. Scroll Select an audio category. For example, if you want to find a track in a particular album,
Scroll Select “Albums”.
Note: If Scroll Selecting “All Tracks” or “Recordings”, skip to Step 5.
4. Scroll Select the sub-category. For example, under Albums, Scroll Select an album. A list appears.
5. Scroll Select “Open”. The tracks within the sub-category appear.
Using Your Player 3-6
Page 48
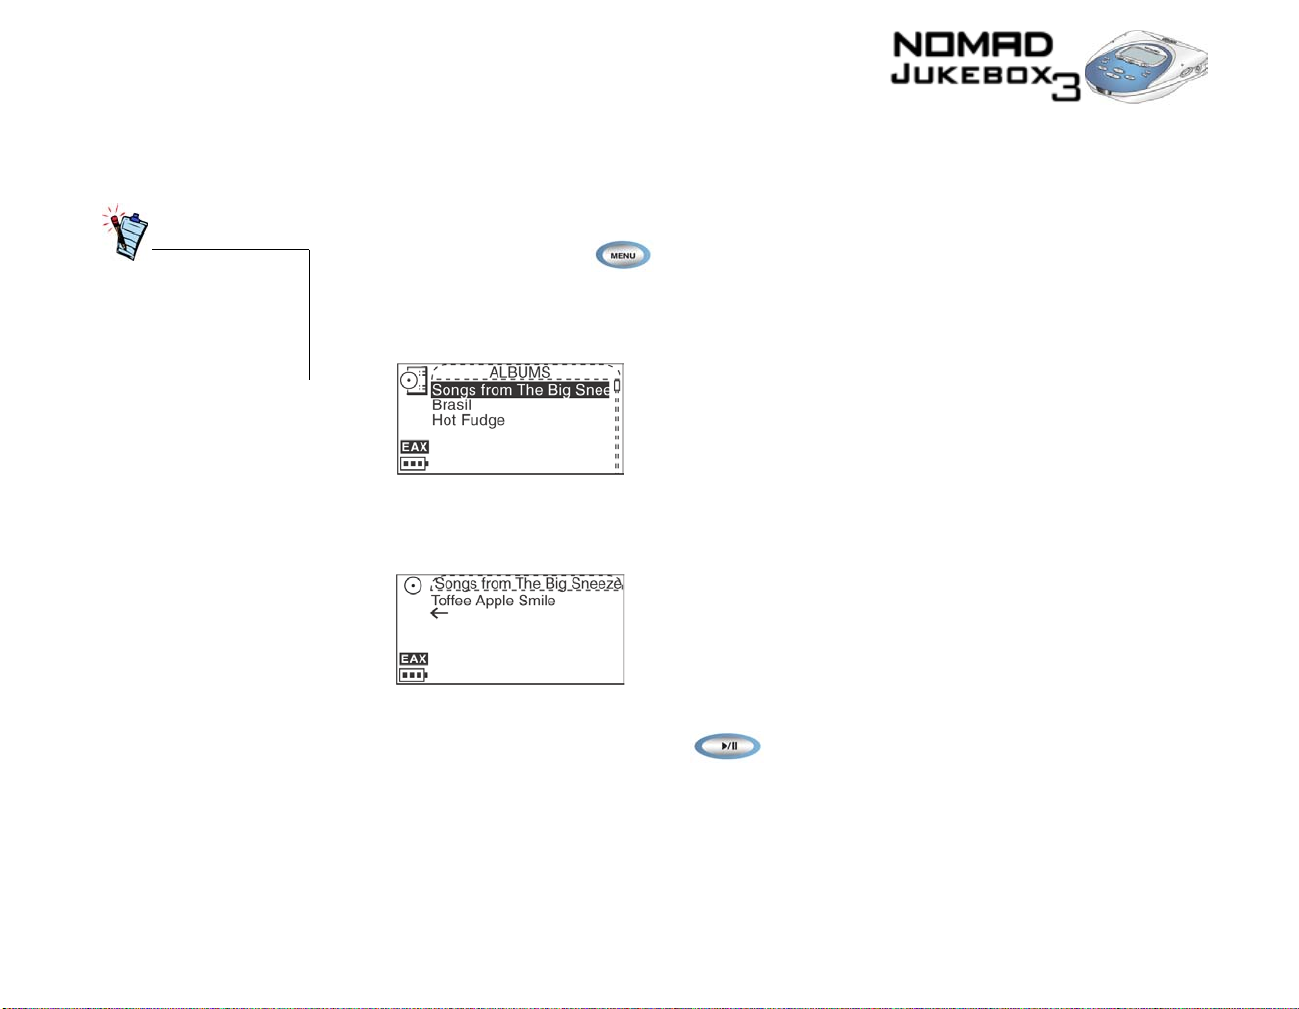
Adding audio
selections to the
Playing List
Audio selections from the Music Library can either be added sequentially after selections already in the
Playing List (“Add to Play”) or placed at the front of the Playing List for immediate playback (“Play
Now”).
To add audio selections
When a playlist is added to
the Playing List, only the
selections within that
playlist are added. The
playlist itself is not added.
1. Press the MENU button .
2. Scroll Select “Music Library”.
3. Scroll Select an audio category. For e xample, if you w ant to add a track in a particular album, Scroll
Select “Albums”.
4. Scroll Select the sub-category. For example, under Albums, Scroll Select an album. A list appears.
Note: If adding an entire album, artist, genre or playlist, skip to step 6.
5. Scroll Select “Open”. The tracks within the sub-category appear.
6. Scroll Select “Add to Play” to add the audio selection to the back of the Playing List. Scroll Select
“Play Now” or press the Play button to add the selection to the front of the Playing List
and immediately play it back.
Using Your Player 3-7
Page 49
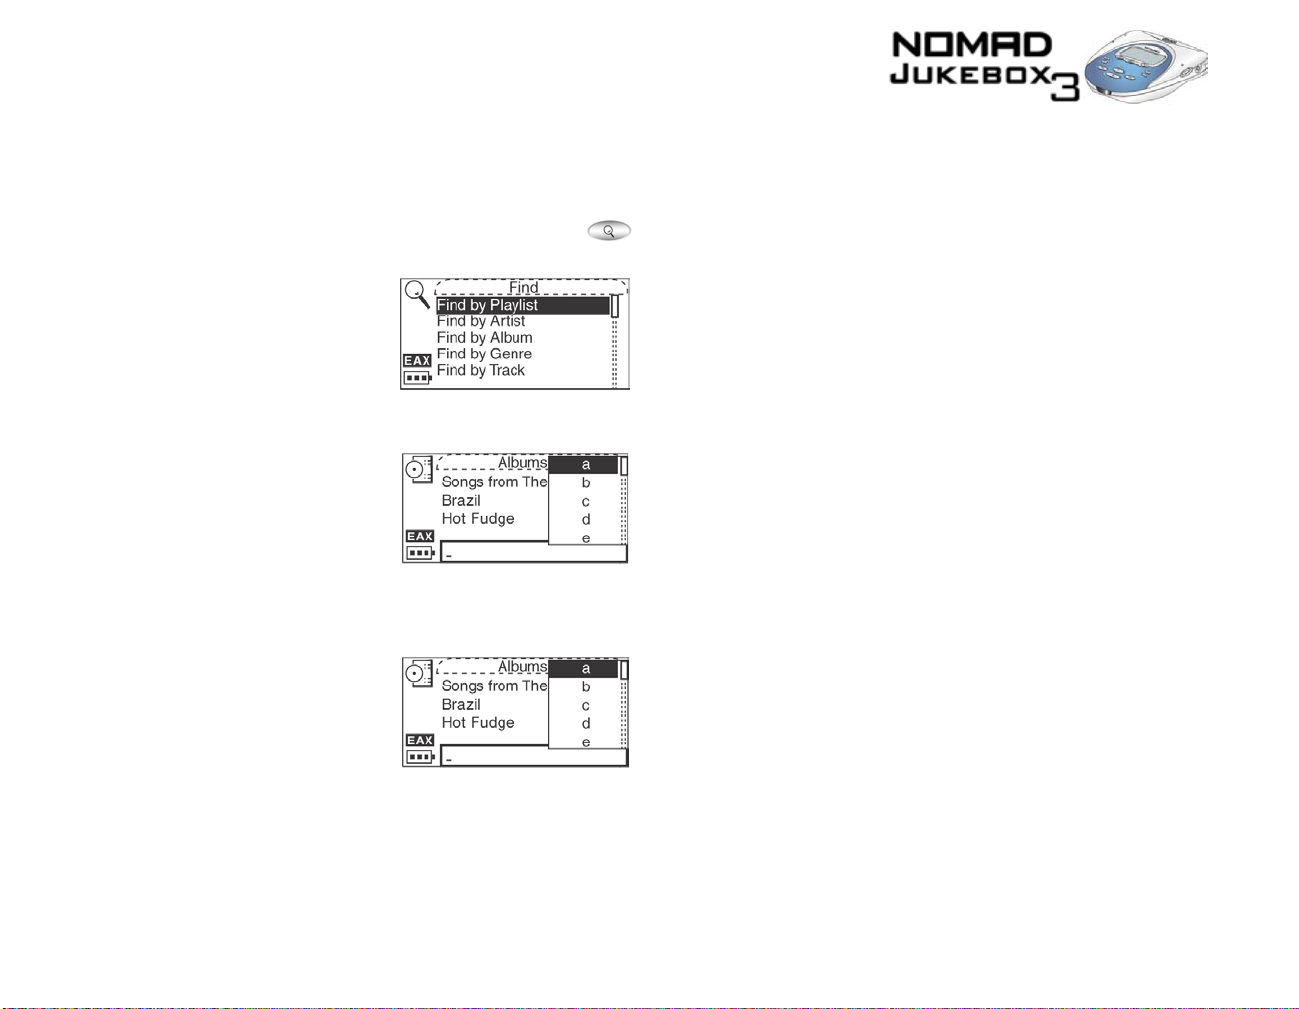
Finding audio
Finding your favorite song or album in the Music Library has been made easy with your player's “Find”
feature.
To find audio with the “Find” feature
1. Press the FIND button . If you are not already exploring the Music Library, the Find screen
appears.
If you press the FIND button when exploring the Music Library, a list appears above the audio
category you are in; skip to step 3.
2. Scroll Select the audio category you want to search. For example, if you want to find a particular
album, Scroll Select “Find by Album” and the respective audio category screen, in this case the
Albums screen, appears with a list.
Using Your Player 3-8
Page 50
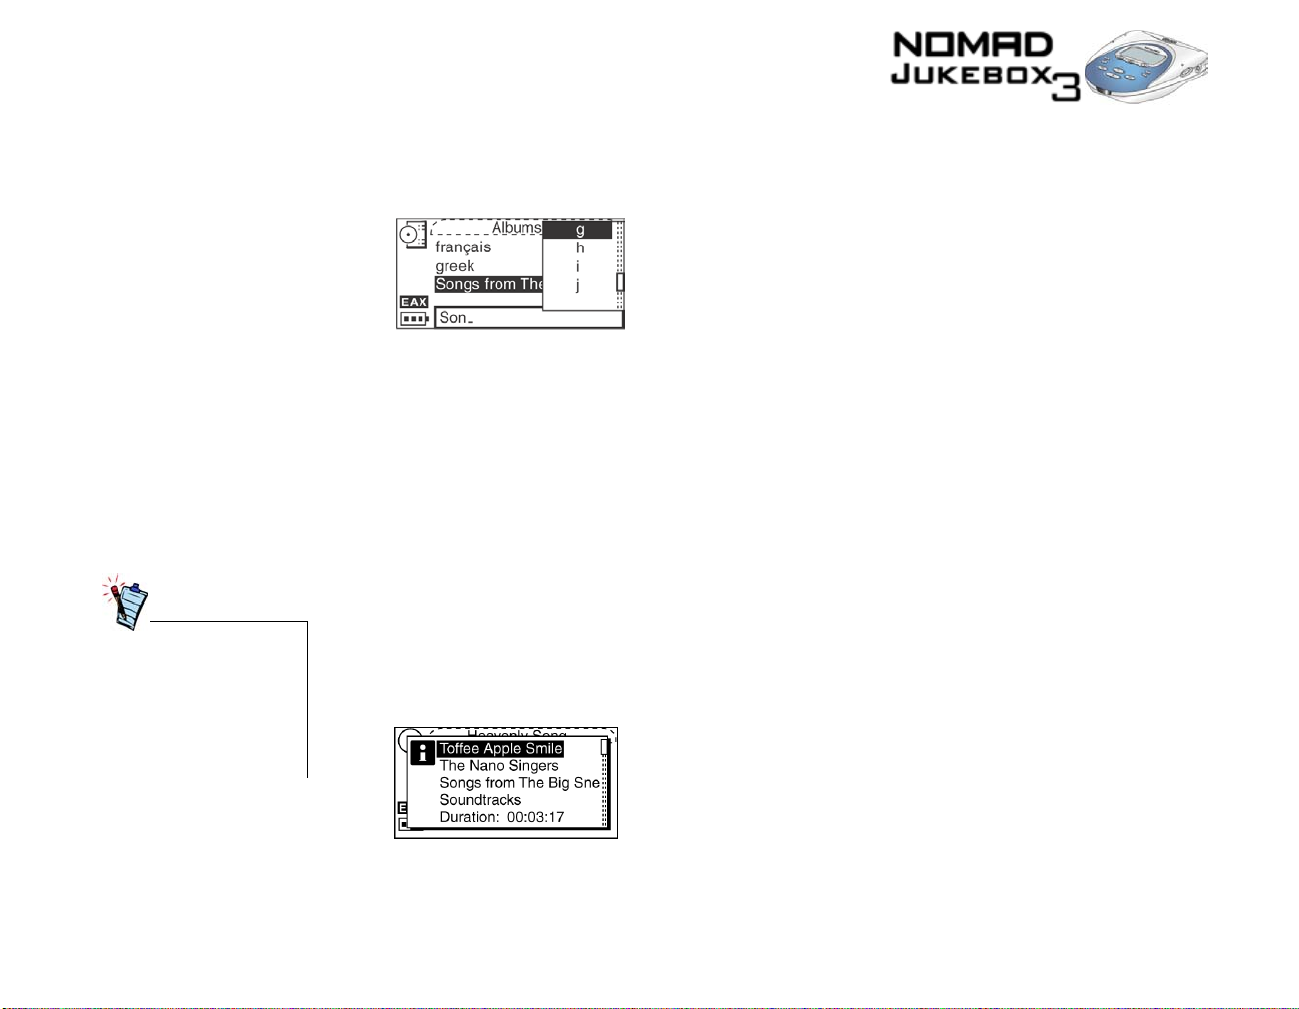
3. Scroll Select the letters on the list to form the name of the track, playlist, album, artist or genre you
want to find. The selected letters appear in the box at the bottom of the screen. Also, each time an
entry is made into the box, the audio category you are in is searched, and the closest matching result
is displayed.
Note: When entering letters into the box, you can switch from upper to lower case (or vice-versa)
by simply Scroll Selecting the letter and holding the Scroller until the letter changes to the case you
want. You can also use different character sets, such as accented characters or numerals, by Scroll
Selecting the “Charset” option on the list.
4. When you see the track, playlist, album, artist or genre you want, Scroll Select the “OK” option to
complete the search.
Viewing track
information
This same information is
already available in the
Playing List. See
“To view information about
tracks in the Playing List”
on page 3-12.
Deleting audio
Detailed information about tracks in the Music Library is readily available. This includes track title,
which artist the track belongs to, which album the track belongs to, which genre the track belongs to as
well track length.
To view information about tracks in the Music Library
1. Follow steps 1 through 5 in “To find a track in the Music Library” on page 3-6.
2. Scroll Select the track you want information on. A list appears.
3. Scroll Select “Track Details”. A message box appears, listing track information.
When you remove audio from the Playing List, as described later in “Removing audio” on page 3-13,
you are not permanently deleting the selections from your player.
Using Your Player 3-9
Page 51
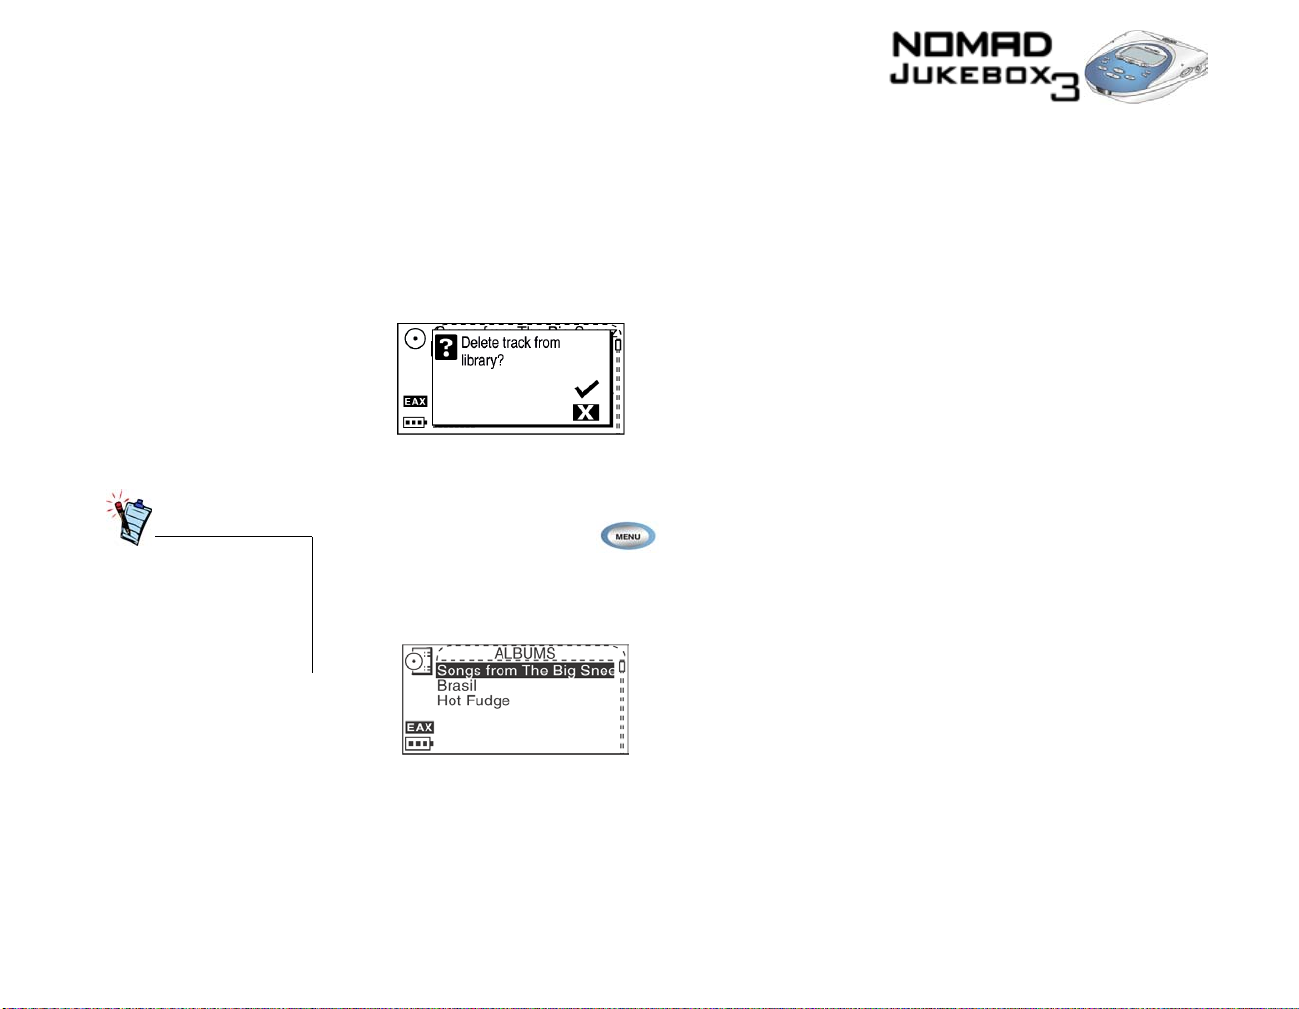
When a playlist is deleted,
the tracks, albums, artists o r
genres within the list are not
deleted; only the list itself is
deleted.
T o permanently delete tracks, alb ums, artists, genres or playlists, you must remove them from the Music
Library in your NOMAD Jukebox 3.
To delete a track
1. Follow steps 1 through 5 in “To find a track in the Music Library” on page 3-6.
2. "Scroll Select" the track to delete. A list appears.
3. "Scroll Select" Delete Track. A confirmation box appears, asking you if you want to delete the
selected track.
4. Scroll Select “the tick”. The track is permanently deleted from your player.
To delete an entire album, artist, genre or playlist
1. Press the MENU button .
2. Scroll Select “Music Library”.
3. Scroll Select an audio category. For e xample, if you want to delete a particular album, Scroll Select
“Albums”.
4. Scroll Select the sub-category. For example, under Albums, Scroll Select the album you want to
delete. A list appears.
Using Your Player 3-10
Page 52
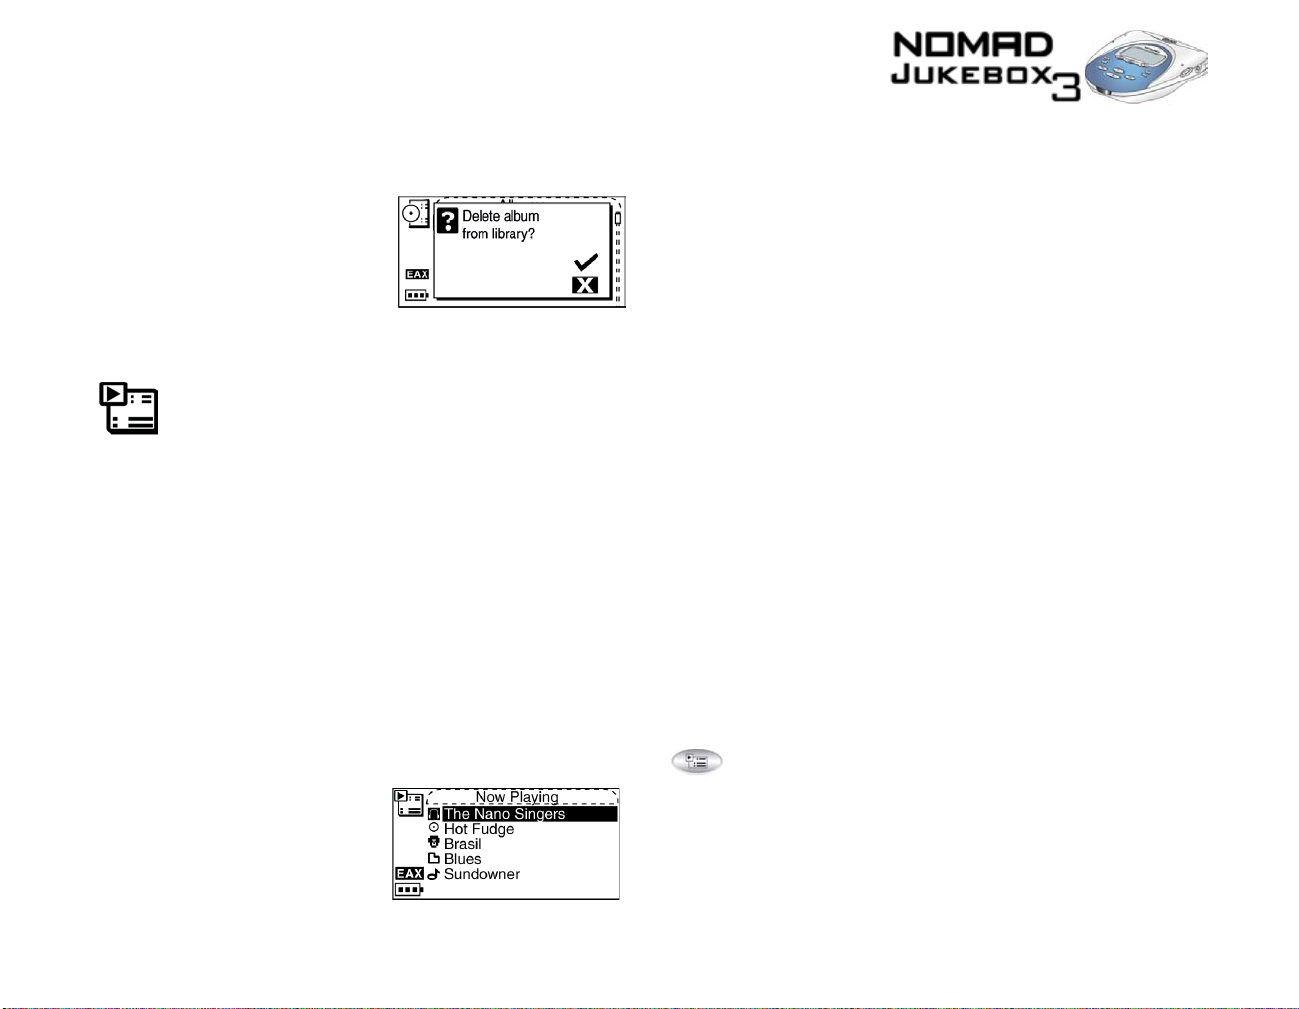
5. Depending on what you are deleting, Scroll Select “Delete Album”, “Delete Artist”, “Delete
Genre” or “Delete Playlist”. A confirmation box appears, asking you if you want to delete the
selected album, artist, genre or playlist.
6. Scroll Select “the tick”. The album, artist, genre or playlist is permanently deleted from your player.
Using the Playing List
Viewing audio in the
Playing List
You can do more than play audio selections in the Playing List. Y ou can:
• View audio in the Playing List
• View information about tracks in the Playing List
• Remove audio
• Rearrange the Playing List
• Save the Playing List as a playlist
When a playlist is added to the Playing List, only the audio selections within that playlist are added; the
playlist itself is not added. However, when entire albums, artists or genres are added to the Playing List,
the tracks within them are hidden (or “collapsed”). To see these tracks, you must “Expand” the album,
artist or genre.
Similarly, to hide these tracks, you should “Collapse” the album, artist or genre. This can be useful in
reducing screen clutter.
To expand an album, artist or genre
1. Press the NOW PLAYING button until the Playing List screen appears.
Using Your Player 3-11
Page 53
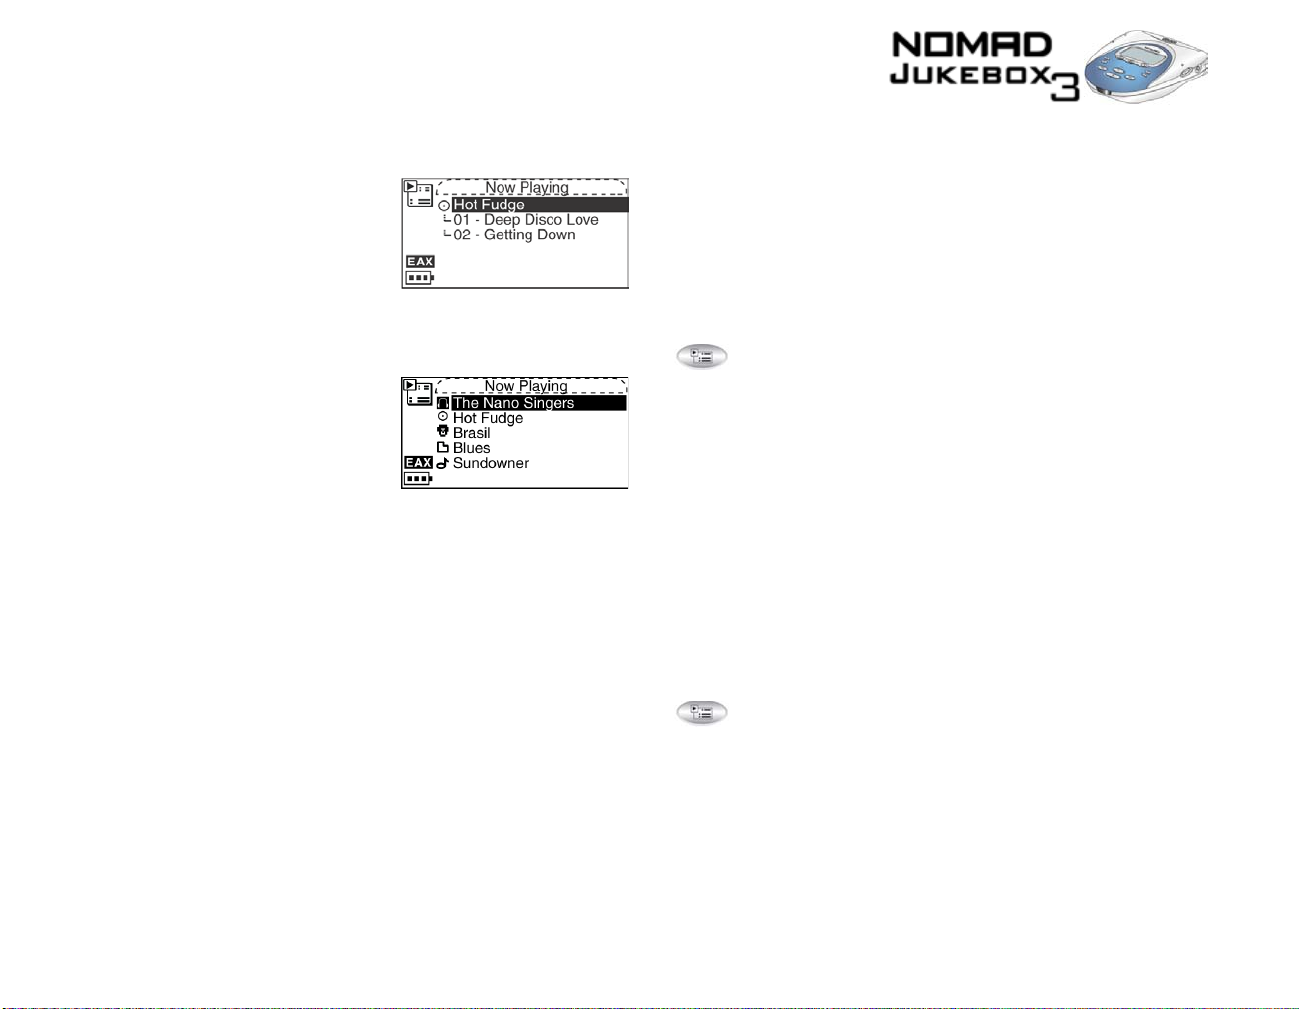
2. Scroll Select the album, artist or genre to expand. A list appears.
3. Scroll Select “Expand”. The tracks in the selection appear beneath the album, artist or genre.
To collapse an album, artist or genre
1. Press the NOW PLAYING button until the Playin g List screen appears.
2. Scroll Select the expanded album, artist or genre. A list appears.
3. Scroll Select “Collapse”. Tracks within the formerly expanded album, artist or genre are hidden.
Viewing track
information
Information about tracks in the Playing List can be easily accessed and viewed. The information
provided is identical to that described in “To view information about tracks in the Music Library” on
page 3-9.
To view information about tracks in the Playing List
1. Press the NOW PLAYING button . Track information can be viewed in either the Playing
List or Playing Track screen.
2. In the Playing List screen, Scroll Select the track that you want to view information about.
In the Playing Track screen, press the Scroller.
In either case, a list appears.
Using Your Player 3-12
Page 54
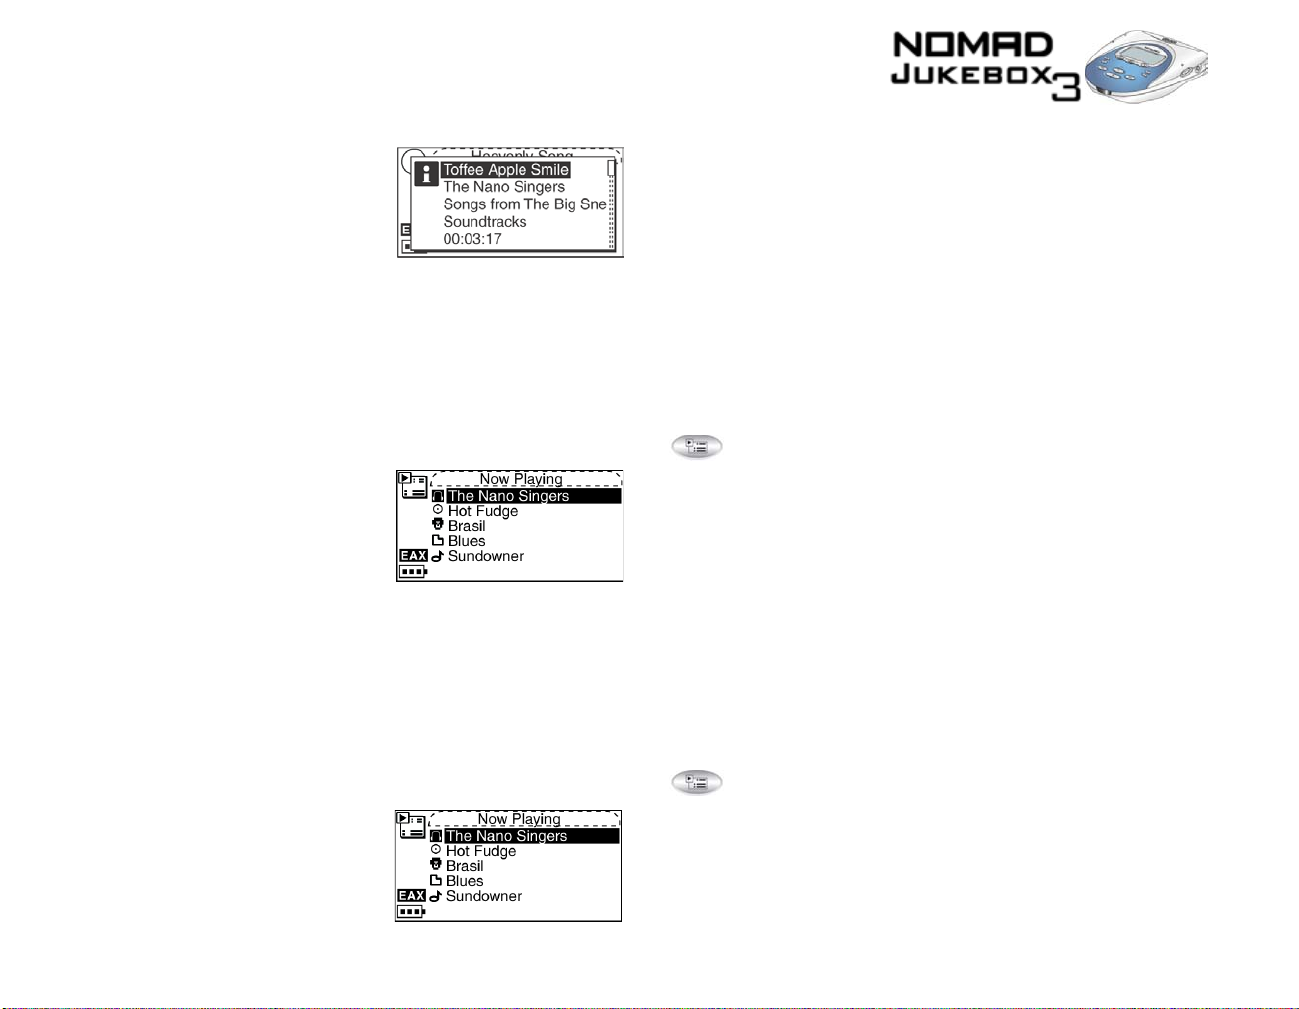
3. Scroll Select “Track Details”. A message box appears, listing track information.
Removing audio
When tracks, albums, artists or genres are removed from your player’s Playing List, they are only
removed from the Playing List—audio still remains in the Music Library. To delete audio completely,
tracks, albums, artists or genres must be deleted from the Music Library as shown in “Deleting audio” on
page 3-9.
To remove a track, album, artist or genre from the Playing List
1. Press the NOW PLAYING button until the Playing List screen appears.
2. Scroll Select the track, album, artist or genre to remove from the Playing List. A list appears.
3. Scroll Select “Remove”. A confirmation box appears if you have selected to remov e an album, artist
or genre from the Playing List; skip to Step 4.
If you have selected to remove a track, it is removed from the Playing List.
4. Scroll Select “the tick”. The track, album, artist or genre is removed from the Playing List.
To remove all audio from the Playing List
1. Press the NOW PLAYING button until the Playing List screen appears.
Using Your Player 3-13
Page 55
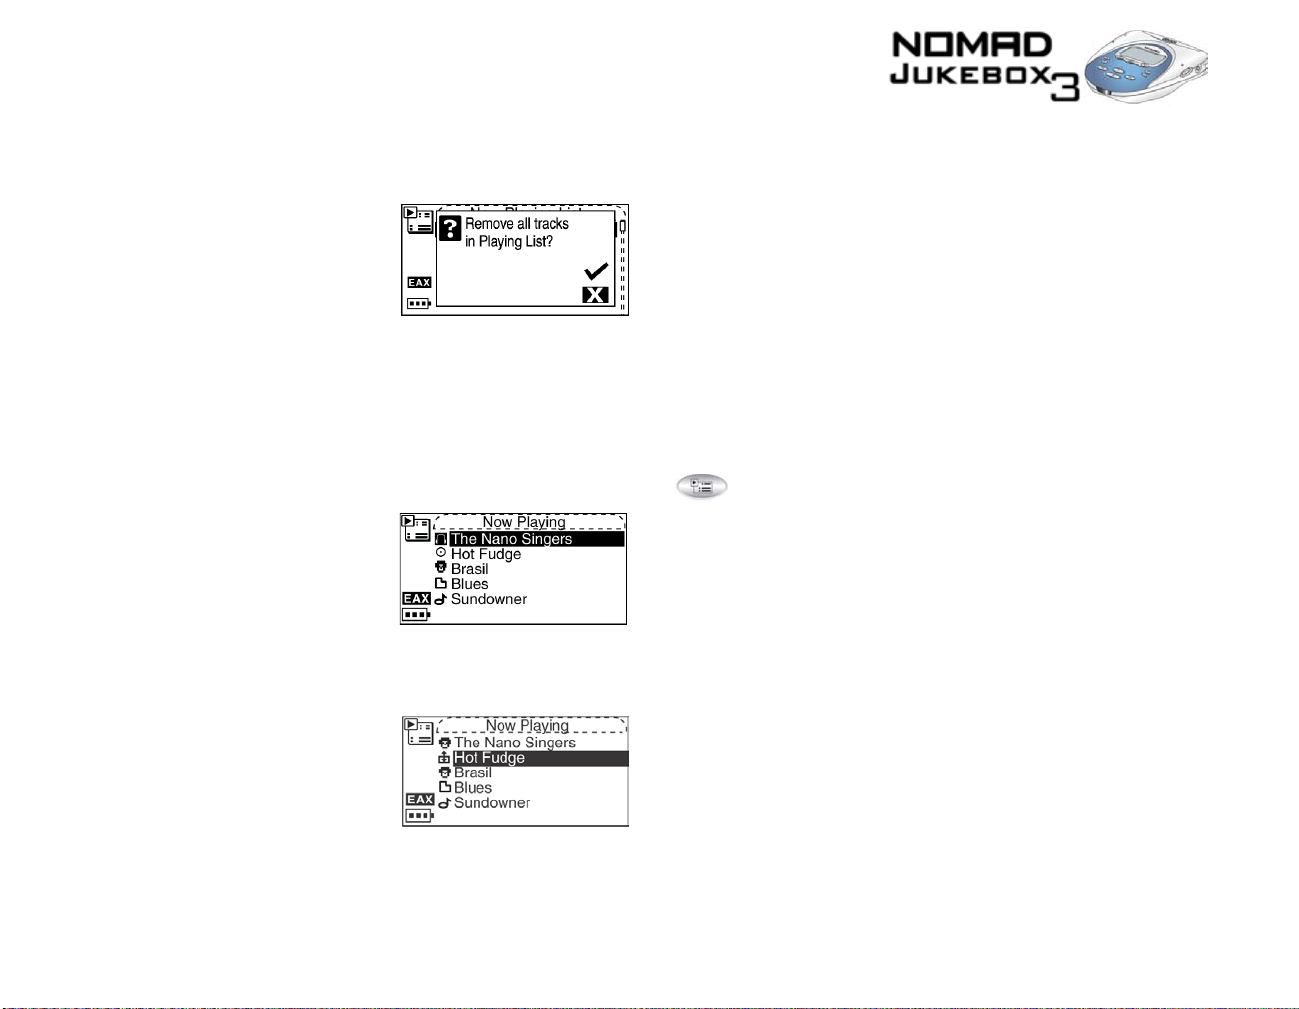
2. Scroll Select any track, album, artist or genre in the Playing List. A list appears.
3. Scroll Select “Remove All”. A confirmation box appears, asking you if you want to remove all
tracks in the Playing List.
4. Scroll Select “the tick”. All audio selections are removed from the Playing List.
Rearranging the
Playing List
If you prefer to hear, for example, a particular album before another in the Playing List, you can
rearrange the album as well as any other artist, genre or individual track in the Playing List.
To rearrange audio in the Playing List
1. Press the NOW PLAYING button until the Playin g List screen appears.
2. Scroll Select the album, artist, genre or individual track to move. A list appears.
3. Scroll Select “Change Order”. An icon appears next to the selected album, artist, genre or
individual track.
Using Your Player 3-14
Page 56
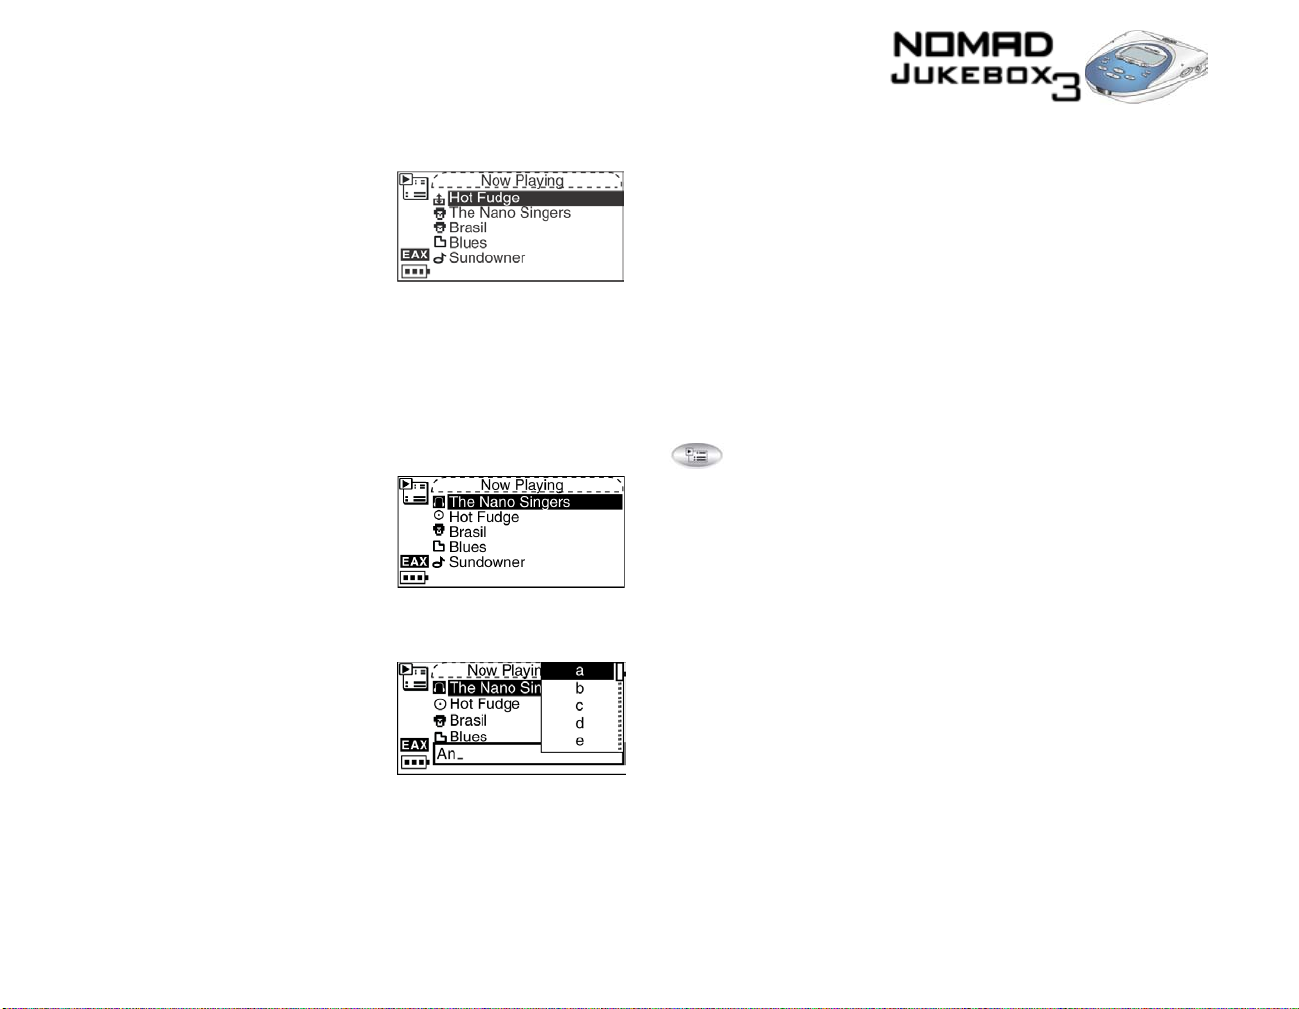
4. Using the Scroller, move the album, artist, genre or individual track to the preferred position in the
Playing List.
5. Press the Scroller to set the position you have selected.
Saving the Playing
List as a playlist
If you like the contents and arrangement of your current Playing List, you can choose to save it as a
playlist for retrieval and playback later.
To save a playlist
1. Press the NOW PLAYING button until the Playing List screen appears.
2. Scroll Select any item in the Playing List. A list appears.
3. Scroll Select “Save as Playlist”. A list appears.
Using Your Player 3-15
Page 57
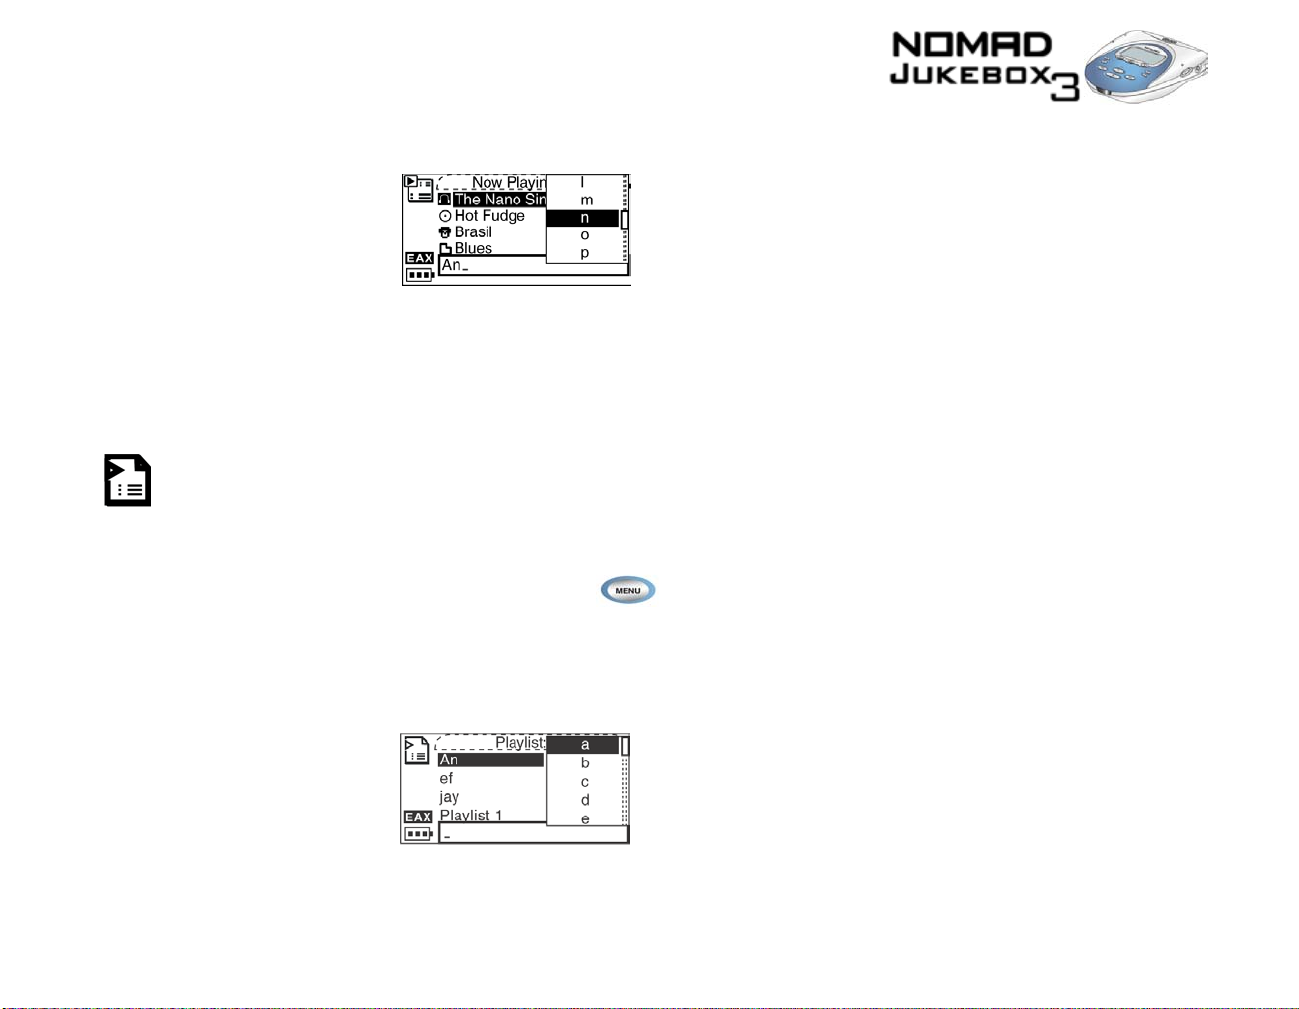
4. Scroll Select the letters on the list to form a name for your playlist. This name appears in the box at
the bottom of the screen.
Note: When entering letters into the box, you can switch from upper to lower case (or vice-versa)
by simply Scroll Selecting the letter and holding the Scroller until the letter changes to the case you
want. You can also use different character sets, such as accented characters or numerals, by Scroll
Selecting the “Charset” option on the list.
5. Scroll Select the “OK” option to save the playlist with the name you have entered.
Using Playlists
As described earlier, a playlist is a Playing List which has been saved. Editing of playlists, such as
rearranging content, should be done in Creative PlayCenter. However, you can rename playlists in your
player.
To rename a playlist
1. Press the MENU button .
2. Scroll Select “Music Library”.
3. Scroll Select “Playlists”.
4. Scroll Select the playlist to rename. A list appears.
5. Scroll Select “Rename”. A list appears.
Using Your Player 3-16
Page 58
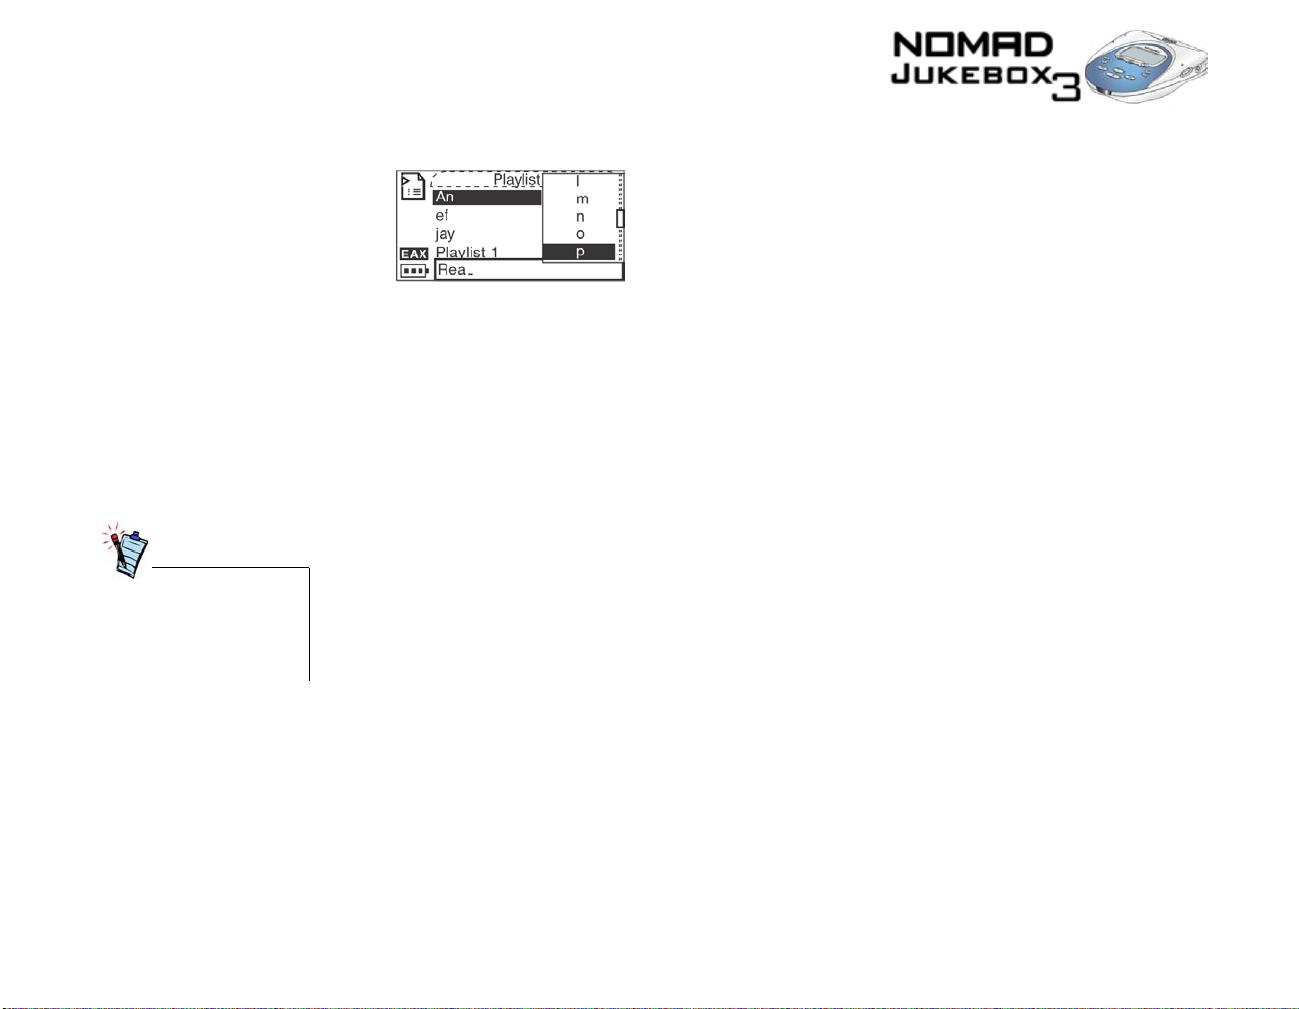
6. Scroll Select the letters on the list to form your playlist’s ne w name, which appears in the box at the
bottom of the screen.
Note: When entering letters into the box, you can switch from upper to lower case (or vice-versa)
by simply Scroll Selecting the letter and holding the Scroller until the letter changes to the case you
want. You can also use different character sets, such as accented characters or numerals, by Scroll
Selecting the “Charset” option on the list.
7. Scroll Select the “OK” option to save the playlist with the new name you have entered.
Enhancing Audio
A reference table of Audio
Enhancement icons appear
in “ A udio Enhancemen t
Icons” on page B-10.
Using Play Modes
You can enhance your listening experience when playing the Playing List by applying Play Mode, EAX,
or both at the same time. If you are previewing a track, you will only be able to use EAX to enhance
listening. Play Modes and EAX are described in the following sections:
• “Using Play Modes” on page 3-17
• “Using EAX” on page 3-22
Your player has Play Modes that allow you to change how your Playing List is played back. When
enabled, you can:
• Repeat audio as show n on pag e 3- 18
• Shuffle audio as shown on page 3-18
• Bookmark audio as shown on page 3-19
• Play an audio track once as shown on page 3-21
Using Your Player 3-17
Page 59
Play Modes are disabled by enabling the “Normal” mode as described in “Disabling Play Modes” on
page 4-26.
Note: In the next few pages, we will assume that you are playing a track. If you select a Play Mode when
not playing a track, the Play Mode icon appears but the mode itself is activated only when playback
resumes.
Repeating audio
If there is only one track in
the Playing List when
“Repeat All” is enabled,
that track will be repeated
continuously.
Shuffling audio
You can choose to repeat a track or repeat the whole Playing List.
To repeat a track in the Playing List
1. Press the NOW PLAYING button until the Playing List screen appears.
Note: If you are in the Playing Track screen, press the Scroller and skip to step 4.
2. Scroll Select the currently playing track. A list appears.
3. Scroll Select “Play Mode...”. A list appears.
4. Scroll Select “Repeat Track”. The Repeat Track icon appears onscreen and the track is
repeated continuously until you stop it.
To repeat the whole Playing List
1. Press the NOW PLAYING button until the Playing List screen appears.
Note: If you are in the Playing Track screen, press the Scroller and skip to step 4.
2. Scroll Select any selection in the Playing List. A list appears.
3. Scroll Select “Play Mode...”. A list appears.
4. Scroll Select “Repeat All”. The Repeat All icon appears onscreen and the Playing List is
repeated continuously until you stop it.
The Shuffle Play Mode can be used once (“Shuffle”) or continuously (“Shuffle Repeat”).
To Shuffle the Playing List once
1. Press the NOW PLAYING button until the Playing List screen appears.
Note: If you are in the Playing Track screen, press the Scroller and skip to step 3.
2. Scroll Select any selection in the Playing List. A list appears.
Using Your Player 3-18
Page 60
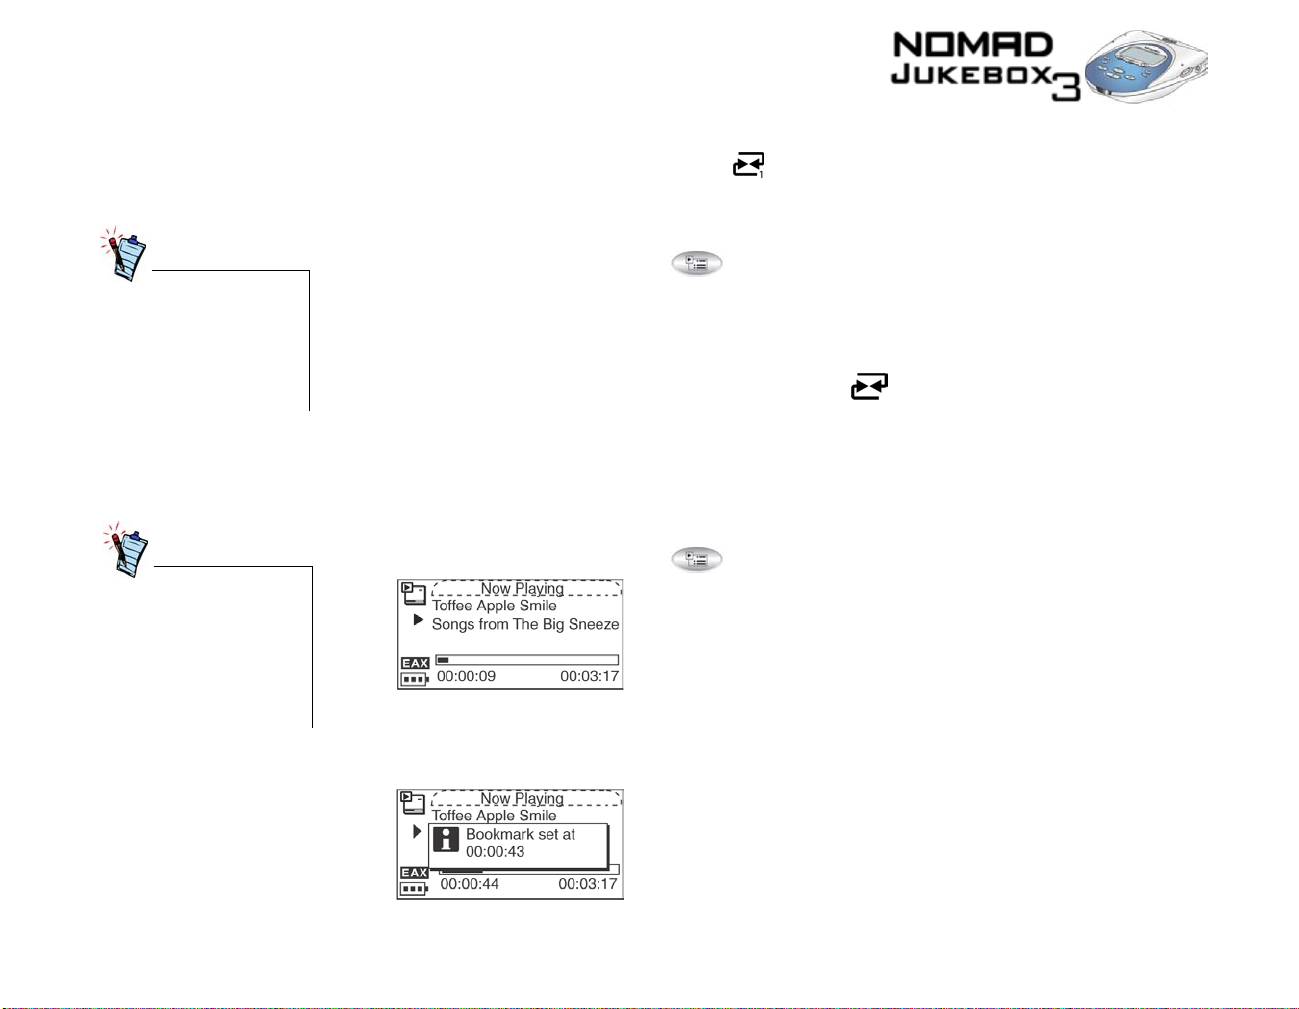
If there is only one track in
the Playing List when
“Shuffle Repeat” is enabled,
that track will be repeated
continuously.
3. Scroll Select “Play Mode...”. A list appears.
4. Scroll Select “Shuffle”. The Shuffle icon appears onscreen and a track is selected at random
and played back. The Playing List stops playing once the track ends.
To Shuffle Repeat the Playing List continuously
1. Press the NOW PLAYING button until the Playing List screen appears.
Note: If you are in the Playing Track screen, press the Scroller and skip to step 3.
2. Scroll Select any selection in the Playing List. A list appears.
3. Scroll Select “Play Mode...”. A list appears.
4. Scroll Select “Shuffle Repeat”. The Shuffle Repeat icon appears onscreen and tracks are
selected at random and played back continuously until you stop playback.
Bookmarking a
track
A track can only be
bookmarked once; setting a
new bookmark will
automatically remove any
previous bookmark in the
track.
Bookmarking a track sets a playback point—you can jump to this point whenever you play the
bookmarked track. This is useful if, for example, you want to bookmark an audio book.
To bookmark a track
1. Press the NOW PLAYING button until the Playing Track screen appears.
2. Press the Scroller. A list appears.
3. Scroll Select “Set Bookmark” at the point where you want to set the bookmark. A message box
appears, telling you that the bookmark has been set at the selected point.
Using Your Player 3-19
Page 61
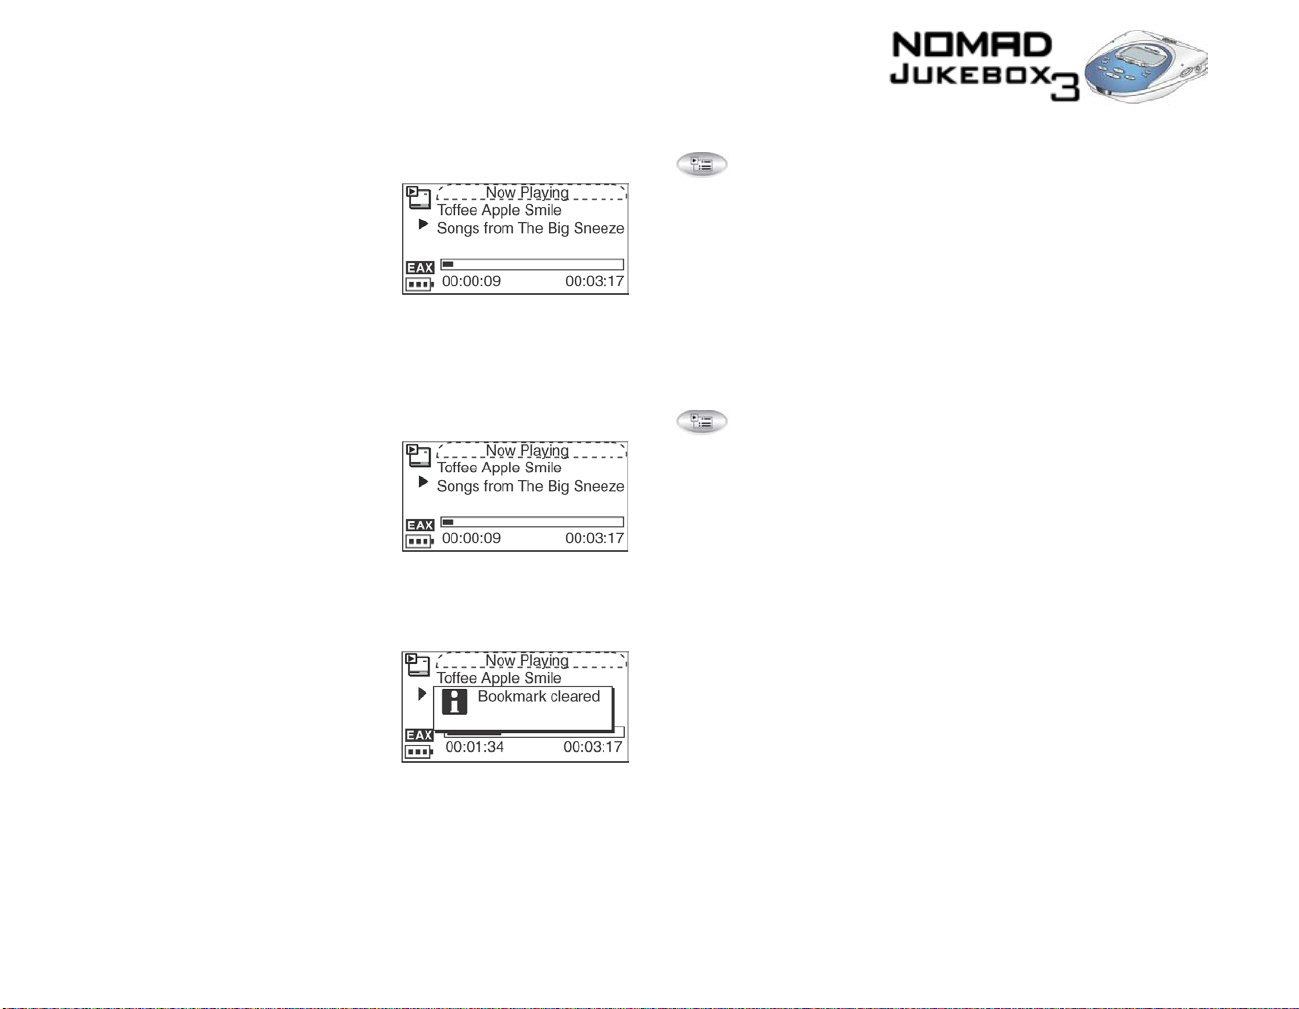
To play the track from the bookmarked point
1. Press the NOW PLAYING button until the Playing Track screen appears.
2. Press the Scroller. A list appears.
3. Scroll Select “Go to Bookmark”. The track plays from the bookmarked point.
To remove a bookmark
1. Press the NOW PLAYING button until the Playing Track screen appears.
2. Press the Scroller. A list appears.
3. Scroll Select “Clear Bookmark”. A message box appears, telling you that the bo okmark has been
cleared.
Using Your Player 3-20
Page 62
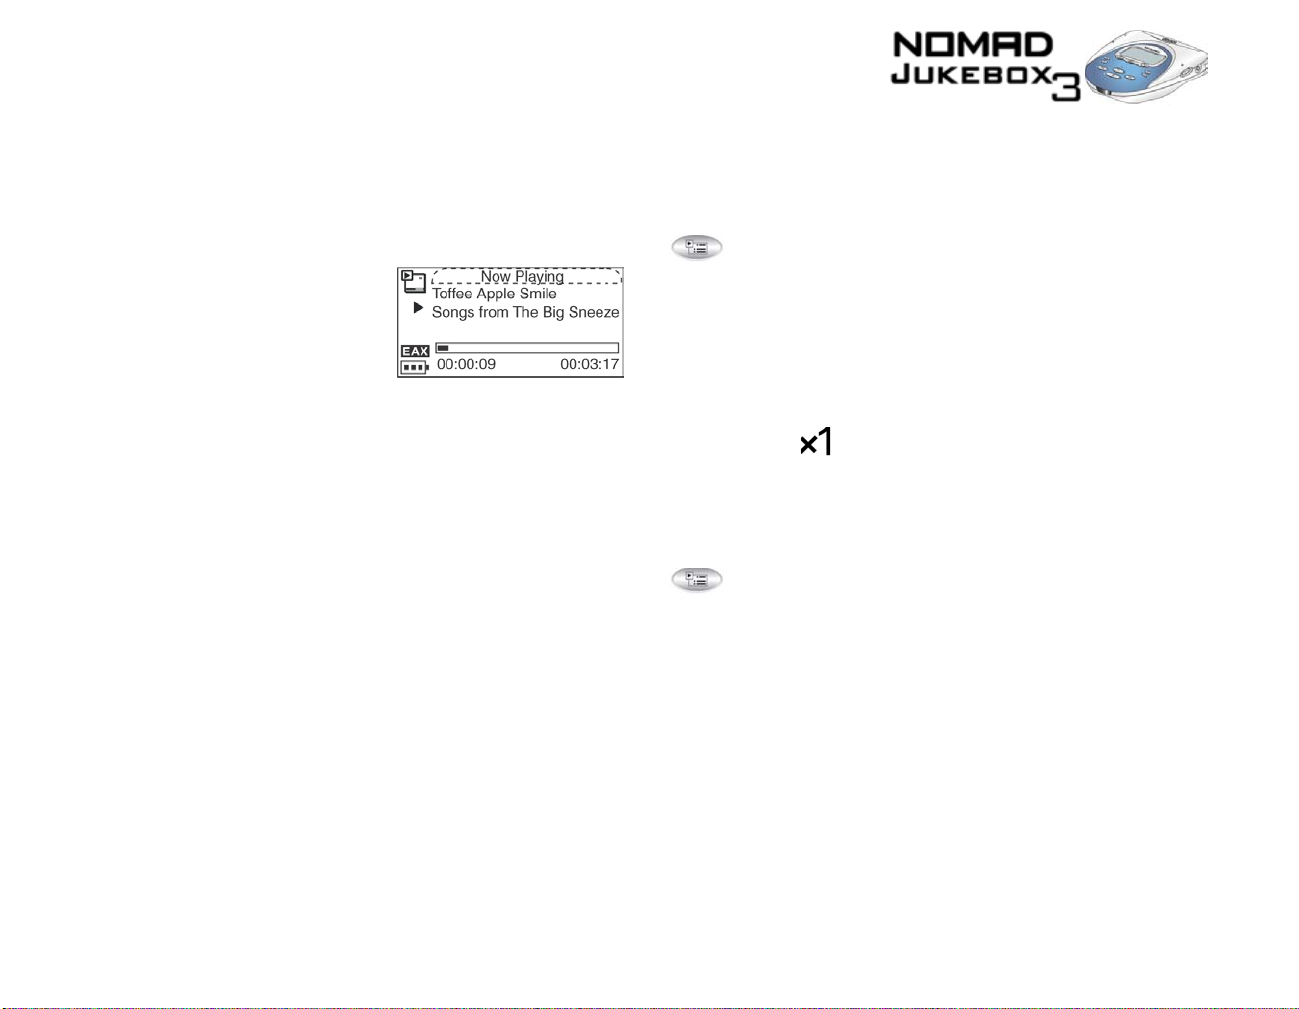
Playing a track once
When the Playing List is played normally, each track in the Playing List is played, from the first track to
the last. However, when the Track Once Play Mode is enabled, playback stops once the current track
ends.
To play a track once
1. Press the NOW PLAYING button until the Playing Track screen appears.
2. Press the Scroller. A list appears.
3. Scroll Select “Track Once”. The Track Once icon appears onscreen. The Playing List stops
playing back once the track ends.
Disabling Play
Modes
Once the “Normal” mode is enabled, each track in the Playing List is played, from the first track to the
last.
1. Press the NOW PLAYING button until the Playing List screen appears.
Note: If you are in the Playing Track screen, press the Scroller and skip to step 4.
2. Scroll Select any selection in the Playing List. A list appears.
3. Scroll Select “Play Mode...”. A list appears.
4. Scroll Select “Normal”. The Playing List plays back normally.
Using Your Player 3-21
Page 63
Using EAX
General information about
EAX is available in “About
EAX” on page B-3, while
information about specific
EAX settings can be found
in “Useful terms to know”
on page A-2.
Besides Play Modes, your player also allows you to enhance your listening experience with EAX
technologies formerly available only with Creative's Sound Blaster Live! and Audigy audio cards. EAX
technologies (or “Settings”) available in your player include:
• Smart Volume Management (SVM), which intelligently controls the dynamic range of audio,
providing a superior audio experience in difficult listening environments such as in a plane or car.
• Time-Scaling, which allows you to speed up or slow do wn audio without changing pitch or distorting
sound quality.
• Environment, a collection of presets that allo ws you to experience audio in the virtual environment of
your choice, such as in a Concert Hall or Cathedral.
• Advanced EQ, a collection of equalizer settings which can enhance audio of a particular genre.
Listen to the difference when you select “Jazz” in a jazz recording.
• Spatialization, which enhances your audio soundstage, useful if, for example, you are listening to
audio with headphones.
To use EAX with your currently playing audio:
1. Select an EAX setting.
2. Select a preset, rate or mode to use with the selected EAX setting.
3. Turn on EAX.
This simple process is described in the following instructions.
To select an EAX setting
1. Press the EAX button .
2. Scroll Select “Setting:X” (where X represents the EAX setting currently selected). A list appears.
3. Scroll Select the EAX setting you want.
To select a preset, rate or mode for use with your EAX setting
1. If you are not already in the EAX screen, press the EAX button .
2. Scroll Select “Preset:X”, “Rate:X” or “Mode:X” (where X represents the preset, rate or mode
currently selected). A list appears.
3. Scroll Select the preset, rate or mode you want to use with your EAX setting.
Using Your Player 3-22
Page 64
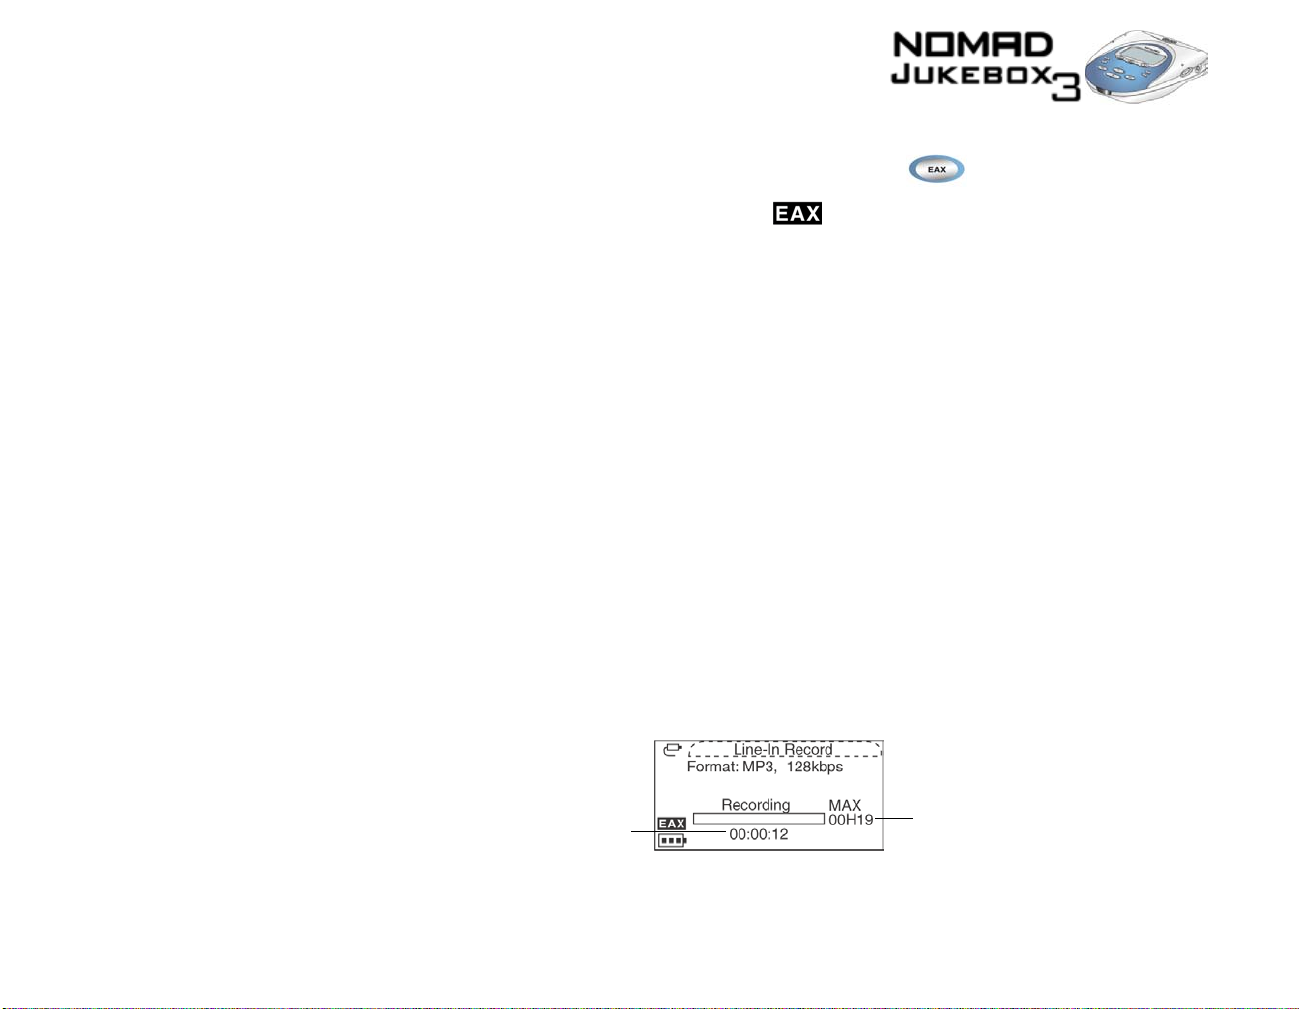
To turn on EAX
1. If you are not already in the EAX screen, press the EAX button .
2. Scroll Select “EAX:Off”. The EAX active icon appears onscreen and is applied immediately
to the audio being played.
Note: If you have connected a Wired Remote to your player, you can also turn on EAX by pressing the
EAX button on the remote.
Recording Audio
Another great NOMAD Jukebox 3 feature is its ability to record audio. Recorded audio is encoded
directly into the file format (WAV or MP3) and bitrate (quality) of your choice.
You can record from:
• A digital/optical line-in source (“Optical Recording”) such as a DVD or MiniDisc player, for
superior audio quality.
• An analog line-in source (“Line-in Recording”) with stereo output such as your CD player,
VCR or home hi-fi system, for good audio quality.
• The microphone on your optional Wired Remote or FM Wired Remote ("Wired Remote
Recording") for lower quality recordings. Useful for recording important interviews on the
move.
When recording, note that the available recording time is determined by:
• Available hard disk space in your player.
• File format and bitrate selected for recording.
• Battery power remaining in your player.
When recording, you will see a bar showing you the time available for recording. You will also see
another bar showing you the elapsed recording time.
Elapsed Recording Time
See “About MP3” on page B-2 for more details on the appropriate file format and bitrate to use for your
recordings.
Maximum Time Available
For Recording
Using Your Player 3-23
Page 65
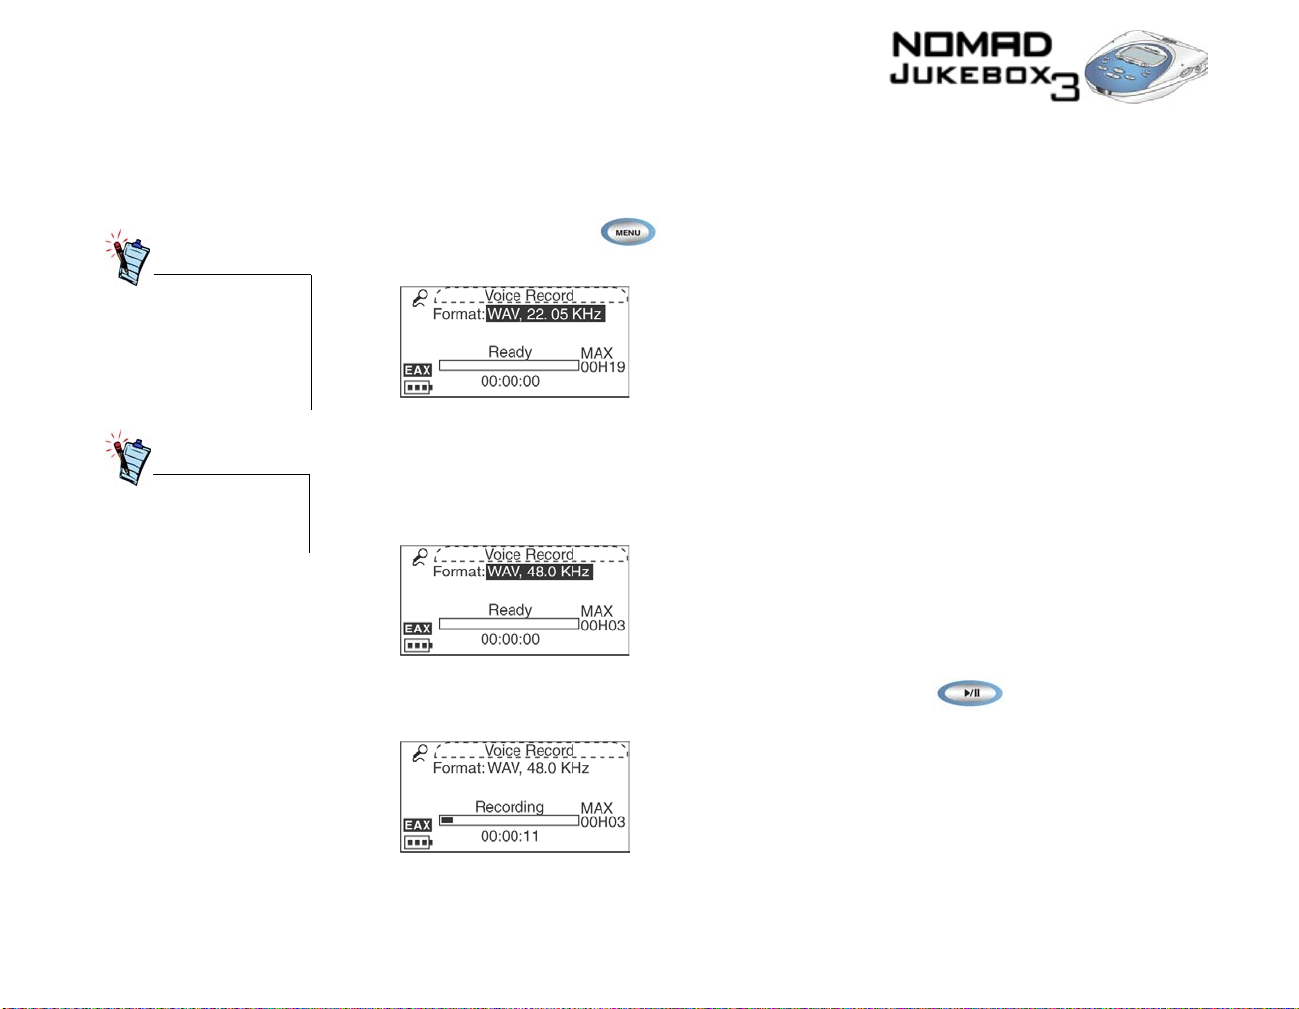
Wired Remote microphone recording
You can make Wired
Remote Microphone
recordings with either a
wired remote or FM Wired
Remote. Both have built-in
microphones.
To pause or resume
recording, press the Pause
button.
To make a Wired Remote microphone recording
1. Connect the Wired Remote to your player as described in the documentation accompanying the
Wired Remote.
2. Press the MENU button .
3. Scroll Select “W.Remote Recording”. The Voice Record screen appears.
Note: You can also quickly access the Voice Record screen by pressing and holding the EAX
button on the Wired Remote.
4. Press the Scroller. A list appears.
5. Scroll Select the file format and bitrate you want to use for this recording. The selected file format
appears onscreen.
6. When you are ready to record, press and hold the RECORD button until the “Recording”
message appears onscreen.
Using Your Player 3-24
Page 66
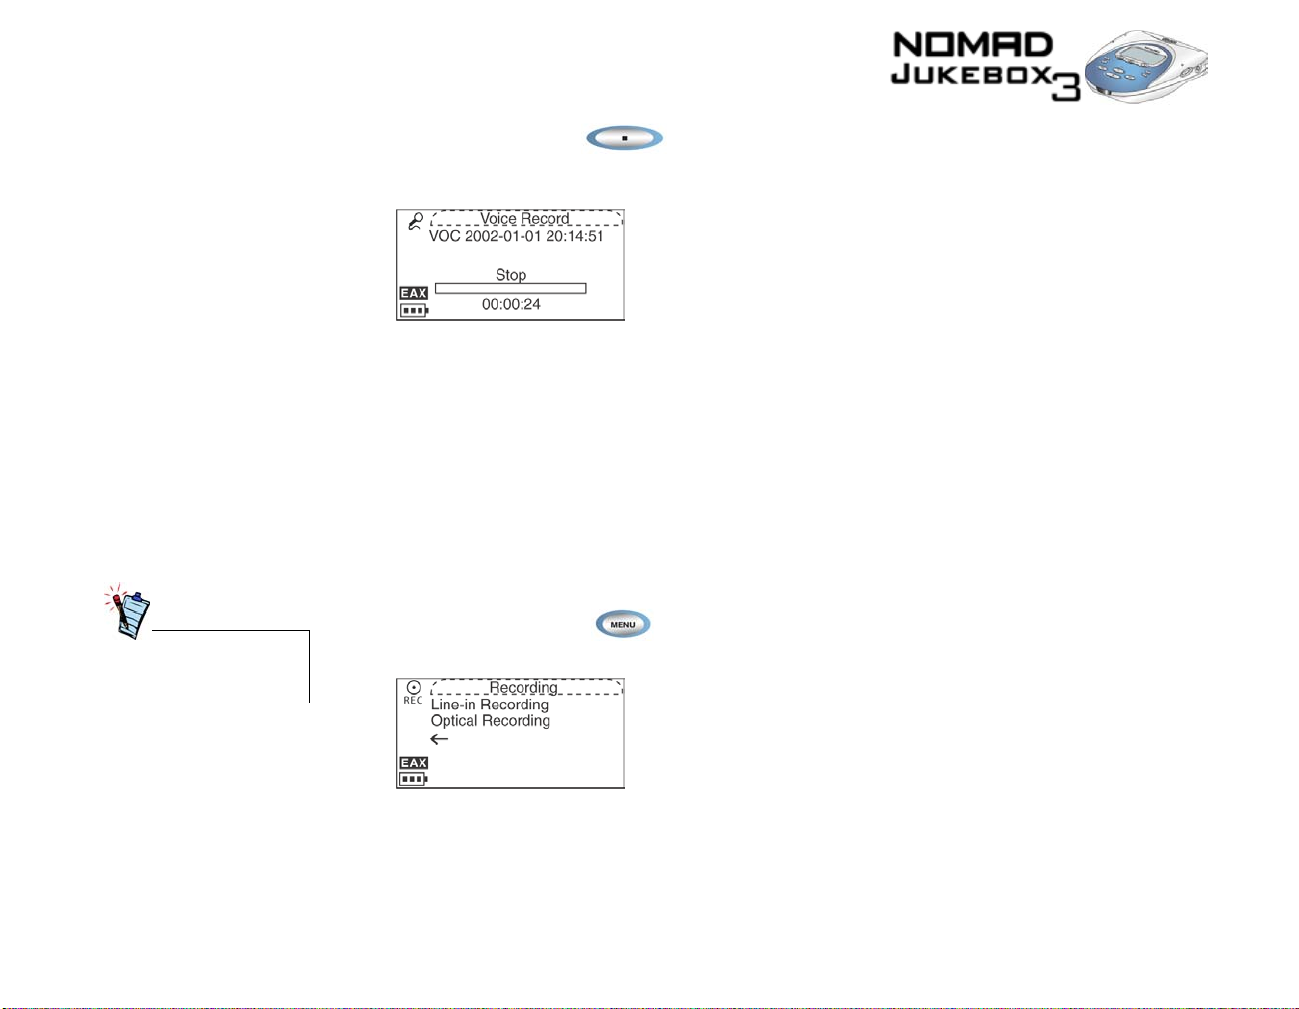
7. Press the STOP button to end the recording. A name is automatically assigned to your
recording and it is saved to the Recordings audio category in your Music Library . The naming
convention typically used is: “VOC [Current Date] [Current Time]”. For example:
At this point, you can:
• Start a new recording by pressing the Scroller, then Scroll Selecting “New Recording” and
repeating instructions from step 1 above.
• Delete the saved recording by pressing the Scroller and Scroll Selecting “Delete Recording”.
The recording is permanently deleted from the Recordings category in the Music Library.
• Preview the saved recording by pressing the Scroller and Scroll Selecting “Preview”.
Analog line-in recording
To pause or resume
recording, press the P A USE
button.
To make an analog line-in recording
1. Connect the analog line-in source to your player as described in the documentation accompanying
the line-in device.
2. Press the MENU button .
3. Scroll Select “Line-in Recording”. The Recording screen appears.
Using Your Player 3-25
Page 67
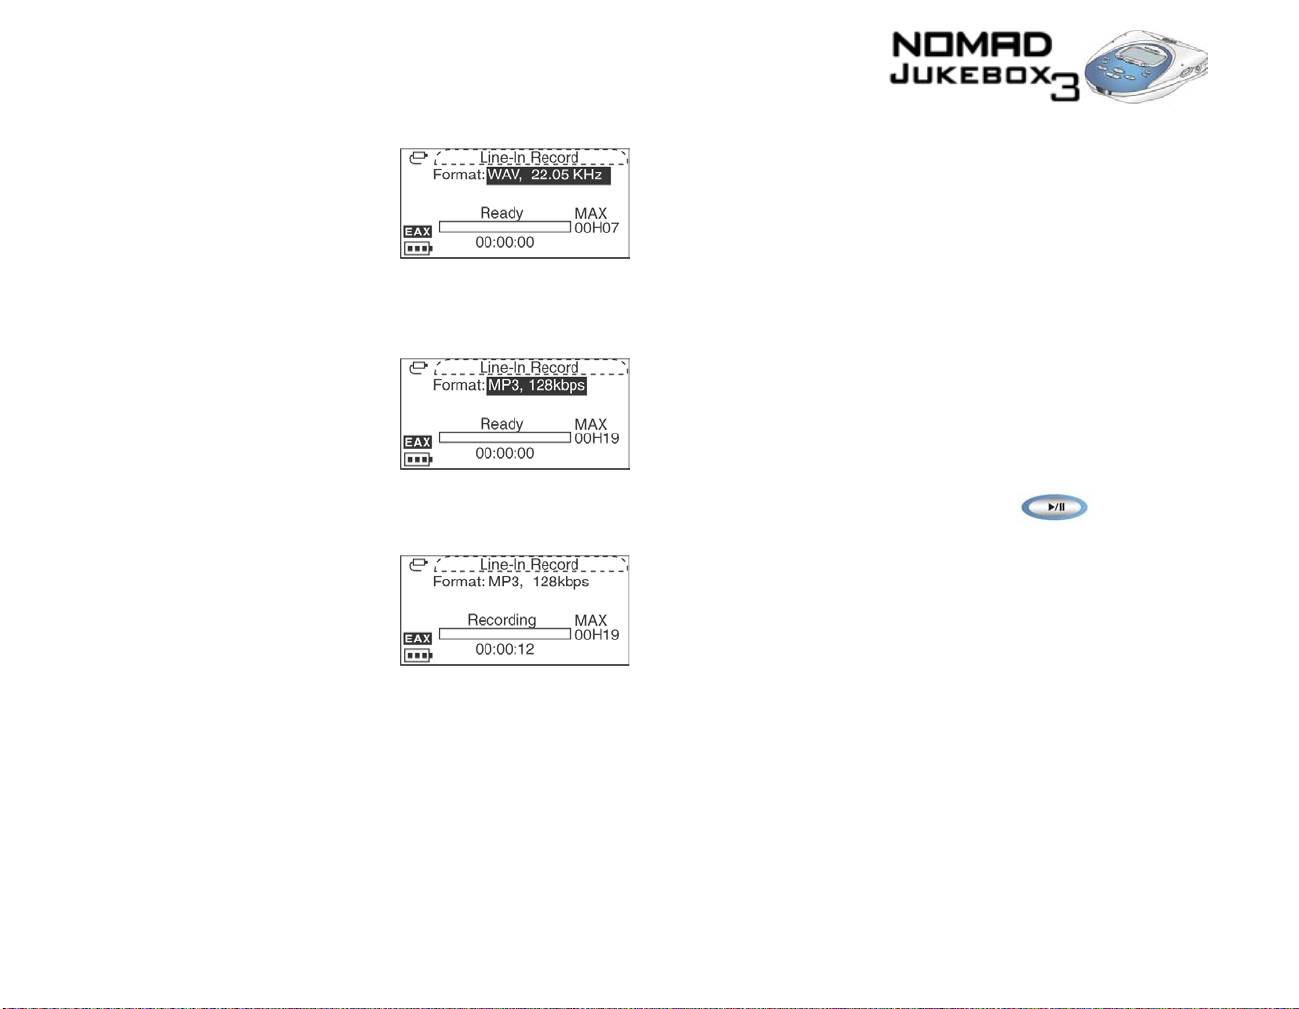
4. Scroll Select “Line-in Recording”. The Line-In Record screen appears.
5. Press the Scroller. A list appears.
6. Scroll Select the file format and bitrate you want to use for this recording. The selected file format
appears onscreen.
7. When the analog line-in source is ready, press and hold the RECORD b utton until the
“Recording” message appears onscreen.
Using Your Player 3-26
Page 68
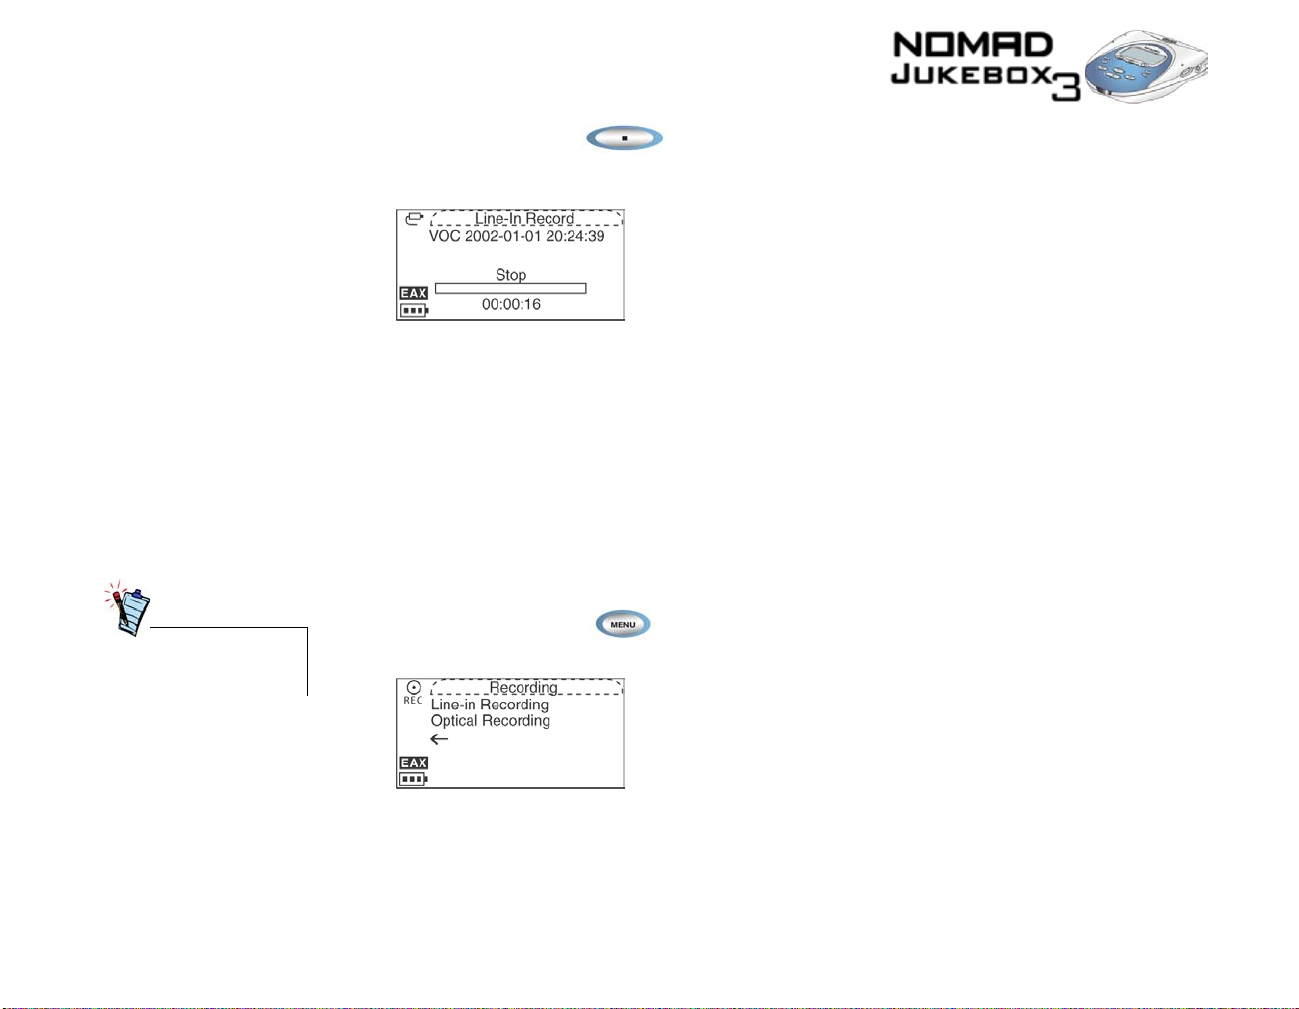
8. Press the STOP button to end the recording. A name is automatically assigned to your
recording and it is saved to the Recordings audio category in your Music Library . The naming
convention typically used is: “Line [Current Date] [Current Time]”. For example:
At this point, you can:
• Start a new recording by pressing the Scroller, then Scroll Selecting “New Recording” and
repeating instructions from step 1 above.
• Delete the saved recording by pressing the Scroller and Scroll Selecting “Delete Recording”.
The recording is permanently deleted from the Recordings category in the Music Library.
• Preview the saved recording by pressing the Scroller and Scroll Selecting “Preview”.
Digital/optical line-in recording
To pause or resume
recording, press the P A USE
button.
To make a digital/optical line-in recording
1. Connect the digital/optical line-in source to your player as described in the documentation
accompanying the line-in device.
2. Press the MENU button .
3. Scroll Select “Line-in Recording”. The Recording screen appears.
Using Your Player 3-27
Page 69
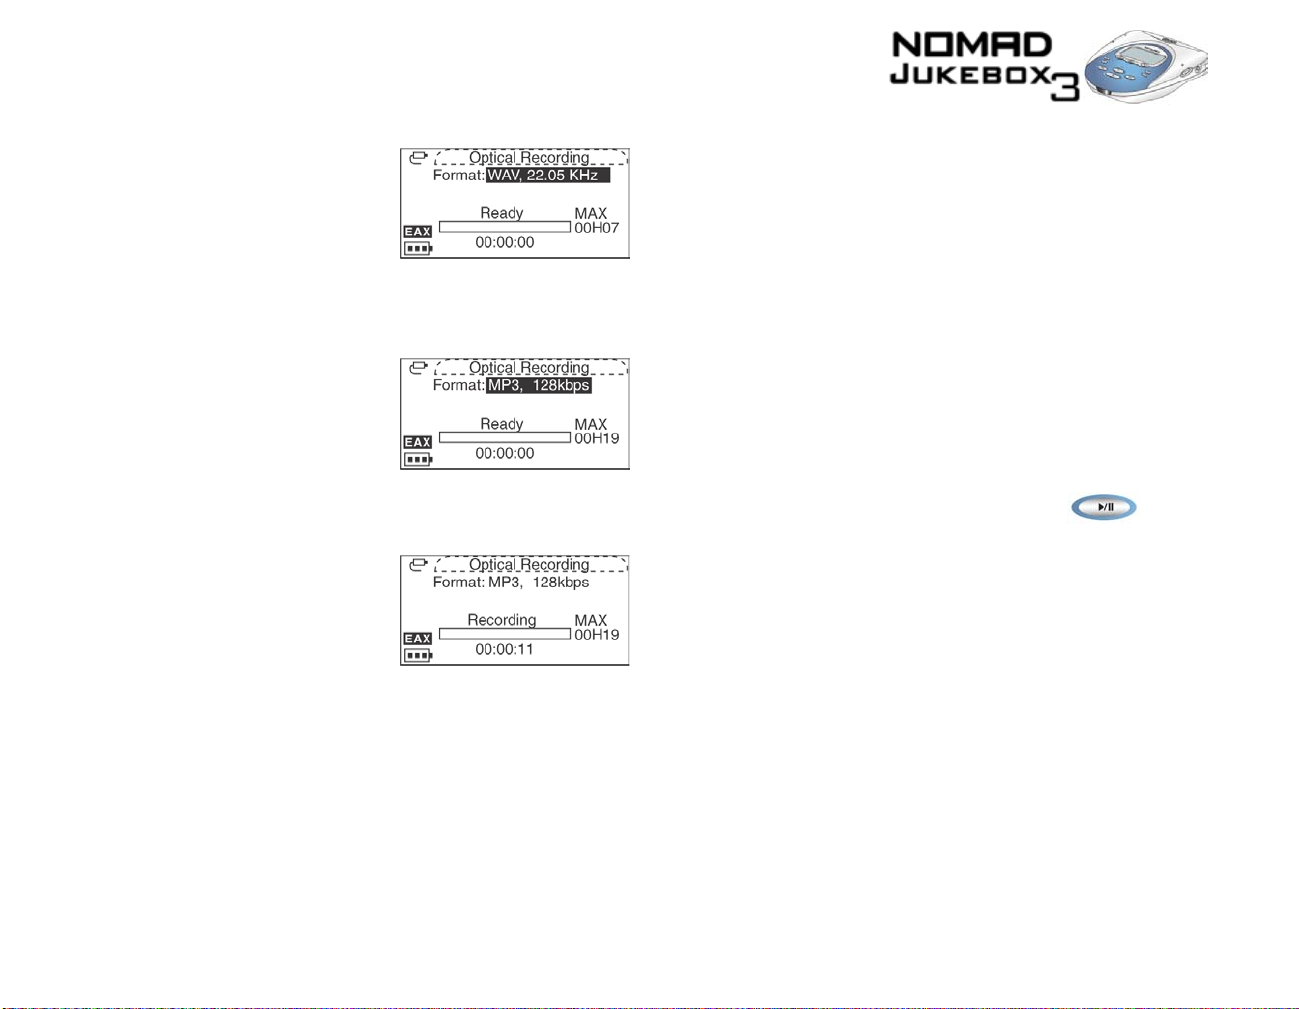
4. Scroll Select “Optical Recording”. The Optical Recording screen appears.
5. Press the Scroller. A list appears.
6. Scroll Select the file format and bitrate you want to use for this recording. The selected file format
appears onscreen.
7. When the digital/optical line-in source is ready, press and hold the RECORD button until
the “Recording” message appears onscreen.
Using Your Player 3-28
Page 70
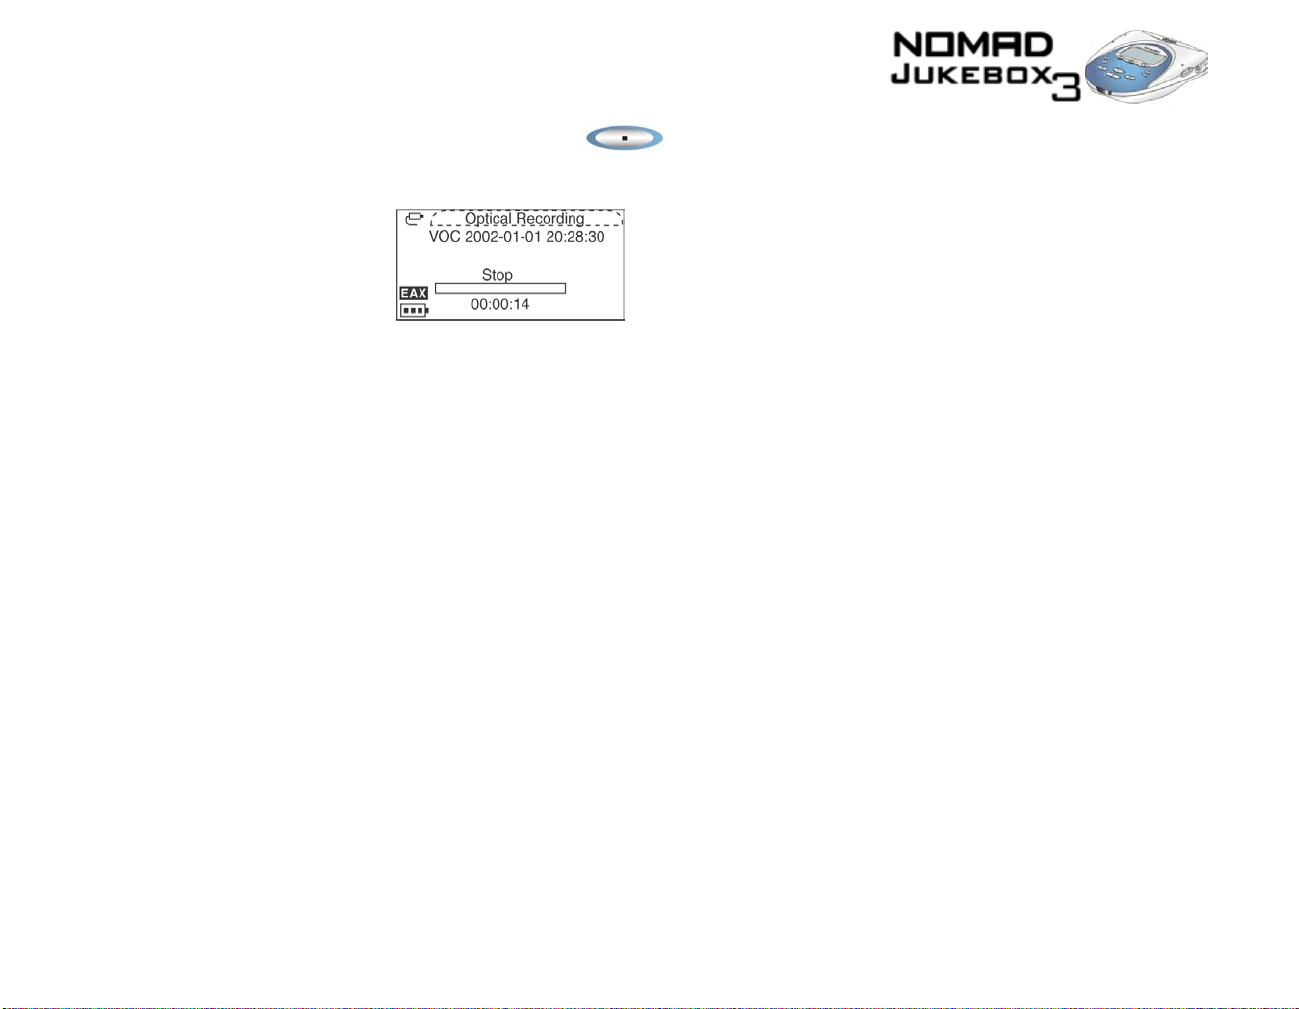
8. Press the STOP button to end the recording. A name is automatically assigned to your
recording and it is saved to the Recordings audio category in your Music Library . The naming
convention typically used is: “Line" [Current Date] [Current Time]”. For example:
At this point, you can:
• Start a new recording by pressing the Scroller, then Scroll Selecting “New Recording” and
repeating instructions from step 1 above.
• Delete the saved recording by pressing the Scroller and Scroll Selecting “Delete Recording”.
The recording is permanently deleted from the Recordings category in the Music Library.
• Preview the saved recording by pressing the Scroller and Scroll Selecting “Preview”.
Using Your Player 3-29
Page 71
4
Using Applications
Page 72

Using Applications
Creative PlayCenter is a powerful application that you will use to transfer audio files to and from your
player. In addition to transferring files, PlayCenter can be used to rip audio CDs, manage music libraries
in your player and PC, connect to CDDB and much more.
PlayCenter also has an AudioSync feature which enables you to automatically compare and transfer
tracks between your player and computer. Detailed instructions on how to use this, and other great
PlayCenter features, are available in the PlayCenter Help file.
Creative File Manager is a dedicated data file manager for your player. It can be used to efficiently
manage the transfer and storage of data files between your computer and player.
Creative PlayCenter, Creative File Manager, and other useful software, are included on your installation
CD. See "Installing Software" on page 2-5.
Using Applications 4-2
Page 73
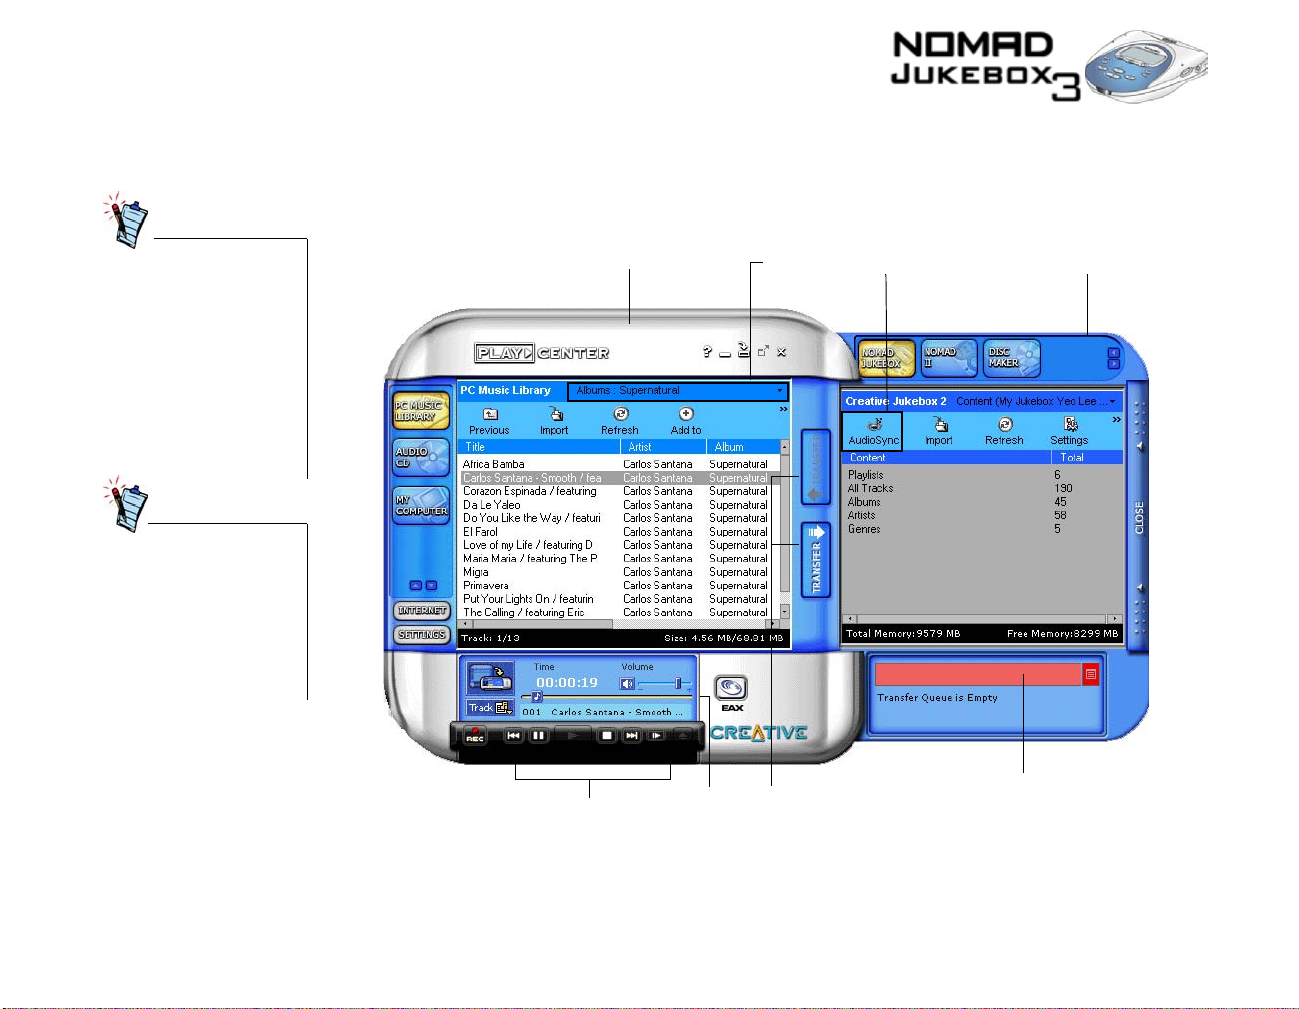
Using PlayCenter
Only basic instructions on how to use PlayCenter with your player are provided in this chapter—
extensive instructions are found in the PlayCenter Help file.
An overview of the PlayCenter interface is provided below:
After PlayCenter is
installed, it stores all
transferred or ripped audio
tracks into a default folder.
You can change the
location of this folder or
default folder name in
PlayCenter settings. See the
PlayCenter’s Help file for
details.
To import existing audio
tracks in your PC to the PC
Music Library, click the PC
MUSIC LIBRARY button
in PlayCenter's Main
Window, then click "Auto
Scan" on the Toolbar.
Main Window
Audio Playback
Buttons
Volume
Slider
Media Bar
Transfer
Buttons
Audio Sync Button
Transfer Window
Transfer
Queue Bar
Figure 4-1: PlayCenter Interface
Using Applications 4-3
Page 74
Ripping tracks from an audio CD
Rather than manually
entering track information,
retrieve such audio CD
information from CDDB
before ripping tracks.
Change the default ripping
format and bitrate for
higher or lower quality
audio.
1. Insert an audio CD into your CD- ROM drive.
If the CD starts playing, click the STOP button. You cannot rip tracks while the CD is playing.
2. In PlayCenter’s Main window, click the AUDIO CD button.
3. Click the boxes next to the tracks you want to rip.
4. To rip to your hard disk, click either the MY COMPUTER or PC MUSIC LIBRARY buttons in the
Transfer window. Note that you can configure the default location for storing rippied track in
Playcenter settings.
To rip directly to your player, click the NOMAD JUKEBOX button in the Transfer window.
5. Click the RIP TO button. The Transfer Queue bar shows the ripping progress.
6. To preview the song that you have just ripped in PlayCenter, click the song title and then click
“Preview” on the Toolbar.
Transferring tracks
Transfer tracks to and from you player by manually selecting the tracks for transfer or by using
PlayCenter's AudioSync feature.
AudioSync is a fast and simple method for synchronizing the music libraries in your PC and NOMAD
Jukebox. To customize music library synchronization, simply select the desired transfer modes and
transfer options in PlayCenter Settings.
Your player must be properly connected to your computer before transferring tracks, as described in
"Installing Software" on page 2-5.
Using Applications 4-4
Page 75

To synchronize
tracks in your music
libraries
1. In the Main window, click the NOMAD JUKEBOX button.
2. On the Toolbar, click "AudioSync".
PlayCenter starts the AudioSync operation.
3. A dialog box appears, showing you the default transfer mode and track comparison information.
The information in the dialog box may take a while to appear, depending on the number of tracks
being analyzed. When the comparison is complete, a summary of tracks and playlists that can be
transferred for both music libraries is shown.
4. Click the CONTINUE button to proceed with the AudioSync operation or wait until the dialog box
disappears.
If you have not configured AudioSync to "Automatically transfer tracks after track comparison",
you can click the CANCEL button to cancel the AudioSync operation.
5. If the music library to be updated has sufficient space for additional tracks, the Transfer Queue
appears.
The Transfer Queue disappears when the transfer is complete.
6. If the music library to be updated does not have enough space, a dialog box appears for you to
select a transfer option, to reduce the size of tracks to be transferred.
Select an option to transfer "tracks from selected genres or artists only or tracks from selected
playlists only".
7. Click the OK button.
8. If you chose to "transfer tracks from selected genres or artists only", select either Genre or Artist in
the Genre/Artist Selection List.
9. In the list that appears, select the required genres or artists to transfer.
The list may take a while to appear.
Select the required genres or artists so that the size of the "Tracks to be transferred" does not exceed
the "Space Available".
10. If you chose to transfer tracks from selected playlists only, select the required playlists so that the
size of the Tracks to be transferred does not exceed the Space Available.
11. Click the OK button to start the transfer.
The Transfer Queue disappears when the transfer is complete.
Using Applications 4-5
Page 76

To transfer specific
tracks from your PC
to your player
1. Turn on your player.
2. In the Transfer window, click the NOMAD JUKEBOX button.
3. In the Main window, click the PC MUSIC LIBRARY button.
Locate the folder where your tracks are stored. Select the tracks you want to transfer to your player.
4. Click the lower TRANSFER button.
To use your player after the transfer, disconnect your player from the computer.
To transfer specific
tracks from your
player to your PC
Owing to copyright
limitations, preloaded audio
in your player cannot be
transferred to your PC.
Editing audio file information
1. Turn on your player.
2. In the Transfer window, click the NOMAD JUKEBOX button.
Locate and select the tracks to be transferred from your player.
3. In the Main window, click the PC MUSIC LIBRARY button.
Locate the folder or album for storing the tracks.
4. Click the upper TRANSFER button.
5. To use your player after the transfer, disconnect your player from the computer.
This function can be useful if, for example, you want to change the name of a track, album, artist or
genre in your player.
1. In the Main window, click the NOMAD JUKEBOX button. PlayCenter takes control over your
player.
2. Click the track you want to edit.
3. On the Toolbar, click “Properties”.
4. In the Track Properties window, double-click the property to edit, for example, Album, Artist or
Genre.
5. Click the OK button.
Using Applications 4-6
Page 77

Creating and editing playlists with PlayCenter
Playlists can be created in your player, as described in "Saving the Playing List as a playlist" on page 3-
15. They can also be created in PlayCenter. Extensive editing options, such as adding or deleting tracks,
are also available with PlayCenter.
To c re a t e a p l ay li s t
To add tracks to a
playlist
To r e m o v e t r ac k s
from a playlist
To c ha n g e t h e
playback order in a
playlist
1. In the Main window, click the NOMAD JUKEBOX button. PlayCenter takes control over your
player.
2. Click the MEDIA BAR, and select “Playlists”.
3. On the Toolbar, click “New”.
4. Type the name of your new playlist.
5. Click the MEDIA BAR, and select a category, for example, All Tracks or By Album.
6. Select the tracks you want to add to the playlist.
7. Right-click the selected tracks and select “Add to Playlist”.
8. Select the playlist to add the tracks to.
Follow steps 5 through 8 in “T o create a playlist” above .
1. In the Main or Transfer window, click the NOMAD JUKEBOX bu tt o n .
2. Click the MEDIA BAR, and select “Playlists”.
3. Locate the playlist from which you want to delete tracks.
4. Select the tracks to delete.
5. On the Toolbar, click “Delete”.
1. In the Main or Transfer window, click the NOMAD JUKEBOX bu tt o n .
2. Click the MEDIA BAR, and select “Playlists”.
3. Locate the playlist for which you want to change the play order.
4. Click the track and click the SHIFT-UP or SHIFT-DOWN icons on the Toolbar.
Using Applications 4-7
Page 78
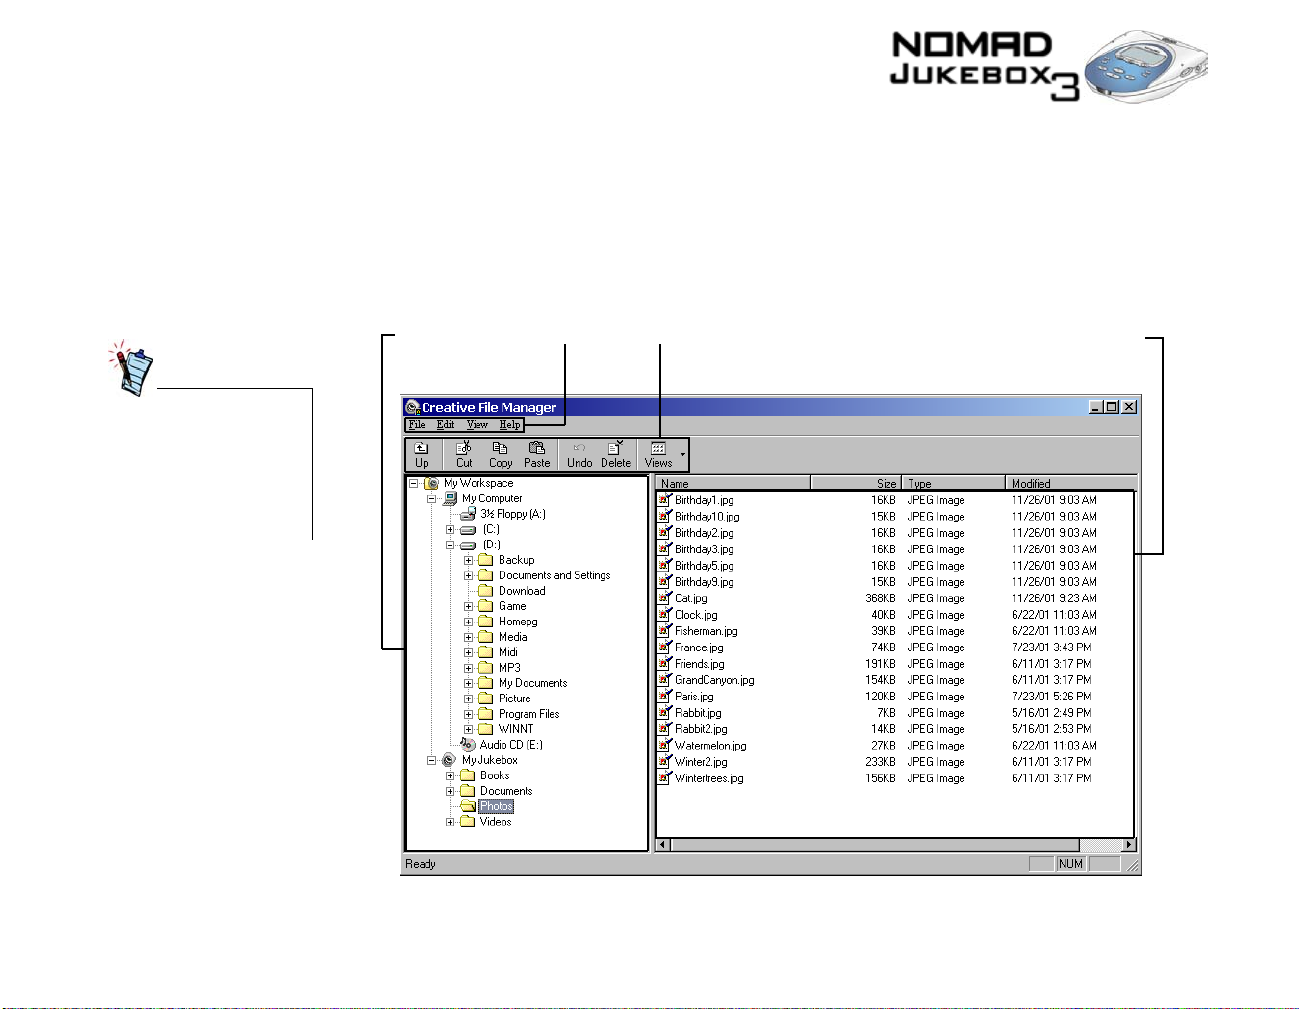
To d el e t e a p l a y l i s t
1. In the Main window, click the NOMAD JUKEBOX button.
2. Click the MEDIA BAR, and select “Playlists”.
3. Click the playlist to delete.
4. On the Toolbar, click “Delete”.
Using File Manager
The Creative File Manager
application can be copied to
a single floppy disk,
allowing you to install the
application onto another
PC.
Extensive instructions on how to use File Manager are in the File Manager Help file—only basic
instructions are provided here. An overview of the File Manager interface is provided below.
Left Pane
Menus
Shortcut
Buttons
Right Pane
Figure 4-2: F ile Manager Interface
Using Applications 4-8
Page 79

Transferring data files
Data files can be transferred to and from your player by either using the "copy-and-paste" or "drag-anddrop" functions. Audio tracks in MP3, WAV or WMA file formats will be stored as data files when they
are transferred from your PC; they cannot be played by your player.
To transfer a data
file by copying-andpasting
To transfer a data
file by dragging-anddropping
1. On the left pane, locate and click the drive that contains the file you want to copy.
2. Click the file to copy.
3. On the Edit menu, click "Copy".
4. Open the folder or disk where you want to put the copy.
5. On the Edit menu, click "Paste".
1. Click and drag the file that you want to copy to the destination folder.
2. Release the mouse button.
3. The selected file or folder is copied to the destination drive.
Using Applications 4-9
Page 80
A
Glossary
Page 81

Glossary
Useful terms to know
1394
Advanced EQ
AIFF
Analog audio
Analog Line-In
This section provides you with a brief explanation of functional terms, technology and abbreviations
used or referred to in this manual.
IEEE 1394 is a high-speed input/output technology for connecting devices to a computer. While similar
to USB, IEEE 1394 is more suited to high-speed multimedia devices such as video camcorders,
synthesizers, hard disks and other mass data storage media. IEEE 1394 supports data transfer rates of up
to 400 Mbps or 400 million bits per second. Like USB, IEEE 1394 offers incredible convenience with
“hot swap” capability. This means that you do not have to turn off or restart your computer when
attaching or detaching your 1394 device. Y ou can connect up to 63 devices to a single port.
Your player uses Creative’s SB1394 standard, which is compliant with IEEE 1394. See 1394.
See Equalization.
The Audio Interchange File Format (AIFF) is an audio file format developed by Apple Computer. AIFF
files tend to be as large as WAV files.
Non-digital audio. An example of an analog audio source is a cassette tape, or a vinyl record. Making an
analog recording from an analog source, for example, duplicating a cassette recording using a cassette
recorder, can result in imperfect recordings. Subsequent analog recordings from the first analog
recording usually suffer a progressive reduction in quality. See "Digital audio" on page A-4 for a
comparison.
Record audio from an analog source by using this connector. The connector accepts both analog or
optical line-in sources, automatically detecting whether the source is analog or optical.
See "Optical Line-In"
Glossary A-2
Page 82

AudioSync
AudioSync can synchronize the music libraries in your player and PC. If either library has insufficent
space, you can selectively transfer tracks by artist, genre or playlist. You can also set up AudioSync so
that either your player or PC is updated. Use an SB1394 or IEEE 1394 cable for lightning-fast transfers.
Bitrate
Bitstream
Bookmark
Category
CDDB
Codec
A bitrate indicates the average number of bits in one second of a digital audio file. MP3 encoders allow
you to specify the bitrate when making MP3 files. The higher the bitrate, the better the audio quality.
Unfortunately , this also means a larger file size.
A flow of information running through a device like an MP3 player. An MP3 bitstream can be translated
back into audio using an MP3 codec, like the codec developed by Fraunhofer IIS-A™.
An electronic bookmark for an audio track. If you prefer to play an audio track from the 12th second
onwards, make a bookmark at 12 seconds. Bookmarks are useful for long tracks. for example, a 45
minute narrative.
A general grouping of audio tracks, for example, Artist, Album or Genre.
This stands for Compact Disc DataBase. The GraceNote® Music Recognition Service™ is a public
information repository for thousands of audio CDs. Many people who listen to audio CDs and music
artists submit information about audio CD albums to GraceNote. This service compares, edits and
reconciles duplicate entries and combines many submissions into individual records.
PlayCenter helps you get information about your audio CD by accessing this massive database. This
saves you the trouble of typing in track information and ensures that track titles appear correctly in your
player.
This is a short form for COder/DECoder. An MP3 codec is an essential part of MP3 encoders and
players. It helps to translate audio into MP3 bitstreams and back.
Confirmation box
A variant of the message box, this box appears for you to confirm an action. For example, if your player
is locked, and you press a button, the confirmation box “Unlock Button?” appears. Use the Scroller to
make a choice in the box.
Glossary A-3
Page 83

Creative Audio
Stream Recorder
The Creative Audio Stream Recorder (ASR) is a software application that enables you to record
streaming audio content from the Internet, and then play it back on your computer or transfer it to your
player. You can record on-demand, or schedule the recording.
Creative File
Manager
Creative
PlayCenter 3
Creative Sound
Blaster Audigy
CreativeLink
Digital audio
Creative File Manager is a dedicated data file manager for your player. You can use File Manager to
efficiently manage the transfer and storage of data and media files between your computer and player.
With Creative File Manager, your player doubles as portable data storage.
For PC users only, this application is what you need to transfer audio files to and from your player.
PlayCenter enables you to rip audio from audio CDs and transfer them as playlists, albums or tracks to
your player.
See the PlayCenter Online Help for more information.
With the onboard 24-bit Analog-to-Digital Convertor (ADC) and Digital-to-Analog Converter (DAC),
the Sound Blaster Audigy card delivers high-definition sound of astounding quality with 96 kHz SPDIF
support. The Sound Blaster Audigy card, with its Audigy processor, is four times as powerful as its
nearest competitor. This enables awesome EAX ADVANCED HD™ technologies for your games and
music listening experience.
The SB1394 port provides easy high-speed connectivity to NOMAD portable digital audio players,
external CD-RW dri v es and other IEEE 1394 compatible devices like DV Camcorders, printers, scanners
and digital still cameras. You can connect your player to the Audigy’s SB1394 jack, without using a
separate IEEE 1394 interface card.
A unique type of interface for use with other Creative devices.
When you convert sound waves into binary data (0s and 1s), you are creating digital audio. Using proper
cables (for example, optical cables) with a standard encoding bitrate usually results in a perfect copy of
the original, with no degradation or noise. See "Analog audio" on page A-2 for a comparison.
Glossary A-4
Page 84

Docking device
Depending on the manufacturer’s intention, a docking device can be used for:
• charging a device (like a mobile phone’s desktop charger)
• enhancing a device (like Creative’s PC Dock)
• data transfer (like a handheld device’s docking station)
• any combination of the above
DRM
EAX
Encoder
Environment
Equalization
Firmware
Digital Rights Management (DRM) is a technology which enables the copyright owner of intellectual
property, like a digital audio file, to control how you, the listener, can use the file. It is normally used to
allow you to download digital audio files while preventing you from distributing the files to other people
or other devices. With DRM, digital audio files contain digital signatures. Creative PlayCenter and your
player are DRM-compliant.
EAX enables you to enhance your audio with various equalizer presets, environments and effects. For
example, you can apply a Concert Hall environment to a solo guitar track. Applying an environment will
make it seem as if the audio is coming from that environment. EAX also provides you with TimeScaling, Advanced EQ and Smart Volume Management.
While there are many types of encoders, an MP3 encoder is a tool capable of translating audio into an
MP3 bitstream. You need an MP3 encoder to create MP3s.
A collection of presets, for example, Opera House, Bath Room and Auditorium, that you can choose to
enhance your audio.
A process that increases or decreases audio at certain frequencies, so that treble, midrange or bass
sounds are heightened or reduced. Advanced EQ provides equalizer presets such as Acoustic, Classical
and Jazz.
The software in your player that allows you to perform numerous functions including playing and
recording audio. The firmware can be used with the supplied applications as described in "Using
Applications" on page 4-2.
You can check to see if your player’s firmware is up-to-date by checking the firmware version number
against the firmware download available at www.NOMADworld.com.
Glossary A-5
Page 85

For information on how to check your firmware version number, see "Checking Jukebox information" on
page 2-10. To upgrade your firmware, see "Using Your Player" on page 3-2.
Genre
Gigabyte (GB)
GraceNote
Hard disk
ID3 tag
InfraRed (IR)
kbps
kHz
A general category of music, for example, Soundtrack, Acid Rock or Classical.
About a thousand million bytes. A 1 GB device can store 1000 MB worth of MP3 files. If your MP3 files
are encoded at 128 kbps and each file is about 4 minutes long, a 10 GB device can store about 2500 MP3
files.
See “CDDB”.
The hard disk on your player is where all of your audio is stored. The hard disk is also known as a Hard
Disk Drive.
ID3 tags are digitally embedded in MP3 files, providing you with information such as the title, album,
artist and genre of a song. This information is displayed when the MP3 audio track is played back. ID3
tags can be edited.
A technology standard for transmitting data without cables, using infrared light waves. Many devices like
wireless remote controls use IR.
Kilobits-per-second. A measure of how good the bitrate is. 128 kbps is the standard bitrate for MP3 files.
128 kbps MP3s are near-CD quality. However, you can encode MP3s at 160 or 192 Kbps.
This stands for kiloHertz, literally a thousand cycles per second, a measure of audio frequency.
Line-In Recording
A WAV or MP3 file made by recording audio through the Line-In connector of your player. In general,
recordings made via the Line-In connector are of better quality than a recording made using the Wired
Remote. You would normally use the Line-In connector to record music from CD players or other audio
playing devices. If you select a high sampling rate for a WAV recording, the audio quality can easily
match that of a MiniDisc recording or a DAT.
Glossary A-6
Page 86
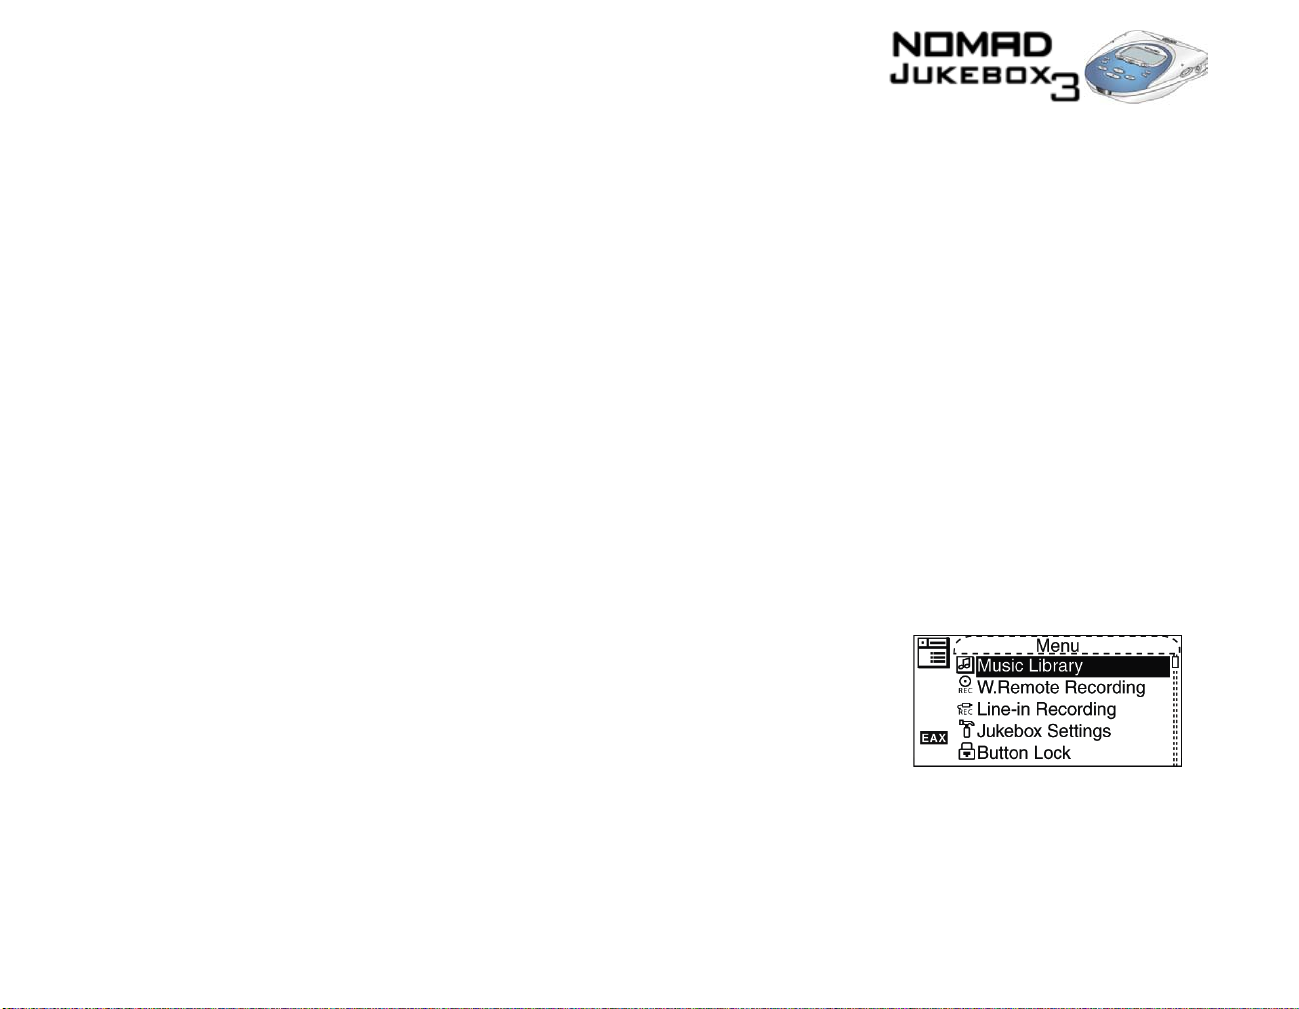
List
From a list, you can select one of many options listed. For example, a list can contain available EAX
environments, or letters and numbers for you to construct a name for a recording.
Lithium-Ion battery
(Li-Ion)
Match Volume
Megabyte (MB)
Memory Effect
Menu
A battery composed of Lithium, a light metal with high electrochemical potential. Lithium batteries are
light and store high amounts of electrical energy. Because of this, Lithium-Ion batteries are ideal for
portable devices like your player. Lithium-Ion batteries do not use poisonous metals, such as lead,
mercury or cadmium, and have no memory effect problems. However, they are more expensive than
conventional Nickel-Cadmium (NiCad) and Nickel Metal-Hydride (NiMH) batteries.
Your player uses Li-Ion batteries.
This feature keeps the playback volume of all the tracks on your playlist at the same level. With this
activated, you don’t have to keep adjusting the volume from song to song.
About 1 million bytes. Bytes, megabytes and gigabytes are measures of how much data a storage device
can hold. For example, a 3-minute MP3 encoded at standard bitrates is approximately 3MB in size.
A property of some NiCad batteries that can surface when a battery is not fully used or discharged before
it is recharged. This can cause the battery to have a false ‘memory’ as to how much electrical energy it
can store. This results in significantly lower battery levels, even after a full charge.
A selection of options in your player’s screen. For example, this
screen shows a menu with four options, Music Library, Recording,
Jukebox Settings and Button Lock.
Message box
A pop-up window that appears to give you information, for example, “Bookmark set at 00:04:23”.
Glossary A-7
Page 87
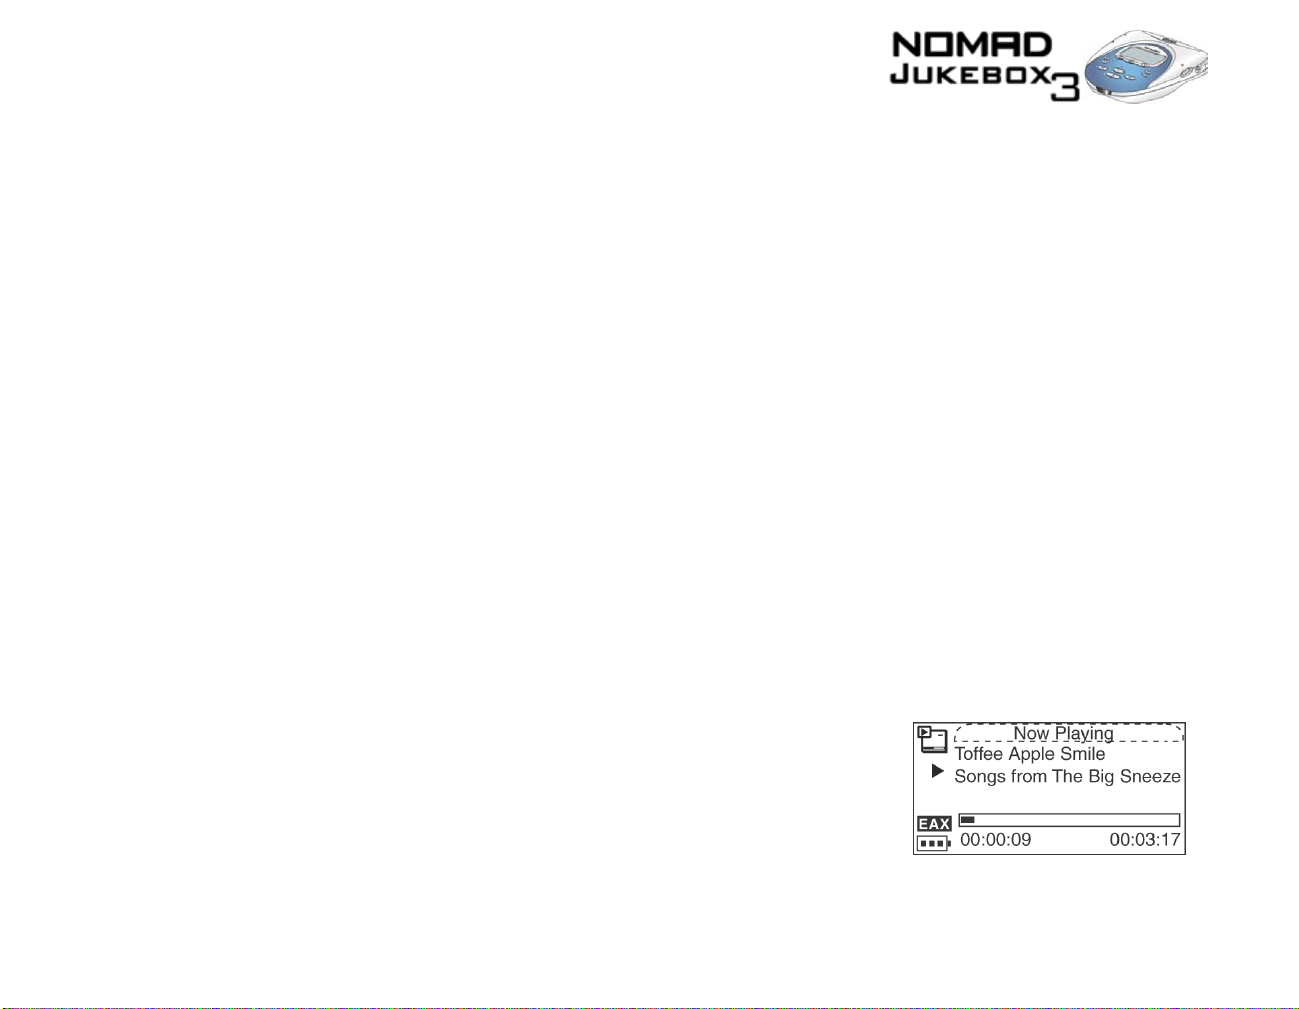
MP3
A member of the MPEG compression family , MP3 is a commonly used compressed digital audio format.
MP3 encoding transforms digital audio files (like WAV) to provide reasonable audio quality in relatively
small file sizes.
Music Library
Nickel-Cadmium
(NiCad)
Nickel Metal
Hydride (NiMh)
Now Playing screens
Optical Line-In
Playing Track screen
An organized collection of audio tracks in your player. Tracks are grouped by categories, namely, “All
tracks”, “Albums”, “Artists”, “Genres”, “Line-In Recordings” and “Voice Recordings”.
An older type of battery often used for portable devices. Some of these batteries suffer from Memory
Effect, and can store less electrical energy than Li-Ion batteries.
An older type of battery often used for portable devices. These batteries do not suffer from Memory
Effect problems, and can store about 50% more energy than NiCad batteries, but not as much as Li-Ion
batteries.
A series of screens—the Playing Track screen and Playing List screen—accessible b y pressing the NOW
PLAYING button.
See "Playing Track screen" and "Playing List".
Using a digital audio source with this connector on your player allows you to make digital recordings,
eliminating unwanted ‘noise’ associated with analog recordings. The connector accepts both analog or
opitcal line-In sources, automatically detecting whether the source is analog or optical.
See "Analog Line-In".
Shows the track that is being played back or the track that has been
selected in the Playing List for playback.
See "Playing List" and "Now Playing screens".
Glossary A-8
Page 88

Playing List
The Playing List is like a long line of audio tracks, waiting for their turn to be played. Y ou can choose an
album or a playlist of tracks to be played. Their turn comes when the tracks listed before them hav e been
played. In Normal mode, tracks are played in the order that they are queued.
Playlist
Presets
Ripping
Sampling Rate
SB1394
Screen
A grouping of audio tracks. Using a playlist, you can create a playback sequence of audio files from
multiple albums or categories without actually rearranging any audio files in the player’s Music Library .
You can also name a playlist, for example, My Favorite Pop Songs.
A collection of EAX Advanced EQ settings that you can select to enhance your audio. Some presets that
you can choose are Acoustic, Classical and Rock.
The process of creating digital audio files from an audio CD. Using a CD ripper and an MP3 encoder,
you can extract favorite tracks from an audio CD and make MP3 files. You can then transfer the audio
files over to your player for your enjoyment.
The sampling rate is a measure of how well an audio source is captured as a digital audio file. For
example, a normal audio CD has audio sampled at 44.1 kHz.
SB1394 is Creative's IEEE-1394 compatible standard for high speed (about 400Mbps at peak) digital
audio transfer. Creative's SB1394 standard offers you maximum speed and compatibility with SB1394
peripherals and also provides you with a seamless user experience for transferring massive MP3
collections, DV editing, easy networking and more.
You can connect your player to your computer using the SB1394 cable. This cable can be connected to
the Audigy audio card’s SB1394 jack or a standard IEEE 1394 interface card. See "1394" on page A-2
for more details about IEEE 1394.
The current display on your player. For example, this is the MENU screen:
Glossary A-9
Page 89
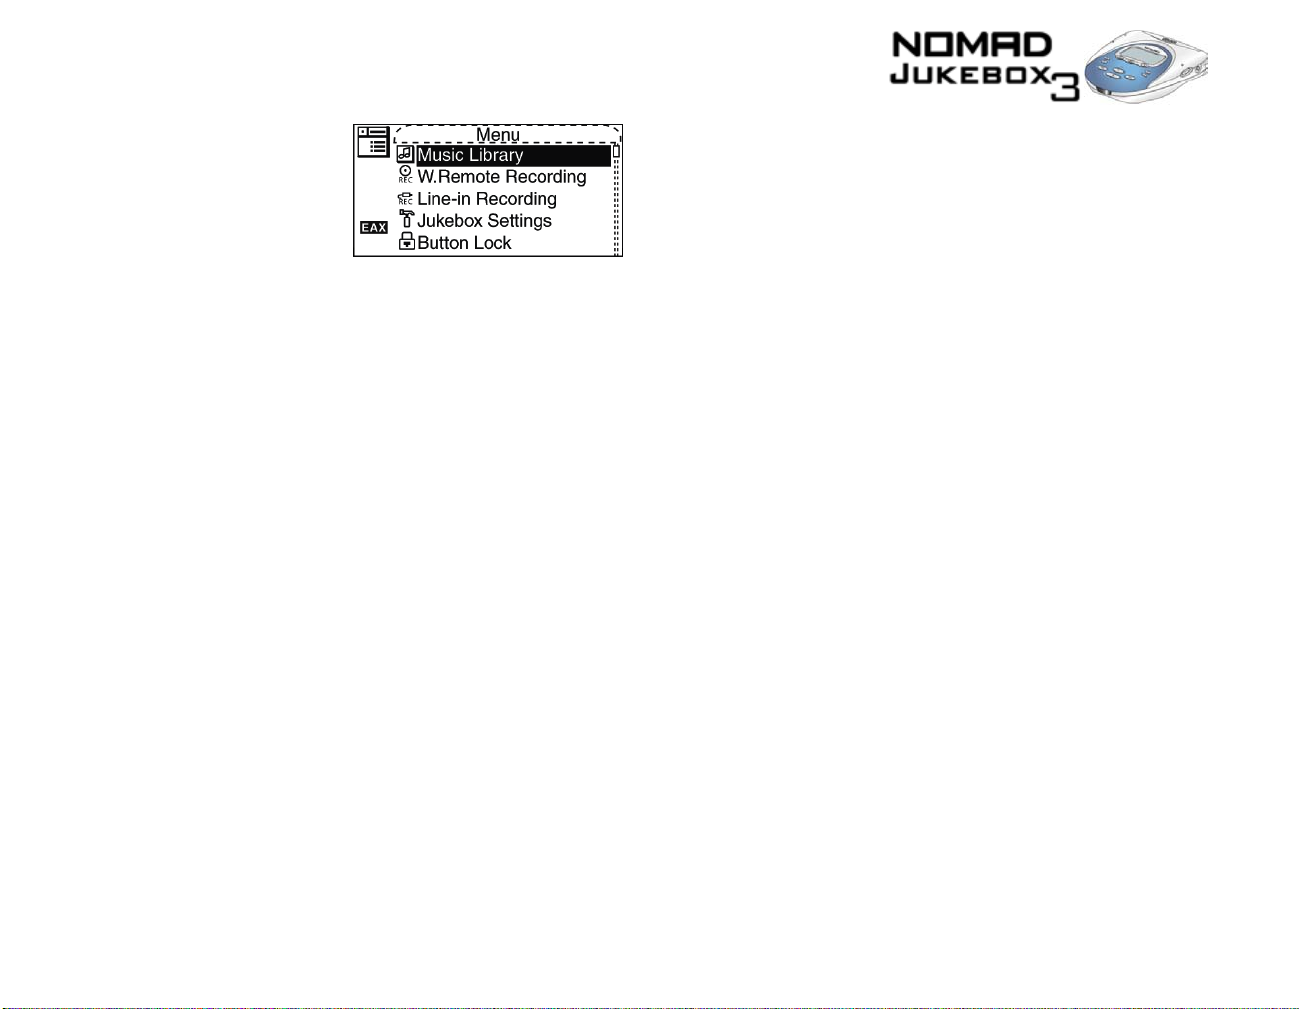
Scroll Select
A term for a two-step operation using your player’s Scroller. Scroll up or down options in menus and
lists, and press the Scroller to select the option.
SDMI
Shock Buffer
Shuffle
Shuffle Repeat
Smart Volume
Management (SVM)
Secure Digital Music Initiative. Developed by a forum of 200 companies in the worldwide recording
industry, SDMI-compliant devices or software can play SDMI encrypted formats, as well as
conventional, unencrypted formats. It was developed to allow consumers, like you, convenient access to
music in online and emerging digital distribution systems. SDMI promises copyright protection for the
artist, and the promotion of new music related technologies. Yo ur player is SDMI-compliant.
This buffer is usually a temporary data storage area. When you carry your player around, it is subjected
to many minor bumps and shakes. To give you uninterrupted audio playback, your player uses a five
minute shock buffer.
A Play Mode that plays tracks at random from the Playing List. It is almost like waiting in line at a
popular nightclub. Sometimes some tracks don’t get played at all.
Just like Shuffle, except that your player continues to select tracks at random to play. Your player will
continue doing this until it runs out of battery power, or until you interrupt it.
Smart Volume Management evens out the volume ‘bumps’ in an audio track. Some types of music, for
example, Mahler’s second symphony, have great contrasts in volume. When you turn up the colume to
listen to a quiet portion of the track you can get deafened when louder portions are played. SVM also
compensates for ambient noise in your listening environment. Choose “Plane”, for example, when you
listen to your player while flying, and the audio level is automatically adjusted. You can turn this feature
on or off from the EAX menu.
Glossary A-10
Page 90

Spatialisation
A feature of EAX that changes your perception of audio from a pair of stereo headphones . Choose either
Full, Narrow or Wide to suit your listening pleasure.
Time-Scaling
USB
Voi c e Rec o rdi n g
WAV (wave )
Wired Remote
Windows Media
Audio (WMA)
A feature of EAX that allows you to change the speed of audio playback without changing the pitch or
distorting the audio quality. For example, you can use this feature to slow down a recording of a speech
for easier note-taking. Choose a setting from 0.5x to 1.5x, where 1.0x is normal speed.
USB stands for Universal Serial Bus. It is a moderately high-speed input/output technology for “hot
swap” data transfers, meaning that you can connect or disconnect a USB device without turning off your
computer.
Using the Wired Remote, you can make recordings of speeches, discussions and meetings. The
recording is in the WAV or MP3 format, and cannot be larger than 2 GB.
An uncompressed digital audio format, WAV files are often used in systems running Microsoft
Windows.
An accessory for your player that you can use to access the player’s controls without dragging the player
out from your bag or pocket.
Microsoft’s Windows Media Audio (WMA) format is suitable for lower bitrates b u t can produce an
audio quality that is almost indistinguishable from the original audio when encoded at 128 kbps. Most
full-featured player programs and portable players can play WMA files. Some WMA files are protected
by a digital signature. See "DRM" on page A-5.
Glossary A-11
Page 91
B
Primers and Information
Page 92
Primers and Information
This chapter contains detailed information on key technologies used in the development of your
NOMAD Jukebox 3 as well as details of Scroller operations and icons used in the player’s screens.
About MP3
It is illegal to encode MP3
files for trade or sale unless
you have the express and
explicit permission of the
copyright holder(s).
MP3 is the acronym for Moving Picture Experts Group (MPEG) Audio Layer 3, a type of audio data
compression technology that can significantly reduce a digital audio file’s size by as much as onetwelfth, with virtually no loss in quality. It is an efficient way to store high-quality music or other audio
content on your computer.
These compressed digital audio files have a file extension of .MP3, and can be downloaded from many
sites on the Internet. You can also produce them legally for personal use, from your original audio CDs.
Making MP3s — audio extraction
The first phase in making an MP3 file is extracting audio data from an audio CD. To extract audio data,
you will need a CD-ROM drive that can extract digital audio data, and a program known as a Ripper.
This program uses the CD-ROM drive to read the audio tracks from the audio CD and stores it on your
hard disk. The time needed for a successful audio extraction depend on:
• CD-ROM drive speed
• defects, like scratches on the audio CD
• error-checking features on the CD-ROM drive
Making MP3s — encoding
Encoding is the second phase of making an MP3 file. Encoders are used to convert the stored audio
tracks, usually WAV files, into MP3 files. MP3 encoding is considered lossy compression, which means
that some data is lost during compression. However, using the standard sampling rate and bitrates will
ensure that your MP3 files retain much of their audio quality. The standard bitrate of most MP3 files is
128Kbps, although some are set higher, at 160 or 192Kbps. Higher bitrates will result in larger MP3 file
sizes, with better audio quality. Use PlayCenter to extract audio tracks and encode MP3s.
Primers and Information B-2
Page 93

Where to get MP3 files
T o get MP3 f iles from the Internet, use a search engine to locate sites with MP3 content. You can also try
out these sites:
The websites listed here are
correct at the time of this
document’s release.
About EAX
NOMADWorld
❍
http://www.NOMADworld.com
SoundClick.com
❍
http://www.soundclick.com
Epitonic.com
❍
http://www.epitonic.com
EAX technology delivers advanced audio functionality and performance, adding sophisticated audio
processing capabilities, interactive and high-definition sound to digital entertainment. EAX technologies
are implemented across a range of audio hardware solutions, system software, application software, and
application programming interfaces (APIs) from Creative. With EAX technology-enabled products, you
can shape and customize your audio experience. Certain EAX features provide advanced audio
capabilities for music composition and sound design. EAX technology is redefining the audio
experience.
In addition to its fully customizable 3D spatialization effects, 4-channel sound, advanced EQ, timescaling, and audio environment settings, EAX is bringing “Smart Volume Management” (SVM) to your
favorite digital audio player. Employing advanced predictive analysis, SVM intelligently controls the
dynamic range of a song, providing a superior audio experience, especially in difficult listening
environments such as a plane or car . Additionally, a Match V olume feature keeps the playback v olume of
all the tracks on your play list at the same level. You no longer have to adjust the volume from song to
song. With these awesome EAX technologies, the NOMAD Jukebox delivers an unsurpassed listening
experience.
❍
AMP3.com
http://www.amp3.com
❍
ArtistOne.com
http://www.artistone.com
❍
Soundbuzz.com
http://www.soundbuzz.com
Primers and Information B-3
Page 94

About USB
An older serial input/output technology than IEEE 1394, USB is commonly used for lower-speed input
devices, such as printers, scanners, mice, keyboards, cameras and other devices connected to your
computer. A USB device is self-configuring and has the same “hot swap” capability as 1394. You can
connect up to 127 devices per computer.
Although USB transfers are faster than most parallel or serial port transfers, high speed devices like CDRecorders and portable hard disk drives will probably be 1394-enabled.
About IEEE1394
Also known as FireWire™, IEEE 1394 is high-speed serial input/output technology for connecting
devices to a your computer. Originally developed by Apple™, it is now an official industry standard.
While similar to USB, 1394 is more suited to high-speed multimedia devices such as video camcorders,
synthesizers, hard disks and other mass data storage media. Like USB, 1394 offers incredible
convenience with “hot sw ap” capability. This means that you do not have to turn off or restart your
computer when attaching or detaching your NOMAD Jukebox 3.
1394 supports up to 63 devices per computer, and provides devices with power . It also features automatic
configuration, with no device IDs or terminators required. 1394 ports support data transfer rates of up to
400 Mbps or 400 million bits per second. 1394 devices are self-configuring.
Primers and Information B-4
Page 95
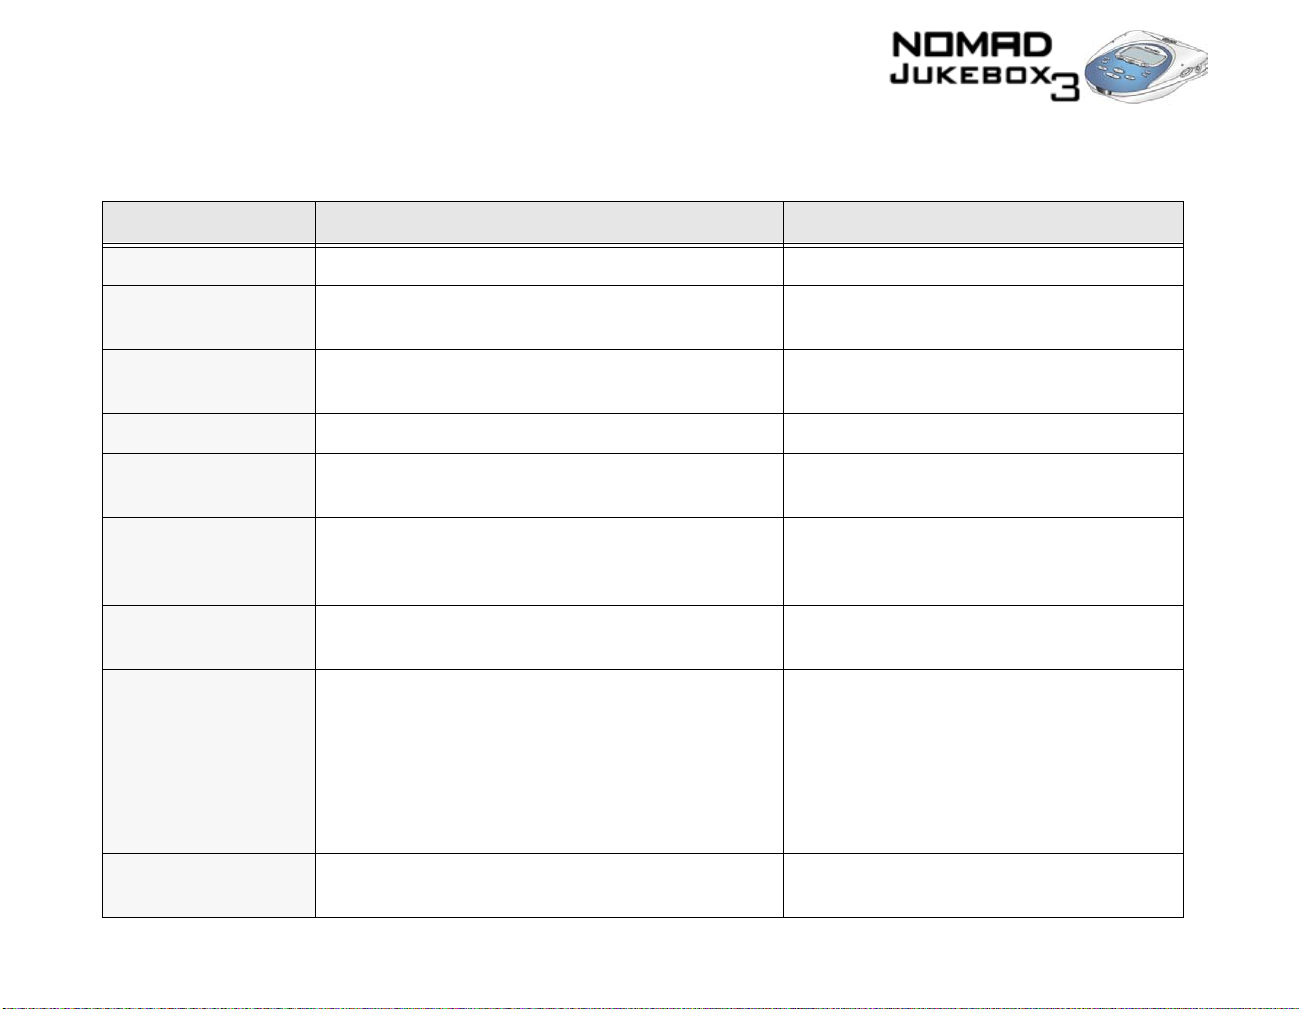
List of Scroller
Many operations are accessible from your player’s context-sensitive Scroller. Here is a summary of all
operations or selections available:
operations
Scroller operation Description Notes
ADD TO P
C
ANCEL
C
HANGE ORDER
C
LEAR BOOKMARK
D
E
XPAND
T
RACK DETAILS
GO TO B
MP3, 64
MP3, 96
ELETE
/ C
OOKMARK
___
OLLAPSE
KBPS
KBPS
MP3, 128
MP3, 160
MP3, 192
MP3, 256
MP3, 320
LAY
KBPS
KBPS
KBPS
KBPS
KBPS
adds the selection to the Playing List
❍
gets out of menu selection without changing
❍
the selection is played when its turn comes
❍
anything
changes the playback order of a selection in the
❍
Playing List
removes the bookmark from a track
❍
deletes track, subcategory or selection from the
❍
Music Library
expands or collapses a category in the Playing List
❍
/
if an album, artist or genre selected
shows track details when track is selected
❍
goes to the bookmarked point in a track
❍
available bitrate and format combinations for
❍
selection is permanently deleted
❍
track must be playing when using this
❍
feature
recording
makes another recording using the same settings as
N
EW
❍
the previous recording
Scroll Select “New” after saving or
❍
discarding the previous recording
Primers and Information B-5
Page 96
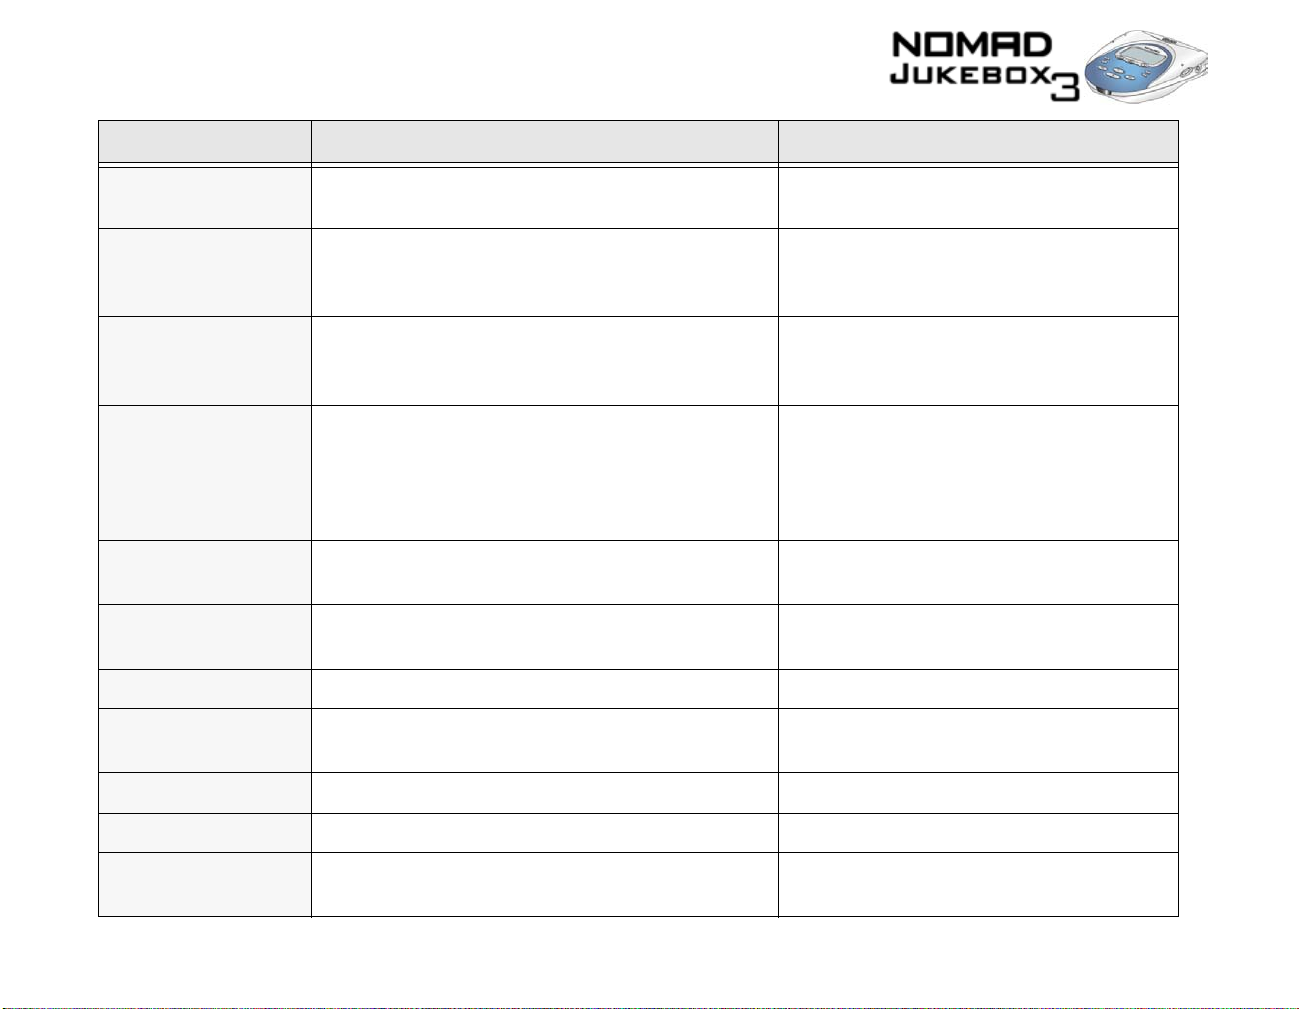
Scroller operation Description Notes
press the PLAY button to play the entire
N
ORMAL
O
PEN
P
LAY NOW
P
LAY TRACK ONCE
P
REVIEW
R
EMOVE
R
EMOVE ALL
disables Play Modes.
❍
shows the contents of a category or sub-category
❍
adds all tracks in the sub-category to the front of
❍
the Playing List. The first track starts playing.
plays the selected track once
❍
samples a track within a category
❍
removes the selection from the Playing List
❍
clears the Playing List
❍
❍
Playing List once, in sequence
for example, if Album is selected, “Open”
❍
shows all albums stored in the Music
Library
for example, if “The Visit” is selected
❍
under Albums, all tracks from the album
“The Visit” will be added
no other tracks are played
❍
you must select the track to play
❍
pressing the FORWARD or REVERSE
❍
buttons during play will skip to the
selected track, and play it once
track being previewed is not added to the
❍
Playing List
does not remove the selection from the
❍
Music Library
you must confirm removal of all tracks
❍
R
ENAME
R
EPEAT ALL
R
EPEAT TRACK
S
AVE AS PLAYLIST
changes the name of the selected playlist
❍
repeats playback of the Playing List
❍
repeats playback of the current track only
❍
saves the contents and playback order of the
❍
Playing List as a playlist
rename a track from PlayCenter and
❍
transfer it into your player
tracks play in sequential order
❍
Primers and Information B-6
Page 97
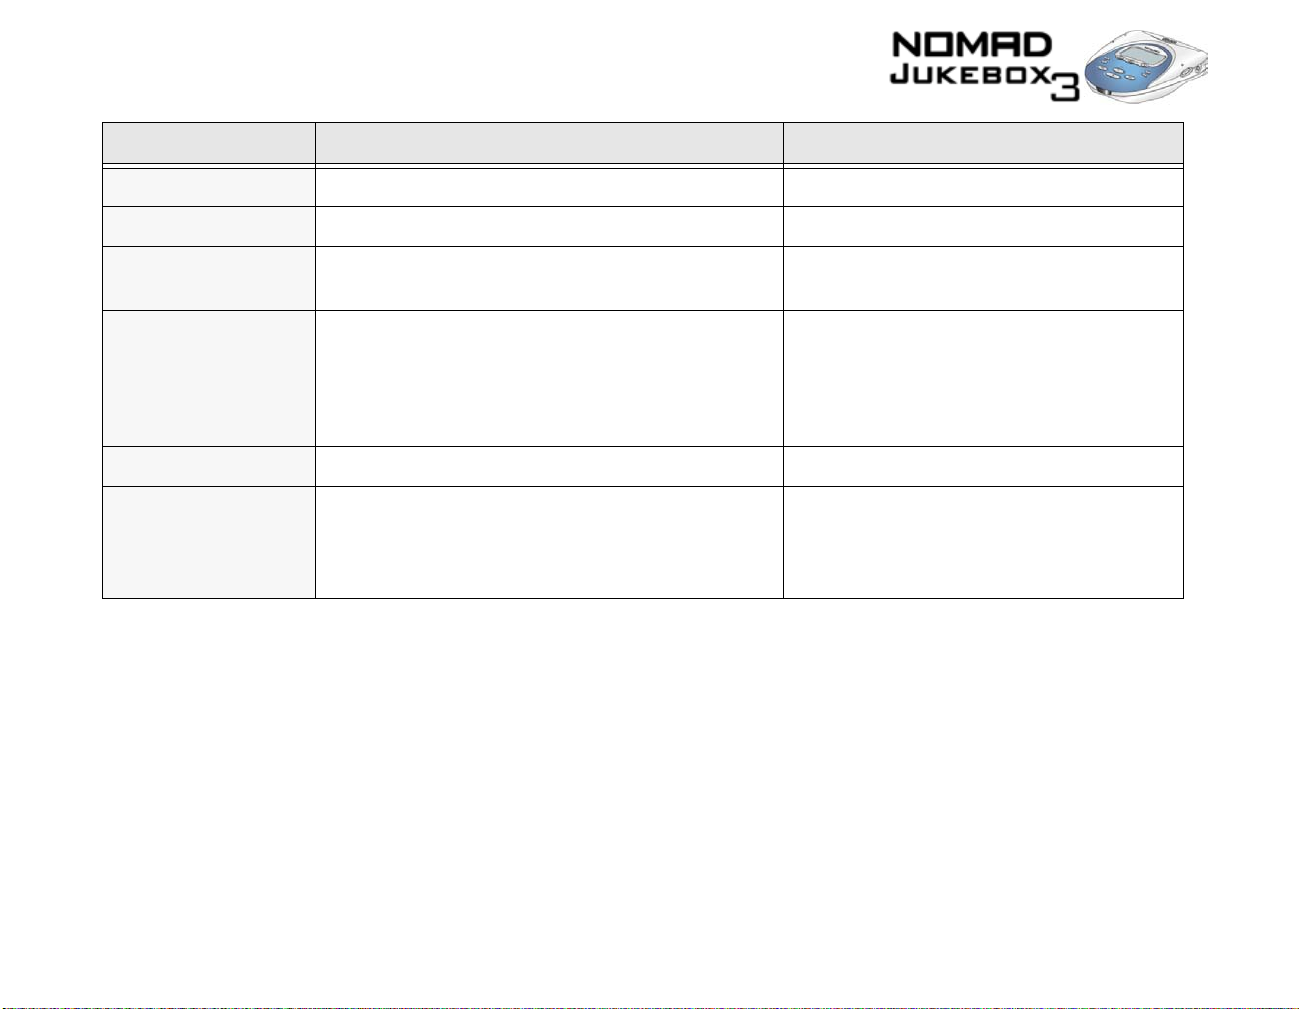
Scroller operation Description Notes
SET B
OOKMARK
S
HUFFLE REPEAT
S
HUFFLE
T
RACK DETAILS
V
OICE
sets a bookmark at this point in the track
❍
randomly plays tracks from the Playing List
❍
randomly picks and plays one track from the
❍
Playing List
shows details of current track
❍
chooses voice recording mode
❍
only one bookmark per track
❍
in the Playing List screen, details include
❍
name of track, artist, album and genre
in the Playing Track screen, details
❍
include name of track, artist, album, genre,
sampling rate and bitrate
WAV, 11.025 KH
WAV, 22.05 KH
WAV, 44.1 KH
WAV, 48.0 KH
Z
Z
Z
Z
available bitrate and format combinations for
❍
recording
Primers and Information B-7
Page 98
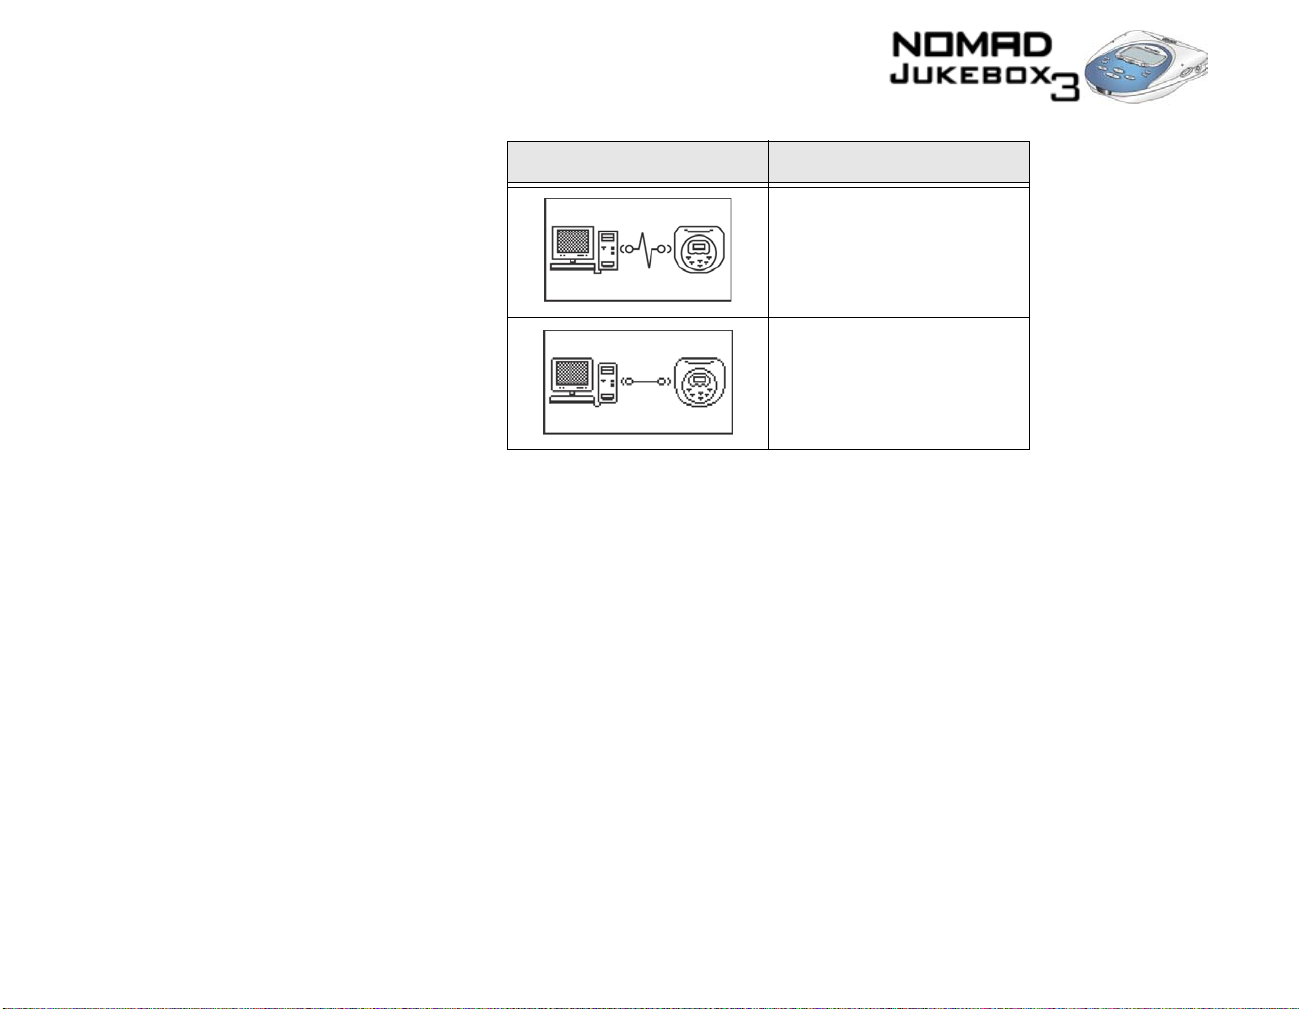
Information Diagram
Diagram Action / Meaning
❍ your PC is actively
managing your player. To
use your player, disconnect
it from your PC.
❍ your PC is not actively
managing your player. To
use your player, disconnect
it from your PC.
Primers and Information B-8
Page 99
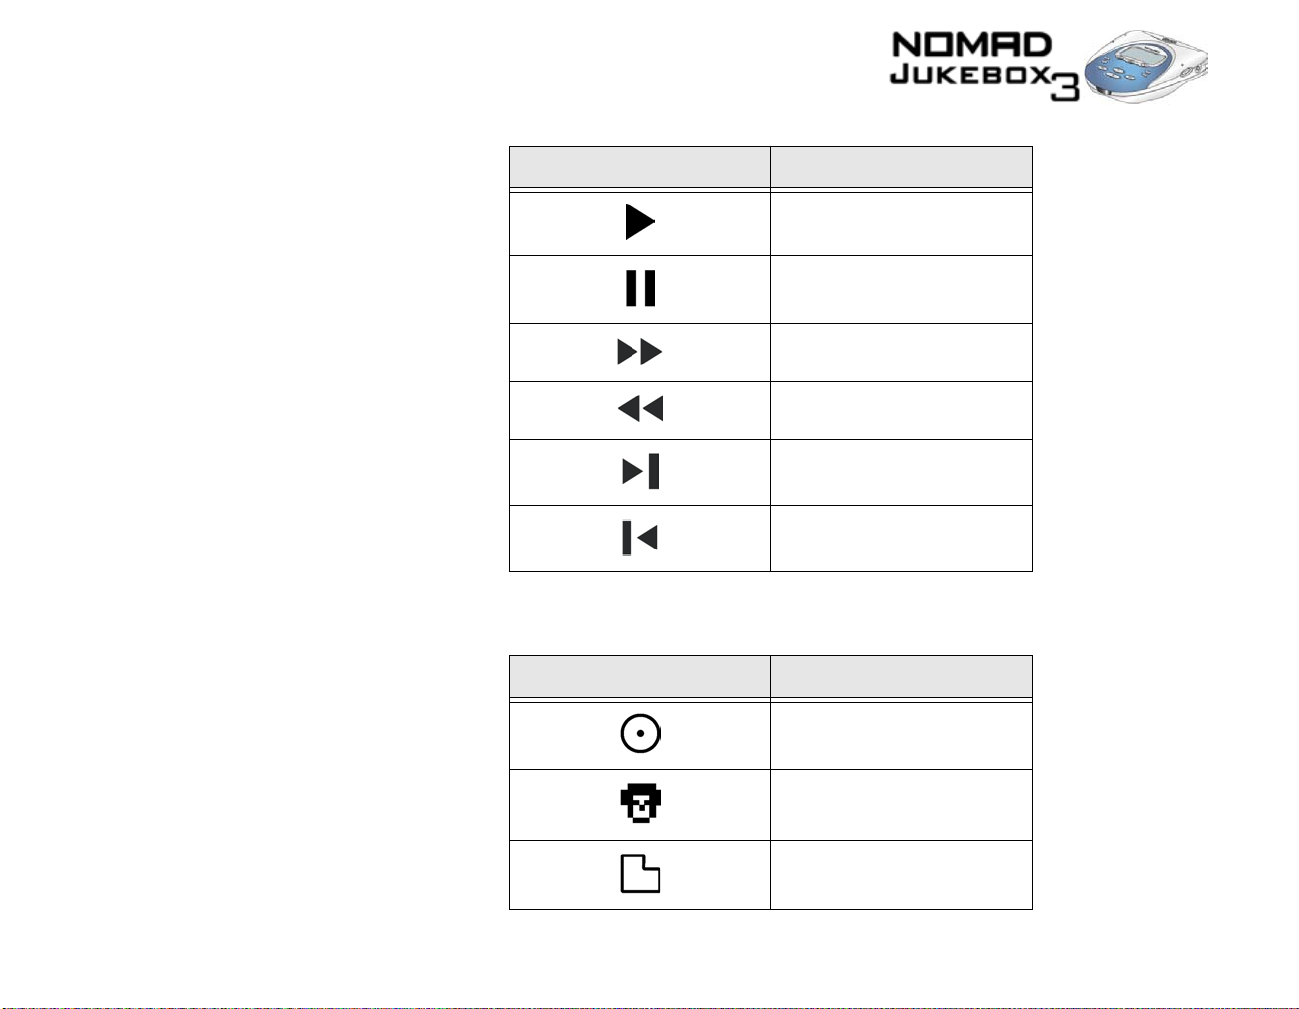
Playback Icons
The following icons appear onscreen when the associated playback action is used.
Icon Action / Meaning
Play
❍
Pause
❍
Forward
❍
Reverse
❍
Skip forward
❍
Skip back
❍
Playing List Icons
The following icons are commonly found in the Playing List screen.
Icon Action / Meaning
Album
❍
Artist
❍
Genre
❍
Primers and Information B-9
Page 100
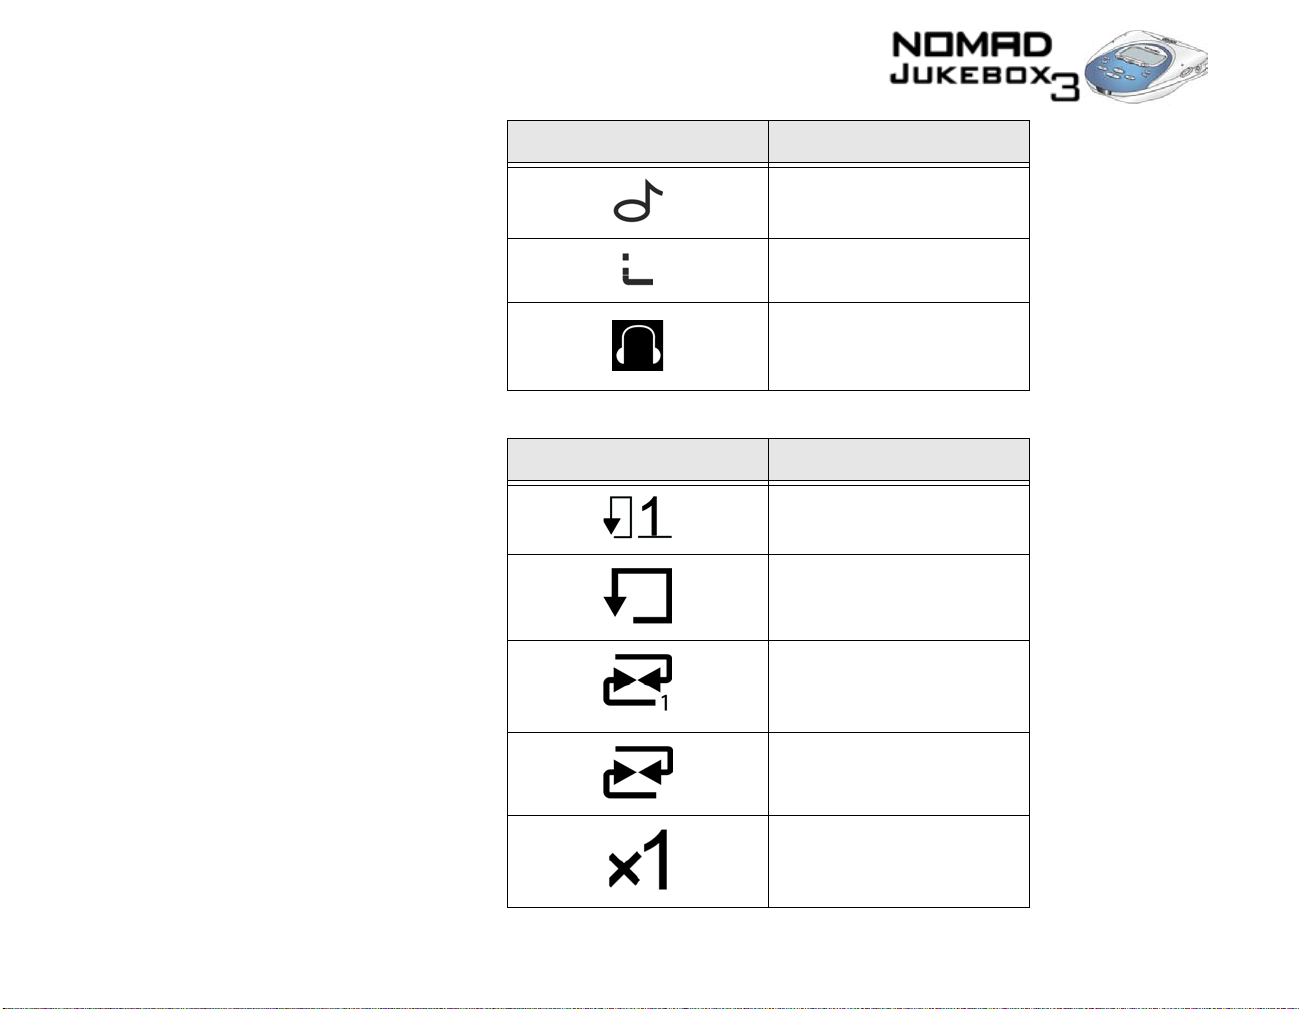
Icon Action / Meaning
Track
❍
Track within audio
❍
category
Audio selected for
❍
playback or which is
currently playing back
Audio Enhancement Icons
The following icons appear onscreen when the respective audio enhancements are active.
Icon Action / Meaning
Repeat Track
❍
Repeat All
❍
Shuffle
❍
Shuffle Repeat
❍
Play Track Once
❍
Primers and Information B-10
 Loading...