

Creative Muvo Muvo2 FM, Muvo 2 FM User Manual

User’s Guide
Creative MuVo2 FM
Information in this document is subject to change without notice and does not represent a commitment on the part of Creative
Technology Ltd. No part of this manual may be reproduced or transmitted in any form or by any means, electronic or mechanical,
including photocopying and recording, for any purpose without the written permission of Creative Technology Ltd. The software
described in this document is furnished under a license agreement and may be used or copied only in accordance with the terms of
the license agreement. It is against the law to copy the software on any other medium except as specifically allowed in the license
agreement. The licensee may make one copy of the software for backup purposes only.
The Software License Agreement is found in a separate folder on the Installation CD.
Copyright © 2004 by Creative Technology Ltd. All rights reserved.
Version 1.0
July 2004
The Creative logo, Creative MediaSource and MuVo are trademarks or registered trademarks of Creative Technology Ltd. in the United
States and/or other countries. Microsoft, MS-DOS, Windows and the Windows logo are registered trademarks of Microsoft
Corporation. Intel and Pentium are registered trademarks of Intel Corporation. All other products are trademarks or registered
trademarks of their respective owners and are hereby recognized as such. All specifications are subject to change without prior
notice. Actual contents may differ slightly from those pictured.

Contents

i
1 Before You Begin
Introduction................................................................................................................................................. 1-1
Minimum System Requirements ........................................................................................................... 1-1
2 A Tour of Your Player
Your Player at a Glance........................................................................................................................... 2-1
Using the Menu Button............................................................................................................................ 2-2
Select.................................................................................................................................................... 2-2
Volume................................................................................................................................................ 2-2
Your Wired Remote................................................................................................................................ 2-5
3 Getting Started
Step 1: Setting Up Your Computer ..................................................................................................... 3-1
Step 2: Inserting the Battery................................................................................................................... 3-2
Step 3: Charging the Battery.................................................................................................................. 3-3
Using the Power Adapter ............................................................................................................. 3-3
Using the USB Cable....................................................................................................................... 3-4
Power Source and Level Indicators ........................................................................................... 3-5
Step 4: Transferring Audio and Data................................................................................................... 3-6
Downloading From the Internet................................................................................................. 3-8
Ripping Audio CDs.......................................................................................................................... 3-9
Step 5: Stopping Your Player Properly ............................................................................................. 3-10
Step 6: Connecting the Earphones and Wired Remote.............................................................. 3-11
Connecting the Earphones ......................................................................................................... 3-11
Connecting the Wired Remote ................................................................................................ 3-12

ii
4 Using Your Player
Turning Your Player On/Off .................................................................................................................. 4-1
Enabling a Mode ......................................................................................................................................... 4-2
Playing Audio Tracks ................................................................................................................................ 4-3
Deleting Audio Tracks ............................................................................................................................. 4-4
Managing Audio Tracks............................................................................................................................ 4-4
Listening to FM Radio............................................................................................................................... 4-5
Audio and FM Recording......................................................................................................................... 4-9
Recording Audio .............................................................................................................................. 4-9
Recording FM Radio...................................................................................................................... 4-10
Playing Recordings................................................................................................................................... 4-11
Play Modes................................................................................................................................................. 4-12
Repeat Track................................................................................................................................... 4-12
Repeat All......................................................................................................................................... 4-13
Track Once...................................................................................................................................... 4-13
Shuffle Repeat.................................................................................................................................. 4-13
Shuffle Once .................................................................................................................................... 4-13
Normal.............................................................................................................................................. 4-13
Enhancing Audio....................................................................................................................................... 4-14
EQ ..................................................................................................................................................... 4-14
Defining Custom EQ .......................................................................................................... 4-14
Setting Preferences.................................................................................................................................. 4-16
Settings ............................................................................................................................................. 4-16
Locking and Unlocking Your Player................................................................................................... 4-17
Locking Your Player...................................................................................................................... 4-17
Unlocking Your Player ................................................................................................................. 4-17
Formatting Your Player ......................................................................................................................... 4-18

iii
5 Software Applications
About Creative MediaSource and Creative AudioSync Wizard ................................................ 5-1
Appendixes
A Onscreen Diagram and Icon Guide
Play Status Icons......................................................................................................................................... A-1
Information Diagrams.............................................................................................................................. A-2
B Frequently Asked Questions
Usage ............................................................................................................................................................. B-1
Updates......................................................................................................................................................... B-3
C General Specifications
Size (WxHxD)........................................................................................................................................... C-1
LCD............................................................................................................................................................... C-1
Playback Formats ...................................................................................................................................... C-1
Signal-to-Noise Ratio............................................................................................................................... C-1
Harmonic Distortion Output ............................................................................................................... C-1
Frequency Response................................................................................................................................ C-1
Earphones Output.................................................................................................................................... C-1
USB Connectivity...................................................................................................................................... C-2

Before You Begin

Before You Begin 1-1
Before You Begin
Introduction
Thank you for purchasing Creative’s new multi-format player, Creative
MuVo2 FM! Your player can store thousands of songs in its music library, and
comes equipped with a USB 2.0 connector, so you can transfer audio tracks
and data quickly and easily.
Minimum
System
Requirements
❑ Microsoft® Windows® XP, Windows Millennium Edition (Me), Windows 2000 or
Windows 98 Second Edition (SE)
❑ Intel® Pentium® II 233 MHz, or AMD-K6®-2 266 MHz
❑ 32 MB RAM
❑ 30 MB available hard disk space
❑ CD-ROM/DVD-ROM drive
❑ USB port (USB 2.0 port recommended for faster transfer speeds)
❑ Internet access for Music Service Provider support (optional)
The software
applications on the
Creative MuVo
2
FM CD
may have higher
requirements for basic
functionality. Refer to
each application’s
documentation for
details.

A Tour of Your Player

A Tour of Your Player 2-1
A Tour of Your Player
Your Player at
a Glance
Play/Pause
button
Liquid Crystal
Display (LCD)
Menu button
Front View
Top View
Power adapter
connector
USB
port
Earphone
connector

A Tour of Your Player 2-2
Using the
Menu Button
Select The Menu button (Figure 2-1) is one of the most
important features of your player. In this document, we
will use the term, “Select”, to mean that you should
move the Menu button towards the left or right to
browse through options, and then select an option by
pressing the Menu button.
Volume You can also adjust volume levels with the Menu button. Move the Menu
button upward to increase volume or downward to decrease volume.
Figure 2-1: Menu button

A Tour of Your Player 2-3
Button What It Does Usage Tips
MENU
❍ Displays Menu options on the
LCD.
❍ For more information on using the Menu
button, see
"Using the Menu Button" on
page 2-2.
PLAY/PAUSE
❍ Turns your player on and off.
❍ Enables various functions,
depending on the mode you are
in.
❍ In Music mode, press this button to start
playing tracks, and press again to pause
playback.
❍ In Microphone mode, press this button
to start or end a recording.
❍ In FM Radio mode, press this button to
switch between FM Preset and Manual
Scan views.
Indicator What It Means Usage Tips
PREVIOUS
❍ Goes to the beginning of the
current track, or to the previous
track.
❍ Move and hold the Menu button towards
to move back within a track.
NEXT
❍ Goes to the next track.
❍ Move and hold the Menu button towards
to move ahead within a track.
VOLUME INCREASE
❍ Increases the volume.
❍ Move and hold the Menu button towards
to increase the volume quickly.
VOLUME DECREASE
❍ Decreases the volume.
❍ Move and hold the Menu button towards
to decrease the volume quickly.
A Tour of Your Player 2-4
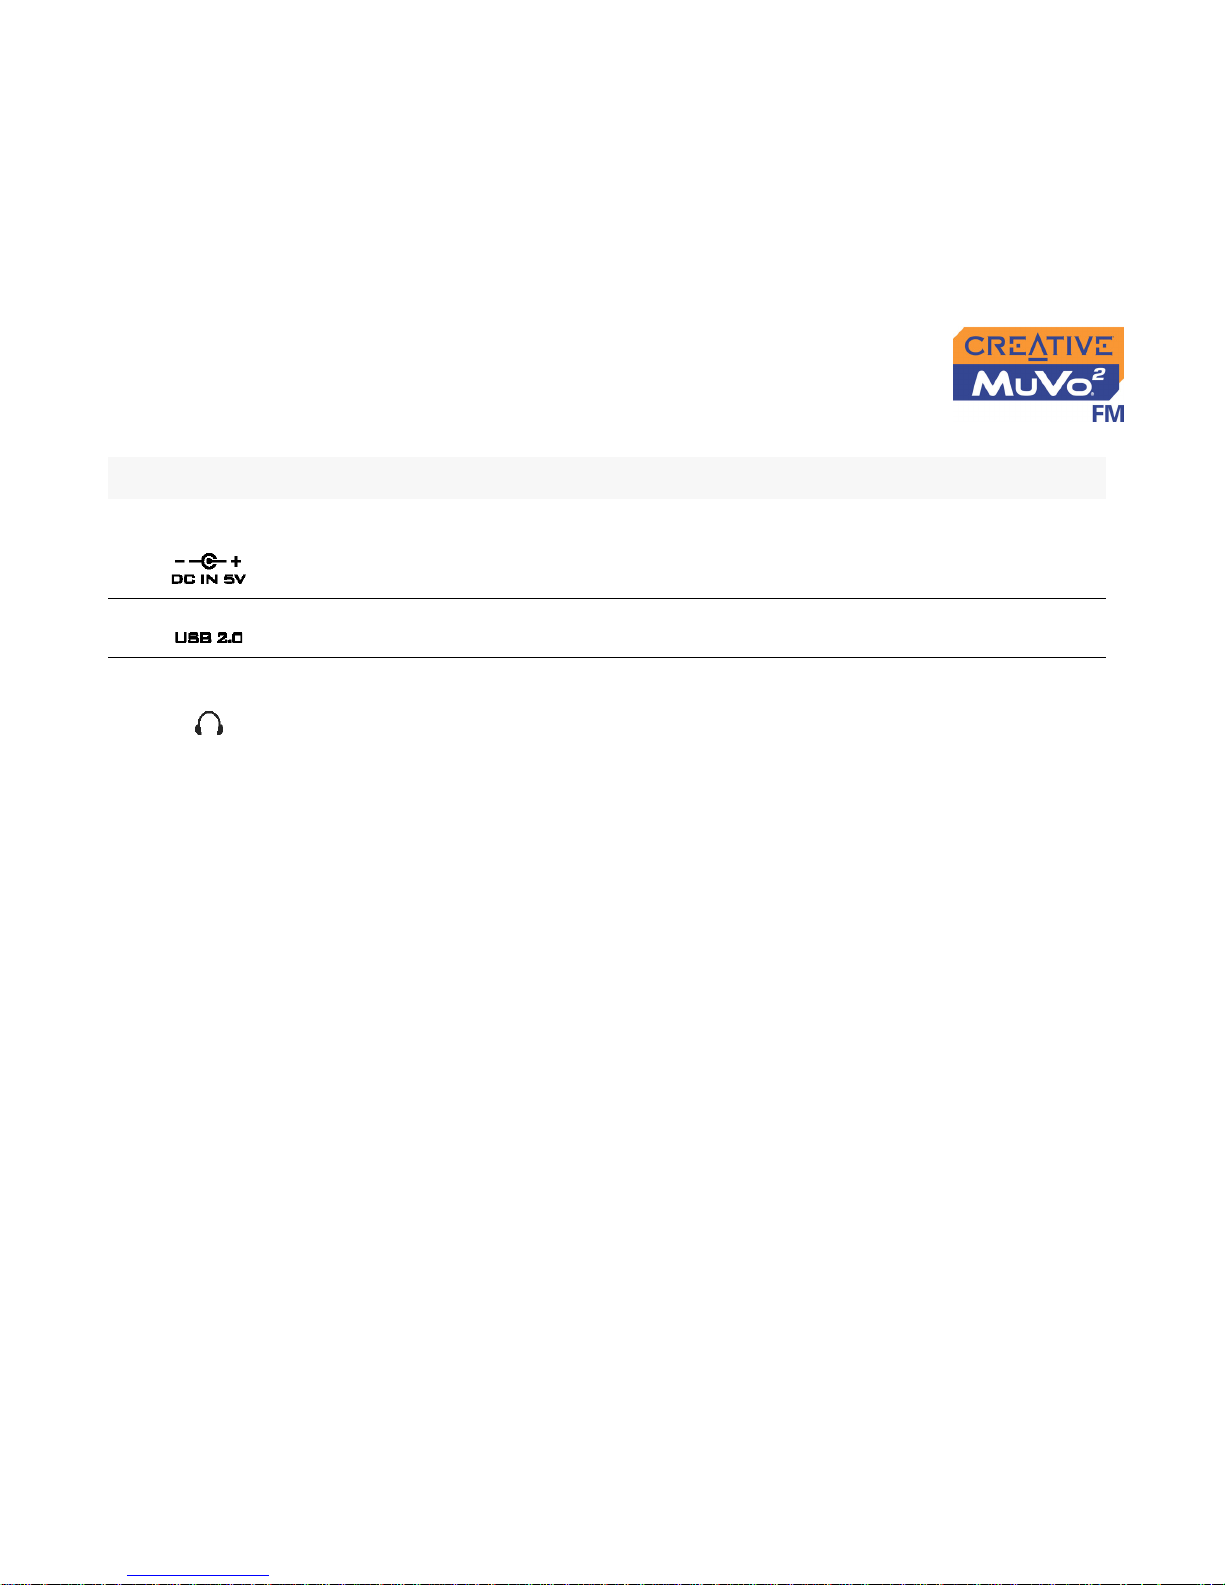
Connector/Port What It Does Usage Tips
POWER ADAPTOR
CONNECTOR
❍ Connect your power adaptor to this
connector.
USB PORT
❍ Connect your USB cable to this port.
EARPHONE
CONNECTOR
❍ Connect your earphones or wired remote
to this connector.
A Tour of Your Player 2-5
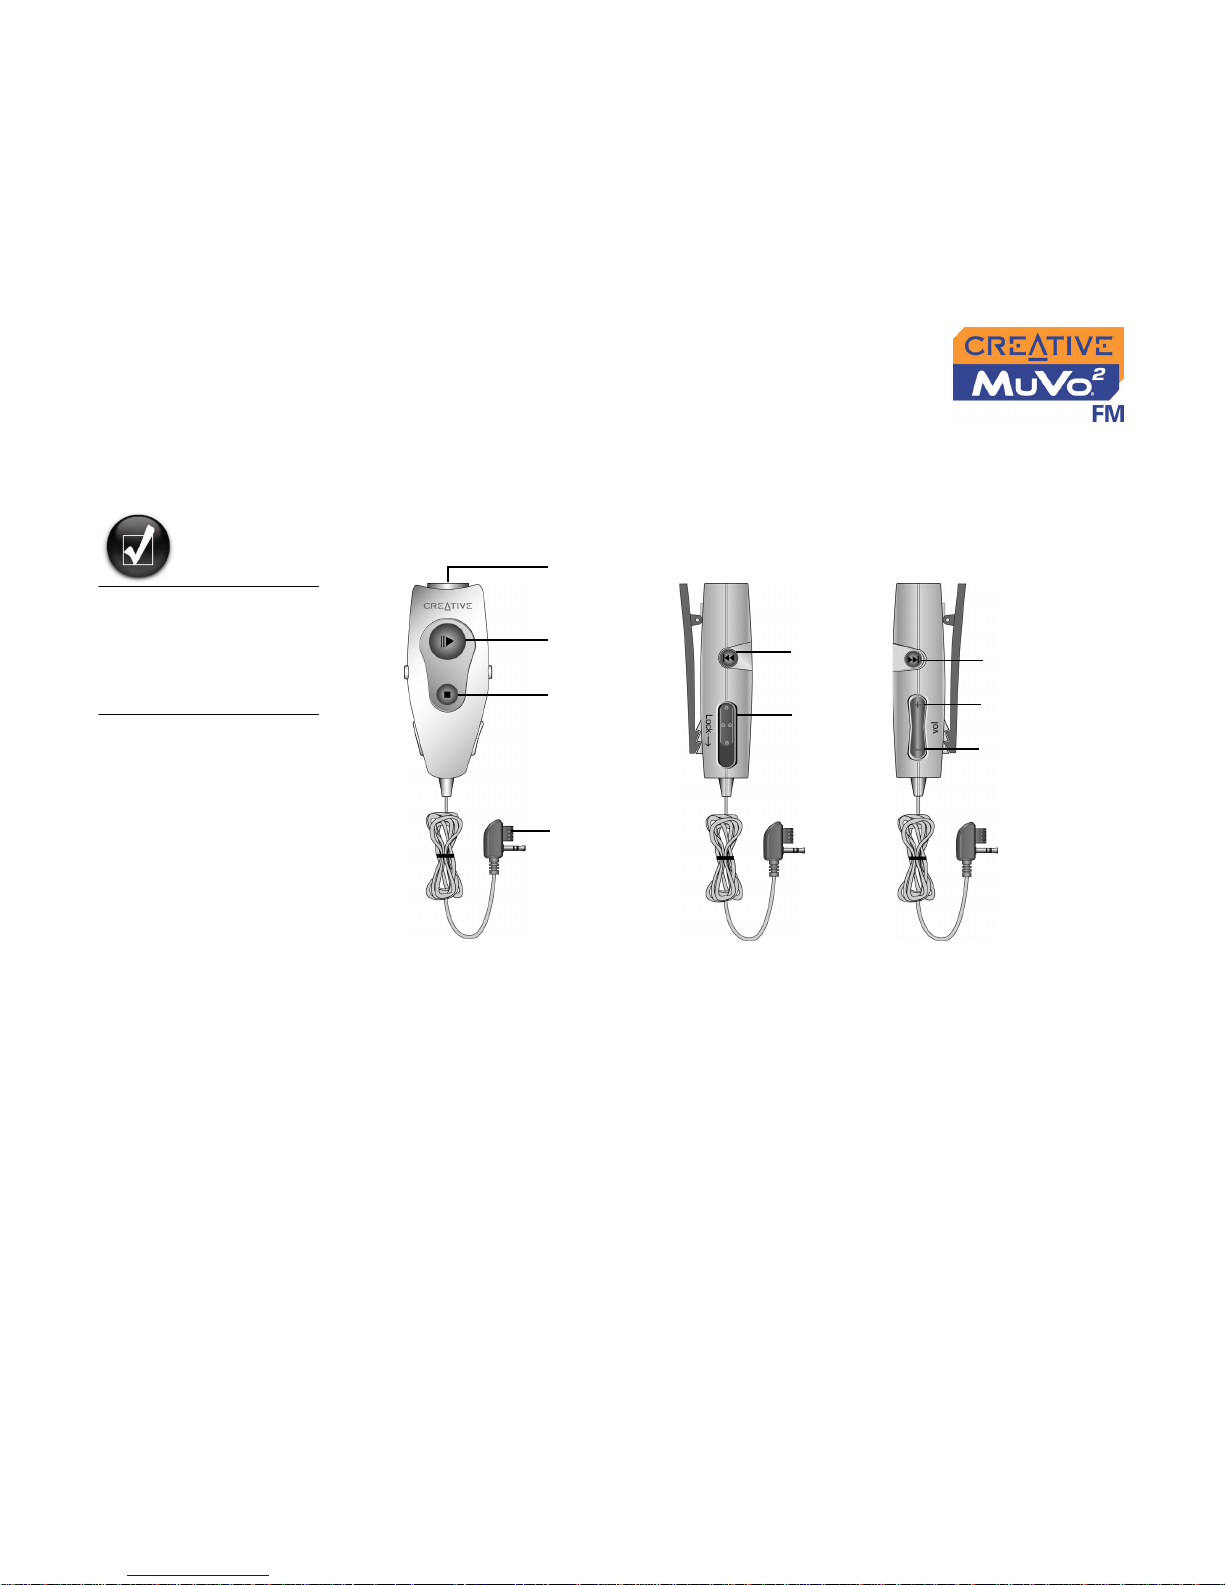
Your Wired
Remote
The wired remote lets you access the controls of your player without
having to take the player out of your bag.
In Music mode, each
button on the wired
remote has the same
function as its
respective button on
the player.
Figure 2-2: Your wired remote.
Next
Volu me Up
Volu me Dow n
Previous
Lock switch
Note: This
switch only
locks the
buttons on
the remote
control.
Wired remote
jack for
connecting to
your player’s
earphone
connector.
Earphone jack for
connecting to
your earphones
Power On
/Play
/Pause
Power Off
/Stop

Getting Started
Getting Started 3-1
Getting Started
Step 1: Setting
Up Your
Computer
1. Ensure that your player is NOT connected to your computer
2. Insert the Creative MuVo2 FM CD into your CD-ROM/DVD-ROM drive.
Your CD should start automatically. If it does not, follow the steps below:
i. Start Windows Explorer.
ii. On the left pane, click the My Computer icon.
iii. Right-click the CD-ROM/DVD-ROM drive icon, and then click AutoPlay.
3. Follow the instructions on the screen to complete the installation.
Creative MediaSource™ and Windows 98 SE drivers (only if applicable)
will be installed on your computer.
4. When prompted, restart your computer.
DO NOT connect your
player to your
computer before
installing the software.
Getting Started 3-2
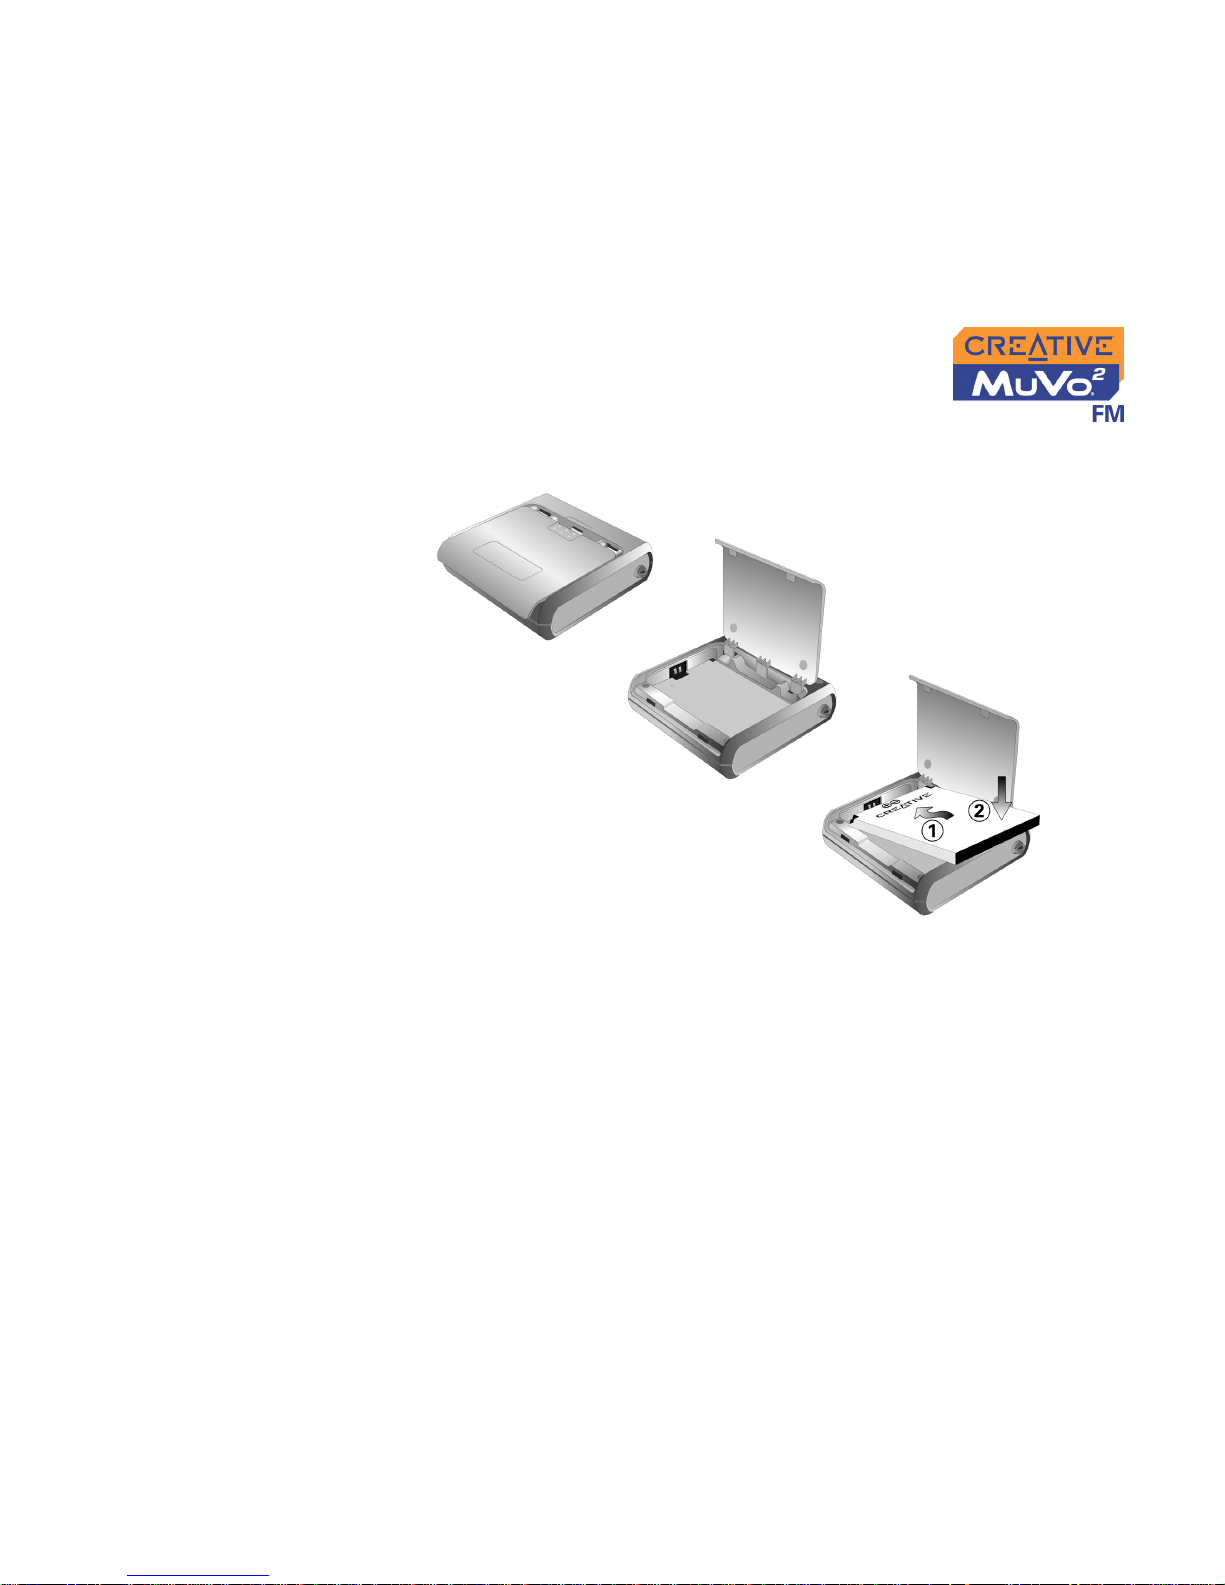
Step 2:
Inserting the
Battery
Insert the supplied battery into your player as shown below in Figure 3-1.
Figure 3-1: Inserting the battery.

Getting Started 3-3
Step 3:
Charging the
Battery
You can charge your battery by connecting your player to a power outlet
using the supplied power adapter, or by connecting your player to your
computer’s USB port using the supplied USB cable.
Using the Power
Adapter
Connect one end of the power adapter to the wall outlet and the other end to
your player’s power adapter connector, as shown in Figure 3-2. Check the
battery icon to see when the battery is fully charged. Charging your battery
for the first time takes about three hours.
DO NOT charge your
player’s battery via the
USB port until after you
have installed the
software.
The amount of
playback time available
depends on various
factors, such as the
type of earphones you
are using. For more
information, see
"Usage" on page B-1.
Figure 3-2: Connecting the player to the wall outlet.
 Loading...