

Page 1
Page 2

User’s Guide
Creative WebCam Notebook
Information in this document is subject to change without notice and does not represent a commitment on the part of Creative
Technology Ltd. No part of this manual may be reproduced or transmitted in any form or by any means, electronic or mechanical,
including photocopying and recording, for any purpose without the written permission of Creative Technology Ltd. The software
described in this document is furnished under a license agreement and may be used or copied only in accordance with the terms of
the license agreement. It is against the law to copy the software on any other medium except as specifically allowed in the license
agreement. The licensee may make one copy of the software for backup purposes.
Copyright © 1998-2005 Creative Technology Ltd. All rights reserved.
Version 1.3
June 2005
Sound Blaster and Blaster are registered trademarks of Creative Technology Ltd. in the United States and/or other countries.
Microsoft, MS-DOS, and Windows are registered trademarks of Microsoft Corporation. All rights reserved. All other products are
trademarks or registered trademarks of their respective owners.
Page 3
Contents
Page 4

Contents
Before You Begin........................................................................................................................................... iv
Package Contents ................................................................................................................................ iv
README file.......................................................................................................................................... iv
Minimum System Requirements ..................................................................................................... iv
Document Conventions..................................................................................................................... v
1 Installing Creative WebCam Notebook
About Creative WebCam Notebook................................................................................................. 1-1
Installing Creative WebCam Notebook ............................................................................................ 1-2
In Windows 98 / 98SE / Me / 2000 / XP ................................................................................. 1-2
Verifying the installation in Windows 98/98SE and Windows Me......................... 1-4
Verifying the installation in Windows 2000 & XP ....................................................... 1-5
2 Creative WebCam Notebook Applications
Creative WebCam Center..................................................................................................................... 2-2
Creative Photo Manager ......................................................................................................................... 2-2
Orb with OrbSecure................................................................................................................................ 2-3
SightSpeed.................................................................................................................................................... 2-4
Yahoo! Messenger..................................................................................................................................... 2-6
3 Using Creative WebCam Center
Starting Creative WebCam Center..................................................................................................... 3-1
Capturing Photos and Videos................................................................................................................ 3-3
Taking a Photo.................................................................................................................................. 3-3
Recording a Video ........................................................................................................................... 3-3
Reactivating the Camera ......................................................................................................................... 3-3
i
Page 5

Appendixes
A Technical Specifications
Construction .......................................................................................................................... A-1
Power ....................................................................................................................................... A-1
Sensor....................................................................................................................................... A-1
Resolution - Video mode ................................................................................................... A-1
Resolution - Still mode........................................................................................................ A-1
Video formats......................................................................................................................... A-1
Exposure control .................................................................................................................. A-1
Colour balance....................................................................................................................... A-1
Colour matrix........................................................................................................................ A-1
Field-of-view ........................................................................................................................... A-1
Depth-of-field......................................................................................................................... A-1
Port compatibility.................................................................................................................. A-2
Software compatibility......................................................................................................... A-2
B Troubleshooting
Problems Using Creative WebCam Notebook .............................................................................. B-1
C Note on USB Compatibility
ii
Page 6
Introduction
Page 7

Introduction
Creative WebCam Notebook is a 24 bit, 16.7 million color digital video camera kit
for your notebook, giving you everything you need to capture still images and full
color video. Not only that, it also allows you to communicate face-to-face with
others on the Internet!
Applications included
on your Installation
CD may vary
depending on camera
model and region of
purchase.
Before You Begin
Package Contents Your Creative WebCam Notebook package contains the following items:
Creative WebCam Notebook is bundled with the following software:
❑ Creative WebCam Center
❑ Creative Photo Manager
❑ Orb with OrbSecure
❑ SightSpeed
❑ Yahoo! Messenger
For more information, see "Creative WebCam Notebook Applications" on page 2-1.
❑ Creative WebCam Notebook with USB cable attached
❑ Creative WebCam Notebook installation CD
❑ Quick Start
README file The README file on the CD-ROM contains information not available at the time of
printing. Read the file before you begin installing Creative WebCam Notebook.
Minimum System Requirements
❑ 350 MHz Pentium® II or higher IBM® compatible notebook
❑ 128 MB RAM
❑ 350 MB free hard disk space (for installation of all software titles)
❑ Available USB port or USB hub with an external power supply
Introduction iv
Page 8
Document Conventions
❑ Microsoft® Windows® 98/98SE, Windows Me, Windows 2000 or Windows XP
❑ AGP display adapter that supports 16 bit color at a resolution of 1024 x 768 pixels
❑ CD-ROM drive installed
❑ Sound Blaster® or other Windows-compatible audio card. Sound Blaster 16 or
higher required for simultaneous two-way conversation with full-duplex support.
For Videoconferencing
❑ Microphone
❑ Modem or LAN access to the Internet at 28.8Kb or faster
Tip. This tells you about short cuts or hints relating to a feature.
Note. This highlights additional or important information about a
feature.
Caution! This highlights proper usage of your product. Use this
information to avoid risky situations.
Warning! This warns you of possible hazards to yourself or your
product, that may result in injury or damage.
Introduction v
Page 9
Installing Creative WebCam Notebook
Page 10
Installing Creative WebCam Notebook
This chapter tells you how to quickly install Creative WebCam Notebook.
About Creative WebCam Notebook
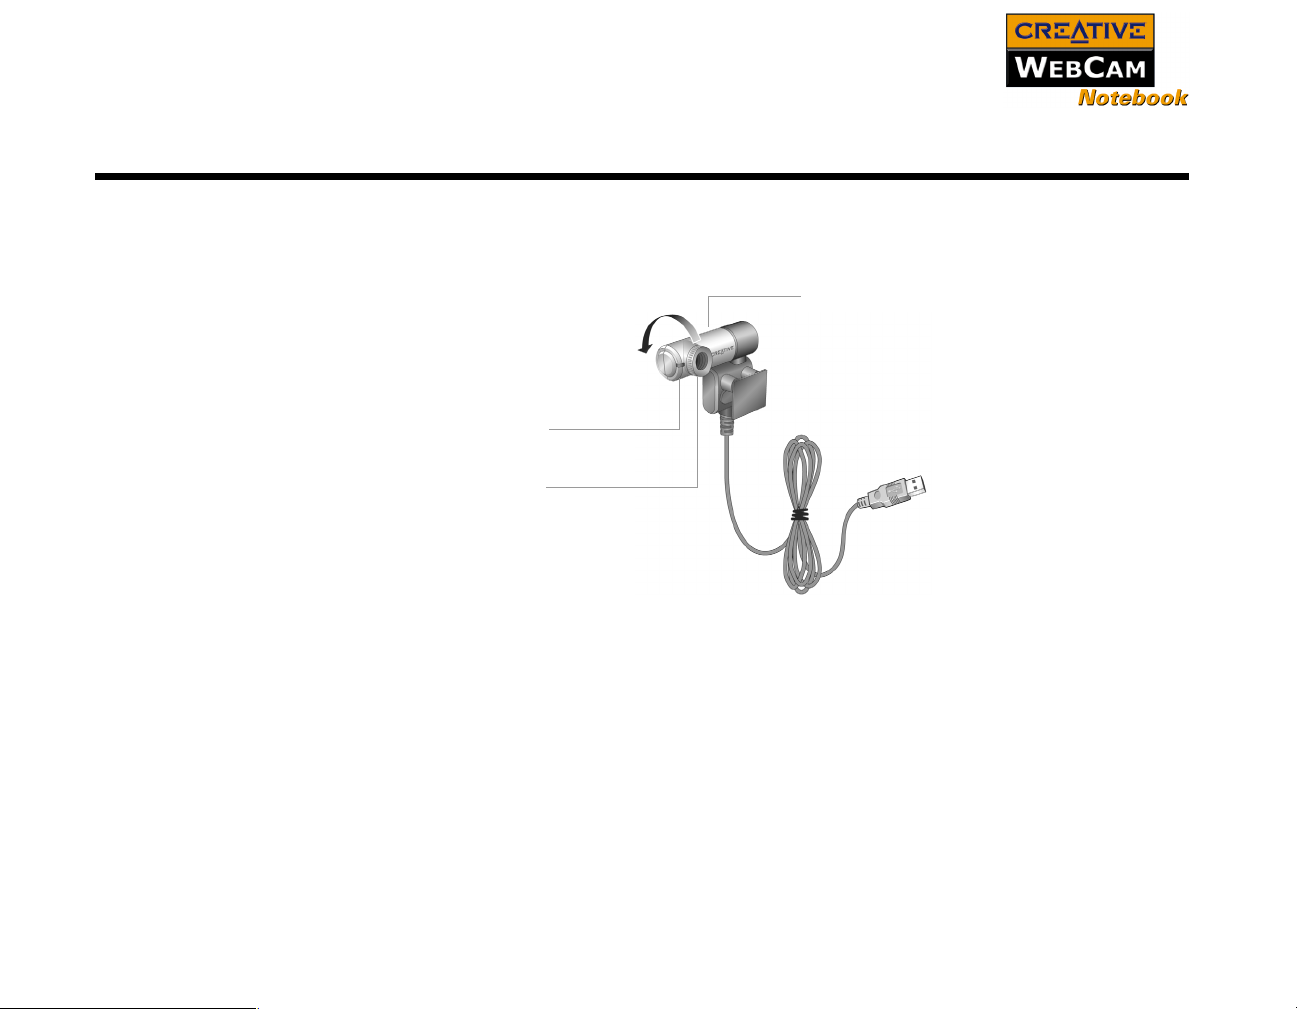
Figure 1-1 highlights the features of Creative WebCam Notebook.
Camera head can be turned to
face backward or forward,
through a range of 270
degrees.
Power LED
USB connector
Focus ring
To adjust the view focus, point the
lens toward your subject and then
rotate this ring in a clockwise or
counterclockwise motion until the
image is in focus.
Figure 1-1: Creative WebCam Notebook
USB cable
Installing Creative WebCam Notebook 1-1
Page 11

Installing Creative WebCam Notebook
Follow the installation procedures for your operating system.
In Windows 98 / 98SE / Me / 2000 / XP
• You can attach
Creative WebCam
Notebook to a USB
hub with an external
power supply.
• If you have a
microphone,
connect it to your
external microphone
connector. Read
your notebook’s
documentation for
more information.
You need to install device drivers and applications before using your webcam.
Do not connect your webcam to your computer before installing the
drivers.
If you accidentally begin installation with your webcam connected and the Add
New Hardware Wizard or Found New Hardware Wizard dialog box appears,
click the Cancel button.
1. Insert the Installation CD into your CD-ROM drive. Your CD should start
automatically. If it does not, follow the steps below:
i. Start Windows Explorer.
ii. On the left pane, click the My Computer icon.
iii. Right-click the CD-ROM/DVD-ROM drive icon, and then click Autoplay.
2. Select the region you are in and then click the Next button.
3. Select a language and then click the Next button.
4. Click the options for installing drivers and applications, and then click the
Install button.
5. Follow the instructions on the screen to complete the installation. You may be
asked, after an application is installed, if you want to restart your notebook. Do
not restart your notebook until all the drivers and applications are installed.
Installing Creative WebCam Notebook 1-2
Page 12
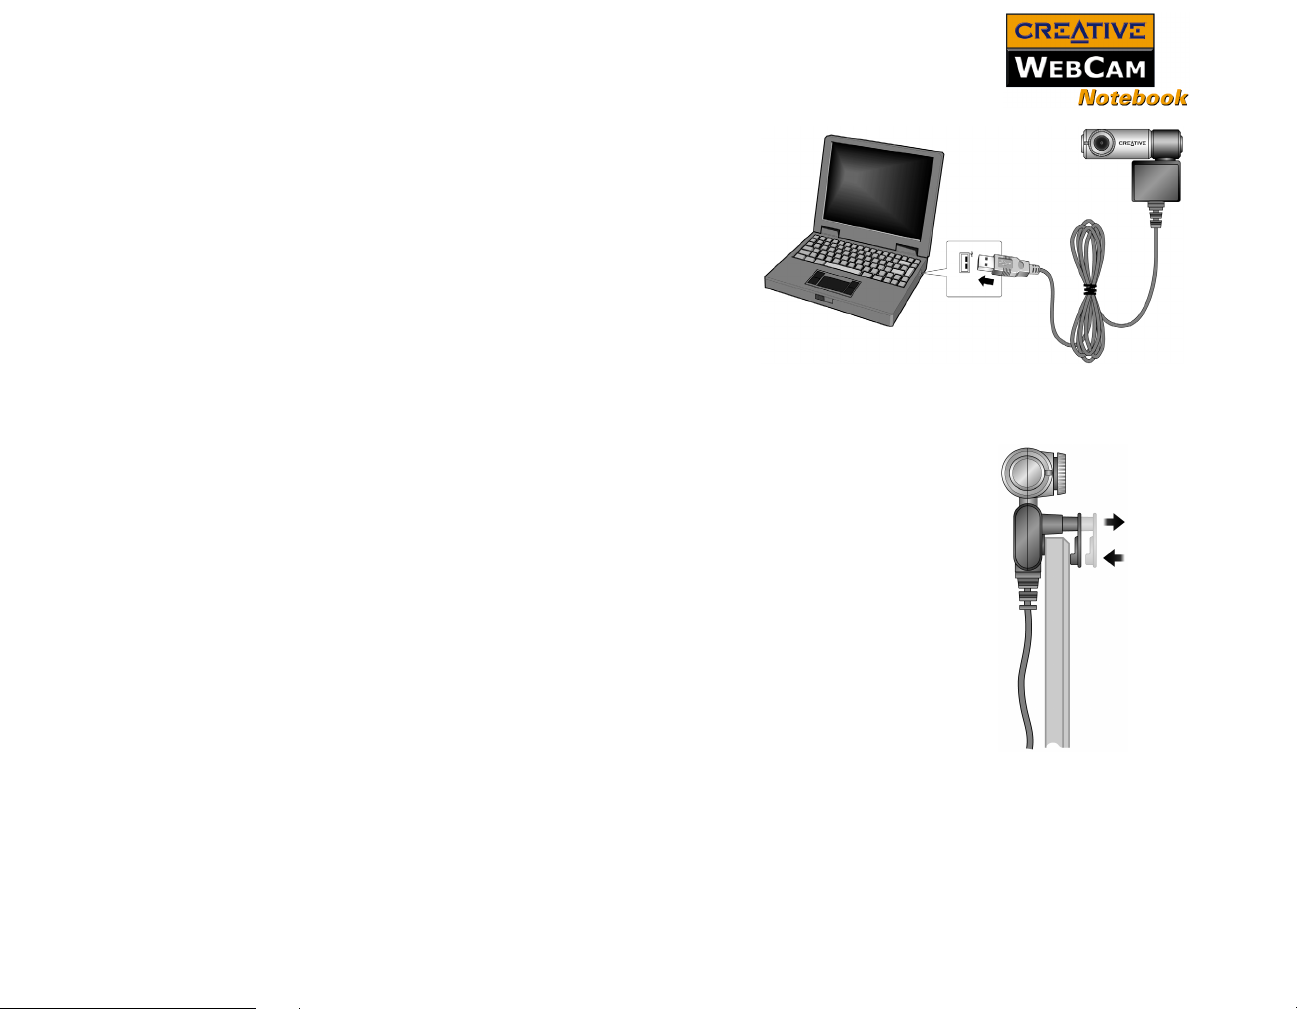
6. Connect the USB cable to an
available USB port on your
notebook (
Figure 1-2).
USB port
Figure 1-2: Connecting Creative WebCam
7. Clip Creative WebCam Notebook
on top of your notebook screen (
Figure 1-3).
Follow the steps below that are for your
operating system.
For Windows 98/98SE and Windows Me
only
After connecting your camera, Windows
automatically detects the device.
iv. If you are prompted to insert the
Windows 98 CD, replace the Creative
WebCam Notebook CD with the
appropriate CD.
Note: Windows 98 is available in various
editions. Be sure to use the correct
edition for your system.
v. In the Insert Disk dialog box, click the
OK button.
Notebook to your notebook
Figure 1-3: Clipping Creative
WebCam Notebook to
your notebook screen
Installing Creative WebCam Notebook 1-3
Page 13
vi. Follow the instructions on the screen.
7. Click the Finish button, and then restart your notebook if you are prompted to
do so.
For Windows 2000 only
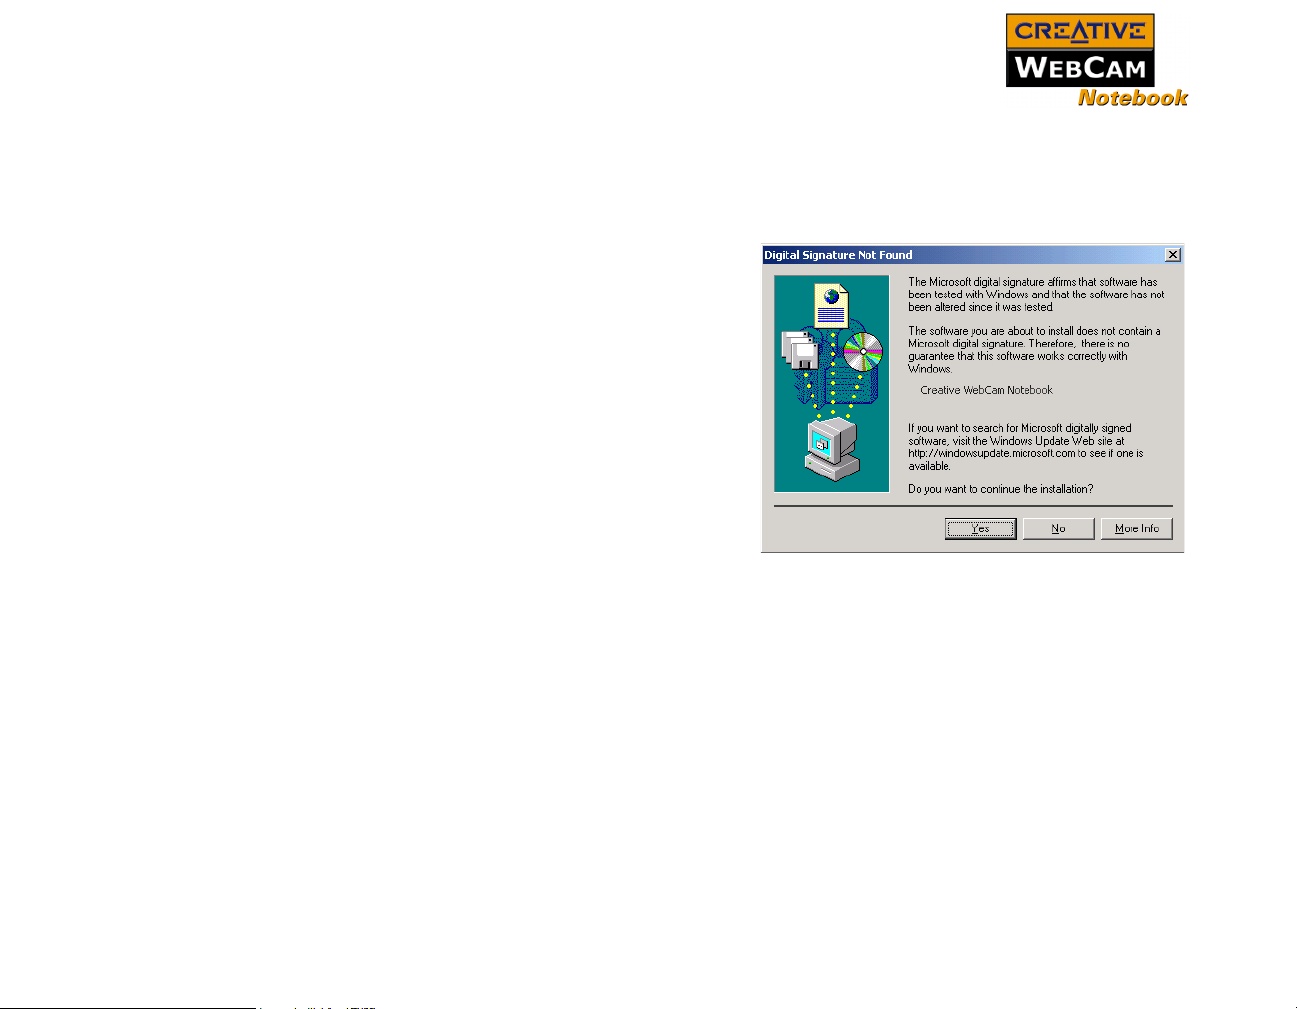
7. When a Digital Signature Not
Found dialog box appears (
1-4), telling you that Creative
WebCam Notebook has been
detected, click the Yes button.
8. Click the Finish button, and then
restart your notebook if you are
prompted to do so.
For Windows XP only
After connecting your camera, Windows
automatically detects the device.
7. When the Found New Hardware
Wizard dialog box appears, select
Install the software
automatically (Recommended),
and then click the Next button.
8. Click the Finish button, and then restart your notebook if you are prompted to
do so.
Figure
Figure 1-4: Digital Signature Not Found
dialog box
Ver i fyi n g t h e installation in Windows 98/98SE and Windows Me
1. Right-click the My Computer icon on your desktop.
2. On the menu that appears, click Properties.
3. In the System Properties dialog box, click the Device Manager tab.
4. Click the plus (+) sign next to the Imaging Device icon.
The entry “Creative WebCam Notebook” should appear.
Installing Creative WebCam Notebook 1-4
Page 14

Ver i fyi n g t h e installation in Windows 2000 & XP
1. Right-click on My Computer.
2. On the menu that appears, click Properties.
3. In the System Properties dialog box, click the Hardware tab.
4. Click the Device Manager button. A window appears.
5. Click the plus (+) sign next to the Imaging Device icon.
The entry “Creative WebCam Notebook” should appear.
Installing Creative WebCam Notebook 1-5
Page 15
Creative WebCam Notebook Applications
Page 16

Creative WebCam Notebook Applications
The Creative WebCam Notebook application CD includes the following:
❑ Creative WebCam Center
❑ Creative Photo Manager
The applications
included with your
webcam may differ
from those described
here.
❑ Orb with OrbSecure
❑ SightSpeed
❑ Yaho o! Messen ger
Creative WebCam Notebook Applications 2-1
Page 17
Creative WebCam Center
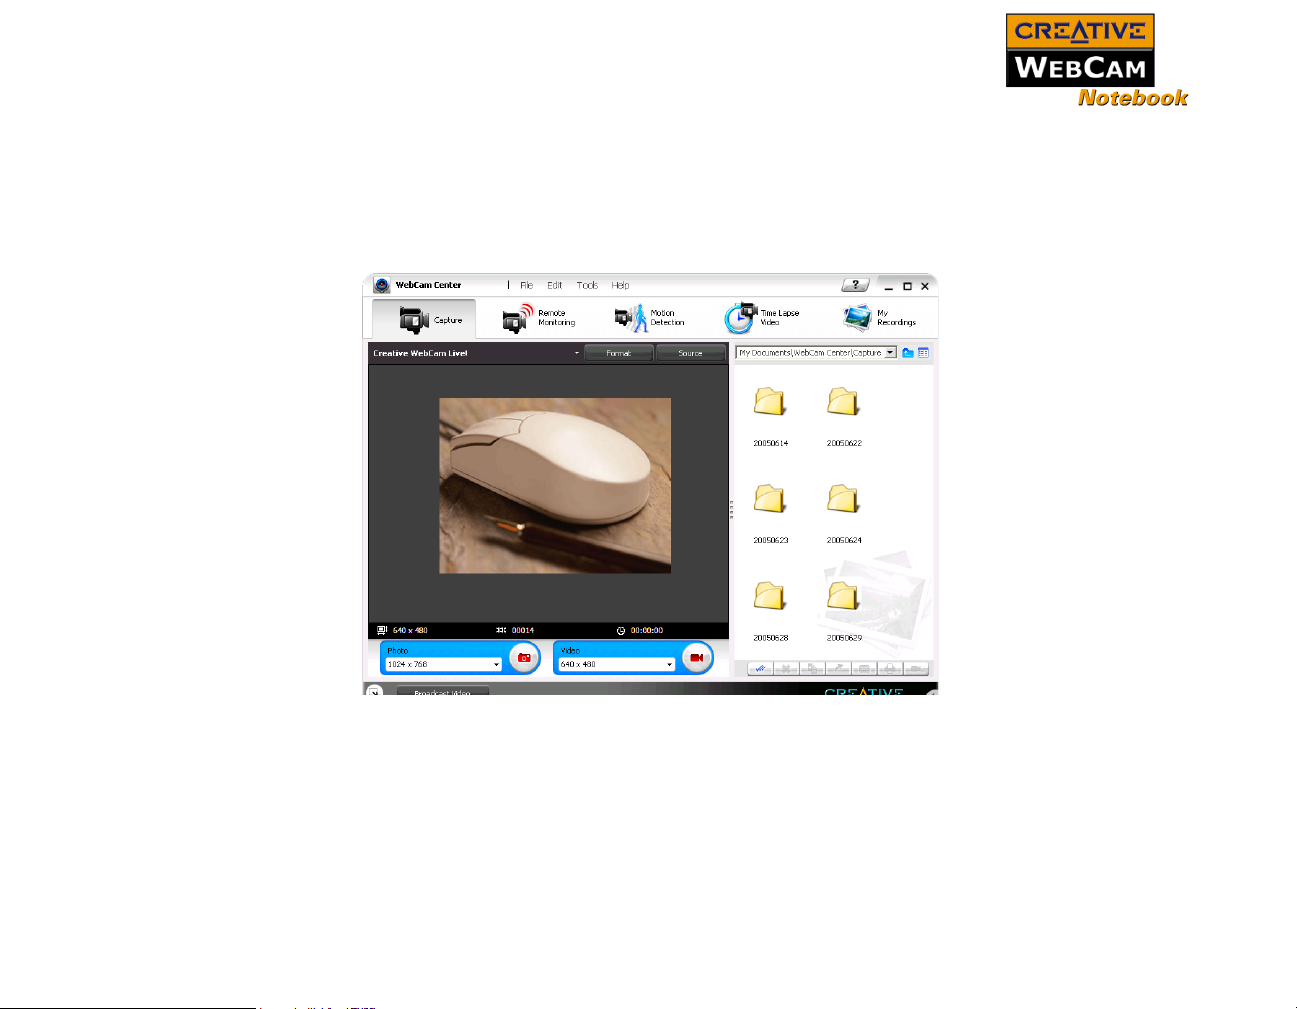
With this powerful application, you can record videos, take pictures and perform
advanced tasks like remote monitoring, motion detection and time lapse video
capturing. There are various settings for you to adjust, allowing you to optimize the
quality of your pictures and videos. You can also export pictures or videos to other
programs, or send them as attachments in your e-mail messages. For details, see
"Using Creative WebCam Center" on page 3-1.
Creative Photo Manager
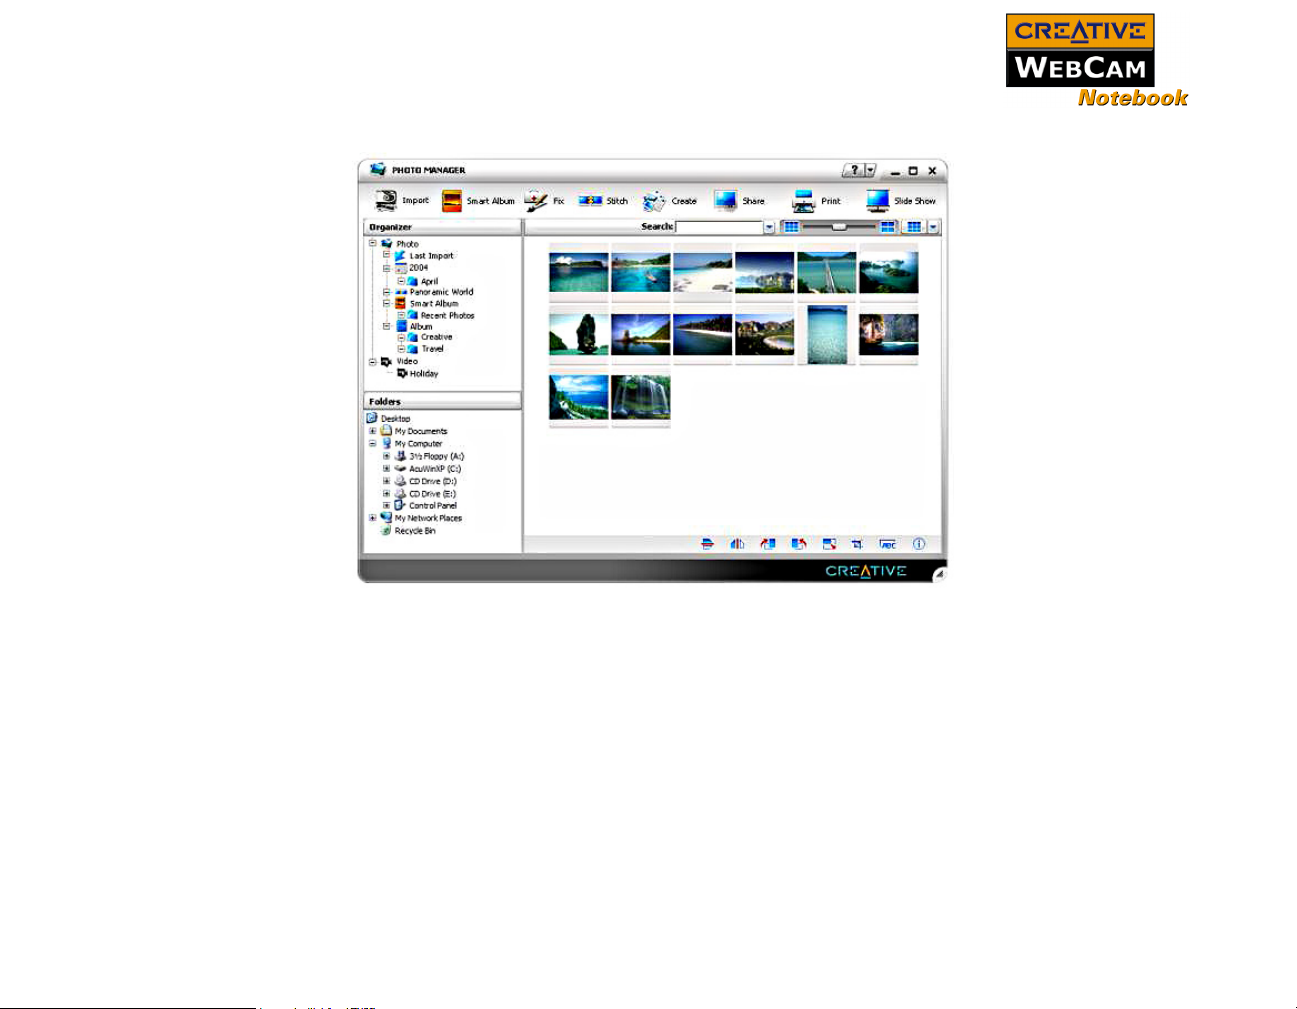
With Creative Photo Manager, you can organize, arrange and manage all your
photos and videos. It also comes with enhanced features and effects for advanced
editing of pictures and videos. Creative Photo Manager, the ultimate tool for photo
and video editing.
Creative WebCam Notebook Applications 2-2
Page 18
For additional information and usage instructions, see the application's Help.
Orb with OrbSecure
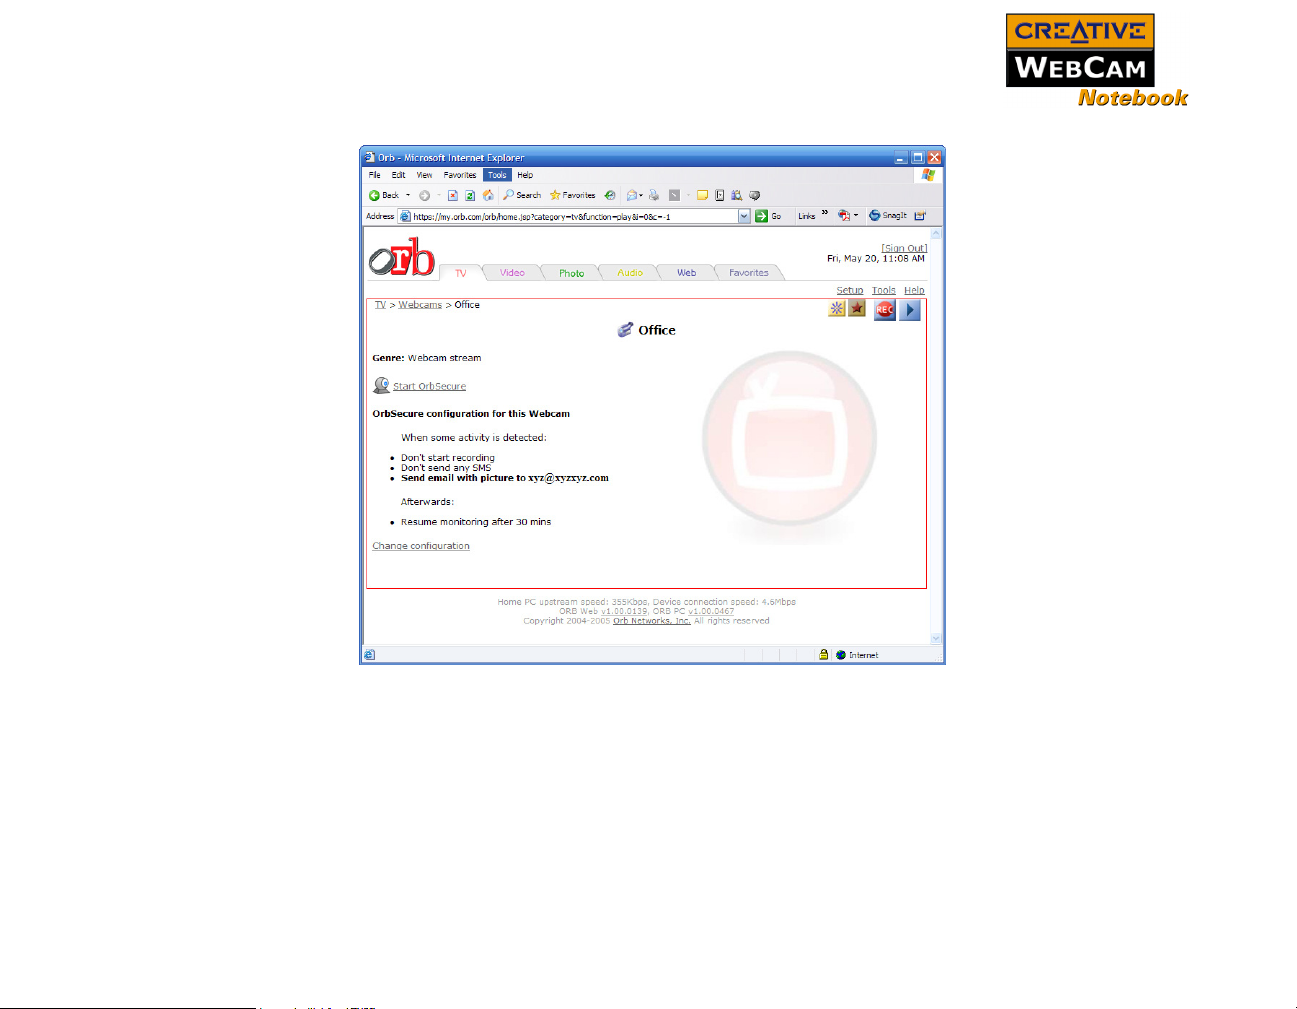
Perfect for remote monitoring, OrbTM with OrbSecure is your personal home
security application. From anywhere and at any time, you can view your home to
assure yourself that all is right.
When used together with Internet-connected devices such as notebooks or Personal
Digital Assistants, Orb with OrbSecure also gives you instant access to files on your
home computer.
Creative WebCam Notebook Applications 2-3
Page 19
For additional information and usage instructions, see the application's Help.
SightSpeed
SightSpeedTM is an easy-to-use technology that transforms your computer into a
video phone. With SightSpeed, you can see and hear your co-workers, friends and
family, no matter how far away they are, without incurring long-distance fees.
Creative WebCam Notebook Applications 2-4
Page 20
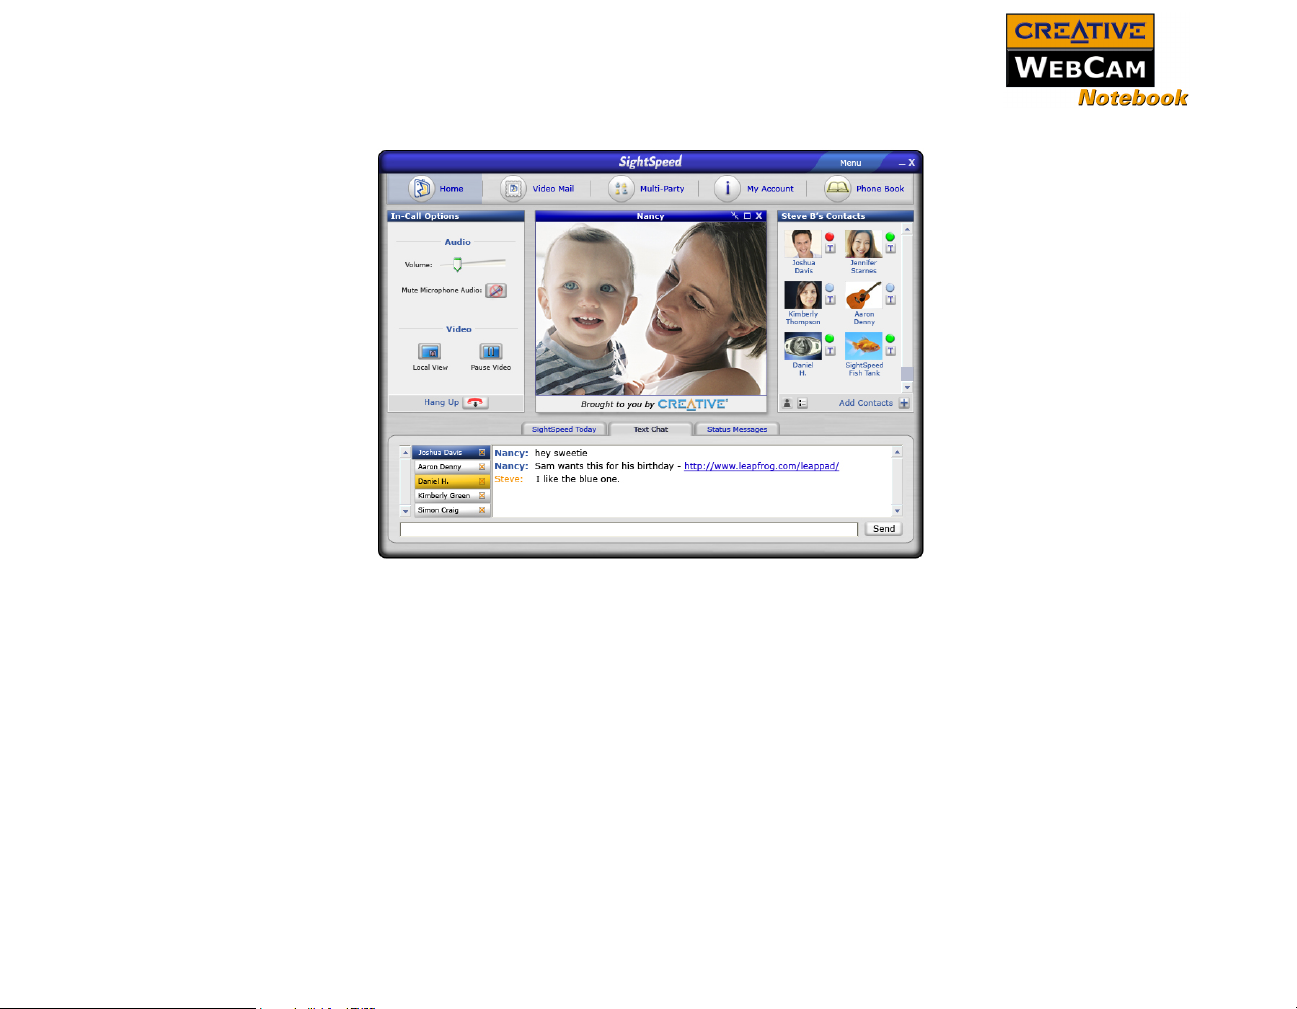
For additional information and usage instructions, see the application's Help.
Creative WebCam Notebook Applications 2-5
Page 21
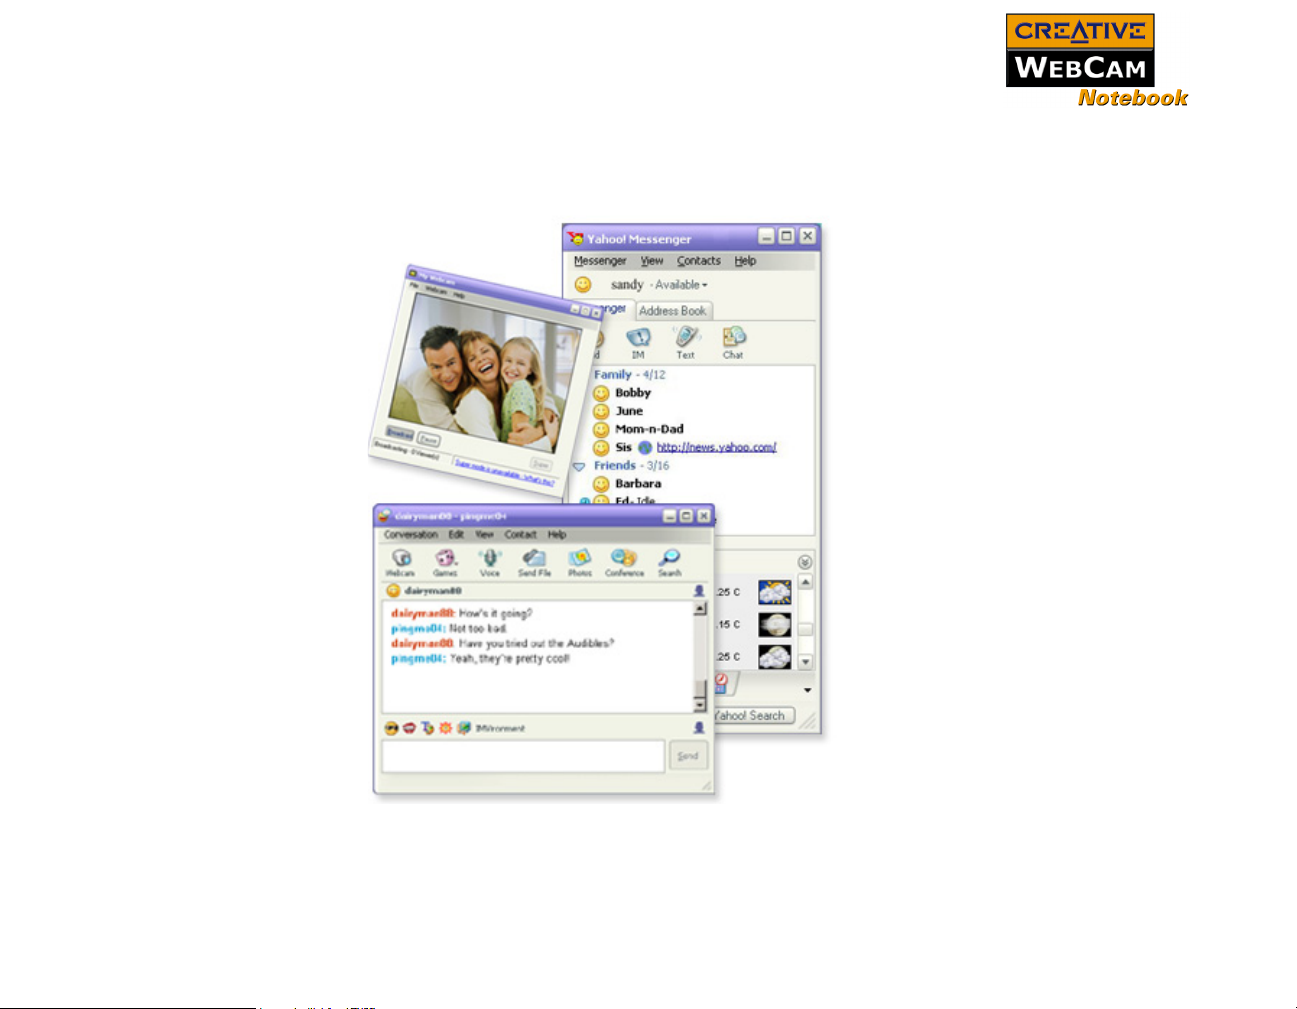
Yahoo! Messenger
Enhance your Internet messaging and web chat experience with Yahoo!®
Messenger services. For additional information and usage instructions, see the
application's Help.
Creative WebCam Notebook Applications 2-6
Page 22
Using Creative WebCam Center
Page 23
Using Creative WebCam Center
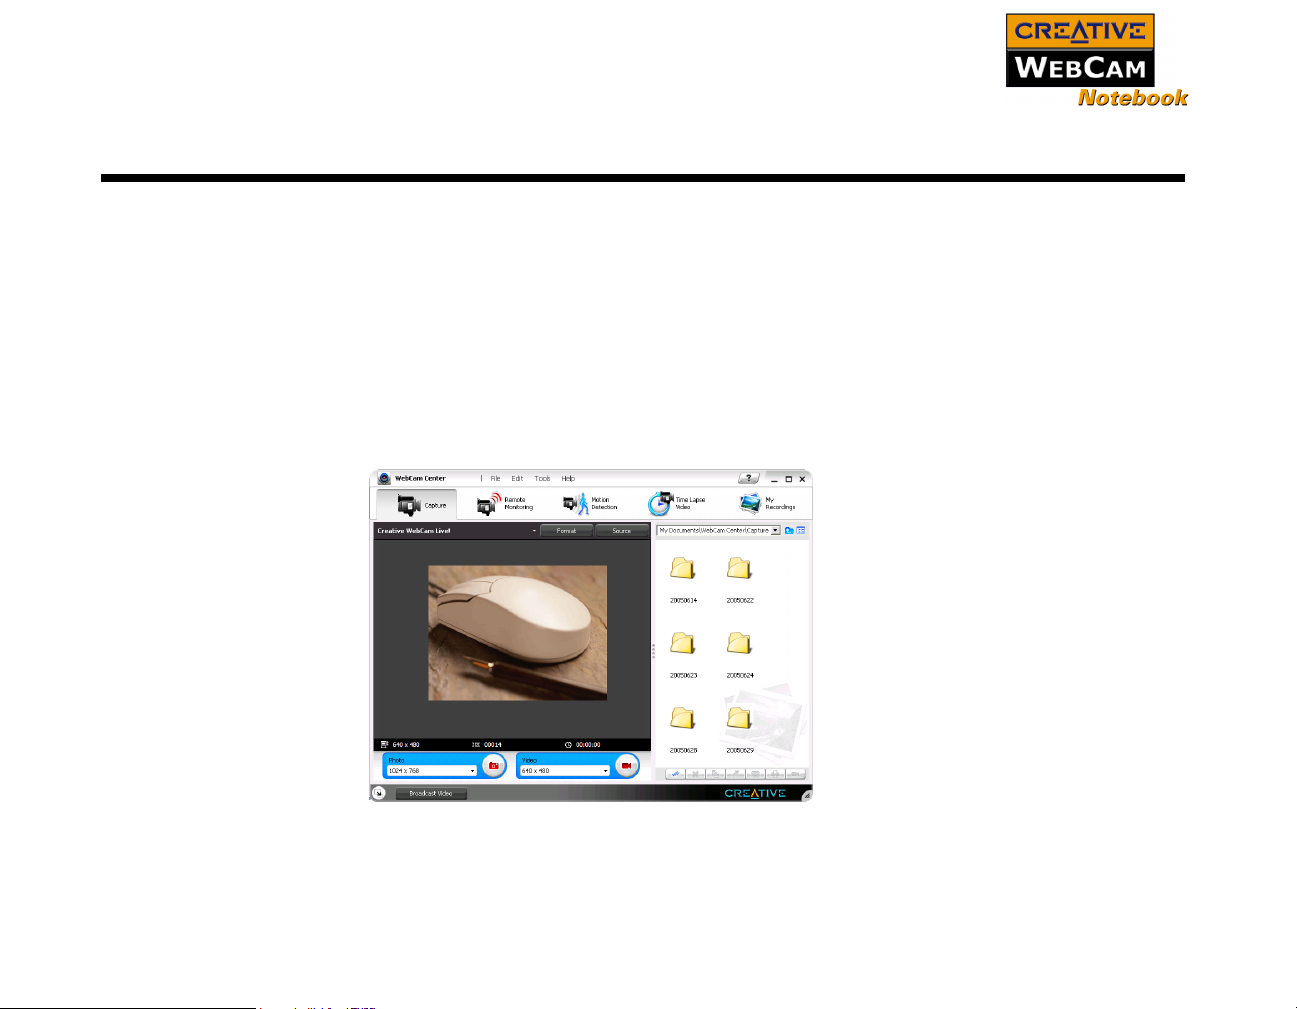
This chapter tells you how to quickly set up Creative WebCam Notebook as a web
camera using the Creative WebCam Center software.
Creative WebCam Center makes it easy to capture photos and videos with your
Creative WebCam Notebook. You can also perform advanced tasks like remote
monitoring, motion detection and time lapse video capturing.
For detailed information about the application’s features and settings, refer to its
Help file.
To start the Help file: In Creative WebCam Center’s main window, click Help.
Starting Creative WebCam Center
You can start Creative WebCam Center in any of the following ways:
❑ Click Start -> Programs -> Creative -> Creative WebCam -> Creative
WebCam Center.
Using Creative WebCam Center 3-1
Page 24
❑ Right-click the Creative Cam Detector icon in your Taskbar, and select
Launch Creative WebCam Center.
This icon appears if, during installation, you clicked the option for Creative Cam
Detector to load automatically at Windows startup.
❑ Plug your camera into the USB port and let Windows auto-detect it. Choose to
start Creative WebCam Center in Capture mode from a popup window that
appears.
Note
• If Creative WebCam Center does not recognize your webcam correctly, see
"Problems Using Creative WebCam Notebook" on page B-1.
• Creative WebCam Center automatically detects your installed webcam, and
disables any unsupported features on the user interface.
Using Creative WebCam Center 3-2
Page 25

Capturing Photos and Videos
With WebCam Center, you can take photos and record videos.
Photos and videos captured with Creative WebCam Center are saved in the default
media folder.
For more instructions on how to take a photo, record a video, or view photos and
videos, refer to the Creative WebCam Center Help file. To launch Creative WebCam
Center Help, see
"Using Creative WebCam Center" on page 3-1.
Taking a Photo 1. In the Creative WebCam Center window, click the Capture tab.
2. Click the Photo Resolution box and select the resolution that you want.
3. Click the Snap photo button to capture an image. Images are saved as
files in the default media folder.
To view the photos in the image viewer, double-click the image files in the
Thumbnails/Details pane.
Recording a Video 1. In the Creative WebCam Center window, click the Capture tab.
2. Click the Video Resolution box and select the resolution that you want.
3. Click the Record button to start and stop video recording.
Videos are saved as files in the default media folder when you stop recording.
To view the videos in the video viewer, double-click the video files in the
Thumbnails/Details pane.
Reactivating the Camera
If your computer goes into standby mode, your camera will go into suspend mode.
You can reactivate the camera and computer by moving the mouse or pressing a
key on the keyboard.
Using Creative WebCam Center 3-3
Page 26
Technical Specifications
Page 27

Technical Specifications
Construction ❑ USB Port version: Remote camera head with a USB cable
Power ❑ From a USB port or USB hub with an external power source
Sensor ❑ CMOS image sensor
Resolution - Video
❑ All resolutions up to 640 x 480
mode
Resolution - Still
❑ All resolutions up to 640 x 480
mode
Video formats ❑ RGB 24
❑ I 420
Exposure control ❑ Automatic
Colour balance ❑ Automatic
Colour matrix ❑ Preset and integral to camera
Field-of-view ❑ 44 degrees +/- 5% (horizontal)
Depth-of-field ❑ 15 centimeters or 6 inches to infinity
Technical Specifications A-1
Page 28

Port compatibility ❑ Universal Serial Bus port
Software compatibility
❑ TWAIN, Video for Windows, and WDM MiniDriver for DirectShow
Technical Specifications A-2
Page 29
Troubleshooting
Page 30

Troubleshooting
If you have a technical problem with this product, you may wish to consult our selfhelp tool “Knowledgebase” for online troubleshooting and solutions. Go to
www.creative.com and select your region.
Problems Using Creative WebCam Notebook
An application reports that the video driver is already in use, or that the
camera cannot be found.
Do the following:
❑ The camera is not properly connected. To resolve this problem, ensure that the
camera’s USB connector is inserted, and that the USB connector is enabled in
the BIOS. Refer to your notebook’s documentation for information on the BIOS.
❑ Reinstall the video capture drivers and restart your notebook.
Troubleshooting B-1
Page 31
The camera’s Power LED does not light
up, or in Windows 98/98 SE, Me and
2000, the computer restarts for no
apparent reason.
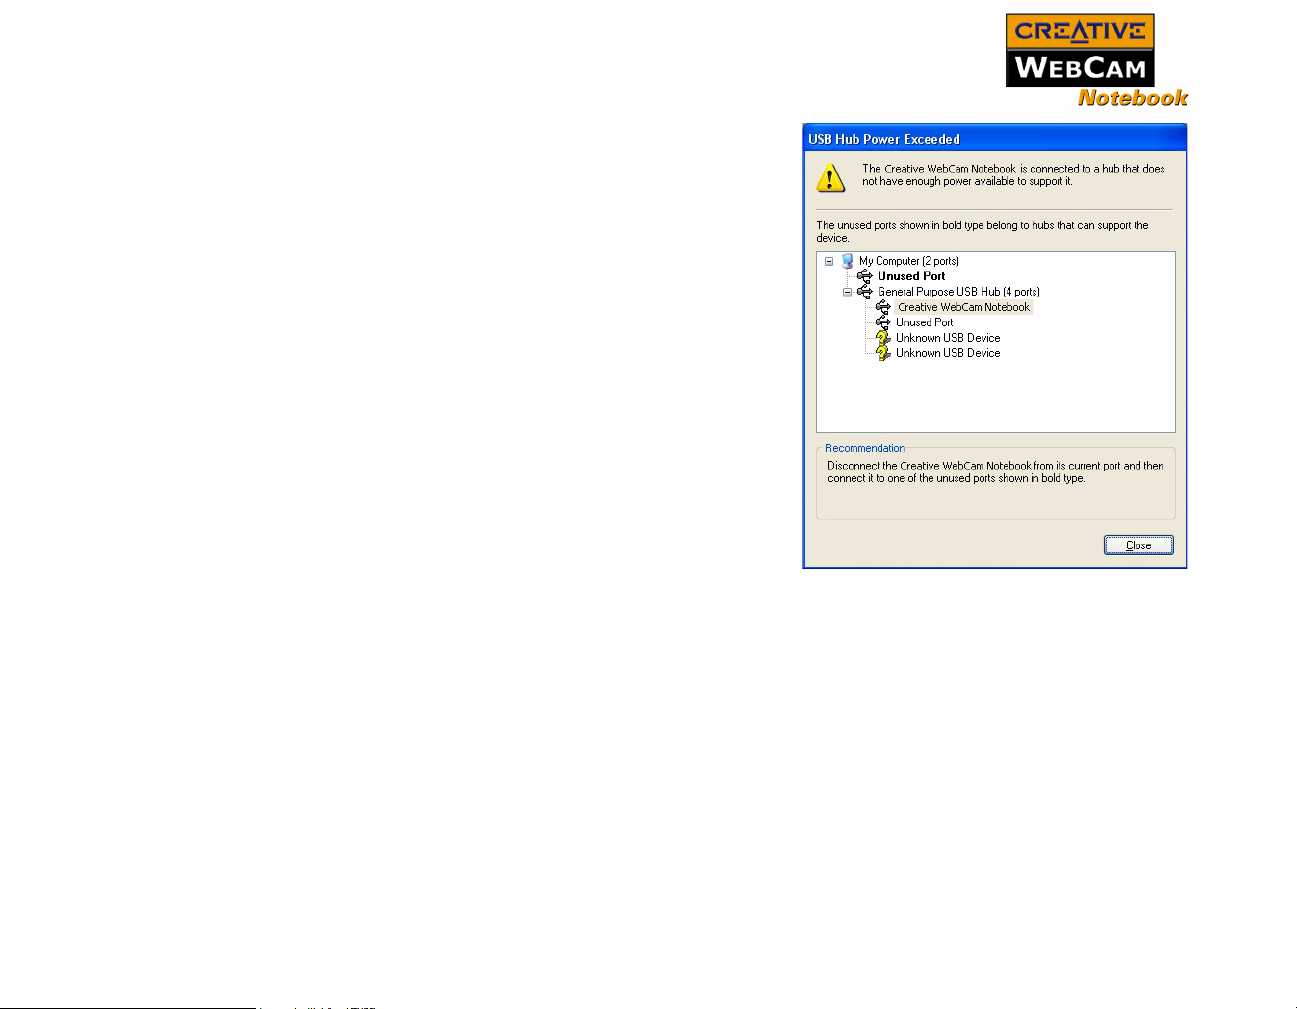
You may have USB devices drawing too
much power from your computer. This can
happen especially when connecting USB
devices to a passive or bus-powered USB
hub. In Windows XP, a dialog box similar to
Figure B-1 appears.
Do the following:
❑ Connect the camera directly to your
computer’s USB port.
❑ Use a USB hub with an external power
supply.
Figure B-1: USB Hub Power Exceeded
dialog box
Insufficient system resources reserved for the USB port, causing the
system to be unable to function.
There are too many devices in the system, causing IRQ problems with the system’s
USB controller.
Do the following:
1. Remove some devices from the system.
2. Restart the system.
The system will rearrange the resources automatically.
Troubleshooting B-2
Page 32
Note on USB Compatibility
Page 33

Note on USB Compatibility
To look for a USB
compatible product,
you can visit the
product search page at
the official USB Web
site: http://
www.usb.org/app/
search/products.
While testing Creative WebCam Notebook on motherboards with integrated
Universal Serial Bus (USB) ports, we encountered a small number of motherboards
that do not meet the USB specification exactly. These and other non-USB-compliant
motherboards may not operate correctly with Creative WebCam Notebook.
Fortunately, the manufacturers of some of these motherboards have released new
versions of motherboards or BIOS to address the problem.
If the setup program warns you that your motherboard’s USB port is incompatible
with Creative WebCam Notebook, or if the camera does not work on your system
and you suspect that the problem may be related to your computer’s USB port, the
following is a list of available options:
1. Contact your computer vendor.
Your computer vendor may be able to upgrade your motherboard or its BIOS to
a newer version that addresses USB incompatibilities.
2. Use a PCI host adapter that provides USB connectors.
If you are not able to upgrade your motherboard or its BIOS, we recommend
this approach.
3. Attach the Creative WebCam Notebook to a USB hub with an external power
supply.
Some USB devices (such as monitors) also operate as USB hubs; you can also
buy USB hubs which are to be attached to your computer’s USB port. However,
in some cases, attaching a USB hub to a non-USB-compliant USB motherboard
connector will not solve the problem.
Note on USB Compatibility C-1
 Loading...