

Page 1
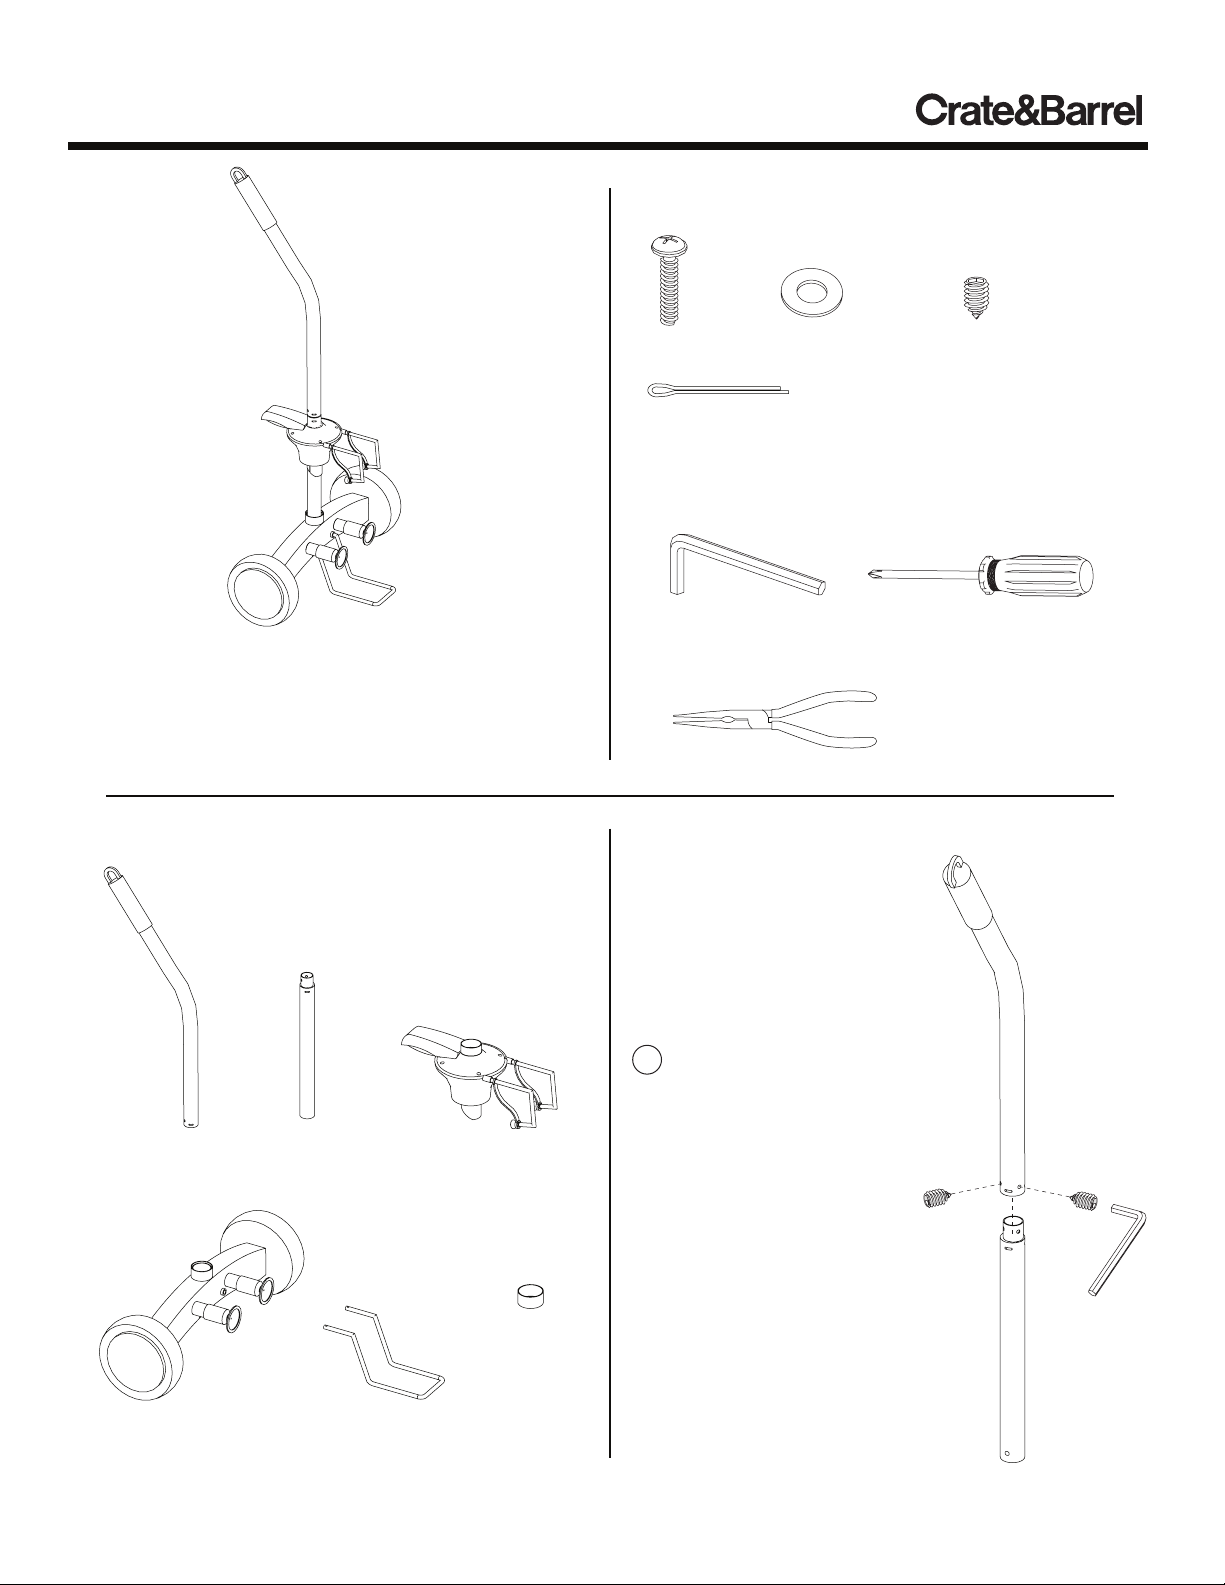
POT MOVER
HARDWARE
Thank you for purchasing the Pot Mover. This page lists
all the contents included in the box. Please take time to
identify the hardware as well as the individual components of this product. As you unpack and prepare for
assembly, place the contents on a carpeted or padded
area to protect them from damage.
COMPONENTS
1 - bolt
2 - pins
1 - washer
TOOLS REQUIRED
allen wrench
(included)
pliers
ASSEMBLY
2 - set screws
phillips head screwdriver
handle
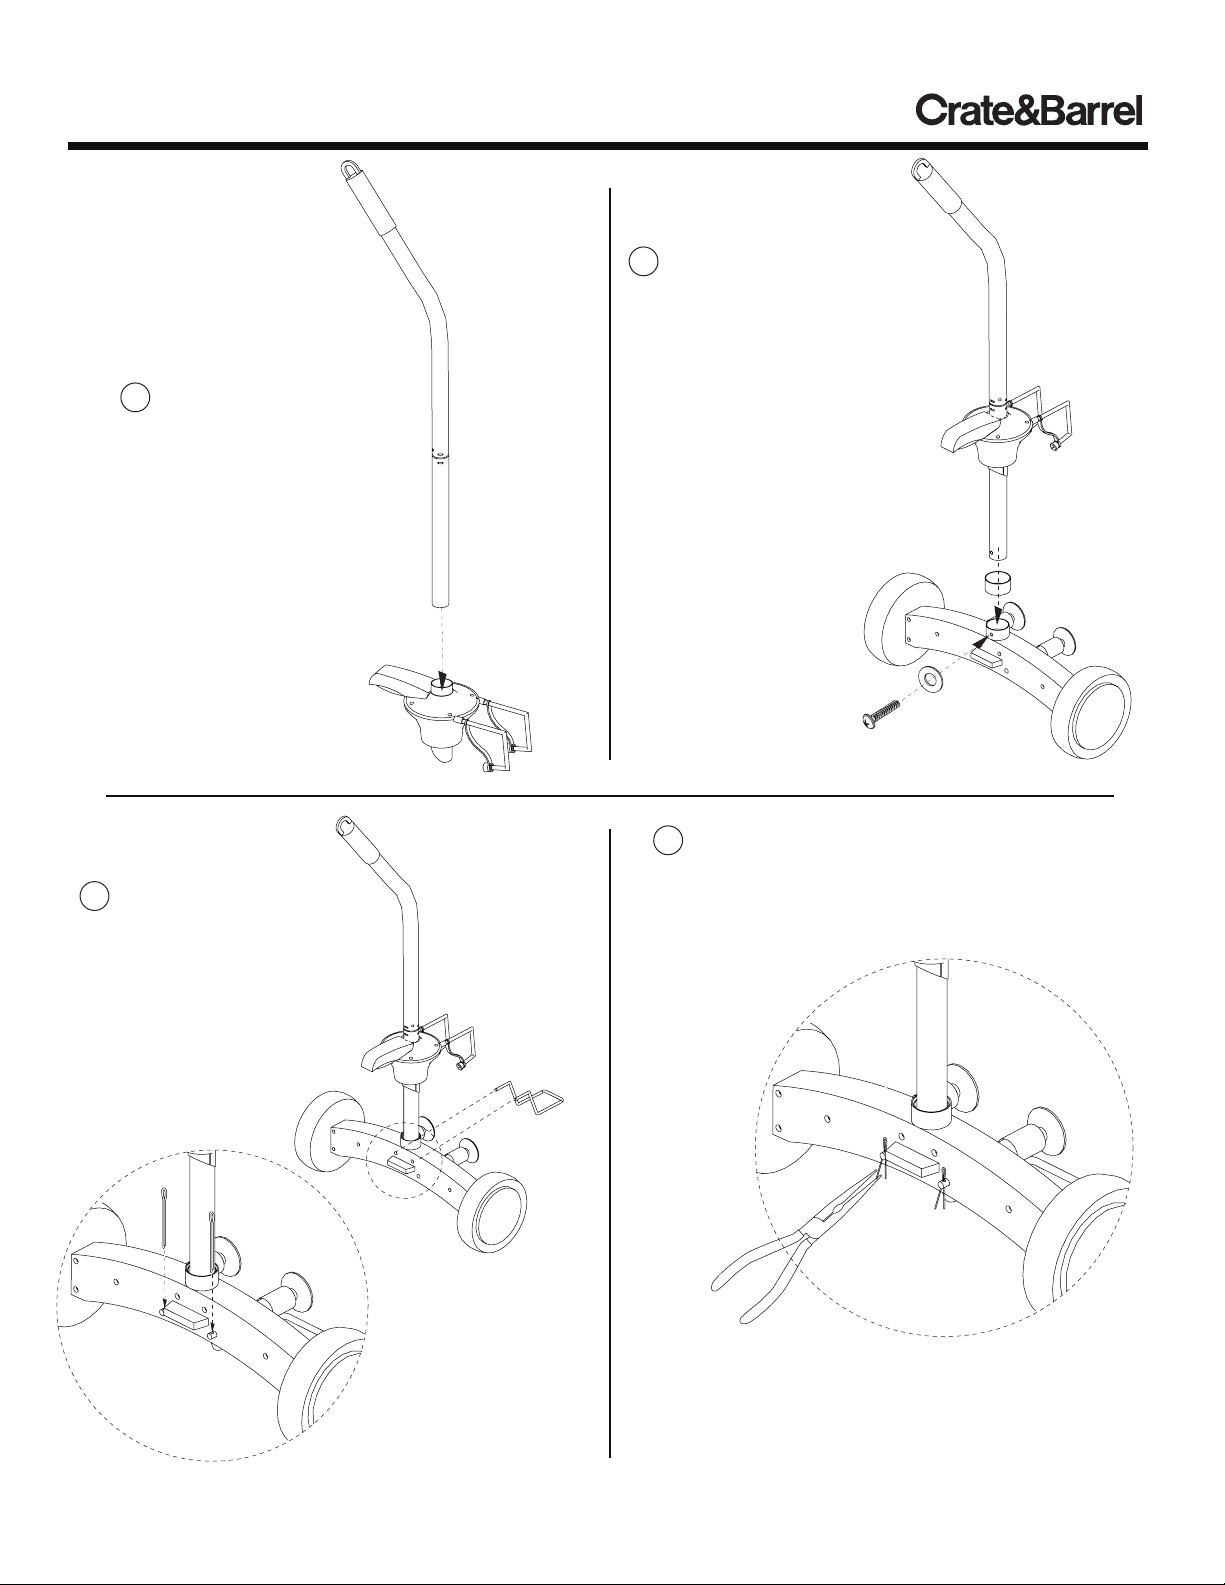
1 Fit handle onto upright
as shown. Align holes in
handle with corresponding
1 - handle 1 - upright 1 - adjustment
mechanism
1 - ring
1 - base 1 - base support
Made in China - r01 Page 1 of 3
Customer Service 800.967.6696 | Latest instructions available at www.crateandbarrel.com
holes in upright, and
secure with 2 set screws
using an allen wrench.
upright
Page 2
POT MOVER
2 Fit handle assembly into
adjustment mechanism as
shown.
3 A) Slide ring onto handle
assembly.
B) Firmly fit handle assembly into corresponding hole
in base and align holes at
rear. If necessary, gently tap
handle assembly with a
rubber mallet to secure.
C) Fasten handle to base
with 1 bolt and 1 washer.
Secure with a phillips head
screwdriver.
B
A
ring
adjustment
mechanism
4 A) Fit base support
into corresponding
holes in base.
B) Secure to base by
inserting 2 pins into
holes in base support.
pin
A
base
support
5 Using a pair of
pliers, bend pin legs
outward to lock pins
into position.
Assembly is now
complete.
C
base
B
Made in China - r01 Page 2 of 3
Customer Service 800.967.6696 | Latest instructions available at www.crateandbarrel.com
CLEANING AND CARE
Clean surfaces with a dry or damp soft cloth. Do not
use abrasive cleaners. Periodically check fasteners
and tighten as necessary.
Page 3

POT MOVER
MOVING A POTTED PLANT
1 Squeeze handle and
slide adjustment
mechanism up. Slide
base support under
pot.
2 Squeeze handle and
slide adjustment
mechanism down,
making sure rubber
prongs engage the
inside edge of the pot
as shown.
3 Apply downward
pressure to handle to
lift pot.
IMPORTANT NOTE:
This unit is rated to carry a
maximum of 165 pounds
(65 kg). Do not exceed
this weight.
Made in China - r01 Page 3 of 3
Customer Service 800.967.6696 | Latest instructions available at www.crateandbarrel.com
 Loading...