

Page 1
Customer Service 800-967-6696 | http://www.crateandbarrel.com
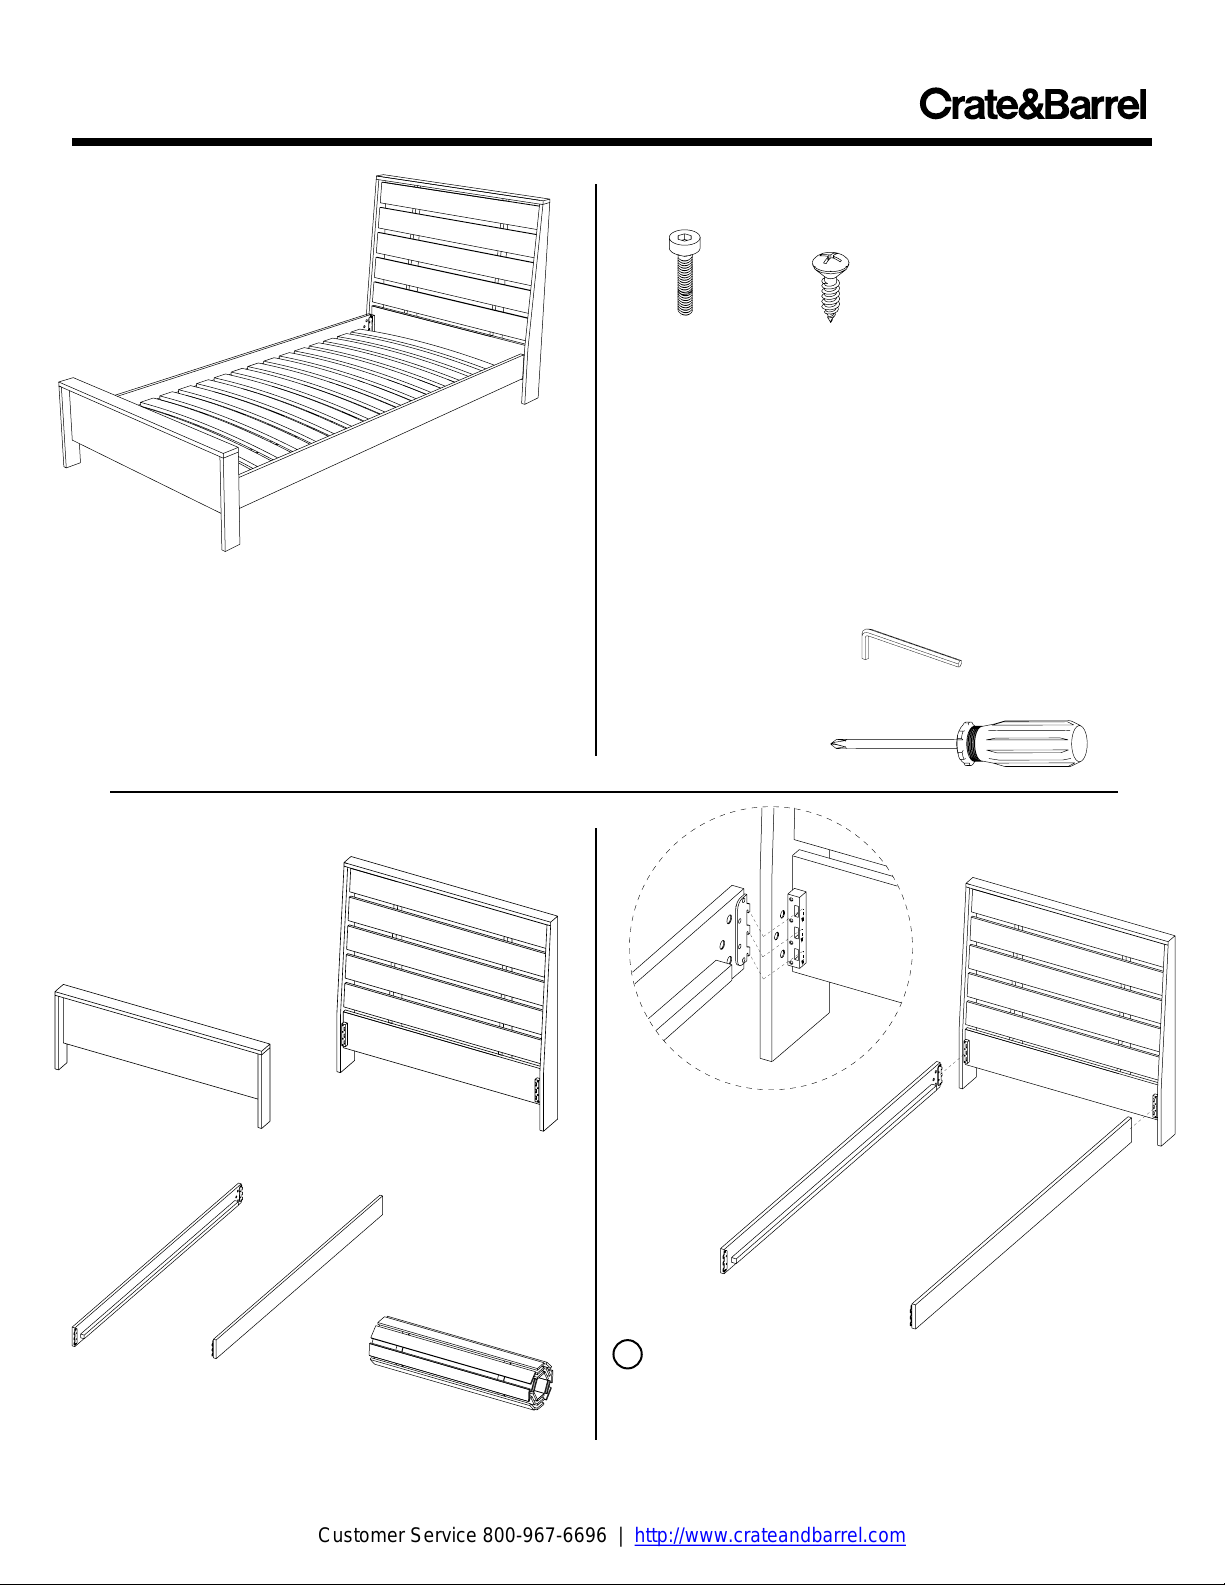
PACIFIC TWIN BED
Thank you for purchasing the Pacific Twin Bed. This
page lists all the contents included in the box. Please
take time to identify the hardware as well as the individual
components of this product. As you unpack and prepare
for assembly, place the contents on a carpeted or padded
area to protect
them from damage.
Note: 2 people are required to safely assemble this
product.
COMPONENTS
1 - footboard
1 - headboard
2 - side rails
(1 left, 1 right)
1 - slat roll
Made in Lithuania - r01
HARDWARE
6 - bolts
Missing hardware? Please call 800.606.6387 for
replacements.
6 - screws
TOOLS REQUIRED
Allen wrench (included)
Phillips head screwdriver
1 With the assistance of another adult, stand headboard
upright. Fit the tabs of the left and right side rails down into
the corresponding slots in the headboard hardware. Make
sure to orient the side rails as shown with the ends of the
rails with the 3 holes secured to the headboard.
Page 1 of 2
Page 2
Customer Service 800-967-6696 | http://www.crateandbarrel.com
PACIFIC TWIN BED
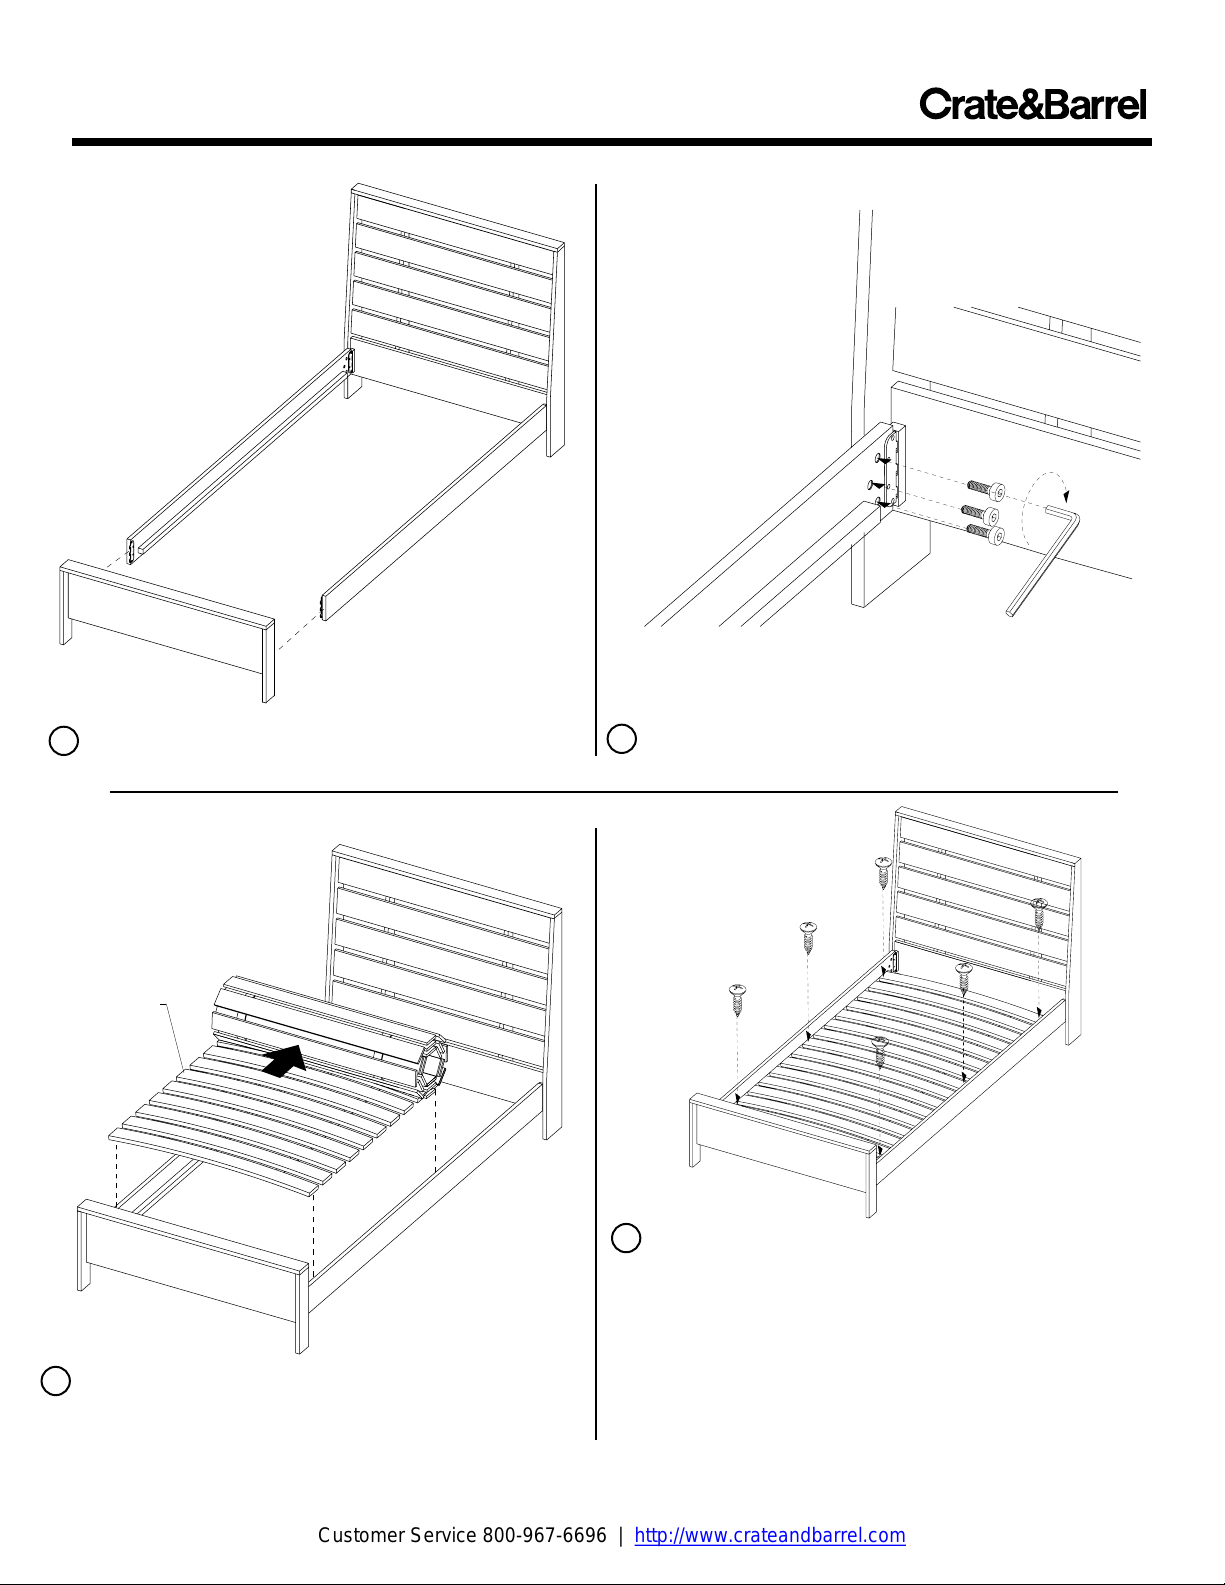
2 Fasten the other ends of the side rails to the footboard
using the same method as Step 1.
Slats should
bow upward
4 Place slat roll into position on the side rail supports and
unroll towards the headboard. IMPORTANT: Make sure the
slats bow upwards.
Made in Lithuania - r01
x 2
3 Fasten 1 bolt into each of the 3 holes at the headboard/side
rail connection. Secure with the allen wrench.
5 Make sure that the canvas webbing between the slats is
taught. Secure the slats to the side rails with 6 screws
where indicated above. Note: There will not be pre-drilled
holes in either the slats or the side rails. Assembly is now
complete.
CLEANING AND CARE
Clean surfaces with a dry or damp soft cloth. Do not use
abrasive cleaners. Do not use furniture wax or polish as the
wood is finished with a protective clear lacquer.
Page 2 of 2
 Loading...