

Page 1

Owner’s Manual
POWER SPRAYER WAND
• Safety Guidelines
• Operation
• Maintenance
• Storage
• Repair Parts
Model No.
919.716171
CAUTION: Read the Safety Guidelines
and All Instructions Carefully Before
Operating.
Sears Canada, Inc., Toronto, Ont. M5B 2B8
D20059 Rev. 2 01/07/03
Page 2

2- ENG
D20059
FULL ONE YEAR WARRANTY ON CRAFTSMAN power sprayer wand
If this Craftsman Power Sprayer Wand fails due to a defect in material or workmanship
within one year from the date of purchase, RETURN IT TO THE NEAREST SEARS
SERVICE CENTER/DEPARTMENT THROUGHOUT CANADA and Sears will at its option
repair or replace it free of charge.
If this Power Sprayer Wand is used for commercial or rental purposes, this warranty
applies for only 90 days from the date of purchase.
This warranty gives you specific legal rights and you may have other rights which vary
from province to province.
Sears Canada, Inc., Toronto, Ont. M5B 2B8
TABLE OF CONTENTS
WARRANTY
WARRANTY . . . . . . . . . . . . . . . . . . . . . . . . . . . . . . . . . . . . . . . . . . . . . . . . .2
SAFETY GUIDELINES - DEFINITIONS . . . . . . . . . . . . . . . . . . . . . . . . . . . . .3
IMPORTANT SAFETY RULES . . . . . . . . . . . . . . . . . . . . . . . . . . . . . . . . . .3-4
SPECIFICATION CHART . . . . . . . . . . . . . . . . . . . . . . . . . . . . . . . . . . . . . . .5
GENERAL INFORMATION . . . . . . . . . . . . . . . . . . . . . . . . . . . . . . . . . . . . . .5
GLOSSARY . . . . . . . . . . . . . . . . . . . . . . . . . . . . . . . . . . . . . . . . . . . . . . . . .5
TOOLS NEEDED FOR ASSEMBLY . . . . . . . . . . . . . . . . . . . . . . . . . . . . . . . .5
OPERATING THE CONTROLS . . . . . . . . . . . . . . . . . . . . . . . . . . . . . . . . . . .6
Air Control Knob . . . . . . . . . . . . . . . . . . . . . . . . . . . . . . . . . . . . . . . . . .6
Water Control Knob . . . . . . . . . . . . . . . . . . . . . . . . . . . . . . . . . . . . . . .6
Soap/Chemical Control Knob . . . . . . . . . . . . . . . . . . . . . . . . . . . . . . . .6
Foliage Nozzle . . . . . . . . . . . . . . . . . . . . . . . . . . . . . . . . . . . . . . . . . . .6
CONNECTING THE HOSE . . . . . . . . . . . . . . . . . . . . . . . . . . . . . . . . . . . . . .7
Non-Bleeder Connector . . . . . . . . . . . . . . . . . . . . . . . . . . . . . . . . . . . .7
Water Hose . . . . . . . . . . . . . . . . . . . . . . . . . . . . . . . . . . . . . . . . . . . . . .7
Air Hose . . . . . . . . . . . . . . . . . . . . . . . . . . . . . . . . . . . . . . . . . . . . . . . .7
Chemical Draw Hose . . . . . . . . . . . . . . . . . . . . . . . . . . . . . . . . . . . . . .7
WASHING WITH THE POWER SPRAYER WAND . . . . . . . . . . . . . . . . . . . . .8
SPRAYING FOLIAGE WITH THE POWER SPRAYER WAND . . . . . . . . . . . . .9
DEGREASING WITH THE POWER SPRAYER WAND . . . . . . . . . . . . . . . . .10
CLEANING AND STORAGE . . . . . . . . . . . . . . . . . . . . . . . . . . . . . . . . . . . .11
TROUBLE SHOOTING GUIDE . . . . . . . . . . . . . . . . . . . . . . . . . . . . . . . . . .12
POWER SPRAYER WAND DIAGRAM . . . . . . . . . . . . . . . . . . . . . . . . . . . . .13
Parts List . . . . . . . . . . . . . . . . . . . . . . . . . . . . . . . . . . . . . . . . . . . . . .13
FRENCH . . . . . . . . . . . . . . . . . . . . . . . . . . . . . . . . . . . . . . . . . . . . . . . .14-26
HOW TO ORDER REPAIR PARTS . . . . . . . . . . . . . . . . . . . . . . . . .back cover
Page 3

3- ENG
D20059
SAFETY GUIDELINES - DEFINITIONS
Indicates an
imminently hazardous
situation which, if not avoided, will
result in death or serious injury.
Indicates a potentially
hazardous situation
which, if not avoided, could
result in
death or serious injury
.
Indicates a potentially
hazardous situation
which, if not avoided, may
result in
minor or moderate injury.
Used without the
safety alert symbol
indicates a potentially hazardous
situation which, if not avoided, may
result in pr
operty damage.
This manual contains information that is important for you to know and understand. This information
relates to protecting YOUR SAFETY and PREVENTING EQUIPMENT PROBLEMS. To help you
recognize this information, we use the symbols below. Please read the manual and pay attention to
these sections.
IMPORTANT SAFETY INSTRUCTIONS
SAVE THESE INSTRUCTIONS
WARNING: Risk of Bursting
Air Tank: The following conditions could lead to a weakening of the tank, and result
in a violent tank explosion and could cause property damage or serious injury.
How To Prevent It
What Could Happen
HAZARD
For essential control of air pressure, you
must install a pressure regulator and
pressure gauge to the air outlet (if not
equipped) of your compressor. Follow the
equipment manufacturers recommendation
and never exceed the maximum allowable
pressure rating of attachments.
A
TTACHMENTS & ACCESSORIES:
Exceeding the pressure rating of air
tools, spray guns, air operated
accessories, tires, and other inflatables
can cause them to explode or fly apart,
and could result in serious injury.
Improper operation or maintenance of this product could result in serious injury and
property damage. Read and understand all warnings and operation instructions before
using this equipment.
Page 4
4- ENG
D20059
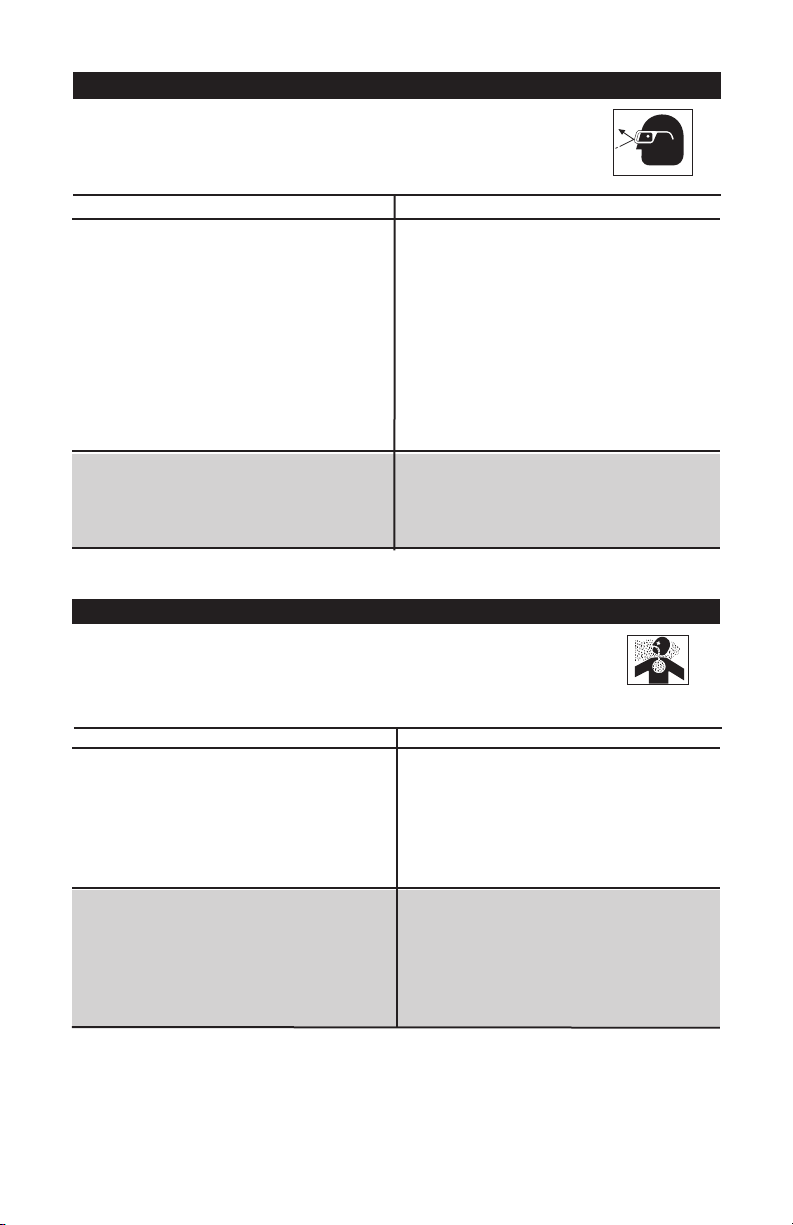
WARNING: Risk from Flying Objects
The compressed air stream can cause
soft tissue damage to exposed skin and
can propel dirt, chips, loose particles,
and small objects at high speed,
resulting in property damage or personal
injury.
Always wear ANSI Z87.1 approved safety
glasses with side shields when using the
compressor.
Never point any nozzle or sprayer
toward any part of the body or at other
people or animals.
Always turn the compressor off and
bleed pressure from the air hose and tank
before attempting maintenance, attaching
tools or accessories.
HAZARD
How To Prevent It
What Could Happen
WARNING: Risk to Breathing
HAZARD
Sprayed materials such as paint, paint
solvents, paint remover, insecticides,
weed killers, may contain harmful
vapors and poisons.
Work in an area with good cross
ventilation. Read and follow the safety
instructions provided on the label or
safety data sheets for the materials you
are spraying. Use a NIOSH/ MSHA
approved respirator designed for use with
your specific application.
How To Prevent It
What Could Happen
Some pesticides, herbicides, and
solvents may cause lung damage, and
burns if inhaled or allowed to come into
contact with skin or eyes.
Use a NIOSH approved mask or
respirator and protective clothing
designed for use with your specific
application and spray materials. Some
masks provide only limited protection
against toxic materials and harmful
solvents.
Certain parts are under pressure
whenever the spray wand is connected to
a pressurized air line. These parts may
be propelled if the gun is disassembled
or over pressured.
Disconnect the wand from the air line
when not in use.
Page 5

5- ENG
D20059
Your Power Sprayer Wand is intended for use with a 3½ Horsepower or larger
tank-type air compressor delivering at least 125 PSIG. The larger the air
compressor used the more powerful your washer will be.
Minimum Air Pressure (for applying detergent/degreaser): 40 PSIG
Minimum Air Pressure (for washing/rinsing surfaces): 90 PSIG
Maximum Air Pressure: 125 PSIG
Minimum Water Pressure: 20 PSIG
Maximum Water Pressure: 100 PSIG
Maximum Water Temperature: 140 ºF
Maximum Chemical Draw Height: 10 Feet
(maximum distance washer can be above the chemical container.)
Optimum Chemical Flow Rate in the Air/Chemical Mode, with the air pressure
setting between 75 and 125 PSIG:
Approx. 10oz. per minute with a two foot draw height
Approx. 7oz. per minute with a five foot draw height
NOTE: Chemicals should have a viscosity (consistency or thickness) similar to
water-dilute as necessary.
SPECIFICATION CHART
Congratulations on your purchase of a
Sears Craftsman Power Sprayer
Wand! It is durable and versatile and
will serve you for years to come. Your
Power Sprayer Wand combines air
pressure with water, detergent or
degreaser to clean and degrease. It
can also be used for spraying lawn,
garden, trees or bushes. It has a
unique nozzle that allows you to
change from a direct, forceful blast to
a light, foliage mist with a push or a
pull.
GENERAL INFORMATION
Your Power Sprayer Wand is
designed to spray in the following
modes:
• Air only
• Water only
• Water and Air only
• Air & chemical together
It is not designed to mix water and
chemicals internally. Chemicals
should be diluted with water before
entering the gun to achieve precise
control of chemicals.
SCFM: (Standard Cubic Feet Per
Minute); a unit of measure of air
delivery.
GLOSSARY
PSIG: Pounds per square inch gauge;
a unit of measure of pressure.
2 Wrenches: a 5/8" open end wrench
for the Non-Bleeder connector and an
adjustable wrench for the air hose.
TOOL NEEDED FOR ASSEMBLY
All other parts on the Power Sprayer
Wand are tightened by hand.
Page 6

6- ENG
D20059
AIR CONTROL KNOB
To turn "On": Push in the control
knob and turn clockwise towards the
"On" indicator.
To turn "Off": Push in the control
knob and turn counter-clockwise to
the "Off" indicator.
Air flow can be adjusted between the
"On" and "Off" positions.
WATER CONTROL KNOB
To turn "On": Push in the control
knob and turn counter-clockwise
towards the "On" indicator.
To turn "Off": Push in the control
knob and turn clockwise to the "Off"
indicator.
Water flow can be adjusted between
the "On" and "Off" positions.
Use moderate hand force when operating controls. Too
much force could result in breakage of the controls.
D20059
OPERATING THE CONTROLS
TER
AIR
ON
ON
OFF
SOAP/CHEMICAL CONTROL KNOB
To turn "On": Turn the control knob
counter-clockwise. The knob can be
turned counterclockwise 2½ turns
only. More than 2½ turns may cause
erratic flow or stop soap/
chemical flow.
To turn "Off": Turn the knob
clockwise.
Soap/chemical flow can be varied by
adjusting the control knob. When
beginning to spray in the
soap/chemical mode, turn the knob
gradually until you achieve the flow
rate you desire.
FOLIAGE NOZZLE
To spray foliage, push the nozzle out
to get a light, mist spray. You can
control the mist pattern by pulling the
nozzle in slightly.
For washing and degreasing, pull the
nozzle all the way in towards the
handle.
R
I
A
N
O
R
E
WAT
N
O
F
F
O
Page 7
7- ENG
D20059
D20059
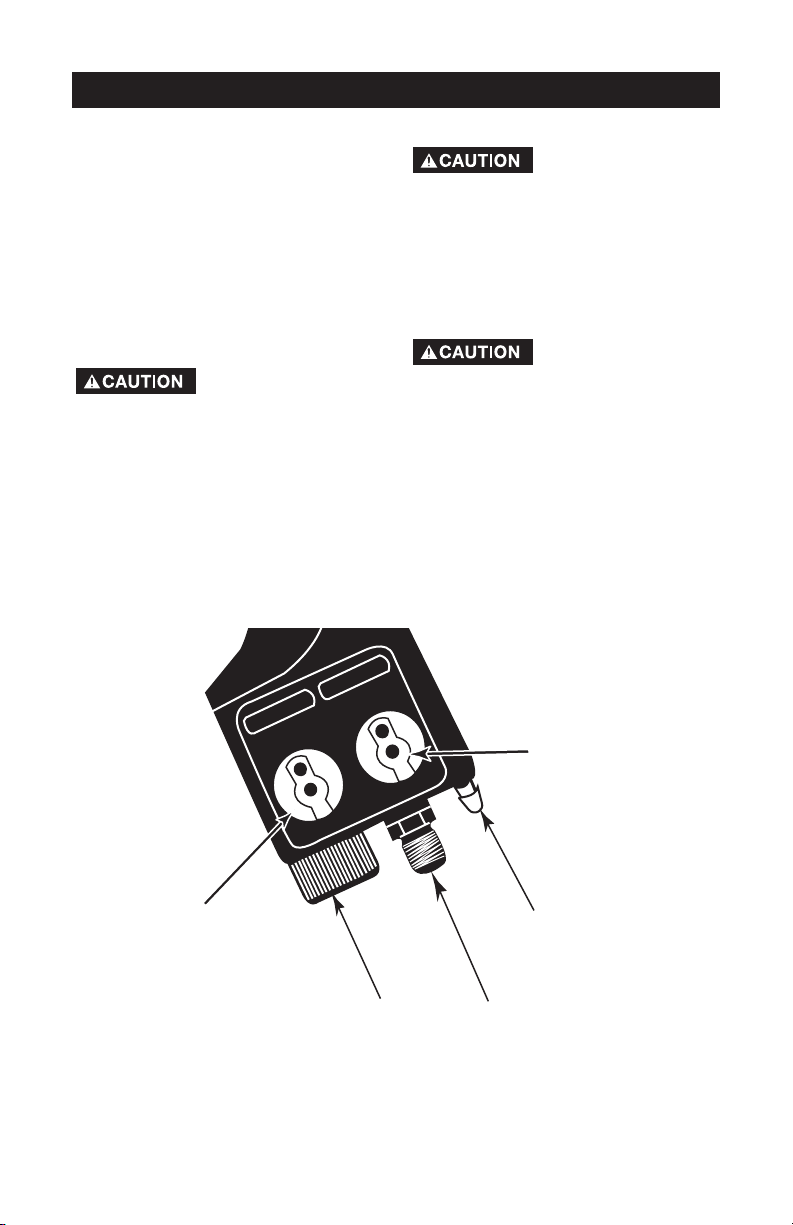
CONNECTING THE HOSES
NON-BLEEDER CONNECTOR
The Power Sprayer Wand comes
equipped with an air hose connector
that is designed for use with air
compressors having a pressure relief
valve and a pressure switch.
WATER HOSE
Connect your garden hose to the
Garden Hose Connector. Tighten by
hand.
AIR HOSE
To tighten or loosen
an air hose to this
connector you must use two
wrenches or you could damage the
plastic threads on the base of the
Power Sprayer Wand.
Using a 5/8" open end wrench, hold
the air hose connector. Connect your
air hose and tighten the hose with an
adjustable wrench. Do not
overtighten.
CHEMICAL DRAW HOSE
Never apply air
pressure to the
Chemical Draw Hose Connector.
Doing so could damage the Power
Sprayer Wand.
Attach the chemical draw hose to the
chemical draw hose connector.
Simply slip the hose over the
connector with your hand.
The chemical draw
hose connector is
designed for hand application of
soft, flexible hoses. Do not use any
type of hose clamp or adhesive.
WATER
AIR
ON
ON
O
FF
AIR
R
E
T
A
W
N
O
O
O
N
Air Control
F
F
Knob
Water Control
Knob
Garden Hose
Connector
Chemical Draw
Hose Connector
1/4" Air Hose
Connector
Page 8

8- ENG
D20059
D20059
WASHING WITH THE POWER SPRAYER WAND
The Power Sprayer Wand works best
using Sears specially formulated
concentrated detergent, which can
be purchased in the Sears lawn and
garden department. Follow the
directions supplied with the detergent
for the proper water/detergent mix
ratio.
Most common household detergents
are not formulated for use in your
Power Sprayer Wand. They are too
heavy or thick to pass through your
Power Sprayer Wand and if they are
diluted with water, they lose their
cleaning efficiency.
NOTE: If you do not use Sears
detergent, be sure the detergent you
do use is specially formulated and
concentrated for use with this type of
equipment. Mix the chosen detergent
with water (1 part detergent to 8 parts
water) to reduce the viscosity
(consistency or thickness) of the
mixture.
1. Prepare a mixture of detergent in
a 1-gallon plastic bucket or
suitable container.
2. Attach the garden hose (cold or
warm water), air hose, and
chemical draw hose to the
Power Sprayer Wand. Place the
free end of the chemical draw
hose into the detergent/water
mixture.
3. For best performance, set your
compressor to the maximum
pressure available from your air
compressor not to exceed 125
PSIG. Be sure the air and water
controls on the Power Sprayer
Wand are in the "Off" position.
4. Turn the water source fully on
and turn on your air compressor.
5. Begin the washing procedure by
adjusting the air control knob
and the soap/chemical control
knob until they begin spraying
the solution onto the surface
to be washed. The water knob
should be OFF. Continue
spraying until the surface is
completely covered with the
solution.
6. To stop spraying, turn the
soap/chemical control knob and
the air control knob to the "Off"
position.
7. Let the soap remain on the
surface for about 30 seconds. A
certain amount of wiping will be
required for most types of foreign
matter.
8. Fully open both air and water
control knobs.
9. Rinse the soap and dirt from the
surface you are washing.
10. When rinising or washing
surfaces with an air/water
mixture, the Power Sprayer
Wand will pulsate under certain
conditions. This is normal,
especially at high air/water
pressures. The pulsations
indicate the air and water are
mixing effectively and should
improve the cleaning action of
the spray.
Page 9

9- ENG
D20059
D20059
SPRAYING FOLIAGE WITH THE POWER SPRAYER WAND
MANY CHEMICALS
ARE TOXIC OR
IRRITATING. READ THE SAFETY
LABEL OR INSTRUCTIONS FOR
EVERY CHEMICAL YOU SPRAY.
CAREFULLY FOLLOW ALL
INSTRUCTIONS REGARDING SKIN,
EYE AND RESPIRATORY
PROTECTION.
1. Prepare a mixture of chemical
and water in a 1-gallon bucket or
suitable container. Carefully
follow the directions on the
chemical container for the proper
water/chemical ratio.
NOTE: Thick or heavy chemicals
must be mixed with water to reduce
their thickness. Heavy materials will
not pass through the Power Sprayer
Wand.
2. Attach the chemical draw hose
and the air hose to the Power
Sprayer Wand. Place the free
end of the chemical draw hose
into the chemical/water mixture.
3. DO NOT attach a hose to the
garden hose connector for
foliage spraying. Be sure the
water control knob is in the "Off"
position.
4. For optimum performance set
your air compressor pressure
between 75 and 125 psig. Be
sure the air control knob is in the
"Off" position.
5. Extend the Foliage Nozzle out as
far as it will go.
6. Turn on the air compressor.
7. Begin the spraying procedure by
adjusting the air control knob
and the soap/chemical control
knob until you are spraying a
mist. You may vary the mist
pattern by pulling the foliage
nozzle in slightly.
8. To stop spraying, turn the air
control knob and the
soap/chemical control knob to
the "Off" position.
Page 10

10- ENG
D20059
D20059
DEGREASING WITH THE POWER SPRAYER WAND
The Power Sprayer Wand works best
using Sears specially formulated
concentrated degreaser, which can
be purchased in the Sears lawn and
garden department. Follow the
directions supplied with the
degreaser for the proper mix ratio.
Most common household degreasers,
are not formulated and concentrated
for use in your Power Sprayer Wand.
They are too heavy or thick to pass
through your Power Sprayer Wand
and if they are diluted with water,
they lose their degreasing efficiency.
NOTE: If you do not use Sears
degreaser, 9-16423, be sure the
degreaser you do use is specially
formulated and concentrated for use
with this type of equipment. Mix the
chosen degreaser with water (1 part
degreaser to 4 parts water) to reduce
the viscosity (consistency or
thickness) of the mixture.
Do not clean a hot
engine. Engine
block can crack or other damage
can occur. Wait until the engine
has cooled at least one hour. Cover
the battery and carburetor throat
when you clean the engine.
1. Prepare a mixture of degreaser in
a 1-gallon plastic bucket or
suitable container.
2. Attach the garden hose (cold or
warm water), air hose, and
chemical draw hose to the
Power Sprayer Wand. Place the
free end of the chemical draw
hose into the degreaser/water
mixture.
3. For best degreasing
performance, set your air compressor to the maximum
pressure available from your air
compressor not to exceed 125
psig. Be sure the air and water
controls on the Power Sprayer
Wand are in the "Off" position.
4. Turn on your air compressor.
5. Begin the degreasing procedure
by adjusting the air control knob
and the soap/chemical control
knob until they begin spraying
the solution. The water knob
should be "Off". Continue
spraying until the surface is
completely covered with the
solution.
6. To stop spraying, turn the
soap/chemical control knob and
the air control knob to the "Off"
position.
7. Let the degreaser solution remain
on the surface for about 30
seconds. A certain amount of
wiping will be required for most
types of foreign matter.
8. Fully open both air and water
control knobs.
9. Rinse the degreaser solution and
dirt from the surface you are
degreasing.
10. When rinsing or washing
surfaces with an air/water
mixture, the Power Sprayer
Wand will pulsate under certain
conditions. This is normal,
especially at high air/water
pressures. The pulsations
indicate the air and water are
mixing effectively and should
improve the cleaning action of
the spray.
Page 11

11- ENG
D20059
D20059
CLEANING AND STORAGE
Clean the exterior of the Power
Sprayer Wand and draw hose with a
damp cloth, soap and water.
Fill a container with clean water,
insert the free end of the chemical
draw hose into the water and rinse
the internal system.
Disconnect all hoses from the Power
Sprayer Wand.
Store the Power Sprayer Wand away
from open flames and heat.
To prevent freezing in cold weather,
make sure all liquids are drained from
your Power Sprayer Wand before
storage.
Store with the air, water and chemical
control knobs in the open or "On"
position. Hang vertically with the
foliage nozzle down.
Page 12

12- ENG
D20059
D20059
TROUBLESHOOTING
PROBLEM
CAUSE
CORRECTION
Doesn't draw
chemical/
detergent like it
should.
Sputters when
spraying
chemical/
detergent.
Pulses when
spraying
air/water
mixture.
Not enough
spray force.
Chemical/
detergent
doesn't
combine with
water pressure
inside Power
Sprayer Wand.
Chemical control knob not
open far enough or too far
open.
Chemical/detergent not
thinned enough.
Water control knob "ON".
Chemical/detergent not
proper type for suction use.
Chemical control knob open
too far
Air pressure to low.
Water and/or air control
knobs not fully open
Water pressure too low.
Surface heavily soiled.
Power Sprayer Wand is
designed to pulse at high
air/water pressures.
Power Sprayer Wand is not
designed to do this
Open knob gradually until
you achieve desired flow
rate (2½ turns maximum).
Add water to thin the
solution.
Turn water control knob
"OFF".Only air and chemical
control knobs should be
"ON".
Use Sears special
cleaner/degreaser.
Close knob until sputter
stops.
Air compressor too small for
application. For best
performance, use 3½ or
larger tank-type air
compressor delivering 125
psig.
Open both knobs fully.
Use maximum water
pressure available (not ot
exceed 100 psig).
Scrub surface with rag or
sponge loosen dirt then
rinse with air and water
control knobs "ON".
None, the pulsations
actually im-proves the
cleaning performance.
To wash or spray chemically
use chemical and air control
knobs"On" only. To rinse,
use water and air control
knobs "On" only.
Page 13

14- FR
D20059
GARANTIE COMPLÈTE D’UN AN SUR LA LANCE DE VAPORISATION
PUISSANTE DE CRAFTSMAN
Si la lance de vaporisation puissante devient défectueuse à cause d’un défaut de
matériau ou de fabrication lors de la première année d’utilisation à compter de la date
d’achat, RETOURNEZ-LA AU CENTRE OU AU DÉPARTEMENT DE SERVICE APRÈSVENTE SEARS LE PLUS PROCHE, AUX ÉTATS-UNIS OU AU CANADA ET SEARS
S’ENGAGERA, à sa seule discrétion, à la réparer ou la ramplacer sans frais.
Cette garantie ne s’applique que pour une période de quatre-vingt-dix jours à compter
de la date d’achat si la lance de vaporisation puissante est utilisée à des fins
commerciales ou comme appareil de location.
Cette garantie vous donne des droits particuliers et il se peut que vous ayez d’autres
droits qui varient d’un état à l’autre et d’une province à l’autre.
Sears Canada, Inc., Toronto, Ont. M5B 2B8
TABLE DES MATIÈRES
GARANTIE
GARANTIE . . . . . . . . . . . . . . . . . . . . . . . . . . . . . . . . . . . . . . . . . . . . . . . . .14
MESURES DE SÉCURITÉ- DÉFINITIONS . . . . . . . . . . . . . . . . . . . . . . . . . .14
MESURES DE SÉCURITÉ . . . . . . . . . . . . . . . . . . . . . . . . . . . . . . . . . . .15-16
TABLEAU DES SPÉCIFICATIONS . . . . . . . . . . . . . . . . . . . . . . . . . . . . . . . .17
RENSEIGNEMENTS GÉNÉRAUX . . . . . . . . . . . . . . . . . . . . . . . . . . . . . . . .17
GLOSSAIRE . . . . . . . . . . . . . . . . . . . . . . . . . . . . . . . . . . . . . . . . . . . . . . . .17
OUTILS REQUIS POUR L’ASSEMBLAGE . . . . . . . . . . . . . . . . . . . . . . . . . .17
UTILISATION DES COMMANDES . . . . . . . . . . . . . . . . . . . . . . . . . . . . . . .18
Bouton de débit d’air . . . . . . . . . . . . . . . . . . . . . . . . . . . . . . . . . . . . .18
Bouton de débit d’eau . . . . . . . . . . . . . . . . . . . . . . . . . . . . . . . . . . . .18
Bouton de débit de détergent/produit chimique . . . . . . . . . . . . . . . . .18
Buse pour feuillage . . . . . . . . . . . . . . . . . . . . . . . . . . . . . . . . . . . . . . .18
RACCORDEMENT DES TUYAUX . . . . . . . . . . . . . . . . . . . . . . . . . . . . . . . .19
Raccord à débit commandé . . . . . . . . . . . . . . . . . . . . . . . . . . . . . . . .19
Tuyau à eau . . . . . . . . . . . . . . . . . . . . . . . . . . . . . . . . . . . . . . . . . . . .19
Tuyau à air . . . . . . . . . . . . . . . . . . . . . . . . . . . . . . . . . . . . . . . . . . . . .19
Tuyau d’aspiration de produit chimique . . . . . . . . . . . . . . . . . . . . . . . .19
LAVAGE AVEC LA LANCE DE VAPORISATION PUISSANTE . . . . . . . . . . . .20
ARROSAGE DE FEUILLAGE AVEC LA LANCE DE VAPORISATION
PUISSANTE . . . . . . . . . . . . . . . . . . . . . . . . . . . . . . . . . . . . . . . . . . . . . . . .21
DÉGRAISSAGE AVEC LA LANCE DE VAPORISATION PUISSANTE . . . . . .22
NETTOYAGE ET ENTREPOSAGE . . . . . . . . . . . . . . . . . . . . . . . . . . . . . . . .23
GUIDE DE DÉPANNAGE . . . . . . . . . . . . . . . . . . . . . . . . . . . . . . . . . . . . . .24
DIAGRAMME DE LA LANCE DE VAPORISATION PUISSANTE . . . . . . . . . .25
Liste des pièces . . . . . . . . . . . . . . . . . . . . . . . . . . . . . . . . . . . . . . . . .25
COMMANDE DE PIÈCES DE RECHANGE . . . . . . . . . . . . . . . . . . . . . . . . .28
Page 14

15- FR
D20059
MESURES DE SÉCURITÉ - DÉFINITIONS
Indique un danger
imminent qui, s'il n'est
pas évité, causera de graves blessures
ou la mort.
Indique la
possibilité
d’un danger qui, s’il n’est pas évité,
pourrait causer de graves blessures ou
la mort.
Ce guide contient des renseignements importants que vous deviez bien saisir. Cette
information porte sur VOTRE SÉCURITÉ et sur LA PRÉVENTION DE PROBLÈMES
D'ÉQUIPEMENT. Afin de vous aider à identifier cette information, nous avons utilisé les
symboles ci-dessous. Veuillez lire attentivement ce guide en portant une attention
particulière à ces symboles.
Indique la
possibilité d'un
danger qui, s'il n'est pas évité, peut
causer des blessures mineures ou
moyennes.
Sans le symbole
d’alerte. Indique la
possibilité d’un danger qui, s’il n’est pas
évité, peut causer des dommages à la
propriété.
CONSIGNES DE SÉCURITÉ IMPORTANTES
Conserver ces directives
Un emploi ou un entretien non appropriés de ce produit peut causer des blessures
graves et des dommages à la propriété. Lire attentivement tous les avertissements et les
directives d'utilisation avant d'utiliser cet appareil.
AVERTISSEMENT : Risque d'éclatement
Réservoir d'air : Les conditions suivantes peuvent affaiblir les parois du réservoir et provoquer
une explosion violente du réservoir qui risque de causer des dommages à la propriété ou des
blessures graves.
Le fait d'excéder la pression nominale des
outils pneumatiques, pistolets vaporisateurs,
accessoires pneumatiques, pneus et autres
objets gonflables risque de provoquer
l'explosion de ces derniers et la projection de
pièces, ce qui risque de causer de graves
blessures.
Prévention
Risque
DANGER
Pour le contrôle essentiel de la pression d'air, il
faut poser un régulateur de pression (s'il n'est
pas déjà posé) et un manomètre à la sortie
d'air du compresseur. Suivre les
recommandations du fabricant de l'équipement
et ne jamais excéder la valeur nominale de
pression spécifiée des accessoires.
Page 15

16- FR
D20059
AVERTISSEMENT : Risque de projection d'objets
Le jet d'air comprimé peut causer des
lésions aux tissus de la peau exposée et peut
projeter de la saleté, des copeaux, des
particules libres et de petits objets à haute
vitesse, ce qui risque de causer des dommages
à la propriété ou des blessures.
Porter toujours des lunettes de protection
homologuées ANSI Z87.1 avec des écrans
latéraux lors de l'utilisation du compresseur.
Ne jamais diriger la buse ou le vaporisateur
vers soi, vers d'autres personnes ou vers des
animaux.
Toujours mettre le compresseur hors fonction
et purger la pression du boyau d'air et du
réservoir avant d'entamer l'entretien ou
d'attacher des outils ou accessoires.
Prévention
Risque
DANGER
Débrancher la lance de la conduite d’air
lorsque inutiliséé.
Certaines pièces sont soumises à la
pression lorsque la LANCE DE
VAPORISATION EST BRANCHéé à une
conduite d’air pressurisé. Ces pièces
risquent d’être propulsées si le pistoletpulvérisateur est démonté ou soumis à un
excés de pression.
Prévention
Risque
Porter un masque ou un respirateur
homologué par le NIOSH ainsi que des
vêtements de protection conçus pour
l’application particulière faite et les matières
pulvérisées. Certains masques n’offrent
qu’une protection limitée contre les matières
et solvants toxiques.
Certains pesticides, herbicides et solvants
peuvent causer des lésions aux poumons et
des brûlures par inhalation ou par contact
avec la peau ou les yeux.
Les matières vaporisées telles que la peinture,
les solvants de peinture, les décapants, les
insecticides et les herbicides contiennent des
vapeurs nocives et toxiques.
Travailler dans un endroit où il y a une bonne
ventilation transversale. Bien lire et respecter
les directives de sécurité indiquées sur
l'étiquette ou la fiche signalétique de la matière
qui est vaporisée. Porter un respirateur
homologué par le NIOSH/MSHA et conçu pour
l'application en question.
DANGER
AVERTISSEMENT : Risque par inhalation
Page 16

17- FR
D20059
La lance de vaporisation puissante a été conçue pour être utilisée avec un compresseur
d’air à réservoir de 3 chevaux-vapeur ou plus, pouvant fournir au moins 125 lb/po2. Plus
le compresseur d’air est puissant plus votre outil aura de pouvoir nettoyant.
Pression d’air minimum
(pour l’application de détergent ou dégraisseur) : 40 lb/po2
Pression d’air minimum (pour laver ou rincer les surfaces) : 90 lb/po2
Pression d’air maximum : 125 lb/po2
Pression d’eau minimum : 20 lb/po2
Pression d’eau maximum : 100 lb/po2
Te mp érature maximum de l’eau : 140 °F (60° C)
Hauteur maximum d’aspiration de produits chimiques : 10 pieds (3 m)
(hauteur maximum de l’outil par rapport au contenantde produits chimiques.)
Débit optimum des produits chimiques en mode air/produit chimique, avec un réglage de
pression d’air se situant entre 75 et 125 lb/po2 :
Approx.10 oz (295 mm) par minute à une hauteur d’aspiration de deux pieds (60 cm)
Approx. 7 oz (207 mm) par minute à une hauteur d’aspiration de cinq pieds (150 cm)
REMARQUE : Les produits chimiques devraient être d’une viscosité (consistance ou
épaisseur) semblable à l’eau - les diluer au besoin.
TABLEAU DES SPÉCIFICATIONS
Nous vous remercions d’avoir acheté la
lance de vaporisation puissante Craftsman
de Sears. Vous utiliserez sûrement cet outil
durable et polyvalent durant plusieurs
années. La lance de vaporisation puissante
combine la pression de l’air avec l’eau
ainsi qu’un détergent ou un dégraisseur
pour le nettoyage ou le dégraissage. Vous
pouvez également l’utiliser pour vaporiser
la pelouse, le jardin, les arbres et arbustes.
Cet outil est doté d’une buse unique qui
vous permet de passer d’un jet direct et
puissant à une légère brume, et ce
simplement en la poussant ou en la tirant.
RENSEIGNEMENTS GÉNÉRAUX
La lance de vaporisation puissante est
conçue pour vaporiser selon les modes
suivants :
• Air seulement
• Eau seulement
• Eau et air seulement
• Air et produit chimique ensemble
Il n’est pas conçu pour mélanger l’eau et
les produits chimiques. Les produits
chimiques doivent donc être dilués avec
de l’eau avant d’être aspirés dans le
pistolet. De cette façon, vous obtiendrez
un contrôle précis de la concentration des
produits chimiques.
pi3/min (SCFM) : (pieds cubes standard
par minute) ; unité de mesure de débit
d’air.
GLOSSAIRE
lb/po2 (PSIG) : pression manométrique
en livres par pouce carré ; unité de
mesure de pression.
2 clés : une clé à fourche de 5/8 po pour
le raccord à débit commandé et une clé à
ouverture variable pour le tuyau à air.
OUTILS REQUIS POUR L’ASSEMBLAGE
Toutes les autres pièces de la lance de
vaporisation puissante sont serrées à la
main.
Page 17

18- FR
D20059
BOUTON DE DÉBIT D’AIR
Pour régler en position ouverte « On » :
appuyez sur le bouton de débit et tournez
dans le sens horaire vers l’indicateur
ouvert « On ».
Pour régler en position fermée « Off » :
poussez le bouton de débit et tournez
dans le sens antihoraire vers l’indicateur
fermé « Off ».
Le débit d’air peut être réglé entre les
positions ouverte « On » et fermée « Off ».
BOUTON DE DÉBIT D’EAU
Pour régler en position ouverte « On » :
appuyez sur le bouton de débit et tournez
dans le sens antihoraire vers l’indicateur
ouvert « On ».
Pour régler en position fermée « Off » :
poussez le bouton de débit et tournez
dans le sens horaire vers l’indicateur
fermé « Off ».
Le débit d’eau peut être réglé entre les
positions ouverte « On » et fermée « Off ».
Utilisez une force manuelle modérée, lors de
l’utilisation des commandes. Une trop grande force
pourrait entraîner le bris des commandes.
MISE EN GARDE
UTILISATION DES COMMANDES
TER
AIR
ON
ON
OFF
BOUTON DE DÉBIT DE
DÉTERGENT/PRODUIT CHIMIQUE
Pour régler en position ouverte « On » :
tournez le bouton de débit dans le sens
antihoraire. Le bouton ne peut tourner que
2 tours dans le sens antihoraire. Si vous
effectuez plus de 2 tours, cela peut
entraîner un débit irrégulier ou arrêter le
débit de détergent/produit chimique.
Pour régler en position fermée « Off » :
tournez le bouton dans le sens horaire.
Le débit de détergent/produit chimique
peut être réglé en ajustant le bouton.
Lorsque vous commencez à vaporiser en
mode détergent/produit chimique, tournez
graduellement le bouton jusqu’à ce que
vous atteigniez le débit désiré.
BUSE POUR FEUILLAGE
Pour vaporiser le feuillage, poussez la
buse vers l’extérieur afin d’obtenir une
légère vaporisation en bruine. Vous
pouvez contrôler la vaporisation de bruine
en tirant légèrement la buse vers
l’intérieur.
Pour le lavage et le dégraissage, tirez la
buse vers la poignée jusqu’au bout.
R
I
A
N
O
R
E
WAT
N
O
F
F
O
Page 18

19- FR
D20059
RACCORDEMENT DES TUYAUX
RACCORD À DÉBIT COMMANDÉ
La lance de vaporisation puissante est
dotée d’un raccord pour tuyau à air conçu
pour l’utilisation avec un compresseur
d’air muni d’un déchargeur de pression et
d’un manostat.
TUYAU À EAU
Raccordez votre tuyau d’arrosage au raccord
de tuyau d’arrosage. Serrez à la main.
TUYAU À AIR
Pour serrer ou
desserrer un
tuyau à air sur ce raccord vous devez
utiliser deux clés, sinon vous pourriez
endommager le filet de plastique à la
base de la lance de vaporisation
puissante.
À l’aide d’une clé à fourche de 5/8 po,
tenez le raccord du tuyau à air. Raccordez
le tuyau à air et serrez le tuyau à l’aide
d’une clé à ouverture variable. Ne serrez
pas trop.
MISE EN GARDE
TUYAU D’ASPIRATION DE
PRODUIT CHIMIQUE
N’appliquez
jamais de
pression d’air sur le raccord du tuyau
d’aspiration de produit chimique car
vous pourriez endommager la lance de
vaporisation puissante.
Connectez le tuyau de produit chimique
au raccord du tuyau de produit chimique.
Faites simplement glisser le tuyau sur le
raccord avec les mains.
Le raccord du
tuyau de produit
chimique est conçu pour l’application
manuelle de tuyaux souples et flexibles.
N’utilisez aucun type de collier de
serrage ou d’adhésif.
MISE EN GARDE
MISE EN GARDE
WATER
AIR
ON
ON
O
FF
Bouton de débit d’air
Raccord de tuyau
d’aspiration de produit
chimique
Raccord de tuyau à air
de 1/4 po
Raccord de tuyau
d’arrosage
Bouton de débit d’eau
R
E
T
A
W
N
O
AIR
O
O
N
F
F
Air Control
Knob
Water Control
Knob
Garden Hose
Connector
Chemical Draw
Hose Connector
1/4" Air Hose
Connector
Page 19

20- FR
D20059
LAVAGE AVEC LA LANCE DE VAPORISATION PUISSANTE
La lance de vaporisation puissante vous
fournira un meilleur rendement, si vous
utilisez le détergent concentré
spécialement formulé de Sears que vous
pouvez vous procurer au Centre du Jardin
chez Sears. Référez-vous aux directives
fournies avec le détergent pour connaître
le ratio approprié du mélange
eau/détergent.
La plupart des détergents domestiques
couramment vendus sur le marché ne
sont pas formulés pour être utilisés dans
votre lance de vaporisation puissante. Ils
sont trop visqueux ou épais pour
utilisation dans votre lance de vaporisation
puissante. Si vous les diluez, ils perdront
leurs propriétés nettoyantes.
REMARQUE : Si vous n’utilisez pas le
détergent que vous pouvez vous procurer
chez Sears, assurez-vous d’utiliser un
détergent concentré, spécialement
formulé pour ce type d’équipement.
Mélangez le détergent que vous avez
choisi avec de l’eau (1 partie de détergent
pour 8 parties d’eau) pour réduire la
viscosité (consistance ou épaisseur) du
mélange.
1. Préparez un mélange de détergent
dans un récipient plastique de 1
gallon (4 litres) ou un autre contenant
approprié.
2. Connectez le tuyau d’arrosage (eau
froide ou eau tiède), le tuyau d’air et
le tuyau d’aspiration de produit
chimique à la lance de vaporisation
puissante. Placez l’autre extrémité du
tuyau d’aspiration de produit
chimique dans le récipient contenant
le mélange eau/détergent.
3. Pour obtenir de meilleurs résultats,
réglez votre compresseur à la pression
maximum disponible, sans excéder
125 lb/po2. Assurez-vous que les
boutons de débit d’air et d’eau de
votre lance de vaporisation puissante
sont à la position fermée « Off ».
4. Ouvrez le robinet d’eau au maximum
et actionnez le compresseur d’air.
5. Amorcez le processus de lavage en
ajustant le bouton de débit d’air et le
bouton de débit de détergent/produit
chimique jusqu’à ce que la
vaporisation de la solution
commence sur la surface qui doit
être lavée. Le bouton de débit d’eau
doit être en position fermée « Off ».
Poursuivez la vaporisation jusqu’à ce
que la surface soit entièrement
recouverte de solution.
6. Pour arrêter la vaporisation, tournez
le bouton de débit de
détergent/produit chimique et le
bouton de débit d’air à la position
fermée « Off ».
7. Laissez agir le savon pendant une
durée d’environ 30 secondes. Vous
pourriez devoir frotter certaines
taches tenaces.
8. Ouvrez complètement les boutons de
débit d’air et d’eau.
9. Rincez le détergent et la saleté se
trouvant sur la surface que vous lavez.
10. Sous certaines conditions
d’utilisation du mélange air/eau, la
lance de vaporisation puissante
produira un jet à pulsions lors du
rinçage ou du lavage des surfaces. Il
s’agit d’un phénomène normal, tout
spécialement à de hautes pressions
air/eau. Les pulsions indiquent que
l’air et l’eau se mélangent
correctement et ceci devrait
améliorer l’action nettoyante du jet.
Page 20

21- FR
D20059
ARROSAGE DE FEUILLAGE AVEC LA LANCE DE
VAPORISATION PUISSANTE
PLUSIEURS
PRODUITS
CHIMIQUES PEUVENT ÊTRE
TOXIQUES OU CAUSER DES
IRRITATIONS. LISEZ LES ÉTIQUETTES
DE SÉCURITÉ OU LES DIRECTIVES
POUR CHACUN DES PRODUITS
CHIMIQUES QUE VOUS UTILISEZ.
SUIVEZ ATTENTIVEMENT TOUTES LES
DIRECTIVES RELIÉES À LA
PROTECTION DE LA PEAU, DES YEUX
ET DES VOIES RESPIRATOIRES.
1. Préparez un mélange de détergent
dans un récipient plastique de 1
gallon (4 litres) ou un autre contenant
approprié. Suivez soigneusement les
directives inscrites sur le contenant
du produit chimique pour connaître le
ratio approprié du mélange
eau/produit chimique.
REMARQUE : Les produits chimiques
visqueux ou épais doivent être mélangés à
l’eau pour réduire leur viscosité. Les
produits visqueux ne peuvent être utilisés
dans votre lance de vaporisation
puissante.
2. Connectez le tuyau d’aspiration de
produit chimique et le tuyau d’air à la
lance de vaporisation puissante.
Placez l’autre extrémité du tuyau
d’aspiration de produit chimique
dans le récipient contenant le
mélange eau/produit chimique.
3. NE RACCORDEZ PAS de tuyau au
raccord pour tuyau d’arrosage lors
de l’arrosage de feuillage. Assurezvous que le bouton de débit d’eau
soit en position fermée « Off ».
4. Pour obtenir de meilleurs résultats,
réglez votre compresseur d’air à une
pression se situant entre 75 et 125
lb/po². Assurez-vous que le bouton
de débit d’air soit en position fermée
« Off ».
5. Sortez la buse de vaporisation au
maximum.
6. Actionnez le compresseur d’air.
7. Amorcez le processus de
vaporisation en ajustant le bouton de
débit d’air et celui de
détergent/produit chimique jusqu’à
l’obtention d’une vaporisation en
bruine. Vous pouvez modifier l’aspect
de la vaporisation de bruine en tirant
légèrement la buse de vaporisation
pour feuillage vers l’intérieur.
8. Pour arrêter la vaporisation, tourner
le bouton de débit d’air et celui de
détergent/produit chimique à la
position fermée « Off ».
Page 21

22- FR
D20059
DÉGRAISSAGE AVEC LA LANCE
DE VAPORISATION PUISSANTE
La lance de vaporisation puissante vous
fournira un meilleur rendement, si vous
utilisez le dégraisseur concentré
spécialement formulé de Sears que vous
pouvez vous procurer au Centre du Jardin
chez Sears. Référez-vous aux directives
fournies avec le dégraisseur pour
connaître le ratio approprié du mélange
eau/dégraisseur.
La plupart des dégraisseurs domestiques
couramment vendus sur le marché ne
sont pas formulés pour être utilisés dans
votre lance de vaporisation puissante. Ils
sont trop visqueux ou épais pour
utilisation dans votre lance de vaporisation
puissante. Si vous les diluez, ils perdront
leurs propriétés dégraissantes.
REMARQUE : Si vous n’utilisez pas le
dégraisseur 9-16423 que vous pouvez
vous procurer chez Sears, assurez-vous
d’utiliser un dégraisseur concentré,
spécialement formulé pour ce type
d’équipement. Mélangez le dégraisseur
que vous avez choisi avec de l’eau (1
partie de dégraisseur pour 4 parties d’eau)
pour réduire la viscosité (consistance ou
épaisseur) du mélange.
Ne pas nettoyer
un moteur chaud.
Le bloc moteur pourrait fendre ou subir
d’autres dommages. Laisser refroidir le
moteur pendant au moins une heure.
Recouvrir la batterie et l’entrée au
carburateur lors du nettoyage.
1.Préparez un mélange de dégraisseur
dans un récipient plastique de 1
gallon (4 litres) ou un autre contenant
approprié.
2. Connectez le tuyau d’arrosage (eau
froide ou eau tiède), le tuyau d’air et
le tuyau d’aspiration de produit
chimique à la lance de vaporisation
puissante. Placez l’autre extrémité du
tuyau d’aspiration de produit
chimique dans le récipient contenant
le mélange eau/dégraisseur.
MISE EN GARDE
3. Pour obtenir de meilleurs résultats,
réglez votre compresseur d’air à la
pression maximum disponible, sans
excéder 125 lb/po². Assurez-vous que
les boutons de débit d’air et d’eau de
votre lance de vaporisation puissante
sont à la position fermée « Off ».
4. Actionnez le compresseur d’air.
5. Amorcez le processus de
dégraissage en ajustant le bouton de
débit d’air et le bouton de débit de
détergent/produit chimique jusqu’à
ce que la vaporisation de la solution
commence. Le bouton de débit d’eau
doit être en position fermée « Off ».
Poursuivez la vaporisation jusqu’à ce
que la surface ne soit entièrement
recouverte de solution.
6. Pour arrêter la vaporisation, tournez
le bouton de débit de
détergent/produit chimique et le
bouton de débit d’air à la position
fermée « Off ».
7. Laissez agir le dégraisseur pendant
une durée d’environ 30 secondes.
Vous pourriez devoir frotter certaines
taches tenaces.
8. Ouvrez complètement les boutons de
débit d’air et d’eau.
9. Rincez le dégraisseur et la saleté se
trouvant sur la surface que vous
dégraissez.
10. Sous certaines conditions
d’utilisation du mélange air/eau, la
lance de vaporisation puissante
produira un jet à pulsions lors du
rinçage ou du lavage des surfaces. Il
s’agit d’un phénomène normal, tout
spécialement à de hautes pressions
air/eau. Les pulsions indiquent que
l’air et l’eau se mélangent
correctement et ceci devrait
améliorer l’action nettoyante du jet.
Page 22

23- FR
D20059
NETTOYAGE ET ENTREPOSAGE
Nettoyez l’extérieur de votre lance de
vaporisation puissante en utilisant de
l’eau, un détergent ainsi qu’un chiffon
humide.
Remplissez un contenant avec de l’eau
propre, insérez l’extrémité du tuyau
d’aspiration de produit chimique dans
l’eau et rincez l’intérieur du système.
Déconnectez tous les tuyaux de la lance
de vaporisation puissante.
Rangez votre lance de vaporisation
puissante loin d’une source de chaleur ou
de flammes nues.
Avant de ranger votre lance de
vaporisation puissante, assurez-vous
d’effectuer un drainage adéquat de tous
les liquides, afin de prévenir tout risque de
gel des composantes.
Assurez-vous que tous les boutons de
débit d’air, d’eau et de produit chimique
soient en position ouverte « On ».
Suspendre votre lance de vaporisation
puissante en position verticale, en prenant
soin de diriger la buse de vaporisation
pour feuillage vers le bas.
Page 23

24- FR
D20059
GUIDE DE DÉPANNAGE
PROBLÈME
CAUSE
SOLUTION
Aspiration
déficiente de
produit
chimique/détergent
Vaporisation
discontinue de
produit
chimique/détergent
Pulsions lors de la
vaporisation du
mélange air/eau
Puissance de
vaporisation
insuffisante
Le produit
chimique/détergen
t ne se mélange
pas à la pression
d’eau à l’intérieur
de la lance de
vaporisation
puissante.
Le bouton de débit de produit
chimique est en position trop
fermée ou trop ouverte.
Produit chimique/détergent non
suffisamment dilué.
Le bouton de commande de l’eau
est en position ouverte « ON ».
Produit chimique/détergent de
type inapproprié pour une
fonction d’aspiration.
Le bouton de commande de
produit chimique est en position
trop ouverte.
Pression d’air trop basse
Les boutons de débit d’eau et/ou
d’air ne sont pas complètement
en position ouverte.
Pression d’eau trop basse
Surface trop sale
La lance de vaporisation
puissante est conçue pour
fournir des pulsions à de hautes
pressions air/eau.
La lance de vaporisation
puissante n’est pas conçue
pour cet usage.
Ouvrez graduellement le bouton
de débit jusqu’à ce que vous
obteniez le débit désiré (2 tours
maximum)
Ajoutez de l’eau pour diluer la
solution.
Tournez le bouton de commande
d’eau à la position fermée « OFF
». Seuls les boutons de débit d’air
et de produit chimique ne doivent
être en position ouverte « ON ».
Utilisez le nettoyeur et le
dégraisseur spécial vendu par
Sears.
Fermer le bouton jusqu’à
l’obtention d’une vaporisation
continue.
Le compresseur d’air ne peut
répondre à la demande. Pour
obtenir de meilleurs résultats,
utilisez un type de compresseur
d’air à réservoir de 3 chevauxvapeur ou plus, pouvant fournir
125 lb/po2.
Ouvrez complètement les deux
boutons de débit.
Utilisez le maximum de
pression d’eau disponible (ne
doit pas excéder 100 lb/po2).
Frotter la surface avec un chiffon
ou une éponge pour déloger la
saleté, puis rincer en tournant les
boutons de débit d’air et d’eau à
la position ouverte « ON ».
Il n’y a rien que vous puissiez
faire. En fait, les pulsions
améliorent l’action nettoyante
du jet.
Pour utiliser un produit chimique
pour laver ou vaporiser, mettez
seulement les boutons de débit
de produit chimique et d’air à la
position ouverte « ON ». Pour
rincer, mettez seulement les
boutons de débit d’eau et d’air à
la position ouverte « ON ».
Page 24

26- FR
D20059
REMARQUE/NOTES
Page 25

27- FR
D20059
REMARQUE/NOTES
Page 26

28- SP
D20059
Get it fixed, at your home or ours!
Just Call:
1-800-4-MY-HOME
(1-800-469-4663)
24 hours a day, 7 days a week
®
For the repair of major brand appliances in your own home
…
no matter who made it, no matter who sold it!
For your nearest Sears Parts and Service location,
to bring in products like vacuums, lawn equipment and electronics.
For Sears Parts & Service
, to order the replacement parts,
accessories and owner’s manuals that you need to do-it-yourself.
www.sears.ca
To purchase or inquire about a Sears Maintenance Agreement, call:
1-800-361-6665
9 a.m. – 8 p.m. EST, Mon. – Fri., 4 p.m. Sat.
Pour service en français:
MC
1-800-LE-FOYER
(1-800-533-6937)
www.sears.ca
HomeCentral
®
TM
®
/
Trademarks of Sears, Roebuck and Co. us ed under license by Sears Canada
MC / MD
Marque de commerce / déposée de Sears, Roebuck and Co. utilisée en vertu d’une licence de Sears Canada © Sears
 Loading...