

Page 1

Owner's Manual
Non-Contact High Temperature InfraRed
Thermometer
MODEL 50466
CAUTION: Read,
understand and follow
Safety Rules and Operating
Instructions in this manual
before using this product.
© Sears, Roebuck and Co., Hoffman Estates, IL 60179 U.S.A.
www.craftsman.com 022205
50466
• Safety
• Operation
• Maintenance
• Español
Page 2

ONE YEAR FULL WARRANTY
ONE YEAR FULL WARRANTY ON CRAFTSMAN Non-Contact High Temperature
InfraRed Thermometer
If this CRAFTSMAN Non-Contact High Temperature InfraRed Thermometer fails to give
complete satisfaction within one year from the date of purchase, RETURN IT TO THE
NEAREST SEARS STORE OR OTHER CRAFTSMAN OUTLET IN THE UNITED
STATES, and Sears will replace it, free of charge.
If this CRAFTSMAN Non-Contact High Temperature InfraRed Thermometer is used for
commercial or rental purposes, this warranty applies for 90 days from the date of
purchase.
This warranty gives you specific legal rights, and you may also have other rights which
vary from state to state
Sears, Roebuck and Co., Dept. 817WA, Hoffman Estates, IL 60179
For Customer Assistance Call 9am-5 PM (EST)
Monday through Friday 1-888-326-1006
SAFETY INSTRUCTIONS
• USE EXTREME CAUTION when the laser pointer
beam is on
• DO NOT point the beam toward anyone's eye or allow
the beam to strike the eye from a reflective surface
• DO NOT use the laser near explosive gases or in
other potentially explosive areas
SPECIFICATIONS
Infrared Thermometer Specifications
o
Range / Resolution -58 to 1000
Accuracy ± 2% of reading or ± 4oF (2oC) whichever is greater.
Note: Accuracy is specified for the ambient temperature
range: 64 to 82°F (18 to 28°C). Add ±0.2ºF/ºF (±0.2ºC/ºC)
outside this range.
Emissivity 0.95 fixed value
Field of View D/S = Approx. 8:1 ratio (D = distance, S = spot)
Laser power Less than 1mW
Spectral response 6 to 14 µm (wavelength)
General Specifications
Display Backlit LCD display with function indicators
Display rate 1 second (approx.)
Operating Temperature 32°F to 122°F (0°C to 50°C)
Operating Humidity Max. 80% RH
Power Supply 9V battery
Automatic Power Off Meter shuts off automatically after 6 seconds
Weight 6.35 oz. / 180g
Size 3.2 x 1.6 x 6.3” (82 x 42 x 160mm)
F (-50 to 538oC) / 0.1oC/F to 200o
Page 3

CONTROLS
1. Laser Pointer
2. InfraRed Sensor
3. Measure Trigger
4. Battery compartment
5. LCD display
1
2
4
0
5
3
4
5
6
6
6
7
6. Function buttons
7. Handle Grip
OPERATING INSTRUCTIONS
1. Hold the meter by its Handle Grip and point it toward the surface to be measured.
2. Pull and hold the red Trigger to turn the meter on and begin testing. The temperature
reading, the ‘SCAN’ icon, the emissivity icon (E=0.95), and the unit of measure will
appear. Note: Replace the battery if the display does not light.
3. While continuing to pull the Trigger:
a. Push the laser button to turn on the laser pointer. When the laser is ON the
laser icon will appear on the LCD over the temperature reading. Aim the red
beam approximately a half inch above the point of test (pressing the laser button
again turns the laser off).
b. Select the temperature units using the
o
C or oF button.
c. Push the backlight button to turn on the LCD backlighting function.
4. Release the Trigger and the reading will hold for approximately 6 seconds (HOLD will
appear on the LCD) and then the meter will automatically shut off.
FIELD OF VIEW
The meter’s field of view is 8:1. For example, if the meter is 16 inches from the target
(spot), the diameter of the target must be at least 2 inches. Other distance ratios are
shown below in the field of view diagram.
Note that measurements should normally be made less than 2 feet from the target. The
meter can measure from further distances but the measurement may be affected by
external sources of light. In addition, the spot size may be so large that it encompasses
surface areas not intended to be measured.
Page 4
MEASUREMENT NOTES
1. The object under test should be larger than the spot (target) size calculated by the field
of view diagram.
2. If the surface of the object under test is covered with frost, oil, grime, etc., clean before
taking measurements.
3. If an object's surface is highly reflective, apply masking tape or flat black paint to the
surface before measuring.
4. The meter may not make accurate measurements through transparent surfaces such
as glass.
5. Steam, dust, smoke, etc. can obscure measurements.
6. The meter compensates for deviations in ambient temperature. It can, however, take
up to 30 minutes for the meter to adjust to extremely wide ambient temperature
changes.
7. To find a hot spot, aim the meter outside the area of interest then scan across (in an up
and down motion) until the hot spot is located.
MAINTENANCE
1. KEEP THE METER DRY . If it gets wet, wipe it off.
2. USE AND STORE THE METER IN NORMAL TE MPERATURES. Temperature
extremes can shorten the life of the electronic parts and distort or melt plastic parts.
3. HANDLE THE METER GENTLY AND CAREFUL LY. Dropping it can damage the
electronic parts or the case.
4. KEEP THE METER CLEAN. Wipe the case occasionally with a damp cloth. DO NOT
use chemicals, cleaning solvents, or detergents.
5. USE ONLY FRESH BATTERI ES OF THE RECO MMENDED SIZE A ND TYPE.
Remove old or weak batteries so they do not leak and damage the unit.
6. IF THE METER IS TO BE STORE D FOR A LONG P ERIOD OF TIME, the batteries
should be removed to prevent damage to the unit.
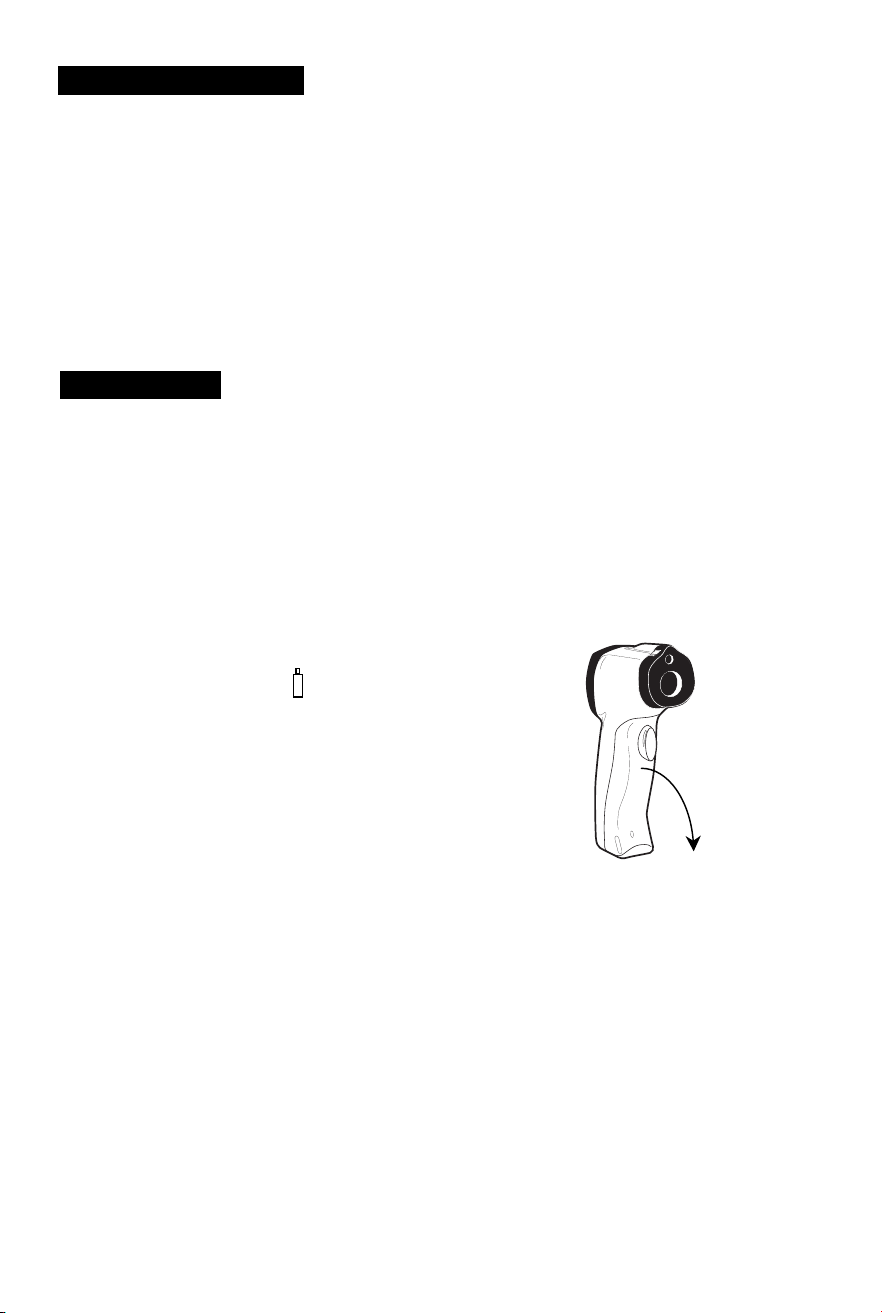
REPLACING THE BATT ERIES
When the low battery symbol appears on the lower left side of the
display, replace the meter’s battery (9V). The battery compartment is
located behind the black panel that surrounds the meter’s trigger
(see diagram). Open the compartment by pulling the black panel
down from the trigger area. Replace the 9V battery and close the
battery compartment cover.
 Loading...