

Craftsman 48624594, 71-24594 Owner’s Manual
Operator's IVlanuai
CRRFTSMRH°
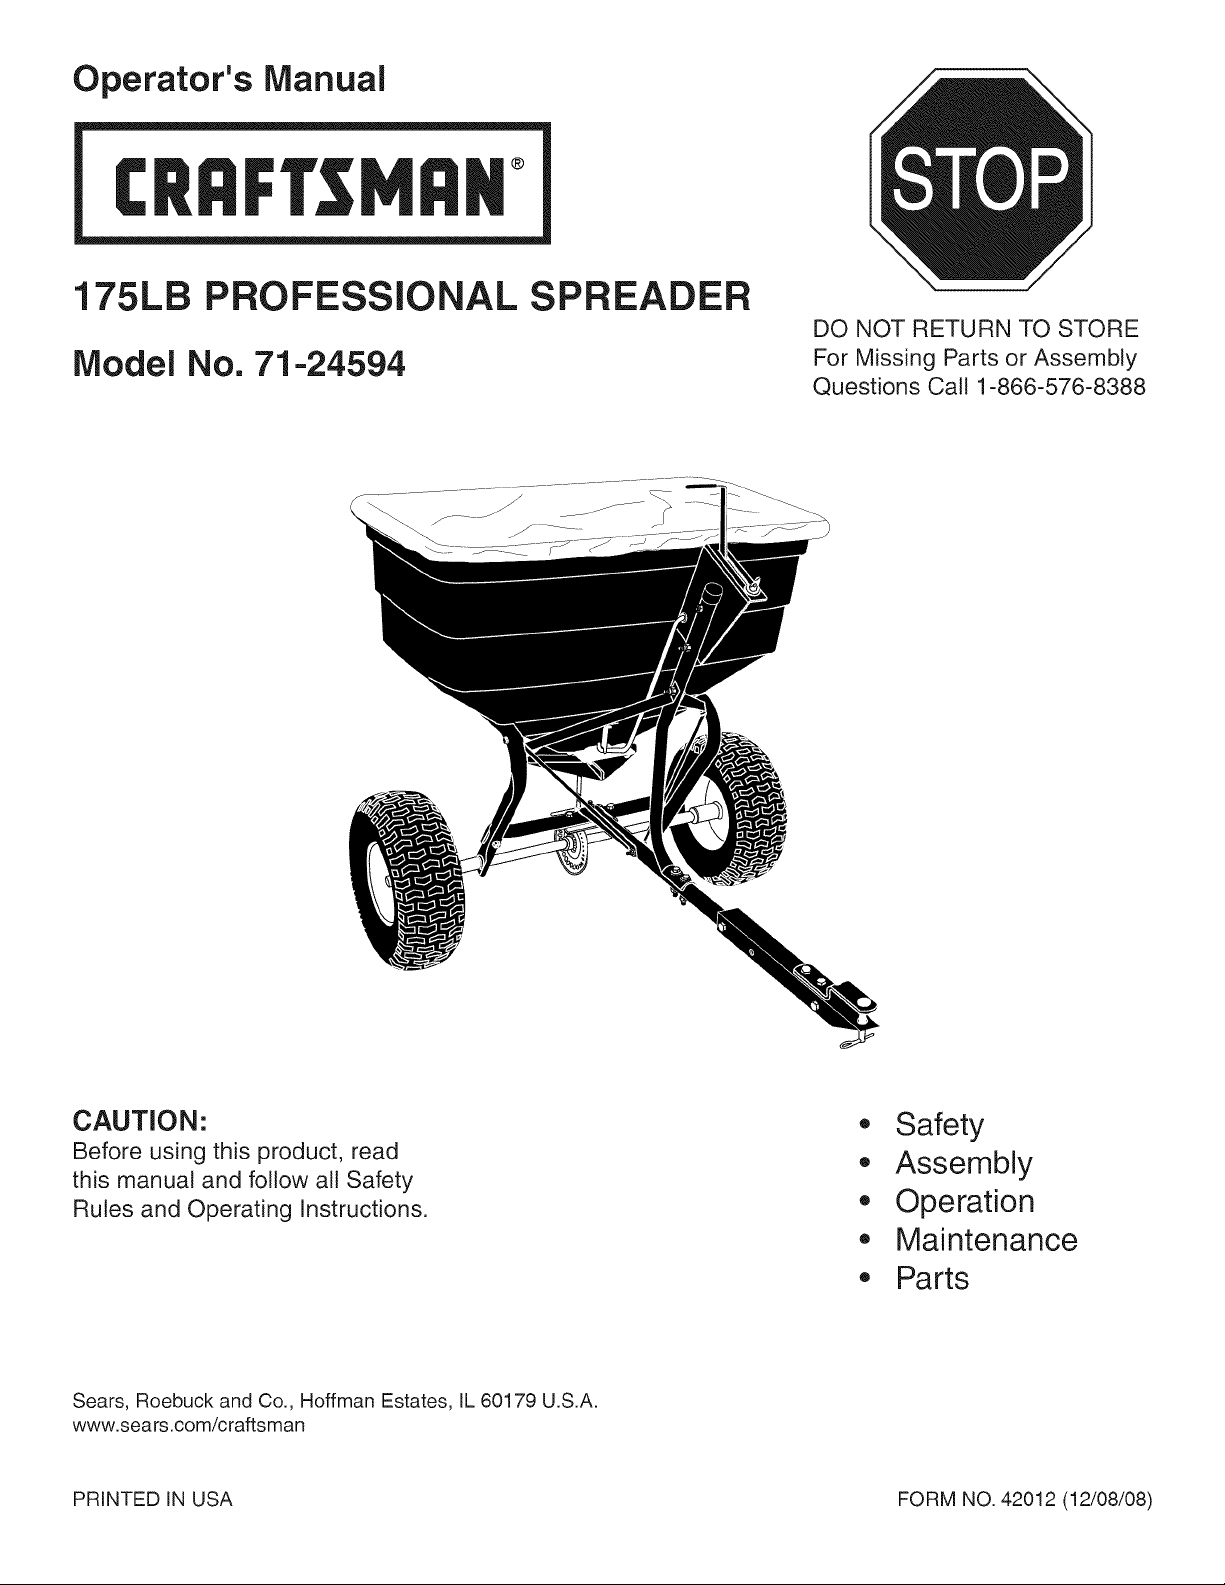
175LB PROFESSIONAL SPREADER
Model No. 71-24594
DO NOT RETURN TO STORE
For Missing Parts or Assembly
Questions Call 1-866-576-8388
CAUTION:
Before using this product, read
this manual and follow all Safety
Rules and Operating Instructions.
,, Safety
,, Assembly
,, Operation
,, Maintenance
,, Parts
Sears, Roebuck and Co., Hoffman Estates, IL 60179 U.S.A.
www.sears.com/craftsman
PRINTED IN USA FORM NO. 42012 (12/08/08)
WARRANTY....................................................................2
SAFETY...........................................................................2
CARTONCONTENTS.....................................................3
FULLSIZEHARDWARECHART....................................3
ASSEMBLY......................................................................5
ACCESSORIESANDATTACHMENTS...........................8
MAINTENANCE..............................................................9
SERVICEANDADJUSTMENTS.....................................9
STORAGE.......................................................................9
REPAIRPARTSILLUSTRATION...................................10
REPAIRPARTSLIST.....................................................11
PARTSORDERING/SERVICE......................BACKPAGE
CRAFTSMAN PROFESSIONAL FULL WARRANTY
When operated and maintained according to all supplied instructions, if this Craftsman Professional product fails due to a
defect in material or workmanship within two years from the date or purchase, return itto any Sears store or other Craftsman
Professional outlet in the United States for free replacement.
This warranty applies for only 90 days from the date of purchase if this product is ever used for commercial or rental
purposes.
This warranty does not include items considered to expendable parts that can wear out from normal use within the warranty
period.
This warranty gives you specific legal rights, and you may also have other rights which vary from state to state.
Sears, Roebuck and Co., D817WA, Hoffman Estates, IL 60179
DO NOT RETURN TO STORE for Missing Parts or Assembly Questions
Call 1-866-576=8388 Attachment Hotline
The model number and serial numbers will be found on a
decal attached to the 1751b Professional Spreader.
You should record both the serial number and the date of
purchase and keep in a safe place for future reference.
Any power equipment can cause injury if operated improperly or if the user does not understand how to operate
the equipment. Exercise caution at all times when operating equipment.
• Read the towing vehicle owners manual and towing
vehicle safety rules. Know how to operate your tractor
before using the broadcast spreader attachment.
Read the chemical label instructions and cautions for
handling and applying the chemicals purchased for
spreading.
Wear eye and hand protection when handling and
when applying lawn or garden chemicals.
Never operate tractor and spreader attachment without
wearing substantial footwear, and do not allow anyone
to ride or sit on spreader attachment frame.
Never allow children to operate the tractor or
spreader attachment, and do not allow adults to
operate without proper instructions.
MODEL NUMBER:
SERIAL NUMBER:
DATE OF PURCHASE:
Always begin with the transmission in first (low) gear
and with the engine at low speed, and gradually
increase speed as conditions permit.
When towing broadcast spreader do not drive too
close to a creek or ditch and be alert for holes and
other hazards which could cause you to loose control
of the broadcast spreader and tractor.
Before operating vehicle on any grade (hill) refer
to the safety rules in the vehicle owner's manual
concerning safe operation on slopes. Stay off steep
slopes!
Follow maintenance and lubrication instructions as
outlined in this manual.
71-24594
LOOK FOR THiS SYMBOL TO POINT OUT iMPORTANT SAFETY PRECAUTIONS. iT |
MEANS m ATTENTION! BECOME ALERT! YOUR SAFETY IS iNVOLVED.
2 Call 1-866-576-8388 for missing parts or assembly help
DO NOT RETURN TO STORE
]
J
3
4
5
J
J
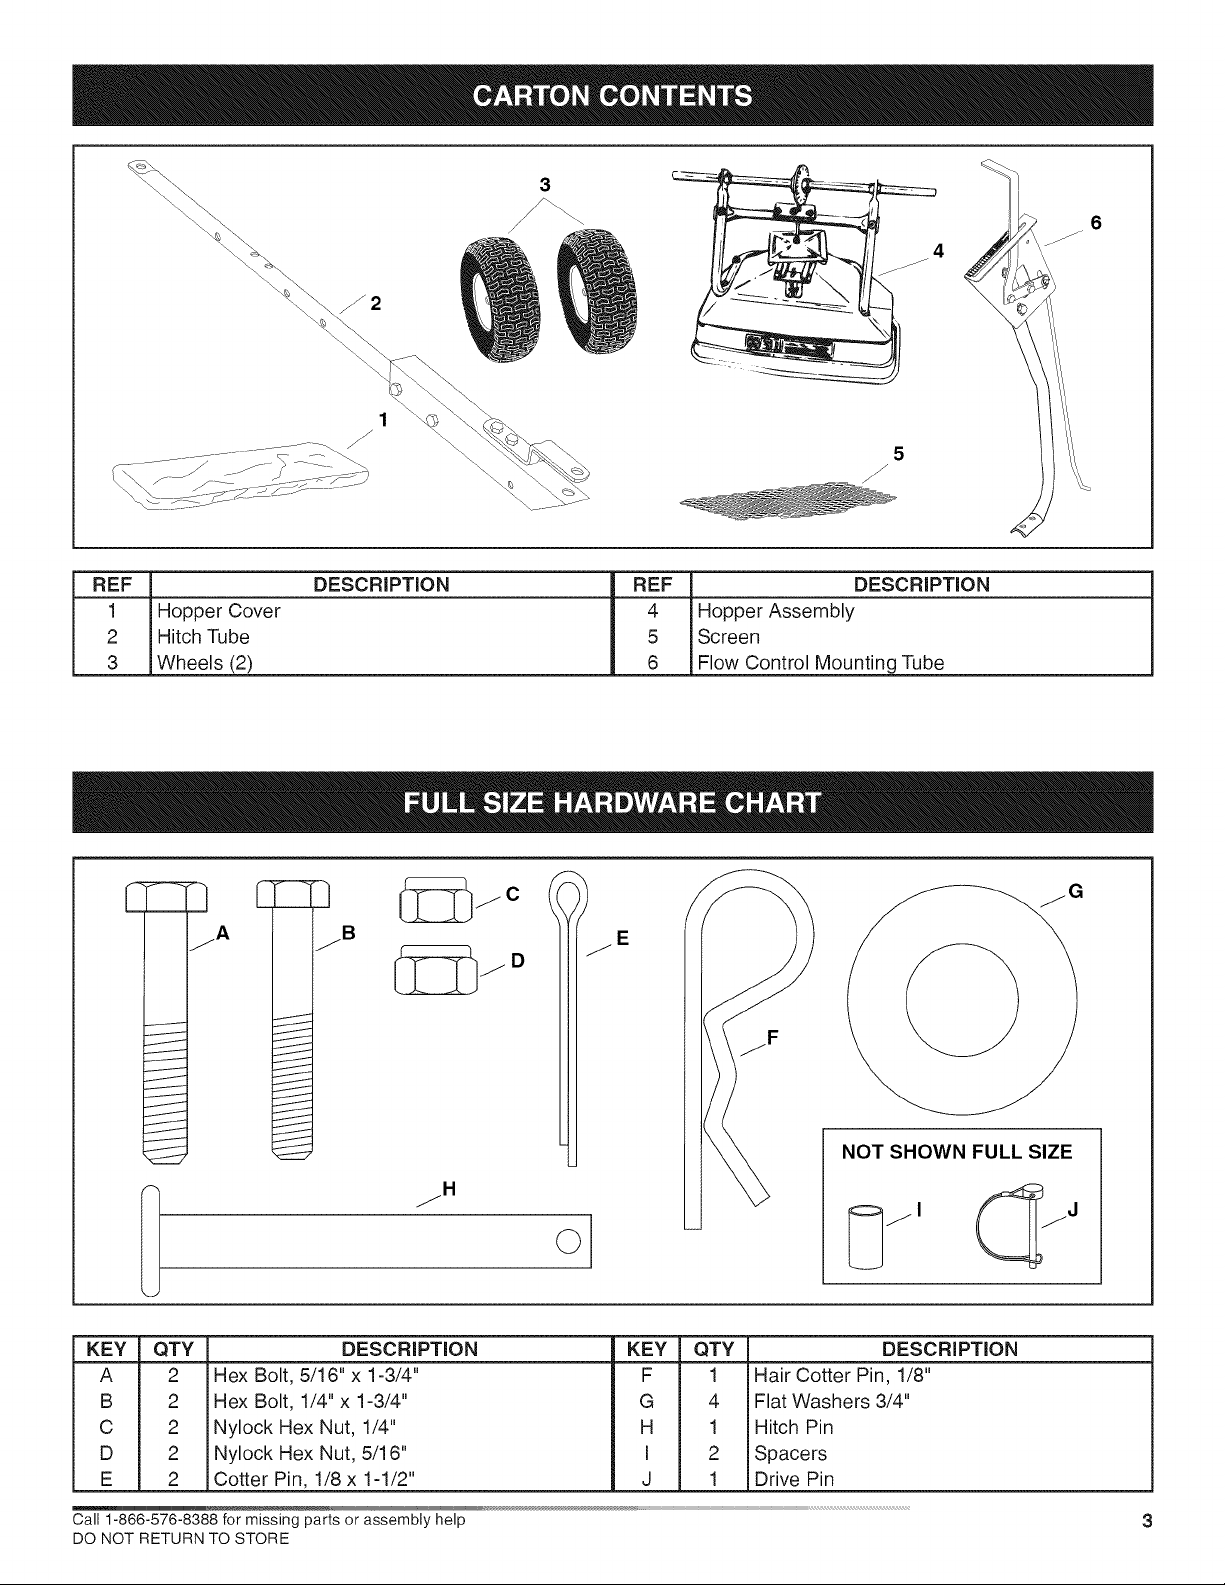
REF DESCRIPTION REF DESCRIPTION
1 Hopper Cover 4 iHopper Assembly
2 Hitch Tube 5 Screen
3 Wheels (2) 6 i Flow Control Mounting Tube
6
_J
J
/
J
I
J
I
J
J
f
J
J
J
J
/
J
KEY QTY
A 2
B 2
C 2
D 2
E 2
q
jB
DESCRIPTION
Hex Bolt, 5/16"x 1-3/4"
Hex Bolt, 1/4" x 1-3/4"
Nylock Hex Nut, 1/4"
Nylock Hex Nut, 5/16"
Cotter Pin, 1/8 x 1-1/2"
E
NOT SHOWN FULL SIZE
KEY QTY DESCRIPTION
F 1 Hair Cotter Pin, 1/8"
G 4 Flat Washers 3/4"
H 1 Hitch Pin
I 2 Spacers
J 1 Drive Pin
Call 1-866-576-8388 for missing parts or assembly help 3
DO NOT RETURN TO STORE
TOOLS REQUIRED FOR ASSEMBLY
(!) Pliers
(2) 7/16" Wrenches
(2) 1/2" Wrenches
(2) 9/16" Wrenches
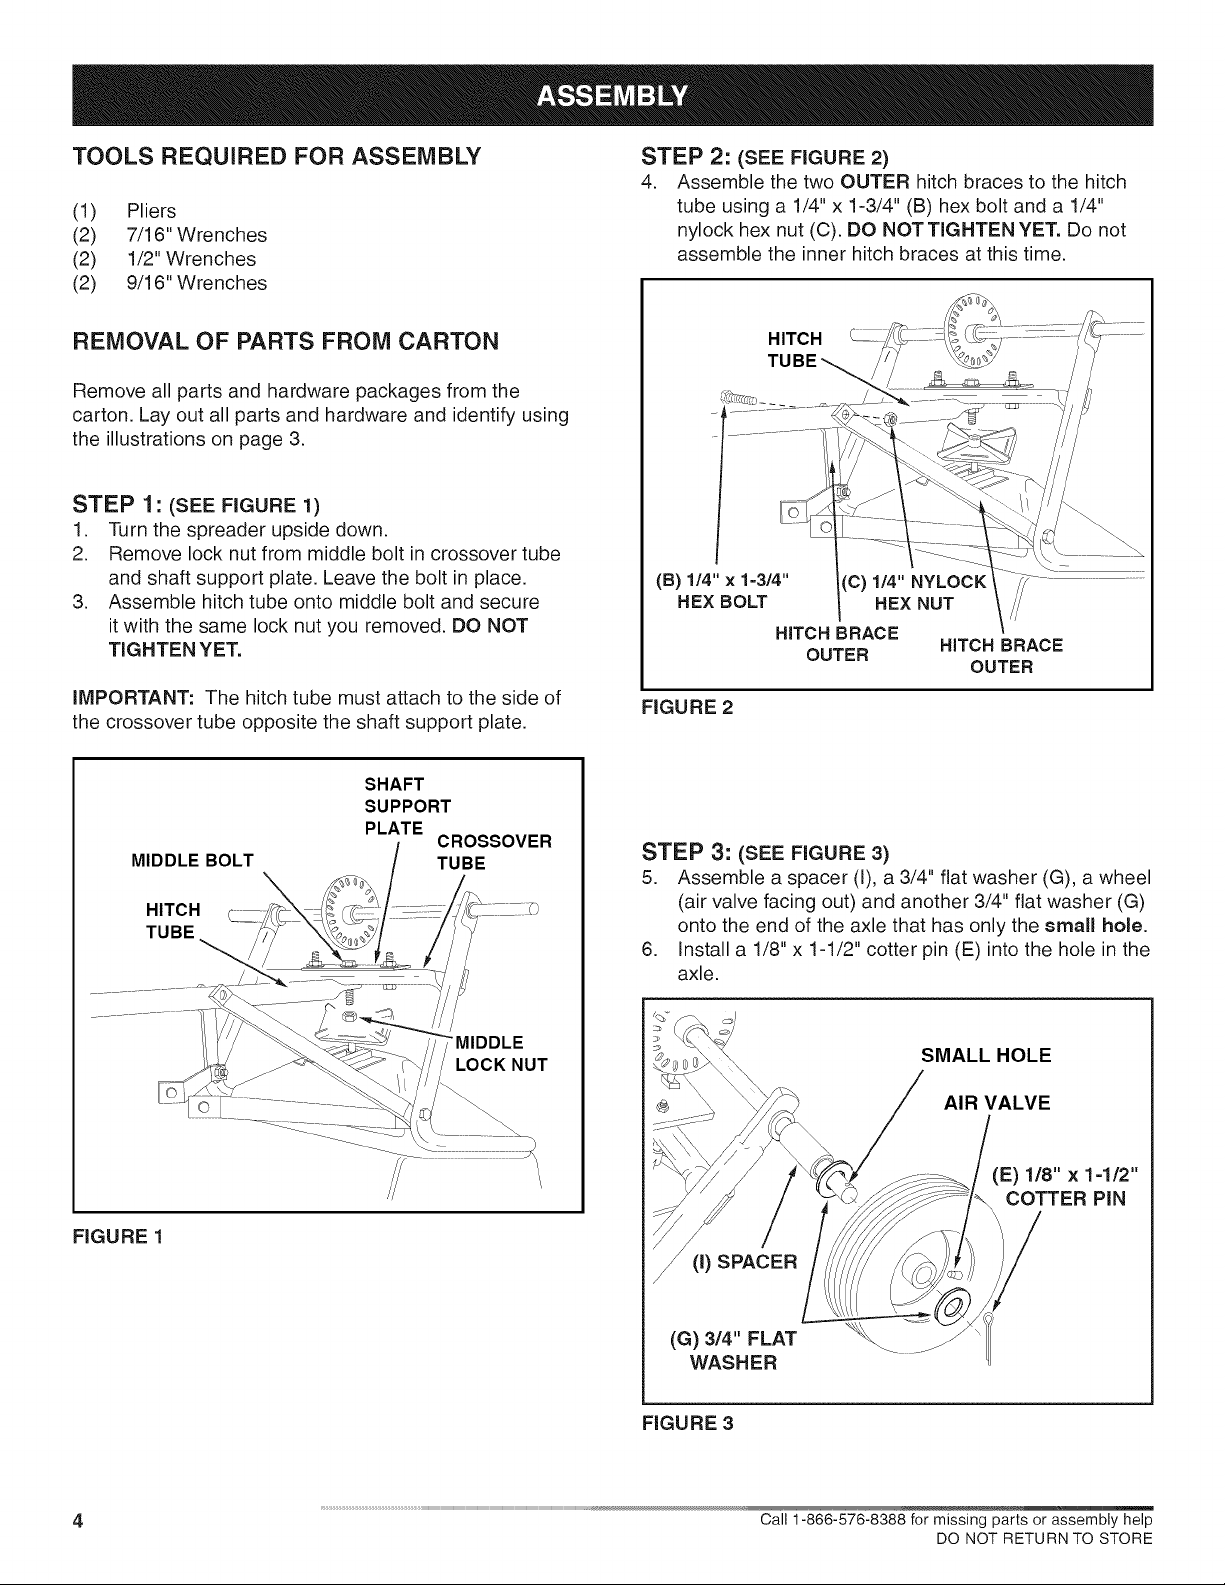
STEP 2: (SEE FIGURE 2)
4. Assemble the two OUTER hitch braces to the hitch
tube using a 1/4" x 1-3/4" (B) hex bolt and a 1/4"
nylock hex nut (C). DO NOTTIGHTEN YET. Do not
assemble the inner hitch braces at this time.
REMOVAL OF PARTS FROM CARTON
Remove all parts and hardware packages from the
carton. Lay out all parts and hardware and identify using
the illustrations on page 3.
STEP 1: (SEE FIGURE 1)
1. Turn the spreader upside down.
2. Remove lock nut from middle bolt in crossover tube
and shaft support plate. Leave the bolt in place.
3. Assemble hitch tube onto middle bolt and secure
it with the same lock nut you removed. DO NOT
TIGHTEN YET.
iMPORTANT: The hitch tube must attach to the side of
the crossover tube opposite the shaft support plate.
SHAFT
SUPPORT
PLATE
MIDDLE BOLT
HITCH
TUBE
CROSSOVER
TUBE
HITCH
(B) 1/4" x 1=3/4"
HEX BOLT
HITCH BRACE
(C) 1/4" NYLOCK
HEX NUT
OUTER
HITCH BRACE
OUTER
FIGURE 2
STEP 3: (SEE FIGURE 3)
5. Assemble a spacer (I), a 3/4" fiat washer (G), a wheel
(air valve facing out) and another 3/4" fiat washer (G)
onto the end of the axle that has only the small hole.
6. installa 1/8" x 1-1/2" cotter pin (E) into the hole in the
axle.
LOCK NUT
SMALL HOLE
AIR VALVE
(E) 1/8" x 1-1/2"
COTTER PiN
FIGURE 1
(I) SPACER
(G) 3/4" FLAT
WASHER
FIGURE 3
4 Call 1-866-576-8388 for missing parts or assembly help
DO NOT RETURN TO STORE
 Loading...