

Craftsman 486244050 Owner’s Manual
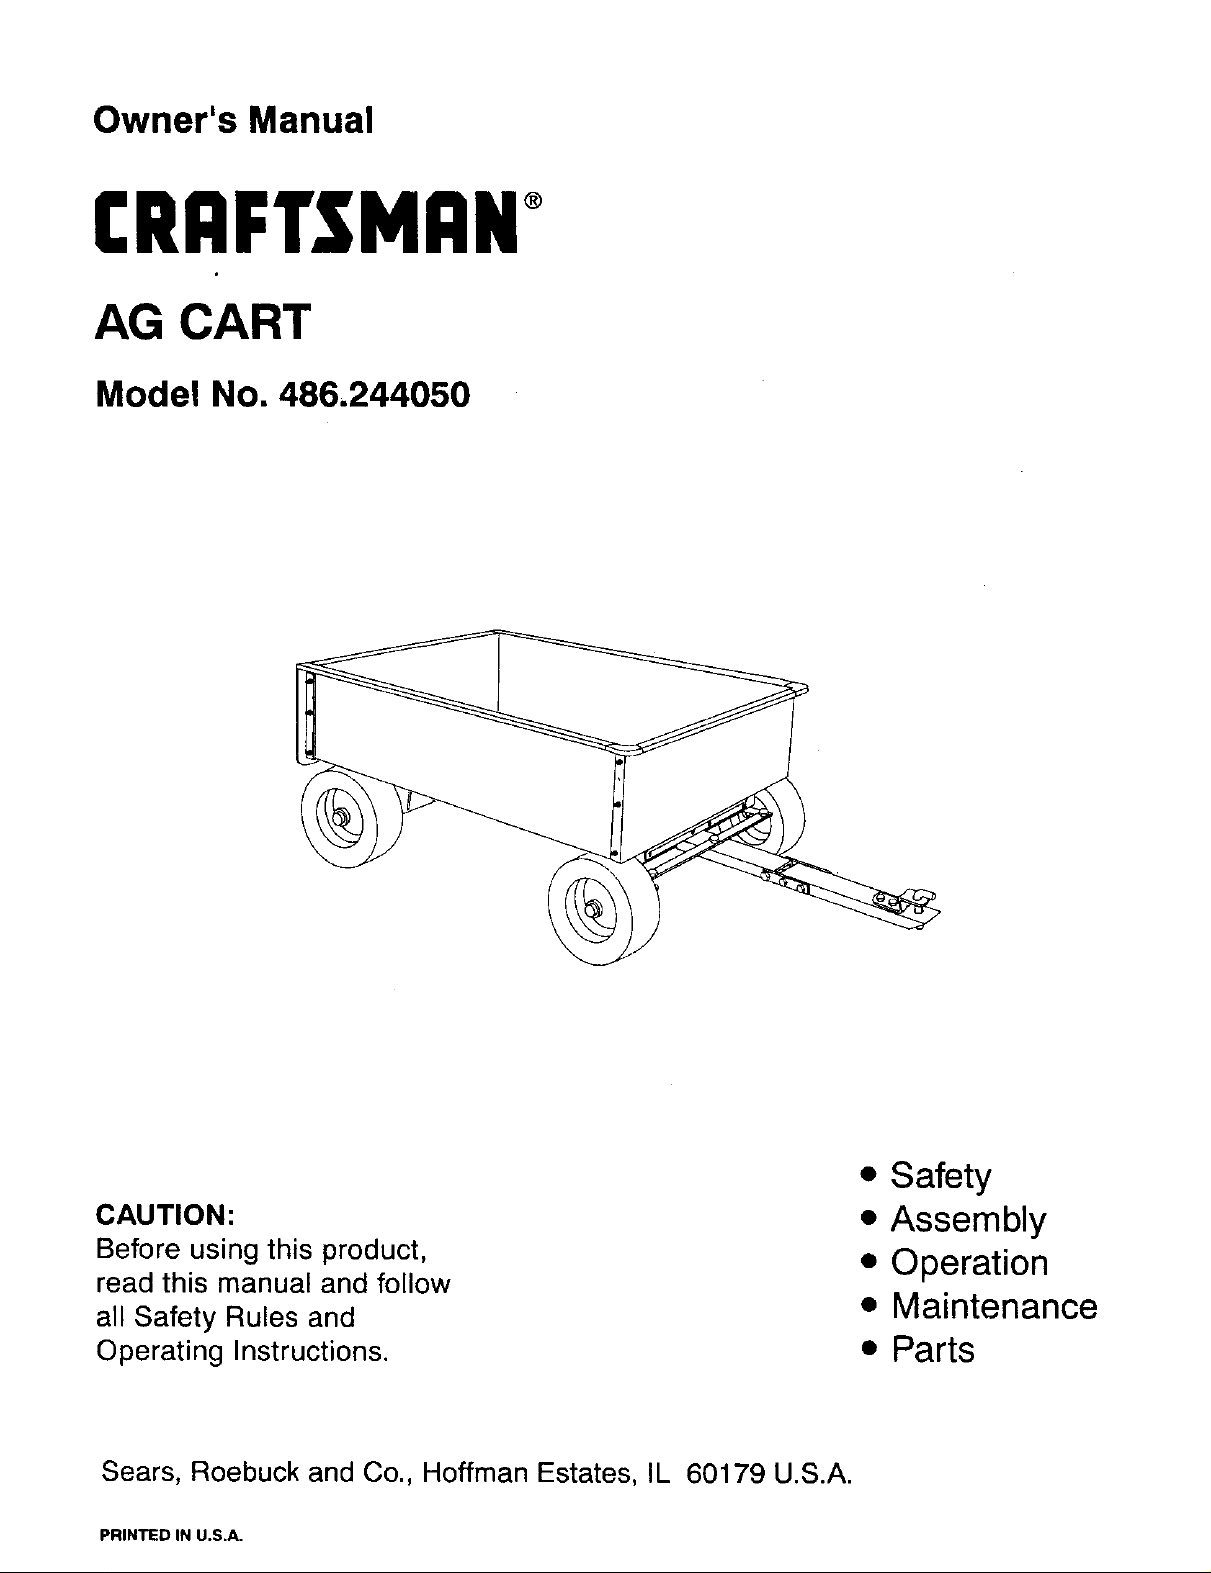
Owner's Manual
CRRFTSMRN
AG CART
Model No. 486.244050
CAUTION:
Before using this product,
read this manual and follow
all Safety Rules and
Operating Instructions.
Sears, Roebuck and Co., Hoffman Estates, IL 60179 U.S.A.
PRINTED IN U.S.A.
• Safety
• Assembly
• Operation
• Maintenance
• Parts
SAFETY RULES ....................................................... 3
FULL SIZE HARDWARE CHART ............................ 4
CARTON CONTENTS .............................................. 5
ASSEMBLY ............................................................... 5
OPERATION ........................................................... 10
MAINTENANCE ...................................................... 11
STORAGE ............................................................... 11
REPAIR PARTS ILLUSTRATION .....:................... 12
REPAIR PARTS LIST ............................................. 13
SLOPE GUIDE ........................................................ 15
PARTS ORDERING/SERVICE ................ Back Cover
LIMITED ONE YEAR WARRANTY ON
For one year from the date of purchase, when this cart is maintained and lubricated according to the operating and
maintenance instructions in the owner's manual, Sears will repair any defect in material or workmanship free of charge.
If this cart is used for commercial or rental purposes, this warranty applies for only 90 days from the date of purchase.
This warranty does not cover repairs necessary because of operator negligence or abuse, including the failure to maintain
the equipment according to instructions contained in the owner's manual.
WARRANTY SERVICE IS AVAILABLE BY CONTACTING THE NEAREST SEARS SERVICE CENTER/DEPARTMENT
IN THE UNITED STATES.
This warranty applies only while this product is in the United States.
This warranty gives you specific legal rights, and you may also have other rights which vary from state to state.
Sears, Roebuck and Co. D/817 WA. Hoffman Estates, Chicago, IL 60179
The model number and serial numbers wil_be found on a
decal attached to the front panel.
You should record both the serial number and the date of
purchase and keep in a safe place for future reference.
MODEL NUMBER:
SERIAL NUMBER:
DATE OF PURCHASE:
486.244050

Any power equipment can cause injury if operated improperly or if the user does not understand how to operate
the equipment. Exercise caution at all times, when using power equipment.
Exercise caution at all times when using power
equipment.
Read this owners manual before attempting to
assemble or operate the cart.
Read the vehicle owners manual and know how to
operate your tractor, before using the cart attach-
ment.
Do not at any time carry passengers in this cart. It has
not been designed to carry passengers.
Never allow children to operate the tractor or the cart
attachment.
Do not allow adults to operate the tractor or cart
attachment without proper instructions.
Always begin with the transmission in first (low) and
gradually increase speed as conditions permit.
Tow the cart at reduced speed over rough terrain and
hillsides or near creeks and ditches to prevent tipping
over and loss of control. Do not drive too close to a
creek or ditch.
Vehicle braking and stability may be affected with the
attachment of this cart. Do not fill cart to maximum
weight capacity without checking the capability of the
towing vehicle to safely pull and stop with the cart
attached.
Before operating vehicle on any grade (hill) refer to
the safety rules in the vehicle owner's manual con-
cerning safe operation on slopes. Refer also to the
slope guide on page 15 of this manual. Stay off
steep slopest
• Do not unhook your cart from the tractor while on a
slope. The cart could unexpectedly roll down the
slope.
• Do not tow this cart on highways or on public thor-
oughfares.
• Maximum towing speed is 10 m.p.h.
• Follow maintenance and lubrication instructions as
outlined in this manual.
,_ Look for this symbol to point out important safety precautions. It mean--Attention!!
Become alertH Your safety is involved.
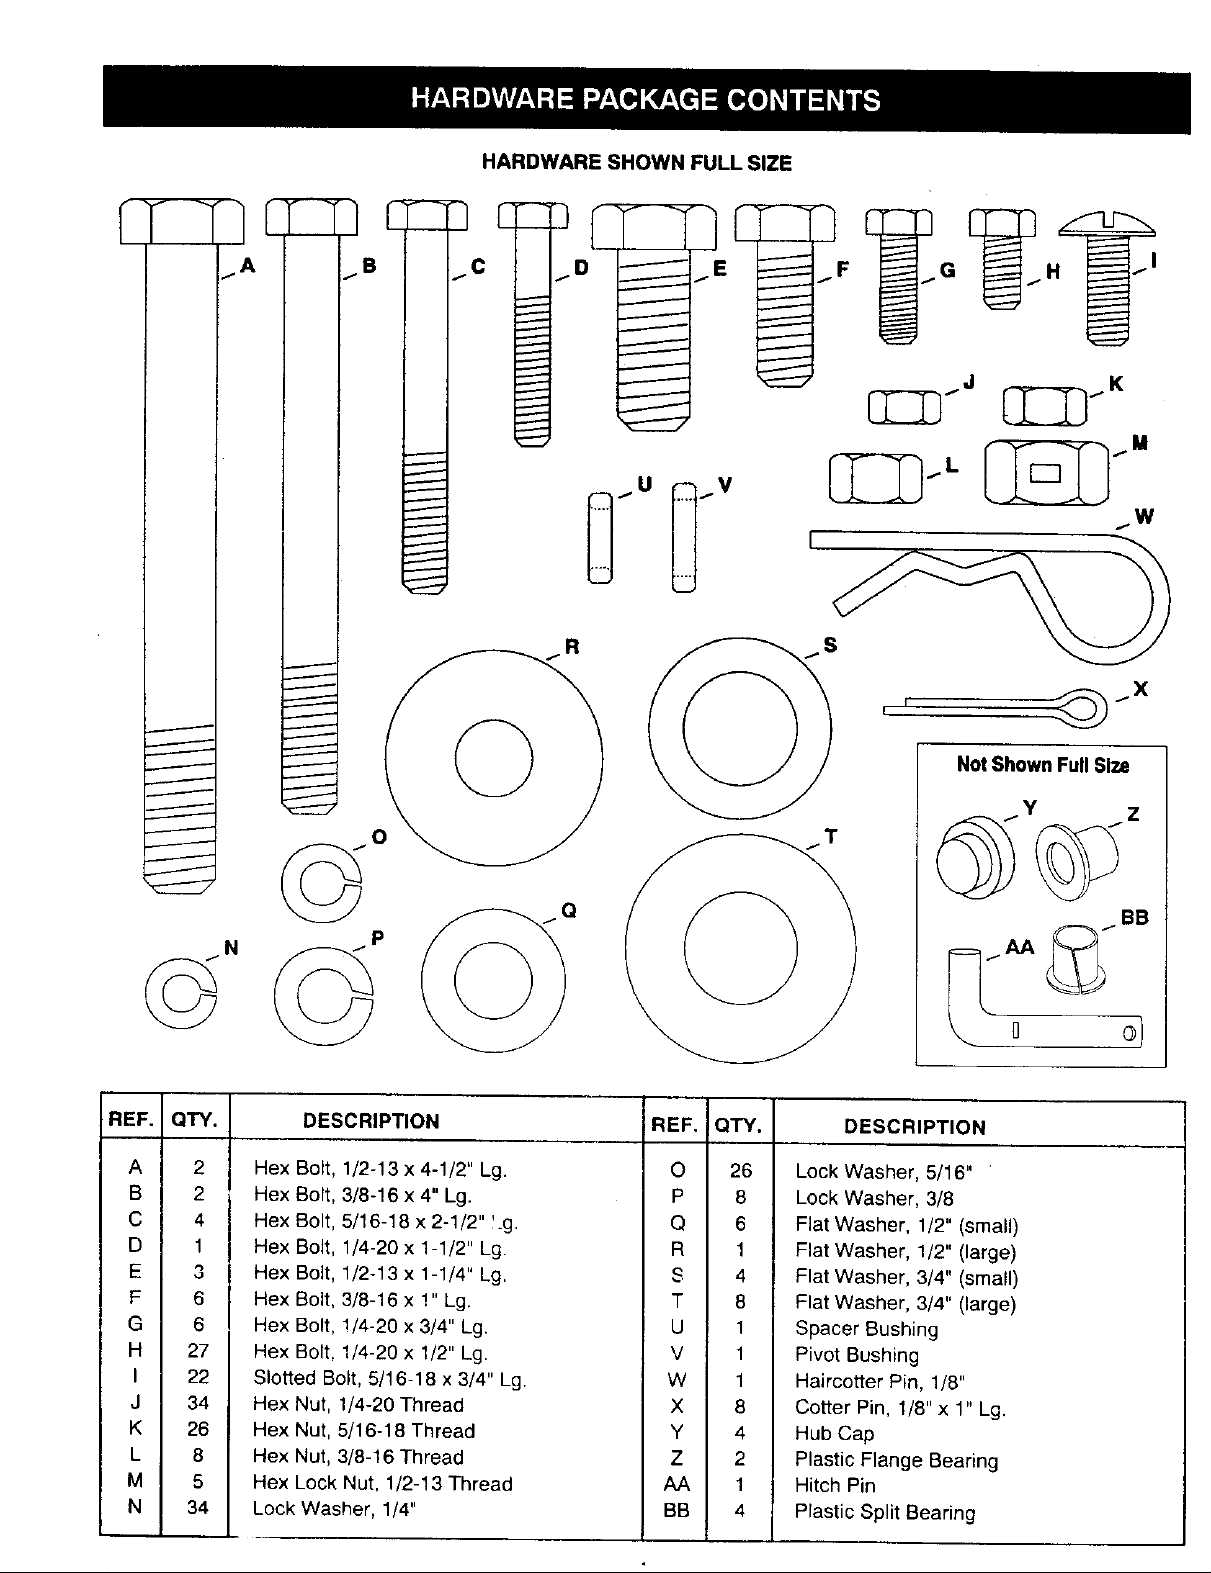
HARDWARE SHOWN FULL SIZE
REF.
A
B
C
D
E
F
G
H
J
K
L
M
N
BB
QTY.
2
2
4
1
6
6
27
I
22
34
26
8
5
34
DESCRIPTION
,=xBolt, 1/2-13 x 4-1/2" Lg.
,_xBolt, 3/8-16 x 4" Lg.
!x Bolt, 5/16-18 x 2-1/2" l.g.
.'x Bolt, 1/4-20 x 1-1/2" Lg.
;x Bolt, 1/2-13 x 1-1/4" Lg,
.=xBolt, 3/8-16 x 1" Lg.
._xBolt, !/4-20 x 3/4" Lg.
.'x Bolt, 1/4-20 x 1/2" Lg.
3tted Bolt, 5/16-16 x 3/4" Lg
._xNut, 1/4-20 Thread
.'x Nut, 5/16-18 Thread
._xNut, 3/8-16 Thread
._xLock Nut, 1/2-13 Thread
,ck Washer, 1/4"
REF. IQTY, DESCRIPTION
O 26
P 8
Q 6
R 1
S 4
T 8
U 1
V 1
W 1
X 8
Y 4
Z 2
AA 1
BB 4
Lock Washer, 5/16"
Lock Washer, 3/8
Flat Washer, 1/2" (small)
Flat Washer, 1/2" (large)
Flat Washer, 3/4" (small)
Flat Washer, 3/4" (large)
Spacer Bushing
Pivot Bushing
Haircotter Pin, 1/8"
Cotter Pin, 1/8" x 1" Lg.
Hub Cap
Plastic Flange Bearing
Hitch Pin
Plastic Split Bearing
15
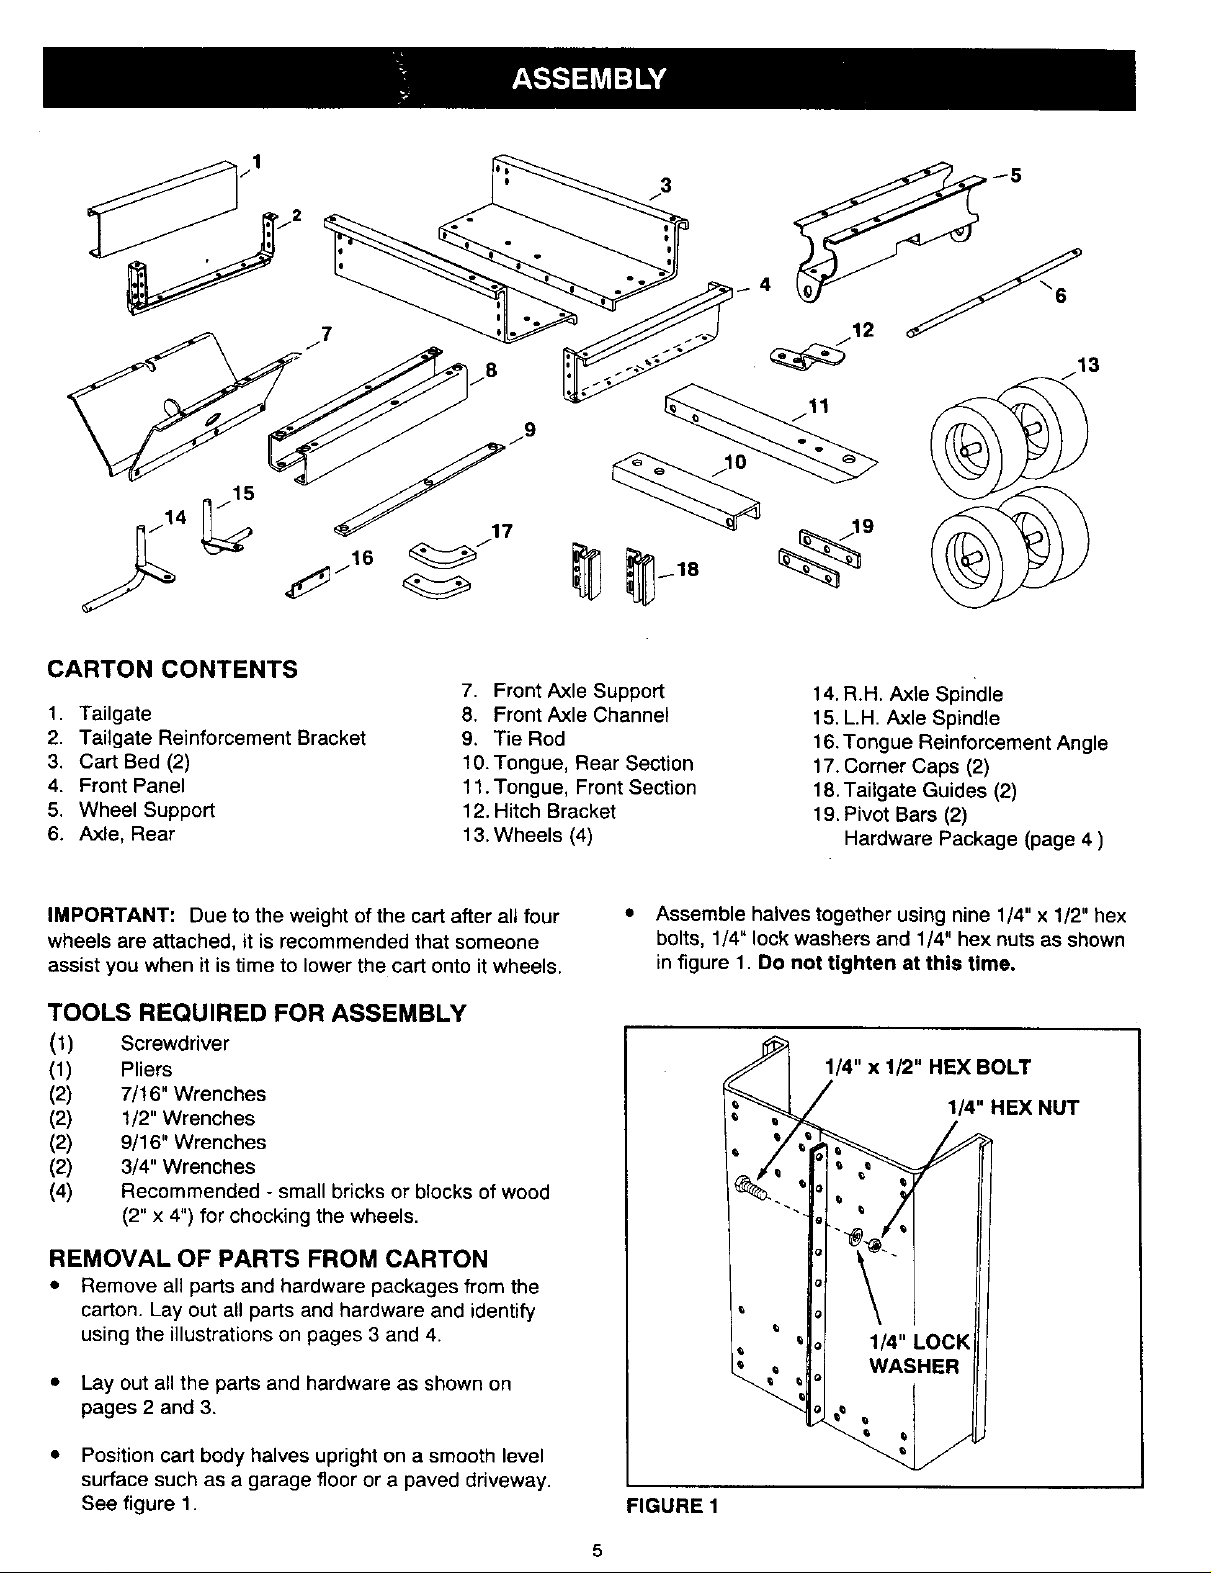
CARTON CONTENTS
1. Tailgate
2. Tailgate Reinforcement Bracket
3. Cart Bed (2)
4. Front Panel
5. Wheel Support
6. Axle, Rear
3
7. Front Axle Support
8. Front Axle Channel
9. Tie Rod
10. Tongue, Rear Section
11. Tongue, Front Section
12. Hitch Bracket
13. Wheels (4)
14. R.H. Axle Spindle
15. L.H. Axle Spindle
16. Tongue Reinforcement Angle
17. Corner Caps (2)
18. Tailgate Guides (2)
19. Pivot Bars (2)
Hardware Package (page 4 )
IMPORTANT: Due to the weight of the cart after all four
wheels are attached, it is recommended that someone
assist you when it is time to lower the cart onto it wheels.
TOOLS REQUIRED FOR ASSEMBLY
(1) Screwdriver
(1) Pliers
(2) 7/16" Wrenches
(2) 1/2" Wrenches
(2) 9/16" Wrenches
(2) 3/4" Wrenches
(4) Recommended - small bricks or blocks of wood
(2" x 4") for chocking the wheels,
REMOVAL OF PARTS FROM CARTON
• Remove all parts and hardware packages from the
carton. Lay out all parts and hardware and identify
using the illustrations on pages 3 and 4.
• Lay out all the parts and hardware as shown on
pages 2 and 3.
• Position cart body halves upright on a smooth level
surface such as a garage floor or a paved driveway.
See figure 1.
• Assemble halves together using nine 1/4" x 1/2" hex
bolts, 1/4" lock washers and 1/4" hex nuts as shown
in figure 1. Do not tighten at this time.
1/4" x 1/2" HEX BOLT
1/4" HEX NUT
FIGURE 1
5
 Loading...