

Craftsman 47099 Operator's Manual
Operator’s Manual
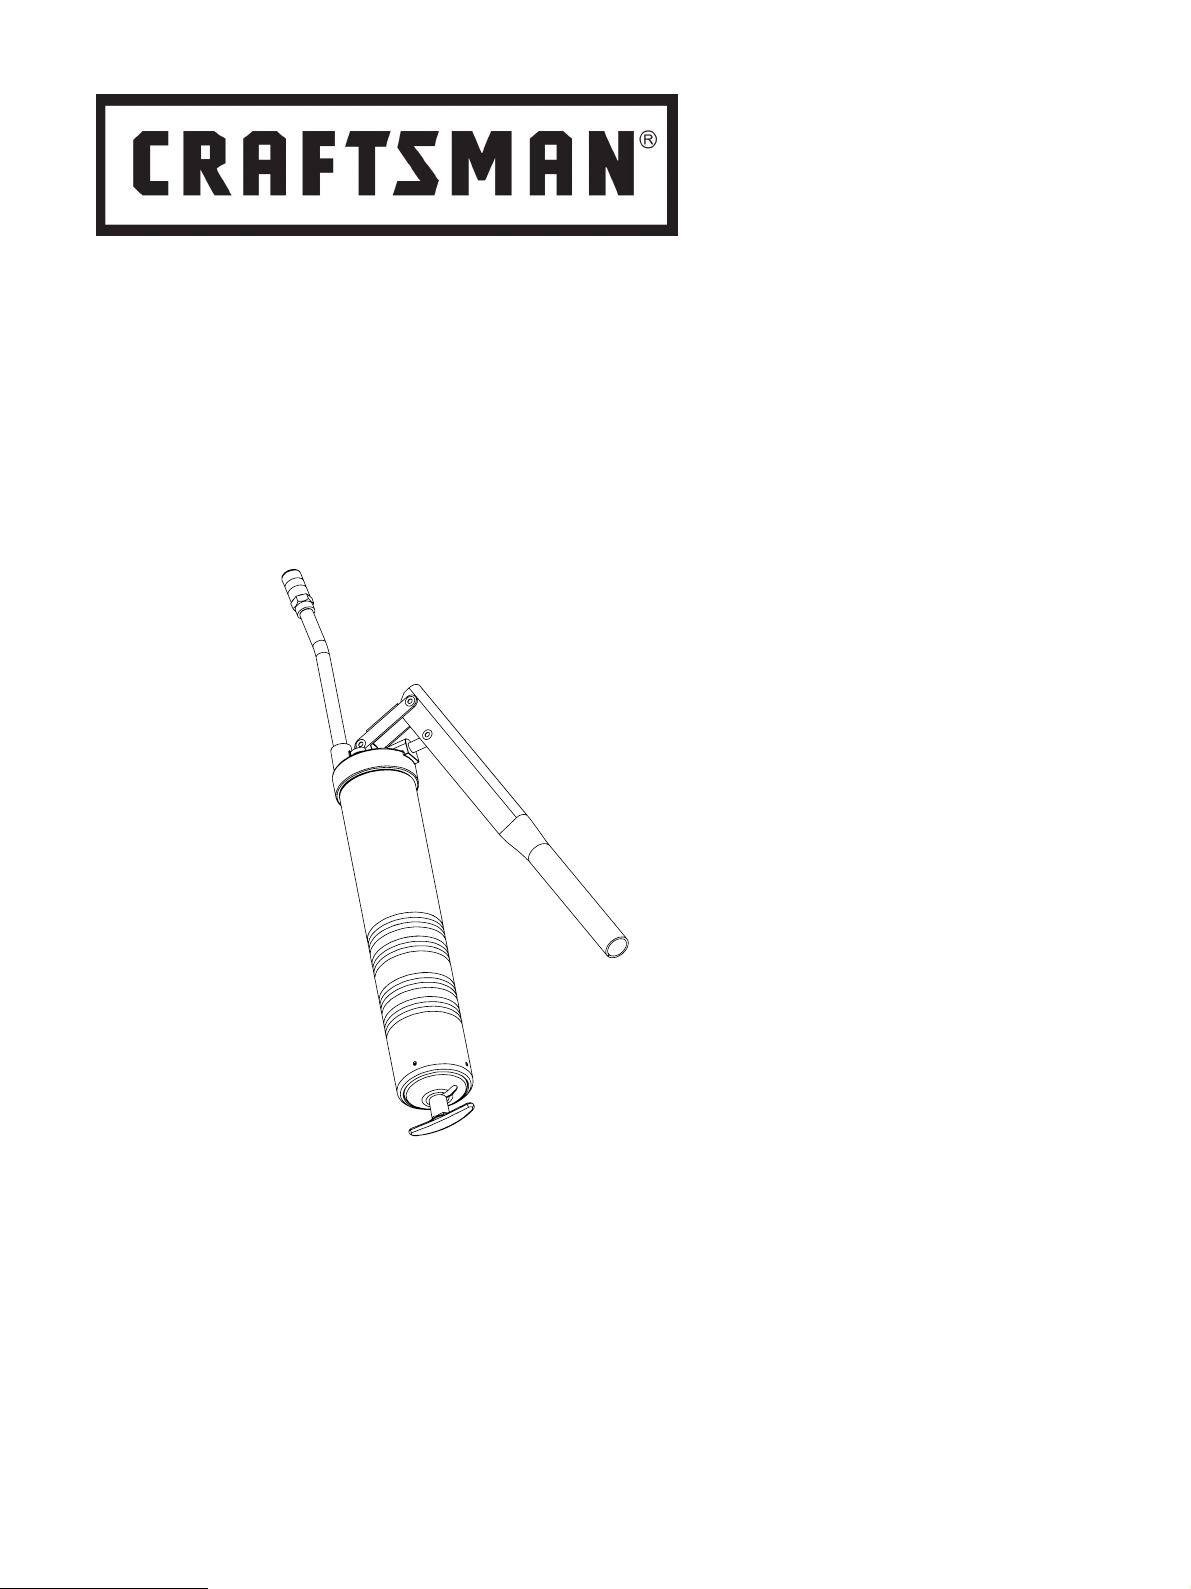
Lever Grease Gun
Model 47099
CAUTION: Before using this
product, read this manual
and follow all its Safety Rules
and Operating Instructions.
Sears Brands Management Corporation, Hoffman Estates, IL 60179 U.S.A.
www.craftsman.com
404669
• SAFETY
• ASSEMBLY
• OPERATION
• MAINTENANCE
• PARTS
• ESPANOL p. 7
TABLE OF CONTENTS GENERAL SAFETY RULES SIGNAL WORDS FOR SAFETY
Safety ........................................... 2
Operating Instructions ................... 3
Install Cartridge ............................ 3
Fill From Bulk Container ................ 4
Expell Air Pockets .......................... 5
Capacities ..................................... 6
Service Parts List .......................... 6
CRAFTSMAN LIMITED WARRANTY
FOR ONE YEAR from the date of sale,
this product is warranted against defects in
material or workmanship.
WITH PROOF OF SALE, a defective
product will be replaced free of charge.
For warranty coverage details to obtain free
replacement, visit the web page:
www.craftsman.com/warranty.
This ONE YEAR warranty is void if this product is ever used while providing commercial
services or if rented to another person.
For 90 DAY commercial and rental use
terms, see the Craftsman warranty web
page.
This warranty gives you specific legal rights,
and you may also have other rights which
vary from state to state.
Sears Brands Management Corporation,
Hoffman Estates, IL 60179.
Read and carefully observe these
installation instructions before installing,
operating or troubleshooting the
assembly. The assembly must be
installed, maintained and repaired
exclusively by persons familiar with the
instructions.
Use the equipment only after safety
instructions and this guide have been
read and are completely understood.
Adequate personal protection must be
used to prevent splashing of material on
the skin or in the eyes.
This equipment generates very high
grease pressure. Extreme caution should
be used when operating this equipment
as material leaks from loose or ruptured
components can inject fluid through the
skin and into the body. If any fluid
appears to penetrate the skin, seek
attention from a doctor immediately.
Do not treat injury as a simple cut. Tell
attending doctor exactly what type of fluid
was injected.
Any other use not in accordance with
instructions will result in loss of claim for
warranty or liability.
• Do not misuse, over-pressurize,
modify parts, use incompatible
chemicals, fluids, or use worn and/or
damaged parts.
• Do not exceed the stated maximum
working pressure of the pump or of the
lowest rated component in your
system.
• Always read and follow the fluid manu-
facturer’s recommendations regarding
fluid compatibility, and the use of pro-
tective clothing and equipment.
• Failure to comply may result in death
or serious injury.
This is the safety alert symbol. It is used
to alert you to potential physical injury
hazards. Obey all safety messages that
follow this symbol to avoid possible
injury or death.
SAFETY INSTRUCTION
Safety instruction signs indicate specific
safety-related instructions or
procedures.
DANGER
Indicates a hazardous situation which,
if not avoided, will result in death or
serious injury.
WARNING
Indicates a hazardous situation which,
if not avoided will result in death or
serious injury.
CAUTION
Indicates a hazardous situation which,
if not avoided, could result in minor or
moderate injury.
2
10
1
3
6
OPERATING INSTRUCTIONS
1 Wipe fittings clean before lubricating.
2 Push coupler (1) onto fitting at slight
angle and then center coupler (1) on
the fitting
3 Operate lever handle (3) to lubricate.
Notice
!
Do not damage seals of
equipment being lubricated by excessive
pressure or lubricant volume.
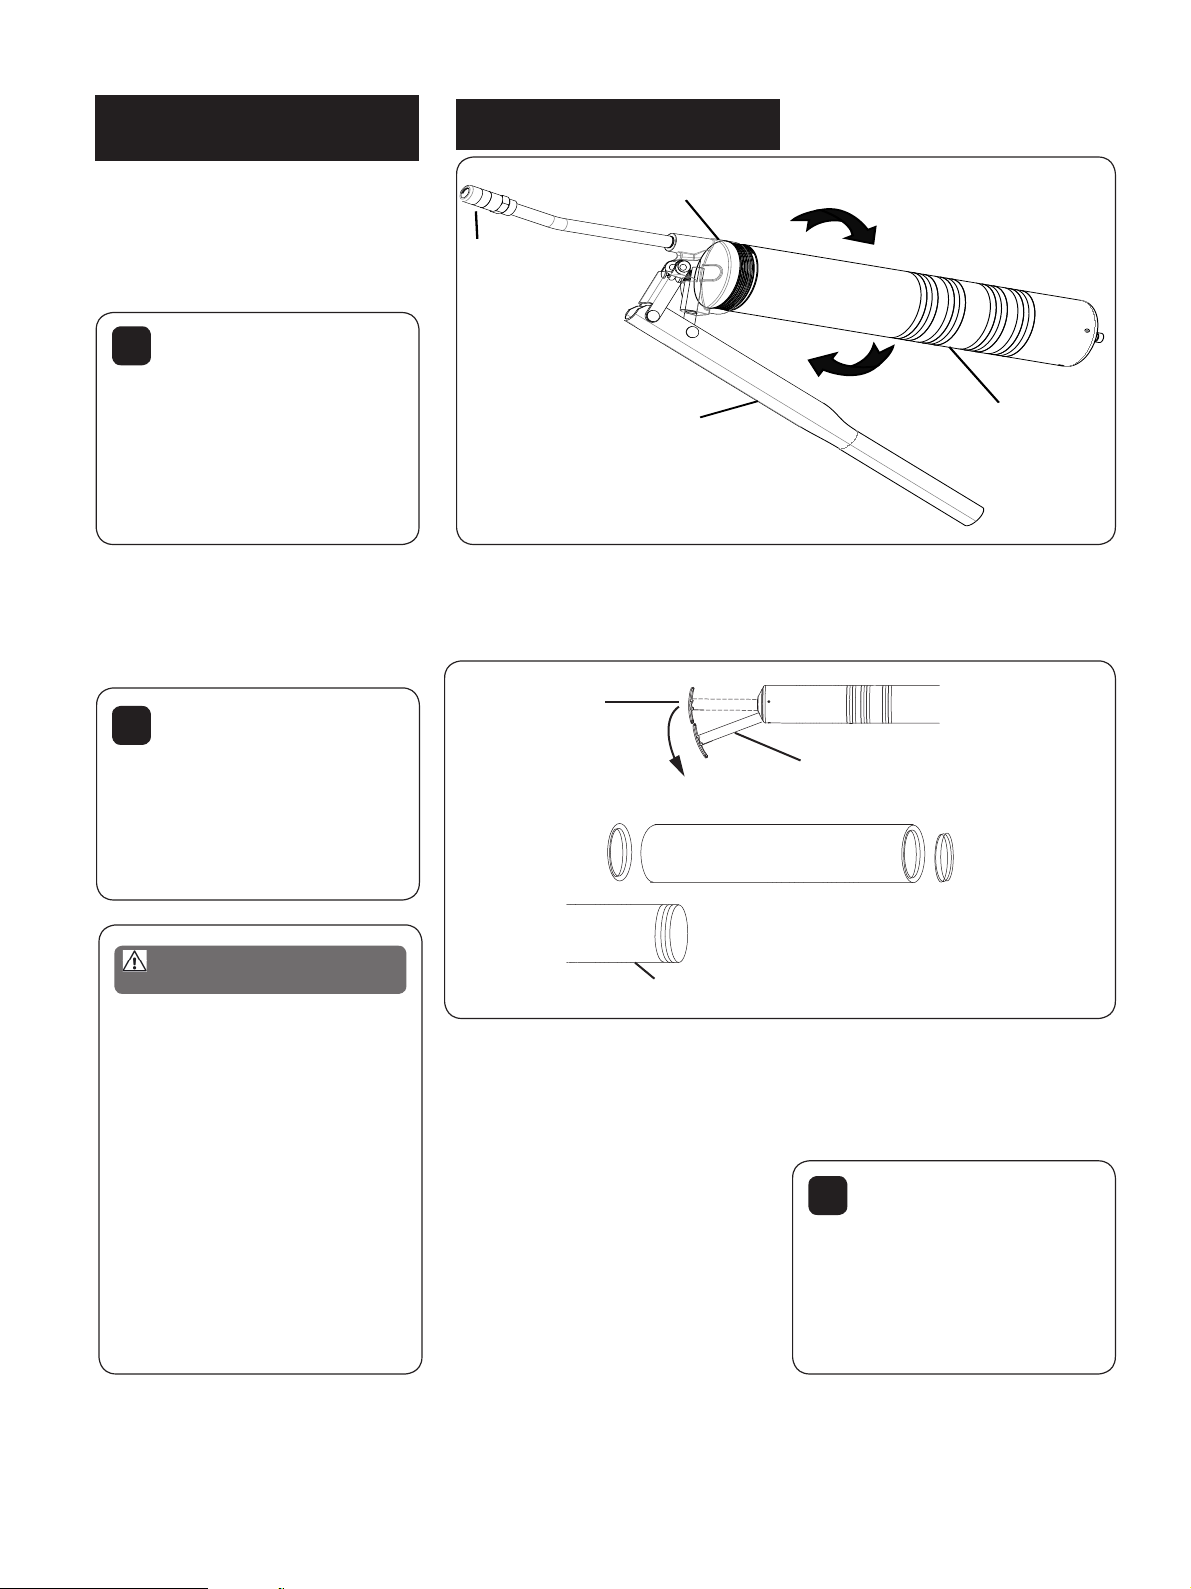
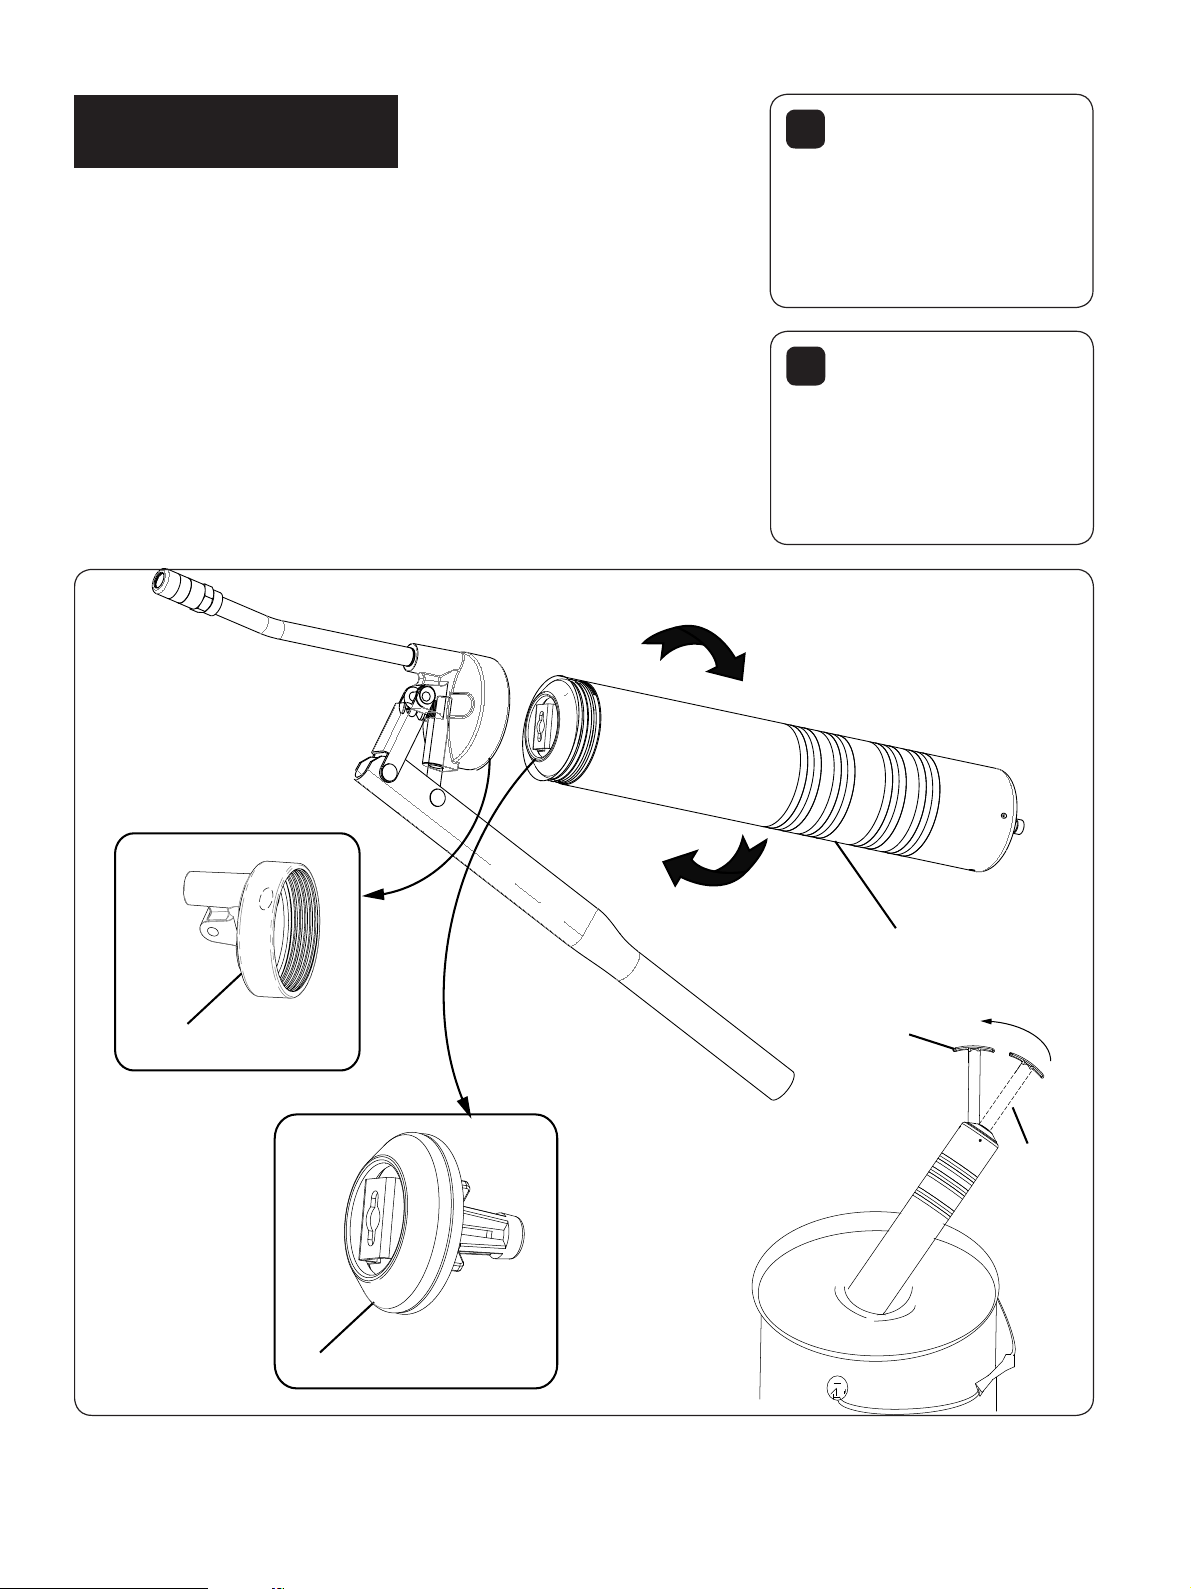
INSTALL CARTRIDGE
4 After lubricating turn coupler (1) at a
slight angle to release grip of the
coupler jaws from the fitting.
!
Notice
Failure to clean and inspect grease gun
will cause it to lose prime.
Air pockets in cartridge will cause lever
gun to lose prime.
1 While holding grease gun container
tube (6), loosen grease gun head (10)
two turns.
8
Large cap
11 Turn T-handle (8) 90° and push into
container tube (6)
5
Grease cartridge
Pull tab
WARNING
Do not over pressurize grease gun.
Extreme pressure may cause nozzle
extension to burst.
Use only identical part nozzle extension replacement. See Service Parts list
on page 6.
Keep hands clear of the extension
during operation of the grease gun.
Grease gun can develop high pressure
up to 10,000 psi (689 bar). Use safety
glasses and gloves for protection during
operation.
Failure to comply with this warning
may result in death or serious injury.
2 Pull T-handle (8) to extend follower rod
(5) fully and slide into slot.
3 Unscrew container tube (6) from
grease gun head (10).
4 Remove empty grease cartridge (if
present) from container tube (6).
5 Remove large cap from top end of new
grease cartridge.
6 Insert new grease cartridge top end
first into container tube (6).
7 Remove pull tab from bottom end of
new grease cartridge.
8 Screw container tube (6) back onto
grease gun head (10) and tighten.
9 Pull lever handle (3) away from
container tube (6).
10 Pull back and remove follower rod (5)
from slot.
6
12 Loosen grease gun head (10) two turns
to expel air and retighten.
Notice
!
If grease does not come out of
coupler (1) after ten strokes of lever
handle (3), refer to Expel Air Pockets
section on page 5.
3
FILL FROM A BULK
LUBRICANT CONTAINER
1 While holding grease gun container
tube (6), loosen grease gun head (10)
two turns.
2 Pull T-handle (8) to extend follower rod
(5) fully and slide into slot.
3 Unscrew container tube (6) from
grease gun head (10).
4 Remove empty cartridge (if present)
from container tube (6).
5 Pull T-handle (8) back and remove
follower rod (5) from slot.
6 Pack lubricant into cavity of the grease
gun head (10) and onto surface of the
follower assembly (4).
7 Insert the open end of the container
tube (6) into lubricant.
8 Pull T-handle (8) back while pushing
container tube (6) deeper into lubricant
to prevent air pockets from being
pulled into container tube (6).
9 Pull T-handle (8) to extend follower rod
(5) fully and slide into slot.
10 Thread grease gun head (10) onto filled
container tube (6).
11 Pull lever handle (3) away from
container tube (6).
12 Pull T-handle (8) back and remove
follower rod (5) from slot.
13 Turn T-handle (8) 90° and push into
container tube (6)
14 Loosen grease gun head (10) two turns
to expel air and retighten.
Notice
!
Failure to clean and inspect
grease gun will cause it to lose prime.
Air pockets in cartridge will cause lever
gun to lose prime.
Notice
!
If grease does not come out of
coupler (1) after ten strokes of lever
handle (3), refer to Expel Air Pockets
section on page 6.
10
6
8
5
4
4
 Loading...