

Craftsman 33063, 33069 Operator's Manual

perator's
I:RRFrSMRN°
LAWN TRACTOR
50-iNCH MULCH KiT
Model No. 33063
iMPORTANT:
Read and follow all Safety
Rules and instructions before
operating this equipment,
Sears Brands Management Corporation, Hoffman Estates, IL 60179 U.S.A.
Visit our website: www.craftsman.com FormNo.769-05779
For answers to your questions about
this product, Call:
1-800-659-5917
CraftsmanTractorHelpLine
5am = 5 pro, Mort =Sat
(April19,2010)
Model33063mulchkitisdesignedforusewithselect50-inchthree-
bladecuttingdecks.Refertoyourtractor'sOperator'sManualto
assurecompatibility
CARTON CONTENTS
Beforebeginninginstallation,removeallpartsfromthecartontomake
sureeverythingispresent.Cartoncontentsarelistedbelowandshown
in Fig.1-1.Partnumbersareshowninparentheses.
o
OneDeckMulchPlug(731-04651)
o
ThreeMulchingBlades(742-040530)
\
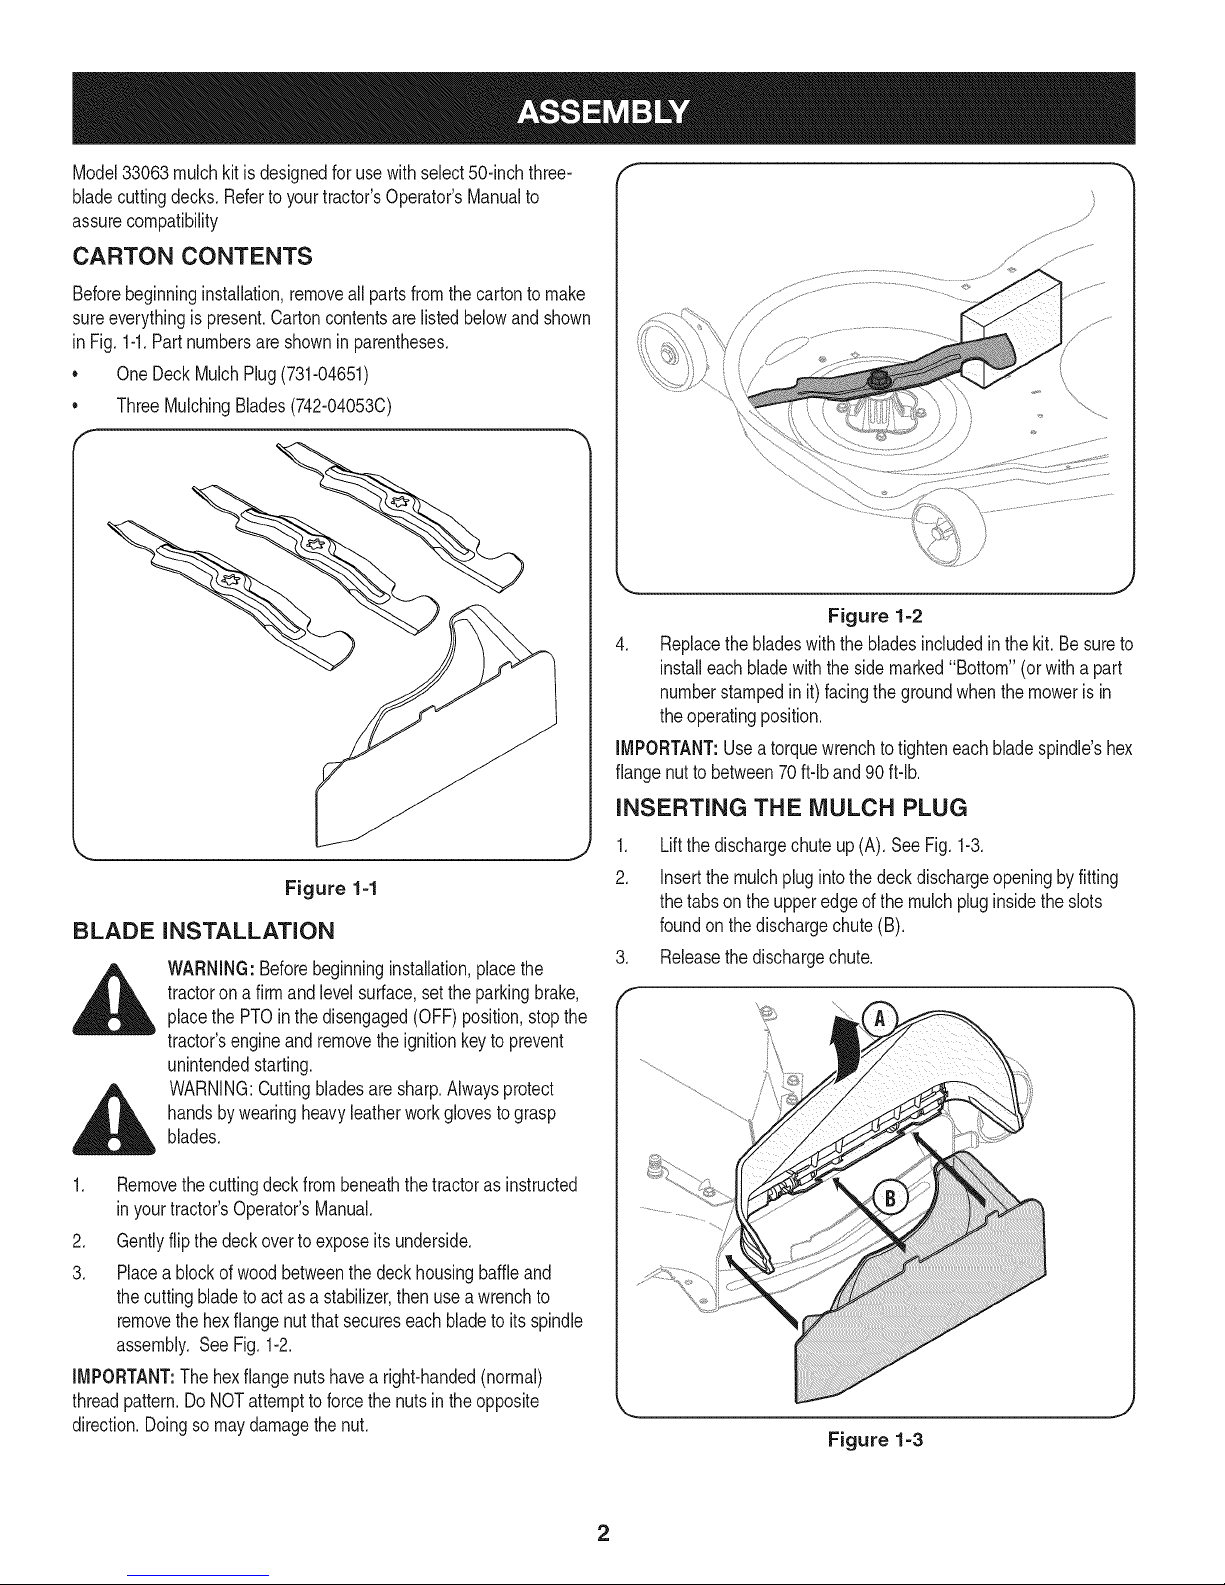
Figure 1=2
4. Replacethebladeswiththebladesincludedinthekit.Besureto
installeachbladewiththeside marked"Bottom"(orwitha part
numberstampedinit) facingthe groundwhenthemoweris in
theoperatingposition.
IMPORTANT:Useatorquewrenchtotighteneachbladespindle'shex
flangenut tobetween70ft-lband90if-lb.
INSERTING THE MULCH PLUG
Figure 1=1
BLADE INSTALLATION
WARNING:Beforebeginninginstallation,placethe
tractoronafirmand levelsurface,setthe parkingbrake,
placethe PTOinthedisengaged(OFF)position,stopthe
tractor'sengineandremovethe ignitionkeytoprevent
unintendedstarting.
WARNING:Cuttingbladesaresharp.Alwaysprotect
handsbywearingheavyleatherworkglovestograsp
blades.
1. Removethecuttingdeckfrombeneaththetractorasinstructed
inyourtractor'sOperator'sManual.
2. Gentlyflip thedeckovertoexposeits underside.
3. Placea blockof wood betweenthedeckhousingbaffleand
thecuttingbladetoactasa stabilizer,thenuseawrenchto
removethehexflange nutthatsecureseachbladeto its spindle
assembly.See Fig.1-2.
IMPORTANT:Thehexflangenutshavea right-handed(normal)
threadpattern.DoNOTattempttoforcethenutsin theopposite
direction.Doingsomaydamagethe nut.
1. Liftthedischargechuteup(A).SeeFig.1-3.
2. Insertthemulchplugintothedeckdischargeopeningbyfitting
thetabsontheupperedgeofthe mulchpluginsidetheslots
foundon thedischargechute(B).
3. Releasethedischargechute.
Figure 1=3
2
 Loading...