

Craftsman 320.48291 User Manual
Owner’s Manual
Palm Grip LASER LEVEL
with Laser Trac®
Model No. 320.48291
CAUTION! Before using this
product, read this manual and
follow all its Safety Rules
and Operating Instructions.
Sears Brands Management Corporation
www.craftsfnan.cotn
» Safety
» Operation
“ Magstlc®
0 Maintenance

TABLE OF CONTENTS
Warranty
Safety Instruction
Description
Operation Instructions
Applications
Maintenance
Troubleshooting
Parts List
Page 2
Page 3
Page 4
Page 6
Page 11
Page 14
Page 15
Page 15
ONE YEAR FULL WARRANTY ON CRAFTSMAN* PRODUCT
If this Craftsman product fails due to a defect in material or workmanship
within one year from the date of purchase, RETURN IT TO THE
NEAREST SEARS STORE OR OTHER CRAFTSMAN OUTLET IN THE
UNITED STATES FOR FREE REPLACEMENT.
This warranty does not include expendable parts such as lamps,
batteries, bits or blades.
If this Craftsman product is used for commercial or rental purposes,
this warranty applies for only 90 days from the date of purchase.
This warranty gives you specific legal rights, and you may also have
other rights, which vary from state to state.
Sears, Roebuck and Co., Hoffman Estates, IL 60179
Contents And Accessories
Palm Grip Laser Level with All-Position Leveling Base, Belt Carrying Case
6-pieces of Magstic® and Operator's Manual.
SAVE THESE INSTRUCTIONS! READ ALL INSTRUCTIONS!
<18291 ManuaLRevised_06C90T
Page 2
^FETY INSTRUCTIONS
A WARNING BE SURE to read and understand all instruction in this manual
before using this Laser Level. Failure to follow all instructions may result in
hazardous radiation exposure, electric shock, and/or bodily injury.
A CAUTION The use of optical instrument with this product will increase
eye hazard. Use of controls or adjustments or performance of procedures
other than those specified herein, may result in hazardous laser radiation
exposure.
IMPORTANT: The following labels are on your
unit. They indicate where the laser light is emit
ted. ALWAYS BE AWARE of their location when
L AVOfD EXPOfiUftE'
X Ln*r b
S «mlltnf ihrouth
I Dtb
using the laser tool. ALWAYS MAKE SURE that
any bystanders in the vicinity of use are made
aware of the dangers of looking directly into the
laser.
WARNING! LASER LIGHT. LASER RADIATION,
Avoid Direct Eye Exposure. Do Not Stare into
Fan Beam.
1. DO NOT remove or deface any product labels Removing product labels
increases the risk of exposure to laser radiation
2. DO NOT stare directly at the laser fan beam or project the laser fan beam
directly into the eyes of others. Serious eye injury could result.
3. DO NOT place the too! in a position that may cause anyone to stare into the
laser fan beam intentionally or unintentionally. Serious eye injury could result,
4. DO NOT use any magnifying optical tools such as, but not limited to tele
scopes or transits to view the laser fan beam. Serious eye Injury coufd result,
5. DO NOT operate the tool around children or allow children to operate the
tool. Serious eye injury could result.
6. ALWAYS turn the tool off when not in use. Leaving the tool on increases the
risk of someone inadvertently staring into the laser fan beam
7. DO NOT operate tool In combustible areas such as in the presence of
flammable liquids, gases or dust,
8. When using any of the base plates. ALWAYS check to be sure that the tool
is securely mounted on the base. Damage to the tool and/or serious injury
to the user could result if the tool falls.
9. ALWAYS use onty the accessories that are sold by Sears for use with this
product. Use of accessories that have been designed for use with other laser
tools could result in serious injury.
10, DO NOT use this tool for any purpose other than those outlined in this
manual. This could result in serious injury.
«18291 MamaLRevisetl 06C907
Page 3
SAFETY INSTRiCTIONS
11, DO NOT leave this tool on unattended.
12, When using the Magstic adhesive material for mounting the tool to a smooth
surface, ALWAYS make sure to place the "tool-side" of the adhesive to the
tool first and then position the tool on the wall in the desired location. The
Magstic material is intended for temporary hands-free use. Do not leave the
tool mounted to the wall using Magstic for extended periods of time. The tool
may fall from the wall resulting in damage to the tool.
13, Magstic is designed for temporary use on smooth, non-porous wall surfaces.
DO NOT use Magstic on porous, heavily textured or wall-papered surfaces.
The tool may fall from the wall resulting in damage to the tool.
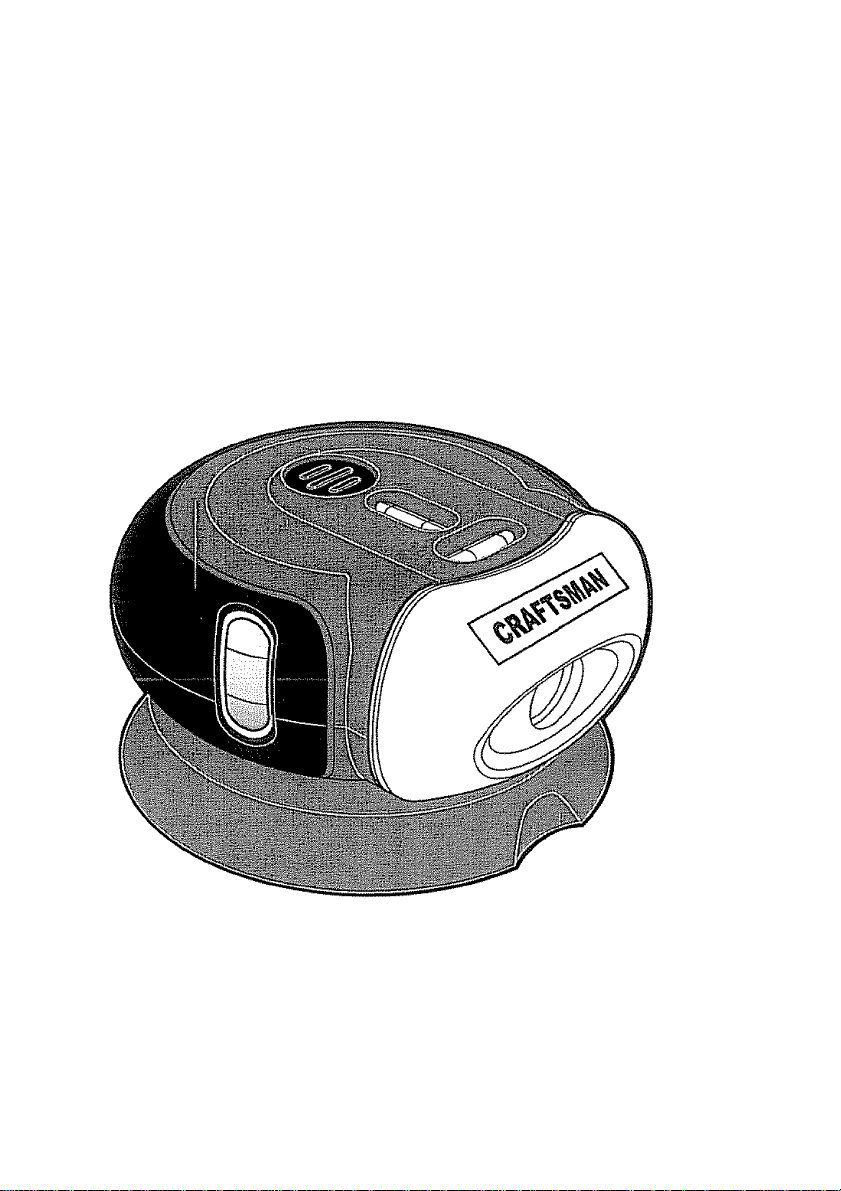
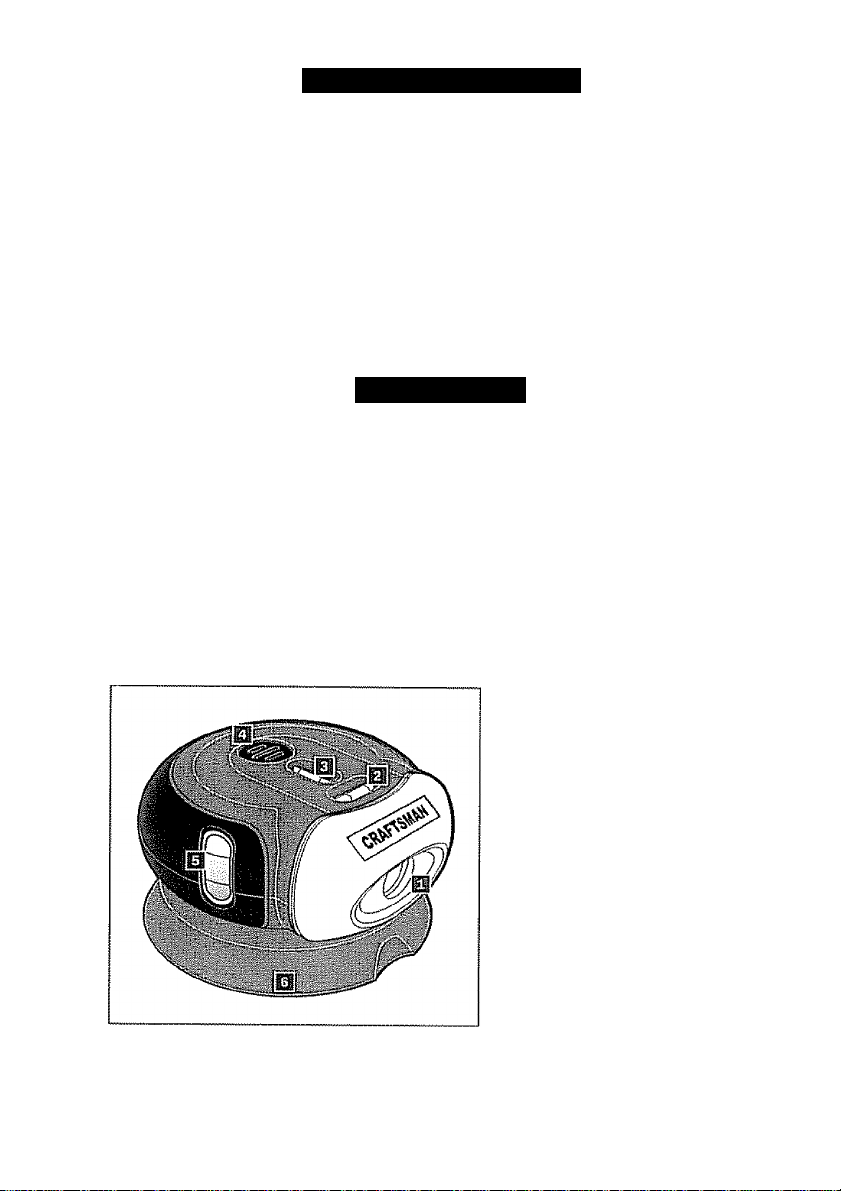
DESCRIPTION
Know Your Palm Grip Laser Level {See Fig,1)
Your Craftsman Palm Grip Laser Level is a highly vereatile laser tool that enhanc
es the traditional pencil, carpenter's mark, and chalk (me. It can be hand-held,
magnetically mounted, Magstic® mounted to a smooth wall surface or leveled on
a horizontal surface or tripod stand and provides a laser guide line on your work
ing area. This marking and leveling toot is easy to use in many applications from
simple home decorating projects to professionally installed cabinets, counter
tops, hand rails, banisters, etc. The Palm Grip Laser Level is not calibrated as a
measuring device and should not be used as such. It will give a precise reference
mark when used as a hand-held, wall mounted tool, or tripod mounted tool.
Fig. 1
i}8291 Manual_RevlEed„06-OS07
1. Laser Aperture; Laser tine
projected from here.
2, X-Vlal: Used for leveling the
Palm Grip Laser Level.
3. Y“Vial: Used for leveling the
Palm Grip Laser Level.
4, Laser Push Button: Turn
on/off the laser light.
5. Z~Vial: Used for leveling the
Palm Grip Laser Level when
laser level is in vertical posi
tion only.
6, All-Position Leveling Base:
leveling and supporting base
of Palm Grip Laser Level
DESCRIPTION
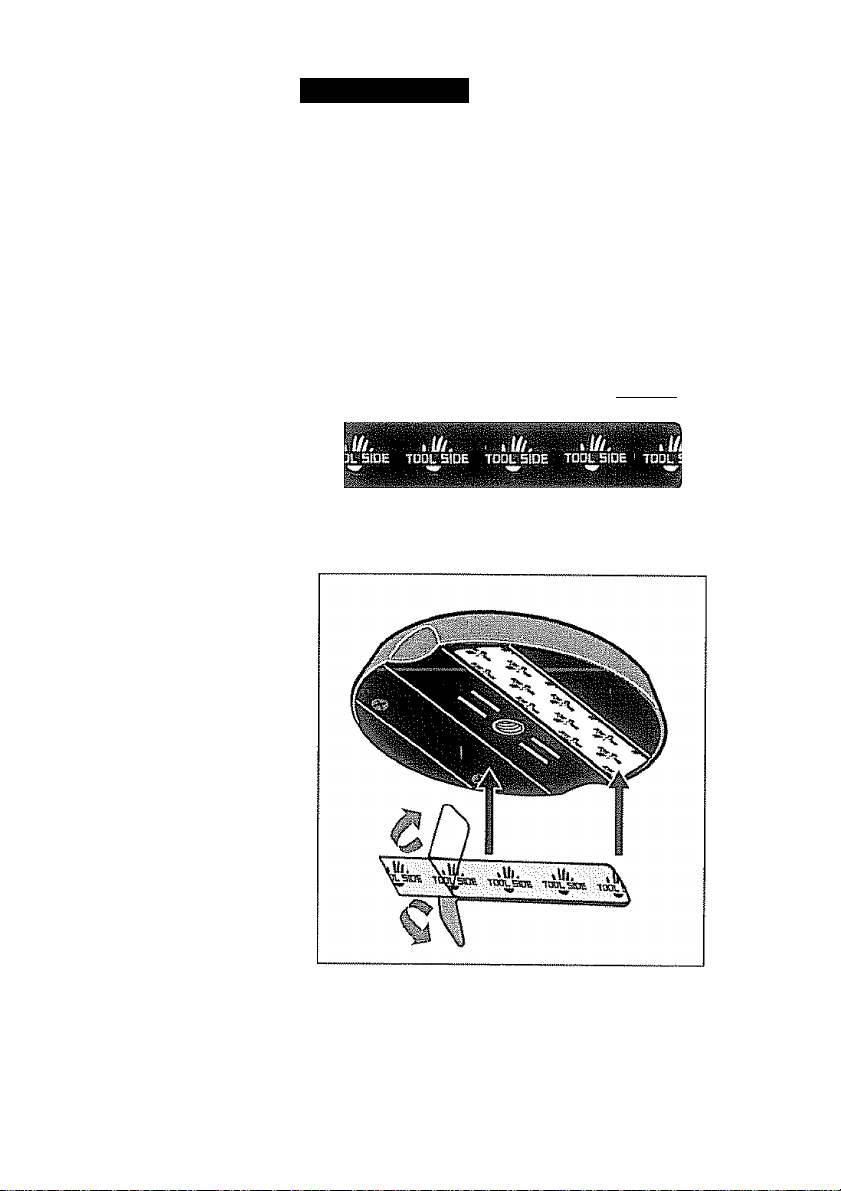
NEWl Magstic Non-Marring Adhesive Strips, (see Fig. 2)
Magstic is an innovative technology that is washable and reusable.. To use,
remove the “RED” tab (Tool Side) and apply the Magstic adhesive strip to the
underside of the tool's base, Remove the "GREEN" tab (Wall Side) and press
the tool firmly against the surface in the desired location. After leveling, carefully
remove the tool and base from the surface . Replace the green plastic tab on the
wall side of the Magstic for storage. The Magstic adhesive strips should remain
on the base of the tool. Once
Magstic is removed from the
tools base, it will no longer be
usable,
To clean the wall side of the
*U.OTE WAÌ4.IHIÌ! WAtLSEPE a.'RttSBE \
■' lift, - ,1/1. ’ ,W. ,Ui\
WAO.SIOE yAÌ.Ì.Si3e iSAU-SH
,1/1. ~ ,1/1. ,Ul. ■" ,Ui.
lAtLSOe WALLSPOE 1
—dt——dll -,1T—Jit________r
.....
,i/J
Magstic adhesive, wipe a
damp cloth across each strip,.
Once the wail side adhesive
has become non-usable,
replace with fresh adhesive
strips.
Fig, 2
Placing Magstic on the Base
of the Palm Grip Laser Level
(see Fig. 3)
For best adhesion, place the
tool side of the adhesive on
the bottom of the base of the
tool first. Then position the
tool on the smooth wall or
surface in the desired loca
tion., The too! can then be
leveled on the base for the
desired angle.
A CAUTION Remove the
Magstic from the wall after
use. Place the “wall-side"
protective tab back on the
adhesive material to help
keep it clean. If the Magstic ^9 3
material is soiled during use,
it can be cleaned with a damp cloth, Magstic is not intended to be used
once It has been removed from the tool. Once removed from the tool, the
strips will not be usable. Replace with new Magstic strips.
<182S1 ManusLRevlsed_060907
Pages
 Loading...