

Page 1
Operator’s Manual
CMFTSMnr
evolv
3/8” Keyless Drill
Model No. 320.17217
A WARNING: To reduce the risk of
injury, the user must read and
understand the Operator’s Manual
before using this product.
Sears Brands Management Corporation
www.craftsman.com
I US
• SAFETY
• ASSEMBLY
• DESCRIPTION
• OPERATION
• MAINTENANCE
Page 2

TABLE OF CONTENTS
Warranty Page 2
Safety Symbols Page 3
Safety Instructions Pages 4-7
Unpacking Pages 8
Description Pages 8-10
Operation Pages 10-13
Maintenance Page 14
Troubleshooting Page 15
Parts List Pages 16-17
Sears Repair Parts Phone Number Back Cover
CRAFTSMAN® EVOLV FULL WARRANTY
If this Craftsman® Evolv product fails due to a defect in material or
workmanship within one year from the date of purchase, return it to any
Sears store or other Craftsman® Evolv outlet in the United States for free
replacement.
This warranty is void if this product is ever used for commercial or rental
purposes.
This warranty gives you specific legal rights, and you may also have other
rights which vary from state to state.
Sears, Roebuck and Co., Hoffman Estates, IL 60179
A WARNING: Some dust created by using power tools contains chemicals
known to the state of California to cause cancer and birth defects or other
reproductive harm.
SAVE THESE INSTRUCIONS!
READ ALL INSTRUCTIONS!
17217 ManuaLRevised_09-0708 Page 2
Page 3

SAFETY SYMBOLS
The purpose of safety symbols is to attract your attention to possible dangers.
The safety symbols and the explanations with them deserve your careful
attention and understanding. The symbol warnings do not, by themselves,
eliminate any danger. The instructions and warnings they give are no substitutes
for proper accident prevention measures.
A WARNING: Be sure to read and understand all safety instructions in this
manual, including all safety alert symbols, such as “DANGER, ” “WARNING,”
and “CAUTION,” before using this keyless drill. Failure to following all
instructions listed below may result in electric shock, fire and/or serious personal
injury.
SYMBOL MBANNING
A SAFETY ALERT SYMBOL: Indicates DANGER, WARNING, OR CAUTION.
May be used in conjunction with other symbols or pictographs.
A DANGER: Failure to obey this safety warning will result in death or serious
injury to yourself or to others. Always follow the safety precautions to reduce the
risk of fire, electric shock, and personal injury.
A WARNING: Failure to obey this safety warning can result in death or serious
injury to yourself or to others. Always follow the safety precautions to reduce the
risk of fire, electric shock, and personal injury.
A CAUTION: Failure to obey this safety warning may result in death or serious
injury to yourself or to others. Always follow the safety precautions to reduce the
risk of fire, electric, shock and personal injury.
DAMAGE PREVENTION AND INFORMATION MESSAGES
These inform user of important information and/or instructions that could lead to
equipment or other property damage if not followed. Each message is preceded
by the word “NOTE” as in the example below.
NOTE: Equipment and/or property damage may result if these instructions are
not followed.
The operation of any power tool can result in foreign
objects being thrown into your eyes, which can result
in severe eye damage. Before beginning power tool
operation, always wear safety goggles or safety glasses
with side shields and a full-face shield when needed.
We recommend a Wide Vision Safety Mask for use over
eyeglasses or standard safety glasses with side shields,
available at Sears Stores or other Craftsman outlets.
Always use eye protection that is marked to comply with
ANSI Z87.1
17217 ManuaLRevised_09-0708 Page 3
Page 4
SAFETY INSTRUCTIONS
A WARNING: Be sure to read and understand all Instructions in this manual
before using the drill. Failure to follow all Instructions may result in hazardous
radiation exposure, electric shock, fire, and/or serious personal injury.
A WARNING: Do not attempt to operate this tool until you have thoroughly
read all Instructions, safety rules, and warnings. Failure to comply with them can
result in fire, electric shock, or serious personal injury. Save the manual and refer
to it frequently.
GENERAL SAETY PRECAUTIONS
WORK AREA SAFETY
• Keep work area clean and well lit. Cluttered or dark areas invite accidents.
• Do not operate power tools in explosive atmospheres, such as in the
presence of flammable liquids, gases or dust. Power tools create sparks
which may ignite the dust or fumes.
• Keep children and bystanders away while operating a power tool.
Distractions cause you to lose control.
ELECTRICAL SAFETY
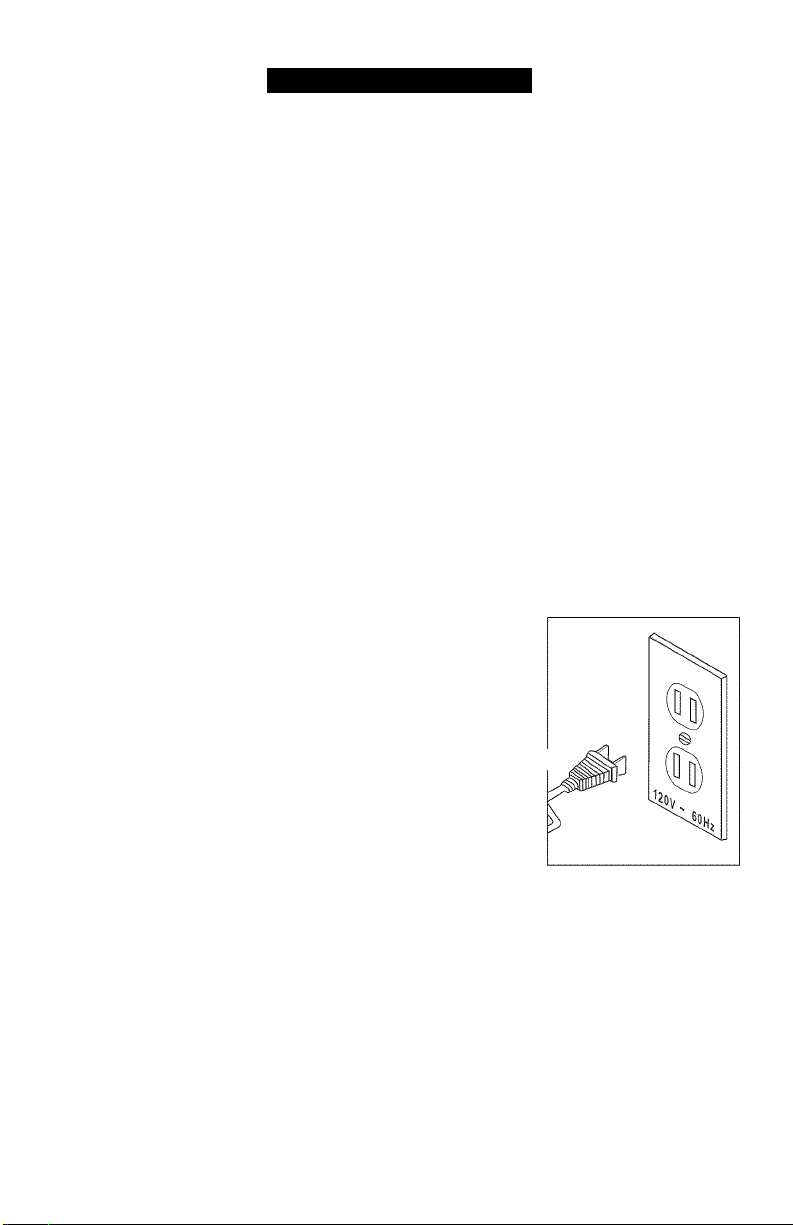
• Double insulated tools are equipped with a polarized plug (one blade
is wider than the other.) This plug will fit in a
polarized outlet only one way. If the plug does not
fit fully in the outlet, reverse the plug. If it still does
not fit, contact a qualified electrician to install a
polarized outlet. Do not change the plug in any
way. Double Insulation eliminates the need for the
three wire grounded power cord and grounded power
supply system.
• Avoid body contact with grounded surfaces such
as pipes, radiators, ranges and refrigerators. There
is an increased risk of electric shock if your body is
grounded.
• Don’t expose power tools to rain or wet conditions. Water entering a
power tool will increase the risk of electric shock.
• Do not abuse the cord. Never use the cord to carry the tools or pull
the plug from an outlet. Keep cord away from heat, oil, sharp edges or
moving parts. Replace damaged cords immediately. Damaged cords
increase the risk of electric shock.
• When operating a power tool outside, use an outdoor extension cord
marked “W-A” or “W”. These cords are rated for outdoor use and reduce
the risk of electric shock. The following table shows the correct size to
use, depending on cord length and nameplate amperage rating of the tool.
17217 ManuaLRevised_09-0708 Page 4
Page 5

When in doubt, use the next heavier gauge. Always use UL and CSA listed
extension cords.
Recommended sizes of extension cords
Ampere Rating
Volts Total Length of Cord in feet
120v 25ft 50ft 100ft 150ft
More Than Not More Than
0 6 18 16 16 14
6 10 18 16 14 12
AWG
10 12 16 16 14 12
12 16 14 12 Not Recommended
PERSONAL SAFETY
• Stay alert, watch what you are doing and use common sense when
operating a power tool. Do not use tool while tired or under the
influence of drugs, alcohol, or medication. A moment of inattention while
operating power tools may result in serious personal injury.
• Dress properly. Do not wear loose clothing or jewelry. Contain long hair.
Keep your hair, clothing, and gloves away from moving parts. Loose
clothes, jewelry, or long hair can be caught in moving parts.
• Avoid accidental starting. Be sure switch is off before plugging in.
Carrying tools with your finger on the switch or plugging in tools that have
the switch on invites accidents.
• Remove adjusting keys or wrenches before turning the tool on. A wrench
or a key that is left attached to a rotating part of the tool may result in
personal injury.
• Do not overreach. Keep proper footing and balance at all times. Proper
footing and balance enables better control of the tool in unexpected
situations.
• Use safety equipment. Always wear eye protection. Dust mask, non-skid
safety shoes, hard hat, or hearing protection must be used for appropriate
conditions.
• Before connecting the tool to a power source (receptacle, outlet, etc.),
be sure voltage supplied is the same as that specified on the nameplate
of the tool. A power source with voltage greater than that specified for the
tool can result in serious injury to the user - as well as damage to the tool.
TOOL USE AND CARE
• Use clamps or other practical way to secure and support the workpiece
to a stable platform. Holding the work by hand or against your body is
17217 ManuaLRevised_09-0708 Page 5
Page 6

unstable and may lead to loss of control.
• Do not force tool. Use the correct tool for your application. The correct
tool will do the job better and more safely at the rate for which is designed.
• Do not use tool if the switch does not turn it on or off. Any tool that
cannot be controlled with the switch Is dangerous and must be repaired.
• Disconnect the plug from the power source before making any
adjustments, changing accessories, or storing the tool. Such preventive
safety measures reduce the risk of starting the tool accidentally.
• Store idle tools out of reach of children and other untrained persons.
Tools are dangerous in the hands of untrained users.
• Maintain tools with care. Keep cutting tools sharp and clean. Properly
maintained tools, with sharp cutting edges are less likely to bind and are
easier to control.
• Check for misalignment or binding of moving parts, breakage of parts,
and any other condition that may affect the tools operation. If damaged,
have the tool serviced before using. Many accidents are caused by poorly
maintained tools.
• Use only accessories that are recommended by the manufacturer for
your model. Accessories that may be suitable for one tool, may become
hazardous when used on another tool.
• Do not alter or misuse tool. These tools are precision built. Any alteration or
modification not specified is misuse and may result in a dangerous condition.
SERVICE
• Tool service must be performed only by qualified repair personnel.
Service or maintenance performed by unqualified personnel could result in a
risk of injury.
• When servicing a tool, use only identical replacement parts. Follow
instructions in the Maintenance section of this manual. Use of
unauthorized parts or failure to follow Maintenance instructions may create a
risk of shock or injury.
17217 ManuaLRevised_09-0708 Page 6
Page 7

SAFETY SYMBOLS FOR YOUR TOOL
The label on your tool may Include the following symbols.
V...............................................................Volts
A...............................................................Amps
Hz.............................................................Hertz
W..............................................................Watts
min
...........................................................
Minutes
...........................................................Alternating Current
3-33
.............................................................
Direct Current
no ............................................................No-load Speed
m..........................................
.../min
.......................................................
...................
Class II construction
Revolutions or Strokes per minute
A...............................................................Indicates danger, warning caution.
It means attention! Your safety is
involved.
SPECIFIC SAFETY RULES FOR DRILL
A DANGER: Keep hands away from drilling area and drill bit. Do not reach
under the material being drilled.
Always keep your body positioned to either side of the drill, but not in line with
the drill bit.
• Do not reach underneath the work.
• Always clamp workpiece before drilling. Never hold a workpiece in your hand
or legs. Small or thin material may flex or vibrate with the drill bit, causing
loss of control.
• Never touch the drill bit after use. It may be hot after prolonged use.
• Always hold tool by insulated gripping surfaces when performing an
operation where the tool may contact hidden wiring or its own cord. Contact
with a “live” wire will make the exposed metal parts of the tool “live” and
shock the operator.
• Always use drill bits that are of a correct size and shape. Drill bits that do not
fit the chuck jaws of the electric drill will perform erratically and will cause
loss of control.
• Always be sure that all chuck adjustments have been made and that the drill
bit is fastened tightly before drilling. Loose drill can cause the tool to slip, and
loss of control may result.
A WARNING: To reduce the risk of injury, user must read instruction manual.
17217 ManuaLRevised_09-0708 Page 7
Page 8

UNPACKING
A. WARNING: Your drill should never be connected to the power source
when you are assembling parts, making adjustments, installing or removing
bits, cleaning it, or when it is not in use. Disconnecting the drill will prevent
accidental starting, which could cause serious personal injury.
When unpacking the box, do not discard any packing materials until all of the
contents are accounted for:
1. Carefully lift the drill out of the carton and place it on a stable, flat surface.
2. Open the color box to locate the following:
• 1 drill
• Operator’s manual
3. Inspect the items carefully to make sure that no breakage or damage has
occurred during shipping. If any of the items mentioned is missing, (refer
to “PARTS LIST” illustration), return the drill to your nearest Sears store or
Craftsman outlet to have the drill replaced.Carefully remove the tool and any
accessories from the box. Make sure that all items listed in the packing list
are included.
A WARNING: If any part is broken or missing, do not attempt to assemble the
drill, plug in the power cord, or operate the drill until the broken or missing part
has been replaced. Failure to do so could result in possible serious injury.
CARTON CONTENTS/LOOSE PARTS (Fig. 1)
Fig. 1
Drill 1
DESCRIPTION
KNOW YOUR DRILL (Fig.2)
Before attempting to use this drill, familiarize yourself with all its operating
features and safety requirements.
A WARNING: Do not allow familiarity with your drill to make you careless.
Remember that a careless fraction of a second is sufficient to inflict severe
injury.
17217 ManuaLRevised_09-0708 Page 8
Page 9

Keyless chuck
Forward/reverse
switch
PRODUCT SPECIFICATIONS
Motor 120V-60HZ, 5.2A
No Load Speed 0-2500 (RPM)
Chuck 3/8” (10mm)
Cord length 6’
Weight 3.1 lbs
A. WARNING: The safe use of this product requires an understanding of the
information on the tool and in this operator’s manual as well as knowledge of the
project you are attempting. Before use of this product, familiarize yourself with
all operating features and safety rules.
VARIABLE-SPEEDTRIGGER SWITCH
To start the drill, press the trigger switch. To stop the drill, release the trigger
switch.
The variable-speed trigger switch delivers higher speed with increased trigger
pressure and lower speed with decreased trigger pressure.
LOCK-ON BUTTON
Squeeze the trigger switch and depress the “Lock-on” button.
FORWARD/REVERSE SWITCH
To use the drill in the forward position, push the switch to the left. To use the drill
in the reverse position, push the switch to the right.
KEYLESS CHUCK
For quick and easy bit changes.
17217 ManuaLRevised_09-0708 Page 9
Page 10

CORD GUARD
Protects the cord from bending to prevent damage.
BUILT-IN BELT CLIP
Conveniently hooks onto your tool belt for carrying the drill.
NOTE: Make sure the plug has been removed from power supply and drill bits
have been removed from drill. Your drill comes equipped with variable speeds,
which can be adjusted by using the 2-finger trigger switch.
• Low-speed range for drilling in hard materials such as steel
• High-speed range for drilling in soft materials
A WARNING: Disconnect the tool from the power supply before installing or
removing a drill bit.
A CAUTION: To prevent gear damage, always allow the chuck to come to a
complete stop before changing the direction of rotation.
OPERATION
A WARNING: Always wear safety goggles or safety glasses with side shields
when operating your electric drill. Failure to do so could result in foreign objects
being thrown into your eyes resulting in possible serious eye damage.
A WARNING: Always wear an appropriate dust mask and hearing protection
when using your electric drill.
A WARNING: Clamp or otherwise secure your workpiece to prevent it from
moving under the drill while being drilled. An unsecured workpiece could be
thrown toward the operator causing injury.
FORWARD/REVERSE SWITCH (Fig. 3)
Your drill is reversible. The
forward/reverse switch is
conveniently mounted above
the trigger switch.
To make the drill rotate
clockwise (for drilling), push the
forward/reverse switch to the
left.
To make the drill rotate
counterclockwise to remove
screws, push the forward/
reverse switch to the right.
Note: Never change position of
17217 ManuaLRevised_09-0708 Page 10
Page 11

the forward/reverse switch while the chuck is turning.
A WARNING: Always disconnect your drill from the power source when
replacing drill bits, tools, cleaning or when it is not in use. Disconnecting the drill
will prevent accidental starting that could cause serious personal injury.
INSTALLING DRILL BITS AND ACCESSORIES (Fig.4)
1. Unplug your drill.
A WARNING: Failure to
unplug the drill could result
in accidental starting causing
possible serious personal injury.
2. With one hand on the rear
of the chuck, use the other
hand to rotate the front
sleeve of the chuck to open
the chuck jaws so that the
opening is slightly larger
than the shaft of the drill bit
you intend to use. Raise the
front of your drill slightly to
prevent the drill bit you will
insert from falling out of the chuck jaws.
3. Insert the drill bit into the chuck jaws as far as it can go.
4. Rotate the chuck clockwise (when the chuck is facing toward you) until the
drill bit is held firmly in place by the chuck jaws.
A WARNING: The drill bit must be properly inserted, with all three chuck jaws
holding the bit centered in the chuck. Failure to properly insert the drill bit could
cause the drill bit to be thrown from the chuck during operation, resulting in
possibly serious injury or damage to the chuck.
A WARNING: Always disconnect your drill from the power source when
replacing drill bits or tools, cleaning it, or when not in use. Disconnecting the drill
will prevent accidental starting that could cause serious personal injury.
REMOVING DRILL BITS AND ACCESSORIES (Fig. 4)
1. Unplug your drill.
A WARNING: Failure to unplug the drill could result in accidental starting
causing possibly serious personal injury.
2. With one hand on the rear of the chuck, use another hand to rotate the front
sleeve of chuck to open the chuck jaws to release the drill bit.
3. Remove the drill bit.
17217 ManuaLRevised_09-0708 Page 11
Page 12

A. WARNING: Every time you use the drill, be sure to verify the following:
• Chuck jaws are tight and securing the drill bit firmly.
• Drill power cord is not damaged.
• Drill bit is the correct type for the material being drilled.
• Drill bit is in good condition, properly installed and securely tightened.
• Safety glasses and dust mask are being worn.
Failure to follow these safety rules can greatly increase your chances of injury!
GENERAL DRILLING TIPS (Fig.5)
A WARNING: Keep hands
and fingers away from the area
between the motor housing
and chuck. Do not reach
underneath the workpiece while
drill is operating.
You can use your drill with
various materials, such as
soft and hard wood, plywood,
plastics, metals, ceramics,
laminates and masonry. Be sure
your drill bit is specified for use
with the respective materials.
You can also use your drill with
a variety of accessories, such as buffing wheels, sanding drums, wire wheels,
hole saws and other accessories specified for use with electric power drills.
When drilling in smooth, hard surfaces (such as metal and hardwoods), use
a center punch (sold separately) to mark the desired hole location. This will
prevent the drill bit from slipping off center as the hole is started. The workpiece
to be drilled should be secured in a vise or clamped to a work surface to keep it
from turning as the drill bit rotates (Fig. 5).
A CAUTION: Do not force the drill bit against the material you are drilling.
The motor may overheat and break the drill bit. If the drill bit breaks, it must be
replaced with a new drill bit.
A WARNING: Always clamp the workpiece to a stable surface. Failure to
clamp the workpiece could result in the workpiece being thrown or kicked back,
causing serious personal injury.
1. Check the drill bit to make sure it is firmly locked in the chuck jaws of the
drill.
2. Check that the forward/reverse switch is in the forward position.
3. Hold the drill firmly with both hands whenever possible. Use one hand to
17217 ManuaLRevised_09-0708 Page 12
Page 13

grasp the handle and trigger switch and the other to grasp the body of the
drill.
NOTE: Make sure that the hand placed on the body of the drill does not cover
the air vents. Covering the air vents will reduce motor cooling and possibly lead
to motor overheating.
4. Holding the drill firmly, place the point of the drill bit at the point to be drilled.
Squeeze the trigger to start the drill.
5. Move the drill bit into the workpiece, applying only enough pressure to keep
the bit cutting. Let your drill and the drill bit do the work. Do not force the drill
bit or apply sideways pressure which will elongate the hole.
A WARNING: Be prepared for drill bit binding or breakthrough. When these
situations occur, the drill bit tends to grab the workpiece and kick the drill in the
opposite direction of the drill bit rotation. If you are not prepared, the resulting
loss of control when binding or breaking through the material could result in
possibly serious injury.
When drilling metals, use light oil on the drill bit to keep it from overheating. The
oil will prolong the life of the drill bit and enhance drill bit cutting action. If the
drill bit jams in the workpiece or if the drill stalls, immediately release the trigger
switch. Remove the drill bit from the workpiece and determine the cause of the
jamming.
A WARNING: Always disconnect your drill from the power source when
replacing drill bits, tools, cleaning or when not in use. Disconnecting the drill will
prevent accidental starting that could cause serious personal injury.
17217 ManuaLRevised_09-0708 Page 13
Page 14

MAINTENANCE
A WARNING: To ensure safety and reliability, all repairs should be performed
by a qualified service technician at a Sears store or other Craftsman Evolv outlet.
A WARNING: For your safety, always turn off the switch and disconnect the
plug from the electrical outlet before performing any maintenance or cleaning.
Periodic maintenance of your drill allows for long life and trouble free operation.
A cleaning, lubrication, and maintenance schedule should be maintained.
As a common-sense and preventive maintenance practice, follow these
recommended steps:
• Inspect the bit; check the rim for wear or damage.
• Use a soft clean and damp cloth to wipe the tool housing. A mild detergent
can be used but nothing like alcohol, gasoline or other cleaning agents. Never
use caustic agents to clean plastic parts.
• Keep the ventilation slots of the motor clean to prevent overheating of the
motor. Electric tools are subject to accelerated wear and possible premature
failure when they are used to work on fiberglass boats and sports cars,
wallboard, spackling compounds or plaster. The chips and grindings from
these materials are highly abrasive to electrical tool parts, such as bearings,
brushes, commutators, etc. Consequently, it is not recommended that
this tool be used for extended work on any fiberglass material, wallboard,
spackling compound, or plaster. During any use on these materials, it is
extremely important that the tool is cleaned frequently by blowing with an air
jet.
A WARNING: Always wear safety goggles or safety glasses with side shields
during power tool operations or when blowing dust. If operation is dusty, also
wear a dust mask.
A WARNING: Keep the tool’s air vents unclogged and clean at all times.
A WARNING: Avoid using solvents when cleaning plastic parts. Most plastics
are susceptible to damage from various types of commercial solvents and may
be damaged by their use. Use clean cloths to remove dirt, dust, oil, grease, etc.
A WARNING: Do not at any time let brake fluids, gasoline, petroleum-based
products, penetrating oils, etc. to come in contact with plastic parts. Chemicals
can damage, weaken or destroy plastic which may result in serious personal
injury.
A WARNING: Water must never come into the tool.
17217 ManuaLRevised_09-0708 Page 14
Page 15

TROUBLE SHOOTING
PROBLEM CAUSE SOLUTION
The drill does not start
when trigger switch is
squeezed
Will not drill
Motor overheating
Check to be sure power
cord is connected to
power source and that
power source (outlet) is
operable
Check drill bit and chuck
jaws
Be sure cooling vents
are free from dust and
obstacles
Connect to power
source.
Confirm power source
(outlet )is operable
Replace drill bit if dull or
worn; tighten chuck jaws
to firmly secure drill bit
Clean, clear vents.
Do not cover with hand
during operation
17217 Manual_Revised_09-0708 Page 15
Page 16

PARTS LIST
3/8” Keyless Drill MODEL NUMBER 320.17217
Always mention the Model Number when ordering parts for this tool
17217 ManuaLRevised_09-0708 Page 16
Page 17

1
3860001000 Chuck 1
2 5620179000 Screw (L.H.) 1
3 3550093000 Spindle 1
4 5700015000 Ball Bearing 1
5 3520013000 Septa 2
6 3520016000 Gear 1
7 5700008000 Ball Bearing 2
8 3320036000 Left Housing 1
9 2240066000 Name Plate 1
10 3120245000 F/R Button 1
11 5610042000 Tapping Screw 9
12 2240073000 Name Plate 1
13 3320035000 Right Housing 1
14 2750119000 Rotor 1
15 2740100000 Stator 1
16 5700004000 Ball Bearing 1
17 4960015000 Carbon Brush 2
18 2800015000 Brush Holder 2
19 3700491000 Flash Board 2
2820717000 1
2820718000 1
2820720000
20
2820722000
Internal Wire ASSY 1-6
2820724000
2820726000
21 4870024000 Switch 1
22 5610023000 Tapping Screw 2
23 3700285000 Cord Anchorage 1
24 3121001000 Cord Guard 1
25 4810002000 Power Cord & Plug 1
1
1
1
1
17217 ManuaLRevised_09-0708 Page 17
Page 18

NOTE
17217 Manual_Revised_09-0708 Page 18
Page 19

NOTE
17217 Manual_Revised_09-0708 Page 19
Page 20

Get it fixed, at your home or ours!
Your Home
For expert troubleshooting and home solutions advice:
manage llOITlCi
www.managemyhome.com
For repair - in your home - of all major brand appliances,
lawn and garden equipment, or heating and cooling systems,
no matter who made it, no matter who sold it!
For the replacement parts, accessories and
owner’s manuals that you need to do-it-yourself.
For Sears professional installation of home appliances
and items like garage door openers and water heaters.
1-800-4-MY-HOME® Cai! anytime, day or night
(1-800-469-4663) (U.S.A. and Canada)
www.sears.com www.sears.ca
Our Home
For repair of carry-in items like vacuums, lawn equipment,
and electronics, call anytime for the location of the nearest
Sears Parts & Repair Service Center
1 -800-488-1222 (U.S.A.) 1 -800-469-4663 (Canada)
www.sears.com www.sears.ca
To purchase a protection agreement on a product serviced by Sears:
1-800-827-6655 (U S A.) 1-800-361-6665 (Canada)
Para pedir servicio de reparación
a domicilio, y para ordenar piezas:
1-888-SU-HOGAR®
(1-888-784-6427)
© Seare Brands, LLC
® Registered Trademark / ™ Trademark / Service Mark of Sears Brands, LLC
® Marca Registrada / ™ Marca de Fábrica / Marca de Servicio de Sears Brands, LLC
Marque de commerce / Marque déposée de Sears Brands, LLC
Au Canada pour service en français:
1-800-LE-FOYER“'=
(1-800-533-6937)
www.sears.ca
 Loading...