

Page 1
Instruction Manual
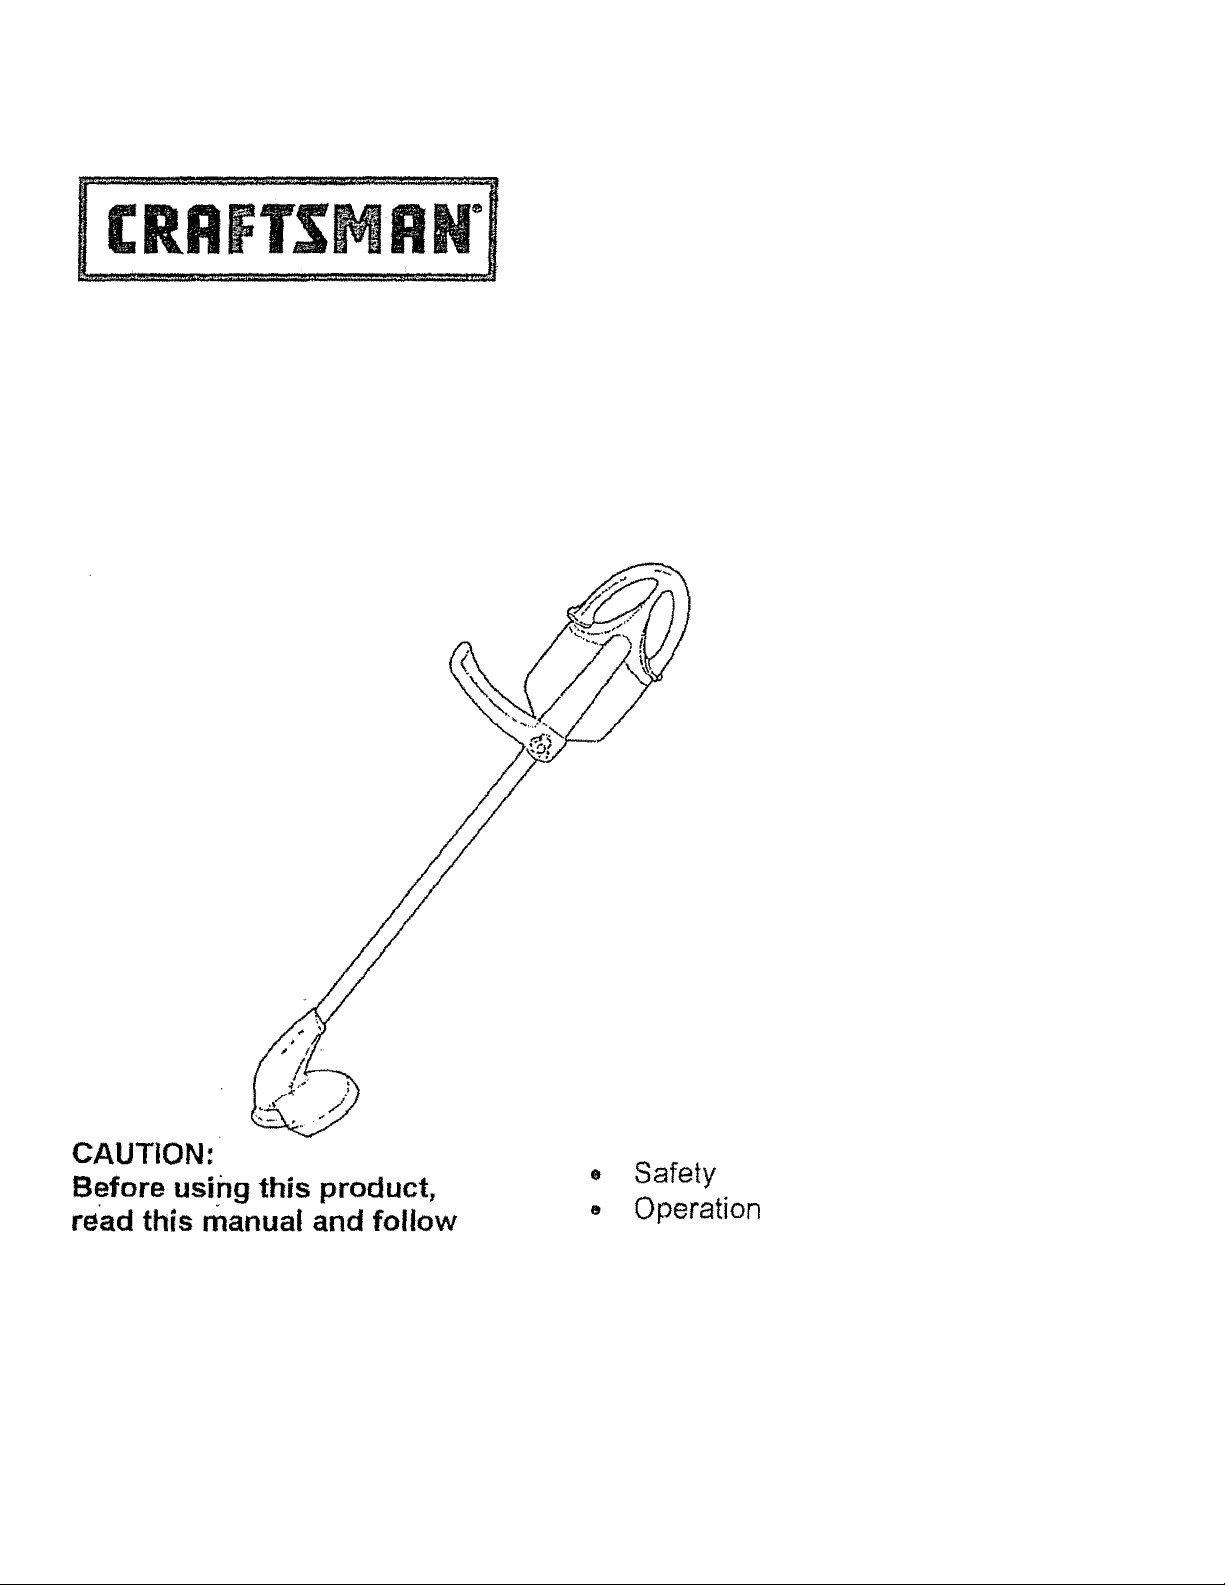
WEEDWACKER®
® Cordless Line Trimmer and Edger
® 24 Volt Power System
Model No. 240.74805
all its Safety Rules and
Operating Instructions.
Sears, Roebuck and Co., Hoffman Estates, IL 60179 U.S.A.
WWW sears,com/craftsman
Form No.
JAN 02
Maintenance
Español
Page 2

Warranty................
Safety Instructions,
Operation .
Maintenance ,,, ,,
Service
Storage
Accessories ...........
Español...
p*. f^»V, f'*'
I- *Í
...........
...............
.........
........
...............
..
Full One Year Warranty on Craftsman Weedwackei
If this Craftsman Weedwacker Cordless Line Trimmer and Edger fails due
to a defect In material or workmanship within one year from the date of
purchase, return it to your nearest Sears store or Craftsman outlet Ifi the
United States, and it will be replaced free of charge, " ■
This warranty applies only while this.Weedwacker is used in the United
States,
This warranty gives you specific legal rights, and you may also have othe
rights, which vary from state to state
Sears, Roebuck and Co., Dept. 817WA, Hoffman Estates, IL 60179
2
2
3
6
,6
6
6
7
Customer Service: 1-800-539-6455
READ ALL INSTRUCTIONS
WARNING: When using this tool, ba
sic safety precautions should always be
followed to reduce the risk of fire, elec
tric shock, and personal injury, including
the following:
To reduce risk of injury:
* Before any use, be sure everyone
using this electric product reads and
understands ail safety and operation
instructions contained in this manual
• Save these instructions and review
frequently prior to use. Store in wall
charger slot
. ATTACH LINE GUARD - Before use,
attach the line guard correctly See
instructions on how to attach
line guard in the Operation section
Failure to attach the line guard may
pose a risk of injury, may cause
motor damage and will void the
warranty
UNIT PARTIALLY CHARGED - The
Weedwacker is shipped in a partially
charged stage, so handle the unit
with care during unpacking and as
sembling of line guard.
AVOID DANGEROUS ENVIRON
MENTS and weather conditions
when using this tool.
KEEP CHILDREN AWAY - All visi
tors should be kept at a safe dis
tance from work area.
STORE IDLE UNIT INDOORS
When not in use, the unit should be
stored indoors in a dry location - out
of reach of children.
DON’T FORCE THE TOOL - It will
do the job better and with less likeli
hood of a risk of injury at the rate for
which it was designed.
Page 3

« USE RIGHT TOOL » Do not use the
tool for any job except that for which it
is intended
® WARNING: KEEP HANDS AND ALL
BODY PARTS AWAY from the line and line head The line while in moti
on can cause injury,
* DRESS PROPERLY - Do not wear
loose clothing or jewelry. They can be
caught in moving parts. Use of gloves
and substantial footwear is recom
mended when working outdoors,
Wear protective hair covering to
contain long hair and long pants to
protect from flying particles.
® DON'T OVERREACH - Maintain
proper footing and balance at all
tiroes.
« USE SAFETY GLASSES-Always
wear proper eye protection, and use
face or dust mask if operation is dusty.
» MAINTAIN UNIT WITH CARE-
Keep the unit clean for best perfor
mance and to reduce the risk of injury,
Follow instructions for service. Keep
handles dry, clean, and free from oil
and grease, , •
® UNINTENTIONAL STARTING-
Don't carry the Weedwacker while
holding the switch area: The unit is
shipped partly charged, and may start
inadvertently during assembly if not
handled properly. '
® CHECK DAMAGED PARTS -
If the Weedwacker Line Trimmer ex
periences a hard impact, check that
no parts were damaged and verify
that the unit operates properly Check
for misalignment or bending of mov
ing parts, breakage of parts, and any
other condition that may aifect opera
tion, A part that is damaged should
be properly repaired or replaced by
an authorized service center.
• STAY ALERT -Watch what you are
doing. Use common sense. Do not
operate the tool when you are tired
« DON'T GRASP MOVING LINE - Do
not attempt to remove cut materia! or
hold material to be cut when the line
is moving. Make sure the unit's switch
is off when clearing or changing line.
To reduce risk when using chaiger:
« DO NOT use charger outdoors or in
wet conditions, use inside only
o DO NOT charge the unit when the
temperature is below +40 F or above
+ 120 F It may lessen the service life
of the battery.
» This unit and its charger are des
igned to work together DO NOT
charge the Weedwacker with any
other charger and DO NOT use this
charger with any other yard too! or
appliance.
« The charger is designed to operate
on 120 volts. DO NOT attempt to
use it at any other voltage,
® Store these instructions by folding in
half and sliding into the siot in the
bjck of the wall charging rack
SAVE THESE INSTRUCTIONS
. ATTACH LINE GUARD PRIOR TO
USE - Attach the line guard to the
trimmer housing by first aligning
both of the side tabs with ihe slots in
the trimmer housing. Next, press
firmly on the rear of the guard to
secure the locking tab (no screws
necessary).
important; The line guard incorpo
rates an automatic line cut-off blade,
which keeps the cutting line trimmed
to the proper length, Remove the
protective tape from this blade be
fore first use.
w ,, , Fig. 1
}.lf!sguafd
spool
un« hosajrtl^
_ guide
CHARGE BAffER^^^^
USE - The Weedwacker does not
come frilly charged when purchased
Before using the unit, the battery
must be charged. Before charging
the battery, read safety and charging
instructions.
Page 4
° PROPER RUN TtME AND PER
FORMANCE can only be obtained
with a fully charged battery
0 CHARGE TIME - Overnight charging
of about 16 hours is sufficient to re
plenish the battery to a full charge.
Initial use, long periods of inactivity,
or storage at extreme temperatures
may require extended charge time,
® WALL CHARGE BRACKET - Before
charging the unit, make sure the
charge bracket is securely attached
to the wall, attach with screws to a
wall stud, or use #8 or larger wall an
chors
To Charge Battery;
1 Plug the charger into a 120 Volt AC
outlet
2 Place the Weedwacker into the wall
charge bracket
3 Charge for at least 16 hours
4, The LED on the plug-in-the-wall part
of the charger glows red when the
Weedwacker is "charging" and
green when it is "ready to use." '
To turn tool OFF, merely release the
trigger. The locking button will snap
backward to prevent the trigger switch
from being accidentally depressed.
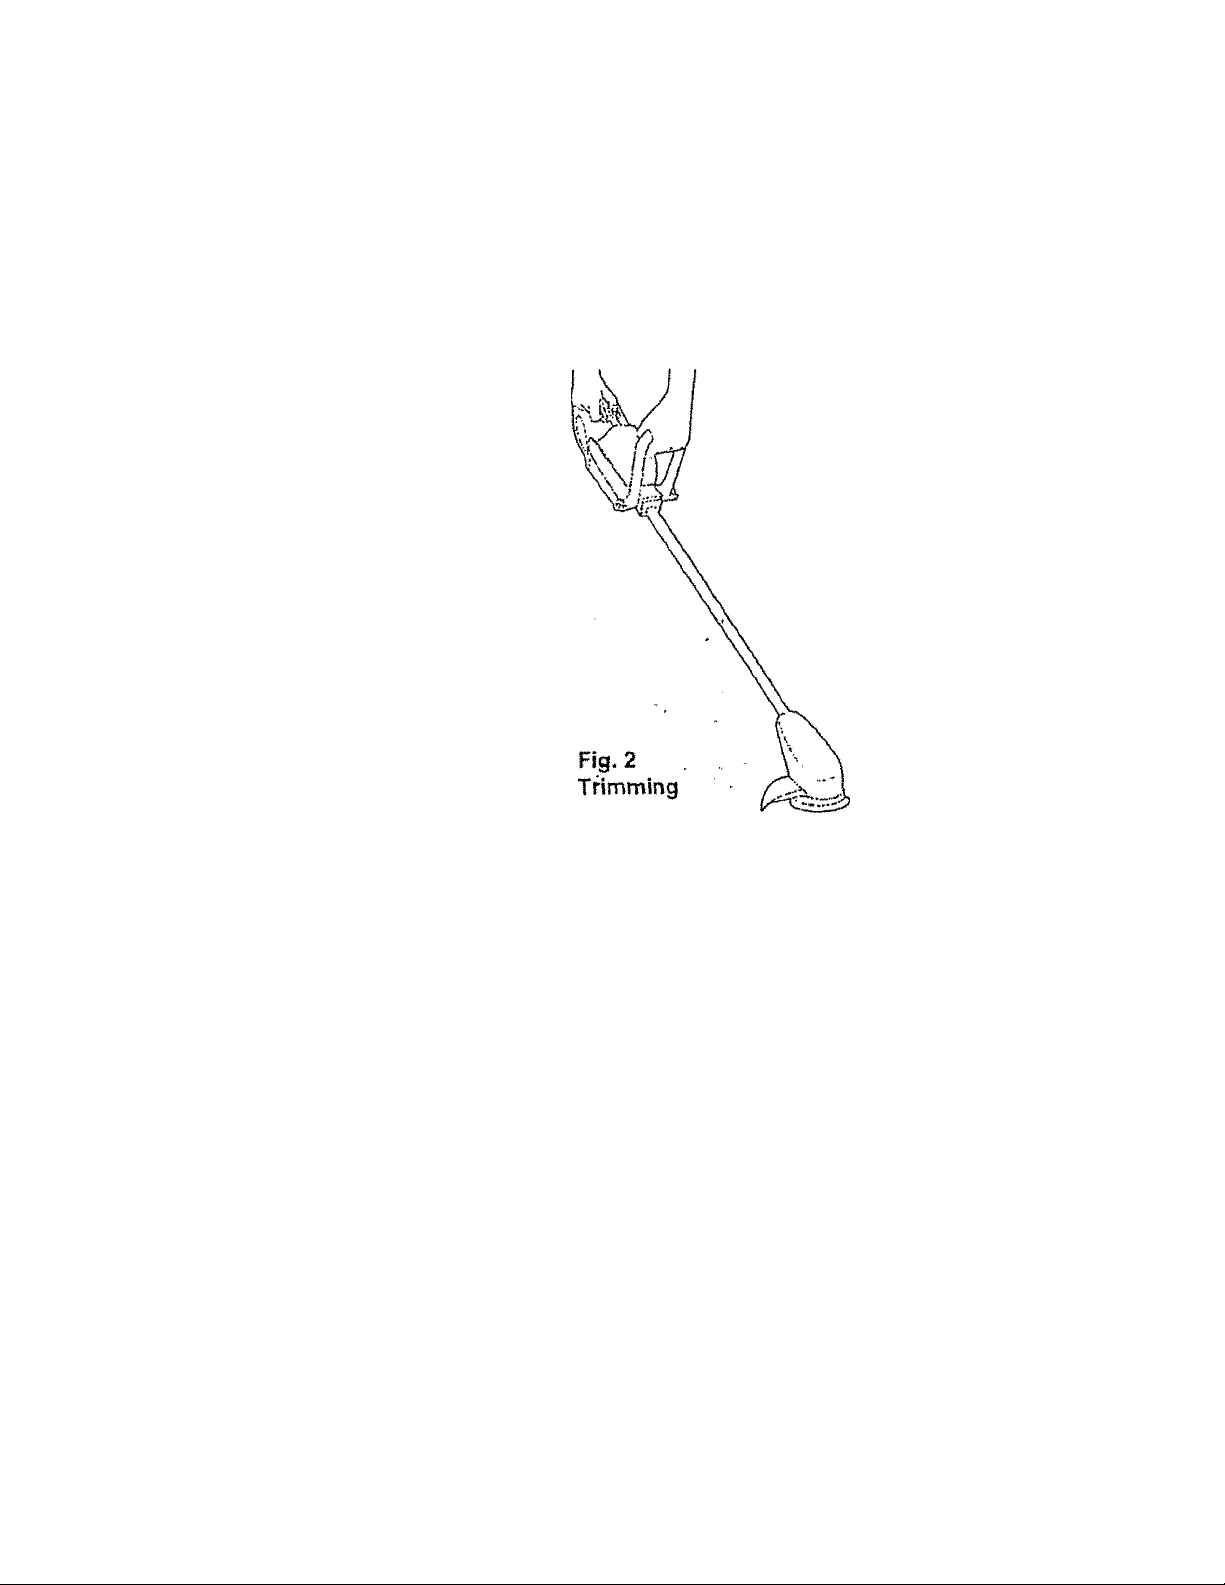
TRIMMING TECHNIQUES
Maintain proper balance at all times.
Keep hand away from moving line.
Wear eye protection when using the
unit Hold the Weedwacker firmly when
starting and operating..
Charging Notes: '
• CAUTION: The charger cari only
be used with 6(> cycle, 115-120
VAC electricity, .
• The charger unit plugged into the
AC outlet will normally become
warm to touch during charging.
» SAFE CHARGE - The charger util
izes trickle charging, which is the
safest way to charge a battery, Tlie
unit wil not overcharge and can be
left on charge indefinitely.
• Longest life and best performance
will be obtained when charging in
normal room temperature
0 Battery life is dependent on usage,
storage temperature and time
To Operate The Weedwacker:
To turn tool ON, slide the thumb switch
on top of the handle FORWARD, While
holding thumb switch FORWARD,
squeeze the trigger switch (under the
handle) to start the unit See Figure 2 or
3, Release the thumb switch once unit
is running.
WEED AND LAWN TRIMMING
e The unit works best with dry grass,
but it can be used safely in wet
grass due to the low voltage design.
* A long sweeping cutting motion will
get the greatest amount of trimming
per charge. -
® Watch out for foreign objects In the
grass. Avoid trimming near wiring or
other objects that could become
tangled in the rotation of the string
head.
e Always inspect area to be trimmed
for objects that could be damaged or
tangled during trimming,
* During normal operation, the cutting
line will wear down and need to be
advanced to its full cutting length
* Advance (bump feed) the cutting
line ~ While the unit is running,
gently tap the line head against the
ground until the cutting line advances
to the cut-off blade. Excess line will be
cut off automatically to maintain prop
er length.
Page 5

To lengthen the life of the string spool,
do not bump feed by tapping the line
head on concrete or asphalt
LAWN AND FLOWERBED EDGING
« Holding the front handle, rotate the
rest of the unit to bring the edging
wheel into position, .
‘ Locate the edging wheel along the
surface to be edged.
0 Slowly let the Weedwacker roll along
the edge of the lawn with the roller
guide wheel supporting the weight of
the unit Stop periodically to advance
the cutting line,
8 When edging an area for the first
time, you will form a groove in the
ground. Forming the groove may
require special attention and fre
quent line advancement After the
groove is formed the first time,
regular maintenance is easy.
» For optimum results, regularly rotate
the line head down and bump feed to
advance string.
« Watch out for foreign objects.
To Change Line
Make sure to keep your hands away
from the trigger and safety switch to
ensure that the tool is not accidentally
turned ON. Place the unit on a flat sur
face or upside down to gain access to
the line head. Reload the line head with
cutting line. Replacement spools with
line are avaitaoie as an accessuiy ai
your iocal Sears store.
WARNING: To prevent injury, keep
hands away from triggers during re
loading,
USE ONLY 0.08" DIAMETER LINE.
Tabs are located on each side of the
line spool cover. Press both tabs on
the line head cover and remove cover
by pulling upward. It may be easier to
press in one tab at a time After the
tabs are pushed in, lift the spool out of
the housing and put spring in a safe
place
1. Remove and discard any remaining
cutting line in the spool.
2. Clean all debris from inside the iine
head assembly.
3. -Holding the end of the line, insert 1”
of the tip into the small hole at the
base of the spool,
4 Evenly and tightly wind the spool in
the direction shown on the bottom
of the spool
5 Continue winding until the line is
just below the rim, then cut the line
with scissors
6. Do not overfill Overfflling can
cause Jams. '
7, Hold the line so it does not unwind,
insert the cut end through the eyeietin the line head housing.
8, Now replace the spring and spool,
making sure that the line is not
caught under the spool.
9. Re-install the line head cover.
Clearing Jams
CAUTION: To prevent injury, keep
hands away from trigger during clear
ing of jams. To prevent injury, do not
use the Weedwacker with damaged
line head assembly.
1. Inspect cutting line and spool and
clear away debris.
2 Unwrap the spool several turns and
inspect the line for damage
3, Cut away damaged line and dis
card. Inspect the line head assem
bly for cracks or damage.
4. While gently pulling on the cutting
line, press the spool (bump head)
until the line releases. If jam is
Page 6

ciearea, the spoor snouia spin tree a
short distance and the line will ad
vance.
5,
If the unit continues to jam or will not
spin freely, call service number list
ed below Failure to stop the unit
when the line is jammed will cause
excessive battery drainage and
shorten motor life (overheating)
rr\r» V
;• r: Ì •
appliance on or aojaceni to renitizers
or chemicals
t - *1 j
REPLACEMENT PARTS - For opti
mum cutting results and the assurance
of top performance, it is recommended
that only Sears Craftsman replace
ment line, spools, and accessories be
used Spool with fine is available at
your local Sears store
LUBRICATION - No periodic relubrica
tion of the Weedwacker bearings or
other moving parts is required.
CLEANING OF PLASTIC PARTS -
Use only a dry brush or a cloth with
warm water and mild soap to clean
plastic parts Many household cleaners
contain chemicals which could damage
the plastic Never use gasoline, turpen
tine, paint thinner or simitar fluids
Never spray-wash tool or immerse in
water. Water or liquid inside the tool
can cause serious damage to the unit
FUSE - The unit is .equipped with a
fuse (15 Arnp) that will protect frorri ex
treme overload to the motor. To change
the fuse, first remove battery housing
cover by unscrewing scr,ew Then re
move battery to access fuse holder,
DROPPING THE UNIT ~ If you drop the
unit, carefully inspect it for any damage
before using it again.
WARNING: Only use Craftsman ac
cessories with the Weedwacker, Use
of non-Craftsman accessories could
be hazardous
BATTERY RECYCLE - To preserve
natural resources, please recycle or
dispose of this product's SEALED
LEAD-ACID BATTERY properly Local,
state and federal laws may prohibit
disposal of sealed |ead-acid batteries
in ordinary trash Consult your local
waste authority or Sears store for in
formation regarding available recycling
and/or disposal options.
battery replacement - When
replacing the batteries, both batteries
shopid be replaced at the same time.
Mixing fresh and discharged batteries
could increase internal cel! pressure
and cause rupture.
WARNING: When replacing the bat
teries, the proper polarity or direction
must be observed Reverse insertion
of batteries can result in leakage of
TEMPERATURE - Temperature
extremes limit the useful life of the bat
tery. The best storage place is one that
is cool and dry. Store the tool away
from direct sunlight, heating pipes, fur
naces, etc Do not store where tem
peratures go below +40 F or above
+ 120 F
preventing corrosion - Fertiliz
ers and other garden chemicals contain
compounds that greatly accelerate the
corrosion of metals. Do not store the
' ' a
i
ISER^ICE
.1.
explosion.
If you see any condition that may
affect safe operation, or if you have
any questions, contact our customer
service number at:
1-BOO- 539-6465
Page 7

Todo un ano de garantía en Craftsman Weedwacker®
Si esta Cortadora y Bordeadora Inalámbrica de Línea Craftsman Weedwacker
fallase debido a defectos en materiales o mano de obra dentro de un año de la
fecha de compra, devuélvala a su tienda Sears o centro Craftsman más cercano en
los Estados Unidos de América y le será reemplazada sin costo alguno.
La presente garantía se aplica sólo mientras (a Weedwacker se use en ios Estados
Unidos de América
La presente garantía le da derechos legales específicos y puede también tener
otros derechos, que pueden variar de estado a estado.
Sears, Roebuck and Co., Dept. 817WA, Hoffman Estates, !L 60170
cuidado durante el desempaque y
ensamble del protector de línea
Servicio al Cliente: 1-800-539-6455
« EVITE ENTORNOS
PELIGROSOS ~ Así como
condiciones metereológicas
peligrosas cuando use esta
herramienta
LEA TODAS LAS INSTRUCCIONES
0 MANTÉNGASE LEJOS DEL
ALCANCE DE LOS NIÑOS - Todo
ADVERTENCIA: Cuando úsela
herramienta, se deben seguir siempre
las precauciones de seguridad para
reducir el riesgo de incendio, descarga
électrica y lesiones personales,
incluyendo lo siguiente:
Para reducir el riesgo de lesiones:
« Antes de usarse, cerciórese de que
qureri use este producto eléctrico lea
y comprenda todas las instrucciones
de seguridad y operativas de!
presente rríanual,
e. Guarde estas instrucciones y
revíselas frecuentemente antes de
usar la herramienta Guárdela en la
ranura de cargador dp^ared
0 COLOQUE EL PROTECTOR DE
LÍNEA - Antes de usarla, coloque
bien el protector de línea, Vea tas
instrucciones para colocar el
protector de línea en la sección
' Funcionamiento El no colocar el
protector de línea implica riesgo de
ieáiohes, daño al motor y anulará la
garantía,
» UNIDAD PARCIALMENTE
CARGADA - El Weedwacker se
embala en estado de carga partía!,
de manera que debe manipularse con
visitante debe mantenerse a una
distancia segura del área de trabajo
». GUARDE LA UNIDAD APAGADA
EN INTERIORES - Cuando no esté
en uso, la unidad debe guardarse en
interiores en un lugar seco, lejos del
alcance de los nlnos,
0 NO FUERCE LA HERRAMIENTA-
Hará mejor su trabajo y con menos
riesgo de lesiones y con el
rendimiento para el que fue
diseñada,
* USE LA HERRAMIENTA
ADECUADA - No use la
herramienta para otro trabajo que no
sea para el que fue diseñada.
0 ADVERTENCIA: MANTENGA LAS
MANOS Y OTRAS PARTES DEL
CUERPO LEJOS de la linea y del
cabezal de la línea. Mientras está en
movimiento, ía línea puede producir
lesiones,
• USE LA ROPA ADECUADA - No
use ropa suelta ni joyas, ya que
pueden quedar atrapadas en (as
partes móviles Se recomienda usar
guantes y zapatos adecuados al
trabajar en exteriores Use una
cobertura protectora para sujetar el
cabello largo, y pantalones largos
rrSt!
г-4
Page 8

para protegerse de las partículas que
salgan disparadas
o NO SE ESTIRE DEMASIADO -
Intente mantener el equilibrio.
» USE GAFAS DE SEGURIDAD-
Siempre lleve protección ocular
adecuada y careta o máscara antipoívo si el ftincionamiento lo requiere,
e CUIDE LA UNIDAD - Mantenga la
unidad limpia para mejor rendimiento
y para reducir el riesgo de lesiones.
Siga las instrucciones de servicio
Mantenga los manubrios secos,
limpios, y libres de aceites y grasas
» ARRANQUE NO INTENCIONAL-
No mueva el Weedwacker mientras
sujeta el área del interruptor. La
unidad se entrega parcialmente
cargada, y puede arrancar
inadvertidamente durante el
ensamblaje si no se manipula
correctamente,
• REVISE LAS PARTES DAÑADAS Si la Cortadora de Línea de
Weedwacker sufriera un fuerte
impacto, vea que no se hayan
dañado partes y que la unidad
funcione correctamente. Revise que
no haya partes móviles desalineadas
o torcidas, piezas rotas o cualquier
otra condición que pueda afectar el
funcionamiento. Una parte dañada
debe ser reparada correctamente o
reemplazada por un centro
autorizado de servicio.,
• MANTÉNGASE ALERTA - Fíjese en
lo que hace. Use el sentido común.
No opere la herramienta cuando esté
cansado,
<* NO COJA LA LÍNEA EN
MOVIMIENTO - No intente retirar el
material cortado ni sujetar el material
a ser cortado cuando la línea esté en
movimiento. Verifique que el
interruptor esté en OFF (APAGADO)
cuando despeje o cambie la línea.
Para reducir el riesgo al usar el
cargador:
• NO use el cargador en exteriores o
en condiciones de humedad, úselo
sólo en interiores,
o NO cargue la unidad cuando la
temperatura esté por debajo de
+40°F ó por encima de +120“F
Puede acortar la vida útil de la
batería.
® Esta unidad y su cargador se han
diseñado para trabajar
conjuntamente, NO cargue el
Weedwacker con otro cargador y
NO use este cargador con ninguna
otra herramienta o aparato. >
» El cargador está diseñado para -
operar a 120 voltios. NO intente
usarlo a ningún otro voltaje.
• Guarde estas, instruofciones
doblándolas por la mitad e insértelas
en la ranura posterior del estante de
carga de la pared.
GUARDE ESTAS INSTRUCCIONES
.
.............
*.*• “V." -.1
mmm
-. «1 h
. CONECTE EL PROTECTOR DE
LÍNEA ANTES DE USAR LA,
UNIDAD “ Conecte el protectof de
línea al bastidor de la cortadora
alineando primero ambas orejas
laterales con las ranuras del bastidor.
Seguidamente, presione firmemente la
parte posterior del protector para
asegurar la oreja de seguridad (no se
necesitan tomillos),
importante: El protector de linea
incorpora una hoja cortadora
automática de línea, que mantiene la
línea de corte recortada a la longitud
correcta. Quite la cinta protectora de
esta hoja antes del primer uso,
» CARGUE LA BATERÍA ANTES DE
USARIJL - El Weedwacker no viene
totalmente cargado cuando se
compra. Antes de usar la unidad, se
debe cargar la batería Antes de
cargar la batería tea las
instrucciones de carga y de
seguridad.
• TIEMPO DE SERVICIO Y
RENDIMIENTO - sólo se pueden
obtener con una batería totalmente
cargada.
• TIEMPO DE CARGA - La carga
nocturna de unas 16 horas es
Г-Г
Page 9

suficiente para reabastecer la batería
a carga total. El uso inicial, períodos
largos de inactividad, o el
almacenamiento a temperaturas
extremas pueden requerir mayor
tiempo de carga
• CARGADOR DE PARED - Antes de
cargar la unidad, vea que el cargador
esté bien colocado en la pared;
asegúrelo con tornillos a un montante,
o use ancíajes de pared #8 ó
mayores.
Para cargar la batería:
5. Conecte el cargador a un
tomacorriente de 120 voltios CA,
6 Coloque ef Weedwacker en el
cargador de pared.
7, Cargúelo por lo menos 16 horas
8, El diodo emisor de luz de la parte
que se conecta a ía pared del
cargador está rojo cuando el
Weedwacker está "cargando" y
verde cuando está "listo para
usarse”.
Eí diseño de interruptor de gatillo de 2
dedos facilita oprimir el gatillo durante
ei funclónamiento.
Para apagar la herramienta,
simplemente suelte eí gatillo. El botón
de seguridad retrocederá para evitar
que el interruptor sea accionado
accidentalmente.
TÉCNICAS DE CORTE
Intente mantener el equilibrio en todo
momento. Mantenga las manos lejos
de la línea en movimiento. Protéjase
los ojos al usar la unidad. Sujete
firmemente ía Weedwacker ai
arrancarla y operarla
Notas sobre la carga:
• CUIDADO: Sólo se puede usar el
cargador con electricidad de 60
ciclos, 115-120 VGA "
e El.cargador conectado ai
tomacorriente CA normalmente se
calentará al tacto durante la carga,
e CARGA SEGURA - El cargador
utiliza la carga lenta, que es (a forma
más segura de cargar una batería.
La unidad no se sobrecargará y
puede ser dejada cargando
indefinidamente,
e Se obtendrá larga vida útil y el mejor
rendimiento cuando ,se carga a
temperatura ambiente noritral,
• La vida útil de la batería depende
del uso, temperatura de
almacenamiento y del tiempo.
t
Para poner el Weedwacker en
funcionarñfento:
Para encender la herramienta,
desplace el interruptor manual sobre el
mango, HACIA ADELANTE, A la vez,
presione el interruptor de gatillo de 2
dedos (bajo el mango) para arrancar la
unidad Vea las Figuras 1 y 2. Al hacer
funcionarla unidad suelte ef interruptor.
Figura 1; Recorte
CORTE DE MALEZA Y CÉSPED
e La unidad trabaja mejor con césped
seco, pero puede usarse con
seguridad en césped húmedo
gracias a su diseño de bajo voltaje
• Un largo movimiento de barrido al
cortar brindará el mayor volumen de
Corte por carga
® Cuídese de ios objetos extraños en
el césped, Evite cortar cerca de
cables u otros objetos que podrían
enredarse en la rotación del cabezal
de línea.
" Siempre inspeccione que no haya
objetos que pudieran dañarse o
enredarse durante ei corte en el
área.
Page 10

Durante ef funcionamiento normal, (a
línea de corte se desgastará y deberá
ser avanzada en toda su longitud de
corte
Avance {alimente) la línea de corte
- Mientras la unidad esté funcionando,
golpee suavemente el cabezal de
línea contra el suelo hasta que la
línea de corte avance a la hoja de
corte El exceso de línea será
automáticamente cortado para
mantener la longitud adecuada.
Para alargar la vida de! carrete de
cuerda, no alimente golpeando el
cabezal de línea sobre concreto o
asfalto.
Figura 2. Bordeado
BORDEADO DE CÉSPED Y FLORES
» Sujetando el mango frontal, gire el
resto de la unidad para poner la
rueda de corte en posición,
o Ubique la rueda de corte a lo largo de
la superficie a ser recortada,
® Lentamente, deje que elWeedwacker
ruede a lo largo del borde del césped
con la rueda guía del rodamiento
soportando el peso de la unidad.
Deténgase periódicamente para
avanzar la línea de corte.
• Cuando bordeee un área por
primera vez, formará un surco en
el suelo. Esto puede requerir
atención especia! y avanzar la
línea frecuentemente. Después de
formar el surco por primera vez,
será fácil darle mantenimiento
periódico.
e Periódicamente gire la unidad y
avance la cuerda por alimentación
para lograr resultados óptimos
e Observe que no haya objetos
extraños
Para cambiar la línea
Asegúrese de mantener las manos
alejadas del gatillo y del interruptor de
seguridad para no ENCENDER la
herramienta accidentalmente,, Ponga
la unidad sobre una superficie plana o
cara abajo para acceder al cabezal de
línea. Vuelva a cargar el Cabezal de
línea con la Línea de corte. Hay
disponibles carretes con IFnea de
reemplazo, como accesorios en su
tienda local Sears.
ADVERTENCIA; Para evitar lestphes
mantenga ías manos-lejos de los
gatillos al volver a cargar.
A cada laflo de la tapa del carrefe°de
línea hay orejas. Presione ambas
orejas de la tapa de! cabezal de línea
y quite la tapa hacia arriba. Puede ser
más fácil presionar una oreja a la vez.
Después de presionar, levante y
saque el carrete de su bastidor y
ponga el resorte en un lugar seguro.
1, Saque y descarte los remanentes
de línea de corte en el carrete.
2, Limpíe todo residuo del interior del
cabezal de línea,
3 Sujetando el extremo de la línea,
inserte Г de la punta en el
pequeño agujero de la base del
carrete,
4. Enrrolle uniforme y firmemente el
carrete en la dirección mostrada
en la base del mismo,
5. Siga enrollando hasta que la línea
esté justo por debajo del canto de!
plástico y corte la línea con tijeras,
6. No sobrellene. Esto puede
originar atasques.
7- Asegure !a línea de manera que
no se desenrolle; inserte el
extremo cortado a través del ojal
del bastidor dei cabezal de línea.
10
Page 11

8, Ahora vuelva a colocar el resorte y
el carrete, asegurándose de que la
línea no quede atrapada bajo el
carrete,
9 Reinstale la tapa del cabezal de
línea
Cuando haya atasques
CUIDADO: Para evitar lesiones,
mantenga las manos lejos de los
gatillos al desatascar Tampoco use el
Weedwacker con el cabezal de línea
dañado,
sumerja en agua El agua o líquido en
el interior puede producir serios daños.
Esta unidad debe ser limpiada antes
de guardarse por períodos largos
FUSIBLE “ La unidad está equipada
con un fusible (15 amp) que la
protegerá de sobrecargas extremas
del motor. Para cambiar el fusible,
quite la tapa del bastidor de la batería
desatornillándola También tiene que
quitar la batería para acceder al
portafusibles. Si hay dudas al
reemplazar, vea la sección “Servicio"
1 Inspeccione la línea de corte y el
carrete y elimine los residuos
2. Desenrolle varias vueltas de!
carrete e inspeccione sí hay daños
en la línea,
3. Corte la línea dañada y descártela
Inspeccione si hay rajaduras o
daños en el cabezal de línea,
4 Mientras tira suavemente de la
línea de corte, presione el carrete
(cabezal) hasta que la línea se
suelte. Si se desatasca, el carrete
debe girar libremente una corta
distancia y lajínea avanzará.
5 Si la unidad sigue atascada o no
gira libremente, vea la sección
titulada "Servicio" El rio detener la
unidad cuando la línea está
atascada agotará la batería y
acortará la vida útil del motor
(sobrecalentamiento)
>1
ШЩ,.
LUBRICACION - No se requiere re
lubricación periódica de los cojinetes u
otras partes móviles del Weedwacker.
SI DEJA CAER LA UNIDAD - Sí deja
caer la unidad, inspeccione
cuidadosamente si hay daños
sBBumm
Si usted ve alguna condición que
pueda afectar ehfuncionamiento
seguro de la Weedwacker, o si tiene
preguntas, comunfqu'ése con
servicio al cliente al:
1-800 ■ 539-6455,
TEMPERATURA - Las temperaturas
extremas limitan la vida útil de ia
batería Eí mejor lugar de
almacenamiento es un lugar frío y
seco. Apártela de la luz directa det sol,
ductos de calefacción, hornos, etc. No
la guarde en lugares con temperaturas
por debajo de +40“F o por encima de
+120T,,
LIMPIEZA DE LAS PARTES
PLÁSTICAS - Use sólo un cepillo seco
o paño con agua caliente y jabón suave
para lavar las partes plásticas. Muchos
limpiadores caseros contienen
compuestos químicos que podrían
dañar el plástico. Nunca use gasolina,
turpentina, dlluente ni fluidos similares
Nunca rocíe la herramienta ni la
EVITAR LA CORROSIÓN - Los
fertilizantes y otros productos químicos
para el jardín contienen compuestos
que aceleran considerablemente la
corrosión de los metales. No guarde ei
aparato en, o junto a, fertilizantes o
productos químicos
11
Page 12

REPUESTOS - Рага obtener
resultados óptimos de corte y asegurar
un alto rendimiento, se recomienda que
sólo se usen repuestos de líneas y
carretes, y accesorios de Sears
Craftsman. El carrete con línea está
disponible en su tienda Sears local
ADVERTENCIA: Sólo use accesorios
Craftsman con la Weedwacker. El usar
accesorios que no sean Craftsman
puede ser peligroso
RECICLAMIENTO DE LA BATERÍAPara conservar los recursos naturales,
por favor recicle o deseche
adecuadamente la BATERÍA DE
PLOMO-ACIDO SELLADA, Las
regulaciones locales, estatales o
federales pueden prohibir desechar
baterías de plomo-ácido selladas en la
basura ordinaria. Consulte a su
autoridad local o a la tienda Sears ,
respecto arias opciones disponibles
para reciclado o para desechar •
12
 Loading...