

Page 1
1-888-266-7096
1-888-266-7096
www.craftsman.com
www.craftsman.com
Model No.
138.98818
Número de modelo
138.98818
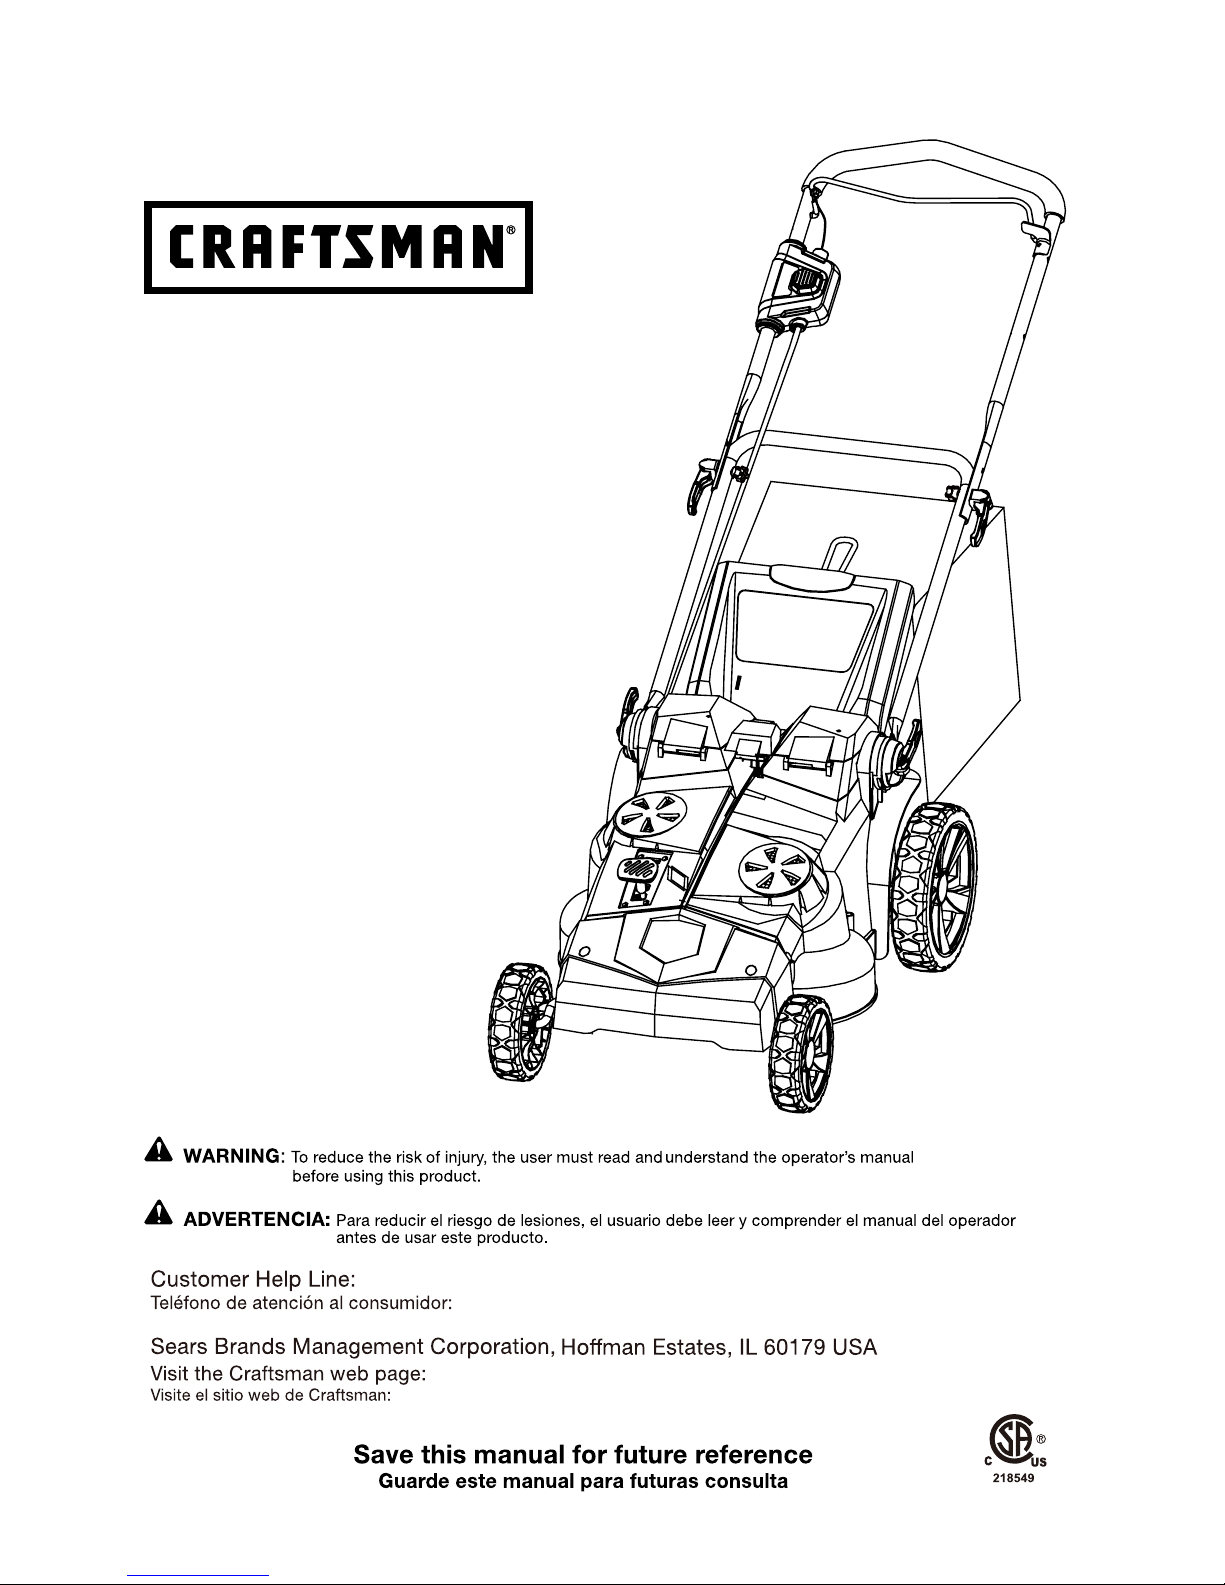
OPERATOR'S MANUAL
MANUEL DEL OPERADOR
20 in. 40 VOLT
DUAL BLADE LAWN MOWER
508 mm (20 pulg.) 40 V
CORTACÉSPED DE HOJA DOBLE
Page 2

TABLE OF CONTENTS / ÍNDICE DE CONTENIDO
INTRODUCTION / INTRODUCCIÓN
ENGLISH ESPAÑOL
■ Warranty.................................................................. 2
■ Introduction..............................................................2
■ Important Safety Instructions................................3-6
■ Symbols................................................................7-8
■ Features...................................................................8
■ Assembly...........................................................9-10
■ Operation..........................................................11-12
■ Maintenance.....................................................13-14
■ Troubleshooting.....................................................15
■ Illustrated parts list...........................................16-18
■ Garantía............................Sección de Inglés pág. 2
■ Introducción......................Sección de Inglés pág. 2
■ Instrucciones de seguridad importantes...............3-7
■ Símbolos............................................................. 8-9
■ Características........................................................9
■ Armado.............................................................10-11
■ Funcionamiento...............................................12-13
■ Mantenimiento.................................................14-15
■ Corrección de problemas......................................16
■ Figura numeras (ilustraciones).............................i-vi
CRAFTSMAN
®
FOUR YEAR LIMITED WARRANTY
FOR FOUR YEARS from the date of purchase this power tool is warranted against any defects in material or
workmanship. FOR TWO YEARS from the purchase date a supplied battery pack or charger is warranted against
material or workmanship defects. With proof of purchase, a defective product will be replaced free of charge.
For warranty coverage details to obtain free replacement, visit the web page: www.craftsman.com/warranty
This warranty does not cover blades, which are expendable parts that can wear out from normal use within the
warranty period.
This warranty is void if this product is ever used while providing commercial services or if rented to another person.
This warranty gives you specic legal rights, and you may also have other rights which vary from state to state.
Sears Brands Management Corporation, Hoffman Estates, IL 60179
GARANTÍA DE CUATRO AÑOS CRAFTSMAN
®
DURANTE CUATRO AÑOS a partir de la fecha de adquisición, esta herramienta eléctrica cuenta con garantía frente
a defectos de material o mano de obra. Durante dos años y a partir de la fecha de compra, el conjunto de la batería
o el cargador que se proporciona está garantizado ante los defectos materiales o de fábrica. Adjuntando la prueba
de compra, se reemplazará gratuitamente el producto defectuoso.
Para detalles sobre la cobertura de la garantía para el reemplazo gratuito, visite la página web: www.craftsman.com/
warranty
Esta garantía no cubre las hojas, que son piezas consumibles que pueden desgastarse con el uso normal durante el
período de garantía.
Esta garantía se anula si se utiliza este producto durante la prestación de servicios comerciales o si se alquila a otra
persona.
Esta garantía le otorga derechos legales especícos y también puede tener otros derechos que varían de estado a
estado.
Sears Brands Management Corporation, Hoffman Estates, IL 60179
This tool has many features for making its use more pleasant and enjoyable. Safety, performance, and
dependability have been given top priority in the design of this product making it easy to maintain and operate.
Esta herramienta ofrece numerosas características para hacer más agradable y placentero su uso. En el
diseño de este producto se ha conferido prioridad a la seguridad, el desempeño y la abilidad, por lo cual se
facilita su manejo y mantenimiento.
2 — English
* * *
* * *
Page 3

IMPORTANT SAFETY INSTRUCTIONS
READ AND UNDERSTAND
ALL INSTRUCTIONS. Failure to follow all
instructions listed below and on the machine
may result in electric shock, re, and/or serious
personal injury.
WARNING!
GENERAL SAFETY RULES
• This cutting machine is capable of amputating
hands and feet and throwing objects. Failure
to observe all safety instructions could result
in serious injury or death.
• Avoid dangerous environment - Do not use
the lawn mower in damp or wet conditions or
operate in the rain.
• Keep children away - Keep all bystanders,
children, and pets at least 50 ft. away. Stop
machine if anyone enters the area.
• Tragic accidents can occur if the operator is
not alert to the presence of children. Children
are often attracted to the machine and the
mowing activity. Never assume that children
will remain where you last saw them.
• Keep children out of the mowing area and
under the watchful care of a responsible
adult other than the operator.
• Be alert and turn mower off if a child
enters the area.
• Do not let children under the age of 14 to
operate this mower.
• Use extra care when approaching blind
corners, shrubs, trees, or other objects
that may block your view of a child.
• Dress properly - Wear heavy, long pants,
long sleeves, boots, and gloves. Do not wear
loose tting clothing, short pants, sandals, or
go barefoot. Do not wear jewelry of any kind.
They can be caught in moving parts.
• Don’t overreach - Keep proper footing and
balance at all times. Overreaching can result
in loss of balance.
• Do not operate the equipment while barefoot
or when wearing sandals or similar lightweight
footwear. Wear protective footwear that will
protect your feet and improve your footing on
slippery surfaces.
• Do not leave the mower unattended while
running.
• Keep hands and feet away from cutting area.
Keep clear of the discharge opening at all times.
• Operate the lawn mower only in daylight or
good articial light.
• Always wear safety glasses with side shields.
Everyday glasses have only impact resistant
lenses. They are NOT safety glasses.
Following this rule will reduce the risk of eye
injury. Use face mask if operation is dusty.
• Use safety glasses - Always wear eye
protection with side shields marked to comply
with ANSI Z87.1. Use face mask if operation
is dusty.
• Use the right appliance - Do not use the lawn
mower for any job except that for which it is
intended.
• Do not force the lawn mower - It will do the
job better and safer at the rate for which it
was designed.
• Stay alert - Watch what you are doing and
use common sense when operating the
lawn mower. Do not operate the mower
while tired, upset or under the influence of
drugs, alcohol, or medication. A moment of
inattention while operating the lawn mower
may result in serious personal injury.
• Maintain lawn mower with care - Keep
machine in good working condition. Keep
blades sharp and guards in place and in
working order. Replace damaged or unevenly
worn blades before using the mower for best
performance.
• Check all nuts, bolts, and screws at frequent
intervals for proper tightness to be sure
the equipment is in safe working condition.
Mower blades are sharp. Wrap the blade or
wear gloves, and use extra caution when
servicing them.
• Do not dispose of the battery in a fire. The
cell may explode. Check with local codes for
possible special disposal instructions.
• Stop the motor, wait until the blade comes to
a complete stop, and remove the battery pack
before cleaning the lawn mower, removing
the grass catcher, or removing the mulching
plug.
• Replace the blade if it is bent or cracked.
An unbalanced blade causes vibration that
could damage the motor drive unit or cause
personal injury. Sharpen a dull blade equally
at each end to maintain the balance. Clean
the blade thoroughly.
• When not in use, mower should be stored
indoors in a dry, locked up place—out of the
3 — English
Page 4

reach of children, and stored in a separate
location out of the reach of children.
• Always use safety protective devices. Do not
operate the mower without the entire grass
catcher, mulching plug and rear discharge
door in place and working properly.
• Do not open or mutilate the battery. Released
electrolyte is corrosive and may cause
damage to the eyes or skin. It may be toxic if
swallowed.
• Follow manufacturer’s instructions for proper
operation and installation of accessories.
Only use accessories approved by the
manufacturer.
• Exercise care in handling batteries in order
not to short the battery with conducting
materials such as rings or bracelets. The
battery or conductor may overheat and cause
burns.
• Clear the work area before each use.
Remove all objects such as rocks, sticks,
metal, wire, bones, toys, or other objects
which can be thrown by the blade.Stay
behind the handle when the motor is running.
• Avoid holes, ruts, bumps, rocks, property
stakes, or other hidden objects. Uneven
terrain could cause a slip and fall accident.
• Do not mow near drop-offs, ditches, or
embankments.
• Mow across the face of slopes, never up
and down. Exercise extreme caution when
changing direction on slopes.
• Plan your mowing pattern to avoid discharge
of material toward roads, sidewalks,
bystanders and the like. Also, avoid
discharging material against a wall or
obstruction, which may cause the material to
ricochet back toward the operator.
• Do not mow on wet grass or excessively
steep slopes. Poor footing could cause a slip
and fall accident. Walk, never run.
• Use extra care when approaching blind
corners, shrubs, trees, or other objects that
may block your view.
• Do not pull the mower backward unless
absolutely necessary. If you must back the
mower away from a wall or obstruction, rst
4 — English
look down and behind to avoid tripping or
pulling the mower over your feet.
• Objects struck by the lawn mower blade can
cause severe injuries to persons. The lawn
should always be carefully examined and
cleared of all objects prior to each mowing.
• If the lawn mower strikes a foreign object,
follow these steps:
• Stop the lawn mower by releasing the
bail, wait until the blade comes to a
complete stop, and then remove the
battery packs.
• Thoroughly inspect the mower for any
damage.
• Replace the blade if it is damaged in
any way. Repair any damage before
restarting and continuing to operate the
mower.
• Stop the motor, wait until the blade comes
to a complete stop, and remove the battery
before unclogging the chute. The cutting
blade continues to rotate for a few seconds
after the motor is shut off. Never place any
part of the body in the blade area until you
are sure the blade has stopped rotating.
• If the mower should start to vibrate
abnormally, stop the motor and check
immediately for the cause. Replace the blade
if it is unevenly worn or damaged in any way.
Vibration is generally a warning of trouble.
• Service on the product must be performed
by qualified repair personnel only. Service
or maintenance performed by unqualified
personnel could result in injury to the user or
damage to the product.
• Use only identical replacement parts
when servicing the product. Use identical
replacement blades only. Use of nonidentical
parts may create a risk of serious injury to
the user, or damage to the product.
• Maintain or replace safety instructions
labels, as necessary.
• Disconnect battery- Disconnect battery pack
from the appliance before storing, servicing,
transporting, or changing accessories
such as blades. Such preventive safety
IMPORTANT SAFETY INSTRUCTIONS
Page 5

5 — English
IMPORTANT SAFETY INSTRUCTIONS
measures reduce the risk of starting the tool
accidentally.
• Stop the unit and disconnect battery pack
when not in use. Carry or push the unit with
the motor stopped and the battery pack
removed from the mower.
• Battery tools do not have to be plugged into
an electrical outlet; therefore, they are always
in operating condition. Be aware of possible
hazards when not using your battery tool or
when changing accessories. Following this
rule will reduce the risk of electric shock, re,
or serious personal injury.
• Do not use battery-operated appliance in
rain.
• Remove or disconnect battery before
servicing, cleaning or removing material from
the gardening appliance.
• Use battery only with charger listed. For
use with Craftsman 40V lithium-ion battery
packs.
• Store idle appliances indoors- When not in
use, mower should be stored indoors in a
dry, locked place out of the reach of children.
• Follow instructions for lubricating and
changing accessories.
• Keep guards in place and in working order.
• Keep blades sharp.
• Keep hand and feet away from cutting area.
• Only allow responsible adults, who are
familiar with the instructions, to operate this
machine.
• Never operate machine in a closed area.
• Never tamper with safety devices. Check for
proper operation regularly.
• Save these instructions. Refer to them
frequently and use them to instruct
others who may use this product. If you
loan someone this tool, loan them these
instructions also.
BATTERY & CHARGER
BATTERY SAFETY RULES
• Battery tools do not have to be plugged
into an electrical outlet; therefore, they are
always in operating condition. Be aware
of possible hazards when not using your
battery tool or when changing accessories.
Following this rule will reduce the risk of
electric shock, fire, or serious personal
injury.
• Do not place battery tools or their batteries
near re or heat. This will reduce the risk of
explosion and possibly injury.
• Do not crush, drop or damage battery pack.
Do not use a battery pack or charger that
has been dropped or received a sharp blow.
A damaged battery is subject to explosion.
Properly dispose of a dropped or damaged
battery immediately.
• Batteries can explode in the presence of a
source of ignition, such as a pilot light. To
reduce the risk of serious personal injury,
never use any cordless product in the
presence of open ame. An exploded battery
can propel debris and chemicals. If exposed,
ush with water immediately.
• Do not charge battery tool in a damp or wet
location. Following this rule will reduce the
risk of electric shock.
• For best results, your battery tool should be
charged in a location where the temperature
is more than 45°F but less than 104°F. To
reduce the risk of serious personal injury, do
not store outside or in vehicles.
• Under extreme usage or temperature
conditions, battery leakage may occur. If
liquid comes in contact with your skin, wash
immediately with soap and water. If liquid gets
into your eyes, flush them with clean water
for at least 10 minutes, then seek immediate
medical attention. Following this rule will
reduce the risk of serious personal injury.
Use only Craftsman
replacement batteries; other batteries may
cause injury or damage to the mower.
CAUTION!
Page 6
6 — English
IMPORTANT SAFETY INSTRUCTIONS
• When battery pack is not in use, keep it away
from other metal objects like: paper clips,
coins, nails, screws, or other small metal
objects that can make a connection from
one terminal to another. Shorting the battery
terminals together may cause sparks, burns,
or a re.
• Always remove battery pack from your tool
when you are assembling parts, making
adjustments, cleaning, or when not in
use. Removing battery pack will prevent
accidental starting that could cause serious
personal injury.
• Always remove battery pack before storing
the device. When battery becomes fully
charged, unplug the charger from the power
supply and remove the battery pack from the
charger.
• Always wear eye protection with side shields
marked to comply with ANSI Z87.1. Failure
to do so could result in objects being thrown
into your eyes and other possible serious
injuries.
• Keep battery pack dry, clean, and free from
oil and grease. Always use a clean cloth
when cleaning. Never use brake fluids,
gasoline, petroleum-based products, or any
solvents to clean battery pack.
PROPER CARE FOR BATTERY
Off-season storage
To obtain the longest possible battery life, we
suggest the following:
• Remove the battery pack from the charger
once it is fully charged and ready for use.
For battery pack storage longer than 30 days:
• Store the battery pack where the temperature
is below 80°F and away from moisture.
• Store battery packs in a 30%-50% charged
condition.
• Every six months of storage, charge the pack
as normal.
CHARGER SAFETY RULES
• DO NOT ABUSE THE CHARGE CORD.
Never carry the charger by the cord. Do not
disconnect the charger from the outlet or
from the mower by pulling the charger cord.
• Do not use a damaged charger. Replace the
charger cords or the charger immediately.
• Keep the mower and the charger away from
water, heat sources (radiators, heaters,
stoves, etc.), ames, and chemicals.
• Make sure the battery pack is secured in the
charger before beginning operation.
• The battery pack will become slightly warm
to the touch while charging. This is normal
and does not indicate a problem.
• Do not place the charger and battery pack
in an area of extreme heat or cold. They will
work best at normal room temperature.
• When batteries become fully charged,
unplug the charger from the power supply
and remove the battery pack.
When transporting or
servicing unit, always remove the battery.
WARNING!
Some dust created by
power sanding, sawing, grinding, drilling,
and other construction activities contains
chemicals known to cause cancer, birth
defects or other reproductive harm. Some
examples of these chemicals are:
• lead from lead-based paints
• crystalline silica from bricks and cement
and other masonry products
• arsenic and chromium from chemicallytreated lumber
Your risk from these exposures varies,
depending on how often you do this type
of work. To reduce your exposure to these
chemicals: work in a well ventilated area,
and work with approved safety equipment,
such as those dust masks that are specially
designed to lter out microscopic particles.
WARNING!
PROPOSITION 65
Page 7
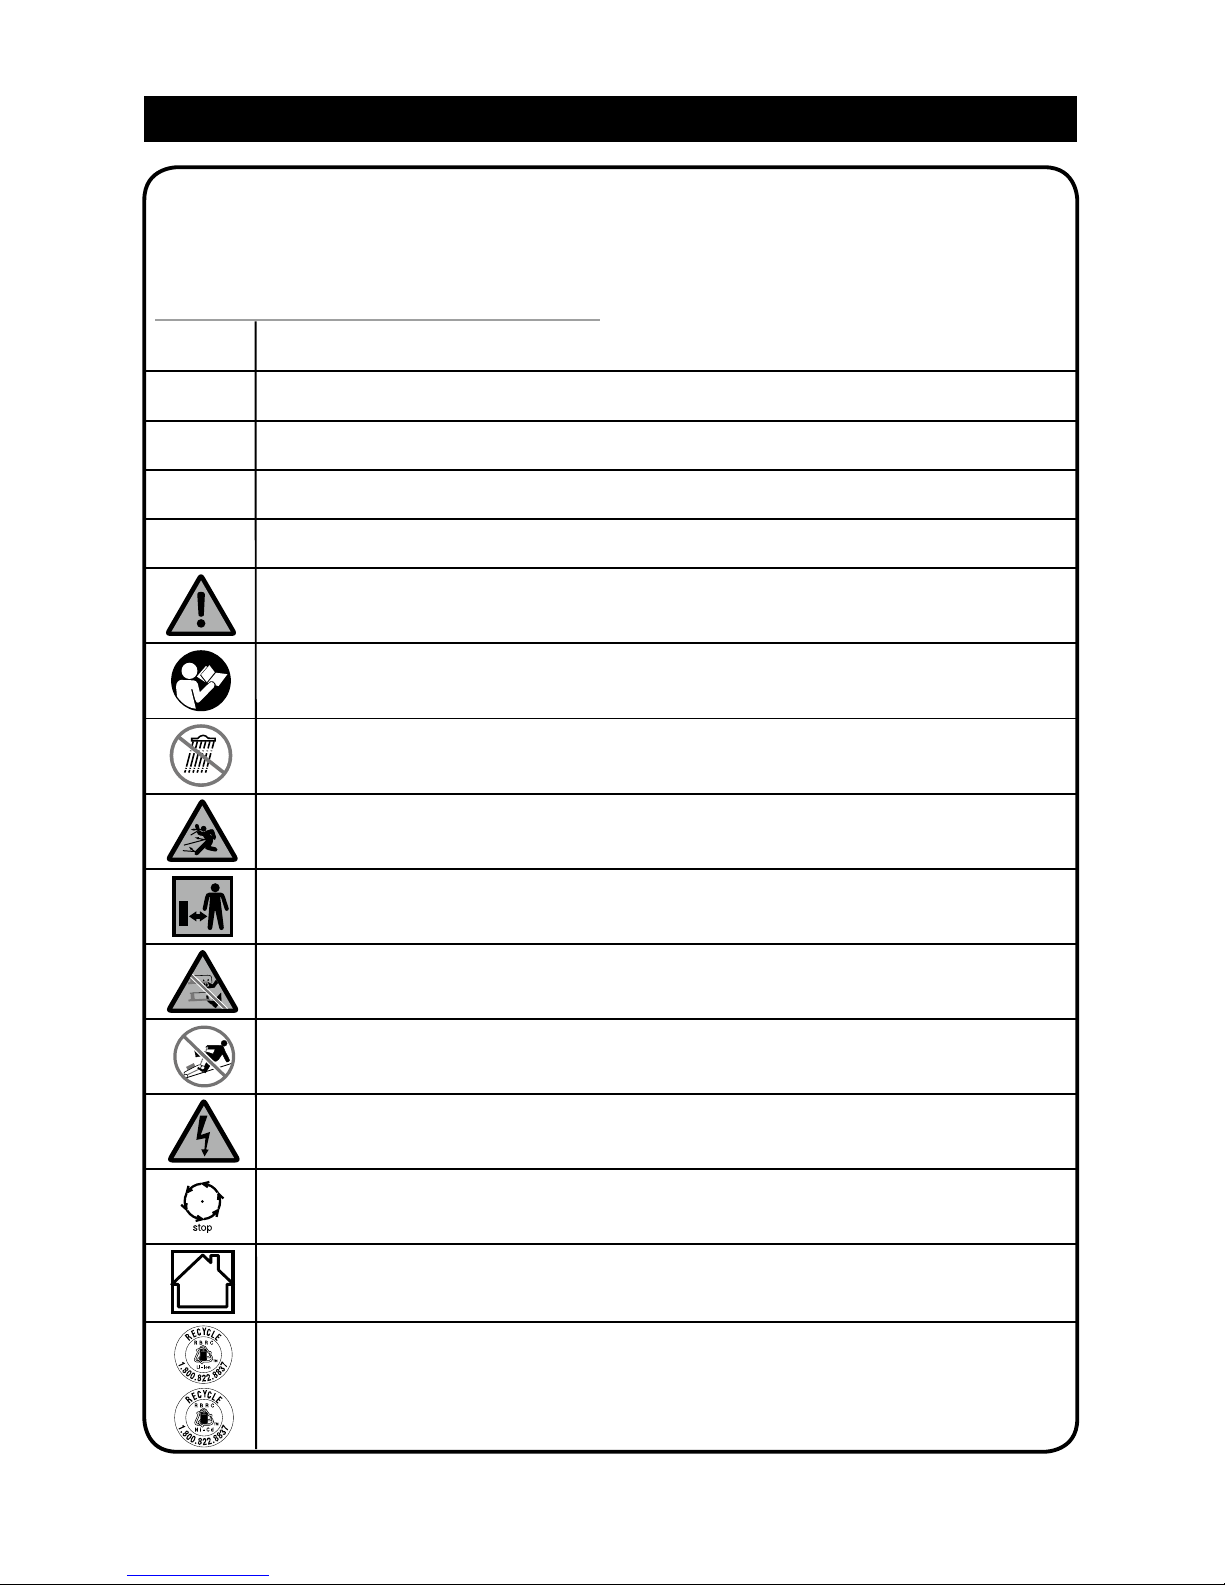
SYMBOL DESIGNATION/EXPLANATION
V Volts
A Amperes
Hz Hertz
W Watts
Hrs Hours
Precautions that involve your safety.
To reduce the risk of injury, user must read and understand user’s manual before
using this product.
Do not expose machine to rain or wet conditions.
Pay attention that bystanders are not injured through foreign objects thrown from
the mower.
Keep all bystanders (especially children and pets) at least 15 m away from the
work area.
Keep hands and feet away from blade and cutting area.
Do not operate on inclines greater than 15°. Mow across the face of slopes, never
up and down.
Beware of electric shock hazard.
Wait for all components of machine to have completely stopped before touching
them.
The charger is intended for indoor use only.
This product uses Lithium-ion (Li-ion) batteries. Local, state or federal laws may
prohibit disposal of batteries in ordinary trash. Consult your local waste authority for
information regarding available recycling and/or disposal options.
SYMBOLS
7 — English
Some of the following symbols may be used on this product. Please study them and learn
their meaning. Proper interpretation of these symbols will allow you to operate the product
better and safer.
Page 8

SYMBOLS
FEATURES
8 — English
The following signal words and meanings are intended to explain the levels of risk associated with this
product.
SYMBOL SIGNAL MEANING
DANGER Indicates an imminently hazardous situation, which, if not
avoided, will result in death or serious injury.
WARNING
Indicates a potentially hazardous situation, which, if not avoided,
could result in death or serious injury.
CAUTION
Indicates a potentially hazardous situation, which, if not avoided,
may result in minor or moderate injury.
CAUTION
(Without Safety Alert Symbol) Indicates a situation that may
result in property damage.
PRODUCT SPECIFICATIONS
Battery .....................................................................................................................40V Lithium-ion
No-load Speed ................................................................................................... 5500 r/min. (RPM)
Cutting Path ........................................................................................................................... 20 in.
Height Adjustments .............................................................................. 1 3/8 - 3 3/4” (3.5 - 9.5 cm)
Unit Weight (without batteries) .............................................................................42.3 lbs (19.2 kg)
KNOW YOUR LAWN MOWER
See Figure 1.
The safe use of this product requires an
understanding of the information on the product
and in this operator’s manual as well as a
knowledge of the project you are attempting.
Before use of this product, familiarize yourself
with all operating features and safety rules.
BATTERY COVER
The battery cover protects the battery port from
moisture and debris.
GRASS CATCHER
The grass catcher collects grass clippings and
prevents them from being discharged across
your lawn as you mow.
HEIGHT ADJUSTMENT LEVER
The height adjustment lever provides cutting
height adjustments.
MOTOR/BLADE CONTROL ASSEMBLY
The motor/blade control, located on the upper
handle of the mower, engages and disengages
the motor and blade.
MULCHING PLUG
Your mower is equipped with a mulching plug
that covers the rear discharge opening, which
allows the mower blade to cut and recut for ner
clippings.
Page 9

ASSEMBLY
9 — English
UNPACKING
This product requires assembly.
■ Carefully remove the product and any
accessories from the box. Make sure that all
items listed in the packing list are included.
■ Inspect the product carefully to make sure no
breakage or damage occurred during shipping.
■ Do not discard the packing material until
you have carefully inspected and satisfactorily
operated the product.
■ If any parts are damaged or missing, please
call 1-888-266-7096 for assistance.
PACKING LIST
Mower
Mulching Plug
Grass Catcher
4 Ah and 2 Ah Batteries
Charger
Operator’s Manual
UNFOLDING AND ADJUSTING HANDLE
ASSEMBLY
See Figure 2-3.
To raise handle assembly:
• Open the lower handle locks.
• Pull up and back on the lower handle until it
is aligned with the slot between the handle
locks and the mower housing.
NOTE: If the lower handle is difcult to move,
turn the lower handle locks clockwise to free
the handle.
• To secure the lower handle in place, close
the lower handle locks.
NOTE: If the lower handle is loose or does
not seat completely in the slot, turn the lower
handle locks counterclockwise to secure the
handle.
• Open the upper handle locks.
• Pull up and back on the upper handle to raise
it into operating position. Make sure that the
lower handle is seated in the grooves at the
bottom of the upper handle.
• To secure the upper handle in place, close
the upper handle locks.
NOTE: If the upper handle is loose or
separated from the lower handle, tighten the
knobs on the upper handle locks by turning
them clockwise.
To lower the handle assembly:
• Open the upper handle locks.
NOTE: If the handle lock is difficult to open,
loosen the knobs on the upper handle locks by
turning them counterclockwise.
• Lower the upper handle.
• Open the lower handle lock.
• Push outward on each side of the lower
handle until it is free from the slot. Then,
fold the handle to the front of the unit. Avoid
pinching or trapping any cables.
If any parts are damaged or
missing do not operate this product until the
parts are replaced. Failure to heed this warning
so could result in serious personal injury.
Do not attempt to modify
this product or create accessories not
recommended for use with this product. Any
such alteration or modification is misuse and
could result in a hazardous condition leading to
possible serious personal injury.
Do not insert battery pack
until assembly is complete. Failure to comply
could result in accidental starting and possible
serious personal injury.
To prevent accidental
starting, do not make any adjustments or
installations with the battery pack inserted.
WARNING!
WARNING!
WARNING!
WARNING!
Page 10

ASSEMBLY
10 — English
INSTALLING THE MULCHING PLUG (FOR
MULCHING OPERATION)
See Figure 4
NOTE: When using the mulching plug, do not
install the grass catcher.
• Remove battery pack. (See To Remove
Battery Pack in Operation section.)
• Lift and hold the rear discharge door.
• Grasp the mulching plug by its handle and
insert it at a slight angle, as shown.
• Push the mulching plug securely into place.
• Lower the rear discharge door.
• Reinstall battery pack when you are ready to
mow.
INSTALLING THE GRASS CATCHER (FOR
REAR BAGGING OPERATION)
See Figure 5-6.
NOTE: When using the grass catcher, do not
install the mulching plug.
• Remove battery pack(s). (See To Remove
Battery Pack in Operation section.)
• Lift the rear discharge door.
• Lift the grass catcher by its handle and place
under the rear discharge door so that the
hooks on the grass catcher are seated onto
the slots on the mower housing.
• Release the rear discharge door.
• Reinstall battery pack(s) when you are ready
to mow.
SETTING BLADE HEIGHT
See Figure 7.
When shipped, the wheels on the mower are
set to a low-cutting position. Before using
the mower for the first time, raise the cutting
position to the height best suited for your lawn.
The average lawn should be between 1-1/2 in.
to 2 in. during cool months and between 2 in.
and 3-1/4 in. during hot months.
To adjust the blade height:
• Remove battery pack(s). (See To Remove
Battery Pack in Operation section.)
• To raise the blade height, grasp the height
adjustment lever and move it toward the front
of the mower.
• To lower the blade height, grasp the height
adjustment lever and move it toward the
back of the mower.
• Reinstall battery pack(s) when you are ready
to mow.
Page 11

OPERATION
11 — English
This product will accept Craftsman 40V lithiumion battery packs only.
For complete charging instructions, refer to the
Operator’s Manuals for your Craftsman battery
pack and charger models.
BATTERY PROTECTION FEATURES
Craftsman lithium-ion batteries are designed
with features that protect the lithium-ion cells
and maximize battery life.
If the tool stops during use, release the bail
switch to reset and resume operation. If the
tool still does not work, the battery needs to be
recharged.
TO INSTALL BATTERY PACK
See Figure 8.
• Raise the battery cover.
• Place the battery pack in the mower. Align
raised ribs on battery pack with grooves in
the mower’s battery port.
• Lower the battery cover.
TO REMOVE BATTERY PACK
See Figure 8.
• Raise the battery cover.
• Press and hold the battery latch button at the
bottom of the battery pack.
• Remove battery pack from the mower.
STARTING/STOPPING THE MOWER
See Figure 9.
• Raise the battery cover.
• Install battery pack(s).
• Lower the battery cover.
• Press and hold the start button. Pull the bail
toward the handle and release the button to
start the mower.
• To stop the mower, release the bail switch.
Do not allow familiarity with
products to make you careless. Remember
that a careless fraction of a second is sufcient
to inict serious injury.
Always remove battery
pack(s) from your tool when you are assembling
parts, making adjustments, cleaning, or when
not in use. Removing battery pack will prevent
any chance of accidental starting that could
cause serious personal injury.
Make sure the latch on the
bottom of the battery pack snaps in place and
the battery pack is fully seated and secure
in the mower’s battery port before beginning
operation. Failure to securely seat the battery
pack could cause the battery pack to fall out.
NOTE: This mower includes two batteries that
can be used simultaneously in this mower for
maximum runtime. This mower can also run off
of one battery if needed.
Always wear eye protection
with side shields marked to comply with ANSI
Z87.1. Failure to do so could result in objects
being thrown into your eyes resulting in
possible serious injury.
Do not use any attachments
or accessories not recommended by the
manufacturer of this product. The use of
attachments or accessories not recommended
can result in serious personal injury.
Always inspect mower for
missing or damaged parts and blade for
damage, uneven, or excessive wear prior
to use. Use of the mower with damaged or
missing parts can result in serious personal
injury.
WARNING!
WARNING!
WARNING!
WARNING!
WARNING!
WARNING!
Page 12

OPERATION
12 — English
MOWING TIPS
• Make sure the lawn is clear of stones, sticks,
wires, and other objects that could damage
the lawn mower blades or motor. Do not mow
over property stakes or other metal posts.
Such objects could damage the blade or
be accidentally thrown by the mower in any
direction and cause serious personal injury
to the operator and others.
• For a healthy lawn, always cut off one-third
or less of the total length of the grass.
• When cutting heavy grass, reduce walking
speed to allow for more effective cutting and
a proper discharge of the clippings.
• Do not cut wet grass. It will stick to the
underside of the deck and prevent proper
bagging or mulching of grass clippings.
• New or thick grass may require a narrower
cut or a higher cutting height.
• Clean the underside of the mower deck after
each use to remove grass clippings, leaves,
dirt, and any other accumulated debris.
NOTE: Always stop mower, allow blades to
completely stop, and remove the battery pack
before cleaning underneath the mower.
SLOPE OPERATION
See Figure 10 and Slope Gauge on Page vi.
• Mow across the face of slopes, not up and
down. Exercise extreme caution when
changing direction on slopes.
• Watch for holes, ruts, rocks, hidden objects,
or bumps which can cause you to slip or trip.
Tall grass can hide obstacles. Remove all
objects such as rocks, tree limbs, etc., which
could be tripped over or thrown by the blade.
• Always be sure of your footing. A slip and
fall can cause serious personal injury. If you
feel you are losing your balance, release the
upper bail immediately.
• Do not mow near drop-offs, ditches, or
embankments; you could lose your footing or
balance.
EMPTYING THE GRASS CATCHER
See Figure 11.
• Stop the mower and allow blades to
completely stop.
• Remove battery pack(s).
• Lift the rear discharge door.
• Lift the grass catcher by its handle to remove
from mower.
• Empty grass clippings.
• Lift the rear discharge door and reinstall the
grass catcher as described earlier in this
manual.
• Reinstall battery pack(s) when you are ready
to mow.
Slopes are a major factor
related to slip and fall accidents that can result
in severe injury. Operation on slopes requires
extra caution. If you feel uneasy on a slope, do
not mow it. For your safety, do not attempt to
mow slopes greater than 15 degrees.
WARNING!
Page 13

MAINTENANCE
13 — English
GENERAL MAINTENANCE
Avoid using solvents when cleaning plastic
parts. Most plastics are susceptible to damage
from various types of commercial solvents
and may be damaged by their use. Use clean
cloths to remove dirt, dust, oil, grease, etc.
Periodically check all nuts and bolts for proper
tightness to ensure safe operation of the
mower.
Remove any build-up of grass and leaves on
or around the motor cover. Wipe the mower
clean with a dry cloth occasionally. Do not use
water.
LUBRICATION
All of the bearings in this product are lubricated
with a sufcient amount of high grade lubricant
for the life of the unit under normal operating
conditions. Therefore, no further bearing
lubrication is required.
REPLACING THE CUTTING BLADE
See Figures 12 - 13.
NOTE: Only use identical replacement blades.
• Stop the motor. Allow blade to come to a
complete stop.
• Remove the battery pack(s).
• Turn the mower on its side.
• Wedge a block of wood between the blade
and mower deck to prevent the blade from
turning.
• Loosen the blade nut by turning it
counterclockwise (as viewed from bottom of
mower) using a 15 mm wrench or socket (not
provided).
• Remove the blade nut, spacer, blade
insulator, and blade.
• Make certain the motor assembly is pushed
completely against the motor shaft.
• Place the new blade on the shaft against the
motor assembly. Ensure blade is properly
seated with shaft going through center blade
hole and the two blade posts inserted into
their respective holes on the blade. Make
sure it is installed with the curved ends
pointing up toward the mower deck and
not down toward the ground. When seated
properly, the blade should be at against the
motor assembly.
• Replace the blade insulator and spacer, then
thread the blade nut on the shaft and nger
tighten.
NOTE: Make certain all parts are replaced in
the exact order in which they were removed.
• Torque the blade nut down clockwise using
a torque wrench (not provided) to ensure the
bolt is properly tightened. The recommended
torque for the blade nut is 350-400 in. lbs.
STORING THE MOWER
See Figure 14.
• Remove the battery and store in a secure
location out of the reach of children.
Before performing any
maintenance, make sure the mower battery
are removed to avoid accidental starting and
possible serious personal injury.
When servicing, use only
authorized replacement parts. Use of any other
parts can create a hazard or cause product
damage.
Always wear eye protection
with side shields marked to comply with ANSI
Z87.1. Failure to do so could result in objects
being thrown into your eyes resulting in
possible serious injury.
Do not at any time let brake
fluids, gasoline, petroleum-based products,
penetrating oils, etc., come in contact with
plastic parts. Chemicals can damage, weaken,
or destroy plastic which can result in serious
personal injury.
WARNING!
WARNING!
WARNING!
WARNING!
Page 14

MAINTENANCE
14 — English
• Before storage, wipe any dirt or debris from
the battery area.
• Turn mower on its side and clean grass
clippings that have accumulated on the
underside of the mower deck.
• Wipe the mower clean with a dry cloth.
• Check all nuts, bolts, knobs, screws,
fasteners, etc., for tightness.
• Inspect moving parts for damage, breakage,
and wear. Have repairs made on any
damaged or missing parts. Check blade for
damage, uneven, or excessive wear and
replace blade if these conditions exist.
• Lower the handle assembly as described
earlier in this manual.
• Store mower indoors in a clean, dry place out
of the reach of children.
• Do not store near corrosive materials such
as fertilizer or rock salt.
Page 15

TROUBLESHOOTING
15 — English
IF THESE SOLUTIONS DO NOT SOLVE THE PROBLEM CONTACT A QUALIFIED SERVICE
DEALER.
PROBLEM
Handle is loose.
Mower will not start
Mower is cutting grass
unevenly
Mower is not mulching
properly
Mower is hard to push
Mower is not bagging
properly
Mower vibrating at higher
speed
Motor stops while cutting
POSSIBLE CAUSE
Handle locks are not locked.
The battery charge is low.
Lawn is rough or cutting
height is not set properly
Wet grass clippings are sticking
to the underside of the deck.
The rear of the mower and
blades are dragging in heavy
grass or the cutting height is
too low.
Cutting height set too low
The mulch plug is not
removed.
Blade is unbalanced,
excessively or unevenly worn
Bent motor shaft.
Cutting height set too low
SOLUTION
Lock upper and lower handle
locks.
Charge the battery.
Adjust the cutting height.
Wait until the grass dries before
mowing.
Raise the cutting height.
Raise cutting height.
Make sure the mulch plug is
removed.
Replace the blade.
Stop the motor, remove battery.
Inspect for damage. Have
repaired by an authorized
service center before restarting.
Raise the cutting height
Page 16

CRAFTSMAN 20in. 40V LAWN MOWER – MODEL NUMBER 138.98818
The model number will be found on a label attached to the unit. To order replacement parts, call
1-800-469-4663.
TO PURCHASE REPLACEMENT PARTS, CALL 1-800-469-4663
16 — English
Page 17

CRAFTSMAN 20in.40V LAWN MOWER – MODEL NUMBER 138.98818
The model number will be found on a label attached to the unit. To order replacement parts, call
1-800-469-4663.
17 — English
TO PURCHASE REPLACEMENT PARTS, CALL 1-800-469-4663
ITEM NO. PART NO. DESCRIPTION QTY
1 31103498 Motor engagement box assy. 1
2 34106467 Knob M8 2
3 31102467 Cam lock assy. 2
4 31103996 40V 2Ah battery 1
5 31103997 40V 4Ah battery 1
6 31101498 Motor cover assy. 1
7 31102467 Cam lock assy. 2
8 34105470-3 Cam lock base 2
9 32201572 Screw 4
10 32208234A Bolt M5x30 1
11 34109470 Height adjustment knob 1
12 32201470 Screw 2
13 31101998 40V Charger 1
14 33304498 Height adjustment lever 1
15 33901470 Height adjustment torsion spring 1
16 33201470 Height adjustment alxe 1
17 33305470-1 Height adjustment bracket 1
18 33306470 Height adjustment plate 2
19 36101486A Motor, 5335F-40V/20” 1
20 32200135 Bolt and washer 6
21 36101486 Motor, 5335Z-40V/20” 1
22 3220537 Lock nut M6 6
23 34114498 Top cover (front) 1
24 34105486-1 Deck 1
25 33320486 Spindle guard 2
26 34106486 Blade holder 2
27 33308486 Reverse blade 1
28 34107486 Blade insulator 2
29 33307486 Blade 1
30 3220535A Nut M10x1.25 1
31 33309486 Spacer 2
32 3221037A Nut M10x1.25 1
33 34111498 Wheel cover 4
34 33101498 7” Wheel assy. 2
35 33318486 Wheel alxe washer 4
36 33301498 Wheel axle (front) 1
37 32201572 Screw 8
38 3220898 Washer 4
39 3290135 Pin 8
Page 18

CRAFTSMAN 20in. 40V LAWN MOWER – MODEL NUMBER 138.98818
The model number will be found on a label attached to the unit. To order replacement parts, call
1-800-469-4663.
18 — English
TO PURCHASE REPLACEMENT PARTS, CALL 1-800-469-4663
ITEM NO. PART NO. DESCRIPTION QTY
40 33303498 Link bar (rear) 1
41 33311498 Height adjustment tension spring 1
42 33302498 Link bar (front) 1
43 33102498 10” Wheel assy. 2
44 33307498 Wheel axle (rear) 1
45 32904131-1 Washer 3
46 3220246D Screw ST3.5x16-C 4
47 34128486-1 Rear bafe 1
48 34141486 Mulch plug 1
49 34127486-1 Rear shield 1
50 32905302A Clip 2
51 3290305 Washer 2
52 3220511D Screw M4x12 2
53 3221237 Lock nut M4 2
54 33317486 Rear cover rod 1
55 33904486 Torsion spring of the rear cover 1
56 34126486-1 Rear cover 1
57 3290506 Clip 2
58 36202486-2A Power switch board 1
59 34105470-3 Cam lock cover 2
60 34143486 Wire clip 1
61 32204113D Screw ST 4.2x20-C 12
62 3330490-1 Wire clip 2
63 33315486-1 Lower handle 1
64 34112498 Grass catcher bag 1
65 33306498 Grass catcher frame 1
Page 19

i
See this section for all of the gures referenced in the
operator’s manual.
Consulte esta sección para ver todas las guras a las que se hace
referencia en el manual del operador.
Fig. 1
A - Bail Switch (interruptor de agarre)
B - Motor/blade control assembly (conjunto de
control del motor/hoja)
C - Start button (botón de arranque)
D - Upper handle (mango superior)
E - Upper handle lock (seguro del mango superior)
F - Lower handle (mango inferior)
G - Lower handle lock (seguro del mango inferior)
D
J
E
G
F
L
K
M
N
B
E
G
I
H
A
C
H - Height adjustment lever (palanca de ajuste de altura)
I - Battery cover (tapa de las baterías)
J - Grass catcher (receptor de hierba)
K - 40V 2Ah Battery pack (batería)
L - 40V 4Ah Battery pack (batería)
M - Charger (Cargador)
N - Mulching plug (tapón para trituración)
Page 20

Fig. 2
Fig. 3 Fig. 4
ii
A - Upper handle lock (seguro del mango superior)
B - Lower handle lock (seguro del mango inferior)
C - Open (abra)
D - Close (cerrar)
E - Knob (perilla)
A - Lower handle (mango inferior)
B - Lower handle lock (seguro del mango inferior)
C - Loosen (aflojar)
D - Tighten (apriete)
E - Slot (ranura)
A - Rear discharge door (puerta de descarga posterior)
B - Rear discharge opening (abertura de descarga posterio)
C - Mulching plug (tapón para trituración)
C
A
A
C
D
DC
D
E A
B
B
E
B
C
Page 21

Fig. 5
Fig. 6 Fig. 8
iii
A - Grass catcher handle (mango del receptor de hierba)
B - Slots (ranuras)
C - Rear door (puerta de descarga)
A - Slots (ranuras) B - Hooks (ganchos)
D - Rear discharge opening (abertura de descarga lateral)
E - Door rod (barra de la puerta)
F - Hooks (ganchos)
Fig. 7
A - Height adjustment lever (palanca de ajuste de altura)
B - Lowest blade setting (ajuste más bajo de la hoja)
C - Highest blade setting (ajustes de cuchilla más alto)
A - Battery pack (paquete de baterías)
B - Battery cover (tapa de las baterías)
C - Latch (pestillo)
A
D
C
F
B
A
A
B C
C
B
E
A
B
Page 22

1
2
Fig. 9 Fig. 10
iv
A - Bail (asa)
B - Start button(botón de arranque)
C - Upper handle (mango superior)
15° MAXIMUM
15° MÁXIMA
A
B
C
Fig. 11
Page 23

Fig. 13
Fig. 14
v
G
B
A
G
C
D
F
E
A - Motor assembly (conjunto del motor)
B - Shaft (eje)
C - Blade (hoja)
D - Blade insulator (aislante de hoja)
E - Spacer (separador)
F - Blade nut (tuerca de la hoja)
G - Blade posts (montantes de cuchilla)
TO STORE THE MACHINE
PARA GUARDAR LA MÁQUINA
Fig. 12
A - Blade (hoja)
B - Wrench (llave)
C - Block of wood (bloque de madera)
A
BC
Page 24

vi
SLOPE GAUGE (MANEJO EN PENDIENTES)
USE THIS SLOPE GAUGE TO DETERMINE
IF A SLOPE IS TOO STEEP FOR SAFE OPERATION!
USE ESTE CALIBRADOR DE INCLINACIÓN PARA
DETERMINAR SI UNA PENDIENTE ES DEMASIADO
EMPINADA PARA UN FUNCIONAMIENTO SEGURO.
To check the slope, proceed as follows:
1. Remove this page and fold along the dashed line.
2. Locate a vertical object on or behind the slope (e.g. a pole,
building, fence, tree, etc.)
3. Align either side of the slope gauge with the object (See Figure
1 and Figure 2 ).
4. Adjust gauge up or down until the left corner touches the slope
(See Figure 1 and Figure 2).
5. If there is a gap below the gauge, the slope is too steep for safe
operation (See Figure 2 above).
Para verificar la inclinación, proceda de la siguiente manera:
1. Retire esta página y dóblela siguiendo la línea discontinua.
2. Busque un objeto en posición vertical sobre o detrás de la
pendiente (como una bandera, edificio, verja, árbol, etc.).
3. Alinee cada extremo del calibrador de inclinación con el objeto
(ver figura 1 y 2).
4. Ajuste el calibrador hacia arriba o hacia abajo hasta que la
esquina izquierda toque la pendiente (ver figura 1 y 2).
5. Si hay un espacio debajo del calibrador, la pendiente es
demasiado empinada para un funcionamiento seguro (ver figura
2 de arriba).
15
o
dashed line (15
o
de línea discontinua)
Slopes are a major factor related to tip-
over and roll-over accidents which can result in severe injury
or death. Do not operate machine on slopes in excess of 15
degrees. All slopes require extra caution. Always mow across the
face of slopes, never mow up and down slopes.
Las pendientes son un factor
importante relacionado con los accidentes de vuelco o inclinación
que pueden causar lesiones graves o mortales. Todas las
pendientes requieren una precaución extrema. Pase siempre
el cortacésped transversalmente a la pendiente y nunca hacia
arriba o hacia abajo.
WARNING! ADVERTENCIA!
OK (OK)
Figure 1 (Figura 1) Figure 2 (Figura 2)
TOO STEEP
(DEMASIADO EMPINADO)
15o Slope
(15° de inclinación)
15
o
Slope
(15° de inclinación)
Page 25

INSTRUCCIONES DE SEGURIDAD IMPORTANTES
3 — Español
LEA Y COMPRENDA
TODAS LAS INSTRUCCIONES. E l
incumplimiento de las instrucciones señaladas
abajo y en la máquina puede causar descargas
eléctricas, incendios y/o lesiones serias.
ADVERTENCIA!
LEA TODAS LAS INSTRUCCIONES
• Esta máquina de corte es capaz de amputar
manos y pies, y de lanzar objetos. La
inobservancia de todas las instrucciones de
seguridad puede causar lesiones serias o la
muerte.
• Evite ambientes peligrosos - No use la
podadora de pasto en condiciones húmedas
o mojadas ni la utilice en la lluvia.
• Mantenga alejados a los niños - Mantenga
alejados a todos los circunstantes, niños y
animales a una distancia mínima de 15,25
m (50 pies). Detenga la máquina si alguien
ingresa al área.
• Pueden producirse accidentes trágicos si
el operador no está alerta a la presencia de
niños. Los niños suelen sentirse atraídos por
la máquina y la actividad de la podadora.
Nunca dé por sentado que los niños
permanecerán donde los vio por última vez.
• Mantenga a los niños alejados del
área de podado y bajo la cuidadosa
supervisión de un adulto responsable
que no sea el operador.
• Esté alerta y apague la podadora si un
niño entra en el área.
• No permita que los niños menores de 14
años manipulen el cortacésped.
• Tenga cuidado extremo al acercarse a
esquinas ciegas, arbustos, árboles u
otros objetos que puedan impedirle ver a
un niño.
• Vístase adecuadamente - Póngase
pantalones largos de tela gruesa, mangas
largas, botas y guantes. No se ponga ropa
holgada o pantalones cortos, sandales
ni ande descalzo. No se ponga joyas de
ninguna clase. Pueden quedar atrapadas en
las piezas móviles.
• Ne pas travailler hors de portée - Toujours se
tenir bien campé et en équilibre. Se puede
perder el equilibrio al tratar de alcanzar
demasiado lejos.
• No accione el equipo cuando esté descalzo
o al llevar puestas sandalias o calzado
liviano similar. Use calzado de seguridad
que le proteja sus pies y mejore su postura
en supercies resbaladizas.
• No deje desatendida la podadora de pasto
mientras la tenga encendida.
• Mantenga las manos y los pies alejados del
área de corte. Manténgase alejado de la
abertura de descarga en todo momento.
• Utilice la podadora de pasto únicamente a la
luz del día o con buena luz articial.
• Siempre use anteojos de seguridad con
protección lateral. Los anteojos comunes
sólo tienen lentes resistentes a los
impactos. NO son gafas de seguridad. Con
el cumplimiento de esta regla se reduce el
riesgo de posibles lesiones oculares. Use
una careta si la operación genera mucho
polvo.
• Utilice gafas de seguridad - Siempre
póngase protección ocular con protección
lateral con la marca de cumplimiento de
la norma ANSI Z87.1. Si el proceso es
polvoriento, utilice una careta.
• Utilice el aparato adecuado para la tarea No utilice la podadora de pasto para ninguna
función diferente de las especicadas.
• No fuerce la podadora de pasto - Efectúa
el trabajo mejor y de manera más segura,
si se utiliza a la velocidad para la que está
diseñada.
• Permanezca alerta - Preste atención a lo
que esté haciendo y use el sentido común
al utilizar la podadora de pasto. No utilice
la podadora cuando está cansado, molesto
o bajo la influencia de drogas, alcohol o
medicamentos. Un momento de descuido al
utilizar la podadora de pasto puede causar
lesiones serias.
• Mantenga la podadora de pasto con
cuidado - Mantenga la máquina en buenas
condiciones de trabajo. Mantenga las
cuchillas afiladas, y las protecciones en
su lugar y en buenas condiciones de
Page 26

4 — Español
trabajo. Reemplace las cuchillas dañadas
o desgastadas de forma irregular antes
de usar la podadora para obtener el mejor
desempeño.
• Revise el apriete de todas las tuercas,
pernos y tornillos con frecuencia para
vericar la seguridad de las condiciones de
funcionamiento del equipo. Las cuchillas de
la podadora son losas. Envuelva la cuchilla
o utilice guantes y sea extremadamente
precavido cuando las repare.
• No deseche la batería en el fuego. Las
baterías pueden estallar. Verifique los
códigos de la localidad para conocer
posibles instrucciones especiales para
desecharlas.
• Apague el motor y espere hasta que la
cuchilla se detenga completamente y retire
la paquete de baterías antes de limpiar la
podadora de pasto, retirar el receptor de
hierba o extraer el tapón para trituración de
pasto para fertilizar.
• Cambie la cuchilla si está doblada o surada.
Una cuchilla mal equilibrada ocasiona
vibraciones que podrían dañar la unidad
impulsora del motor o causar lesiones
personales. Afile la cuchilla desafilada de
la misma manera en cada extremo para
mantener el equilibrio. Limpie profundamente
la cuchilla.
• Cuando no está en uso, la podadora debe
guardarse en el interior, en un lugar seco y
cerrado con llave, lejos del alcance de los
niños y guárdela en un lugar apartado fuera
del alcance de los niños.
• Siempre utilice dispositivos de protección.
No utilice la podadora si no tiene el receptor
de hierba, la protección de descarga, el
tapón para trituración de pasto y la puerta de
descarga trasera en sus debidos lugares y
en perfectas condiciones de funcionamiento.
• No abra ni dañe el paquete de pilas. El
electrolito emitido es corrosivo y puede
causar daños en los ojos y en la piel. Puede
ser tóxico si se ingiere.
• Siga las instrucciones del fabricante
para el correcto manejo e instalación de
los accesorios. Sólo utilice accesorios
aprobados por el fabricante.
• Tenga cuidado cuando maneje baterías a n
de no realizar un cortocircuito en la batería
con materiales conductores como anillos,
brazaletes. La batería o el conductor pueden
recalentarse y provocar quemaduras.
• Despeje el área de trabajo cada vez antes
de utilizar esta herramienta. Retire todos los
objetos como piedras, palos, metal, alambre,
huesos, juguetes u otros objetos que puedan
ser lanzados por la cuchilla. Permanezca
detrás del mango mientras el motor esté en
funcionamiento.
• Evite pozos, surcos, montículos, rocas,
estacas que indican los límites de la
propiedad u otros objetos ocultos. El terreno
desnivelado puede causar un accidente por
resbalón y caída.
• No pode el pasto cerca de precipicios, zanjas
o terraplenes.
• Pode atravesando el frente de las pendientes;
nunca hacia arriba ni hacia abajo. Tenga
mucha precaución al cambiar de dirección en
una pendiente.
• Planifique su patrón de podado para evitar
la descarga de material en caminos, aceras,
circunstantes y demás. Además, evite
descargar material contra una pared u
obstrucción que pueda hacer que el material
rebote hacia el operador.
• No pode la hierba cuando está mojada ni
en pendientes excesivamente empinadas.
Una postura mal afirmada puede causar un
accidente por resbalón y caída. Camine, no
corra nunca.
• Tenga cuidado extremo al acercarse a
esquinas ciegas, arbustos, árboles u otros
objetos que puedan impedirle ver.
• No tire de la podadora hacia atrás a menos
que sea absolutamente necesario. Si debe
retroceder la podadora para alejarla de una
pared u obstrucción, primero mire hacia abajo
y hacia atrás para evitar tropezar o tirando la
podadora hacia los pies.
• Los objetos golpeados por la cuchilla de la
podadora de pasto pueden causar graves
heridas a las personas. Siempre debe
INSTRUCCIONES DE SEGURIDAD IMPORTANTES
Page 27

5 — Español
examinarse el pasto con cuidado y despejarlo
de cualquier objeto antes de cada poda.
• Si la podadora de pasto golpea un objeto
extraño, siga estos pasos:
• Detenga la podadora de césped soltando
el asa, espere hasta que la cuchilla se
detenga por completo y retire la paquete
de baterías.
• Inspeccione minuciosamente la
podadora para ver si tiene daños.
• Reemplace la cuchilla si presenta algún
tipo de daño. Repare todo daño antes de
volver a arrancar la podadora y continuar
utilizándola.
• Detenga el motor, espere hasta que la
cuchilla se detenga por completo y retire
la paquete de baterías. antes de limpiar la
bolsa colectora. La cuchilla continúa girando
durante algunos segundos después de que se
apaga el motor. Nunca coloque ninguna parte
del cuerpo en el área de la cuchilla hasta que
esté seguro de que la cuchilla ha dejado de
girar.
• Si la podadora comienza a vibrar de manera
anormal, detenga el motor e inspecciónela
inmediatamente para determinar la causa.
Reemplace la cuchilla si presenta algún tipo
de daño o si se ha desgastado de forma
irregular. La vibración es generalmente una
advertencia de problemas
• Sólo personal de reparación calificado debe
dar servicio al producto.Todo servicio o
mantenimiento efectuado por personal no
calicado puede signicar un riesgo de lesiones
al usuario, y de daños físicos al producto.
• Al dar servicio a este producto, sólo utilice
únicamente repuestos idéntico. Utilice
solo cuchillas de repuesto idénticas a las
originales. El empleo de piezas no idénticos
puede signicar un riesgo de lesiones serias
al usuario, o de daños físicos al producto.
• Mantenga las etiquetas de instrucciones de
seguridad en buen estado o cámbielas, según
sea necesario.
• Desconecte el paquete de baterías –
Desconecte el paquete de baterías antes de
guardar la herramienta, servicio, transporte,
o cambie los aditamentos como una hojas.
Tales medidas preventivas de seguridad
reducen el riesgo de poner en marcha
accidentalmente la herramienta.
• Apague la unidad y desconecte el paquete
de baterías cuando no esté en uso. Traslade
o transporte la unidad con el motor apagado
y el paquete de baterías ya retirados de la
podadora.
• Las herramientas de baterías no se necesitan
conectar a una toma de corriente; por lo
tanto, siempre están en condiciones de
funcionamiento. Esté consciente de los
posibles peligros cuando no esté usando
la herramienta de baterías o cuando esté
cambiando los accesorios de la misma. Con
el cumplimiento de esta regla se reduce el
riesgo de una descarga eléctrica, incendio o
lesión corporal seria.
• No use aparatos accionados por baterías en
la lluvia.
• Quite o desconecte la batería antes de
proporcionarle servicio, realizarle una limpieza
o quitar material del aparato para el cuidado
del jardín.
• Cargue las baterías solamente con el
cargador indicado. Para utilice con baterías
de iones de litio de Craftsman 40 V.
• Guarde en el interior los aparatos que no se
están usando - Cuando no se está usando,
se debe guardar la recortadora de hilo en el
interior, en un lugar seco y cerrado con llave,
inaccesible a los niños.
• Siga las instrucciones para lubricar y cambiar
accesorios.
• Mantenga las protecciones en su lugar y en
perfectas condiciones.
• Mantenga las cuchillas aladas.
• Mantenga las manos y los pies alejados del
área de corte.
• Solo permita que esta máquina sea operada
por personas adultas responsables que estén
familiarizadas con las instrucciones.
• Nunca opere la máquina en un espacio
cerrado.
INSTRUCCIONES DE SEGURIDAD IMPORTANTES
Page 28

6 — Español
INSTRUCCIONES DE SEGURIDAD IMPORTANTES
• Nunca altere los dispositivos de seguridad.
Compruebe periódicamente que la máquina
funcione correctamente.
• Guarde estas instrucciones. Consúltelas
con frecuencia y empléelas para instruir
a otras personas que puedan utilizar
esta herramienta. Si presta a alguien
esta herramienta, facilítele también las
instrucciones.
BATERÍA Y CARGADOR
NORMAS DE SEGURIDAD DE LA BATERÍA
• No se necesita conectar a una toma de
corriente las herramientas de baterías; por
lo tanto, siempre están en condiciones de
funcionamiento. Esté consciente de los
posibles peligros cuando no esté usando
la herramienta de baterías o cuando esté
cambiando los accesorios de la misma. Con
el cumplimiento de esta regla se reduce el
riesgo de una descarga eléctrica, incendio o
lesión corporal seria.
• No coloque herramientas de baterías ni
las baterías mismas cerca del fuego o del
calor. De esta manera se reduce el riesgo de
explosiones y de lesiones.
• No aplaste, deje caer o dañe la batería.
Nunca utilice una batería o cargador que
se ha caído, aplastado, recibido un golpe
contundente o ha sido dañado(a) de alguna
manera. Las baterías dañadas pueden
sufrir explosiones. Deseche de inmediato
toda batería que haya sufrido una caída o
cualquier daño.
• Las baterías pueden explotar en presencia
de una fuente de inflamación, como una
luz guía. Para reducir el riesgo de lesiones
corporales serias, nunca use un producto
inalámbrico en presencia de llamas vivas.
La explosión de una batería puede lanzar
fragmentos y compuestos químicos. Si ha
quedado expuesto a la explosión de una
batería, lávese de inmediato con agua.
• No cargue ninguna batería en lugares
mojados o húmedos. Con el cumplimiento
de esta regla se reduce el riesgo de una
descarga eléctrica.
• Para obtener resultados óptimos, debe
cargarse la batería en un lugar donde la
temperatura esté entre 45°F (7°C) y 104°F
(40°C). No la guarde a la intemperie ni en el
interior de vehículos.
• En condiciones extremas de uso o
temperatura las baterías pueden emanar
líquido. Si el líquido llega a tocarle la piel,
lávese de inmediato con agua y jabón. Si le
entra líquido en los ojos, láveselos con agua
limpia por lo menos 10 minutos, y después
busque de inmediato atención médica. Con
el cumplimiento de esta regla se reduce el
riesgo de lesiones corporales serias.
• Cuando no esté utilizándose el paquete
de baterías, manténgalo lejos de otros
objetos metálicos, como clips, monedas,
clavos, tornillos o otros objetos metálicos,
pequeños que puedan establecer conexión
entre ambas terminales. Establecer una
conexión directa entre las dos terminales
de las baterías puede causar quemaduras o
incendios.
• Siempre retire el paquete de baterías de
la herramienta cuando esté ensamblando
partes, realizando ajustes, limpiando o
cuando ésta no esté en uso. Si retira el
paquete de baterías, evitará arranques
accidentales que podrían provocar lesiones
graves.
• Siempre retire el paquete de baterías antes
de guardar el dispositivo.
• Cuando la batería esté completamente
cargada, desconecte el cargador del
suministro de corriente y retire el paquete de
baterías del cargador.
• Siempre póngase protección ocular
con protección lateral con la marca de
cumplimiento de la norma ANSI Z87.1. Si
no cumple esta advertencia, los objetos
que salen despedidos pueden producirle
lesiones serias en los ojos.
Utilice baterías de
repuesto únicamente. Otras baterías pueden
ocasionar daños a la podadora.
PRECAUCIÓN!
Page 29

7 — Español
INSTRUCCIONES DE SEGURIDAD IMPORTANTES
• Mantenga el paquete de baterías seco,
limpio y sin aceite ni grasa. Use siempre un
paño limpio para limpiar. Nunca use líquido
de frenos, gasolina, productos derivados del
petróleo o solvente para limpiar el paquete
de baterías.
CUIDADO ADECUADO DE LA BATERÍA
Almacenamiento fuera de temporada
Para lograr la más larga duración posible de las
baterías, se sugiere lo siguiente:
• Retire el paquete de baterías del cargador
una vez cargado completamente y listo para
usarse.
Para guardar el paquete de baterías más de 30
días:
• Guarde la batería donde la temperatura sea
inferior a 27°C (80°F) y lejos de la humedad.
• Guarde el paquete de baterías cargado
30%-50%.
• Cargue la batería de manera normal, cada
seis meses de almacenamiento.
NORMAS DE SEGURIDAD PARA EL
CARGADOR
• No maltrate el cable del cargador. Nunca
transporte el cargador del cable. No tire
del cable para desconectar el cargador del
tomacorriente o de la podadora. No repare la
máquina con el cargador conectado ni con la
llave de seguridad colocada.
• No utilice un cargador dañado. Cambie los
cables o el cargador de inmediato.
• Mantenga la podadora y el cargador alejados
de agua, fuentes de calor (radiadores,
calentadores, estufas, etc.), llamas y
químicos. No incinere este producto ya que
las baterías en su interior podrían explotar o
sufrir fugas.
• Asegúrese de que el paquete de baterías se
asegura en el cargador antes de utilizar.
• El paquete de baterías se siente un poco
caliente al tocarse mientras está cargándose.
Esto es normal y no indica ningún problema.
• No coloque el cargador ni el paquete de
baterías en ningún área extremadamente
calurosa o fría. Funcionan mejor a la
temperatura normal del interior.
• Una vez cargadas completamente las
baterías, desconecte el cargador del
suministro de corriente y del paquete de
baterías.
Al transportar o dar
servicio a la unidad, quite siempre la batería.
ADVERTENCIA!
Algo del polvo
provocado por las lijas, sierras, trituradoras
y taladros eléctricos, y otras actividades
de construcción Contiene químicos
reconocidos como causantes de cáncer y
defectos congénitos u otros daños en el
aparato reproductivo. Algunos ejemplos de
estos químicos son:
• plomo de pinturas con base de plomo
• sílice cristalina de ladrillos, cemento y
otros productos de mampostería
• arsénico y cromo de madera tratada con
químicos
El riesgo que corre a la exposición de
estos químicos varía dependiendo de la
frecuencia con que realiza estos tipos de
trabajos. Para reducir la exposición a estos
químicos: trabaje en un área bien ventilada
y con el equipamiento de seguridad
aprobado, como por ejemplo máscaras
especialmente diseñadas para filtrar
laspartículas microscópicas.
ADVERTENCIA!
PROPUESTA 65
Page 30

SÍMBOLO DENOMINACIÓN/EXPLICACIÓN
V Voltios
A Amperios
Hz Hertzios
W Vatios
Hrs Horas
Precauciones para su seguridad.
Para reducir el riesgo de lesiones, el usuario debe leer y entender el manual del
usuario antes de utilizar este producto.
No exponga la máquina a la lluvia o humedad.
Tenga cuidado para que los espectadores que puedan estar cerca no resulten
heridos por objetos extraños que puedan salir despedidos del cortacésped.
Mantenga a los espectadores (especialmente niños y animales), por lo menos a
15m de distancia del área de trabajo.
Mantenga las manos y los pies alejados de la hoja y la zona de corte.
No utilice la unidad en pendientes superiores a 15º. Siempre corte a través de las
super cies de las cuestas, nunca de arriba hacia abajo.
Tenga cuidado ya que podría sufrir descargas eléctricas.
Espere a que todos los componentes de la herramienta se hayan detenido
completamente antes de tocarlos.
El cargador está diseñado para uso en interiores.
Este producto contiene baterías de iones de litio (Li-ion). Es posible que algunas
leyes municipales, estatales o federales prohíban desechar las baterías en la basura
normal. Consulte a las autoridades reguladoras de desechos para obtener
información en relación con las alternativas de reciclado y desecho disponibles.
SÍMBOLOS
8 — Español
Es posible que se empleen en este producto algunos de los siguientes símbolos. Le
suplicamos estudiarlos y aprender su significado. Una correcta interpretación de estos
símbolos le permitirá utilizar mejor y de manera más segura el producto.
Page 31

SÍMBOLOS
CARACTERÍSTICAS
Las siguientes palabras de señalización y sus significados tienen el objeto de explicar los
niveles de riesgo relacionados con este producto.
SÍMBOLO SEÑAL SIGNIFICADO
PELIGRO Indica una situación peligrosa inminente, la cual, si no se evita,
causarála muerte o lesiones serias.
ADVERTENCIA Indica una situación peligrosa posible, la cual, si no se evita,
podríacausar la muerte o lesiones serias.
PRECAUCIÓN Indica una situación potencialmente peligrosa la cual, si no se
evita, puede causar lesiones leves o moderadas.
PRECAUCIÓN (Sin el símbolo de alerta de seguridad) Indica una situación que
puede producir daños materiales.
9 — Español
ESPECIFICACIONES DEL PRODUCTO
Batería ................................................................................................................Ión de litio de 40 V
Velocidad en vacío ............................................................................................ 5,500 r/min. (RPM)
Trayectoria de corte ............................................................................................................ 20 pulg.
Ajustes de altura ...........................................................35 mm a 95 mm (1 3/8 pulg. a 3 3/4 pulg.)
Peso (sin baterías)................................................................................................42,3 lbs (19,2 kg)
FAMILIARÍCESE CON SU PODADORA DE
PASTO
Vea la gura 1.
Para usar este producto con la debida seguridad
se debe comprender la información indicada
en el producto mismo y en este manual, y
se debe comprender también el trabajo que
intenta realizar. Antes de usar este producto,
familiarícese con todas las características de
funcionamiento y normas de seguridad del
mismo.
MEDIDOR DE PILA
El medidor de pila mide la cantidad de carga
que queda en la pila.
RECEPTOR DE CÉSPED
El receptor de césped impide que los recortes
de césped se dispersen por el pasto mientras
lo poda.
PALANCA DE AJUSTE DE ALTURA
La palanca de ajuste de altura brinda ajustes
de la altura de corte.
CONJUNTO DE CONTROL DEL MOTOR/
CUCHILLA
El control del motor/cuchilla se ubica en el
mango superior de la podadora y sirve para
activar y desactivar el motor y la cuchilla.
TAPÓN PARA TRITURACIÓN
Su podadora está equipada con un tapón para
trituración que corta y recorta el césped para
obtener recortes más nos.
Page 32

ARMADO
10 — Español
DESEMPAQUETADO
Este producto requiere armarse.
■ Extraiga cuidadosamente de la caja la
herramienta y los accesorios. Asegúrese
de que estén presentes todos los artículos
enumerados en la lista de empaquetado.
■ Inspeccione cuidadosamente la herramienta
para asegurarse de que no haya sufrido
ninguna rotura o daño durante el transporte.
■ No deseche el material de empaquetado
sin haber inspeccionado cuidadosamente
la herramienta y haberla utilizado
satisfactoriamente.
■ Si hay piezas dañadas o faltantes, le
suplicamos llamar al1-888-266-7096, donde le
brindaremos asistencia.
LISTA DE EMPAQUETADO
Podadora
Tapón para trituración
Receptor de hierba
4 Ah y 2 Ah Baterías
Cargador
Manual del operador
DESPLEGAR Y AJUSTAR EL CONJUNTO
DE MANGOS
Vea la gura 2-3.
Para levantar el conjunto de los mangos:
• Abra las trabas del mango inferior.
• Tire hacia arriba y hacia atrás del mango
inferior hasta que quede alineado con la
ranura que se encuentra entre las trabas del
mango y la carcasa de la podadora.
NOTA: Si le resulta difícil mover el mango
inferior, gire las trabas del mango inferior en el
sentido de las agujas del reloj para liberar el
mango.
• Para fijar el mango inferior en su posición,
cierre las trabas del mango inferior.
NOTA: Si el mango inferior está flojo o si no
está totalmente asentado en la ranura, gire las
trabas en el sentido contrario a las agujas del
reloj para jarlo.
• Abra las trabas del mango superior.
• Tire hacia arriba y hacia atrás del mango
superior para elevarlo hasta la posición de
operación. Asegúrese de que el mango
inferior esté asentado en las ranuras de la
parte inferior del mango superior.
• Para jar el mango superior en su posición,
cierre las trabas del mango superior.
NOTA: Si el mango superior está flojo o
separado del mango inferior, apriete las perillas
de las trabas del mango superior haciéndolas
girar en el sentido de las agujas del reloj.
Para bajar el conjunto de los mangos:
• Abra las trabas del mango superior.
NOTA: Si le resulta difícil abrir la traba del
mango, afloje las perillas de las trabas del
mango superior haciéndolas girar en sentido
contrario a las agujas del reloj.
• Baje el mango superior.
• Abra la traba del mango inferior.
• Ejerza presión hacia afuera sobre cada uno
de los laterales del mango inferior hasta que
salga de la ranura. Posteriormente, pliegue
el mango hacia la parte frontal de la unidad.
Evite doblar o atrapar cables.
Si hay piezas dañadas
o faltantes, no utilice este producto sin
haber reemplazado todas las piezas. La
inobservancia de esta advertencia podría
causar lesiones serias.
No intente modificar
este producto ni hacer accesorios no
recomendados para el mismo. Cualquier
alteración o modicación constituye maltrato y
puede causar una condición peligrosa, y como
consecuencia posibles lesiones serias.
No introduzca la paquete
de baterías sin haber terminado de armarla.
De lo contrario la unidad puede ponerse en
marcha accidentalmente, con el consiguiente
riesgo de lesiones serias.
Para evitar que la
podadora arranque inadvertidamente, no haga
ningún ajuste ni instalación mientras esté
insertada la paquete de baterías.
ADVERTENCIA!
ADVERTENCIA!
ADVERTENCIA!
ADVERTENCIA!
Page 33

ARMADO
INSTALACIÓN DEL TAPÓN PARA
TRITURACIÓN (PARA LA OPERACIÓN DE
TRITURACIÓN)
Vea la gura 4.
NOTA: Cuando se usa la tapón para trituración,
no instala el receptor de hierba.
• Retire la paquete de batería(s). (Ver quitar
batería en la sección Operación.)
• Levante y sujete la puerta de descarga
posterior.
• Sostenga la tapón para trituración del mango
e insértelo inclinándolo levemente, como se
muestra.
• Empuje rmemente el tapón para trituración
en su lugar.
• Suelte la puerta de descarga posterior.
Vuelva a instalar el paquete de batería(s) cuando
esté listo para podar el pasto.
INSTALACIÓN DEL RECEPTOR DE HIERBA
(OPERACIÓN DE ENSACADO TRASERO)
Vea la gura 5 y 6.
NOTA: Cuando se usa el receptor de hierba,
no instala el tapón para trituración.
• Retire la paquete de batería(s). (Ver quitar
batería en la sección Operación.)
• Levante la puerta de descarga posterior.
• Levante el receptor de hierba por su mango
y colóquelo debajo de la puerta de descarga
posterior de modo que los ganchos del
receptor de hierba queden asentados en la
caja del podadora.
• Suelte la puerta de descarga posterior.
• Vuelva a instalar el paquete de batería(s)
cuando esté listo para podar el pasto.
AJUSTE DE LA ALTURA DE LA CUCHILLA
Vea la gura 7.
Para enviarlas, las ruedas de la podadora se
ajustan en una posición de corte bajo. Antes
de usar la podadora por primera vez, ajuste
la posición de corte a la altura más adecuada
para su pasto. El pasto promedio debe tener
11 — Español
una longitud de entre 38,10 mm (1-1/2 pulg.)
y 50,80 mm (2 pulg.) durante los meses fríos,
y entre 50,80 mm (2 pulg.) y 82,55 mm (3-1/4
pulg.) durante los meses calurosos.
Para ajustar la altura de la cuchilla:
• Retire la paquete de baterías. (Ver quitar
batería en la sección Operación.)
• Para levantar la altura de la cuchilla, tome la
palanca de ajuste de altura y muévala hacia
la parte posterior de la podadora.
• Para bajar la altura de la cuchilla, tome la
palanca de ajuste de altura y muévala hacia
la parte delantera de la podadora.
• Vuelva a instalar el paquete de baterías
cuando esté listo para podar el pasto.
Page 34

FUNCIONAMIENTO
Este producto acepta los paquetes de baterías
de iones de litio de 40 V.
Para ver las instrucciones de carga completas,
consulte los manuales del operador del
paquete de baterías Craftsman y los modelos
de cargador.
CARACTERÍSTICAS DE PROTECCIÓN DE
LAS BATERÍAS
Las baterías de iones de litio Craftsman están
diseñadas con características que protegen
las celdas de iones de litio y maximizan la
duración de las baterías.
Si la herramienta se detiene durante el uso,
suelte el interruptor de agarre para reiniciarla
y reanude el funcionamiento. Si aun así no
funciona, se debe recargar la batería.
INSTALACIÓN DEL PAQUETE DE BATERÍAS
Vea la gura 8.
• Abra la tapa de las batería(s).
• Coloque la batería en la podadora. Alinee
la costilla realzada exterior del paquete de
pilas con la ranura interior del receptáculo
para pilas de podadora.
• Cierre la tapa de las baterías.
NOTA: Este cortacésped incluye dos baterías
que pueden utilizarse en éste a la vez para
conseguir un mayor tiempo de funcionamiento.
En caso de ser necesario, el cortacésped
funciona solo con una batería.
EXTRACCIÓN DEL PAQUETE DE BATERÍAS
Vea la gura 8.
• Abra la tapa de las baterías.
• Presione y mantenga presionado el botón de
la traba de las baterías de la parte inferior
del paquete de baterías.
• Retire de la podadora el paquete de baterías.
ENCENDIDO Y APAGADO DE LA
PODADORA
Vea las guras 9.
• Abra la tapa de las baterías.
• Instalar el paquete de batería(s).
• Cierre la tapa de las baterías.
No permita que su
familarización con este tipo de producto lo
vuelva descuidado. Tenga presente que un
descuido de un instante es suficiente para
causar una lesión grave.
Retire siempre el
paquete de batería(s) de la herramienta antes
de instalar las piezas, realizar ajustes. limpiarla
o cuando no la utilice. Retirar el paquete de
baterías evitará que la unidad se accione
accidentalmente y provoque lesiones graves.
Asegúrese de que el
pestillo en la parte inferior del paquete de
baterías entre adecuadamente en su lugar y
que el paquete de baterías esté bien colocado
y asegurado en el puerto de batería de la
podadora antes de que encenderla. Una falla
en colocar el paquete de baterías de forma
segura puede causar que el paquete de
baterías se desprenda y termine provocando
lesiones corporales serias.
Siempre utilice
protección ocular con protección lateral con
la marca de cumplimiento de la norma ANSI
Z87.1, como así también protección auditiva
cuando utilice este equipo. Si no cumple esta
advertencia, los objetos que salen despedidos
pueden producirle lesiones serias en los ojos.
No utilice ningún
aditamento o accesorio no recomendado por
el fabricante de este producto. El empleo de
aditamentos o accesorios no recomendados
puede causar lesiones serias.
Antes de cada uso,
inspeccione todo el producto para detectar
algún daño, partes faltantes o sueltas la
cuchilla no esté dañada o desgastada. El
funcionamiento de la podadora con piezas
dañadas o faltantes puede ocasionar lesiones
graves.
ADVERTENCIA!
ADVERTENCIA!
ADVERTENCIA!
ADVERTENCIA!
ADVERTENCIA!
ADVERTENCIA!
12 — Español
Page 35

FUNCIONAMIENTO
13 — Español
• Oprima y no suelte el botón de arranque.
Tire del asa hacia el mango y suelte el botón
para arrancar la podadora.
• Para detener la podadora, suelte el
interruptor de agarre.
SUGERENCIAS PARA EL PODADO
• Asegúrese de que el pasto no tenga piedras,
palos, alambres ni otros objetos que puedan
dañar las cuchillas o el motor de la podadora
de pasto. No corte sobre estacas que indican
los límites de la propiedad o sobre otros
postes metálicos. Dichos objetos podrían ser
dañar la lame o lanzados accidentalmente
por la podadora en cualquier dirección y
provocar lesiones serias al operador y a
otras personas.
• Para tener un pasto saludable, siempre corte
un tercio o menos de la longitud total de la
hierba.
• Al cortar hierba frondosa, reduzca la
velocidad mientras camina para poder
obtener un corte más ecaz y una descarga
adecuada de los recortes.
• No corte la hierba cuando esté mojada. Se
pegará a la parte inferior del piso e impedirá
evita el embolsado o la trituración adecuada
del césped cortado.
• La hierba nueva o gruesa puede requerir un
corte más bajo o una mayor altura de corte.
• Limpie la parte inferior del piso de la
podadora después de cada uso para eliminar
recortes de hierba, hojas, suciedad y otros
desechos acumulados.
NOTA: Siempre detenga la podadora, espere
a que las cuchillas se detengan por completo
y retire l la paquete de baterías antes de limpiar
debajo de la podadora.
SLOPE OPERATION
Vea la gura 10 y el calibrador de inclinación
en la página vi.
• Pode atravesando las pendientes; no hacia
arriba ni hacia abajo. Tenga mucha precaución
al cambiar de dirección en una pendiente.
• Tenga cuidado con los pozos, surcos,
piedras, objetos ocultos o montículos que
puedan provocar que se resbale o tropiece.
La hierba alta puede ocultar obstáculos.
Retire todos los objetos como piedras,
ramas de árboles, etc., que puedan provocar
tropezones o ser lanzados por la cuchilla.
• Siempre asegúrese de su postura. Un
resbalón y caída puede provocar lesiones
serias. Si siente que está perdiendo
el equilibrio, suelte el asa superior
inmediatamente.
• No pode el pasto cerca de precipicios,
zanjas o terraplenes; podría perder la
rmeza de la postura o el equilibrio.
VACIADO DEL RECEPTOR DE HIERBA
Vea la gura 11.
• Detenga la podadora, y espere a que las
cuchillas se detengan por completo.
• Retire la paquete de batería(s).
• Abra la tapa de las baterías y retire la llave
de fusible.
• Levante la puerta de descarga posterior.
• Levante el receptor de césped del mango
para retirarlo de la podadora.
• Vacíe los recortes de hierba.
• Levante la puerta trasera y reinstale
el receptor de césped como se indicó
anteriormente en este manual.
• Vuelva a instalar el paquete de batería(s)
cuando esté listo para podar el pasto.
Las pendientes son una
de las causas principales de accidentes por
resbalones y caídas que pueden provocar
lesiones graves. El manejo en pendientes
requiere precaución extra. Si se siente inseguro
en una pendiente, no la pode. Para su seguridad,
no intente podar pendientes de más de 15 grados.
ADVERTENCIA!
Page 36

14 — Español
MANTENIMIENTO
MANTENIMIENTO GENERAL
Evite el empleo de solventes al limpiar piezas
de plástico. La mayoría de los plásticos son
susceptibles a diferentes tipos de solventes
comerciales y pueden resultar dañados. Utilice
paños limpios para eliminar la suciedad, el
polvo, el aceite, la grasa, etc.
Revise periódicamente el apriete de todos los
pernos y tuercas para asegurar un manejo
seguro de la podadora.
Elimine la hierba y las hojas acumuladas sobre
la cubierta del motor o a su alrededor.Limpie
ocasionalmente la podadora con un paño
seco. No utilice agua.
LUBRICACIÓN
Todos los cojinetes de este producto están
lubricados con suciente cantidad de aceite de
alta calidad para toda la vida útil de la unidad
en condiciones normales de funcionamiento.
Por lo tanto, no se necesita lubricación
adicional de los cojinetes.
REEMPLAZO DE LA CUCHILLA
Vea las guras 12 y 13.
NOTA: Utilice únicamente piezas de repuesto
idéntico.
• Apague el motor. Permita que la cuchilla se
detenga por completo.
• Retire el paquete de batería(s).
• Gire la podadora sobre su costado.
• Introduzca a presión un bloque de madera
entre la cuchilla y el piso de la podadora
para evitar que la cuchilla gire.
• Aoje la tuerca de la cuchilla al girarlo a la
izquierda (como se observa en la base de la
podadora) usando una llave de tuercas o de
boca tubular de 15 mm (no se suministra).
• Retire la tuerca de la cuchilla, el separador,
el aislante de cuchilla y la cuchilla.
• Asegúrese de que el conjunto del motor esté
totalmente empujado contra el eje del motor.
• Coloque la cuchilla nueva en el eje contra
el conjunto del motor. Asegúrese de que
la cuchilla esté correctamente asentada
con el eje pasando por el orificio central de
la cuchilla y los dos postes insertados en
los respectivos orificios sobre la cuchilla.
Asegúrese de que esté instalada con los
extremos curvos orientados hacia arriba,
donde está el piso de la podadora, y no hacia
abajo, donde está el suelo. Si está asentada
correctamente, la cuchilla permanecerá plana
contra el conjunto del motor.
• Vuelva a colocar el aislante de cuchilla y el
separador; luego, enrosque la tuerca de la
cuchilla en el eje y apriétela con los dedos.
NOTA: Asegúrese de volver a colocar todas
las piezas en el orden exacto en que fueron
retiradas.
• Apriete la tuerca de la cuchilla derecha
usando una llave dinamométrica (no
suministrada) para asegurar que el perno
esté apretado correctamente. La fuerza de
torsión recomendada para la tuerca de la
cuchilla es de 350-400 lb-pulg.
Al dar servicio a la
unidad, asegúrese de que la batería se hayan
retirado para evitar el arranque accidental y
posibles lesiones graves.
Al dar servicio a la
unidad, sólo utilice piezas de repuesto
autorizadas. El empleo de piezas diferentes
puede causar un peligro o dañar el producto.
Siempre póngase
protección ocular con protección lateral
con la marca de cumplimiento de la norma
ANSI Z87.1. Si no cumple esta advertencia,
los objetos que salen despedidos pueden
producirle lesiones serias en los ojos.
No permita en ningún
momento que fluidos para frenos, gasolina,
productos a base de petróleo, aceites
penetrantes, etc., lleguen a tocar las piezas
de plástico. Las sustancias químicas pueden
dañar, debilitar o destruir el plástico, lo cual a su
vez puede producir lesiones corporales serias.
ADVERTENCIA!
ADVERTENCIA!
ADVERTENCIA!
ADVERTENCIA!
Page 37

MANTENIMIENTO
15 — Español
GUARDADO DE LA PODADORA
Vea la gura 14.
• Retire la paquete de baterías y almacena en
una ubicación segura fuera del alcance de
niños.
• Antes de guardar, limpie el polvo o los
residuos del área de la batería.
• Gire la podadora sobre su costado y limpie
los recortes de hierba que se acumularon en
la parte inferior del piso de la podadora.
• Limpie la podadora con un paño seco.
• Verifique el apriete de todos los pernos,
tuercas, perillas, tornillos, sujetadores,
etcétera.
• Inspeccione las piezas móviles para ver
si hay daños, rupturas y desgaste. Haga
que reparen todas las piezas dañadas o
faltantes. Verifique que la cuchilla no esté
dañada o desgastada excesivamente en
forma irregular y reemplácela si existen
estas condiciones.
• Abaisser la ensemble de poignée como se
indicó anteriormente en este manual.
• Guarde la podadora en el interior, en un
lugar limpio y seco, lejos del alcance de los
niños.
• No la guarde cerca de materiales corrosivos
como fertilizantes o sal gema.
Page 38

a.
CORRECCIÓN DE PROBLEMAS
SI CON ESTAS SOLUCIONES NO SE RESUELVE EL PROBLEMA, COMUNÍQUESE CON EL
CONCESIONARIO DE SERVICIO CALIFICADO DE SU PREFERENCIA.
PROBLEMA
El asa viene suelto.
El cortacésped no arranca.
El cortacésped corta la
hierba de forma desigual.
La podadora no tritura el
pasto correctamente.
Es difícil empujar la
podadora.
La podadora no recolecta
correctamente.
La podadora vibra a
mayor velocidad.
Motor se detiene mientras
corta el césped
CAUSA POSIBLE
Cerraduras de manija no están
bloqueados.
La carga de la batería está
baja.
El césped es grueso o desigual
o la altura de corte no es la
correcta.
Hay recortes de hierba mojada
pegados en la parte inferior del
piso.
La parte trasera del
cortacésped y las láminas se
arrastran en césped denso o la
altura de corte puede resultar
muy baja.
La altura de corte es muy baja
La tapa del conector viene sin
retirar.
La cuchilla está desequilibrada,
gastada excesivamente o en
forma irregular.
El eje del motor está doblado.
La altura de corte es muy baja
SOLUCIÓN
Cierre las trabas del mango
superior y del mango inferior.
Cargue la batería.
Ajuster la altura de corte.
Espere hasta que la hierba se
seque antes de podar.
Levante la altura de corte.
Levante la altura de corte.
Asegúrese de que retira la tapa
del conector.
Reemplace la cuchilla
Apague el motor, desconecte
la paquete de baterías.
Inspeccione la unidad para
ver si están dañadas. Lleve la
unidad a un centro de servicio
autorizado para que la reparen
antes de volver a encenderla.
Levante la altura de corte.
16 — Español
Page 39

Product questions or problems?
1-888-331-4569
Customer Care Hot Line
Get answers to questions, troubleshoot problems,
order parts, or schedule repair service.
Para respuestas a preguntas o problemas, y ordenar
piezas o pedir servicio para la reparación de su equipo.
To help us help you, register your product at www. craftsman.com/registration
Para poderte ayudar mejor, registra tu producto en www.craftsman.com/registration
Receive exclusive member benefits including special pricing and offers,
Como miembro exclusivo, recibe diversos beneficios como ofertas, precios especiales, proyectos
nuevos, consejos de expertos y nuestro programa de puntos SHOP YOUR WAY REWARDS!
project sharing, expert advice, and SHOP YOUR WAY REWARDS!
Join the Craftsman Club today!
® Registered Trademark / TM Trademark of KCD IP, LLC in the United States, or Sears Brands, LLC in other countries
® Marca Registrada / TM Marca de Fábrica de KCD IP, LLC en Estados Unidos, o Sears Brands, LLC in otros países
 Loading...