

Craftsman 113178200 Owner’s Manual
MODEL NO,
113o178200
Serial
number
Model and serial
number may be found
on the motor cover.
You should record both
model and serial
number in a safe place
for future use.
CAUTmON:
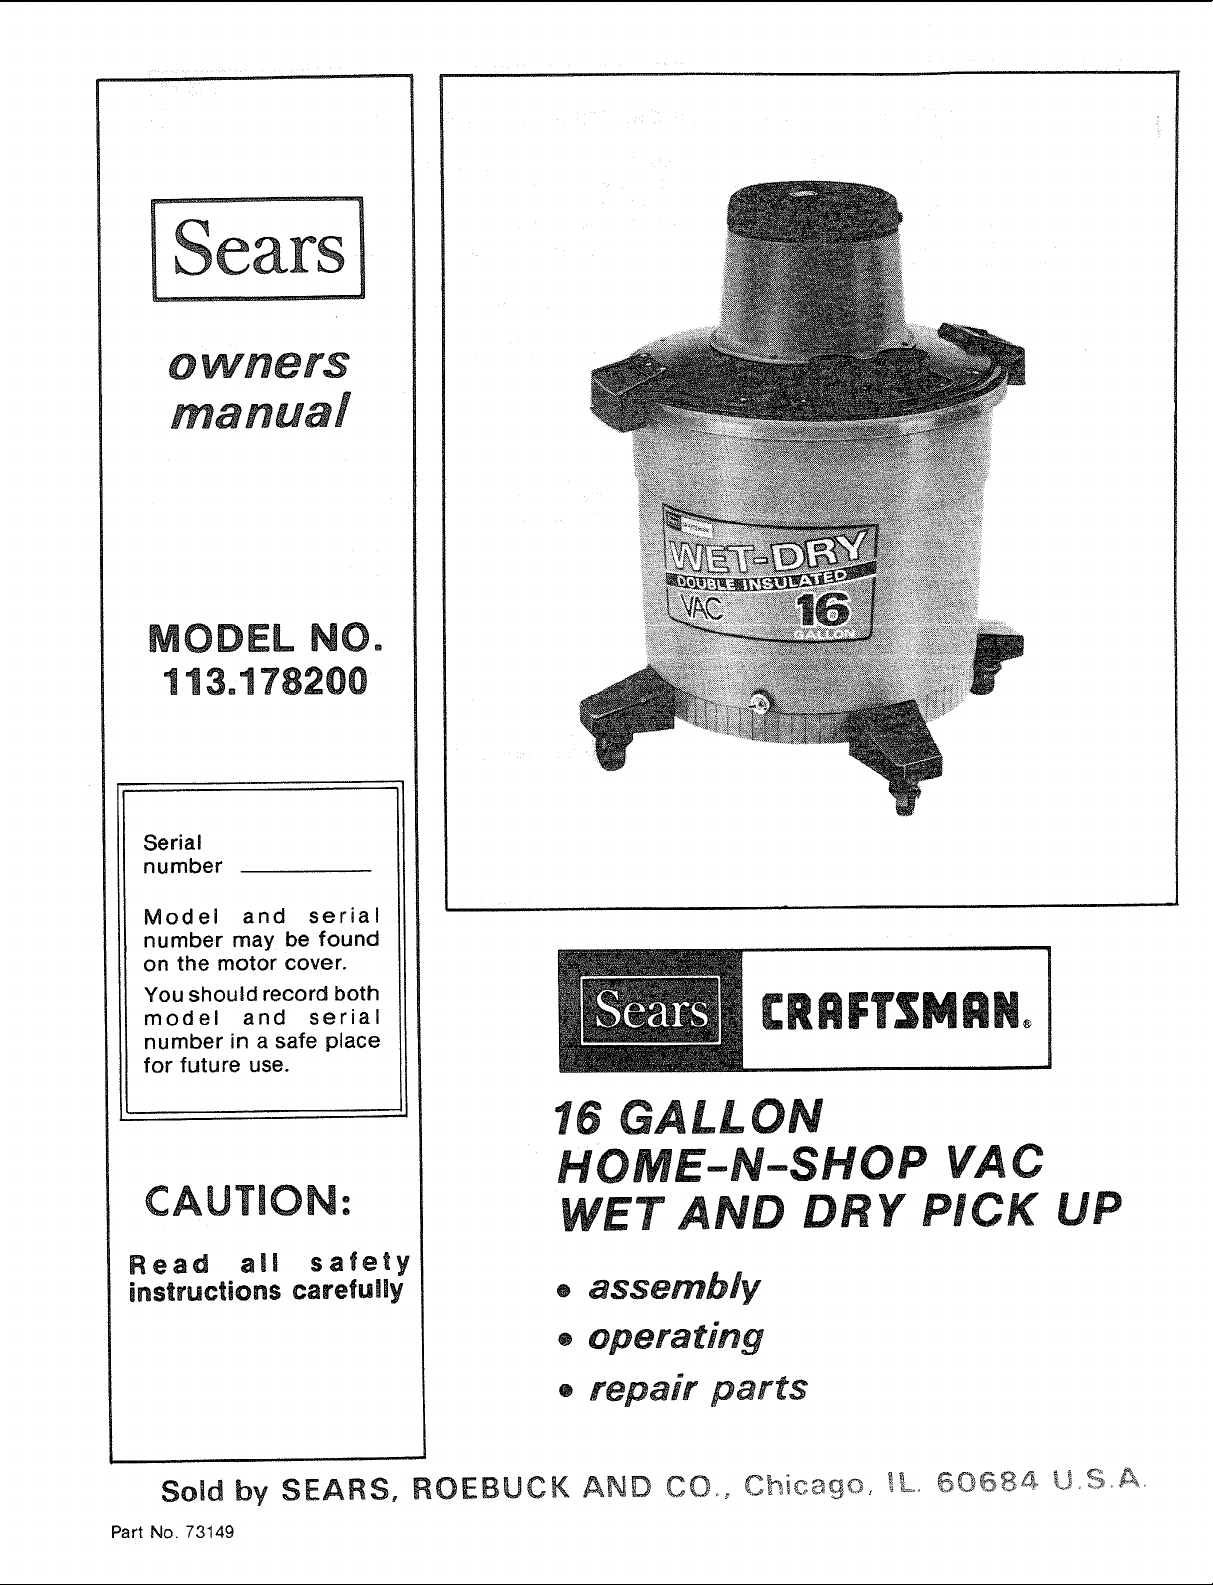
16 GALLON
HOME-N-SHOP VA C
WET AND DRY PiCK
UP
Read all safety
instructions carefufly
® assembly'
® operating
• repair parts
Sold by SEARS, ROEBUCK. ANO CO., Chicago, _L. 6068_ L!.SA
Part No. 73149
FULL ONE YEAR WARRANTY ON CRAFTSMAN HOME-N-SHOP VACSo
if within one year from date of purchase, this Craftsman Home-N-Shop Vac fails due to a
defect in material or workmanship, Sears will repair it, free of charge.
WARRANTY SERVICE IS AVAILABLE BY SIMPLY CONTACTmNG THE NEAREST SEARS
STORE OR SERVICE CENTER THROUGHOUT THE UNITED STATES.
This warranty gives you specific legal rights, and you may also have other rights which vary
from state tO state.
SEARS, ROEBUCK AND CO., Sears Tower, BSC 41-3, Chicago, IL 60684
SAFETY INSTRUCT! ONS
Rules for Safe Operation
1. Know Your Vac.
Read and understand the owners manual and
labels affixed to the vac. Learn its applications
and limitations as welt as the specific potential
hazards peculiar to this vac.
2. Use the proper extension cord to prevent fires
and wiring damage.
NOTE: The use of any Extension Cord will cause
some loss of power. To keep the loss to a
minimum and to prevent overheating and motor
burnout, use the table below for the MINIMUM
wire size Extension Cord.
Extension Cord Length Wire Size
0- 50 Feet No. 14
50- 100 Feet No. 12
Use only three wire extension cords which have
3-prong grounding type plugs and 3-pole
receptacle that will accept the plug on your VAC.
3. WARNING: To avoid fire or explosion caused by
the igniting of vapors or dust due to the arcing of
the motor brushes:
a. Do not operate this VAC in areas with
explosive vapors (such as lighter fluid,
cleaners, oil-base paints, gasoline or gasahol)
or dust (such as coal, magnesium, grain or gun
powder) in the air.
b. Do not vacuum explosive dust, flammable,
volatile liquids or hot ashes.
c. Do not use VAC without the filter in place.
d. Do not use VAC with a torn filter. Replacefilter
if torn.
e. Do not use VAC as a sprayer for any flammable
volatile liquid.
f. Tie back long hair.
4. Sears Service Center can repair your vac should
the need ever exist. However, if you choose to
service the vac yourself please read and under-
stand MAINTENANCE instructions before
changing brush assembly.
WARNING: Taking apart this VAC can result in
dangerous electrical hazard if any leads (wires)
are pinched against metal surfaces when VAC is
put together again.
5. NOTE: Static Build-up -- A stationary electrical
charge may sometimes build up around your vac
hose and housing. This is common in dry areas
anda slight shock may be gotten much the same
as walking across a carpet and touching a wall
switch. This is onty temporary and doesnot affect
the use of the vac.
A special 2-1/2 inch diameter hose and extension
handle Kit which may reducetheamount of static
build up, Service Part Number 73100, can be
purchased through your Sears Service
Department.
Additional Safety Instructions
1. Plug VAC into 110-120v. grounding type outlet
protected by 15 amp. fuse or circuit breaker.
IF YOU ARE NOT SURE THAT YOUR OUTLET IS
PROPERLY GROUNDED, HAVE IT CHECKED
BY A QUALIFIED ELECTRICIAN.
if the outlet you are planning to use for your VAC
is of the two prong type DO NOT REMOVE OR
ALTER THE GROUNDING PRONG IN ANY
WAY. It isrecommended that you have a qualified
electrician replace the two-prong outlet with a
grounding type 3-prong.
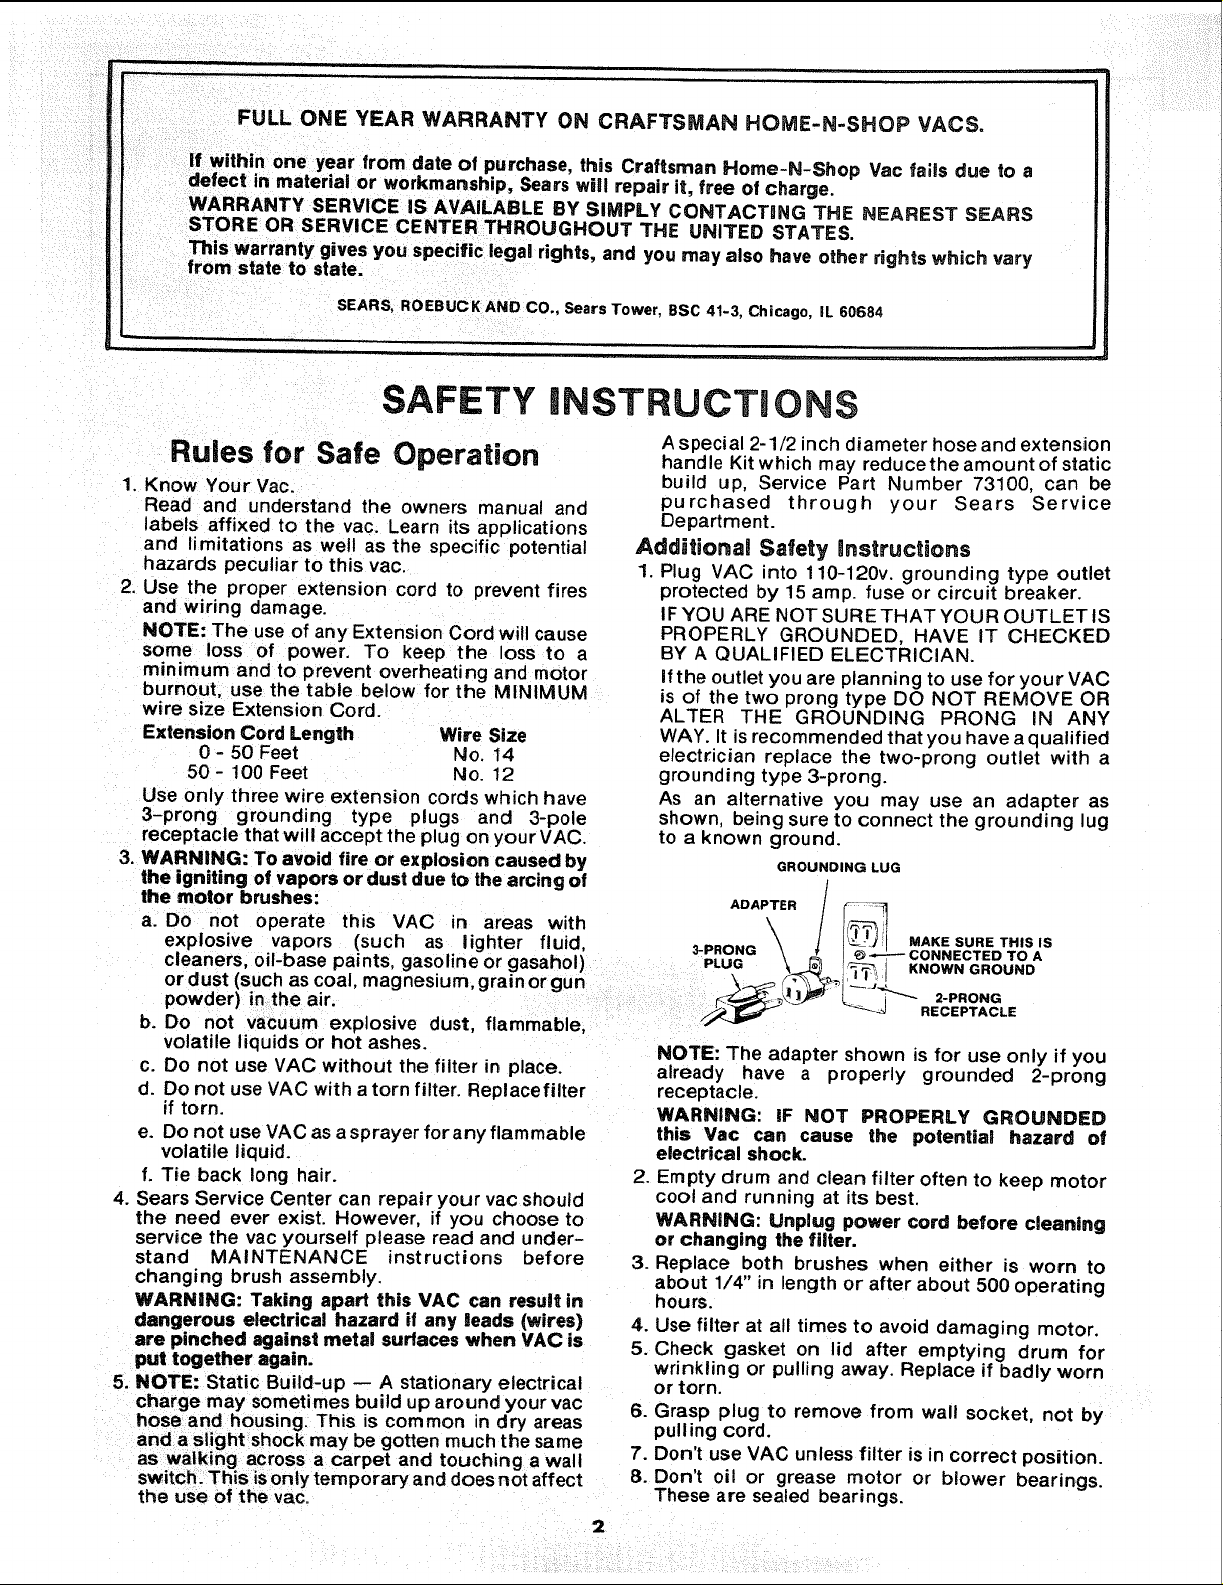
As an alternative you may use an adapter as
shown being sure to connect the grounding lug
to a known ground.
GROUNDING LUG
/
ADAPTER / -
\
3-PRONG \ ÷ |/_'j, ! MAKE SURE THIS IS
NOTE: The adapter shown is for use only if you
already have a properly grounded 2-prong
receptacle.
WARNING: IF NOT PROPERLY GROUNDED
this Vac can cause the potenUa! hazard of
electrical shock.
2. Empty drum and clean filter often to keep motor
cool and running at its best.
WARNING: Unplug power cord before cleaning
or changing the filter.
3. Replace both brushes when either is worn to
about 1/4" in length or after about 500 operating
hours.
4. Use filter at all times to avoid damaging motor.
5. Check gasket on lid after emptying drum for
wrinkling or pulling away. Replace if badly worn
or torn.
6. Grasp plug to remove from wall socket, not by
pulling cord.
7. Don't use VAC unless filter is in correct position.
8. Don't oil or grease motor or blower bearings.
These are sealed bearings.
2
/
g.Make sure filter is dry for both dry vacuuming and
storing.
10. Use only recommended accessories.
11. Note the cautions and warnings that appear on
the motor housing and dust drum:
CAUTION: Keep Filter clean.
WARNING: To avoid eaectric shock do not expose
to rain. Store indoors.
WARNING: For your own safety, read and under-
stand Owner's Manual. Do not pick up flarnrnabie
materials, hot ashes or coals. Do not use around
explosive liquids or vapors.
The operation of any utility vac can result in foreign
objects being b_own into the eyes, which can result
in severe eye damage. Always wear safety goggles
introduction
Your Home N Shop Vac is made for both vacuuming
and blowing. You will find many uses for both; from
blowing sawdust and wood chips off of your
Craftsman power tools to vacuuming excess water
from your basement floor.
\
complying with ANSi Z87.1 (shown on Package)
before commencing operation. Safety Goggles are
available at Sears retail or catalog stores.
CONTENTS
Rules for Safe Operation ..................... 2
Introduction ................................. 3
Unpacking and Checking Contents ........... 3
Assembly .................................... 4
Operation ................................... 5
Maintenance ................................. 6
Optional Accessories ........................ 8
Repair Parts ................................. 9
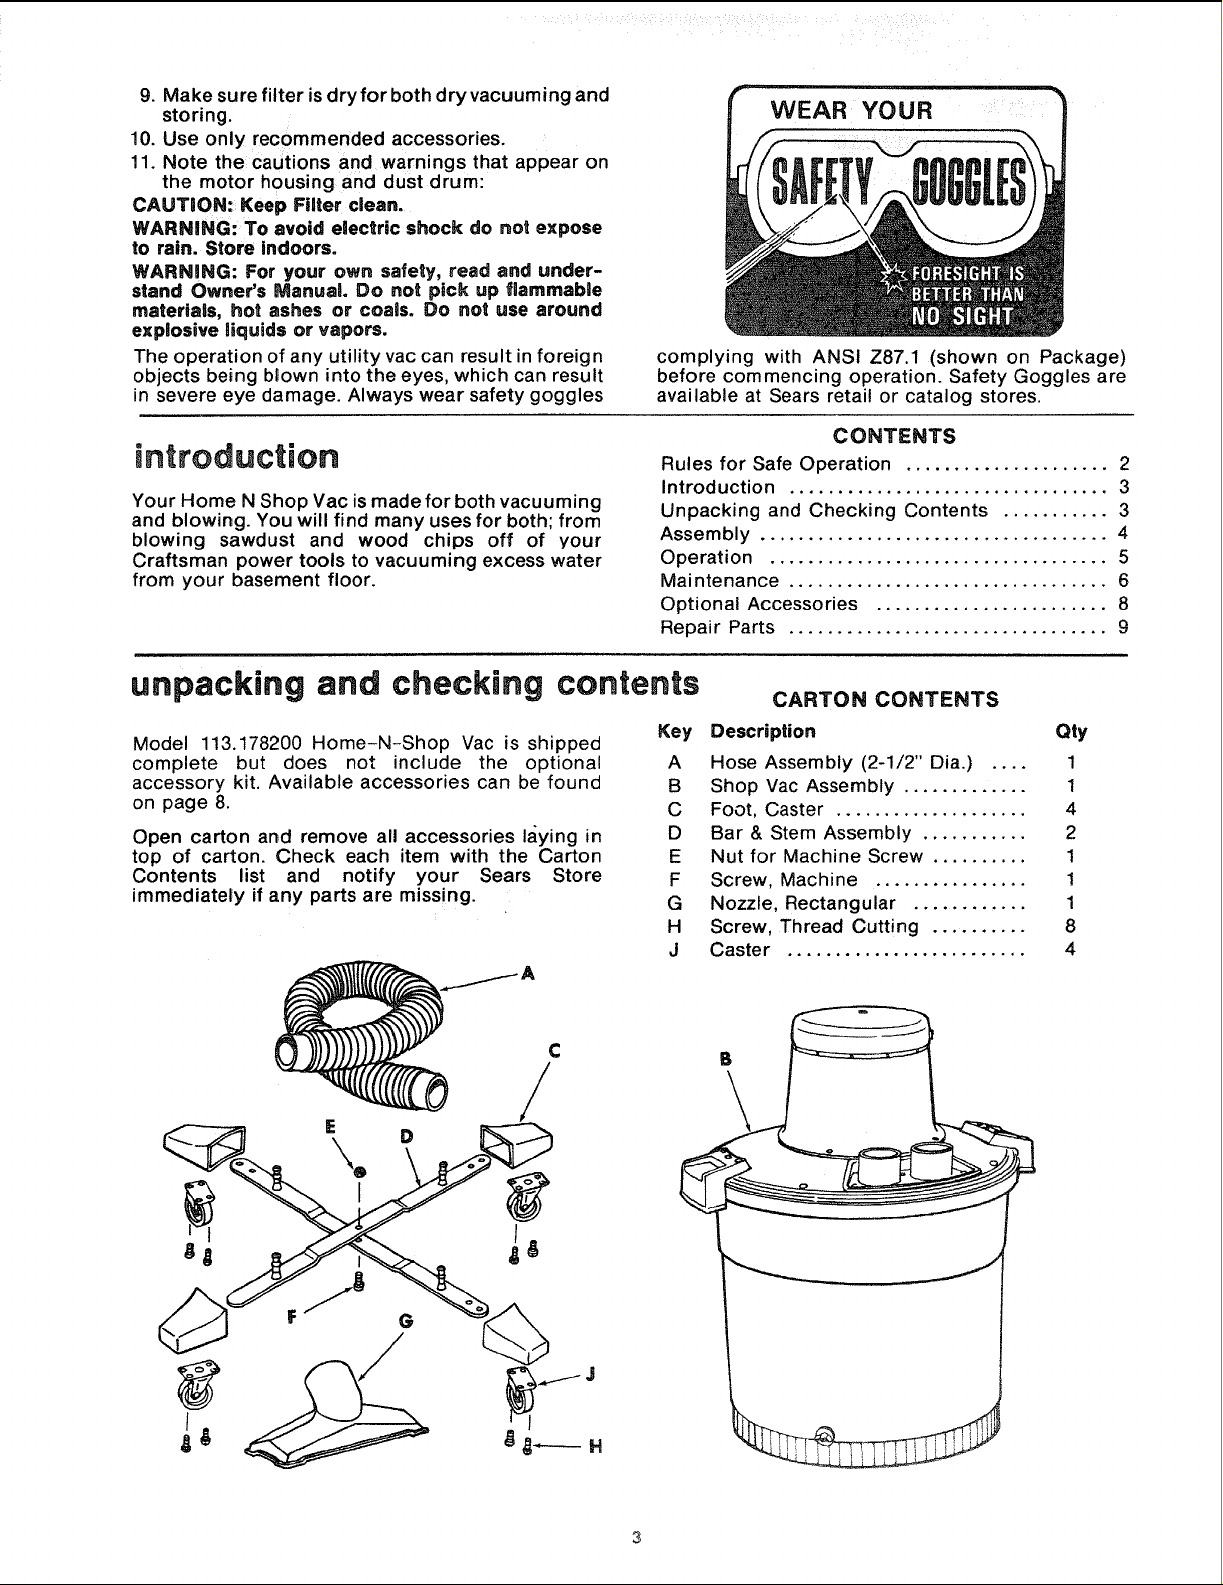
unpacking and checking contents
Model 113.178200 Home-N-Shop Vac is shipped
complete but does not include the optional
accessory kit. Available accessories can be found
on page 8.
Open carton and remove all accessories laying in
top of carton. Check each item with the Carton
Contents list and notify your Sears Store
immediately if any parts are missing.
C
Key Description Qty
/
CARTON CONTENTS
A Hose Assembly (2-1/2" Dia.) .... 1
B Shop Vac Assembly ............. 1
C Foot, Caster .................... 4
D Bar & Stem Assembly ........... 2
E Nut for Machine Screw .......... 1
F Screw, Machine ................ 1
G Nozzle, Rectangular ............ 1
H Screw, Thread Cutting .......... 8
J Caster ......................... 4
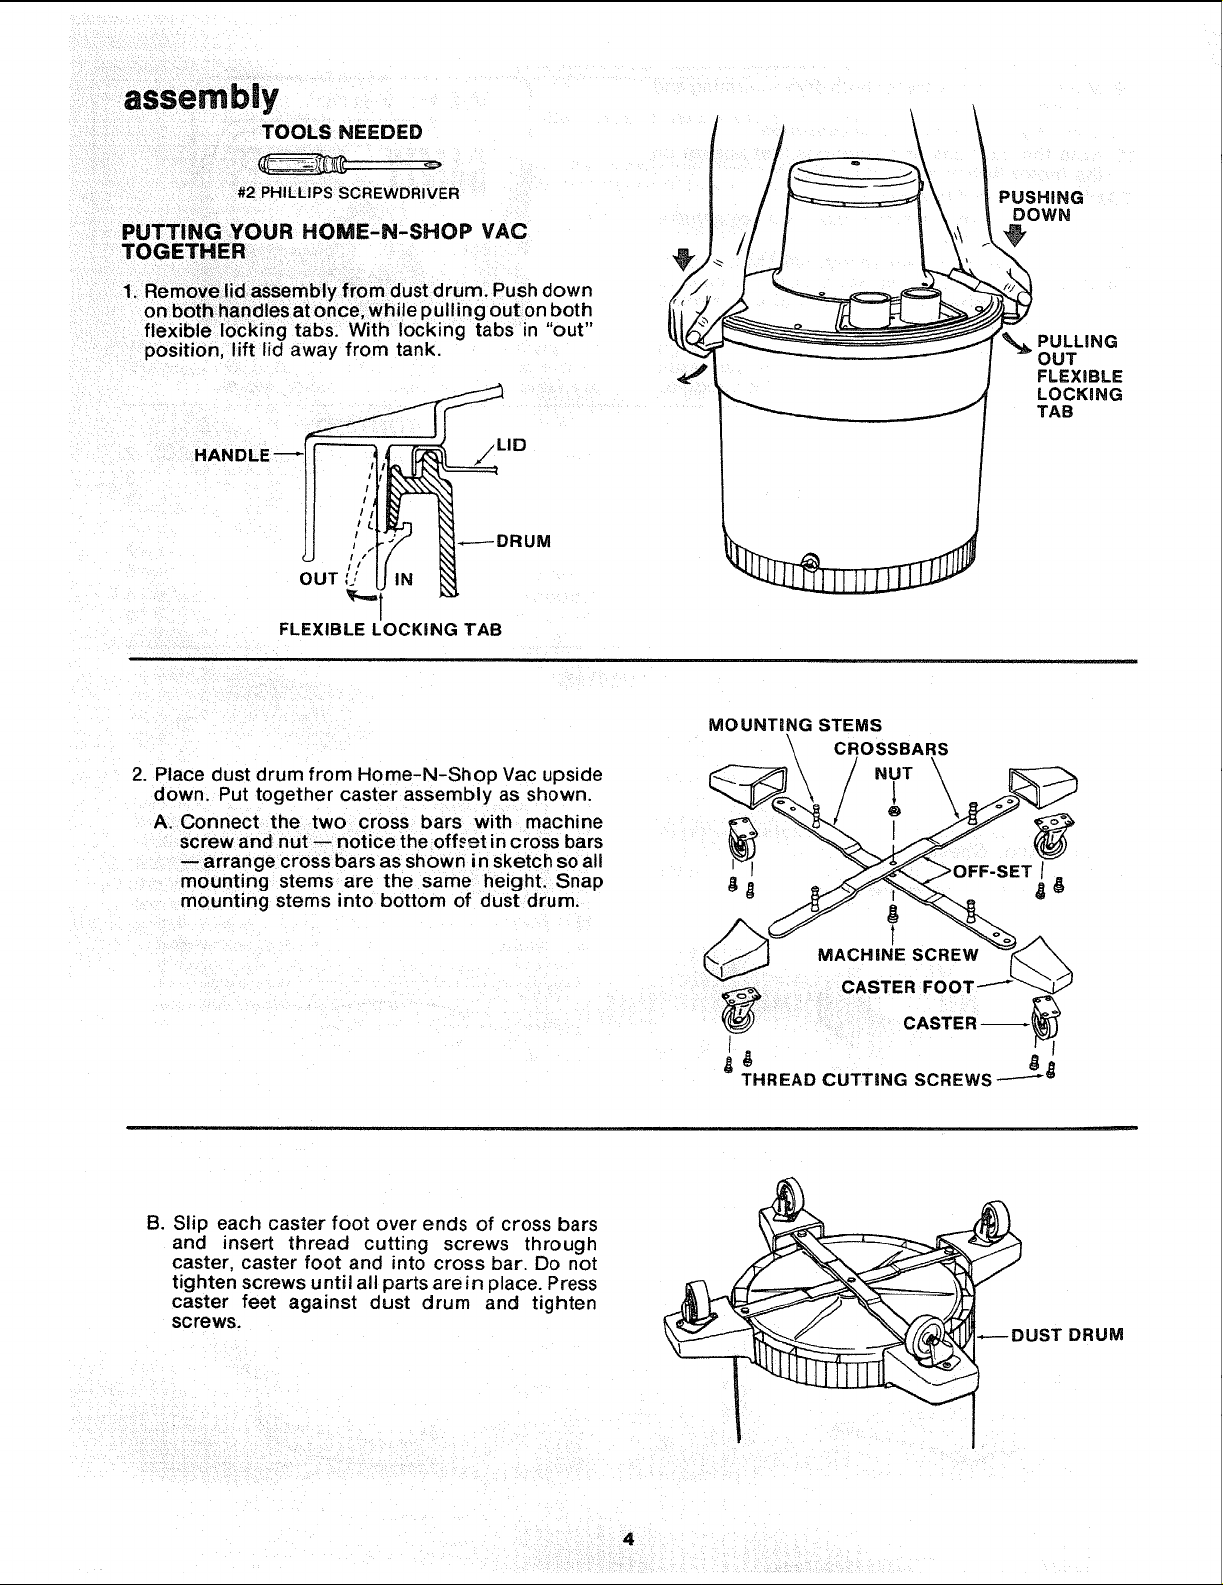
assembly
TOOLS NEEDED
#2 PHILLIPS SCREWDRIVER
PUTTING YOUR HOME-N-SHOP VAC
TOGETHER
'__lj= / _ ! PUSHING
flexible locking tabs. With locking tabs in "out"
position, lift lid away from tank.
_DRUM
OUT '
FLEXIBLE LOCKING TAB
2. Place dust drum from Home-N-Shop Vac upside
down. Put together caster assembly as shown.
A. Connect the two cross bars with machine
screwand nut-- notice the offsgt in cross bars
-- arrange cross bars as shown in sketch so ali
mounting stems are the same height. Snap
mounting stems into bottom of dust drum.
'f'_b. PULLING
| OUT
|FLEXIBLE
LOCKING
TAB
MOUNTING STEMS
\ CROSSBARS
NUT
® \
B. Slip each caster foot over ends of cross bars
and insert thread cutting screws through
caster, caster foot and into cross bar. Do not
tighten screws until all parts are in place. Press
caster feet against dust drum and tighten
sc rews.
I
THREAD CUTTING SCREWS---_ _
4
CASTER
CASTER --
_DUST DRUM
 Loading...