


OWNER’S
INSTRUCTIONMANUAL
CALLER ID TYPE II
MULTI-FEATURE TELEPHONE
THANK YOU
FOR PURCHASING THE
COLLEAGUE CALLER ID TYPE II
MULTI-FEATURE TELEPHONE
We want you to know all about your new Colleague Telephone, how to install it, the features it provides, and the services you can expect from its use. We have included this information in your Owner’s Instruction Manual.
PLEASE READ BEFORE INSTALLING
AND USING YOUR NEW TELEPHONE EQUIPMENT.
TABLE OFCONTENTS |
|
IMPORTANT SAFETY INSTRUCTIONS ............................................................. |
2 |
TELEPHONE USAGE ............................................................................................ |
4 |
SETUP/INSTALLATION ................................................................................ |
4 |
WALL MOUNT INSTRUCTIONS ................................................................... |
5 |
UNIT SETUP ........................................................................................................ |
5 |
FACTORY PRESETS ................................................................................... |
5 |
TELEPHONE PART IDENTIFICATION ................................................................ |
7 |
TELEPHONE FEATURES..................................................................................... |
8 |
PULSE AND TONE DIALING ........................................................................ |
8 |
RECEIVING A PHONE CALL ....................................................................... |
8 |
PLACING A PHONE CALL ........................................................................... |
8 |
SPEAKERPHONE BUTTON .......................................................................... |
8 |
DURATION COUNTER .................................................................................. |
9 |
TONE BUTTON ............................................................................................ |
9 |
AUTOMATIC MEMORY ................................................................................ |
9 |
TO STORE A PHONE NUMBER IN MEMORY .......................................... |
9 |
TO DIAL A PHONE NUMBER IN MEMORY ............................................ |
10 |
VOLUME BUTTON ..................................................................................... |
10 |
REDIAL BUTTON ....................................................................................... |
10 |
PAUSE BUTTON ........................................................................................ |
10 |
HOLD BUTTON ........................................................................................... |
11 |
FLASH BUTTON ......................................................................................... |
11 |
DATA PORT ................................................................................................ |
11 |
CALL WAITING DISPLAY .......................................................................... |
11 |
CALLER ID FEATURES ..................................................................................... |
12 |
MESSAGE LIGHT ....................................................................................... |
12 |
MESSAGED WAITING ............................................................................... |
12 |
RECEIVING CALLS .................................................................................... |
13 |
REVIEWING CALLS ................................................................................... |
14 |
DELETING CALLS ..................................................................................... |
14 |
CALLBACK... ............................................................................................ |
15 |
DIAL OPTIONS BUTTON ........................................................................... |
15 |
MESSAGE ERROR ..................................................................................... |
17 |
NO DATA SENT ......................................................................................... |
17 |
PRIVATE CALLS ........................................................................................ |
17 |
UNKNOWN CALLS .................................................................................... |
18 |
TELEPHONE SERVICE PROBLEMS ................................................................. |
19 |
MAINTENANCE INFORMATION ....................................................................... |
20 |
TELEPHONE REPAIR ......................................................................................... |
21 |
FCC INFORMATION .......................................................................................... |
22 |
INDEX ............................................................................................................. |
23 |
IMPORTANTSAFETYINSTRUCTIONS
Always follow basic safety precautions when using your telephone equipment to reduce the risk of fire, electrical shock, and injury.
1.Read and understand all instructions in the Owner’s Instruction Manual.
2.Read all warnings and follow all instructions marked on the product.
3.Unplug this product from the wall outlet before cleaning. Use a damp cloth for cleaning. Do not use liquid or aerosol cleaners.
4. |
Do not use the telephone near water |
. For example, do no |
|
bathtub, wash bowl, kitchen sink, laundry tub, swimming pool, or in a wet |
|
|
basement. |
|
5.Donotplacethisproductonanunstablecartorstand. The product may fall causing serious damage to the product.
6.Useonlythetypepowersourceindicatedonthelabel.Ifyouarenotsure of the type power supply to your home, consult your dealer or local power company.
7.Do not place any objects on the telephone line cord. Do not locate the telephone where the line cord will be walked on.
8.Do not block or cover ventilation slots and openings in the bottom of the telephone. The openings should never be blocked by placing the telephone on a bed, sofa, rug, or other similar surfaces. The telephone should never be placed near or over a radiator or heat register. The telephone should never be placed in a built-in installation unless proper ventilation is provided.
9.Neverspillliquidonthetelephoneorpushobjectsofanykindthrough ventilation slots. Liquid or objects may touch dangerous voltage points or short out parts that could result in a risk of fire or electrical shock.
2
10.Do not disassemble this product. Opening or removing covers may expose you to dangerous voltages or other risks. Incorrect reassembly can cause electrical shock when the product is subsequently used.
11.Do not overload outlets and extension cords. Some telephones require AC power from an outlet. Overloading the outlets can result in the risk of fire or electric shock.
12.Avoid using a telephone during a local thunderstorm. There may be a remote risk of electrical shock from lightning.
13.Do not use a telephone to report a gas leak in the vicinity of the leak.
14.Unplug the telephone from the wall outlet and refer servicing to qualified service personnel under the following conditions:
•When the line cord is frayed or plugs damaged.
•If liquid has been spilled into the telephone.
•If the telephone has been exposed to rain or water.
•If the telephone does not operate properly by following the operating instructions. (Adjust only those controls covered by the operating instructions. Improper adjustment of other controls may result in damage and will often require extensive work by a qualified technician to restore the product to normal operation.)
•If the telephone has been dropped or the housing damaged.
•If the telephone exhibits distinct change in performance.
SAVETHESE INSTRUCTIONS
15-101-613
3

TELEPHONE USAGE
SET UP/INSTALLATION
1.Connect the adapter. Plug the large part of the adapter into the wall outlet and the adapter tip to the jack at the rear side of unit. (Use only 9V DC. 200mA, center positive Class 2 adapter.)
2.Connect the telephone line cord.
a.To connect without an answering machine.
•Use the new line cord to connect the PHONE jack of your new caller ID phone to the modular wall jack.
b.To connect with an existing answering machine.
•Use the existing line cord supplied to connect the LINE jack of your answering machine to the wall modular line jack.
•Use the new line cord supplied to connect the telephone’s jack of your new Caller ID phone to the PHONE jack of your answering machine.
•Set your answering machine to answer the phone after 2 or more rings.
3.Follow the procedure “Unit Setup” to set up your unit.
4.Place the unit on a flat table or mount it on a wall. If you desire to place it on a wall, use the wall mount bracket and short line cord supplied to accomplish the wall mounting.
4

WALLMOUNT INSTRUCTIONS
1.Install wall mount bracket in wall mount position and route cords as shown in diagram below.
2.Connect the adapter and the line cord. See Steps 2 & 3 on preceding page for specific instructions.
3.Push out the handset hook and reattach in opposite direction for the wall mount position, plug the coiled cord into the handset, and then plug the other end of the cord into the base.
4.Place the handset on the base.
1 |
|
2 |
|
|
|
AC POWER |
Wall Jack |
|
|
ADAPTER |
|
Desk |
Wall |
|
|
Wall Mounting Bracket Positions |
Wall Jack Mounting Views |
|
|
3 |
|
4 |
|
|
|
WALL |
|
Desk top position |
Wall mount position |
|
|
Handset Hook
UNIT SETUP
FACTORYPRESETS
The following table shows you the factory settings for your unit:
Display |
Setting |
Language |
English |
LCD Contrast |
1 |
Area Code |
no setting |
LDS Code |
1 |
5


 WALL
WALL
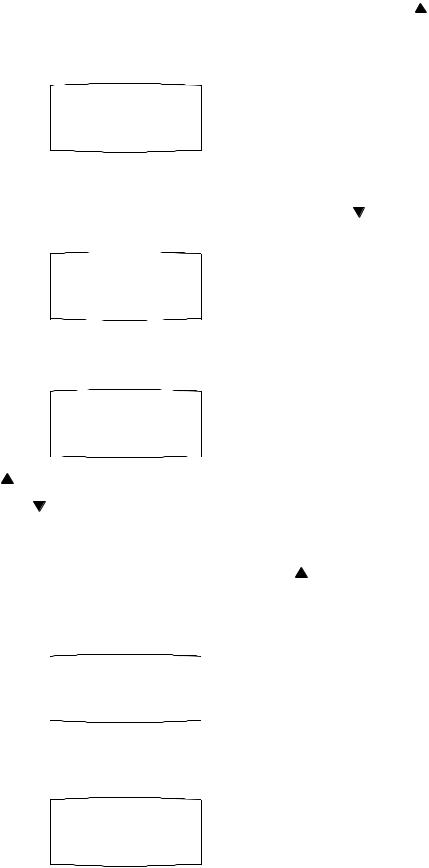
After the adapter is connected, the display will show as indicated below for setting.
1. |
[SET LANGUAGE] appears on the display. Press the |
( ) buttonREVIEWto |
UP |
|
select the language. E - English, F - French, S - Spanish, and then press the DIAL |
|
|
|
button to confirm the selection. |
|
|
E
SET LANGUAGE
2.When [LCD CONTRAST] appears, press REVIEW UP (  ) button to set the
contrast darker, and then you can press |
REVIEW(DOWN) button to set the |
contrast back to the preset. |
|
2
LCD CONTRAST
3.When [SET AREA CODE] appears, use REVIEW UP (  ) button and REVIEW DOWN (
  ) button to set your local area code.
- - -
SET AREA CODE
REVIEW UP ( ) button - to change the digit from -. 0, 1, 2, -9 |
|
|||
REVIEW DOWN ( ) button - to move to the next digit. |
|
Di |
||
When you are finished setting the local area code, press |
. |
|||
4. When [SET LDS CODE] appears, press REVIEW UP( ) button to change the long |
|
|||
distance code from -, 0, 1, 2, -9. When you are finished, Press DIAL. The display |
|
|||
will indicate as shown (Stand-By Screen) and be ready to receive incoming calls. |
|
|||
You have to set the LDS code as 1 when you are in the USA or Canada. |
|
|||
|
Stand-By Screen |
|
||
|
1 |
|
||
|
SET LDS CODE |
|
||
|
|
|
|
|
5.The time and date are automatically set when a caller ID (CID) number is received. The unit will keep the current time accurately, and is updated each time a CID number is received.
TOTAL CALLS 00
After you have set up the unit completely for the first time, use the MENU button to review or reprogram the Language, Area Code or LDS Code.
6
 Loading...