

Page 1
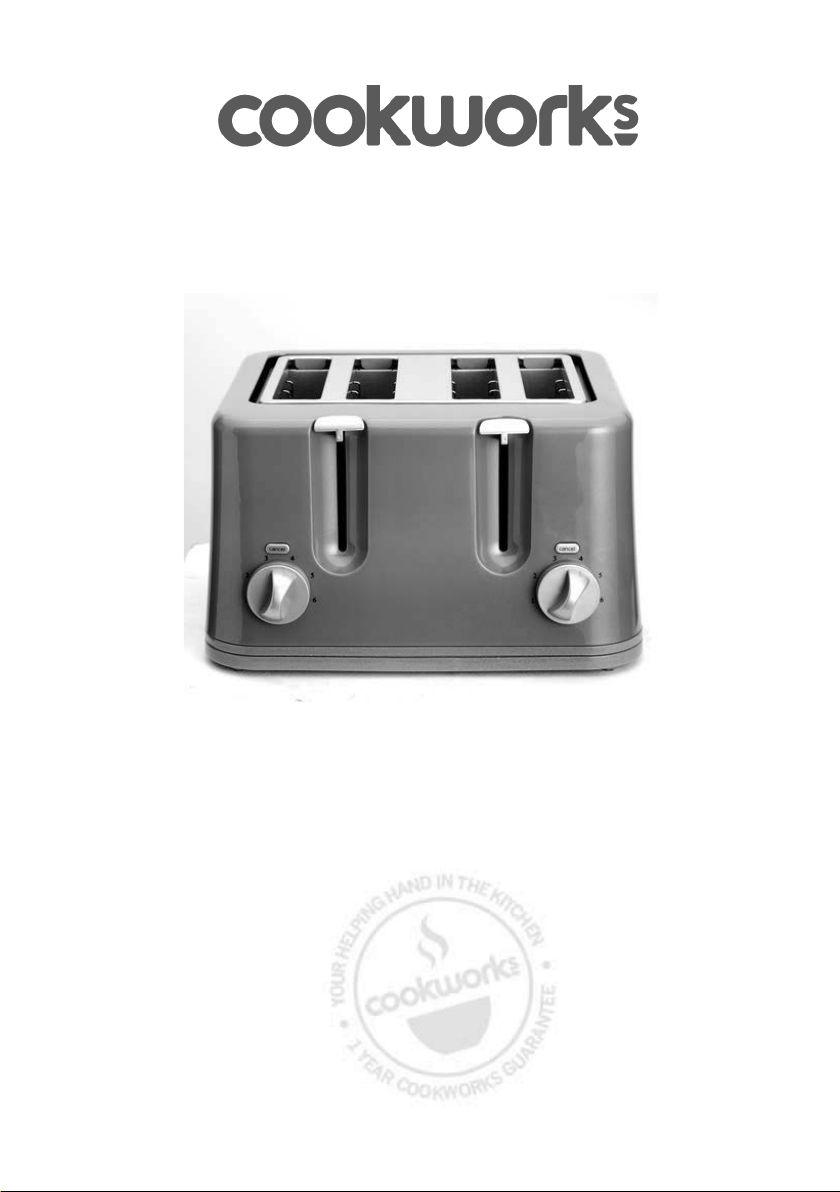
4–SliceToaster
Model No. T363DA
Care & Instruction Manual
For household and indoor use only
Please read these instructions before use and retain for
future reference
ISSUE-124/7/2017 1
Page 2

Electrical safety
• You should only plug the appliance into a 220V‐240V AC, 50Hz
supply. Connecting it to other power sources may damage the
appliance and will invalidate the guarantee.
• Switch off and unplug when not in use and before cleaning the
appliance.
• Keep the appliance and its cord out of reach of children less than
8 years.
• Do not allow children to use the appliance without supervision.
• This appliance can be used by children aged from 8 years and
above and persons with reduced physical, sensory or mental
capabilities or lack of experience and knowledge if they have
been given supervision or instruction concerning use of the
appliance in a safe way and understand the hazards involved.
Children shall not play with the appliance. Cleaning and user
maintenance shall not be made by children unless they are older
than 8 and supervised.
• Keep cable and plug and appliance dry and away from areas
where it is likely to get splashed. Never immerse in water.
• Do not pull on the cable to disconnect from mains supply.
• Do not force bread that is too thick or wide into the toaster
carriage. If bread becomes stuck in the toaster, switch off and
unplug before removing. Be careful, do not damage the internal
components and never use sharp objects such as forks or knives
to dislodge the item.
• Do not operate the appliance if damaged or after it malfunctions.
In the event the supply cord is damaged, in order to avoid a
hazard it must only be replaced by a qualified service engineer,
with a suitably approved part.
• This appliance must be positioned so that the plug is accessible
and the plug socket is within easy reach of the power cord.
• This appliance must be plugged in to an earthed socket outlet.
Warning!
• This appliance is intended exclusively for use in domestic
households. It is not suitable for commercial use.
• Do not leave unattended during use. Bread can catch fire if
overdone.
ISSUE-124/7/2017 2
Page 3
Warning! (continued)
6
• Do not use toasters directly under cupboards as this may
damage the toaster and/or the cupboard. Always ensure a clear
gap of at least 60cm above the toaster.
• Do not cover and allow the toaster to cool fully before storing.
• Do not operate the toaster using a timer or separate remote
control
• T
.
he surfaces of the toaster may become hot; wear oven gloves
when handling the appliance during and immediately after use.
• Bread may burn, do not use the toaster on, near or under
flammable materials (e.g. curtains) or heat sensitive surfaces.
• Do not use without the crumb trays correctly fitted and closed
completely. Do not allow crumbs to build up in the trays, the
rumb trays should be cleaned regularly.
c
• Do not place foil wrapped food in this toaster and remove all
wrappings from food before toasting.
• Not suitable to toast bread and other foodstuffs coated or
containing butter, other spreads or containing sugar and jams.
• When toasting raisin or other fruit breads, remove any loose
raisins from the surface of the bread before placing in the toaster.
This will help prevent pieces from falling into the toaster or
sticking on the guard wire in the slot.
• To prevent jamming do not use your toaster with torn slices of
bread. Make sure the size and thickness of the bread slices fit
easily into the toast slot
s
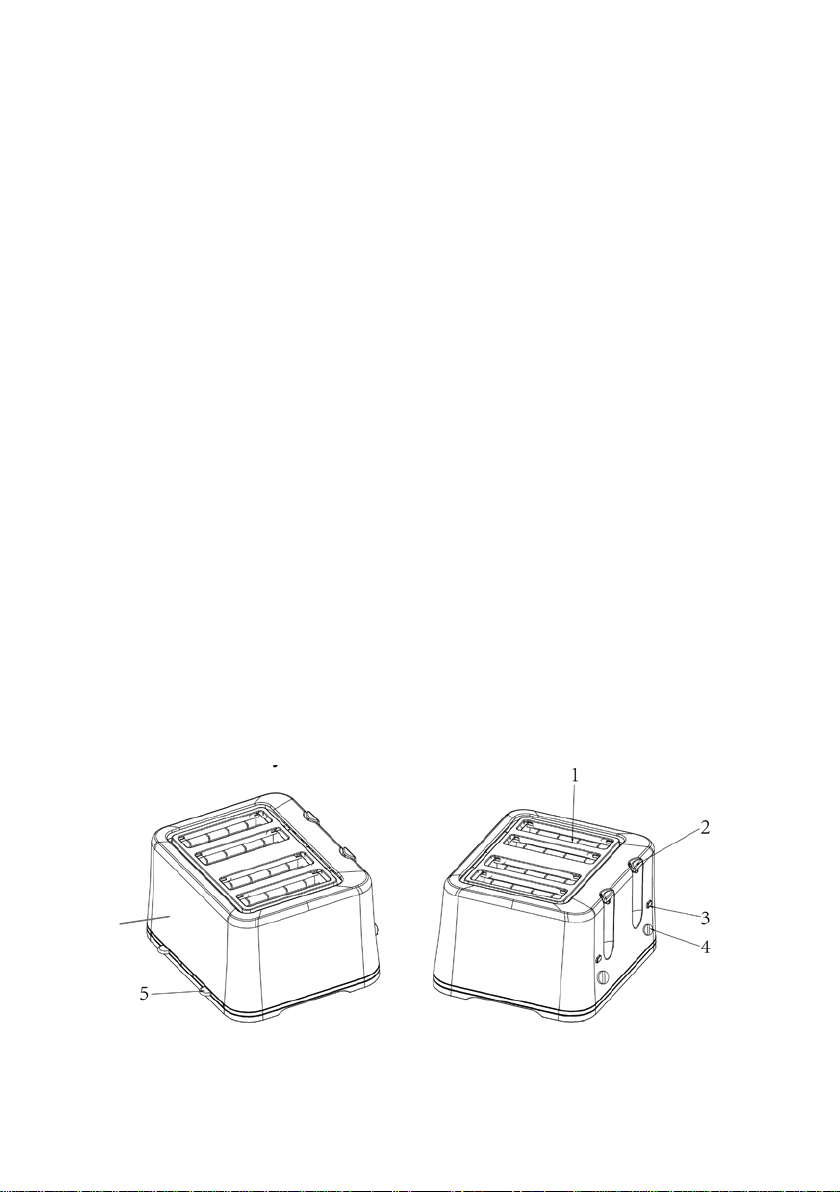
Parts
1. Toasting slots / carriage
2. Carriage handles
3. Cancel button
ISSUE-124/7/2017 3
4. Browning control knobs
5. Crumb trays
6. Body
Page 4

To use
1. Place the toaster on a stable, flat, heat resistant surface and
away from any flammable materials.
2. Fully unwind the cable and plug in.
3. The left and right hand carriages work independently of each
other and are controlled by the corresponding buttons of the
control panel.
4. Select the degree of browning required by adjusting the browning
control knob. A lighter coloured toast will be obtained by
selecting the lower settings (1 & 2) and darker toast by selecting
the higher settings (5&6).
5. After selecting an appropriate setting, place a slice of bread into
each carriage and lower the toast by pressing down on the
carriage handle. If the carriage does not stay down, check that
the toaster is switched on at the socket.
6. The toast will automatically pop up when the toasting time has
been completed. When using for the first time or changing bread
types initially set the browning control to between 3 and 4 and it
is advisable to check at intervals to see if the desired browning
level has been reached.
7. Toasting can be stopped at anytime by pressing the CANCEL
button, or by unplugging the toaster.
Notes:
• Before using for the first time it is advisable to let the toaster
complete several toasting cycles at the highest setting with no
bread in the carriage. Allow the toaster to cool down between
cycles.
• If the toast starts to smoke, press the CANCEL button
immediately.
• Dry thin slices of bread will toaster quicker than moist or thick
slices and should be toasted on a lower setting.
• For best results when toasting crust slices, insert the bread so
the crust side is nearest the outside, and the cut side is nearest
the middle of each pair of slots in the toaster.
• Turn the browning control knob to a lower setting if you are
toasting a single slice.
ISSUE-124/7/2017 4
Page 5

Cleaning.
Clean and empty both crumb trays on a regular basis. If the toaster
is used frequently then it is recommended this is done weekly.
1. Switch off and unplug the toaster and allow it to cool.
2. Wipe external surfaces with a soft damp cloth and polish with a
soft dry cloth. Do not use detergent or abrasives as these may
scratch the surface.
3. Slide out each crumb tray from underneath the toaster, wipe
clean and replace.
4. If there are pieces of bread remaining inside the toaster, turn the
toaster upside down and gently shake
ever touch the internal surfaces and always allow surfaces to
5. N
.
fully dry before using the toaster again.
Technical specification
Rated voltage 220 – 240V AC 50/60Hz
Power consumption 1460 - 1740W
Class rating I (earthed)
BS 1362 fuse 13A
Capacity 4 Slices
ISSUE-124/7/2017 5
Page 6

If you encounter any problems
Produced in China for
MK9 2NW. UK.
Plug / Wiring advice
The wires in this mains lead are coloured in accordance with the
following UK electrical code: BLUE = NEUTRAL
BROWN = LIVE
GREEN + YELLOW = EARTH
Non-rewireable plug
This appliance may be fitted with a “non‐rewireable” plug. If you
need to change the fuse in a “non‐rewireable” plug, the fuse cover
must be refitted. If the fuse cover is lost or damaged, the appliance
must not be used.
Rewireable plug
The colours of the wires in the mains lead of this appliance may
notcorrespond with the coloured markings identifying the terminals
in a rewireable plug.
Rewireable plugs should only be replaced by a
suitably competent person. If in doubt, consult a qualified
electrician.
The BLUE wire must be connected to the
terminal marked with the letter N
The BROWN wire must be connected to the
terminal marked with the letter L
The GREEN & YELLOW wire must be
connecting to the terminal marked with the
letter E or the earth symbol .
Recycling electrical products
This marking indicates that this product should not bedisposed
with other household wastes throughout theEU. To prevent
possible harm to the environment orhuman health from
uncontrolled waste disposal, recycleit responsibly to promote
the sustainable reuse ofmaterial resources. To return your used
device, pleaseuse the return and collection systems or contact
theretailer where the product was purchased. They cantake this
product for environmental safe recycling.
with this product please call our
customer care team on
0345 640 30 30
ISSUE-124/7/2017 6
Argos Limited,
489 – 499 Avebury Boulevard
Central Milton Keynes
Page 7

ISSUE-124/7/2017 7
 Loading...