

Page 1
Pressure Cooker
Model No. MY-CS6007WP
Care & Instruction Manual
For household and indoor use only
Please read these instructions before use and retain for
future reference
ISSUE-1 2/8/2017 1
Page 2

Electrical safety
You should only plug the appliance into a 220V‐240V AC, 50Hz
supply. Connecting it to other power sources may damage the
appliance and will invalidate the guarantee.
Switch off and unplug when not in use and before cleaning or
moving the appliance.
This appliance shall not be used by children. Keep the appliance
and its cord out of reach of children.
This appliance can be used by persons with reduced physical,
sensory or mental capabilities or lack of experience and
knowledge if they have been given supervision or instruction
concerning use of the appliance in a safe way and understand
the hazards involved.
Children shall not play with the appliance.
Keep the pressure cooker housing, cable and plug dry and away
from areas where it is likely to get splashed. Never immerse in
water.
Do not pull on the cable to disconnect from mains supply.
Do not operate the appliance if damaged or after it malfunctions.
In the event the supply cord is damaged, in order to avoid a
hazard it must only be replaced by a qualified service engineer,
with a suitably approved part.
This appliance must be positioned so that the plug is accessible
and the plug socket is within easy reach of the power cord.
The appliance is not intended to be operated by means of an
external timer or a separate remote-control system.
This appliance must be plugged into an earthed socket outlet.
ISSUE-1 2/8/2017 2
Page 3

Warning!
This appliance is intended exclusively for use in domestic
households. It is not suitable for commercial use.
Do not attempt to remove the lid when the pressure cooker is
operating or when it is still under pressure (float valve raised).
Do not cover or block exhaust valve during operation and allow it
to cool fully before storing.
The internal and external surfaces of the pressure cooker will
become hot during use and will have residual heat after cooking.
Do not touch and always use oven gloves when handling.
Do not use the pressure cooker near or under surfaces that are
heat sensitive or those that may be damaged by steam.
Do not overfill the pressure cooker and do not fill above half way
when cooking foods that expand.
Only use with the parts provided and to cook food. This
appliance can cause personal injury if misused.
To prevent burns, remove lid slowly and with the underside of
cover angled away from you to allow the steam to escape
gradually. Do not reach over the pressure cooker.
Food safety
Thoroughly defrost frozen meat, poultry, fish and seafood in the
refrigerator before cooking. Keep raw meat and poultry separate
from cooked foods.
Always wash hands after handling raw meat and poultry, before
handling any ready to eat foods.
Wipe and disinfect surfaces that have been in contact with raw
meat and poultry.
Use separate utensils for handling raw meat/poultry and cooked
food or wash them thoroughly between uses.
To check whether meat, particularly poultry, is cooked, pierce
the flesh with a skewer or fork; the juices should run clear.
Ensure the product is piping hot throughout.
Fish is cooked when it appears opaque and can be flaked easily.
ISSUE-1 2/8/2017 3
Page 4
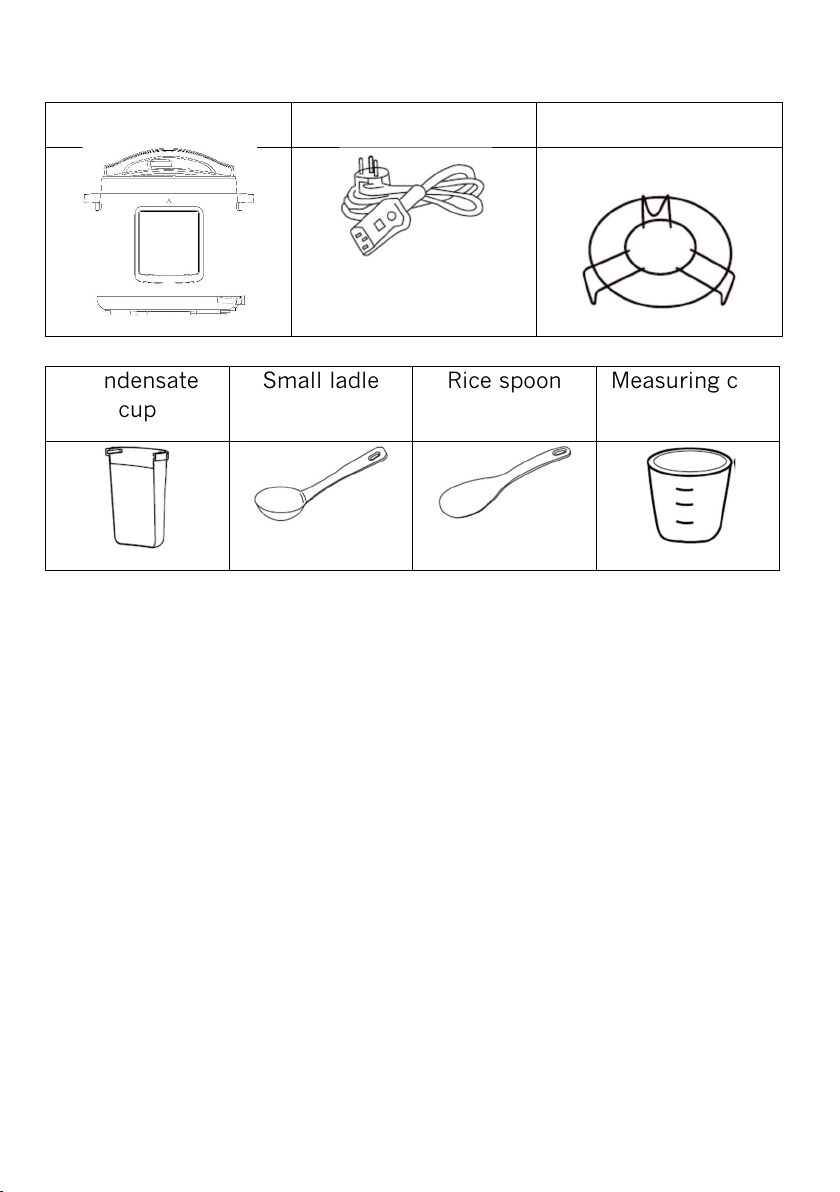
Contents
Pressure cooker
Power lead
Steam trivet
Condensate
Small ladle
Rice spoon
Measuring cup
cup
ISSUE-1 2/8/2017 4
Page 5

Parts
3
1
11
2
4
1. Exhaust valve cover
(removable)
2. Push rod
3. Float valve gasket
4. Seal
(removable)
(removable)
5. Control panel
6. Bowl
(removable)
7. Inner bowl
ISSUE-1 2/8/2017 5
8. Pressure cooker handles
9. Pressure cooker housing
10. Power cable socket
11. Lid handle
12. Exhaust valve
13. Float valve
(removable)
(removable)
Page 6

Control Panel
ISSUE-1 2/8/2017 6
Page 7

Fitting the condensate cup
Slide the condensate
cup into position at the
reverse of the pressure
cooker as shown (figs. 1)
Figs. 1
Removing and fitting the lid
To remove the lid (figs. 2) - hold the lid by the handle and turn the lid
anticlockwise until the alignment mark () on the rim of the
pressure cooker housing is aligned with the ‘unlocked’ padlock
symbol on the lid. Lift off the lid.
Figs. 2
To fit the lid (figs. 3)- Position the lid above the pressure cooker and
align the ‘unlocked’ padlock symbol on the lid with the alignment
mark () on the rim of the pressure cooker housing. Turn the lid
clockwise until the ‘locked’ padlock symbol is aligned with the
alignment mark ().
Figs. 3
ISSUE-1 2/8/2017 7
Page 8

Using the pressure cooker – manual mode
1. Use utensils suitable for non stick pans when using this item.
2. Wash all removable parts before first use and dry thoroughly.
3. Place the pressure cooker housing on a stable, flat, heat resistant
surface and away from surfaces that may be damaged by steam.
4. Fit the condensate cup and remove the lid.
5. Unwind the cable and plug into the pressure cooker housing and
then plug into the mains supply. The display will illuminate. For
safety do not allow the cable to dangle over the edge of units.
6. Place the ingredients to be cooked into the bowl. Do not fill past
the MAX (10) mark and ensure approximately 2 cm of liquid is in
the bowl.
7. Check that the seal is fitted into the lid and close fully ensuring
that the ‘locked’ padlock symbol is aligned with the alignment
mark (). A series of ascending notes will be heard and locked
indicator on the control panel will extinguish.
8. Turn the exhaust valve to the pressure position
(figs.4 & 5).
Fig. 4
9. To manually set the cooking time, press the MANUAL button and
the default cooking time of 30 minutes (0:30) will be shown in
the display and the cook indicator above the start button will
flash.
10. When cooking foods there is a great deal of personal preference
on how tender or what texture food should have after cooking.
Adjust the cooking time using the + /- buttons and press the
START button to start operation. Three bleeps will be heard, the
cook indicator will stop flashing and all buttons except the cancel
button will be inoperative.
11. The pressure cooker will now start to build pressure. The time
required to build the pressure will depend on the volume of food
and liquid in the cooker and ranges from 5 minutes (minimum
quantity to 25 minutes when the cooker is filled to maximum.
ISSUE-1 2/8/2017 8
Page 9

12. When the cooker is up to pressure, the display will start to count
down the cooking time, the float valve will pop up (fig. 5) and
some hissing and a small amount of steam is normal just before
the float valve pops up.
Fig. 5
Float valve up
Float valve down
Fig. 6
13. After the cooking time has finished, ten bleeps will be heard and
the pressure cooker will switch to warming mode automatically,
the cook indicator will extinguish and the display will show
‘L0:00’.
14. When the pressure cooker is in warming mode the pressure will
slowly normalise and the float valve will drop (fig. 6) but the
display will count up (e.g. L0:01, L0:02 etc.) to show the length
of time the food has been kept in warming mode. Never keep
food warm for longer than 2 hours.
15. If cooking more delicate foodstuffs (e.g. fish, chicken and
vegetables), use the quick pressure release method to
prevent overcooking. To release the internal pressure
more quickly, use an oven glove and turn the exhaust
Fig. 7
valve slowly to the exhaust position (fig. 7). Do not reach
over the pressure cooker. If the steam escape is too
fast, close the valve and then try again.
16. When the pressure has normalised, remove lid slowly with the
underside angled away from you to allow steam to escape.
17. To stop the cooking process, switch off at the mains and allow
any built up pressure to normalise.
ISSUE-1 2/8/2017 9
Page 10

Using the pressure cooker – programmed mode
1. Follow steps 1 – 8 above for manual mode.
2. Press the programmed button corresponding to the food being
cooked and the default cooking time (see table 1) will be shown
in the display, the ‘medium’ indicator will illuminate and the
cook indicator above the start button will flash.
Default
(medium)
Rice 18 n/a n/a 0 - 0:36
Multigrain 35 20 50 0 - 1:40
Soup 30 20 40 0 - 1:20
Meat / Stew 35 25 45 0 - 1:30
Poultry 20 10 30 0 - 1:00
Fish 5 3 8 0 - 0:16
Steam 15 5 25 0 - 0:50
Beans/ Chilli
Quinoa 40 30 50 0 - 1:40
Cake 20 10 30 0 - 1:00
35 30 40 0 - 1:20
Low High Adjustment
range
(hr:min)
Table 1
3. When cooking foods there is a great deal of personal preference
on how tender or what texture food should have after cooking.
The cooking time can be reduced or extended as before using
the + /- buttons (adjustment range shown in table 1).
4. The length of time that the pressure cooker stays at pressure /
cooking temperature can be reduced or extended using the
ADJUST button. Press the button to scroll between low, medium
and high and the indicator above each option will illuminate to
show the option selected.
5. Press the START button to start operation. Three bleeps will be
heard, the cook indicator will stop flashing and all buttons
except the cancel button will be inoperative.
Follow steps 11 – 17 above for manual mode.
6.
ISSUE-1 2/8/2017 10
Page 11

Pressure cooker - general cooking advice
Pressure cooking is great for casseroles, stews and for cooking
cheaper cuts of meat. Many dried pulses and beans can be added to
the recipe without the need for overnight soaking. Favourite recipes
can be adapted and prepared in a fraction of the time as food cooks
in about a third to one half of the time that they would by
conventional methods and some typical recipes have been added at
the end of this manual to show how to use the pressure cooker. For
pressure cooker recipes, techniques and specific cooking times
consult a specialist recipe book. Some general advice follows.
Never pressure cook anything without approximately 2cm of
liquid in the bottom of the bowl.
For a pressure cooker to work, space is needed at the top of the
bowl for the steam to build. Do not fill past the maximum level
(10) shown on the bowl.
If cooking foods that expand, do not fill past the half way level to
allow for expansion.
When following pressure cooker recipes all cooking times should
be from the point that the cooker becomes pressurized and the
float valve pops up. Note: If using the programmed modes this
pressure cooker starts the countdown timer when at pressure
The time required to build the pressure will depend on the
volume of food and liquid in the cooker.
Adding hot liquid or stock to the pressure cooker will allow the
pressure cooker get to pressure more quickly and cooking times
can be shortened.
Cooking liquid does not reduce, so it may be necessary to add
less liquid to a favorite recipe or to simmer and reduce the liquid
using the sauté function after pressure cooking.
Thicken sauces and gravies only after cooking.
If you prefer vegetables in a recipe to have a little bite,
depressurize 5 – 10 minutes before the end of the cooking cycle,
add the vegetable and then bring the cooker back up to pressure
to complete the cycle.
Trim excess fat from meat, as the cooking method does not allow
the fat to drain away.
Unless a pressure cooker recipe advises otherwise, if adding
fresh milk, cream or yoghurt this should be done after the
pressure cooking cycle has been completed.
ISSUE-1 2/8/2017 11
Page 12

Outline cooking times
Meats
Weight /
quantity
Chicken breasts, boneless 450 8-10
Chicken thighs, boneless 8 x 85g 20
Whole chicken 1.4 – 1.8kg 20-30
Beef stew (inc potatoes and veg) 700 15 – 20
Short ribs (5cm) 1.8kg 45-60
Brisket / skirt 1.4kg 30
Pot roast, topside / chuck 900-1.4kg 30
Lamb shanks 3 x 225g 15-20
Lamb shoulder (boneless) 1.4kg 20-30
Pork chops (2.5cm thick) 2 x 280g 8-10
Pork spareribs 1.4kg 30
Pork shoulder (boneless) 1.4kg 20-30
Ham 1.4kg 30
Pressure
cooking time
Beans and Pulses
When cooking beans and pulses, DO NOT fill past half way mark as
they will expand during cooking. Always use enough water to cover
the beans / pulses and to allow for absorption.
Pressure cooking time
Soaked overnight Unsoaked
Black beans 20-25 minutes 28-30 minutes
Cannellini 18-22 minutes 33 to 38 minutes
Chickpeas 35 minutes 50 minutes
Great northern 30 minutes 40 minutes
Lentils N.A. 8-10 minutes
Pinto beans 20-25 minutes 30-35 minutes
Red beans 22-25 minutes 30-35 minutes
Soy beans 26-33 minutes 33-40 minutes
ISSUE-1 2/8/2017 12
Page 13

Vegetables (cooked by steaming method)
Add approximately 1 cup of liquid into the bowl of the pressure
cooker and then place the trivet into the base of the bowl.
Unless told otherwise, place the vegetables to be cooked onto a
plate and place the plate onto the trivet.
Fit the lid and set the time to the time shown in the table. If you
like vegetables with a little bite, use shortest time shown.
At completion of the cooking cycle, use the quick pressure
release method to prevent overcooking.
Weight /
quantity
Courgette, sliced 1 medium 1-3
Green beans, whole 225g 2
Carrots, 1cm slice 2 cups 2-3
Carrots, whole 4-6 4-5
Sweetcorn (placed directly onto the trivet) 3 cobs 8–10
Broccoli, florets 3 cobs 1-3
Fresh beets, quartered 3 cups 20-25
Brussel sprouts, whole 1 cup 0-2
Squashes (
Baby potatoes, whole 8 medium 8-10
New potatoes, whole 6 medium 10-12
Sweet potatoes, cubed 2 cups 4-6
Potatoes, cubed 2 cups 5-7
e.g. butternut
) peeled and cubed 1lb 3-5
Cooking time
Rice
To cook rice, add the number of cups of rice into the bowl and
season to taste.
Unless the advice on the rice packet advises a different quantity,
fill the bowl to the corresponding mark on the inside of the bowl
with water.
For example if cooking 3 cups of rice, add the rice into the bowl
and then add water up to the 3 mark on the bowl.
Set the time to the time below.
Cup quantity 1 2 3 4 5
Timer setting 18 20 23 25 28
ISSUE-1 2/8/2017 13
Page 14

Using the sear/ saute function
1. Use utensils suitable for non stick pans when using this item.
2. Wash the removable bowl and lid before first use and dry
thoroughly.
3. Place the pressure cooker on a stable, flat, heat resistant surface
and away from surfaces that may be damaged by steam.
4. Unwind the cable and plug in to the pressure cooker housing and
then plug into the mains supply. The display will illuminate. For
safety do not allow the cable to dangle over the edge of units.
5. Remove the lid and descending series of notes will be heard.
6. Press the SEAR button and the cook indicator above the start
button will flash.
7. Press the start button and the default cooking time of 30
minutes (0:30) will be shown in the display, the cook indicator
will stop flashing and sear function will start to operate. Allow
the bowl to heat and sauté food as you would normally. DO NOT
fit the lid and please note the length of the cooking time cannot
be adjusted.
8. When cooking is complete, press the cancel button to switch off
the sear function.
ISSUE-1 2/8/2017 14
Page 15

Using the slow cook function
1. Use utensils suitable for non stick pans when using this item.
2. Wash all removable parts before first use and dry thoroughly.
3. Place the pressure cooker housing on a stable, flat, heat
resistant surface and away from surfaces that may be damaged
by steam.
4. Fit the condensate cup and remove the lid.
5. Unwind the cable and plug into the pressure cooker housing and
then plug into the mains supply. The display will illuminate. For
safety do not allow the cable to dangle over the edge of units.
6. Place the ingredients to be cooked into the bowl. Do not fill past
the MAX (10) mark on the bowl.
7. Check that the seal is fitted into the lid and close fully ensuring
that the ‘locked’ padlock symbol is aligned with the alignment
mark (). A series of ascending notes will be heard and locked
indicator on the control panel will extinguish.
8. Turn the exhaust valve to the exhaust position (fig.6).
9. Press the SLOW COOK button and the default cooking
time of 4 hours (4:00) will be shown in the display
Fig. 6
and the cook indicator above the start button will
flash.
10. Adjust the cooking time (2 – 12 hours) using the + /- buttons
and press the START button to start operation. Three bleeps will
be heard, the cook indicator will stop flashing and all buttons
except the cancel button will be inoperative.
11. After the cooking time has finished, ten bleeps will be heard and
the pressure cooker will switch to warming mode automatically,
the cook indicator will extinguish and the display will show
‘L0:00’.
12. The display will then count up (e.g. L0:01, L0:02 etc.) to show
the length of time the food has been kept in warming mode.
Never keep food warm for longer than 2 hours.
ISSUE-1 2/8/2017 15
Page 16

Slow cook function - general cooking advice
All ingredients must be fully thawed before cooking.
Vegetables such as carrots, potatoes and turnips require longer
cooking than many types of meat and should be cut into the
smallest sizes practical. Place in the bottom or the sides of the
bowl and cover with liquid.
Dried pulses need to be soaked overnight before adding to the
slow cooker and in some instances (e.g. red kidney beans)
require boiling for a minimum of ten minutes to ensure that they
are safe to eat. Follow ‘on pack’ guidance when using dried
pulses.
Trim excess fat from meat, as the cooking method does not
allow the fat to drain away.
Avoid removing the during the cooking process as this breaks the
seal formed around the lid and adds time to the cooking
process.
If adding fresh milk or yoghurt, this should be done in the final
two hours of cooking. Evaporated milk may be added at the
start of cooking.
When adding liquid or stock to the slow cooker use hot liquid to
reduce the cooking time.
Part cooking or sautéing vegetables and browning meats before
they are added to the slow cooker can reduce cooking times.
Rice, noodles and pasta are not recommended for long cooking
periods. Cook them separately and then add to the slow cooker
during the final 30 minutes.
ISSUE-1 2/8/2017 16
Page 17

Using the delay start function
1. Follow the usual directions outlined above for assembling and
setting the pressure cooker but DO NOT press the START button.
2. Press the DELAY button and the display will show a default delay
time of 2 hours.
3. Adjust the delay interval (10 seconds or 1 - 24hours) using the
+ /- buttons and now press the START button to complete the
program. Three bleeps will be heard, the cook indicator will stop
flashing and all buttons except the cancel button will be
inoperative.
4. The display will count down to show the length of time remaining
before the pressure cooker will start to operate.
5. When the display reaches zero, the pressure cooker will start to
operate and the display will now show the cooking time
remaining.
6. When the display reaches zero, the pressure cooker will switch to
warming mode as indicated under manual operation.
Note:
Please note that the delay start function is not available for slow
cooking, searing and keep warm mode.
Cleaning
1. Clean all parts before first use and after each use.
2. Switch off, unplug and allow the pressure cooker to cool fully.
3. Remove the condensate collector, seal, exhaust valve, exhaust
value cover, float valve gasket and float valve and wash
separately.
4. The lid, removable bowl, utensils and the removable parts listed
above may be washed in hot water with a little washing up liquid.
Rinse and wipe dry. Not suitable for use in dishwashers.
5. Wipe the surfaces of the pressure cooker housing with a damp
cloth; do not use detergent or abrasives as these may scratch the
surface. Never immerse the motor housing, cable or plug in
water.
6. Refit all parts after washing.
ISSUE-1 2/8/2017 17
Page 18

Troubleshooting
Difficult to
Seal not installed
Float valve is catching on
Lid won’t
Cooker still pressurized
Steam leaks
Seal ring incorrectly fitted
from float
Food debris on float
Steam coming
out of exhaust
Exhaust valve not in
Float valve not
water in
indicator not
Observation Possible cause Action to take
Refit the seal
close lid
open
from lid
Steam leaks
valve
valve
rising
POWER
illuminated
correctly.
Gently push the rod to release.
the push rod.
Allow pressure to normalize.
and float valve still raised.
Fit / refit the seal
or not installed.
Seal ring damaged Replace seal
Lid not closed correctly Refit lid
Clean around gasket
gasket
Float valve damaged Replace gasket
Turn exhaust valve to
pressure position.
Too little food /
bowl
Damaged power cable Replace cable
Is there a power cut?
position
Add liquid
ISSUE-1 2/8/2017 18
Page 19

Demonstration recipe ideas
Cooking a gammon joint
1.25kg Gammon joint
2 tbsp whole grain mustard
¼ cup brown sugar or honey
10 black peppercorns
2 bay leaves
1. Prepare all ingredients.
2. Place the bowl into the pressure cooker housing, plug in and
switch on.
3. Place the gammon into the bowl and add enough water to come
half way up the sides of the joint.
4. Add the remaining ingredients.
5. Fit the lid, select ‘manual’ cooking mode and set the time to 45
minutes. If using a larger joint, extend the cooking time.
6. When the cooking cycle is completed, allow the pressure to
normalise naturally and when the float valve drops remove the
lid.
7. Lift out the gammon and allow to cool.
ISSUE-1 2/8/2017 19
Page 20

Lamb shanks in port and garlic sauce
2 lamb shanks
1 tbsp vegetable oil
10 garlic cloves, peeled and whole
½ cup of lamb stock
½ cup port
1 tbsp tomato puree
2 tsp rosemary, fresh and finely chopped
15g butter, salted
2 tsp balsamic vinegar
Salt and pepper, to taste
1. Prepare all ingredients.
2. Place the bowl into the pressure cooker housing, plug in and
switch on.
3. Select the sauté function, add the vegetable oil into the bowl and
allow it to heat a short while before adding and browning the
lamb shanks. Remove the lamb shanks and set to one side.
4. Now sauté the garlic cloves until light golden in colour.
5. Place the lamb shanks back into the pot and add all ingredients
EXCEPT the butter and the vinegar.
6. Fit the lid, press the ‘cancel’ button to stop the sauté function.
Then select ‘manual’ cooking mode and set the time to 35
minutes.
7. When the cooking cycle is completed, allow the pressure to
normalise naturally and when the float valve drops remove the
lid.
8. Remove the lamb shanks, place into a serving dish and allow to
rest in a warm location.
9. Select the sauté function again, allow the sauce to boil and
reduce to approximately half volume.
10. Stir in the butter, balsamic vinegar and season to taste quantity.
11. Switch off the cooker and ladle the sauce over the lamb shanks.
ISSUE-1 2/8/2017 20
Page 21

Beef stew with a horseradish twist
450g beef braising steak, cut into roughly 3cm pieces
1 tbsp plain flour
1 tbsp vegetable oil
1 onion, finely chopped
1 carrot, chopped
250g closed cup chestnut mushrooms, sliced
390g tin chopped tomatoes
300ml beef stock, made with 1 stock cube
1 bay leaf
2 tbsp horseradish sauce
15g bunch fresh flat-leaf parsley, washed and chopped
1. Prepare all ingredients.
2. Place the bowl into the pressure cooker housing, plug in and
switch on.
3. Coat the pieces of beef in the flour.
4. Select the sauté function, heat the oil in the bowl and brown the
meat until browned all over. Remove from the bowl, then add the
onion and carrot and cook for 6-8 minutes until softened and
golden, stirring regularly and scraping the bottom of the pot to
release the flavour.
5. Add the mushrooms and cook for 3-4 minutes until softened.
6. Return the beef to the pot then add the chopped tomatoes, beef
stock and bay leaf. Season to taste.
7. Fit the lid, press the ‘cancel’ button to stop sauté function. Then
select ‘manual’ cooking mode and set the time to 40 minutes.
8. When the cooking cycle is completed, allow the pressure to
normalise naturally and when the float valve drops remove the
lid.
9. Select the sauté function again, allow the sauce to simmer until
the sauce has thickened.
10. Switch off the cooker, lift out the bowl, remove the bay leaf then
stir through the horseradish sauce and the parsley.
ISSUE-1 2/8/2017 21
Page 22

Technical specification
Rated voltage 220-240V AC 50/60Hz
Power consumption 1000W
Max. capacity 6 litres
Working pressure 70kPa
Class rating I (earthed)
BS 1362 fuse 13A
Plug / Wiring advice
The wires in this mains lead are coloured in accordance with the
following UK electrical code: BLUE = NEUTRAL
BROWN = LIVE
GREEN + YELLOW = EARTH
Non-rewireable plug
This appliance may be fitted with a “non‐rewireable” plug. If you
need to change the fuse in a “non‐rewireable” plug, the fuse cover
must be refitted. If the fuse cover is lost or damaged, the appliance
must not be used.
Rewireable plug
The colours of the wires in the mains lead of this appliance may not
correspond with the coloured markings identifying the terminals in a
rewireable plug. Rewireable plugs should only be replaced by a
suitably competent person. If in doubt, consult a qualified
electrician.
The BLUE wire must be connected to the
terminal marked with the letter N
The BROWN wire must be connected to the
terminal marked with the letter L
The GREEN & YELLOW wire must be
connecting to the terminal marked with the
letter E or the earth symbol .
ISSUE-1 2/8/2017 22
Page 23

Recycling electrical products
If you encounter any problems
Produced in China for
This marking indicates that this product should not be
disposed with other household wastes throughout the EU. To
prevent possible harm to the environment or human health
from uncontrolled waste disposal, recycle it responsibly to
promote the sustainable reuse of material resources. To return
your used device, please use the return and collection systems
or contact the retailer where the product was purchased. They
can take this product for environmental safe recycling.
with this product please call our
customer care team on
0345 640 30 30
ISSUE-1 2/8/2017 23
Argos Limited,
489 – 499 Avebury Boulevard
Central Milton Keynes
MK9 2NW. UK.
Page 24

ISSUE-1 2/8/2017 24
 Loading...