

Consew 733R-5 User Manual
LDNSEIN
OPERATING
INSTRUCTIONS,
PARTS LIST
MAINTENANCE
PROCEDURES
CONSOLIDATED SEWING
MACHINE
Model
CORP.
733R-5
EXTRA
HEAVY
LONG
DUTY
ARM
SINGLE
DROP
ALTERNATING
LOCKSTITCH
CONSOLIDATED
COPYRIGHT (01989
CONSOLIDATED
NEEDLE
FEED
PRESSER
MACHINE
SEWING MACHINE
SEWING MACHINE
FEET
CORP.
CORPORATION
INTRODUCTION
-CONSEWMODEL
733R-5
Consew Model733R-5 is a single needle,flatbed,type
sewing machine used is the fabrication and repair
of
Consew Model 733R-5 is capable
nylon duck to multiple layers
Consew Model 733R-5 is able to fabricate and install
extraction-parachutes,
Machines should
accumulation which, when allowed to build up,mixes with oil and becomes caked on the
After use, sewing machines should
Once a week the inside
blown out with shop air
CAUTION:
Once a year the machine should be cleaned with a solvent such as Freon, then
immediately oiled thoroughly to prevent rust and corrosion.
CAUTION:
When the machines are
Using the proper oil is
ENSURE GOOD VENTILATION WHENUSING SOLVENTS.
bridle loops,locking stow loops,harnesses and multiple layer
Preventive Maintenance
be
kept covered when not in operation to prevent dust and dirt
if
available.If shop air is not available, clean with a soft bristle
USE EYE PROTECTION WHEN USING SHOP AIR.
in
constant use they should
of
utmost importance. For lubrication
quality sewing machine oil shoud
a.
Oiling points are shown in figures 10 and 11.
Use one drop at each oiling point.
b.
sewing fabrics that range from heavy cotton and
heavy webbing splices.
machine.
be
wiped down with oil and a soft cloth before
covering.
of
the machine and the motor should
brush.
301 stitch,reverse feed,industrial
of
aerial delivery equipment.
of
heavy webbing.
personnel-,cargo-and
be
be
oiled at least twice daily.
of
the machine, only good
be
used.
SECTION
MAINTENANCE
I1
OPERATING INSTRUCTIONS AND
PROCEDURES
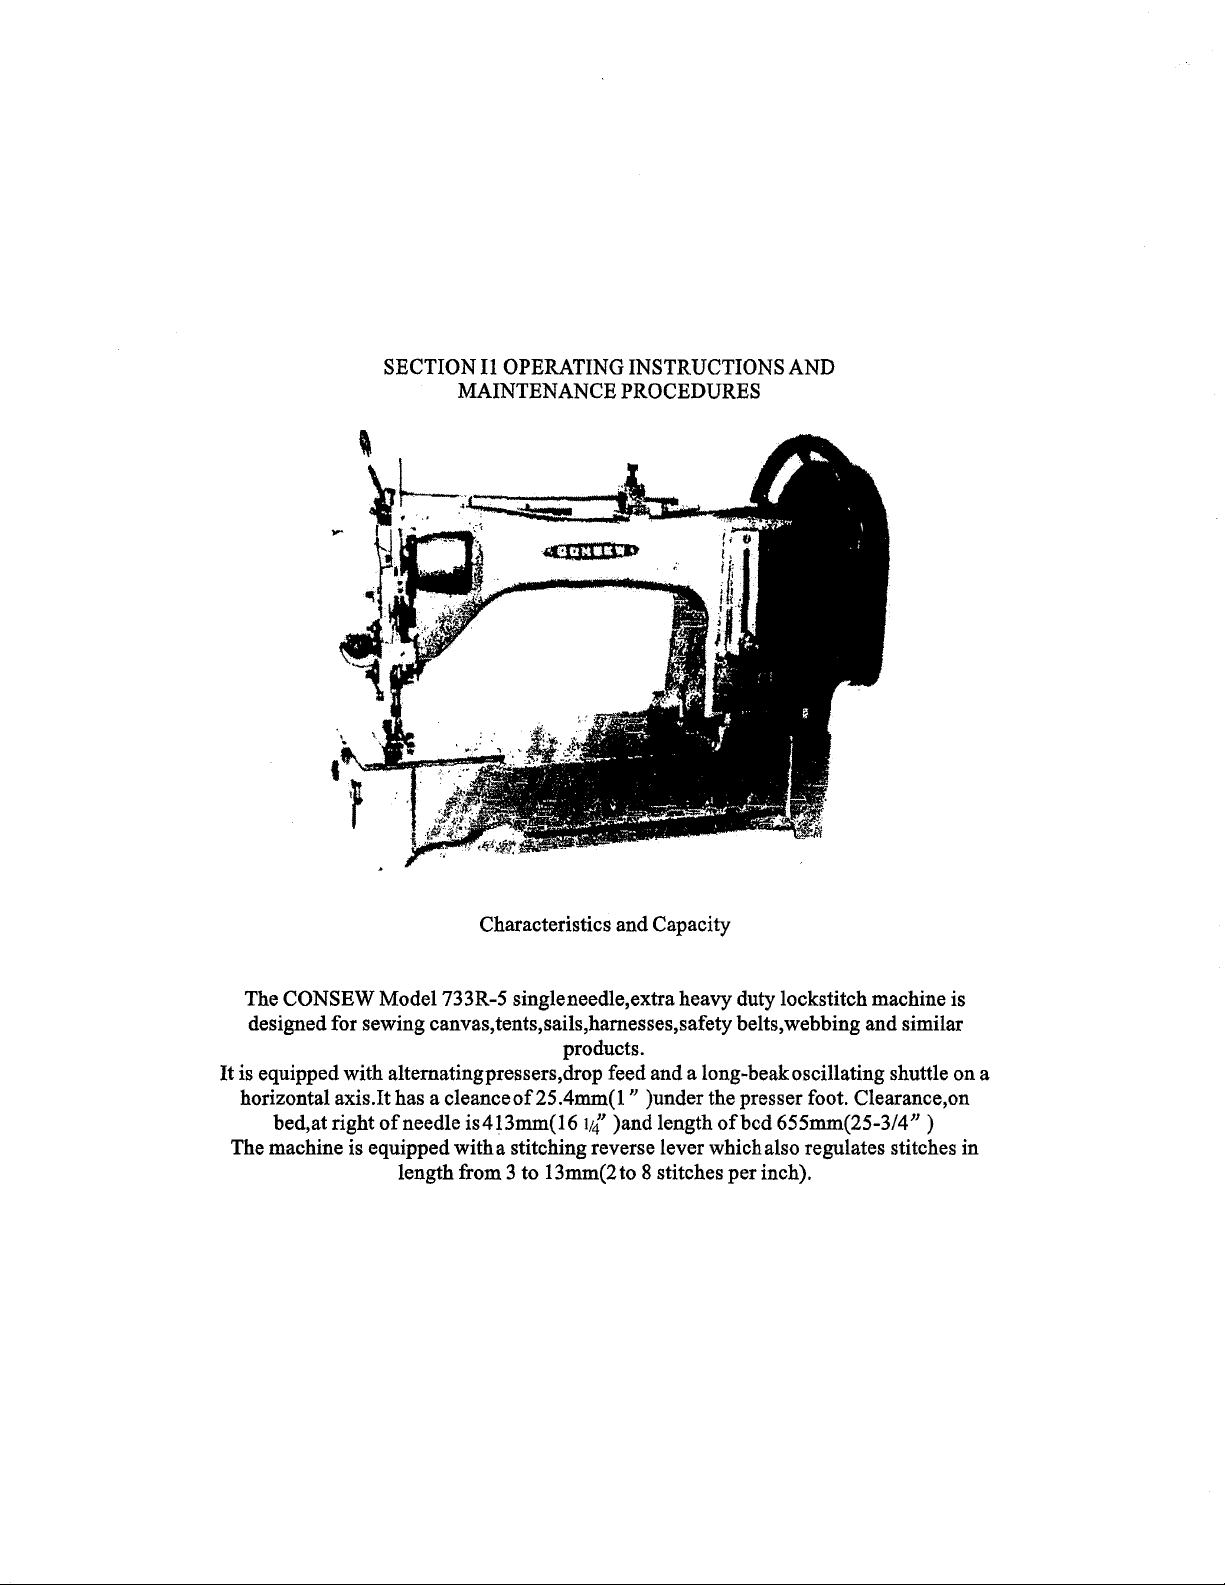
Characteristics and Capacity
The CONSEW Model 733R-5 single needle, extra heavy duty lockstitch machine is
designed for sewing canvas,tents,sails,hamesses,safety belts, webbing and similar
products.
It
is equipped with altematingpressers,drop feed and a long-beak oscillating shuttle on a
horizontal axis.It has a
bed,at right
The machine is equipped with a stitching reverse lever which also regulates stitches in
of
cleanceof25.4mm(l"
needle is413mm(16
length from 3 to 13mm(2 to 8 stitches per inch).
t;4'
)under the presser foot. Clearance,on
)and length
ofbcd
655mm(25-3/4")
Alternating pressers consist of a vibrating presser
in
combination .In operation,the pressers alternately press
vibrating presser working
or
more
plies of material which
operated presser foot lift
minute.
The
in
unison with
are
and
reverse.The
balance wheel
THREAD
AND
the
feed,
being
sewn.
maximum
always
THREAD
rotates towards the operator.
NEEDLE
foot
and
a lifting presser
down
on
so
that there
Additional features include pedal
operating speed
SELECTION
is
no
foot
the
material,the
slipping of
is
550
stitches per
working
the
two
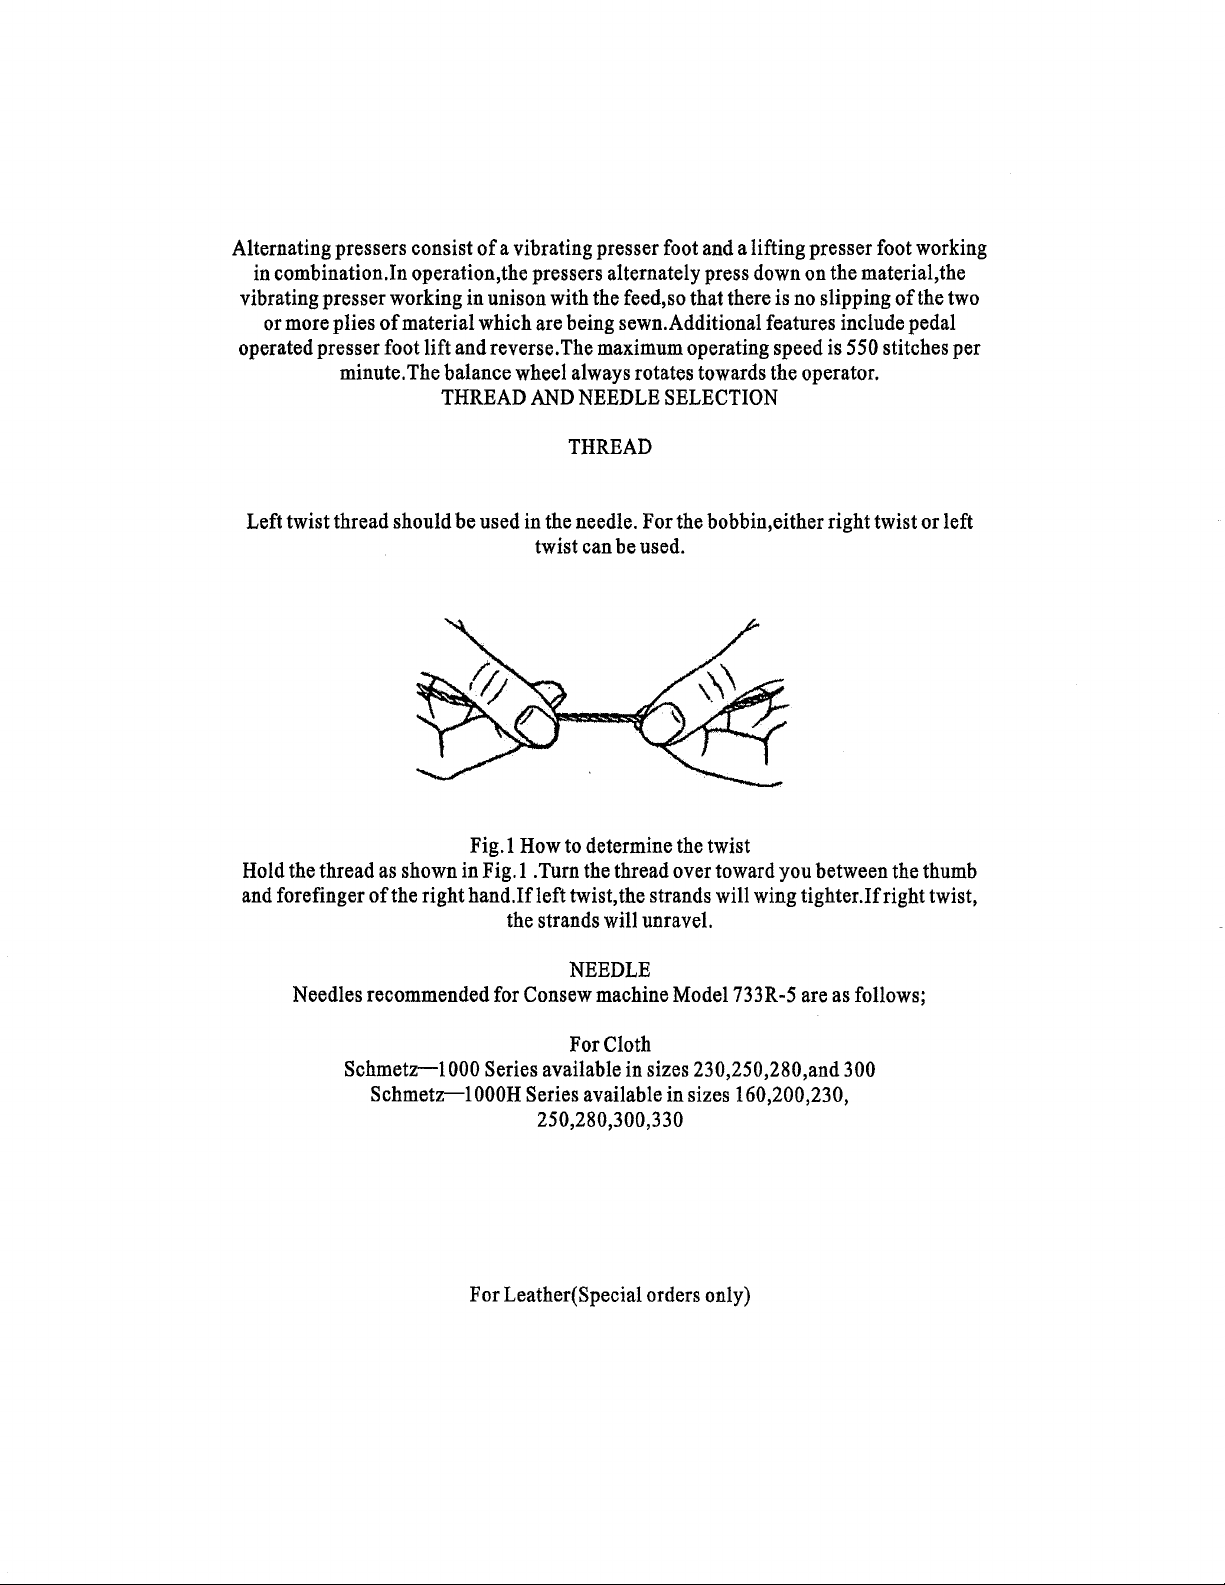
Left twist thread should
Hold
the
thread
as
shown
and
forefinger of the right
Needles recommended
Schmetz-1
Schmetz-1000H Series available
be
used
in
twist
Fig.1
How
in
Fig.1 . Turn
hand
.If left twist,
the
strands will unravel.
for
Consew
000
Series available
250,280,300,330
the
needle. For
can
to
determine
the
NEEDLE
machine
For Cloth
the
bobbin,either right twist
be
used.
the
twist
thread over toward
the
strands will
Model
in
sizes 230,250,280,and
in
sizes 160,200,230,
wing
733R-5
you
between
tighter .If right twist,
are
as
follows;
300
the
or
left
thumb
For Leather( Special orders only)
Schmetz- J.003D Series,triangularpoint,available
Schnietz- 1
Schmetz-
Schmetz-
Schmetz
The
size
of
the needle
Do
not use rough
needle eye,as such thread will interfere with the successful use
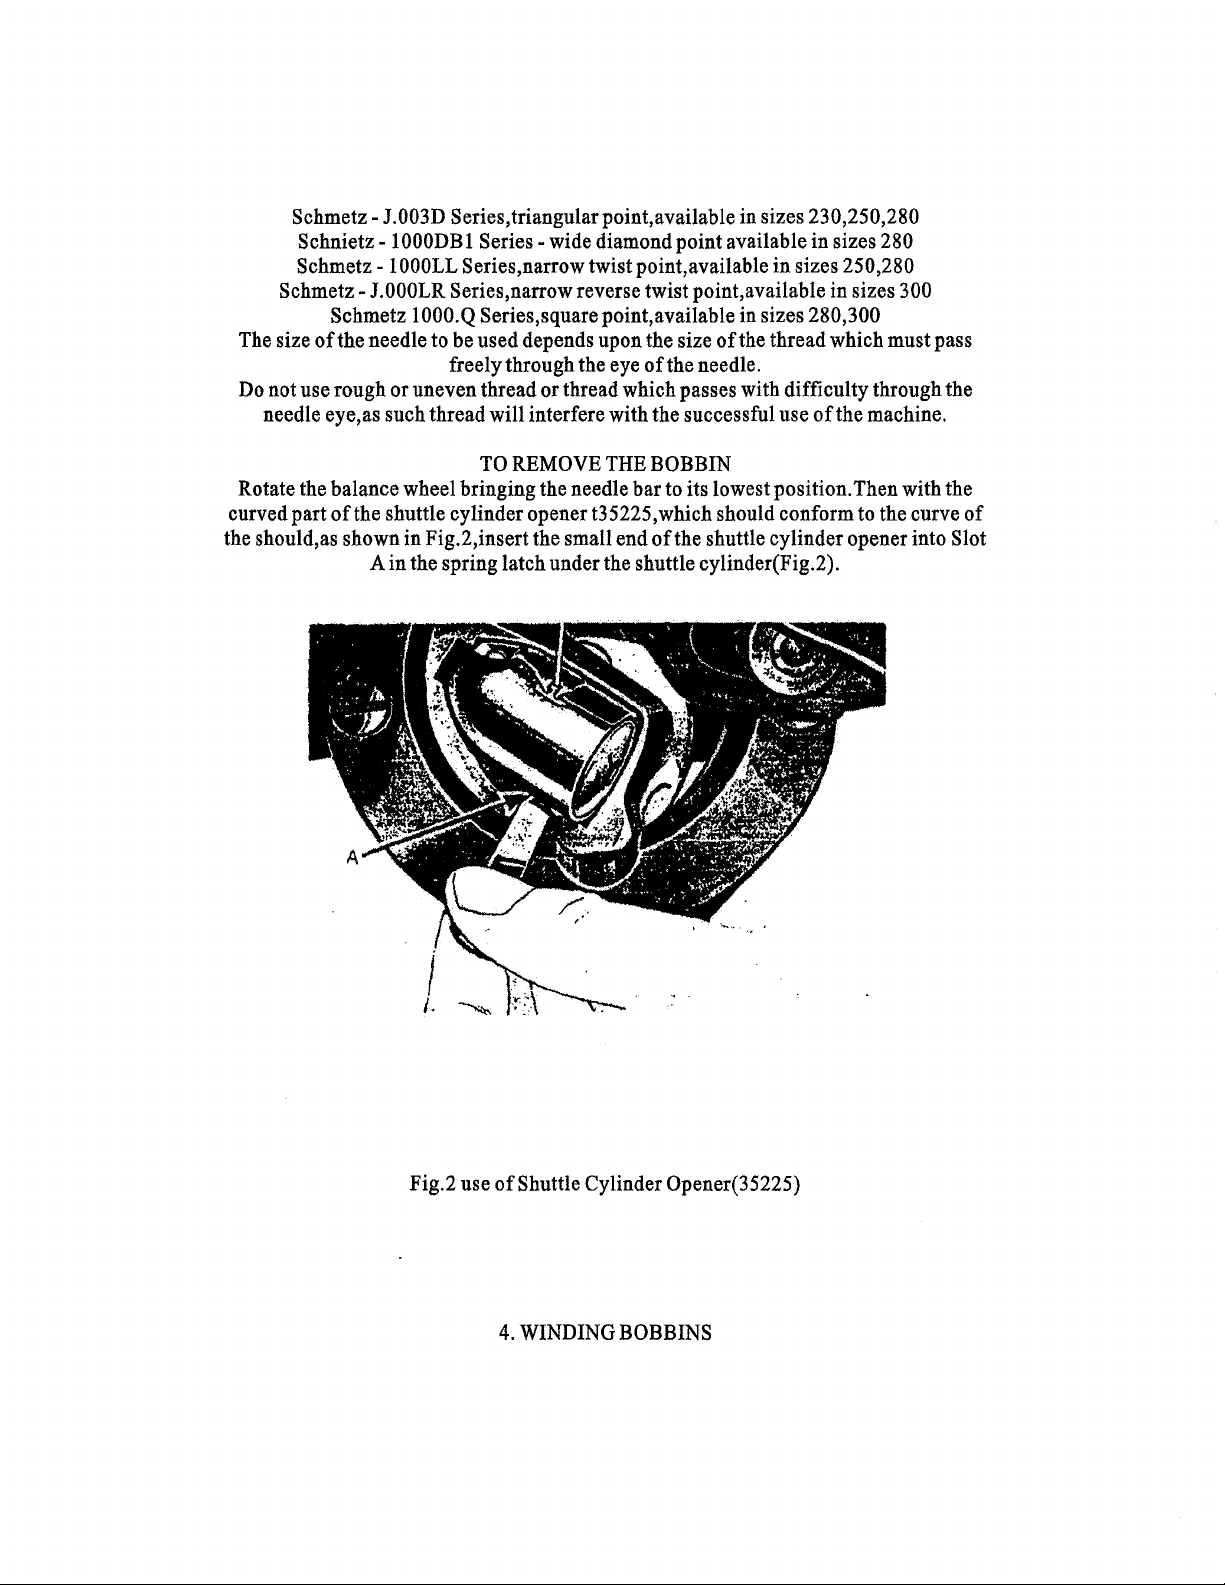
Rotate
curved part
the should,
the
balance wheel bringing
of
as
OOODB
lOOOLL
J.OOOLR
or
the shuttle cylinder opener t35225,which should conform
shown in Fig.2,insert the small
A in the spring latch under
1 Series-
Series,narrow twist point,available in sizes 250,280
Series,narrow reverse twist point, available in sizes
lOOO.Q
uneven thread or thread which passes with difficulty through the
Series,square point, available
to
be
used depends upon the size
freely through the
TO
wide
REMOVE
the
needle bar
diamond point available in sizes
eye
of the needle.
THE
BOBBIN
to
its lowest position. Then with the
end
of
the shuttle cylinder opener into Slot
the
shuttle cylinder(Fig.2).
in
sizes 230,250,280
in
sizes 280,300
of
the
thread which must pass
of
the machine.
280
300
to
the curve of
of
Fig.2 use
Shuttle Cylinder Opener(35225)
4.
WINDING
BOBBINS
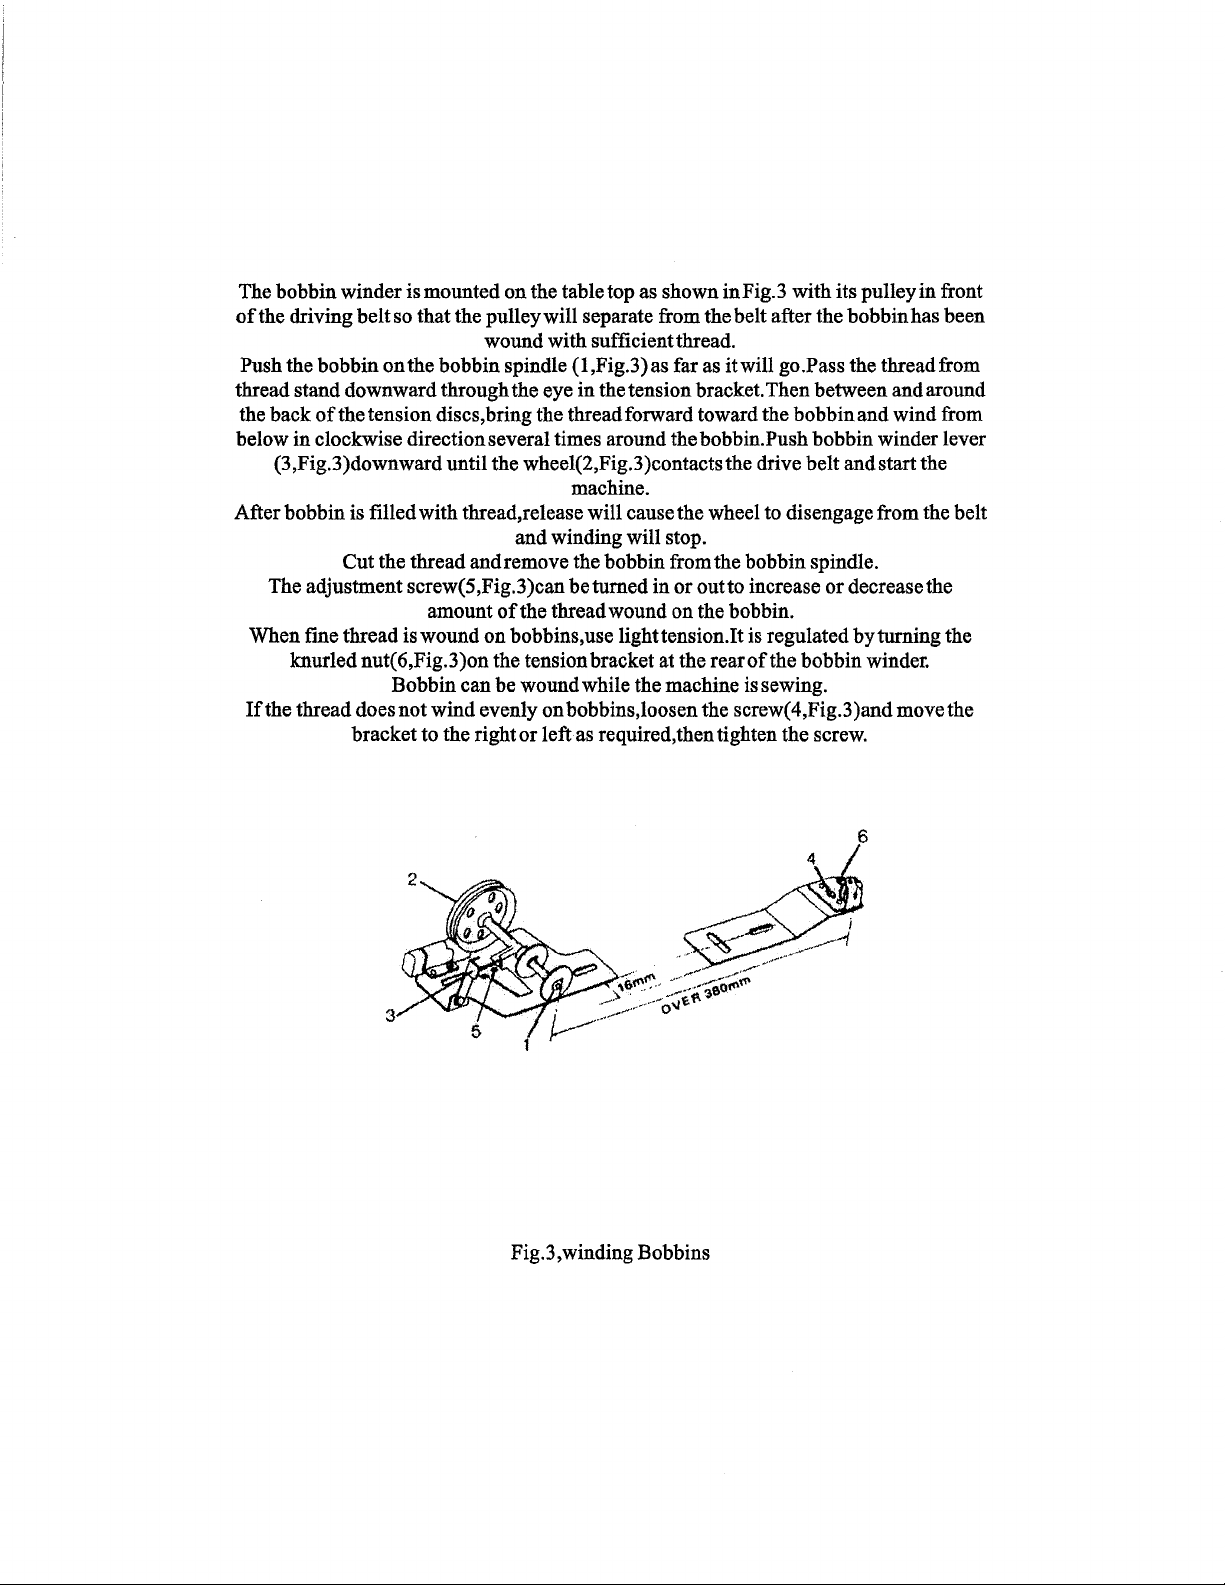
The bobbin winder is mounted
of
the driving
Push the bobbin
thread stand downward through the eye
the back
below
in
{3,Fig.3)downward until the wheel{2,Fig.3)contactsthe drive belt and start the
After bobbin is filled with thread,release will cause the wheel to disengage from the belt
The adjustment screw{S,Fig.3)can
When fine thread is wound
knurled nut{6,Fig.3)on the tension bracket at the rear
If
the thread does
belt
so that the pulley will separate from the belt after the bobbin has been
on
the bobbin spindle
of
the tension discs,bring the thread forward toward the bobbin and wind from
clockwise directionseveral times around thebobbin.Push bobbin winder lever
Cut the thread and remove the bobbin from the bobbin spindle.
amount
Bobbin can
not
wind
bracket to the right
on
the table top as shown inFig.3
wound with sufficient thread.
{l,Fig.3)as
in
the tension bracket. Then between and around
machine.
and winding will stop.
be
turned in
of
the thread wound on the bobbin.
on
bobbins, use lighttension.lt is regulated
be
wound while the machine is sewing.
evenly on bobbins,loosen the screw( 4,Fig.3)and move the
or
left as required, then tighten the screw.
far as
itwill
or
out to increase
with
its pulley
go.Pass the thread from
or
decrease the
by
turning the
of
the bobbin winder.
6
in
front
3
Fig.3, winding Bobbins
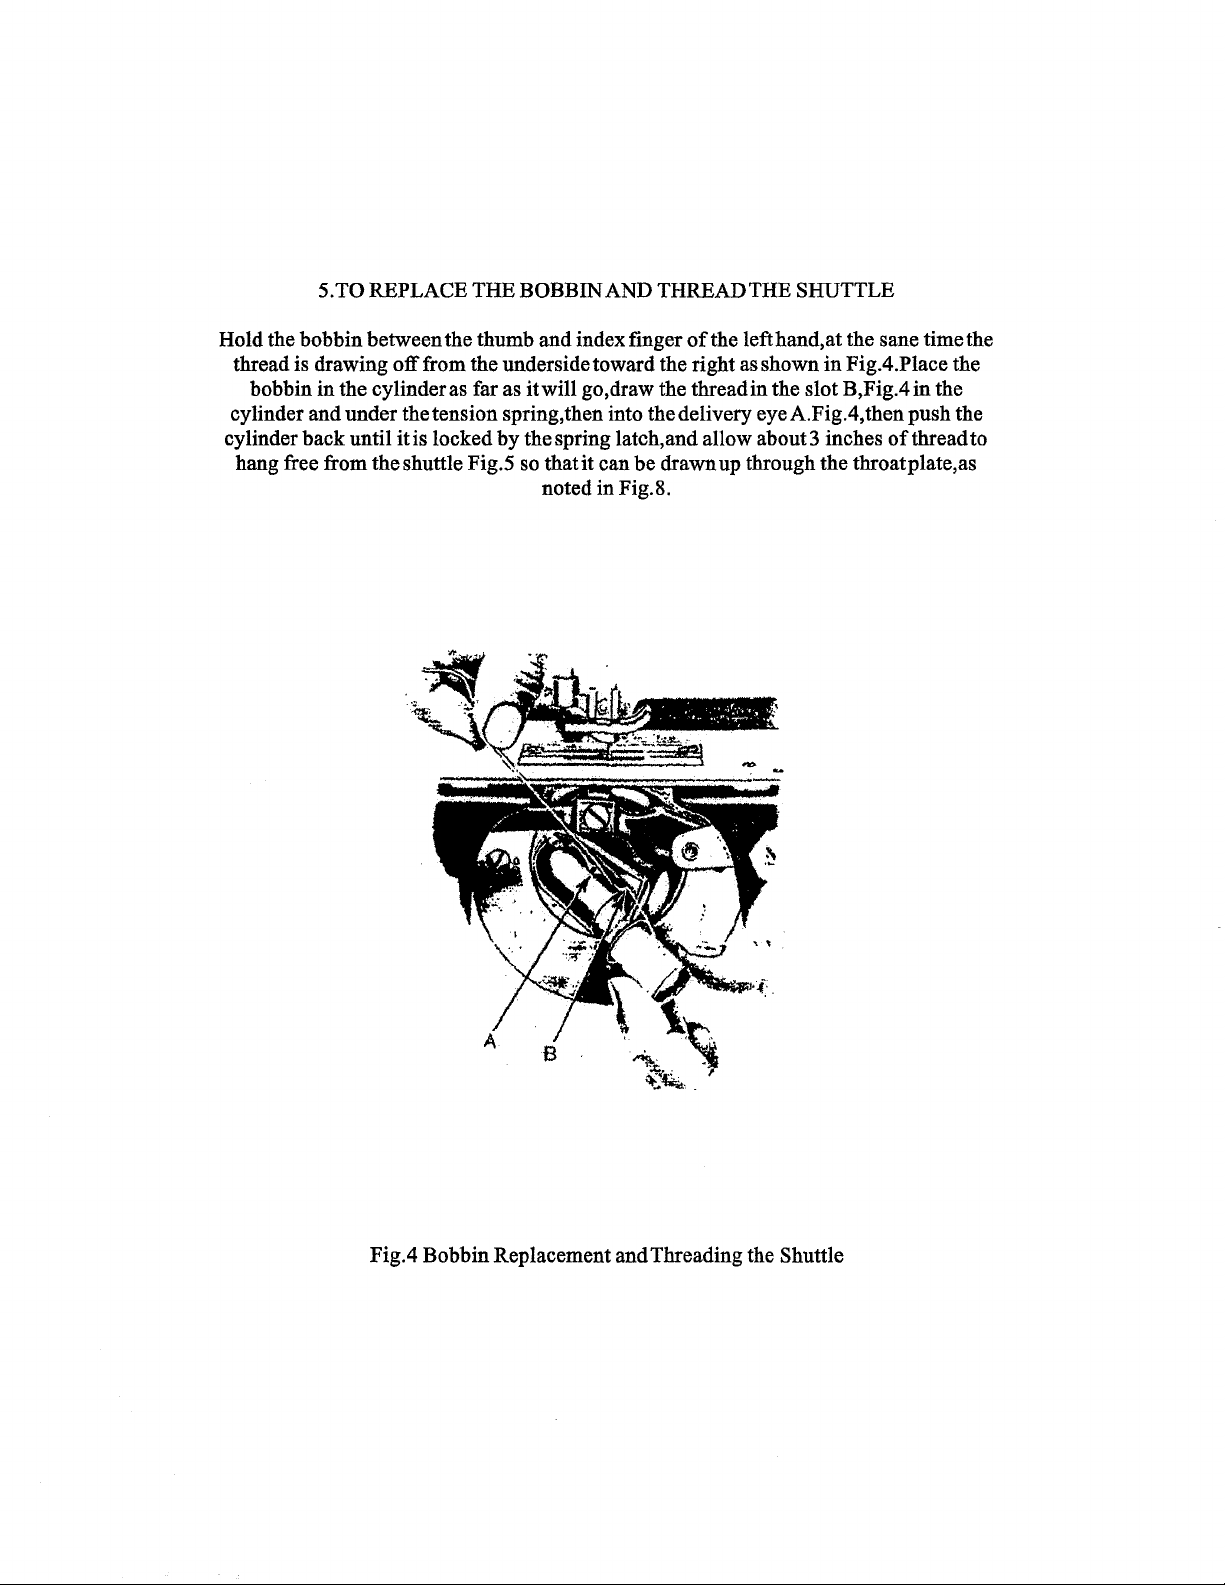
5. TO REPLACE THE BOBBIN AND THREAD THE SHUTTLE
of
Hold the bobbin between the thumb and index finger
thread is drawing off from the underside toward the right as shown
in
bobbin
cylinder and under the tension spring, then into the delivery eye A.Fig.4, then push the
cylinder back until
hang free from the shuttle Fig.S so that
the cylinder as far as
it
is locked
it
will go,draw the thread in the slot
by
the spring latch, and allow about 3 inches
it
can be drawn up through the throatplate,as
noted in Fig.
the lefthand,at the sane time the
in
Fig.4.Place the
B,Fig.4in
8.
of
thread to
the
Fig.4 Bobbin Replacement and Threading the Shuttle
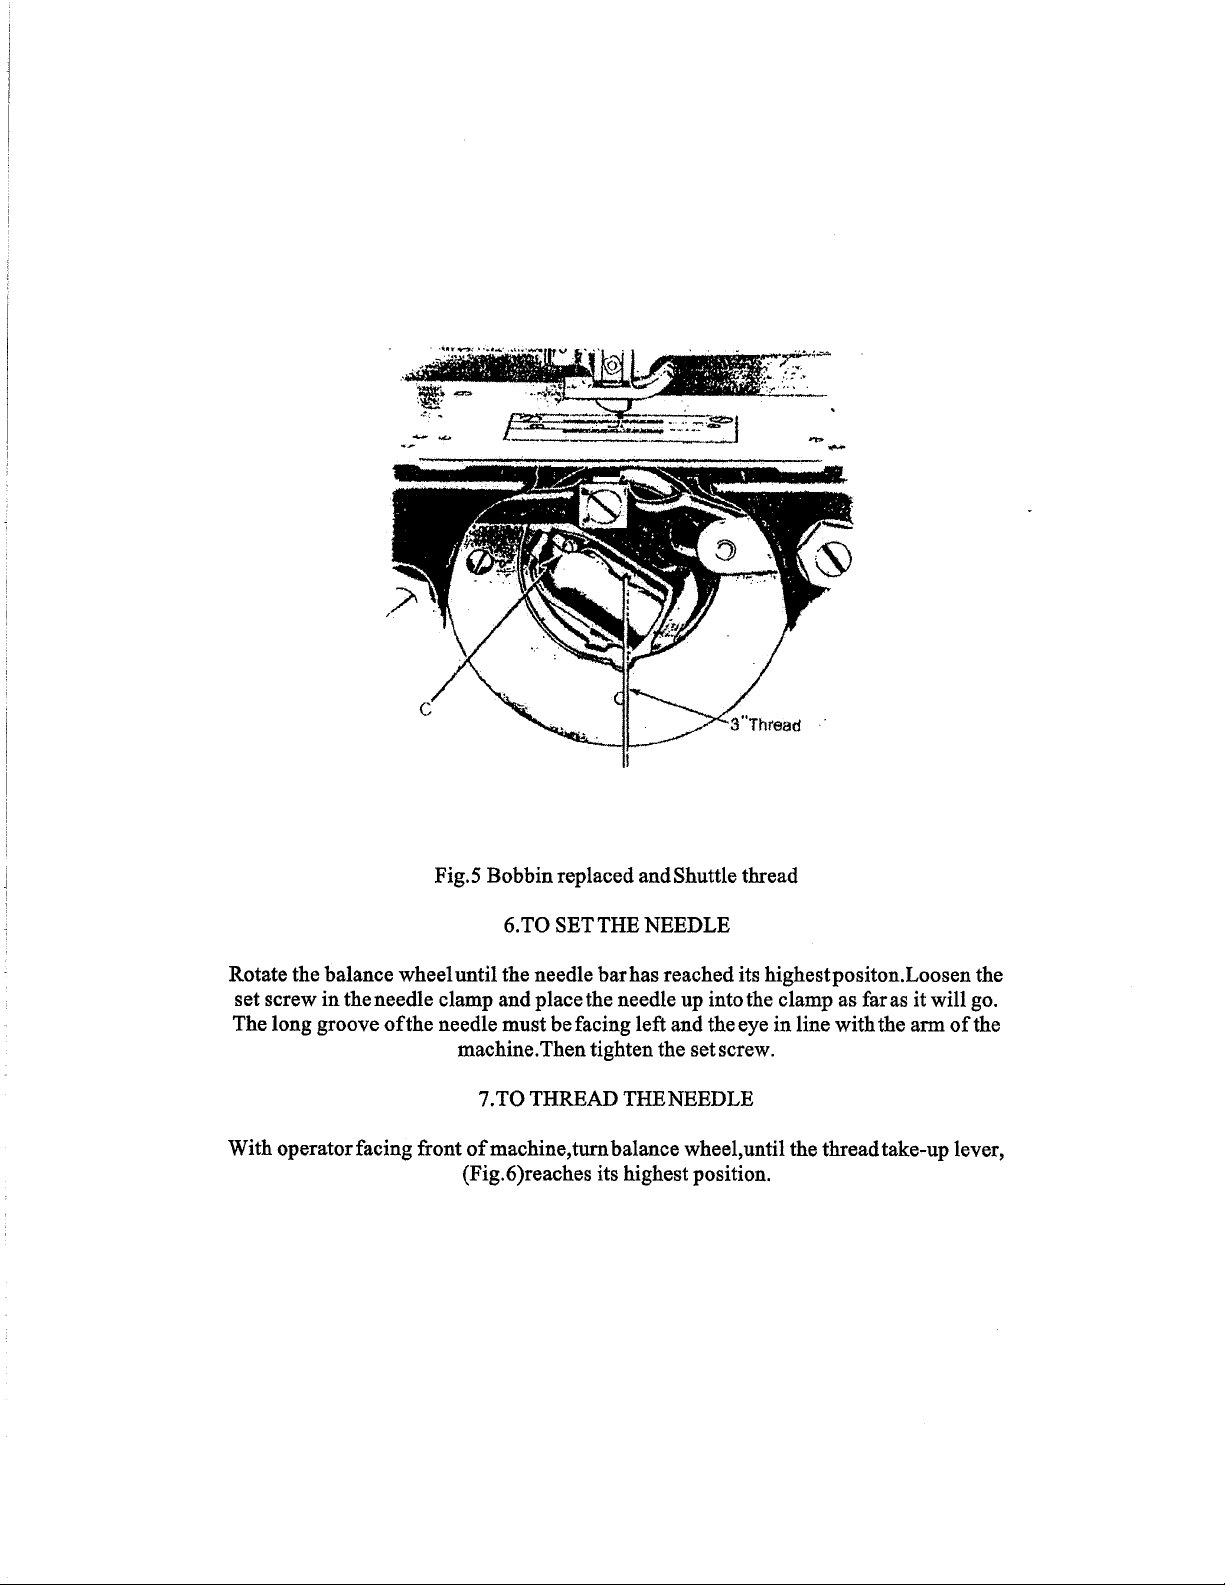
Fig.5 Bobbin replaced and Shuttle thread
6.TO SET THE NEEDLE
Rotate the balance wheel until the needle
in
set screw
The long groove
With operator facing front
the needle clamp and place the needle up into the clamp as far as it will go.
of
the needle must be facing left and the eye
machine. Then tighten the set screw.
.TO THREAD THE NEEDLE
7
of
machine,
(Fig.6)reaches its highest position.
tum
bar
has reached its highestpositon.Loosen the
in
line with the arm
balance wheel, until the thread take-up lever,
of
the
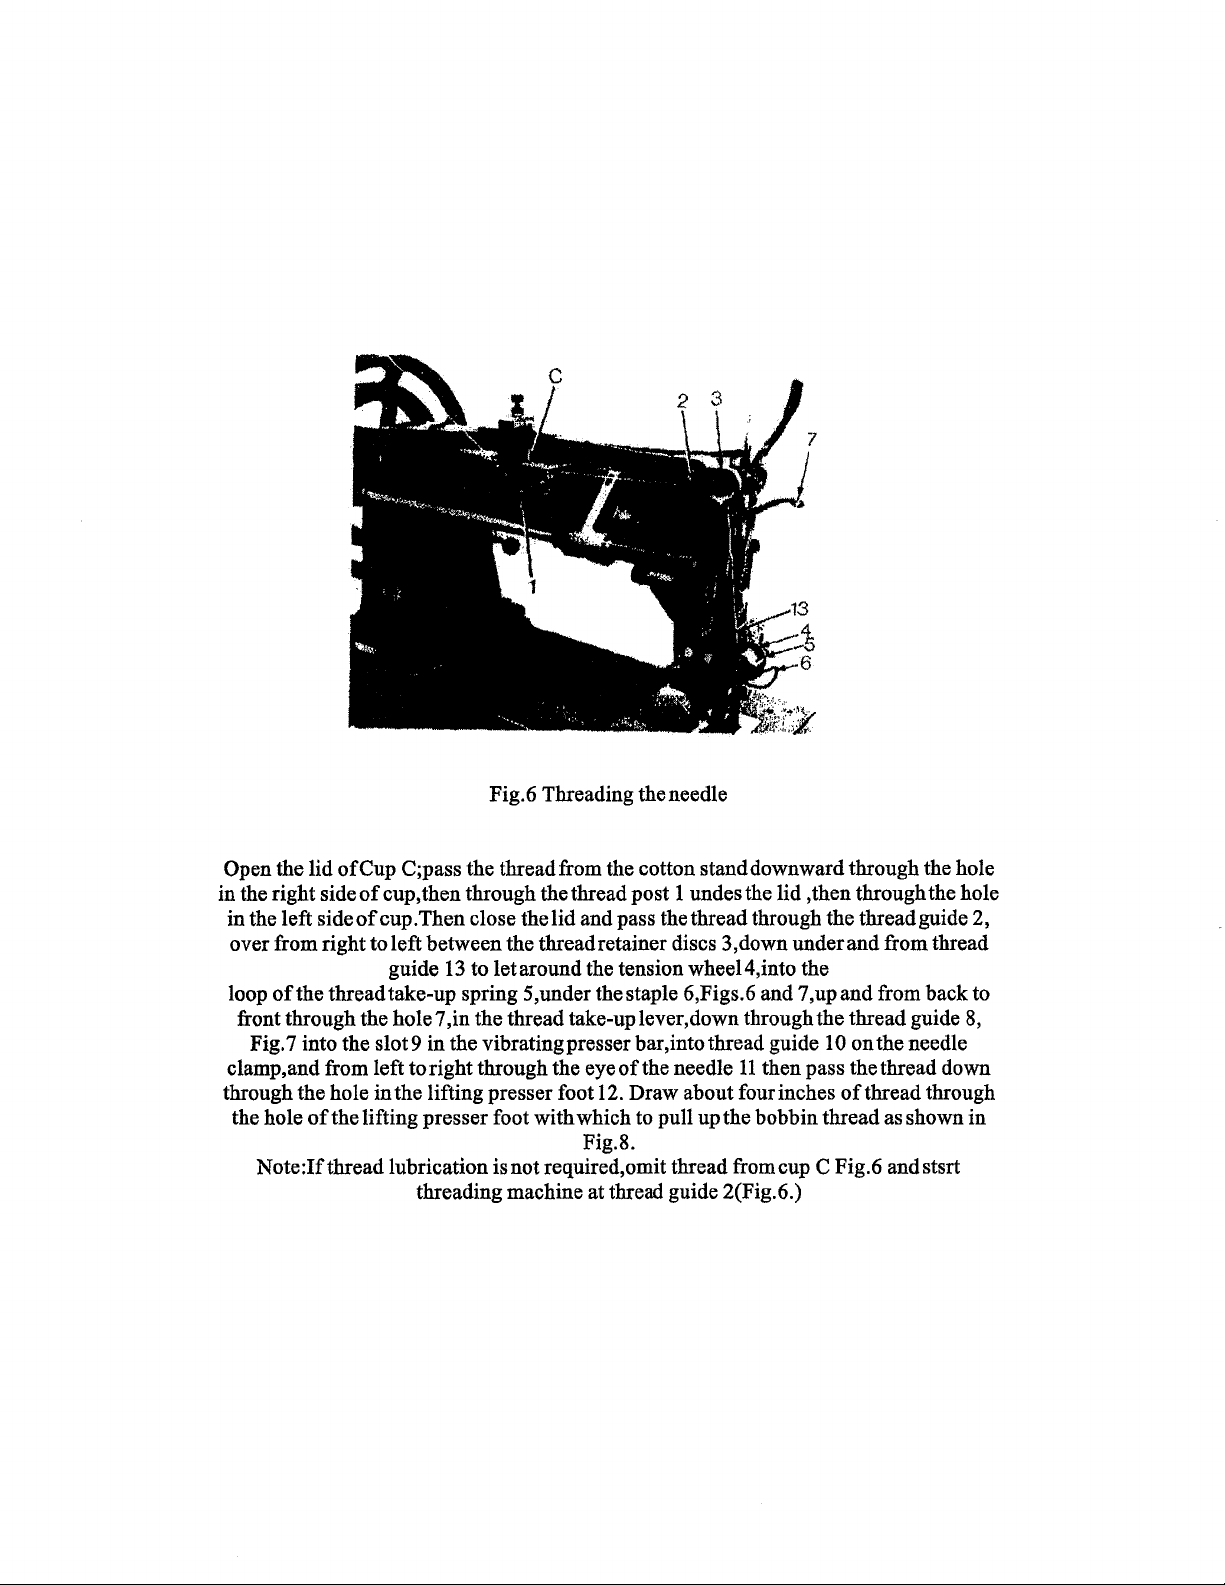
Fig.6 Threading the needle
Open the lid
in the right side
in the left
over from right to left between the thread retainer discs 3,down under and from thread
of
loop
front through the hole 7 ,in the thread take-up lever,down through the thread guide
Fig. 7 into the slot 9
clamp,and from left to right through the eye
through the hole in the lifting presser foot 12. Draw about four inches
the hole
Note:Ifthread
ofCup
sideofcup.Then
the thread take-up spring S,under the staple 6,Figs.6 and
of
the lifting presser foot with which to pull up the bobbin thread as shown
C;pass the thread from the cotton stand downward through the hole
of
cup, then through the thread post 1 undes the lid , then through the hole
close the lid and pass the thread through the thread guide 2,
13
guide
lubrication is not required,omit thread from cup C Fig.6 andstsrt
to let around the tension wheel4,into the
7,upand
in
the vibrating presser bar ,into thread guide 1 0 on the needle
of
the needle
Fig.8.
threading machine at thread guide 2(Fig.6.)
11
then pass the thread down
from back to
of
thread through
8,
in
7
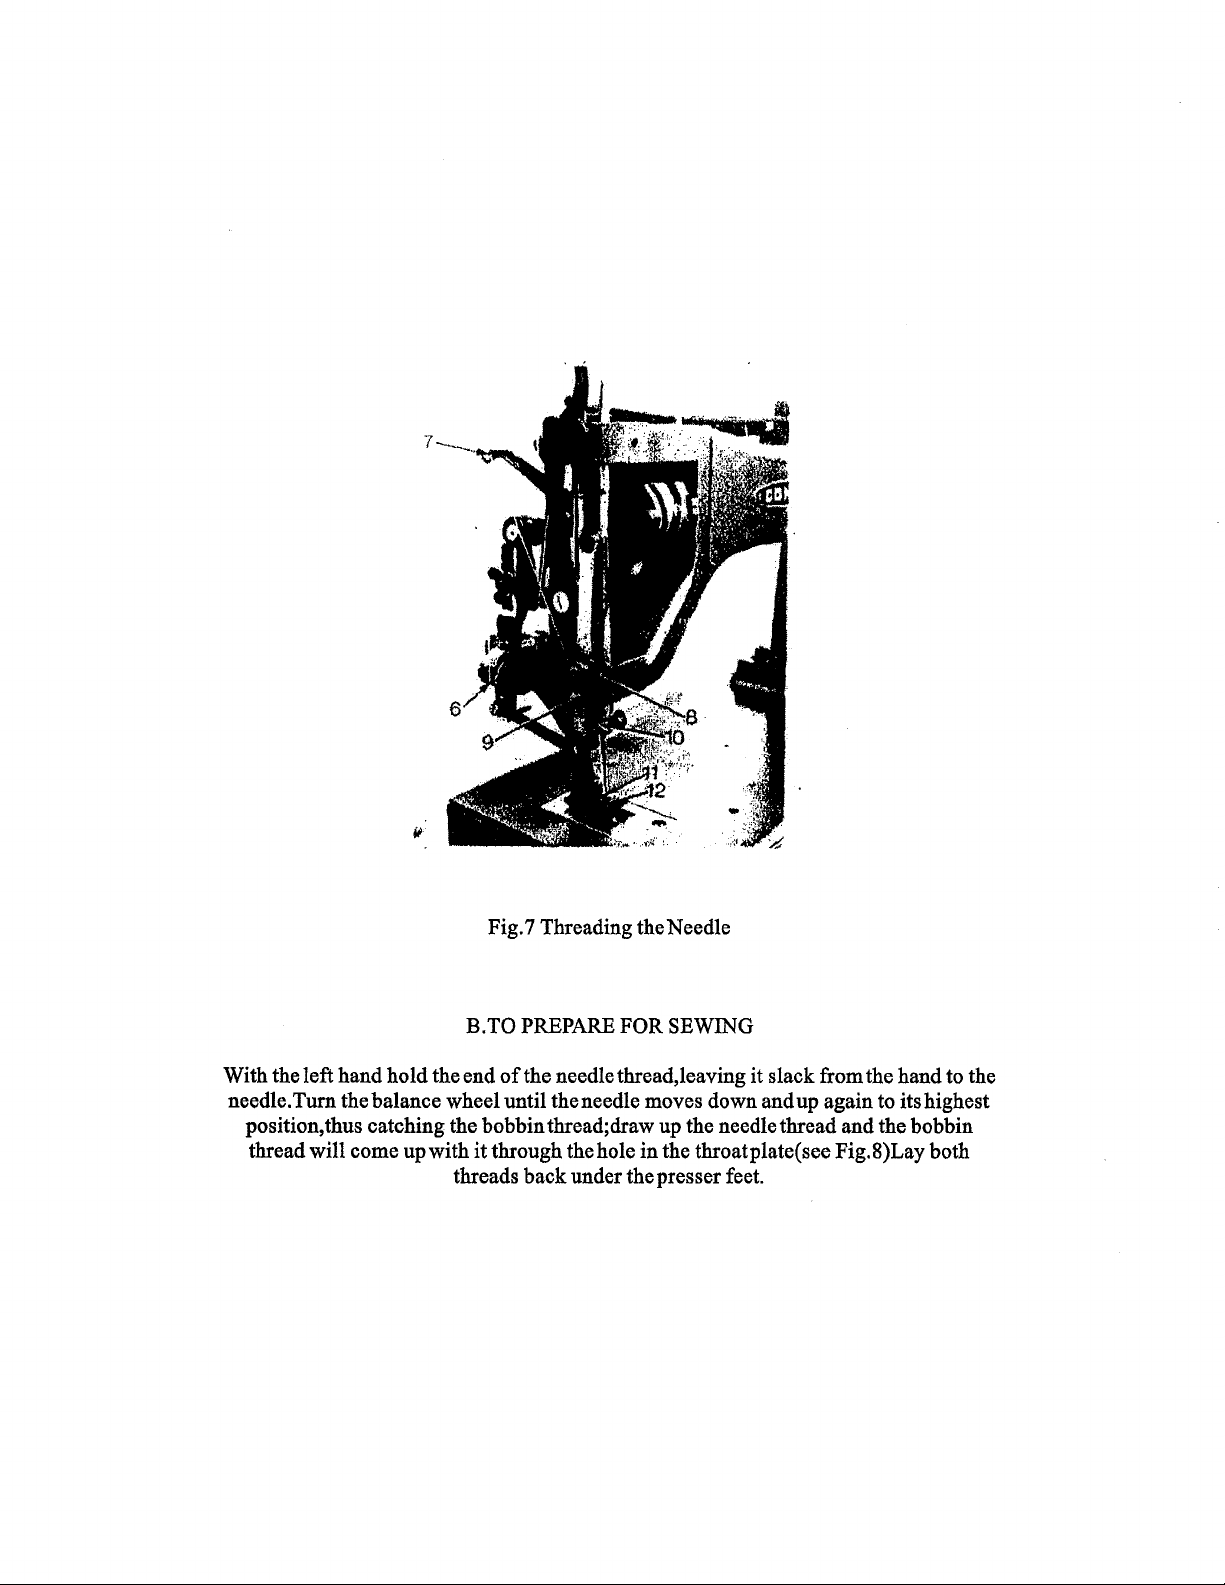
Fig.7 Threading the Needle
B.
With the
needle.
left
hand
hold
Turn
the
balance
position,thus catching
thread
will
come
up
TO PREPARE
the
end
of
the needle thread, leaving it slack from the
wheel
until the needle moves down
the
bobbinthread;draw
with
it
through
threads
back
FOR
SEWING
up the needle
the hole
under the presser feet.
in
the throat plate( see Fig.8)Lay
hand
and
up again to its highest
thread
and
the
to the
bobbin
both
9.
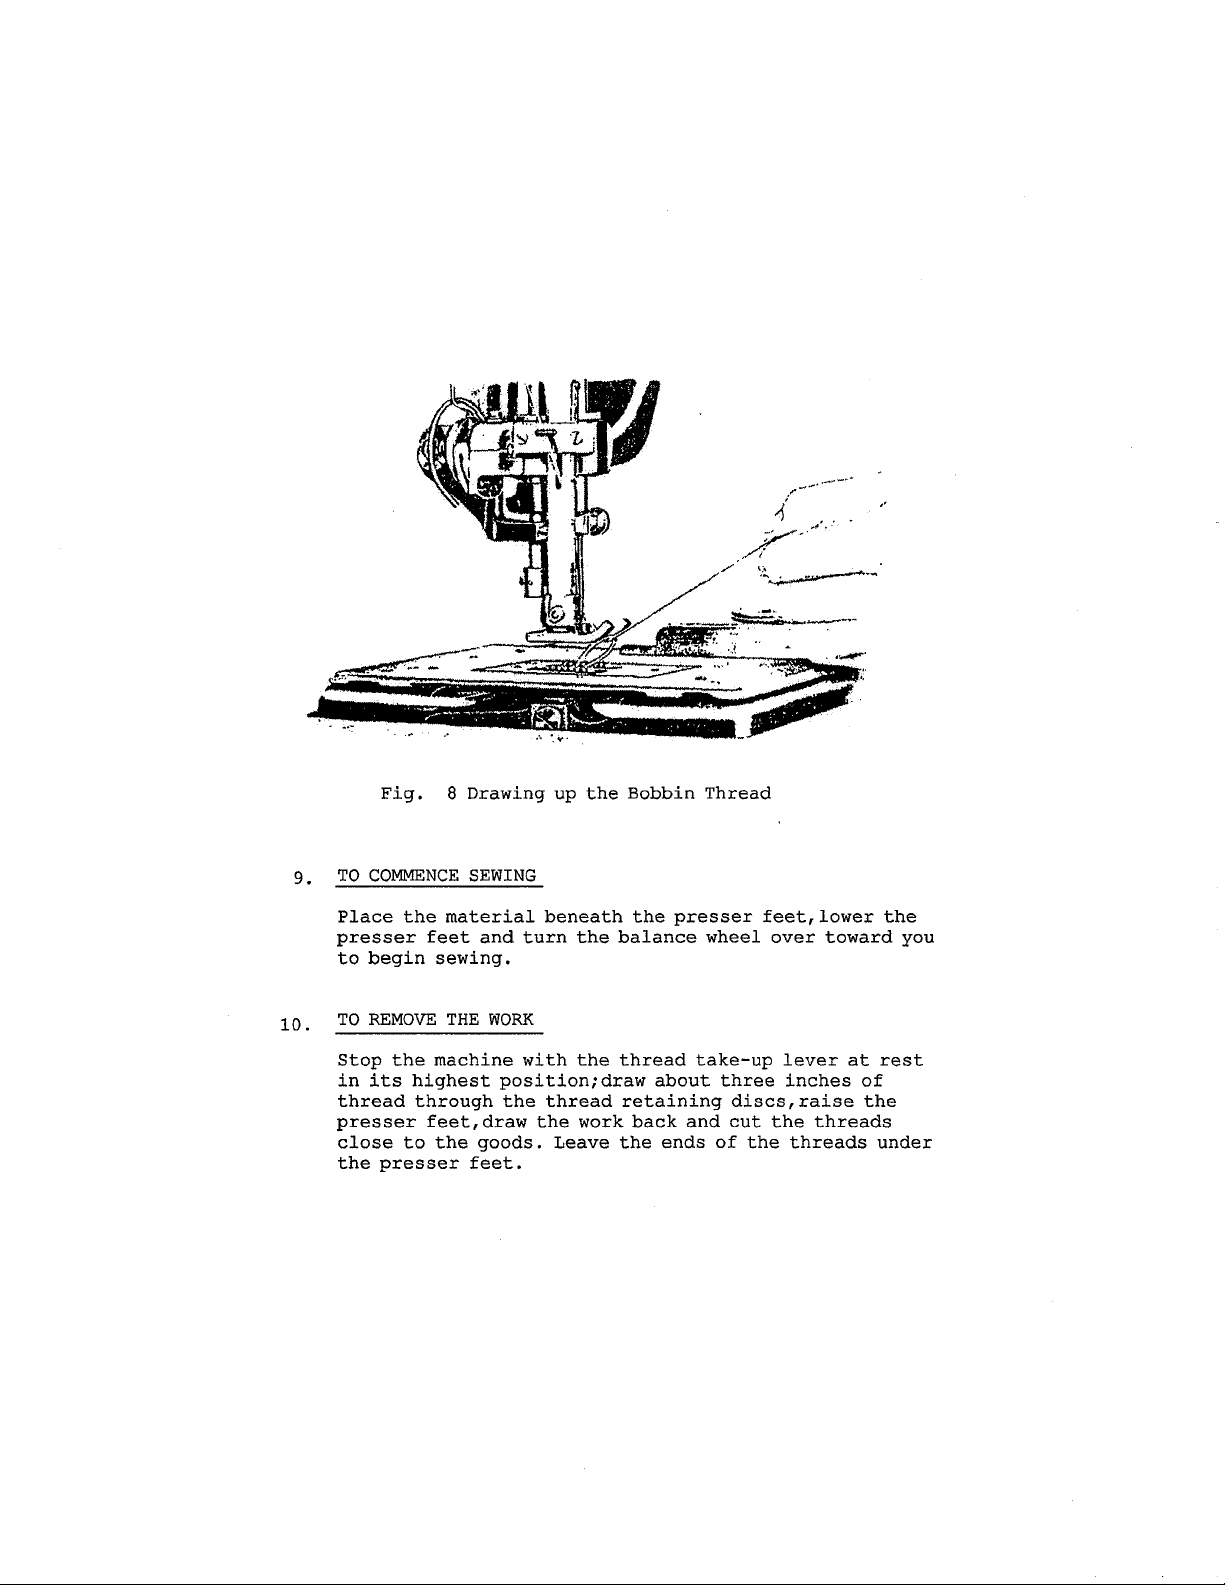
Fig.
TO
COMMENCE
8
Drawing
SEWING
up
the
Bobbin
Thread
Place
presser
to
10 • TO
Stop
in
thread
presser
close
the
the
begin
REMOVE
the
its
highest
through
to
presser
material
feet
and
sewing.
THE
WORK
machine
position;draw
feet,draw
the
goods.
feet.
the
beneath
turn
with
thread
the
Leave
the
the
work
the
presser
balance
thread
about
retaining
back
and
the
ends
wheel
take-up
three
discs,raise
cut
of
the
feet,lower
over
toward
lever
inches
the
threads
threads
at
the
you
rest
of
the
under
 Loading...