

Page 1
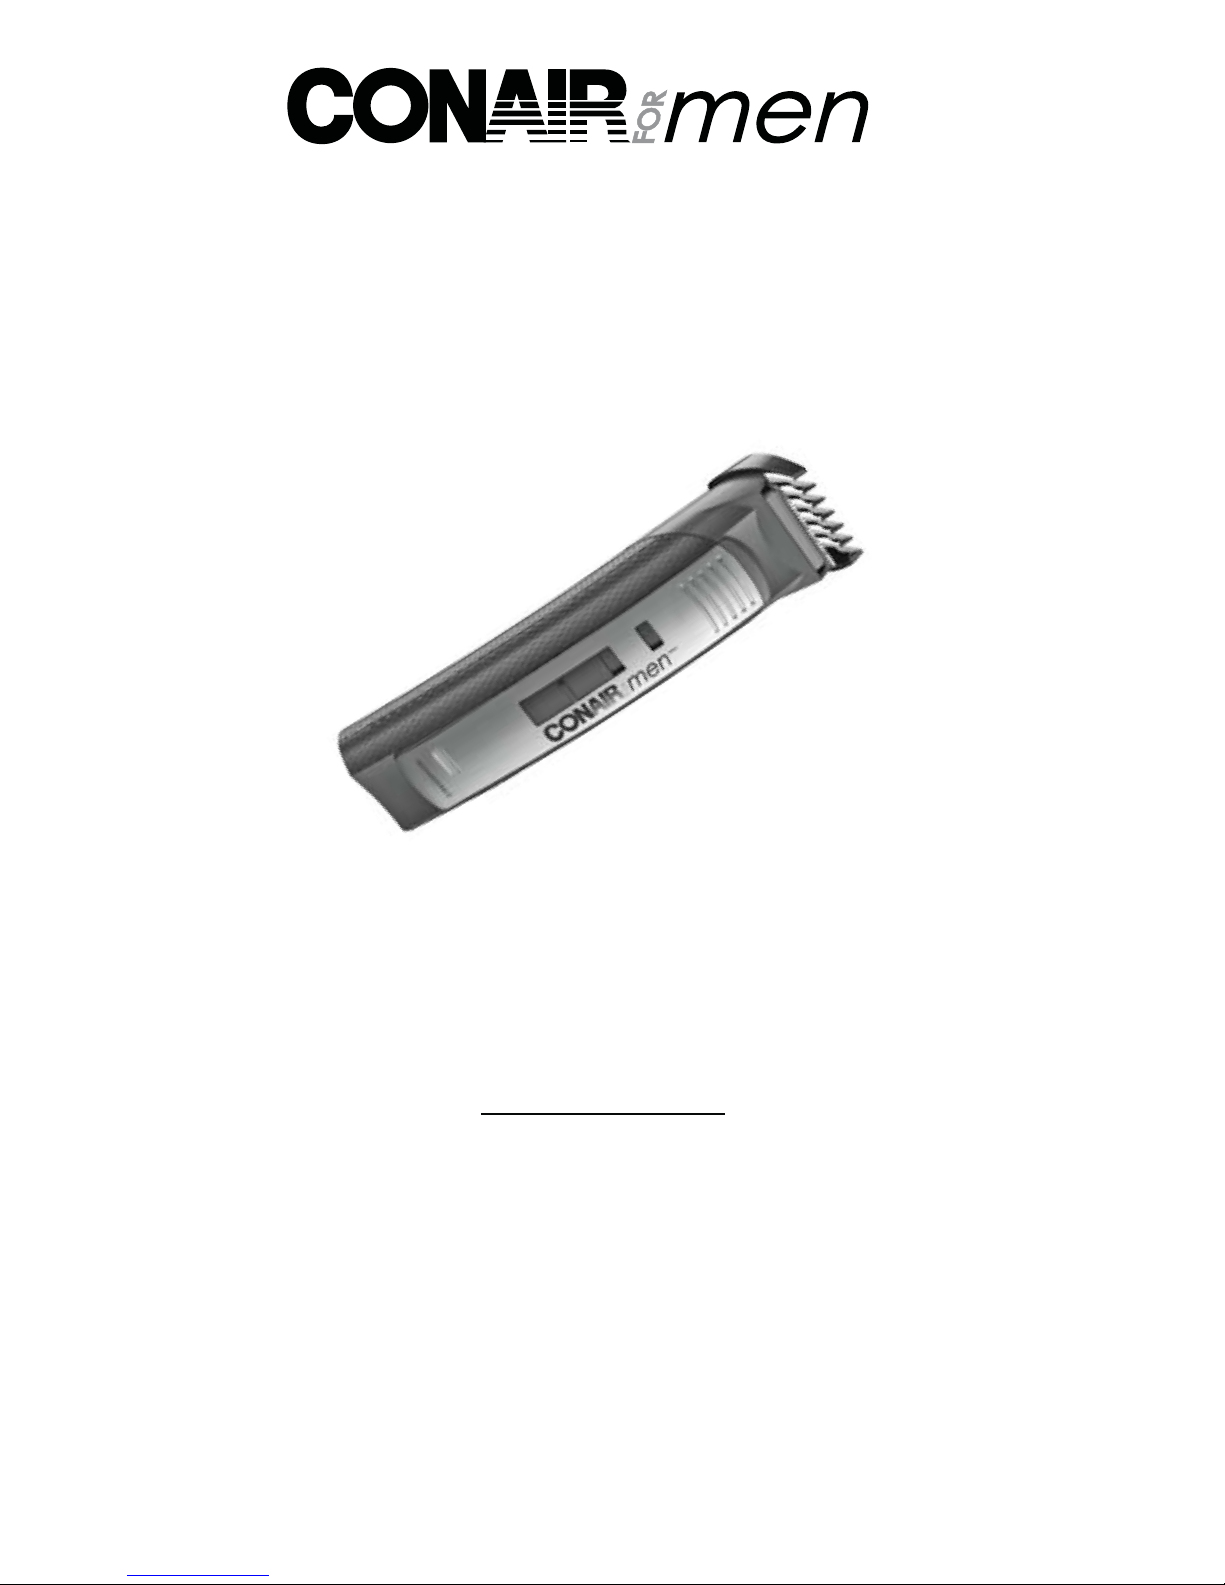
multi-purpose trimmer -
face and body
;4
Have a Question?
Please do not return this product
Our customer service and product
experts are ready to answer ALL your
Please call our TOLL-FREE customer
service number at: 1-800-472-7606
to the retailer.
Call Us First!
questions.
or visit us online at
www.conaircanada.ca
Model GMT836C
Instruction Booklet
Page 2

evaporate or slow the blades down.
Oil is specially formulated for trimmers, it will not
ing oil.
and oil the blades using a few drops of lubricatAfter cleaning, attach a trimmer head, switch on
Periodically, it may be necessary to oil the blades.
remove any hair.
Brush the blades using the cleaning brush to
(Fig. 6)
and remove them by pressing the top of the blade.
off. Hold the trimmer with the blades pointing up
can be removed. Make sure the trimmer is turned
To make cleaning easier, the Conair trimmer blades
Removable blades
tain their optimal performance.
Cleaning the trimmer blades regularly will mainRemove the cutting guide after each use.
MAINTENANCE
underarms).
when you don’t want to shave completely (for ex.
allows you to determinate the hair length to 3mm
The cutting guide used with the shaving head
precise shaving.
shorten long hair and allow you to easily achieve
The shaving head includes 2 blades. These blades
(chest, stomach, legs, etc.)
or shave any part of your body quickly and evenly
Thanks to this shaving head for body, you can trim
BODY
to avoid any risk of injury.
NOTE! Only use in the opening of the nostrils or ears
cut the hairs.
Gently insert trimmer head into the ear or nose and
To eliminate undesirable nose and ear hairs
and beard with great accuracy.
narrow size (7mm) enables you to pattern your hair
comes with an exclusive special short cut blade. Its
Use the precision trimmer. Your precision trimmer
Patterning your hair and giving it a perfect finish
time for an impeccable look.
a close shave. Result: a neat and precise cut in less
of your face and gives even the most difficult parts
The shaving head adapts perfectly to the contours
For an irresistibly soft skin...
your beard against the hair growth.
towards the hair. Make sure you always trim or style
towards the ears. Then continue on your cheeks
starting under the jaw. Come back up each side
its natural growth, decide on the desired shape by
After having combed your beard in the direction of
To determine the shape of the beard
make the cut precise and comfortable.
mend cutting the beard when it is dry. This helps
feel it is necessary. For better results, we recomappearance by using the trimmer as soon as you
beard and/or moustache, it is easy to maintain its
and/or moustache. After deciding on the form of the
face and natural growth and thickness of your beard
suits your face taking into account the size of your
Decide on the type of beard or moustache that best
it…
For the beard or moustache just the way you want
FACE
evenness of the cut regularly. (Fig. 5)
- Remove the cut hair using a comb and check the
- Cut your hair along the comb or your fingers.
of hair to the desired length.
- Move the comb or your fingers along the section
in your fingers.
- Take up a small section of hair with a comb or
- Work without a cutting guide.
‘finger’ cuts:
you are experienced, you can create ‘comb’ or
Page 3

jack is plugged into the unit before plugged the
13. Do not short the polarity (output cord), ensure
12. Avoid skin contact with moving blades.
then remove plug from outlet.
outlet. To disconnect, turn all controls to “OFF”
11. Always attach plug to appliance first, then to
ings free of lint, hair, and the like.
openings may be blocked. Keep the air openface, such as a bed or couch, where the air
openings blocks or while on a soft sur-
10. Never operate the appliance with the air
oxygen is being administered.
(spray) products are being used or where
9. Do not use outdoors or operate where aerosol
of your Trimmer”).
certain blades are aligned properly. (See “Care
blades as injury may occur. Before use, make
broken comb or with teeth missing from the
8. Do not use this appliance with a damaged or
is operating.
7. Do not place appliance on any surface while it
opening on this appliance.
6. Never drop or insert any object into any
5. Keep the cord away from heated surfaces.
service centre for examination and repair.
dropped into water. Return the appliance to a
properly, if it has been dropped or damaged, or
damaged cord or plug, or if it is not working
4. Never operate this appliance if it has a
operate this appliance.
manufacturer. Do not use an extension cord to
attachments not recommended by the
purpose as described in this manual. Do not use
3. Use this appliance only for its intended
disabilities.
or near children or individuals with certain
2. This appliance should not be used by, on,
cord around appliance.
when plugged in. Do not pull, twist, or wrap line
1. This appliance should never be left unattended
To reduce the risk of burns,
electric shock, fire, or injury to persons:
WARNING–
INTO THE WATER
DO NOT REACH
out of the rating.
7. Never operate the adapter if the specification is
using.
appliance from electrical outlet immediately after
6. Except when charging, always unplug this
vapor or rain. Unplug immediately.
water. Dry location use only or expose to liquid,
5. Do not reach for an appliance that has fallen in
4. Do not place in, or drop into water or other liquid.
3. Do not use while bathing or in a shower.
be pulled into a tub or sink.
2. Do not place or store appliance where it can fall or
unplug immediately after use.
1. Unplug this appliance before cleaning and
shock.
To reduce the risk of death or injury by electric
even when the switch is off.
DANGER–Any appliance is electrically live,
FOR HOUSEHOLD USE ONLY
KEEP AWAY FROM WATER
BEFORE USING
READ ALL INSTRUCTIONS
precautions, including the following:
when children are present, take basic safety
When using electrical appliances, especially
INSTRUCTIONS
IMPORTANT SAFETY
Page 4
7
THE MUNICIPAL WASTE
PROPERLY. DO NOT DISPOSE OF IN
RECYCLED OR DISPOSED OF
BATTERY. MUST BE COLLECTED,
6
CONTAINS NICKEL-METAL HYDRIDE
E
É
L
C
Y
C
E
R
E
C
Y
C
L
E
/
R
5
waste disposal services in your region.
waste treatment facilities, please contact the
For more details on recovery of materials and
4
batteries with your ordinary household waste.
3. To protect the environment, do not dispose your
using wire cutters.
3
2. Open the trimmer and remove the batteries
1. First, unplug the trimmer.
these instructions:
the battery block for disposal or recovery, follow
2
when the unit is no longer operating. To remove
teries should be removed and properly disposed
In an effort to protect the environment, these batThis trimmer has Nickel-Metal Hydride batteries.
DISPOSAL OF NI-MH BATTERIES
1
damaged.
You can get new blades when these are worn or
Page 5

maintain its appearance. To do this, use your trimmer to
mustache has been styled, it is essential that you
on what style would be best. Once your beard or
a professional hair stylist and ask for an opinion
tache that would most suit your face, speak with
If you are unsure of the type of beard or mus-
3. The thickness of your beard/mustache.
2. The natural growth of your beard/mustache.
1. The shape and dimensions of your face.
beard or mustache style is best for you:
There are three key factors that will determine which
GROWING A BEARD AND MUSTACHE
4. The adapter may become warm while charging —
adaptor when not in use.
listed on the label affixed to the adapter). Unplug the
3. Plug the adaptor into any wall outlet (at the voltage
not in use.
the cord is connected to the trimmer and the unit is
2. Always check to see if the charging light is on when
cycles. Always switch off trimmer for charging.
will only be reached after 3 charging and discharging
continuously for 16 hours. Maximum battery capacity
1. Before using your trimmer for the first time,charge
OPERATING INSTRUCTIONS:
TAKING CARE OF YOUR TRIMMER
INSTRUCTIONS
facturer.
trimmer only for the purpose intended by the manuTo promote the long life of the appliance, use your
same time.
that both blades are sharpened or replaced at the
blades. When you have your trimmer serviced, be sure
Be especially careful when changing or adjusting
the next use.
mer in its storage pouch to protect the blades until
that has collected in the blades. Then store the trimcleaning brush provided and brush away any loose hair
care. Each time you finish using the trimmer, take the
very special use, they should always be handled with
Because the trimmer blades are precision-made for a
BLADE CARE
TROUBLESHOOTING
INSTRUCTIONS
OPERATING
INSTRUCTIONS
SAVE THESE
switch is in the "OFF" position.
properly, all connections are secure and the trimmer
3. Make sure that the adapter is inserted to the trimmer
off.
switch which turns power off when lights are turned
2. Make sure the electrical plug is not connected to a
another appliance to test it.
1. Be sure the electrical outlet is working by plugging in
steps before returning it for repair:
be taking a charge, take the following troubleshooting
If your cordless/rechargeable trimmer does not seem to
USER MAINTENANCE
in a vertical or floor mount position.
6. This power unit is intended to be correctly orientated
Immediately shut the switch OFF and fully recharge.
allowing the trimmer to run until the motor stops.
5. The battery life can be improved by periodically
this is normal.
proper configuration for the power outlet.
USA., use an attachment plug adapter of the
16. For connection to a supply not in Canada or
plugging in.
15. Be sure voltage is in correct voltage before
oriented in vertical floor mount position.
14. This power unit is intended to be correctly
adapter into outlet.
Page 6
IB-11525
12CN132824
Consumer_Canada@Conair.com
Consumer Call Centre E-mail :
www.conaircanada.ca
©2012 Conair Consumer Products Inc.
1-800-472-7606
Woodbridge, Ontario, L4H 0L2.
100 Conair Parkway,
Conair Consumer Products Inc.
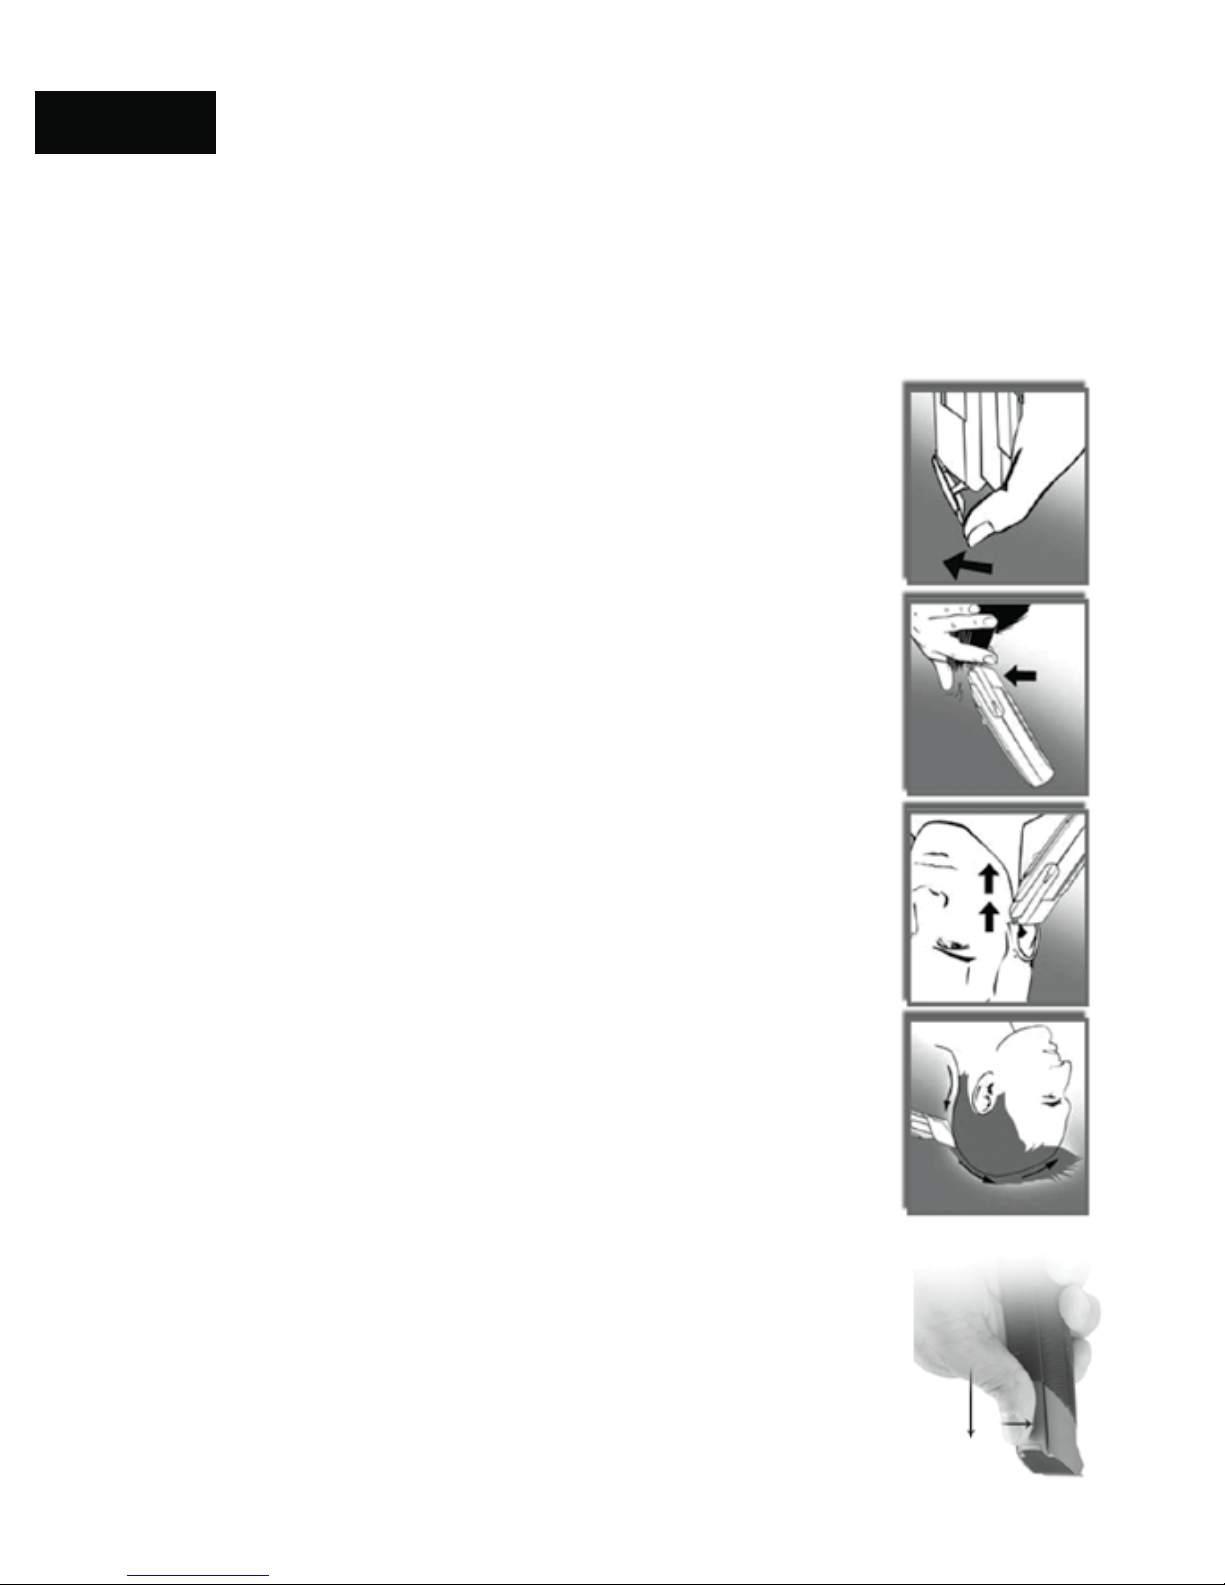
Fig.5
SERVICE CENTRE:
to province.
may also have other rights, which vary from province
This warranty gives you specific legal rights, and you
Fig.4
WARRANTY, EXPRESS OR IMPLIED, WHATSOEVER.
DAMAGES FOR BREACH OF THIS OR ANY OTHER
ANY SPECIAL, INCIDENTAL, OR CONSEQUENTIAL
IN NO EVENT SHALL CONAIR BE LIABLE FOR
OF THIS WRITTEN, LIMITED WARRANTY.
LIMITED IN DURATION TO THE 36 MONTH DURATION
Fig.3
FITNESS FOR A PARTICULAR PURPOSE, SHALL BE
IMPLIED WARRANTY OF MERCHANTABILITY AND
LIABILITIES, INCLUDING BUT NOT LIMITED TO THE
ANY IMPLIED WARRANTIES, OBLIGATIONS, OR
date of manufacture.
the warranty period shall be 36 months from the
receipt,
Fig.2
postage and handling. In the absence of a purchase
together with your purchase receipt and $5.50 for
defective product to the service centre listed below,
To obtain service under this warranty, return the
the appliance is defective in workmanship or materials.
of charge for 36 months from the date of purchase if
Conair will repair or replace (at our option) your unit free
LIMITED THREE YEAR WARRANTY
Fig.1
Page 7

to remove it (Fig.2).
hand and push up on the head with your free hand
To remove a head, hold the handle of the unit in one
the unit pressing it until you hear a click.
To attach a head, fit the base of the accessory onto
ing the trimmer head or accessories.
Make sure that the unit is switched off before chang-
ATTACHING AND REMOVING ACCESSORIES
clean, it guarantees a maximum hygiene.
proof and can even be used in the shower. Easy to
For a greater comfort of use, your trimmer is water-
WATERPROOF
mous use.
2. A full charge will allow you 30 minutes of autonoindicator light is on.
the OFF position and check that the charging
1. Charge the trimmer with the ON/OFF switch in
charge for 16 hours.
Before using the trimmer for the first time, allow it to
CHARGING THE UNIT
recharge cycles.
unit will only be obtained after three complete
mately every three months. Full autonomy of the
before using it for the first time and then approxiomy possible, allow it to charge for 16 hours
To obtain and maintain the longest battery autonBATTERIES OF THIS UNIT
IMPORTANT INFORMATION REGARDING THE NI-MH
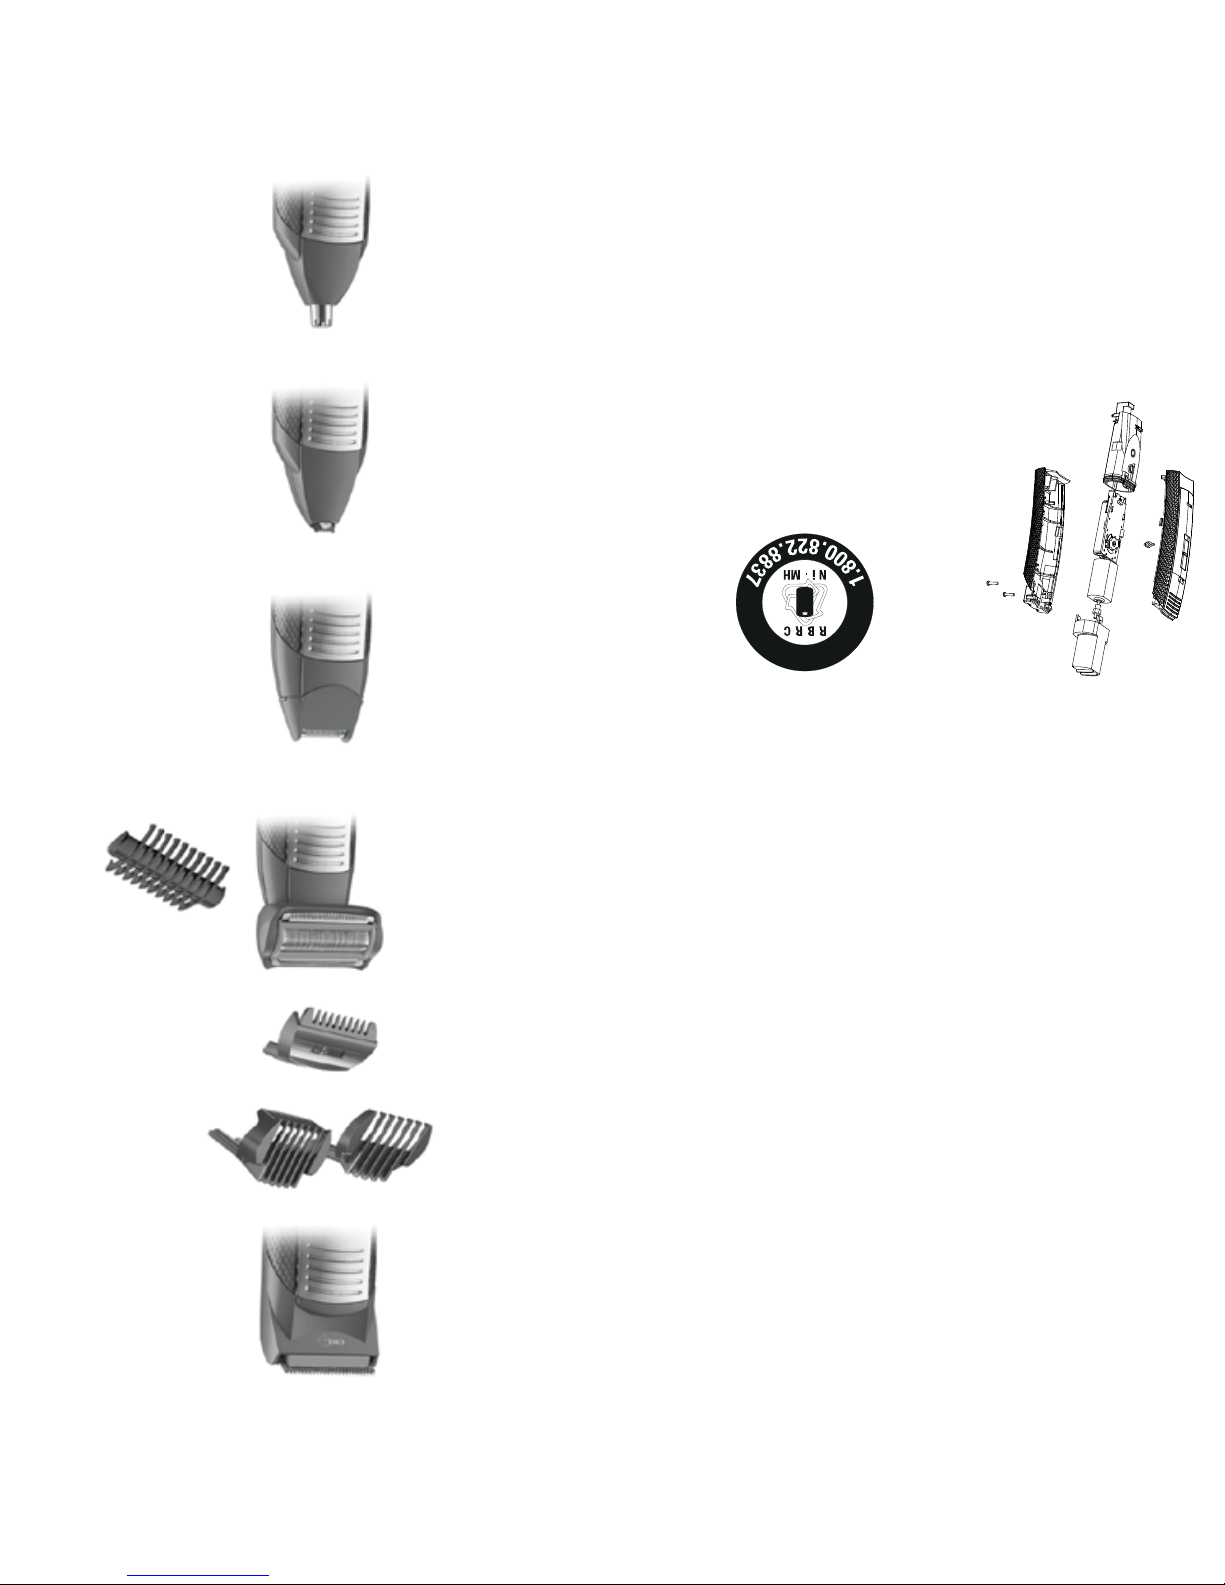
10. Cleaning brush
9. Charging indicator light
8. On/Off switch
and ear hair
7. Nose/ear accessory, to eliminate unwanted nose
tours and original designs
6. 7mm precision blade, to create precisely con-
5. 18mm shaving head for face
your body
for a quick and even shave of all the parts of
4. Shaving head for body + 1 cutting guide (3mm)
for very short cuts
3. 6-position precision guide (from 0,5 to 3mm)
hair and beard
2. 2 cutting guides (2-14mm and 3-15mm) for
Fixed Blade: Stainless steel
hardwearing and 100% stainless steel blade.
- CMS (Chrome-Molybdenum-Stainless Steel): ultra-
exceptionally sharp cutting edge.
- Exclusive three-dimensional etching process: for an
Moveable blade:
1. 32mm blades
AND BODY
MULTI-PURPOSE TRIMMER FOR HAIR, FACE
HAIR, FACE AND BODY
MULTI-PURPOSE TRIMMER FOR
cheeks, past your sideburns and toward your hairline.
define the upper outline of your beard across your
toward your ears. Then
on each side of your face
chin and work upward
beard’s shape under your
3. Begin defining your
ning under your jawline.
the desired shape, begindirection it grows naturally, you will want to outline
2. After you have combed through your beard in the
beard.
1. It is always best to begin with a clean, slightly damp
GETTING STARTED: OUTLINING YOUR BEARD
TYPES OF BEARDS/MUSTACHES
than desired.
This will prevent the trimmer from removing more hair
slightly damp (NOT WET) when using your trimmer.
For the best trimming results, your beard should be
trim your beard/mustache weekly.
Page 8

t*GZPV XBOU B MFOHUI HSFBUFS UIBO NN PS JG
top to bottom. (Fig. 4)
guide. Turn your trimmer over and move it from
and sideburns, use the trimmer without a cutting
t'PSUIFGJOJTIJOHUPVDIFTUIBUJTBSPVOEUIFOBQF
of your head.
back, that is, from your forehead to the crown
t'PS UIF DSPXO PG UIF IFBENPWF GSPN GSPOU UP
(Fig. 3)
trimmer in contact with your head at all times.
teeth of the guide slightly upward. Keep the
head. Move your trimmer slowly, pointing the
and move the trimmer toward the crown of your
t#FHJOBUUIF OBQF1MBDFUIFHVJEFPO UIFTDBMQ
of hair growth.
t"MXBZT NPWF UIF USJNNFS BHBJOTU UIF EJSFDUJPO
that suits you best.
In this way you’ll quickly find the cutting length
through the shorter lengths to the one you want.
with a longer cutting length and gradually work
t5P GBNJMJBSJTF ZPVSTFMG XJUI UIF USJNNFS TUBSU
t6TFUIFUSJNNFSPODMFBOESZIBJS
HAIR
EXPERTS
CUTTING TECHNIQUES AND ADVICE FROM THE
trimmer.
The selected length is displayed at the back of the
To reduce the cutting length, push it down.
guide up.
To increase the cutting length, push the cutting
manually adjustable.
The cutting length of your GMT836C trimmer is
before changing the guide.
BEFORE turning the trimmer on, and turn it off
IMPORTANT: Always attach the cutting guide
cutting length.
Very practical, the cutting guide guarantees equal
USING THE CUTTING GUIDES
 Loading...