


PPaappeerr HHaannddlliinngg
PPaappeerr SSppeecciiffiiccaattiioonnss
It is important to use the correct paper for obtaining the best performance. See the information table
below:
FFaannffoolldd PPaappeerr
Loading Mode
Width 76 to 432 mm
Length 76 to 609 mm
Thickness max. 0.635 mm
Copies 1 + 7 1 + 7
Weight (g/m2):
- Original 55 to 150 55 to 150
- Other sheets 45 to 75 45 to 75
- Carbon Paper 35 35
Front1 Tractor
3 to 17 inches
3 to 24 inches
0.025 inches
Front2 Tractor
76 to 432 mm
3 to 17 inches
76 to 609 mm
3 to 24 inches
max. 0.635 mm
0.025 inches
110
FFaannffoolldd PPaappeerr LLooaaddiinngg
LLooaaddiinngg PPaappeerr UUssiinngg tthhee FFrroonntt11 TTrraaccttoorr
1. To select the Front1 tractor paper path, press the
LOAD FRONT1
• If you have been using a different path, the display shows:
PATH CHANGING
• If you have been using fanfold paper in the Front2 tractor paper path, the printer
automatically starts the parking procedure. The display shows alternately:
TEAR IF NECESS. and PARK PAPER
• Tear off the fanfold loaded with the Front2 tractor (if it is longer than 18 inches) and press
PARK
the
key. The display shows:
PARKING
followed by
LOAD FRONT1
PATH
key. The display shows:
111
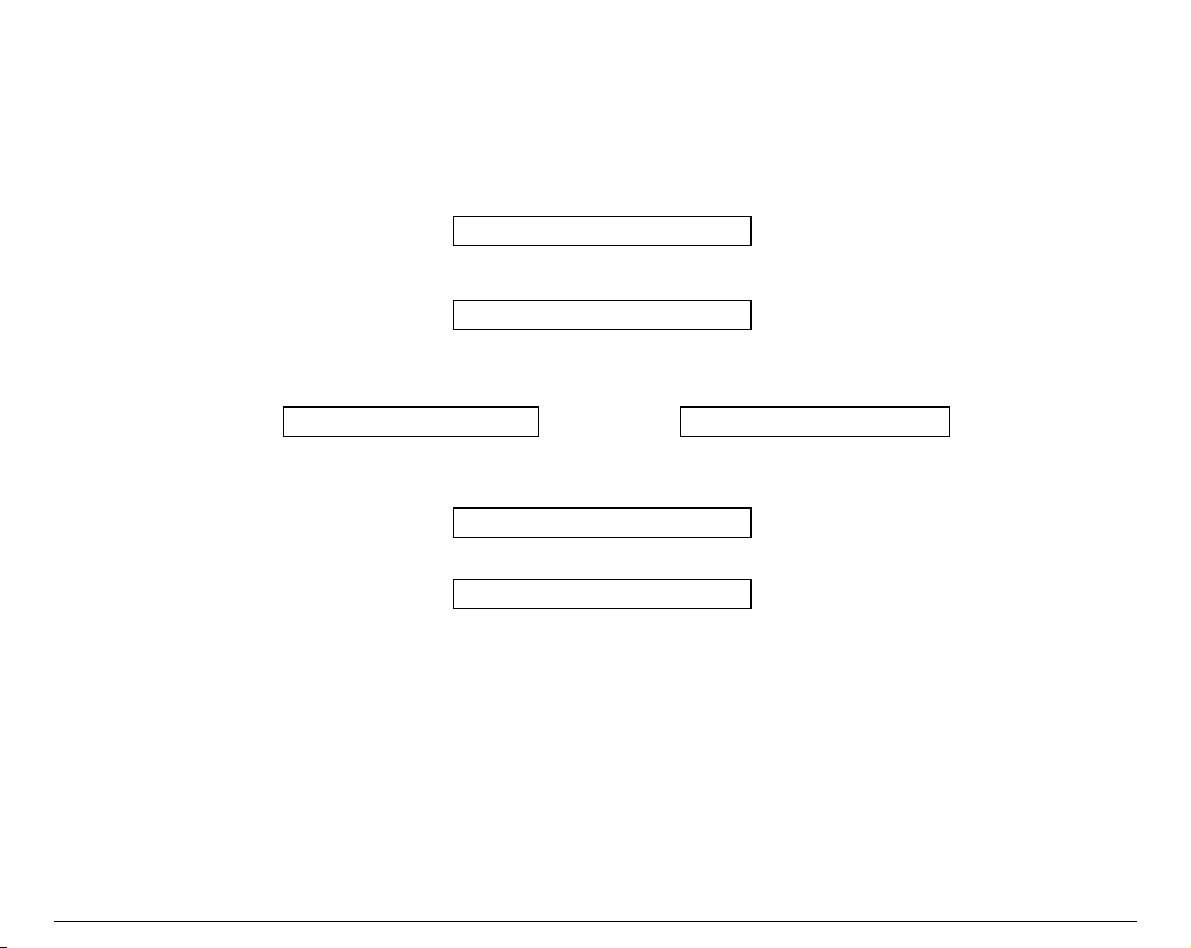
2. Open the tractor area cover turning is upwards until it stops.
3. Rotate the Front 2 tractor outside of the
printer.
112
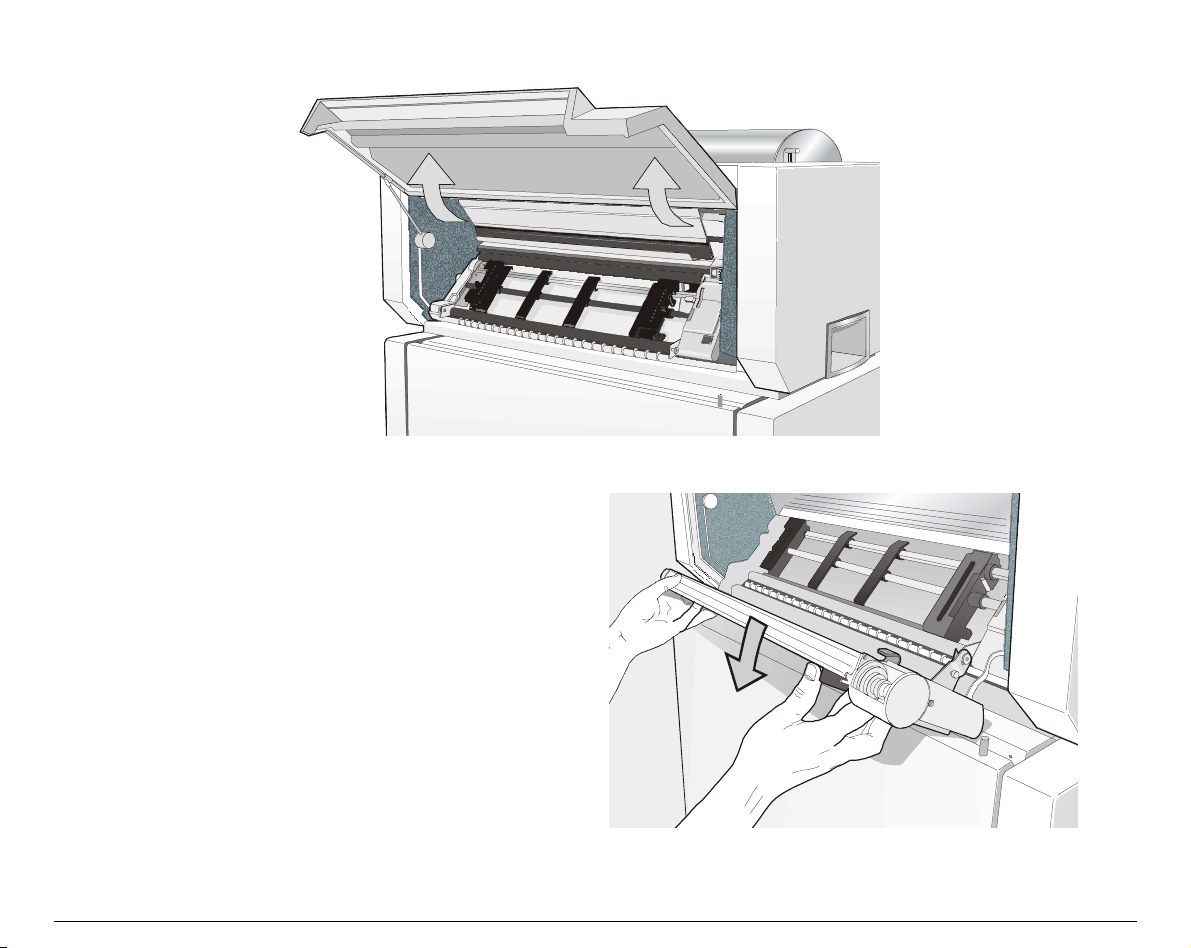
4. Unlock the sprockets of the Front1
tractor moving the sprocket levers up.
Slide the left sprocket to the first
printing column.
For easier understanding some of the following pictures show the printer without the Front 2
tractor installed.
113
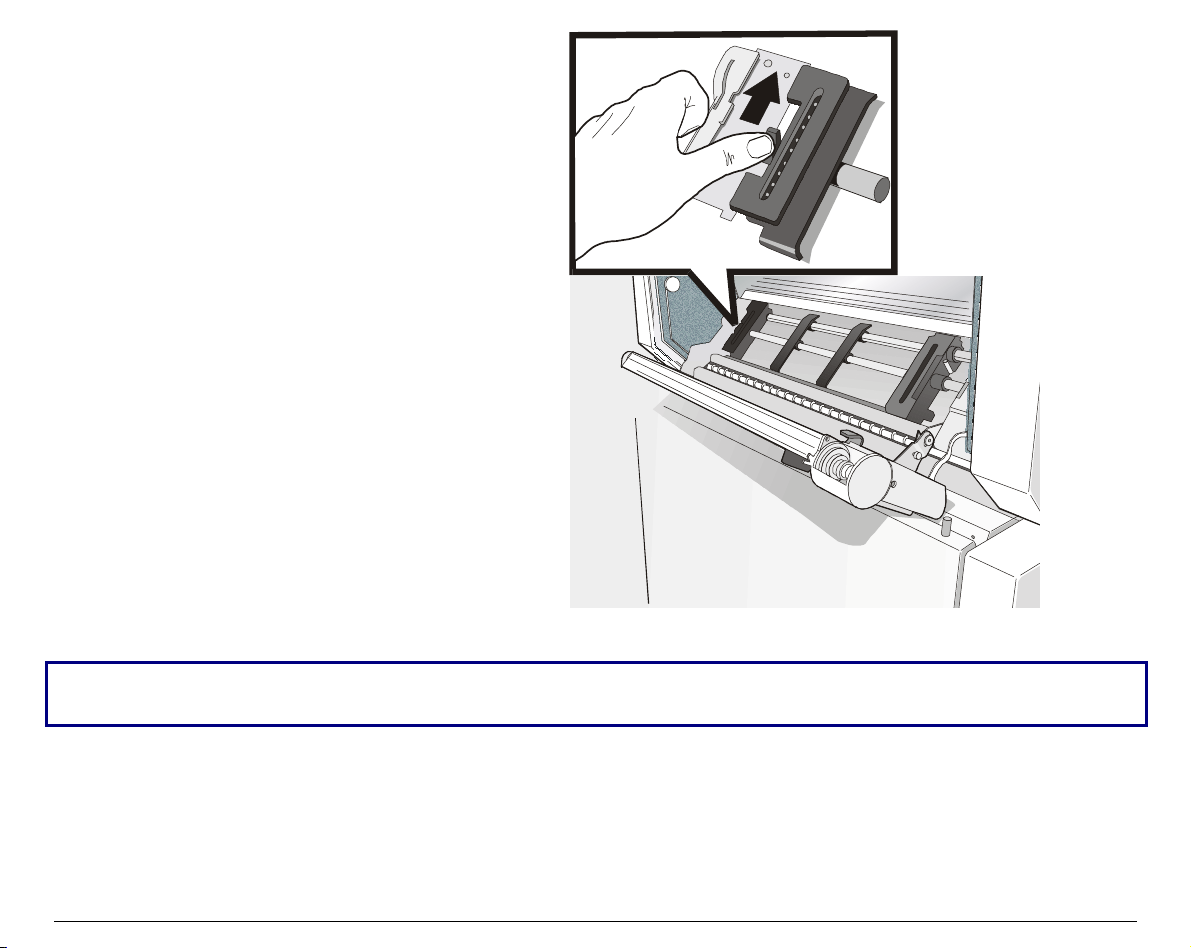
Space the paper guides along the tractor
55..
bar. Open the sprocket covers of the left
and right sprocket.
6. Insert the fanfold paper between the
lower and the upper tractor.
114

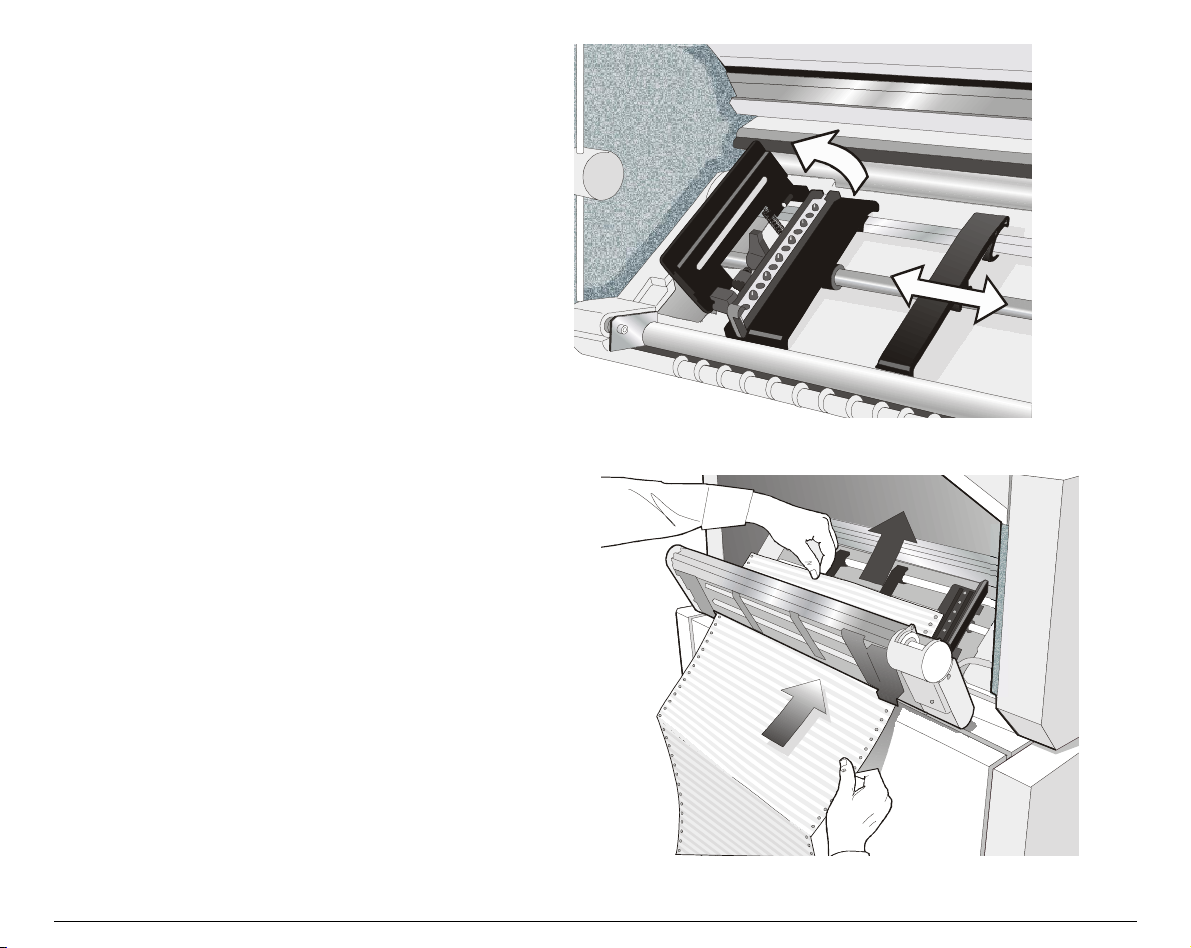
Hold the fanfold paper in front of the
77..
sprockets and insert the paper
perforation on the left sprocket pins
and close the sprocket cover.
Insert the paper on the right sprocket
88..
pins, make sure the paper goes under
the paper sensor and close the sprocket
cover.
115
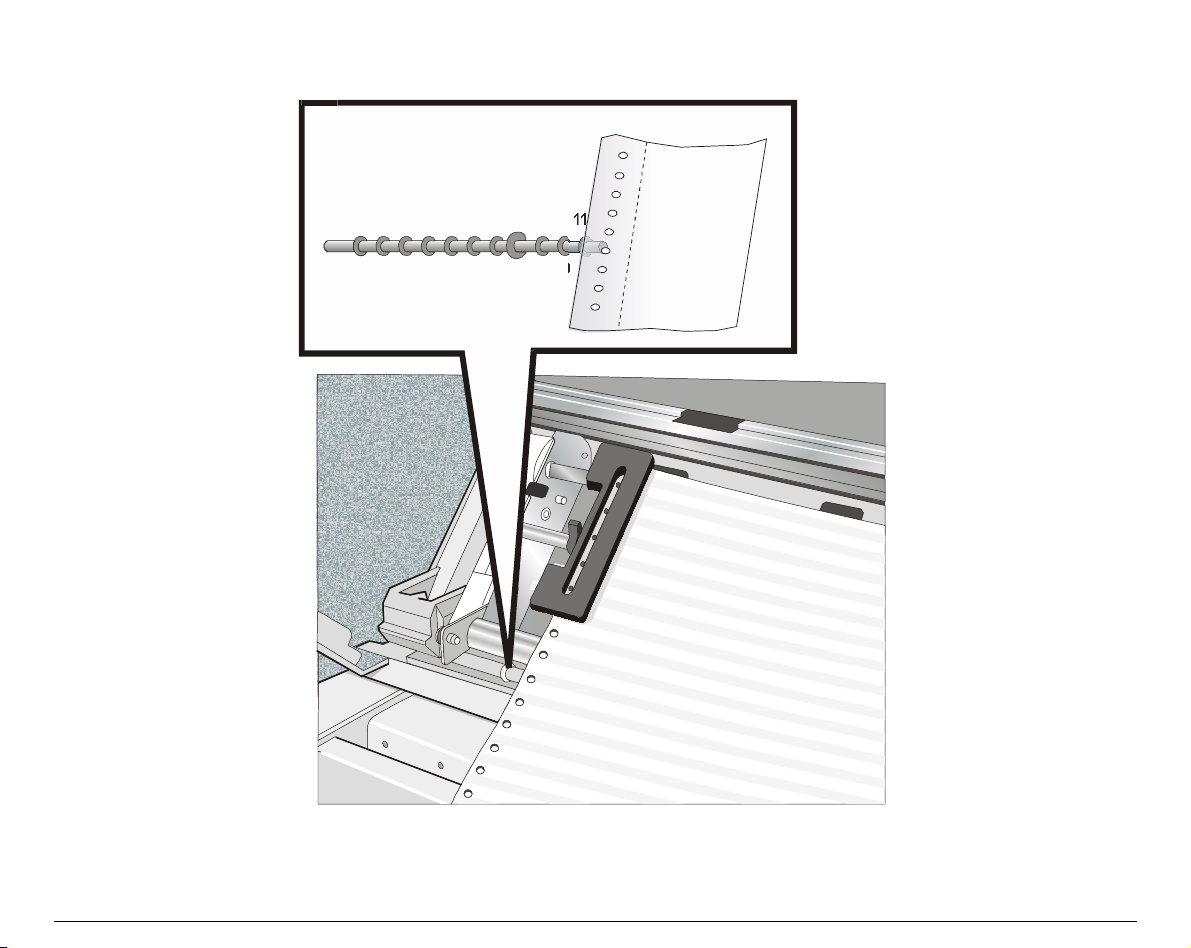
9. Match the left sprocket for the first printing position, i.e. the left paper margin must match
the eleventh notch on the printer cabinet.
11
1
2
56
4
3
78910
116
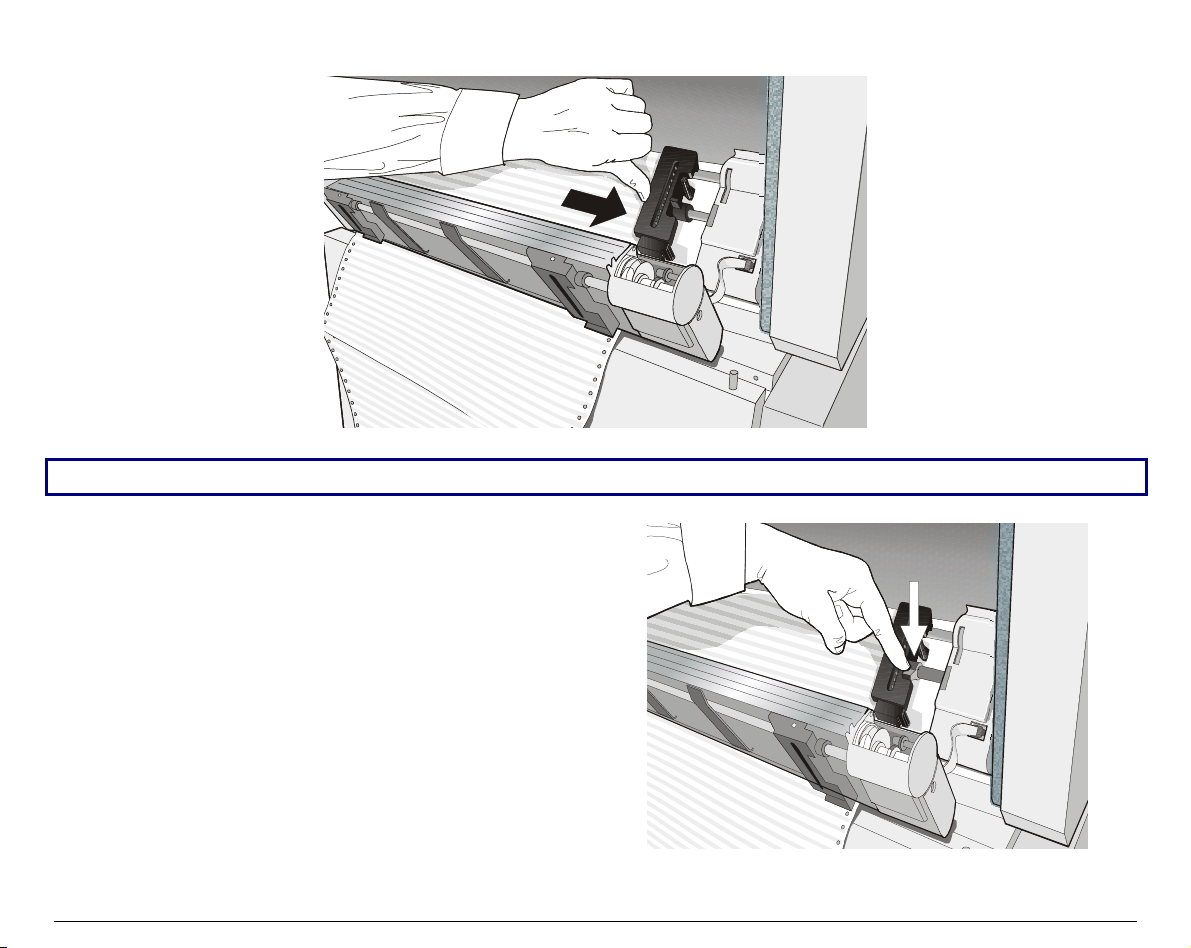
10. Adjust the right sprocket gently to remove slack from the paper.
Make sure the paper is not taut.
11. Lock the left and right sprockets moving
the sprocket levers down.
117

12. Reposition the Front2 tractor in its initial
position.
13. Open the printer cabinet door and lay the
paper staple onto the shelf inside the
printer cabinet:
• Onto the lower shelf if you are using only
one paper staple. The paper must be fed
in front of the antistatic cable;
• Onto the upper shelf if you are going to
install a second paper staple. The paper
must be fed behind the antistatic cable.
Antistatic cable
14. Close the printer cabinet door and the
tractor area cover. Press the
LOAD/FF
key
to load the paper into the printer.
118

15. Press the
ON LINE
key, the LOAD FRONT1 message is displayed.
16. Press the
17. Press the
LOAD/FF
ON LINE
key to load the paper into the printer.
key again, the printer now is ready to print.
The printed paper is output on the rear side of the printer.
119

LLooaaddiinngg PPaappeerr UUssiinngg tthhee FFrroonntt22 TTrraaccttoorr
To load paper in this way, it is necessary to install the upper tractor. See before "Front2 Tractor
Installation" section.
1. To select the Front2 tractor paper path press the
LOAD FRONT2
• If you have been using a different path, the display shows:
PATH CHANGING
• If you have been using fanfold paper in the Front 1 tractor paper path, the printer
automatically starts the parking procedure. The display shows alternately.
TEAR IF NECESS. and PARK PAPER
• Tear off the fanfold loaded with the Front 1 tractor (if it is longer than 18 inches) and
press the
PARK
key. The display shows:
PARKING
followed by
LOAD FRONT2
PATH
key until the display shows:
120

2. Open the tractor area cover turning is upwards until it stops.
3. Unlock the Front2 tractor sprockets moving
the sprocket levers up.
121

4. Space the paper guides along the
tractor bar. Open the sprocket covers
of the left and right sprocket.
5. Hold the fanfold paper in front of
the sprockets and insert the paper
perforation on the left sprocket
pins and close the sprocket cover.
6. Insert the paper on the right
sprocket pins, make sure the paper
goes under the paper sensor and
close the sprocket cover.
122

7. Position the left sprocket for printing, matching the left paper margin with the eleventh
notch on the printer cabinet and lock it in place.
11
1
2
456
3
789
10
8. Adjust gently the right sprocket to remove slack from the paper.
123

9. Open the printer cabinet door and lay the
paper onto the lower shelf inside the printer
cabinet.
10. Close the printer cabinet door and the tractor
area cover.
11. Press the
ON LINE
key the following message
is displayed: LOAD FRONT2.
12. Press the
LOAD/FF
key to load the paper into
the printer.
13. Press the
ON LINE
key, now the printer is
ready to print.
The paper is ejected from the rear of the printer.
124
 Loading...