

Page 1
˙
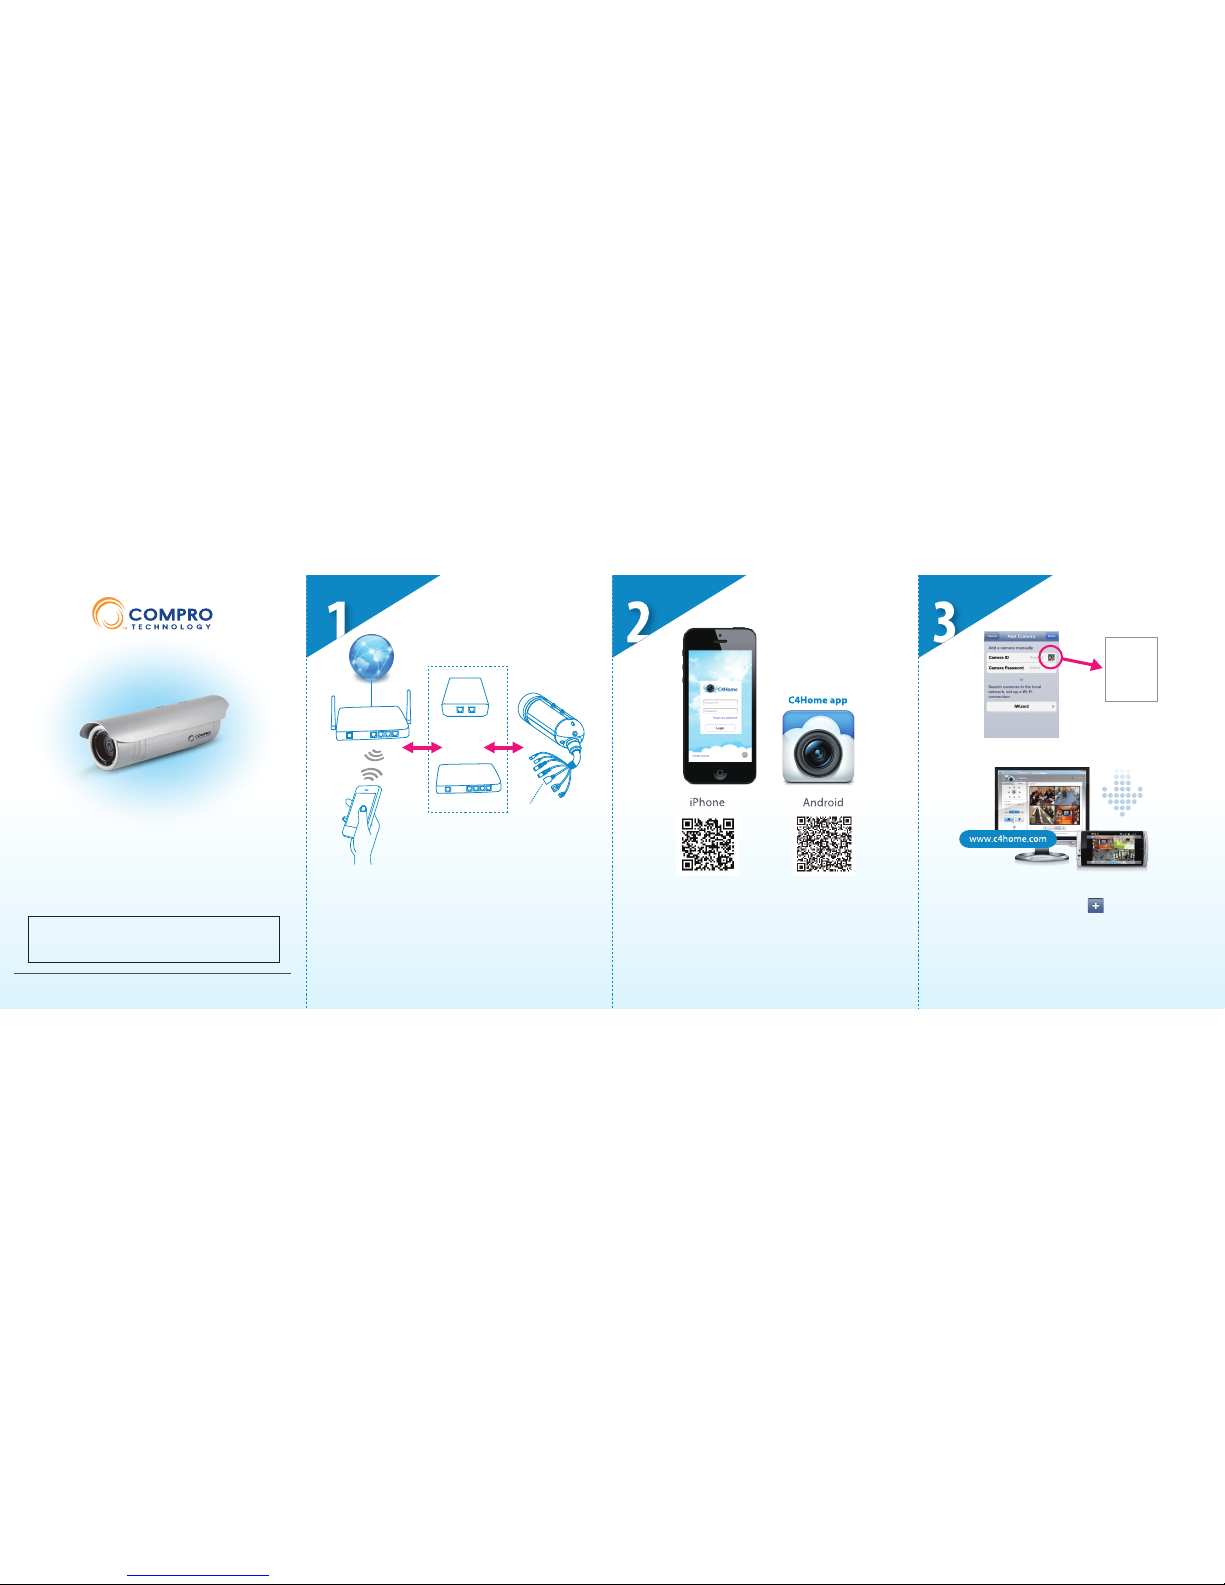
Using iPhone or Android phone to scan the QR code above
for download and install the C4Home app.
( Also you can download the C4Home app from App Store or
Google Play. )
˙
Start the C4Home app and register your personal account.
Compro Technology, Inc.
www.comprousa.com
3GA0310918
TN4230
Cloud Network Camera
Quick Start Guide
This Quick Start Guide includes the QR-code to
install your IP camera. Please keep this guide in case
of you need to reinstall the network camera.
Click the QR-code icon on the “Add
Camera” page of C4Home app and
scan the QR-code above to add
camera.
˙
Login the C4Home app and click to add new camera:
1. Scan the QR code above or on the camera. ( Or direct input
the 10 digits camera ID under the QR code. )
2. Click “iWizard” to search/install camera from local network.
˙
After installation, now you can watch the live video of camera
from C4Home app or login to the www.c4home.com from PC.
˙
Connect an Ethernet cable between PoE Midspan/Injector
(”in” port) or PoE Switch/Router with your wireless
switch/router. And plug-in the power of the PoE device*.
˙
Connect an Ethernet cable (not supplied in the package)
between IP camera with your PoE Midspan/Injector (”out”
port) or PoE Switch/Router**.
˙
Make sure your smartphone is able to access the internet via
your wireless switch/router.
Midspan
(PoE Injector)
Wireless
Switch/Router
PoE
Switch/Router
OR
* The PoE device must follow the IEEE 802.3af Class 3 Type B specification.
** While using the PoE connection, the power adapter is not necessary.
Ethernet
connector
Page 2
Camera LayoutPackage Contents Adjust the Lens
Reset Button
Press and hold the reset button (seen at the end of
terminal cable) for about 10 seconds. After the camera is
reset, it will take 1 minute to reboot. Please wait
patiently.
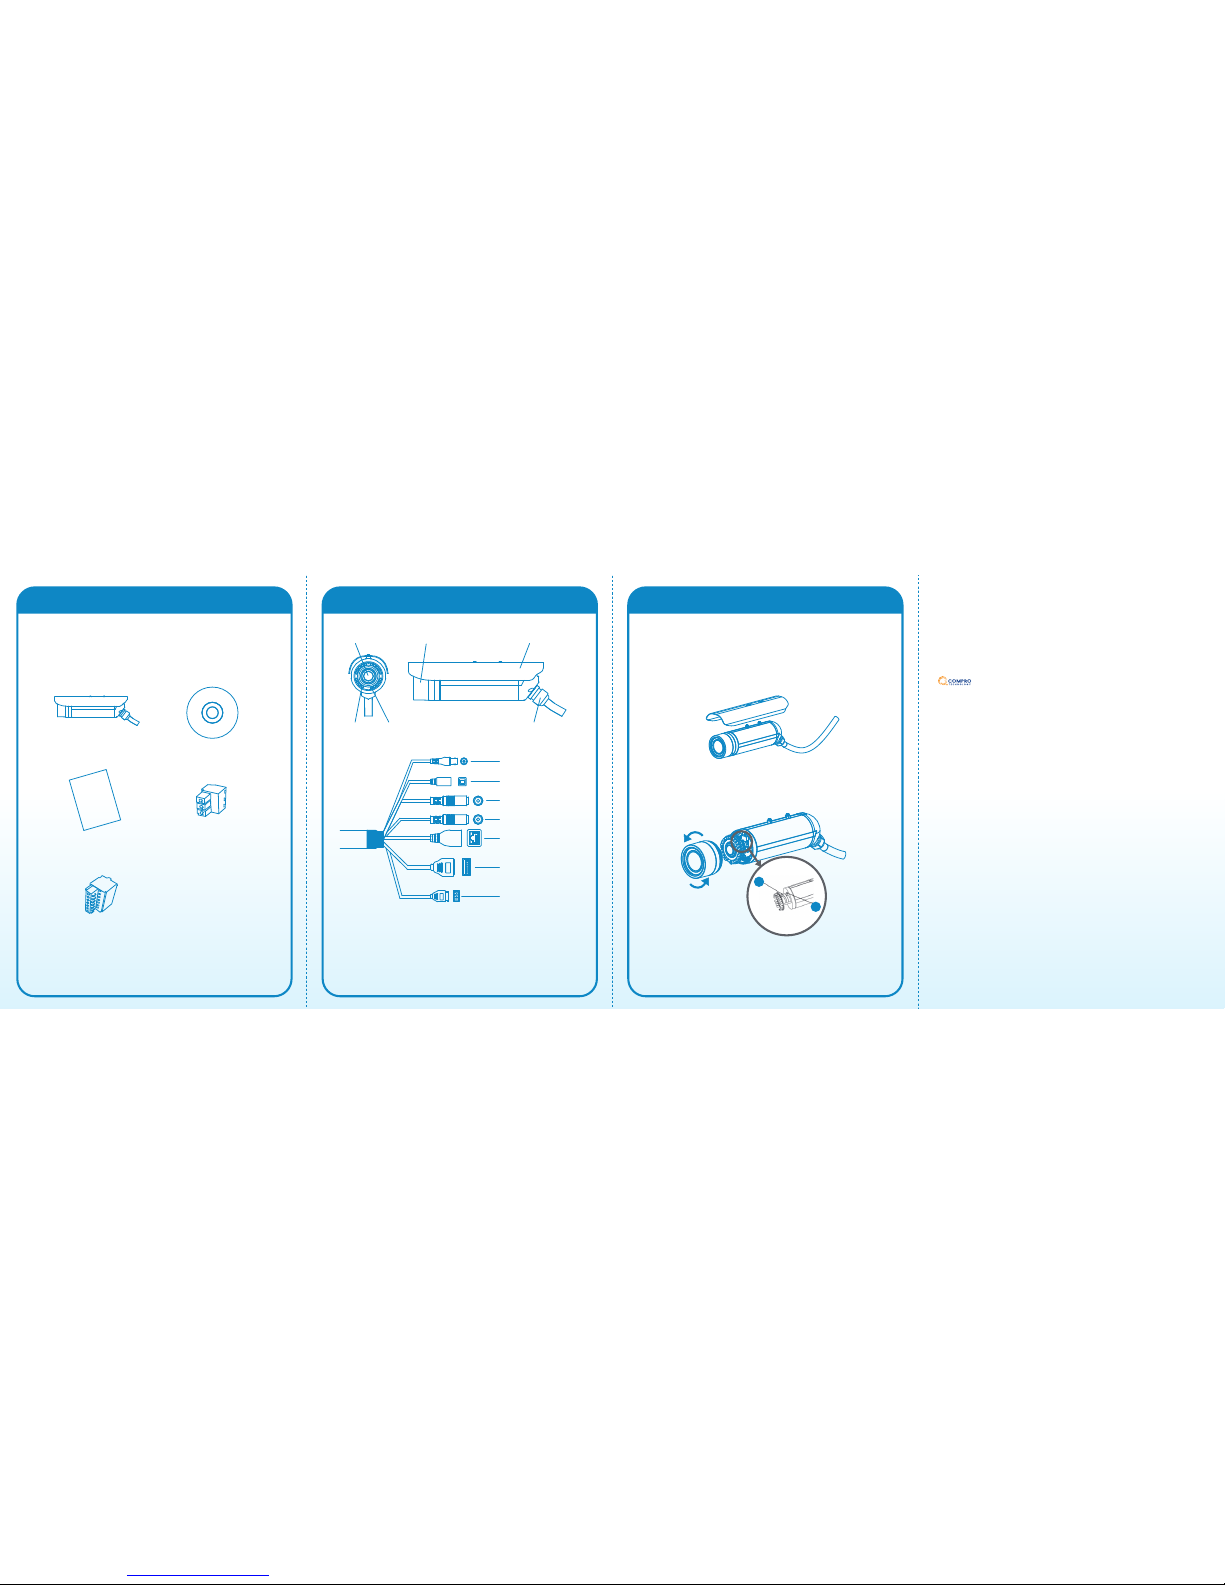
Please check the package contents on your hand. If
anything is missing, please don’t hesitate to contact
your local distributor.
Network Camera
Installation CD
3-pin
power terminal block x 1
7-pin I/O & RS485
terminal block x 1
Quick Start Guide
Network Camera
Quick Start Guide
Compro Technical Support Information
For any problems you may encounter, please refer to the user's manual on the
installation CD. If you need further assistance from Compro technology, you can
fill out the online help form (www.comprousa.com/feedback/) or direct email us
at [email protected].
Trademark
Compro Technology is the registered logo of Compro Technology,
Inc. C4Home and C4Home logo are registered trademarks of AVSecur
Technology, Inc. SD, SDHC and microSDHC Logos are trademarks of SD-3C, LLC.
Apple, Apple Logo, MAC and MAC OS are trademarks of Apple Inc., registered in
the U.S. and other countries. Other names and marks may be trademarks of their
respective owners.
Restriction & Disclaimer
No part of this document may be copied or reproduced in any form or by any
means without the prior written consent of Compro Technology, Inc. Compro
Technology makes no warranties with respect to this documentation and
disclaims any implied warranties of merchantability, quality, or fitness for any
particular purpose. The information in this document is subject to change
without prior notice.
Regulatory Notice
FCC Information: This device complies with Part 15 of the FCC Rules. Operation
is subject to the following two conditions: (1) This device may not cause harmful
interference, and (2) This device must accept any interference received,
including interference that may cause undesired operation.
Compro Technology, Inc.
www.comprousa.com
Tel. +886 2 2918 0169 | Fax +886 2 2915 2389
4F, No.12, Alley 6, Lane 45, Pao Shin Road, Hsintien District, New Taipei City 231,
Taiwan
© 2013 Compro Technology, Inc. All rights reserved.
Lens Cover Sunshield
All-in-one
terminal cable
IR LEDs
Lens
Light Sensor
BNC Out
Reset Button
All-in-one Terminal Cable
Audio Out (green)
Mic In (pink)
Power Connector
IO & RS-485
Connector
Ethernet Connector
When necessary, users can manually adjust the camera's focus and
zoom. Connect the camera’s BNC connector to the video input of
a monitor to aid you in lens adjustment. Then refer to the steps
below.
1. Loosen the top screws to separate the camera's sunshield from
the housing.
2.
Remove the lens cover at the front by turning it
counterclockwise. Then turn the zoom ring on knob 1, and the
focus ring on knob 2. When complete, re-install the lens cover.
Note: Users may open up the front cover of the bullet camera
series for focus & zoom adjustment. Care must be taken to ensure
the water resistant O-ring is properly seated in the O-ring gasket.
Failure to do so will void the warranty of the camera.
1
2
 Loading...