

Page 1
i
Page 2

Copyrights © 2002 Compex Systems Pte Ltd
All Rights Reserved
This document contains information, which is protected by copyright. Reproduction, adaptation
or translation without prior permission is prohibited, except as allowed under the copyright
laws.
Trademark Information
Compex®, ReadyLINK® and MicroHub® are registered trademarks of Compex, Inc. Microsoft
Windows and the Windows logo are the trademarks of Microsoft Corp. NetWare is the
registered trademark of Novell Inc. All other brand and product names are trademarks or
registered trademarks of their respective owners.
Notice: Copyrights © 2002 by Compex, Inc. All rights reserved. Reproduction, adaptation, or
translation without prior permission of Compex, Inc. is prohibited, except as allowed under the
copyright laws.
Manual Revision by Jake Chia
Manual Number: U-0351-V1.2C Version 1.2C, October 2002
Disclaimer
Compex, Inc. provides this manual without warranty of any kind, either expressed or implied,
including but not limited to the implied warranties of merchantability and fitness for a particular
purpose. Compex, Inc. may make improvements and/or changes to the product and/or
specifications of the product described in this manual, without prior notice. Compex, Inc will
not be liable for any techni cal inaccuraci es or typograph ical errors found in this guide. Changes
are periodically made to the information contained herein and will be incorporated into later
versions of the manual. The information contained is subject to change without prior notice.
Your Feedback
We value your feedback. If you find any errors in this user’s manual, or if you have suggestions
on improving, we would like to hear from you. Please contact us at:
Telephone : (65) 6381-0139
Fax : (65) 6280-9947
Email: feedback@compex.com.sg
ii
Page 3

FCC NOTICE
This device has been tested and found to comply with the limits for a Class B digital device,
pursuant to Part 15 of the FCC Rules. These limits are designed to provide reasonable
protection against harmful interference in a residential installation. This device generates, uses
and can radiate radio frequency energy and, if not installed and used i n accordance with the
instructions, may cause harmful interference to radio communications. However, there is no
guarantee that interference will not occur in a particular installation. If this device does cause
harmful interference to radio or t elevision recep tion, th e user is encour aged to try to correct the
interference by one or more of the following measures:
• Reorient or relocate t he receiving antenna.
• Connect the computer into an outlet on a circuit different from that to which the
receiver is connected.
• Increase the separation bet ween the computer and receiver.
• Consult the dealer or an experienced radio/TV technician for help.
Caution: Any changes or modifications not expressly approved by the grantee of this device
could void the user's authority to operate the equipment.
FCC Compliance Statement: This device complies with Part 15 of the FCC Rules.
Operation is subject to the following two conditions
This device may not cause harmful interference, and
This device must accept any interference received, including interference that may cause
undesired operation.
:
Declaration of Conformity
Compex, Inc. declares the followin g:
Product Name: Compex iWavePort 11Mbps Wireless LAN PCMCIA Card
Model No.: WL11A+ conforms to the following Product Standards:
Radiated Emission Standards: EN55022A, FCC Part 15 Class B; Conducted Emission
Standards: EN60555Pt2 conducted emission; EN55022A conducted emission, FCC Part 15
Class B; Immunity Standards: IEC 801-2; IEC 801-3; IEC 801-4.
Therefore, this product is in conformity with the following regional standards:
FCC Class B - following the provisions of FCC Part 15 directive;
CE Mark - following the provisions of the EC directive.
This Class B digital apparatus complies with Canadian ICES-003.
th
October 2002
8
iii
Page 4
Technical Support Information
The warranty information and registration form are found in the Quick Install Guide.
For technical support, you may contact COMPEX or its subsidiaries. For your convenience, you
may also seek technical assistance from the local distributor, or from the authorized
dealer/reseller that you have purchased this product from. For technical support by email, write
to support@compex.com.sg
.
Refer to the table below for the nearest Technical Support Centers:
Technical Support Centers
Contact the technical support center that services your location.
U.S.A., Canada, Latin America and South America
Write
Call
Fax
Write
Call
Fax
Compex, Inc.
4051 E. La Palma, Unit A
Anaheim, CA 92807, USA
Tel:
Tel:
Fax:
BBS:
ReadyLINK Networktechnology Gmbh
Albert Einstein Straβe 34 / M21
63322 Rödermark, Germany
Tel:
Fax:
BBS:
(714) 630-7302 (8 a.m.-5 p.m. Pacific time)
(800) 279-8891 ext.122 Technical Support
(714) 630-6521
(714) 630-2570 (24-hour access)
+49 (0) 6074 - 98017 (8 a.m.-5 p.m. local time)
+49 (0) 6074 - 90668
+49 (0) 6074 - 93974 (24-hour access)
Email:readylink@compex.com.sg
Asia, Australia, New Zealand, Middle East
and the rest of the World
Write
Call
Internet
access/
Website:
Fax
Compex Systems Pte Ltd
135, Joo Seng Road #08-01, PM Industrial Building
Singapore 368363
Tel:
Tel:
Fax:
BBS:
E-mail:
FTPsite:
http://www.cpx.com or http://www.compex.com.sg
(65) 6286-1805 (8 a.m.-5 p.m. local time)
(65) 6286-2086 ext.199 Technical Support
(65) 6283-8337
(65) 6282-8854 (24-hour access)
support@compex.com.sg
ftp.compex.com.sg
iv
Europe
Page 5
About This Document
The product described in this document, Compex iWavePort Series, WL11A+ is a licensed
product of Compex Systems Pte Ltd. This document contains instructions for installing,
configuring and using the WL11A+. It also gives an overview of the key applications and the
networking concepts with respect to the product.
This documentation is for both Network Administrators and the end user who possesses some
basic knowledge and expertise in the networking structure and protocols.
It makes a few assumptions th at the host co mputer has already been inst alled with TCP/IP and
already up & running and accessing the Internet. Procedures for Windows 98/2000/XP
operating systems are included in this document. However, for other operating system, you may
need to refer to your operating system’s documentation for networking.
How to Use this Document
The document is written in such a way that you as a user will find it convenient to find specific
information pertaining to the product. It comprises of chapters that explain in details on the
installation and configuration of WL11A+.
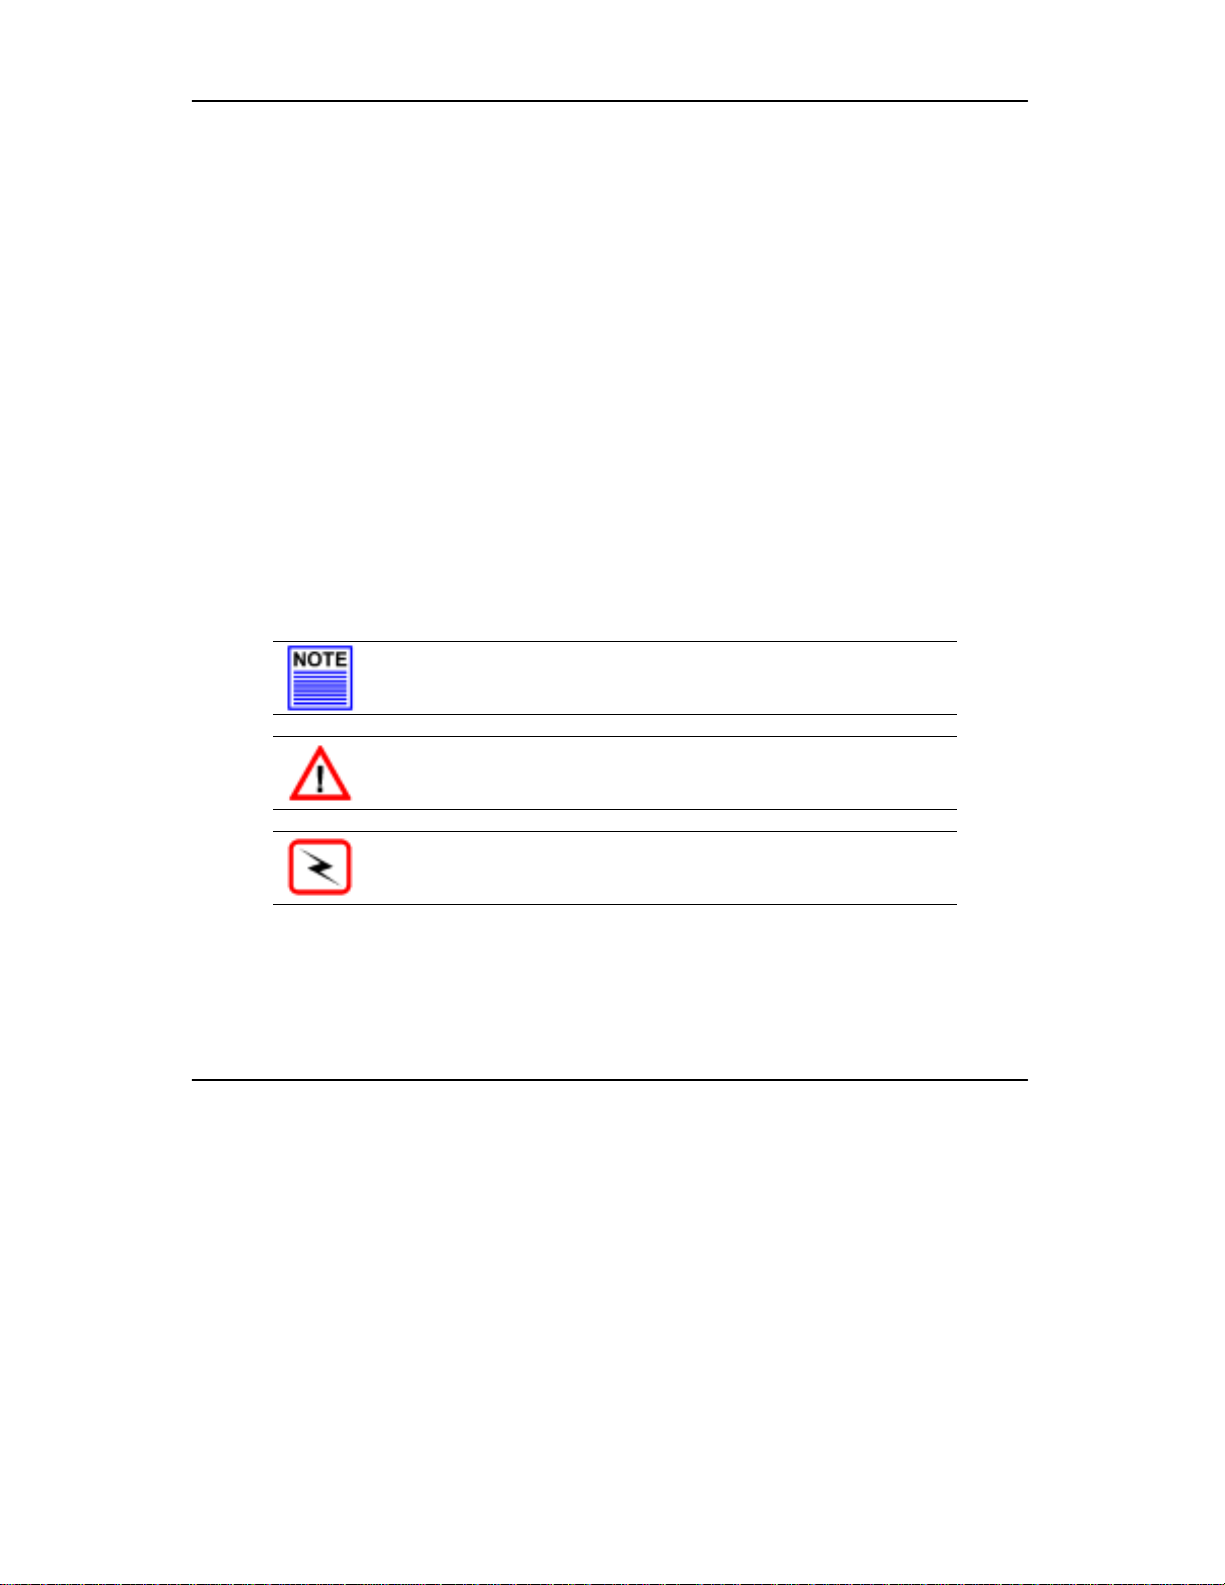
Conventions
In this do cument, speci al conven tions are u sed to help and presen t the informatio n clearly. The
Compex iWavePort 11Mbps PCMCIA Wireless LAN Card is often referred to as WL11A+ in
this document. Below is a list of conventions used throughout.
NOTE
This section will consist of important features or instructions
CAUTION
This section concerns risk of injury, system damage or loss of data
WARNING
This section concerns risk of severe injury
References on Menu Command, Push Button, Radio Button, LED and Label appear in
Bold. For example, “Click on the Ok button”
v
Page 6

Table of Contents
Copyrights © 2002 Compex Systems Pte Ltd...........................................................ii
Trademark Information.............................................................................................ii
Disclaimer .............................................................................................................ii
Your Feedback ..........................................................................................................ii
FCC NOTICE...........................................................................................................iii
Declaration of Conformity .......................................................................................iii
Technical Support Information ................................................................................iv
About This Document............................................................................................... v
How to Use this Document ....................................................................................... v
Conventions .............................................................................................................v
Chapter 1 Product Overview.......................................................................1
1.1 Introduction..................................................................................................... 1
1.2 Overview......................................................................................................... 1
1.3 Features and Benefits...................................................................................... 1
1.3.1 IEEE 802.11b compliant......................................................................1
1.3.2 Supports 1, 2, 5.5 and 11Mbps Data Rates..........................................1
1.3.3 Wired Equivalent Privacy (WEP) 64/128-bit data encryption.............2
1.3.4 External Antenna Connector Slot........................................................ 2
1.4 Applications.................................................................................................... 2
1.4.1 When do you need wireless LAN........................................................ 2
1.4.2 Networking scenarios for WL11A+ .................................................... 2
1.5 Technical Specifications................................................................................. 4
Chapter 2 Getting Started............................................................................5
2.1 Package Content..............................................................................................5
2.2 Setup Considerations ...................................................................................... 5
2.2.1 Software requirements.........................................................................5
2.2.2 Hardware requirements........................................................................ 5
Chapter 3 Hardware and Software Installation........................................6
3.1 WL11A+ Hardware and Software Installation for Win98/ME/2000 .............. 6
3.2 WL11A+ Hardware and Software Installation for Windows XP.................... 9
Page 7

Table of Contents
Chapter 4 Client Manager Configuration................................................12
4.1 Installing the Wireless Client Manager......................................................... 12
4.2 Functions of the Wireless Client Manager.................................................... 16
4.2.1 Under File Heading ........................................................................... 16
4.2.2 Under Actions Heading..................................................................... 17
4.2.3 Under Advanced Heading ................................................................. 22
4.2.4 Under Help Headings........................................................................ 30
Chapter 5 TCP/IP Configuration..............................................................33
5.1 Adding TCP/IP network protocol for Windows 98/98SE/ME...................... 33
5.2 TCP/IP network protocol configuration for Windows XP............................ 37
Chapter 6 Wireless Network Configuration in Windows XP.................41
6.1 Configuring wireless network in Windows XP............................................. 40
NOTES ......................................................................................44
Page 8

Chapter 1 Product Overview
Chapter 1 Product Overview
1.1 Introduction
Wireless networki ng is a convenient way of sett ing up a network bo th at home and in
the office. The lack of physical infrastructure such as LAN cables increases the cost of
implementing a network environment. However, with wireless networking, a
networking structure can easily be implemented.
As a home user, you can enjoy the freedom to roam around your house and maintain
connection to your network. Surfing the web, sending e-mail or downloading a
program while in the garden, near your swimming pool or anywhere in your house has
become a reality.
With the many benefits tha t a wireless networ k environment br ings, many new offices
are contempla ting of expanding their network environment with wireless d evices.
1.2 Overview
The Compex WL11A+ is a simple 11Mbps wireless adapter and is compliant with the
IEEE 802.11b industry standard. It offers the convenience of plug and play by simply
connecting to a PCMCIA interface of your PC or notebook. With a built in external
antenna connector slot, you can purchase a Compex external antenna (WA-HGA-5+)
to connect to the Compex WL11A+ for a wider coverage area.
1.3 Features and Benefits
Compex WL11A+ is designed to give you all the support features you need in a
wireless network to establish connection with a wireless client. The list below
identifies some of the features and benefits of WL11A+.
1.3.1 IEEE 802.11b compliant
The Compex WL11A+ can interoperate with any other wireless devices that comply
with IEEE802.11b Direct Sequence Spread Spectrum (DSSS).
1.3.2 Supports 1, 2, 5.5 and 11Mbps Data Rates
The Compex WL11A+ works at a maximum speed of 11Mbps on the wireless
interface; and is backward compatible to support older wireless products with lower
speeds of 1 or 2 Mbps.
1
Page 9

Chapter 1 Product Overview
1.3.3 Wired Equivalent Privacy (WEP) 64/128-bit data encryption
For data privacy, the Compex iWavePort WL11A+ uses a 64-bit or 128-bit private
encryption key to code your data. This ensures that only wireless clients configured
with the same WEP key are able to gain access to the data.
1.3.4 External Antenna Connector Slot
To increase the range of the Compex WL11A+ for wider and better coverage, a
Compex (WA-HGA-5+) external antenna can be purchased separately and fitted to
your Compex WL11A+.
1.4 Applications
The Compex WL11A+ facilitates wireless connections to other hosts on a network.
1.4.1 When do you need wireless LAN
Installing the Compex WL11A+ will give you these benefits:
• High mobility at your home or office
• No messy wires
• Overcoming structural restrictions in the building
• Cost effectiveness against laying of cables
• Easy scalability and quick expansion of existing network
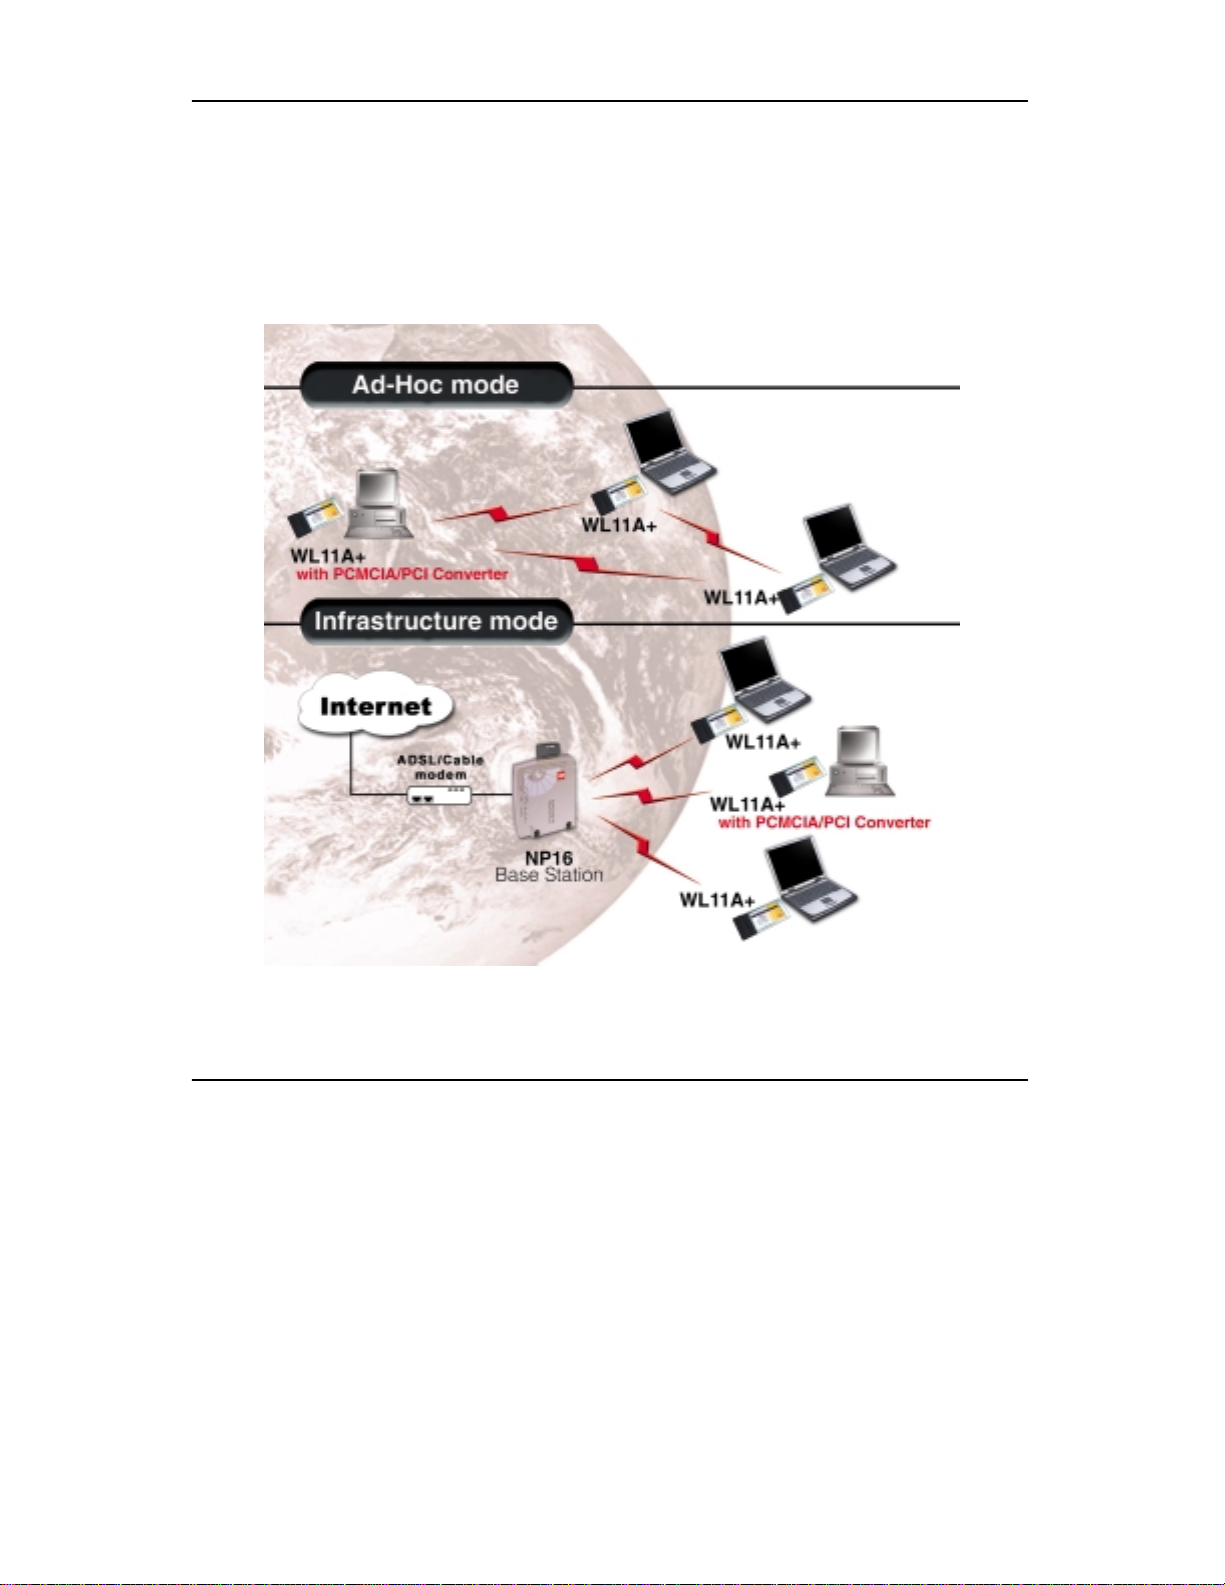
1.4.2 Networking scenarios for WL11A+
WL11A+ can be configured for 2 types of wireless architectures – Infrastructure and
Ad-Hoc.
In an Ad-Hoc architecture, the wireless clients communicate directly with one
another. No access points exists on such a wireless LAN configuration. Each wireless
client is allowed to transfer data packets with each other.
In an Infrastructure architecture, all the wireless clients communicate through access
points which are devices that act as base stations for all wireless communication. The
data packets from the wireless clients are transferred to the access points before being
transmitted to other hosts on the network.
2
Page 10
Chapter 1 Product Overview
The following figure shows an example of how a Compex WL11A+ can work in an
Ad-Hoc architecture.
In an Ad-Hoc architecture, there is no limit to the number of wireless clients you can
connect.
In an Infrastructure architecture, the number of wireless clients supported depends on
the access point.
Figure 1.4.2a Different Networking Infrastructures
3
Page 11

Chapter 1 Product Overview
1.5 Technical Specifications
Model iWavePort WL11A+
Industry Standards IEEE 802.11 & 802.11b DSSS
CE Mark, FCC Class B, Gost, C-Tick
Radio Technology Direct Sequence Spread Spectrum (DSSS)
Frequency Band 2400 ~ 2483.5MHz (US, Canada)
2400 ~ 2497MHz (Europe, Japan)
Operating Channe ls 11 Channels
Media Access Method Carrier Sense Multiple Access with Collision
Avoidance (CSMA/CA)
Data Rate 11Mbps, 5.5Mbps, 2Mbps, 1Mbps
Modulation CCK, BPSK, QPSK
Data Privacy 64-bit or 128-bit WEP (selectable)
Operating Range 50 meters @ 11Mbps (Indoor)
160 meters @ 11Mbps (Outdoor)
Dimension(L x W x H) 115mm x 54mm x 8mm
Environmental Requirement
Temperature
Humidity
Operating : 0°C to 40°C
Storage : -20°C to 70°C
Operating : 10%RH to 70%RH
Storage : 5%RH to 90%RH
4
Page 12

Chapter 2 Getting Started
Chapter 2 Getting Started
This chapter outlines the basic requirements before you begin any installation and
configuration of the Compex WL11A+.
2.1 Package Content
Thank you for purchasing the Compex WL11A+. The package should contain the
following:
• Compex WL11A+ Adapter
• Quick Install Guide with warranty registration
• User Manual
• CD with software drivers and utilities
2.2 Setup Considerations
• Check your Local Area Network configurations. Determine if it is a Dynamic
or Static IP addressing.
• Check the TCP/IP protocols and IP address settings of the PCs/Clients or
Ethernet Hub/Switch in your LAN. (refer to Chapter 5, “TCP/IP
Configuration” for more information)
2.2.1 Software requirements
• Windows 95/98/98SE/ME/2000/XP
• 2 MB of hard disk space
2.2.2 Hardware requirements
• Laptops with PCMCIA slot.
5
Page 13
Chapter 3 Hardware and Software Installation
Chapter 3 Hardware and Software Installation
The Compex WL11A+ is a Plug and Play device. You can plug it into your PCMCIA
slot for auto-detection. If the device cannot be detected, please refer to Chapter 6,
Appendix for more information. For Windows 98, you would need your Windows 98
Installation CD.
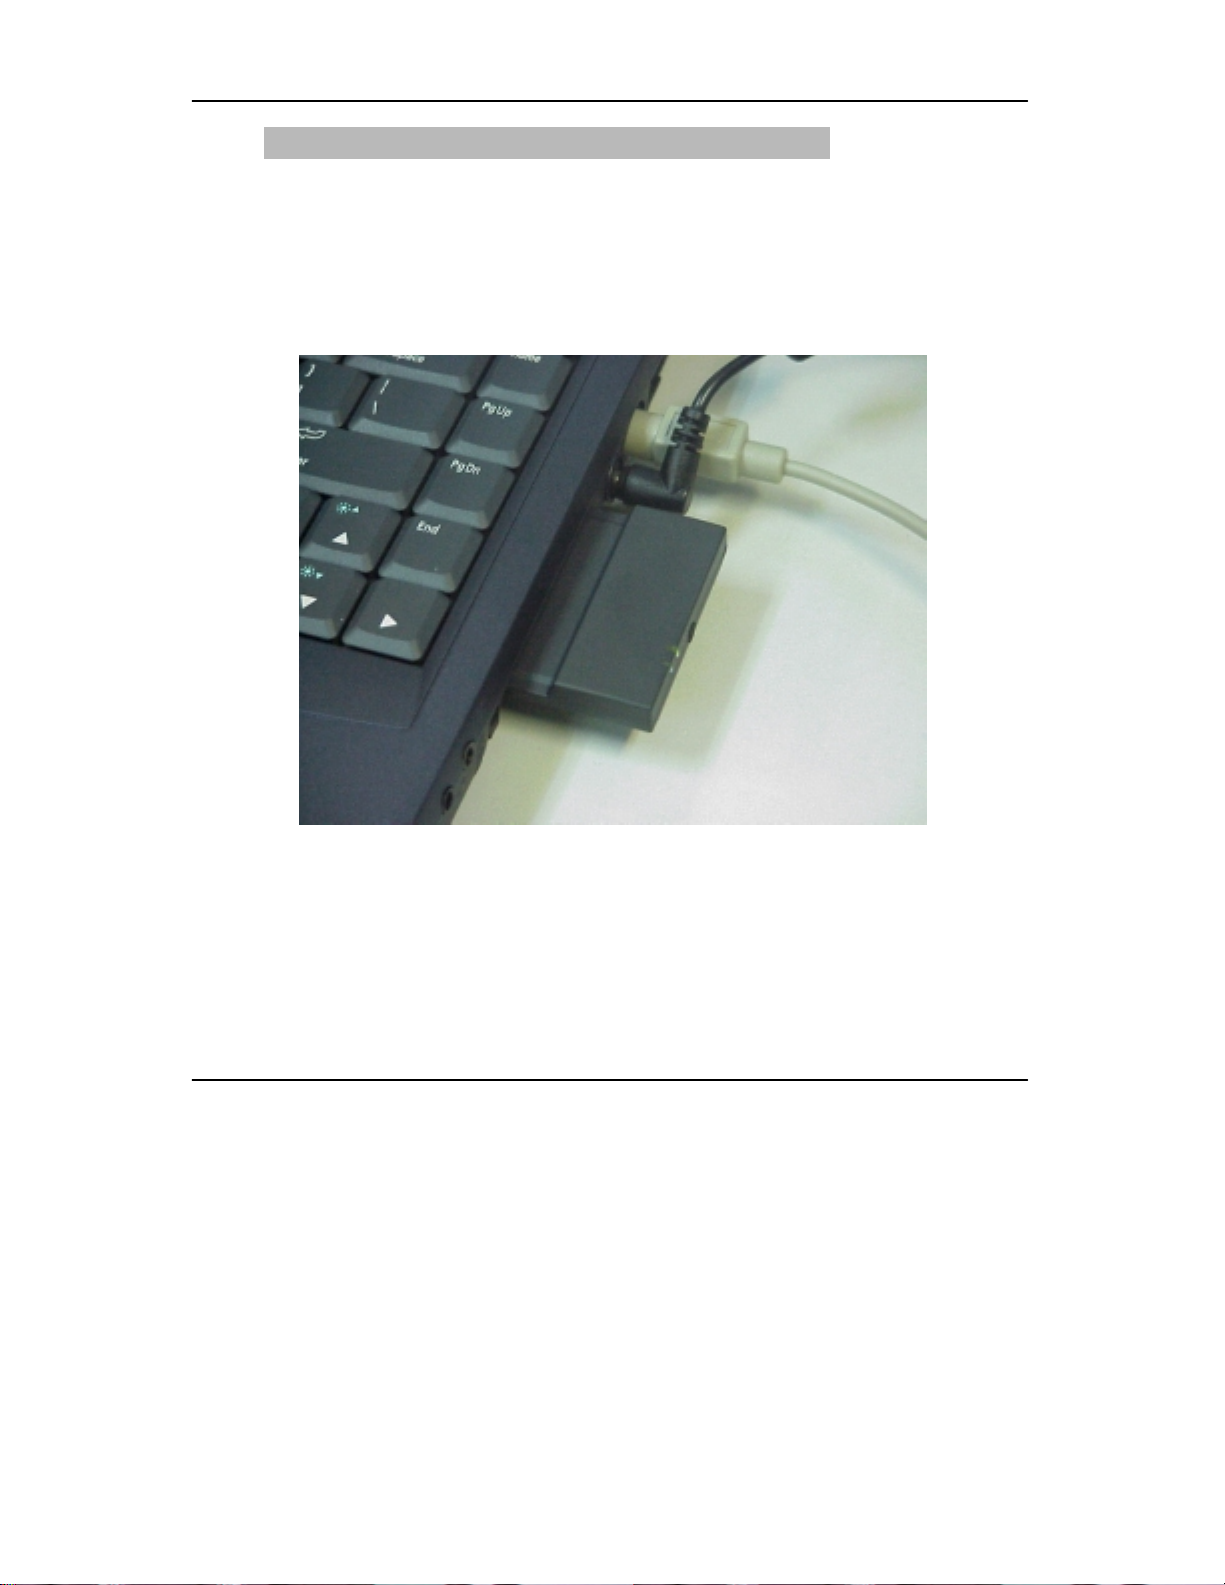
3.1 Compex WL11A+ Hardware Installation
Figure 3.1a WL11A+ slotted in PCMCIA Slot
For Windows 98/98SE/ME/2000:
To begin:
1. Insert the Compex WL11A+ into the PCMCIA slot of your laptop and power
up your laptop.(Note: You do not need to power up your laptop for Windows
ME/2000/XP, as it will auto-detect the WL11A+)
6
Page 14
Chapter 3 Hardware and Software Installation
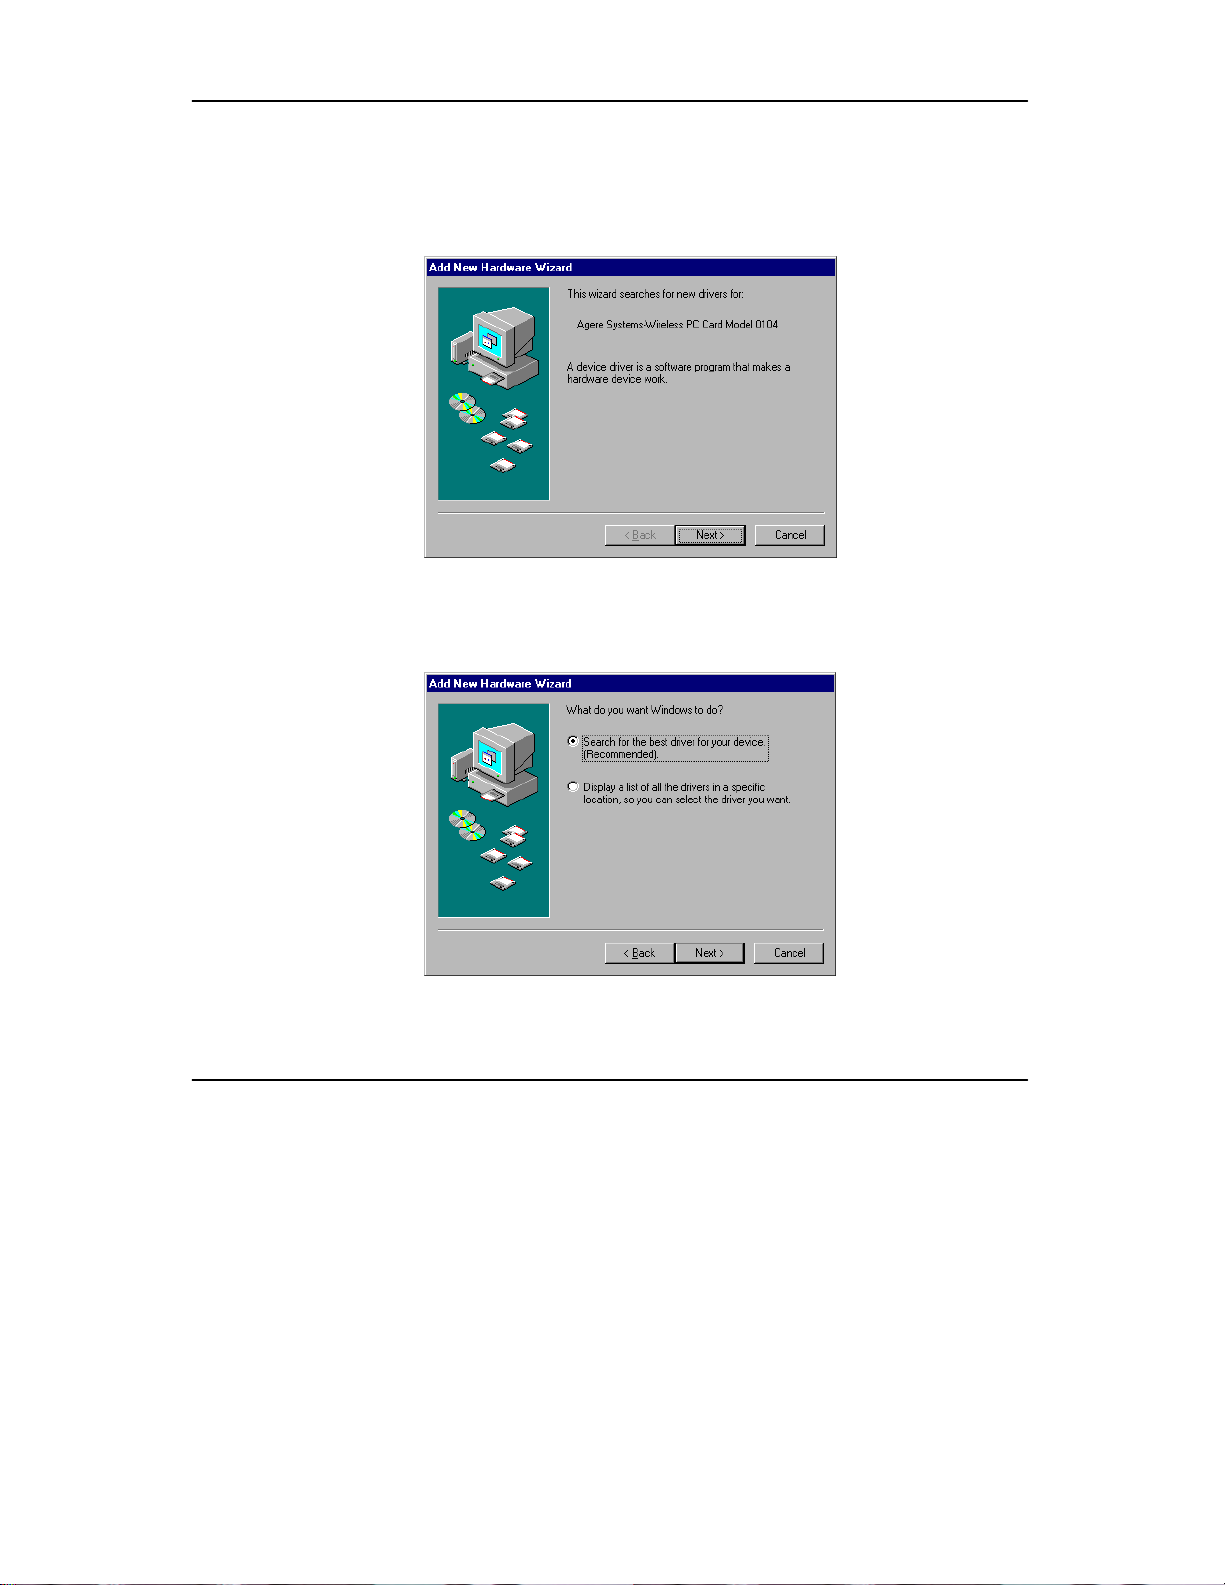
2. The LED will light up indicating that the WL11A+ is receiving power from
your laptop.
3. Your laptop will detect the new hardware and prompt for the device driver as
shown in the following screen. Click Next.
Figure 3.1b Add New Hardware Wizard Screen 1
4. Select Search for the best driver for your device (Recommended) and
click on Next.
Figure 3.1c Add New Hardware Wizard Screen 2
7
Page 15
Chapter 3 Hardware and Software Installation
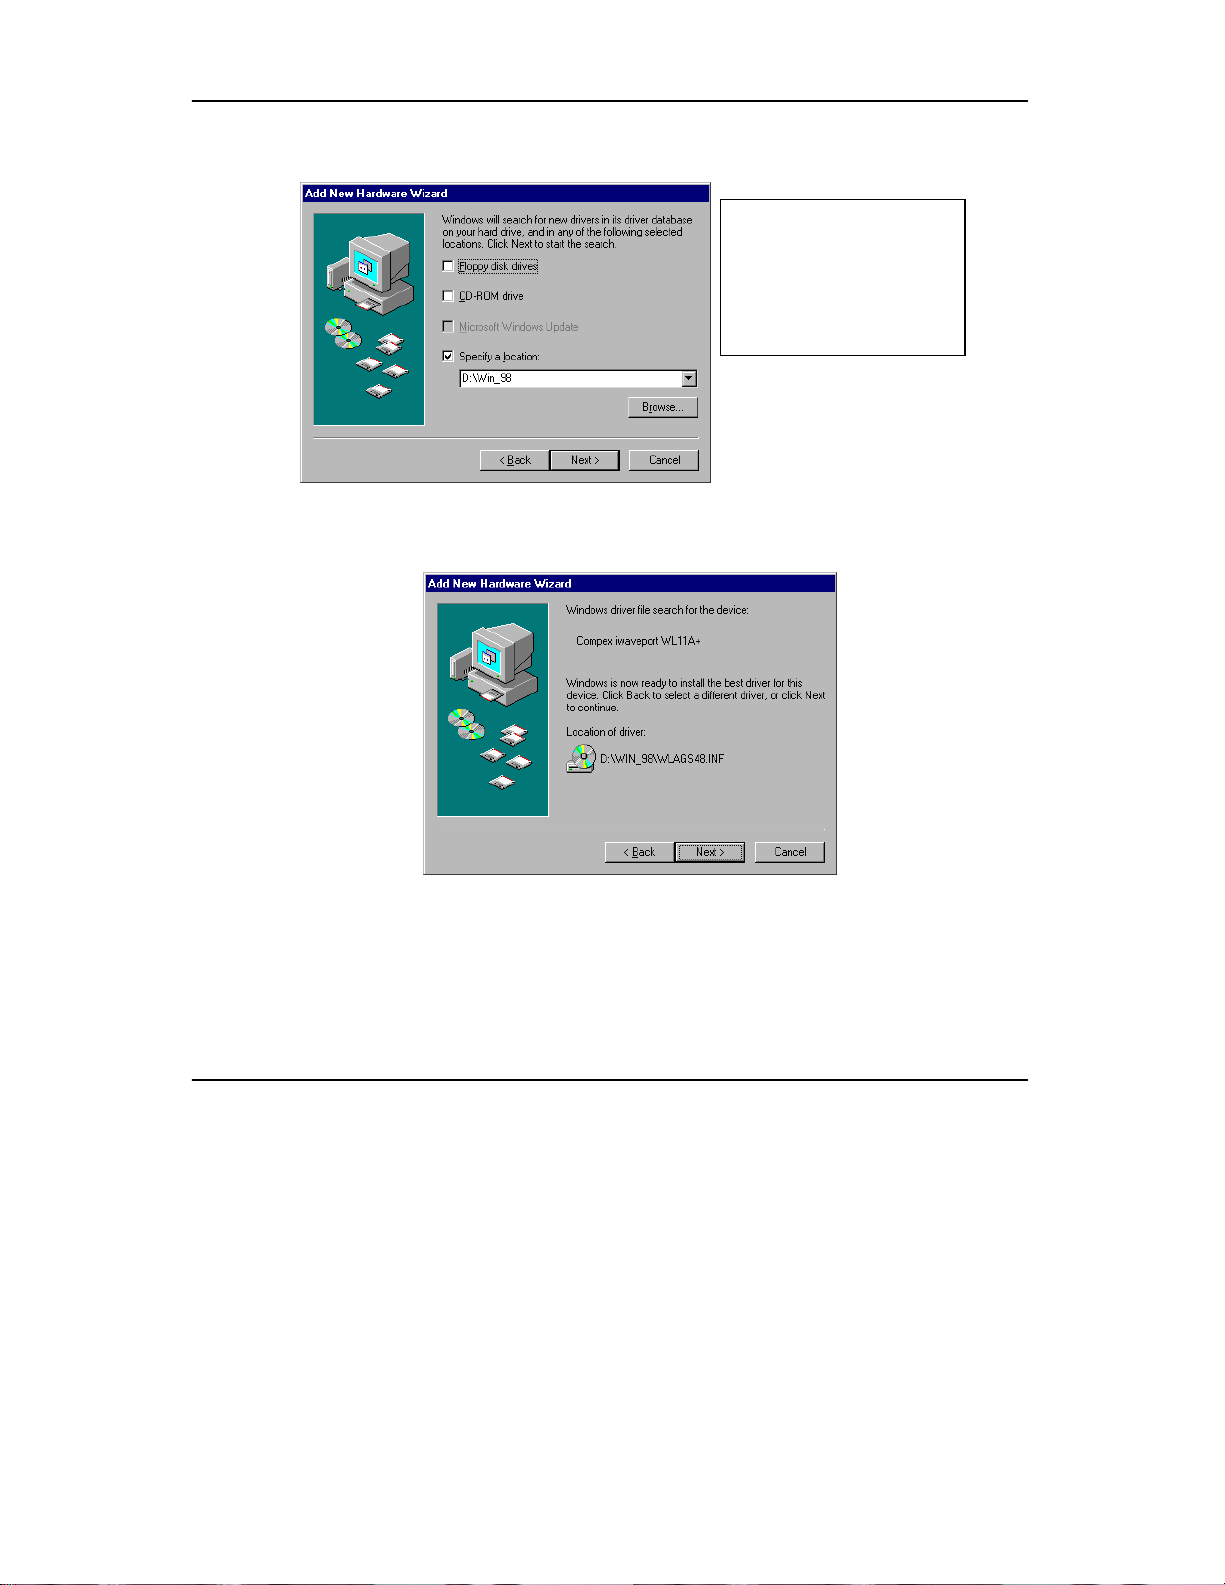
5. In sert the CD into your computer CD-ROM drive. Select Specify a location:, Enter
text shown below accordi ng to your operating system. Click Next.
Type e:\win_95\ for Windows 95
Type e:\win_98\ for Windows 98
Type e:\win_NT\ for Windows NT
Type e:\win_ME\ for Windows ME
Type e:\win_2000\ for Windows2000
Note: e: denotes the CD-ROM drive.
Figure 3.1d Add New Hardware Wizard Screen 3
6. Once Windows detect your drivers, Click Next and your drivers would be installed.
Figure 3.1e Drivers Located
7. When the installation is done and a screen confirming that you have installed
the Compex iWavePort WL11A+ would appear. Click on Finish. After
which, Windows 98 would prompt you to reboot. Please do so accordingly.
8
Page 16
Chapter 3 Hardware and Software Installation
For Windows XP:
To begin:
1. Insert the Compex WL11A+ into the PCMCIA slot of your laptop.
2. The LED will light up indicating that the Compex WL11A+ is receiving
power from your laptop.
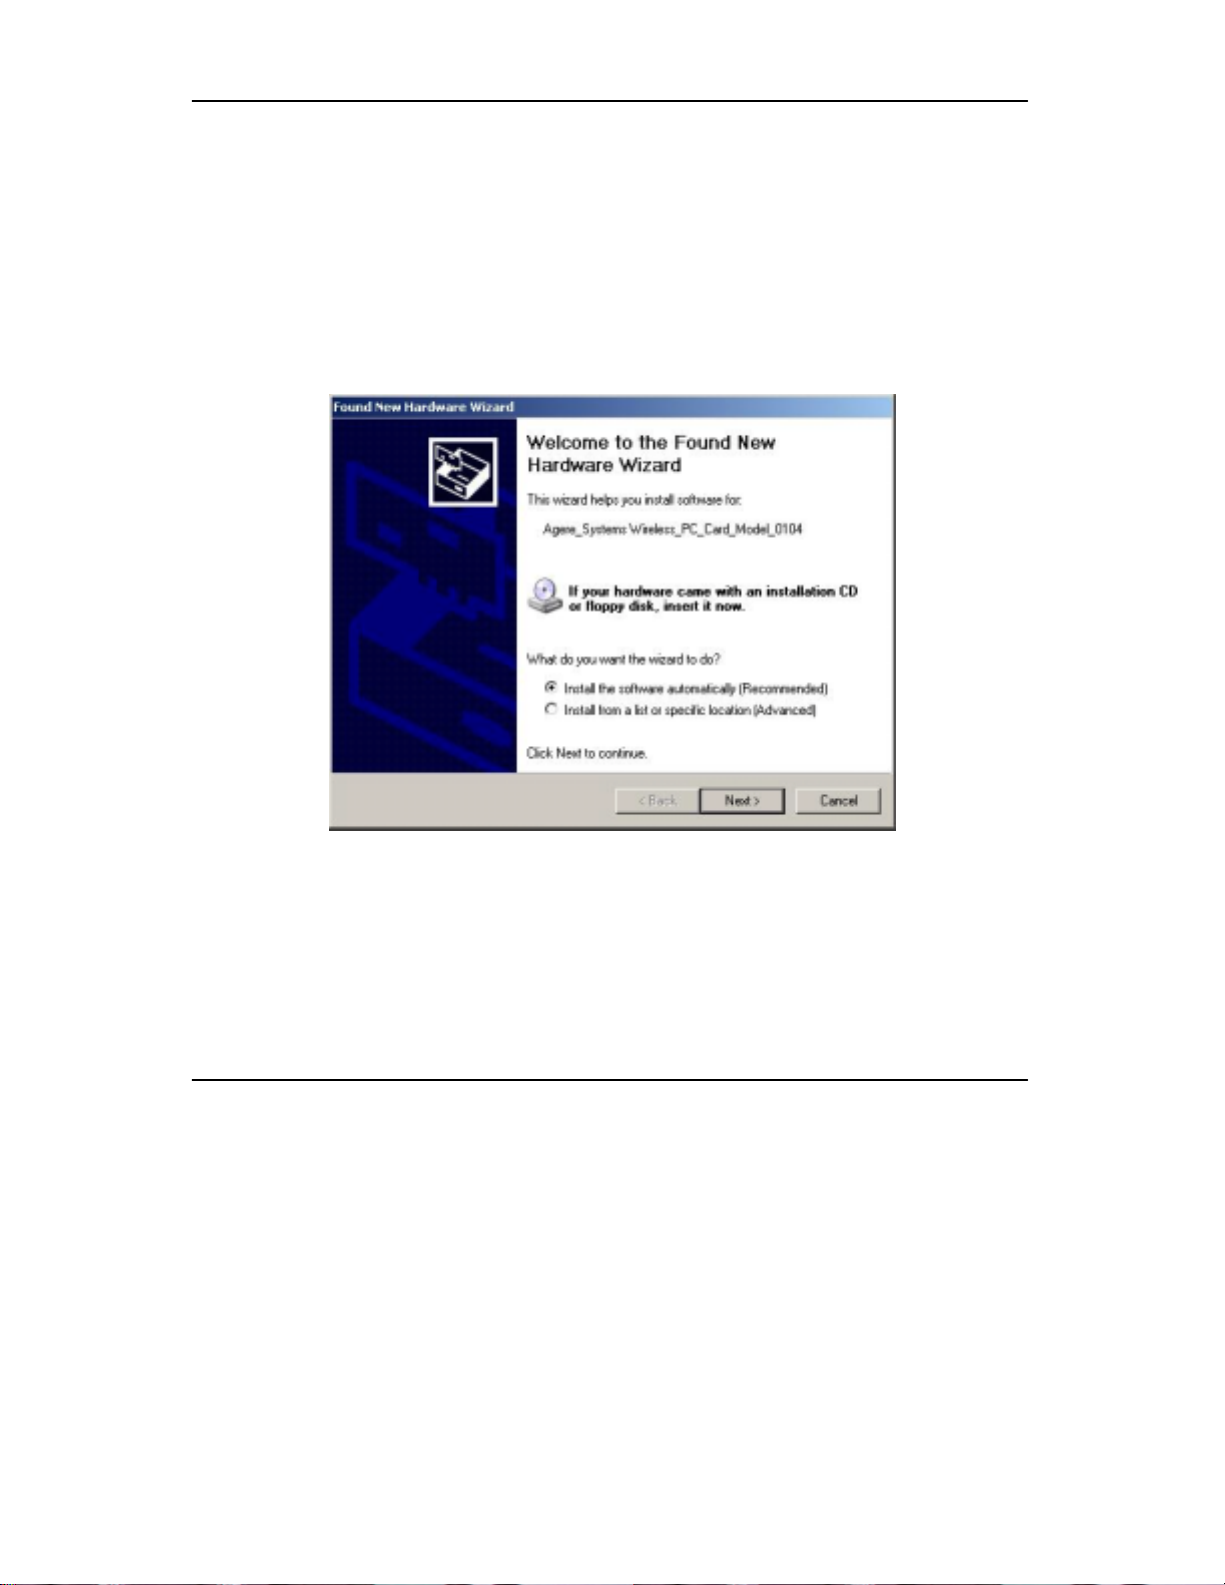
3. Your laptop will detect the new hardware and prompt for the device driver. A
screen would appear like the following figure shown.
Figure 3.1.1a Found New Hardware Wizard Screen 1
4. Insert the CD provided and select install the software automatically
(Recommended). Click Next.
9
Page 17

Chapter 3 Hardware and Software Installation
5. Insert the CD into your CD-ROM drive. Select Include this location in the
search:, enter x:\Win_XP and click Next as shown in Figure 3.1.1b. Note: x
refers to the drive letter of your CD-ROM drive. Alternatively, you can click
on Browse to look for the Win_XP folder.
Figure 3.1.1b Windows Logo Test
6. Windows will copy the necessary files and the installation is completed when
Figure 3.1.1c is shown.
Figure 3.1.1c Installation Complete
10
Page 18

Chapter 3 Hardware and Software Installation
7. Go to My Computer, right mouse click and go to Properties. Select
Hardware and then click Device Manager. Select Network adapters. You
will be able to find Compex iWavePort WL11A+ if it has been successfully
installed. (See Figure 3.1.1d)
Figure 3.1.1d Checking Status of WL11A+ Driver
11
Page 19

Chapter 4 Client Manager Configuration
Chapter 4 Client Manager Configuration
This chapter explains the configuration of the Compex WL11A+ using the Client
Manager program that you will installed.
4.1 Installing the Wireless Client Manager
1.
.Put your installation CD into your CD-rom and a start page in a browser
format like the following figure below would be shown. Click on Drivers
and Utilities and click on Client Manager link. A welcome page would be
shown.
Figure 4.1a Wireless Client Manager Setup Welcome Page
12
Page 20

Chapter 4 Client Manager Configuration
Figure 4.1b Client Manager Utility Setup
2. Click on Next and a License Agreement screen would be displayed. Read the
License Agreement. To agree, click on Yes.
Figure 4.1c License Agreement
13
Page 21
Chapter 4 Client Manager Configuration
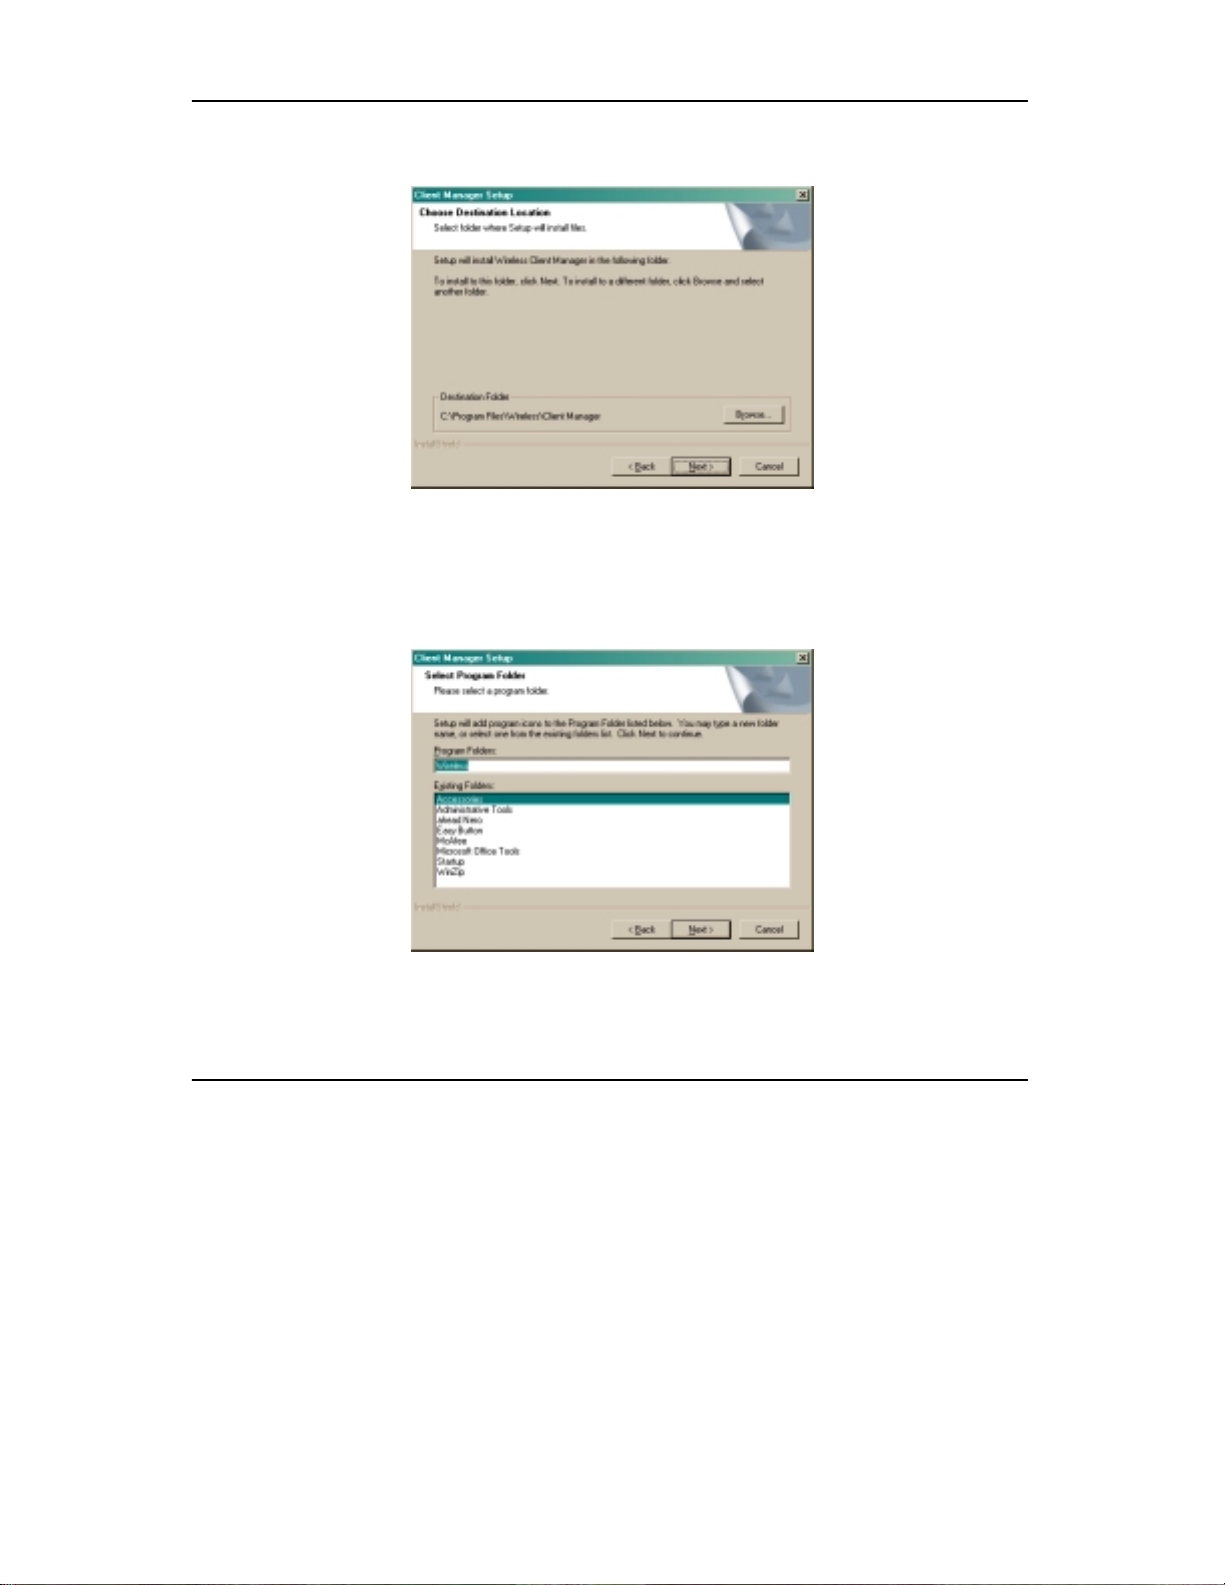
3. Enter the destination folder you want your Client Manager to be installed in
and Click Next.
Figure 4.1d Choose Destination Folder
4. Enter the folder that you want the Client Manager to appear in your Start
Menu and click Next.
Figure 4.1e Select Program Folder
14
Page 22

Chapter 4 Client Manager Configuration
5. Check on the language of your choice and click Next.
Figure 4.1f Select Language
6. Check the box and click on Finish. The Client Manager will start up automatically.
Figure 4.1g Installation Complete
15
Page 23

Chapter 4 Client Manager Configuration
7. Once the installation is completed, you will be able to see the utility icon like the
one below appearing on the system tray, which can be found at the bottom right of the
computer screen. Click on the icon to pull up the Wireless Client Manager.
Figure 4.1h Wireless Client Manager Icon
4.2 Functions of the Wireless Client Manager
Click on the utility icon of the Client Manager on the system tray and a Wireless
Client Manager would be pulled out just like the figure below.
Figure 4.2a Wireless Client Manager Configuration
There are 4 headings in the Wireless Client Manager. They would be discussed in
greater detail in the following pages. You will also be able to switch preset profiles
just by changing the name in the Current Configuration Profile and clicking ok.
4.2.1 Under File Heading
Under File, there are 2 options:
• Disable Radio
• Close Window
Disable Radio: Disables the WL11A+ PCMCIA Card
16
Page 24

Chapter 4 Client Manager Configuration
Close Window: Closes the Wireless Client Manager window and minimizes it into
the system tray.
Figure 4.2.1a Wireless Client Manager Under File Configuration
4.2.2 Under Actions Heading
Under Actions, there are 2 options:
• Add/Edit Configuration Profile
• Select Configuration Profile
Figure 4.2.2a Wireless Client Manager Under Actions Configuration
17
Page 25

Chapter 4 Client Manager Configuration
Add/Edit Configuration Profile:
The Add/Edit Configuration Profile allows the user to set the PCMCIA card as an
Access Point, Residential Gateway, Peer to Peer Group or Act as a Base station,
accordingly.
Note:
The Add/Edit Configuration Profile is not available for Windows XP.
The networking configuration of WL11A+ would be done in
Windows XP. (See Chapter 6 Wireless Network Configuration in
Windows XP) The Client Manager program can still be used for
diagnostics.
The different connections are shown in the following diagrams for you to easily
understand how to configure your Compex WL11A+. Note: Residential Gateway and
Access Point serve the same function.
WL11A+
Access Point
WL11A+
Figure 4.2.2b Access Point/Residential Gateway Mode
18
Page 26

Chapter 4 Client Manager Configuration
WL11A+
WL11A+
WL11A+
WL11A+
Figure 4.2.2c Peer to Peer Group Mode
WL11A+
Base Station
WL11A+
Figure 4.2.2d Act as Base Station Mode
19
Page 27

Chapter 4 Client Manager Configuration
Select Add/Edit Configuration Profile to d isplay the following screen. You can add
a new profile by clicking the Add Button or edit the profile by clicking the Edit
Button. You can also delete the profile by clicking on the Delete button.
Figure 4.2.2e Add/Edit Configuration Profile
Click Add and type in a profile name. Select the appropriate network configuration
setup as shown in the diagrams earlier. Click Next.
Figure 4.2.2f Add ESSID
20
Page 28
Chapter 4 Client Manager Configuration
Type in the Network Name (ESSID) or press Scan to allow automatic scanning of all
available networks. Note: The Network Name is case sensitive. Ensure your Network
Name is exactly the same as your access point’s network name.
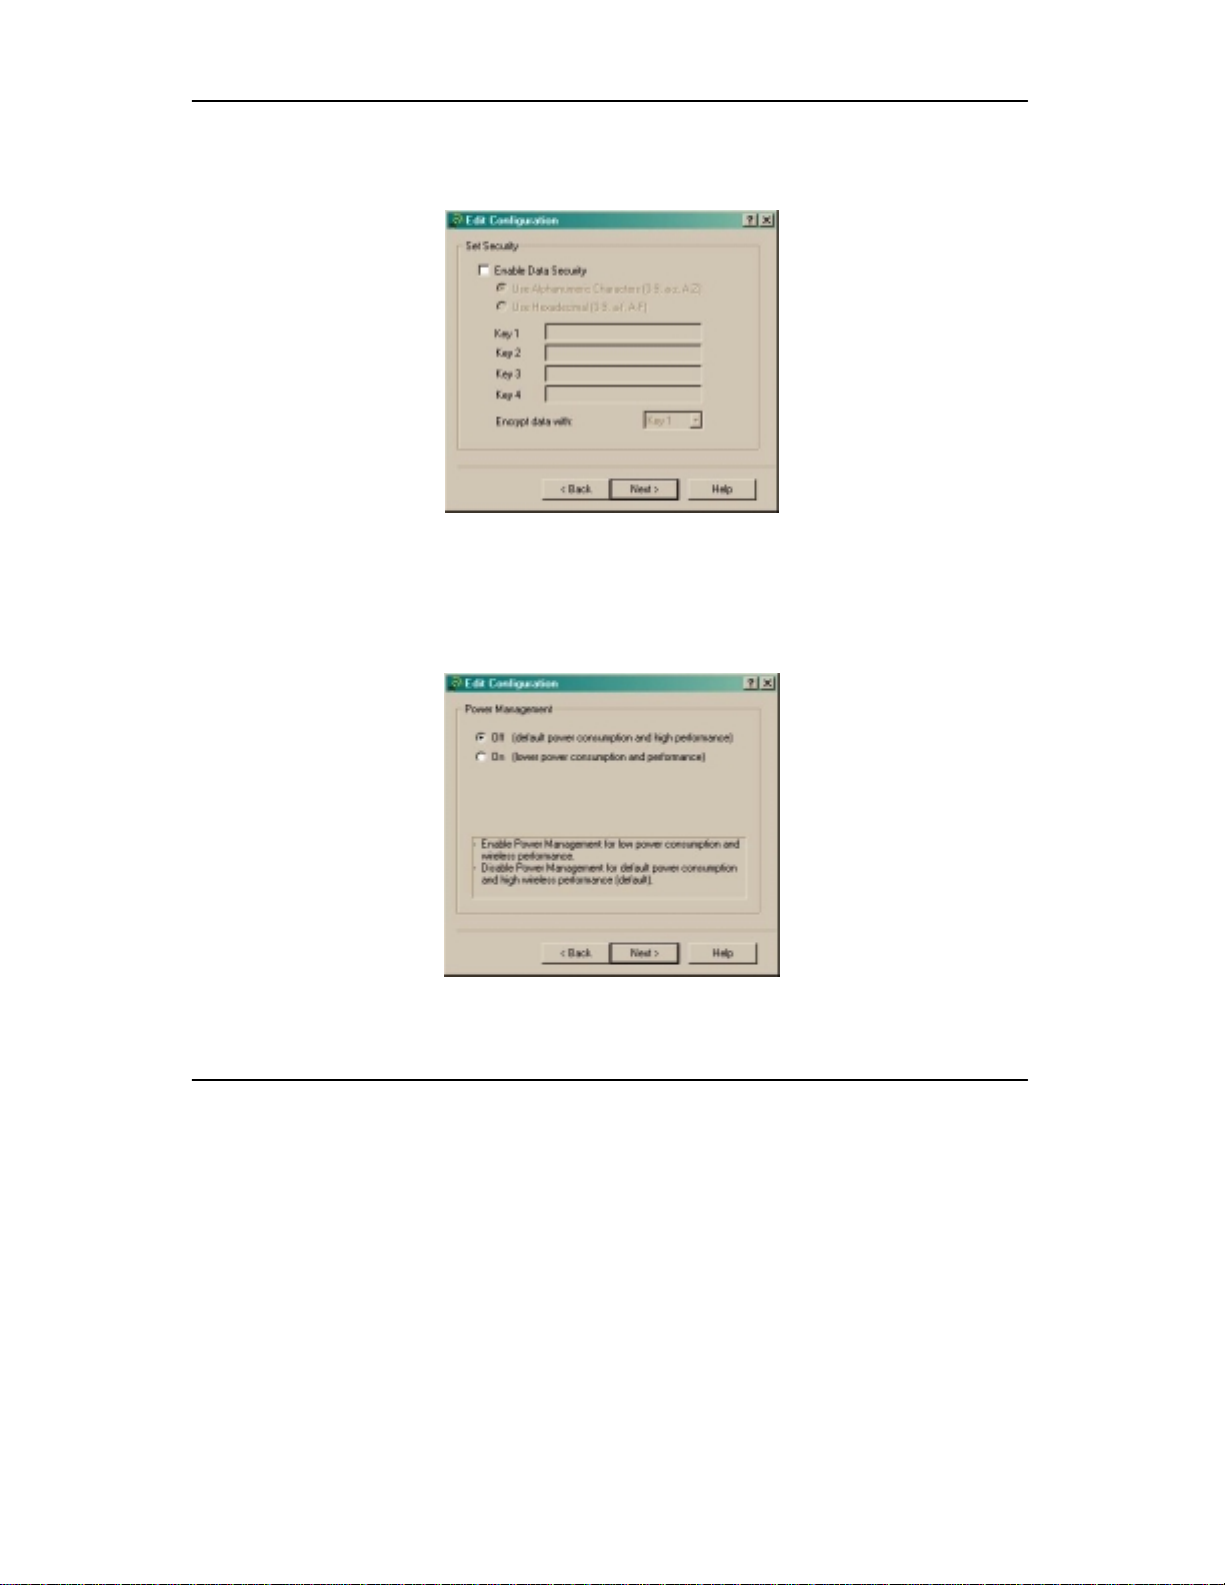
Figure 4.2.2g Set Security Keys
If you want data security, check the corresponding box and enter your keys. Make sure
that your access points have the same keys as your Compex WL11A+ in order for
them to communicate. You can fill in a few keys and choose the key to use in the
encrypt data with: option.
Figure 4.2.2h Power Management
Choose your Power Management configuration and click Next.
21
Page 29
Chapter 4 Client Manager Configuration
Note: Selecting On (Lower power consumption and performance) enables your
laptop to use less battery power to power your WL11A+,thus increasing the battery
duration.
Figure 4.2.2i Profile Configuration Done
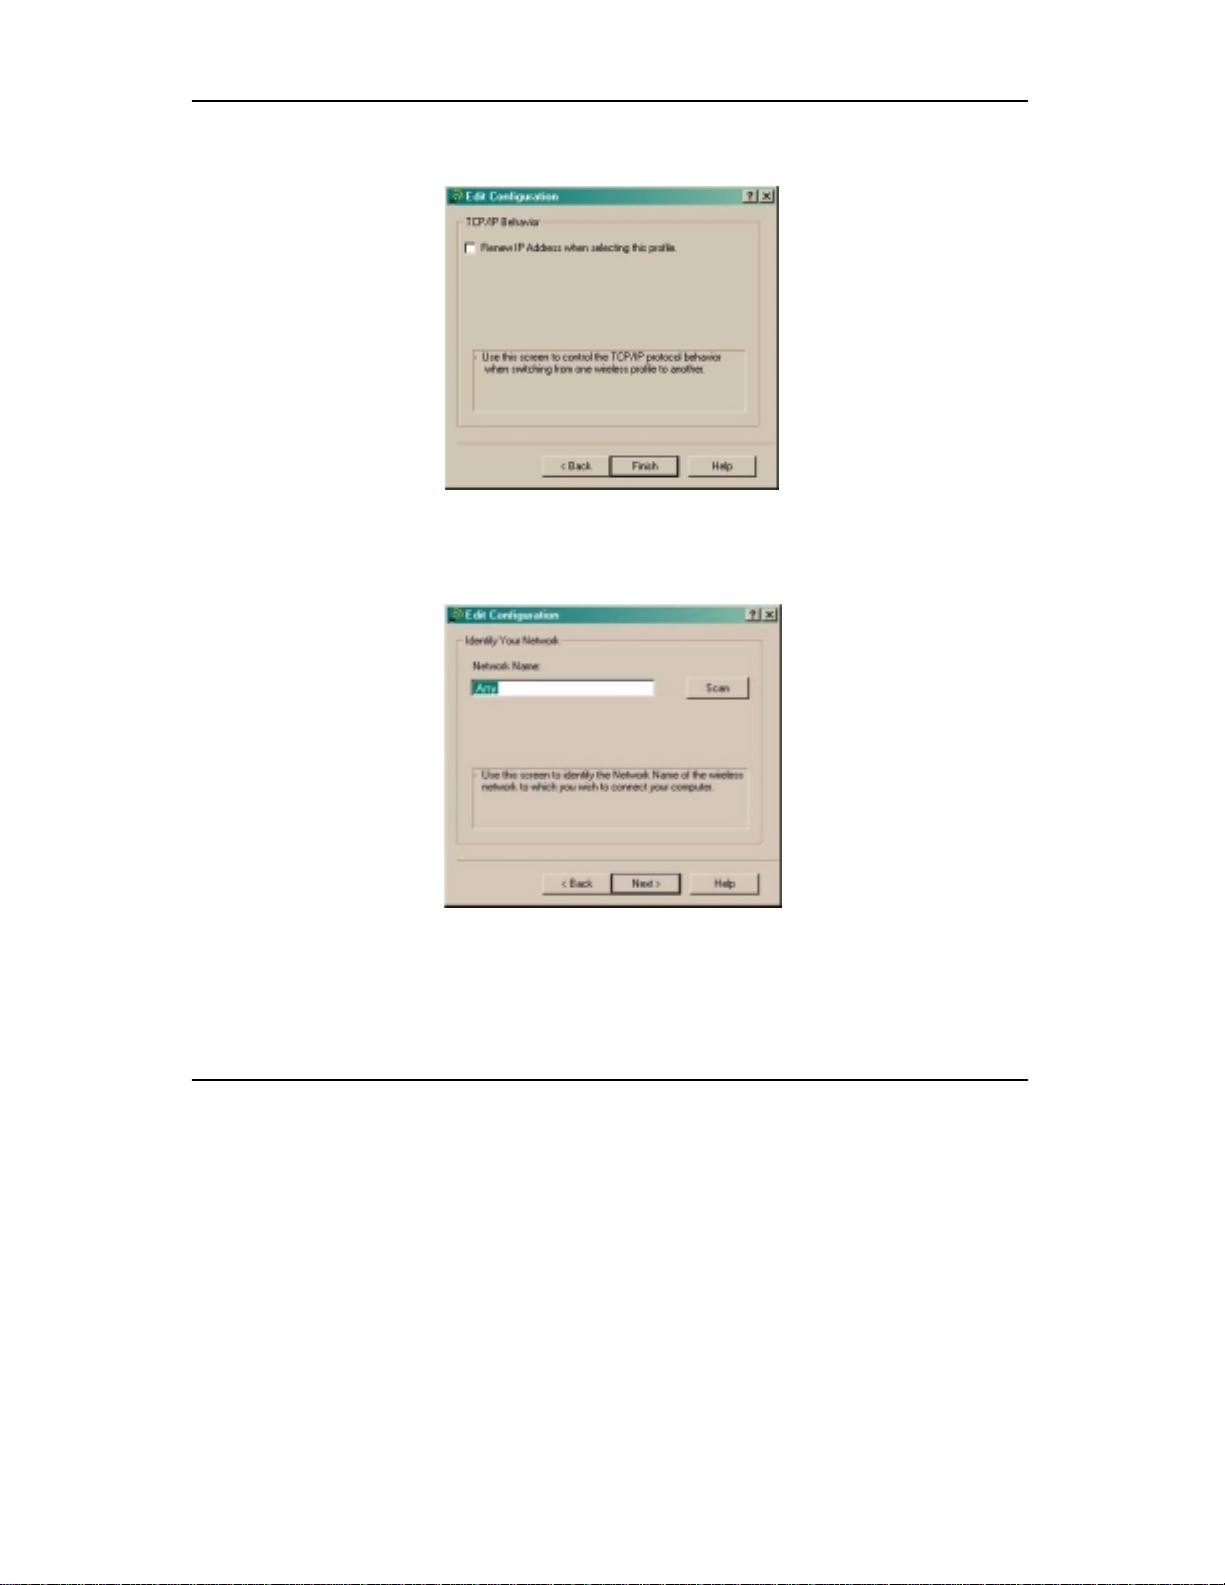
Click Finish to end the configuration process. Check Renew IP Address when
selecting this profile if there is a change in IP address.
Figure 4.2.2j Entering ESSID and Channel Number for Peer to Peer and Base
Station Configuration
For Peer to Peer Group and Base Station Configuration, you are allowed to change the
channel number. Usually, this would be automatically detected and configured
between the peers. You can also choose a particular channel if you prefer.
22
Page 30

Chapter 4 Client Manager Configuration
Select Configuration Profile:
This enables you to select pre-programmed profiles that you have already setup, to
avoid the hassle of changing the settings once you reach a different network or change
to a different function.
Note: Under Windows XP, the Add/Edit Configuration Profile is not available.
Windows XP use their own network connection settings to configure the Compex
WL11A+. You can still use the Client Manager to diagnose the signal strength that
the Compex WL11A+ is getting.
4.2.3 Under Advanced Headings
Under Advanced, there are 3 options:
• Card Diagnostic s
• Link Test
• Site Monitor
These options are mainly for advanced users who want to test out the card through
various formats. The Compex WL11A+ provides that option for these users.
Figure 4.2.3a Wireless Client Manager Under Advanced Configuration
Card Diagnostics:
23
Page 31

Chapter 4 Client Manager Configuration
This allows the user to test the card to verify that the various parameters as shown in
the figure below are working. Click on Test Card Now button to start the diagnosis.
The self test results would be shown on the same screen. If more help is needed, click
on the Advice button. If you want a report on the problem, click Generate Report
and save the report in .txt file format.
Figure 4.2.3b Wireless Client Manager Diagnose
Under Link Test there are 3 different tabs as shown in the figure below:
• Test Results
• Test History
• Logging Settings
24
Page 32

Chapter 4 Client Manager Configuration
Figure 4.2.3c Test Results
Test Results:
This diagnostic tool helps indicate the signal strength and the noise level between the
test partner (access points, another WL11A+…) and the Compex WL11A+ on your
laptop. You can also Freeze the readings by clicking on the Freeze but ton found on
the right hand bottom of the screen. To reset the total messages sent, click Reset.
25
Page 33
Chapter 4 Client Manager Configuration
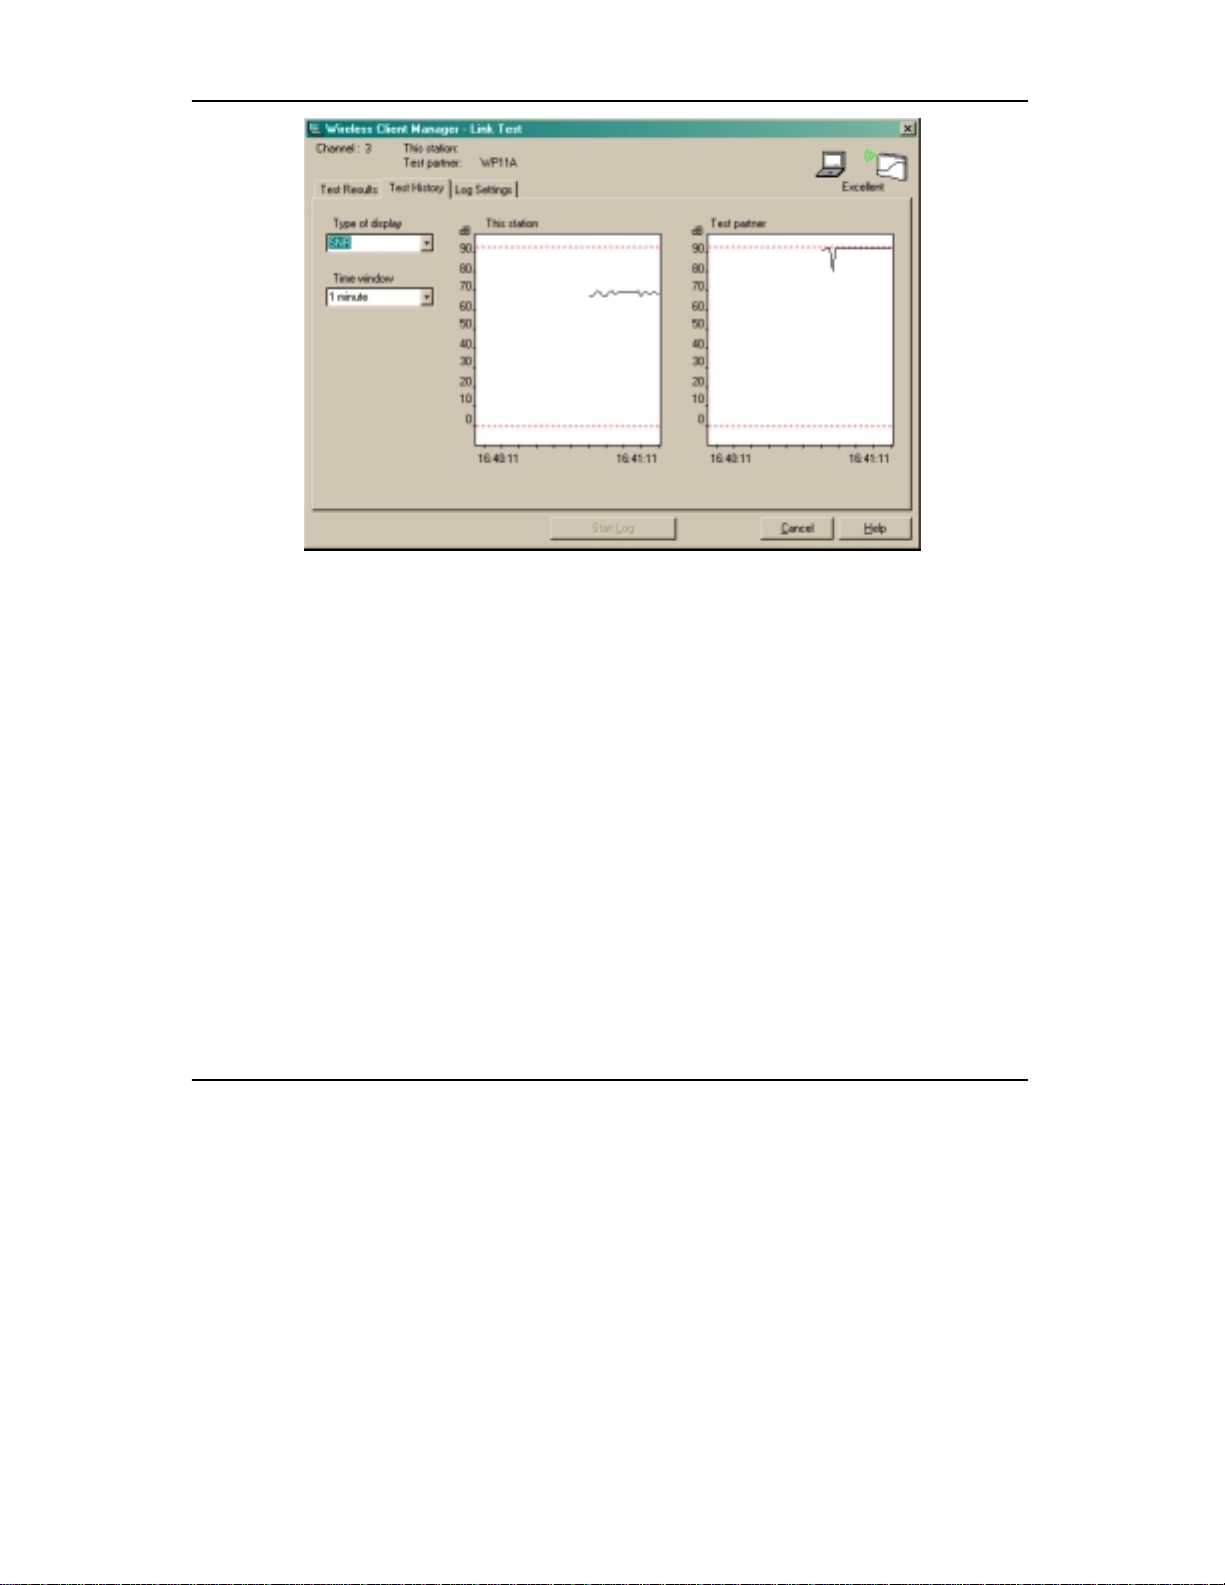
Figure 4.2.3d Test History
Test History:
This diagnostic tool allows the users to monitor the signal strength and noise of
Compex WL11A+ and the test partner over a period of time. Graphs plotted can have
different parameters as the user chooses under the options Type of Display and Time
Window on the left hand corner of the screen.
26
Page 34

Chapter 4 Client Manager Configuration
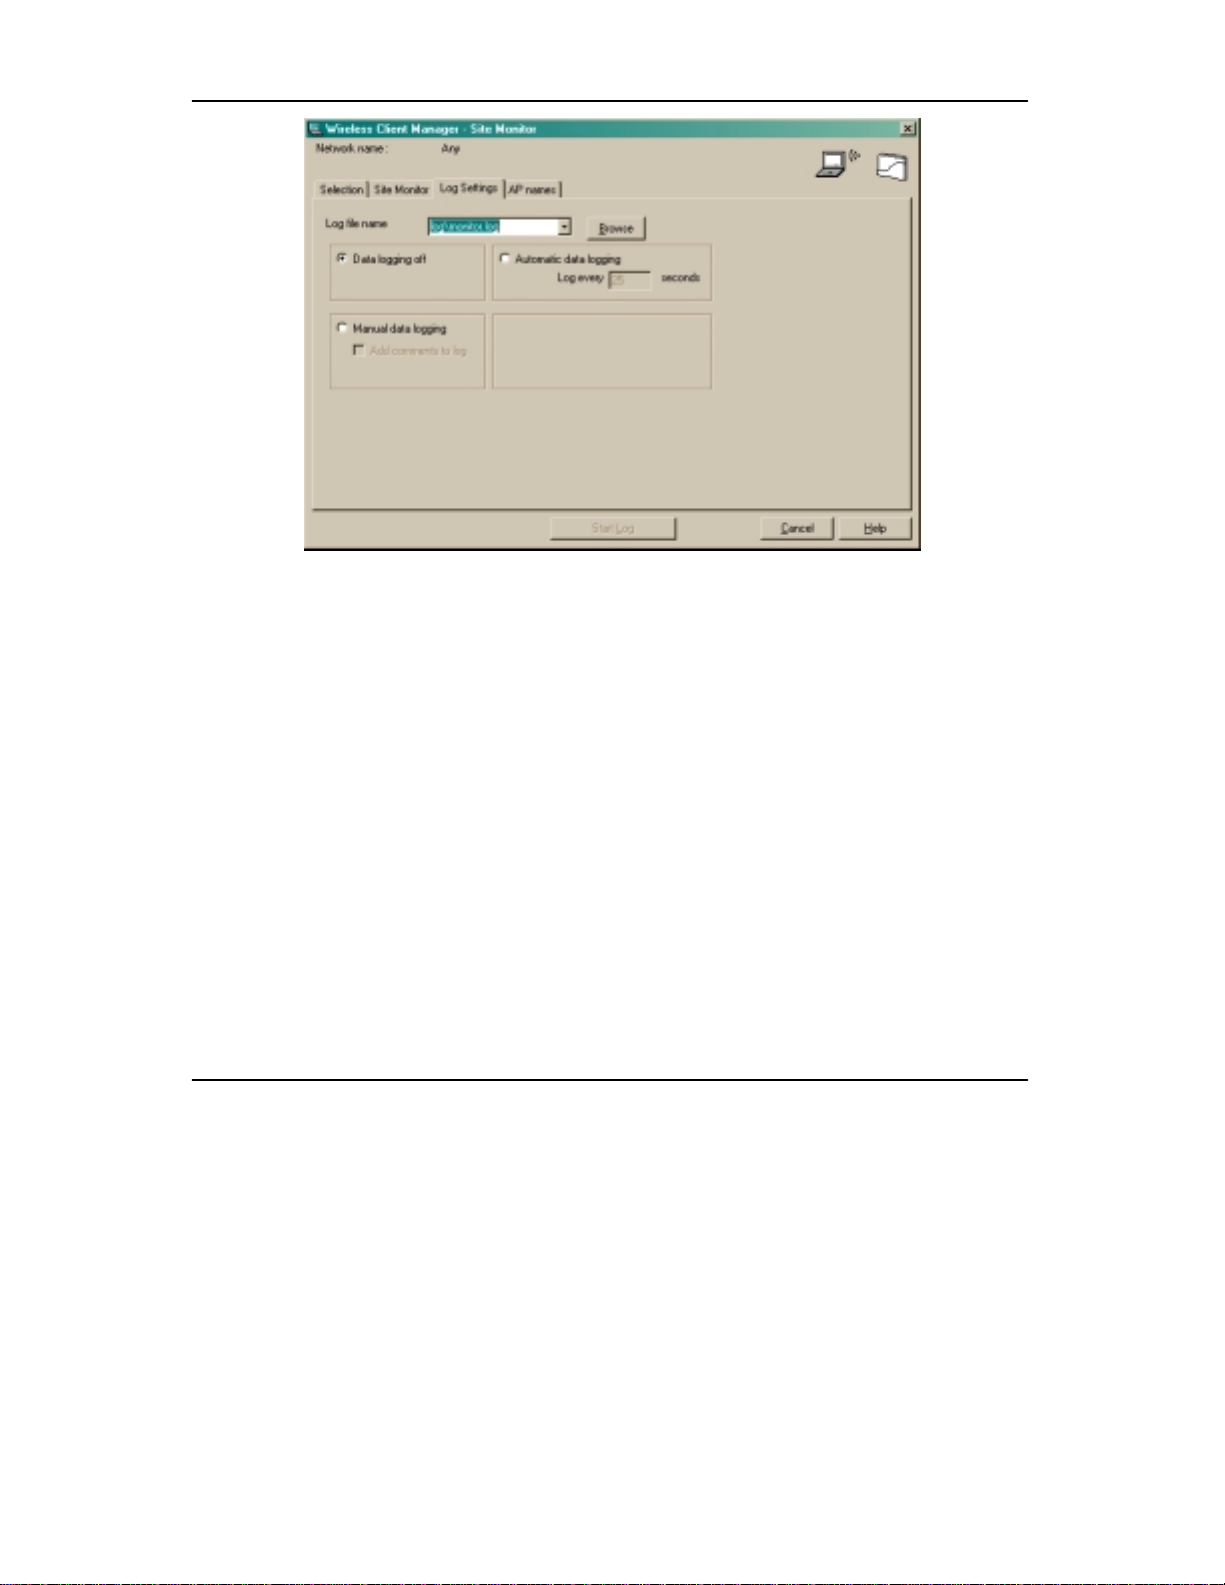
Figure 4.2.3e Log Settings
Log Settings:
This feature allows users to log in data on the performance of the Compex WL11A+.
To save the log file, input the file name and click on Browse to navigate around your
computer’s hard disk to find a folder to store your log file.
Under Site Monitor there are 4 options:
• Selection
• Site Monitor
• Log Settings
• AP Names
This section allows users to monitor the access points (APs) and other IEEE 802.11.b
devices that the Compex WL11A+ is able to detect within it’s radius of operation.
27
Page 35

Chapter 4 Client Manager Configuration
Figure 4.2.3f AP Names
Selection:
This feature allows users to monitor the networks detected by the Compex WL11A+
that WL11A+. To redetect all available networks in the radius of operation, simply
click Scan Now.
28
Page 36

Chapter 4 Client Manager Configuration
Figure 4.2.3g Site Monitor
Site Monitor:
Every networking product has a unique MAC address. The Site Monitor feature
allows users to sort out all networking devices the Compex WL11A+ is able to detect,
according to specific criterias. The Freeze button is able to capture the signal to noise
ratio (SNR) and other time variable constants. The Reset Button allows users to start
the monitoring process again.
29
Page 37
Chapter 4 Client Manager Configuration
Figure 4.2.3h Log Settings
Log Settings:
This enables the user to log in the results from the tests in Site Monitor. It also allows
the user to specify the recording format.
30
Page 38

Chapter 4 Client Manager Configuration
Figure 4.2.3i AP Names
AP Names:
AP Names show the access points (APs) that is detected by the Compex WL11A+.
The user is also able to enter MAC address for other networking products by entering
their MAC addresses and AP names in the blank fields available on the right. Click
Add to Table to add the MAC address to the MAC address list.
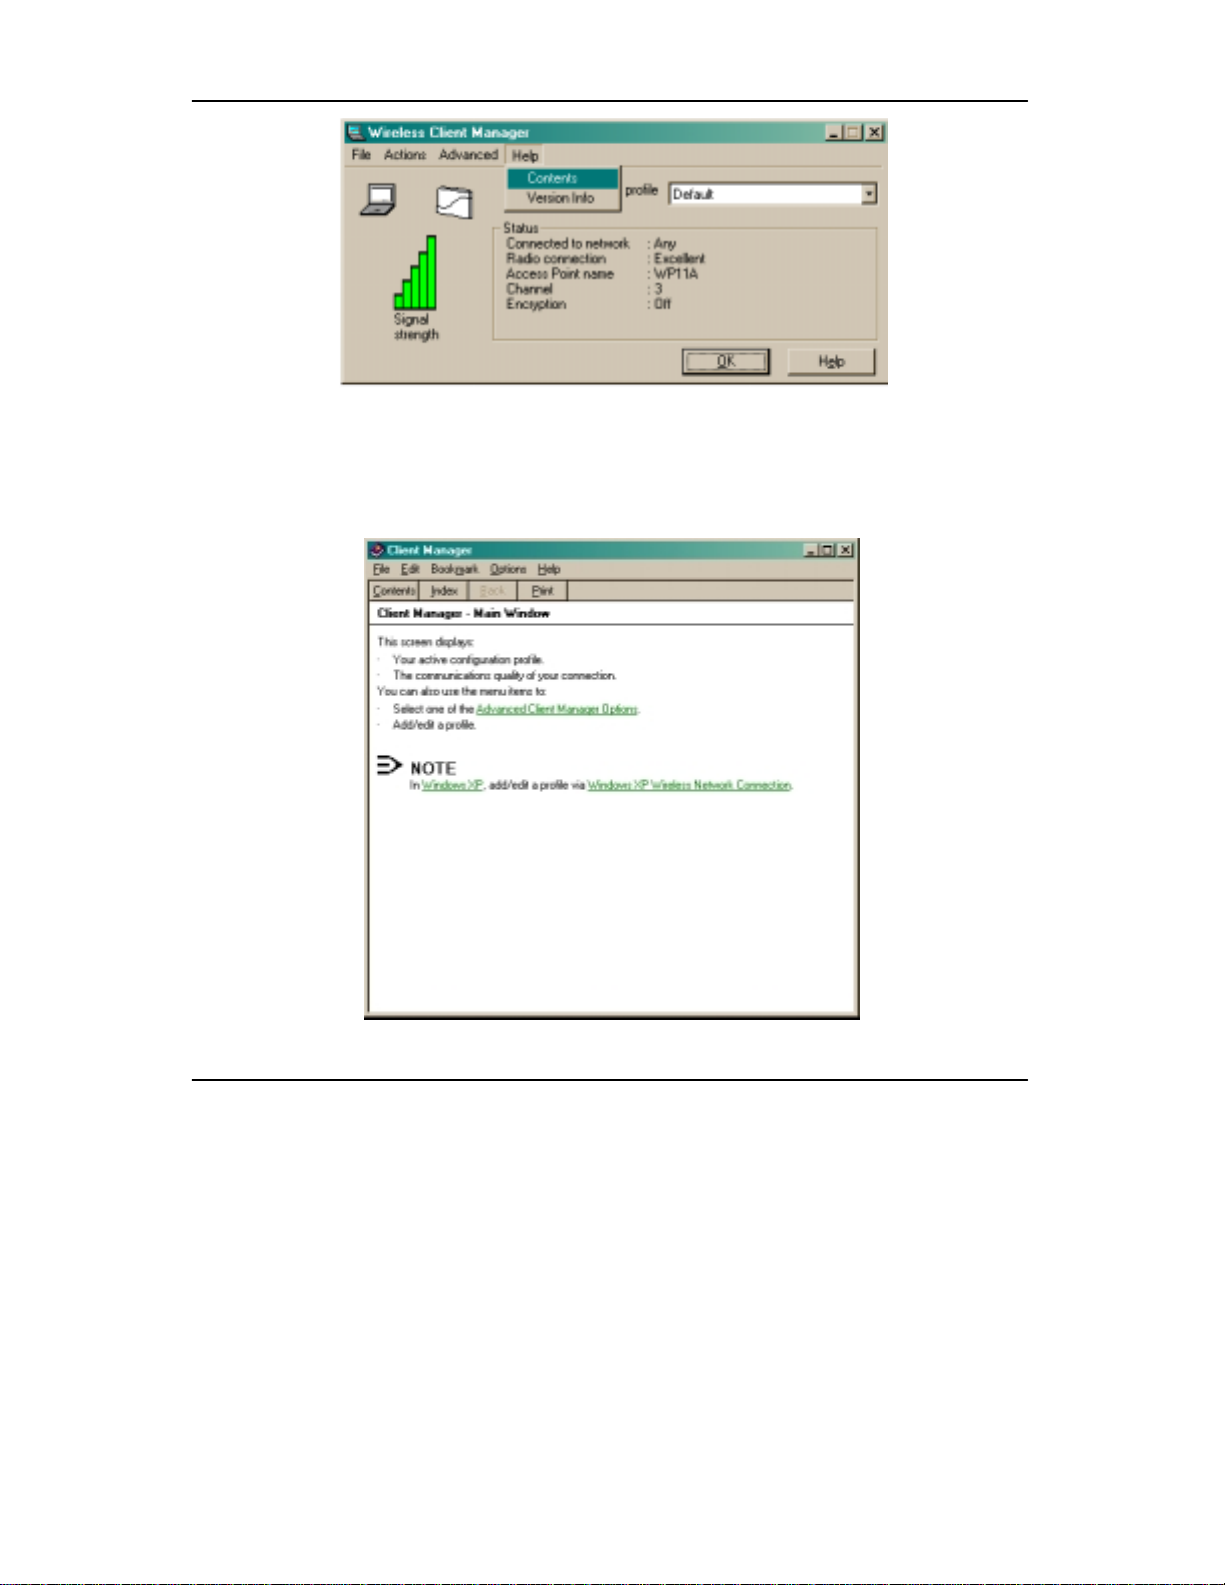
4.2.4 Under Help Headings
Under Help, we have 2 options:
• Contents
• Version Info
31
Page 39
Chapter 4 Client Manager Configuration
Figure 4.2.4a Wireless Client Manager Under Help Configura t ion
Contents: Clicking on Contents will bring up a Help file with an index of words and
instructions.
Figure 4.2.4b Client Manager Help Index
32
Page 40

Chapter 4 Client Manager Configuration
Version Info: Displays the Utility Version, the Driver Version, the Card
Specifications of the Compex WL11A+, and the Firmware that is currently loaded
onto the WL11A+. Please refer to Compex’s website at www.compex.com.sg
www.cpx.com
for the latest release of newer drivers and firmwares.
or
Figure 4.2.4c Version Info
33
Page 41

Chapter 5 TCP/IP Configuration
Chapter 5 TCP/IP Configuration
This chapter discusses the configuratio n of your TCP/IP connec tion of your Compex
WL11A+.
Upon the successful installation of the Compex WL11A+, the Compex WL11A+
network adapter will be added to your network folder. To configure TCP/IP
connection settings for the Compex WL11A+, please follow the steps listed below. If
you are using Windows 2000/XP, please go to section 5.2.
5.1 Adding TCP/IP network protocol for Windows 98/98SE/ME
1. From the Windows 98/98SE/ME Start Button, select Settings, and then
Control Panel.
2. Double-click on the Network icon and a Network screen will appear as
shown in Figure 5.1a.
Figure 5.1a Network Configuration
34
Page 42

Chapter 5 TCP/IP Configuration
3. Go through the list of Network Components in the Network window
Configuration tab. If TCP/IP is not installed, click on Add to start the
installation
4. Select Protocol and click Add.
Figure 5.1b Select Network Component Type
5. Select Microsoft and TCP/IP in the Manufacturers and Network Protocols
columns respectively. Click OK.
Figure 5.1c Select Net work Protocol
35
Page 43

Chapter 5 TCP/IP Configuration
6. After TCP/IP is installed, go back to the Network screen and select TCP/IP in
the list of Network Components.
Figure 5.1d Select TCP/IP protocol
36
Page 44
Chapter 5 TCP/IP Configuration
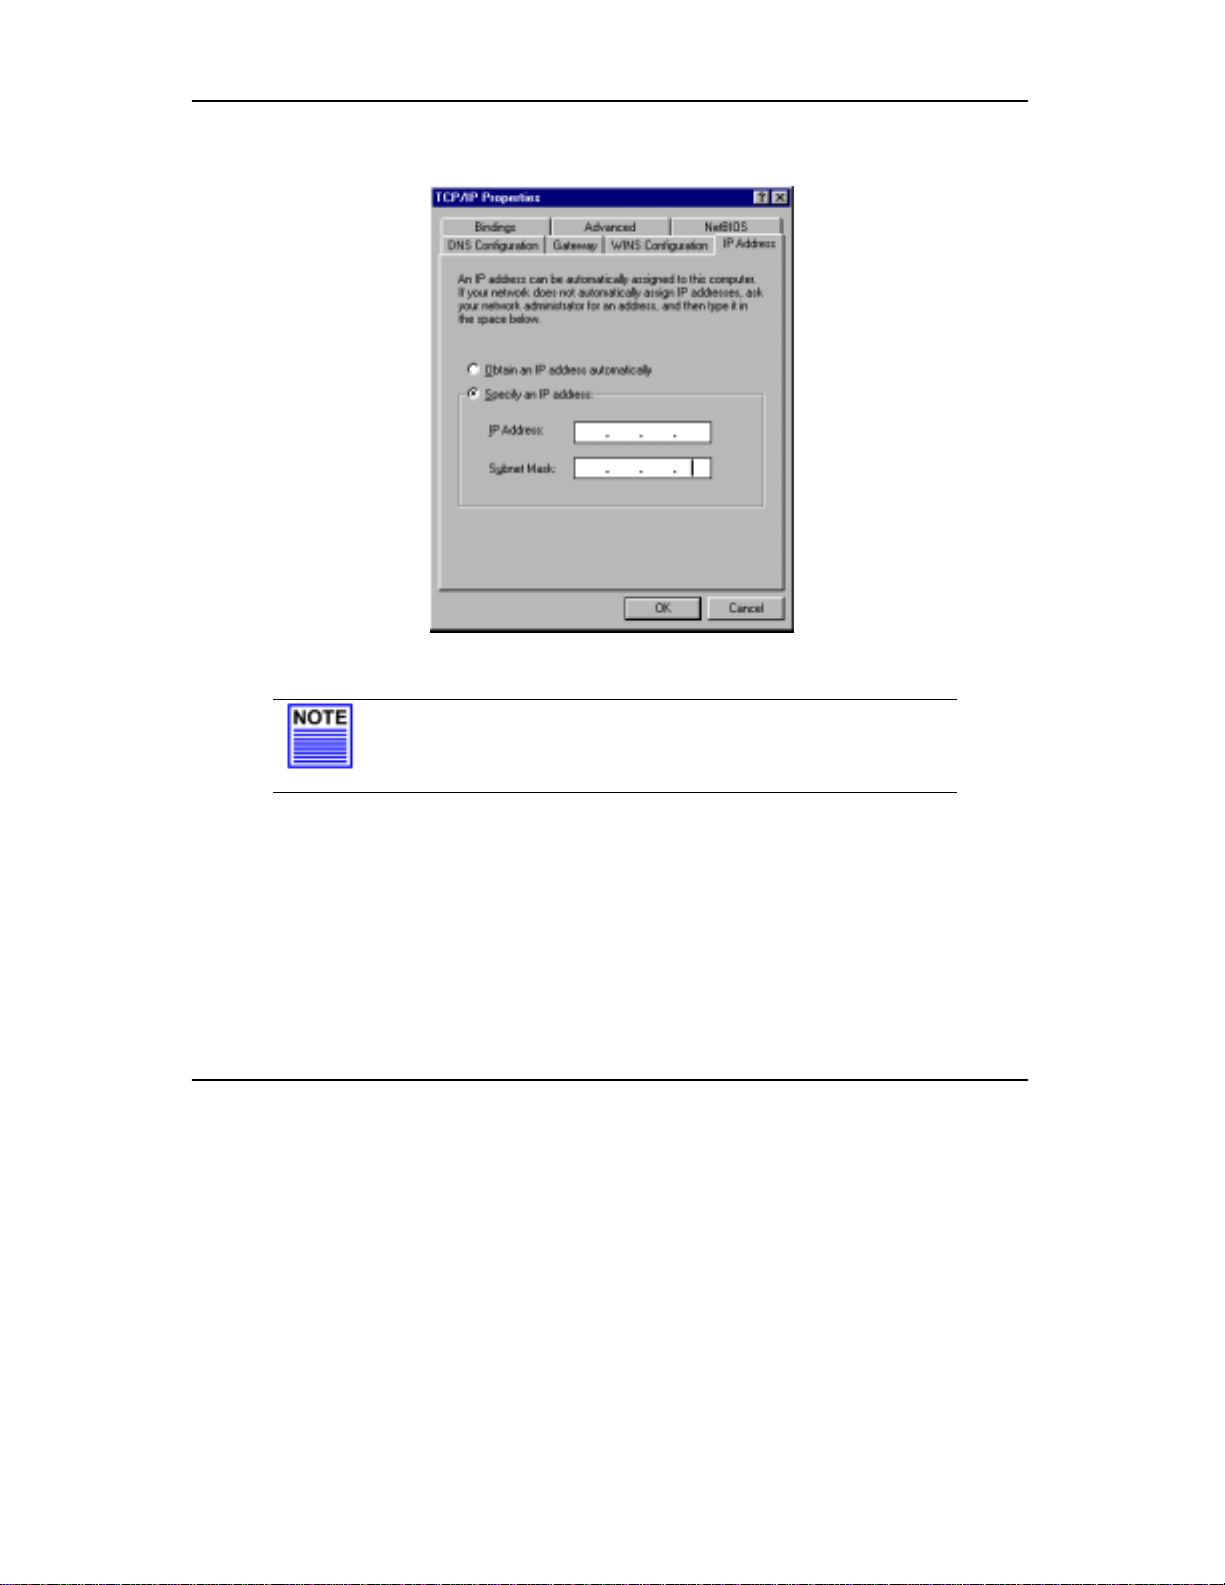
7. Click Properties, and configure the settings in each of the TCP/IP Properties
window.
Figure 5. 1e IP Address Configuration
Note:
Please check with your system administrator or Internet Service
Provider for more information on the TCP/IP parameters.
37
Page 45

Chapter 5 TCP/IP Configuration
5.2 TCP/IP network protocol configuration for Windows XP
For Windows XP users, you do not need to add the TCP/IP protocol as it is already
setup when a network card is installed. Therefore only the configuration for TCP/IP is
needed.
1. From the Windows XP Start menu, click Control Panel, followed by
Network and Internet Connections. Then click Network Connections and
your computer will display a screen similar to Figure 5.2b.
Figure 5.2a Network Connections Icon
38
Page 46
Chapter 5 TCP/IP Configuration
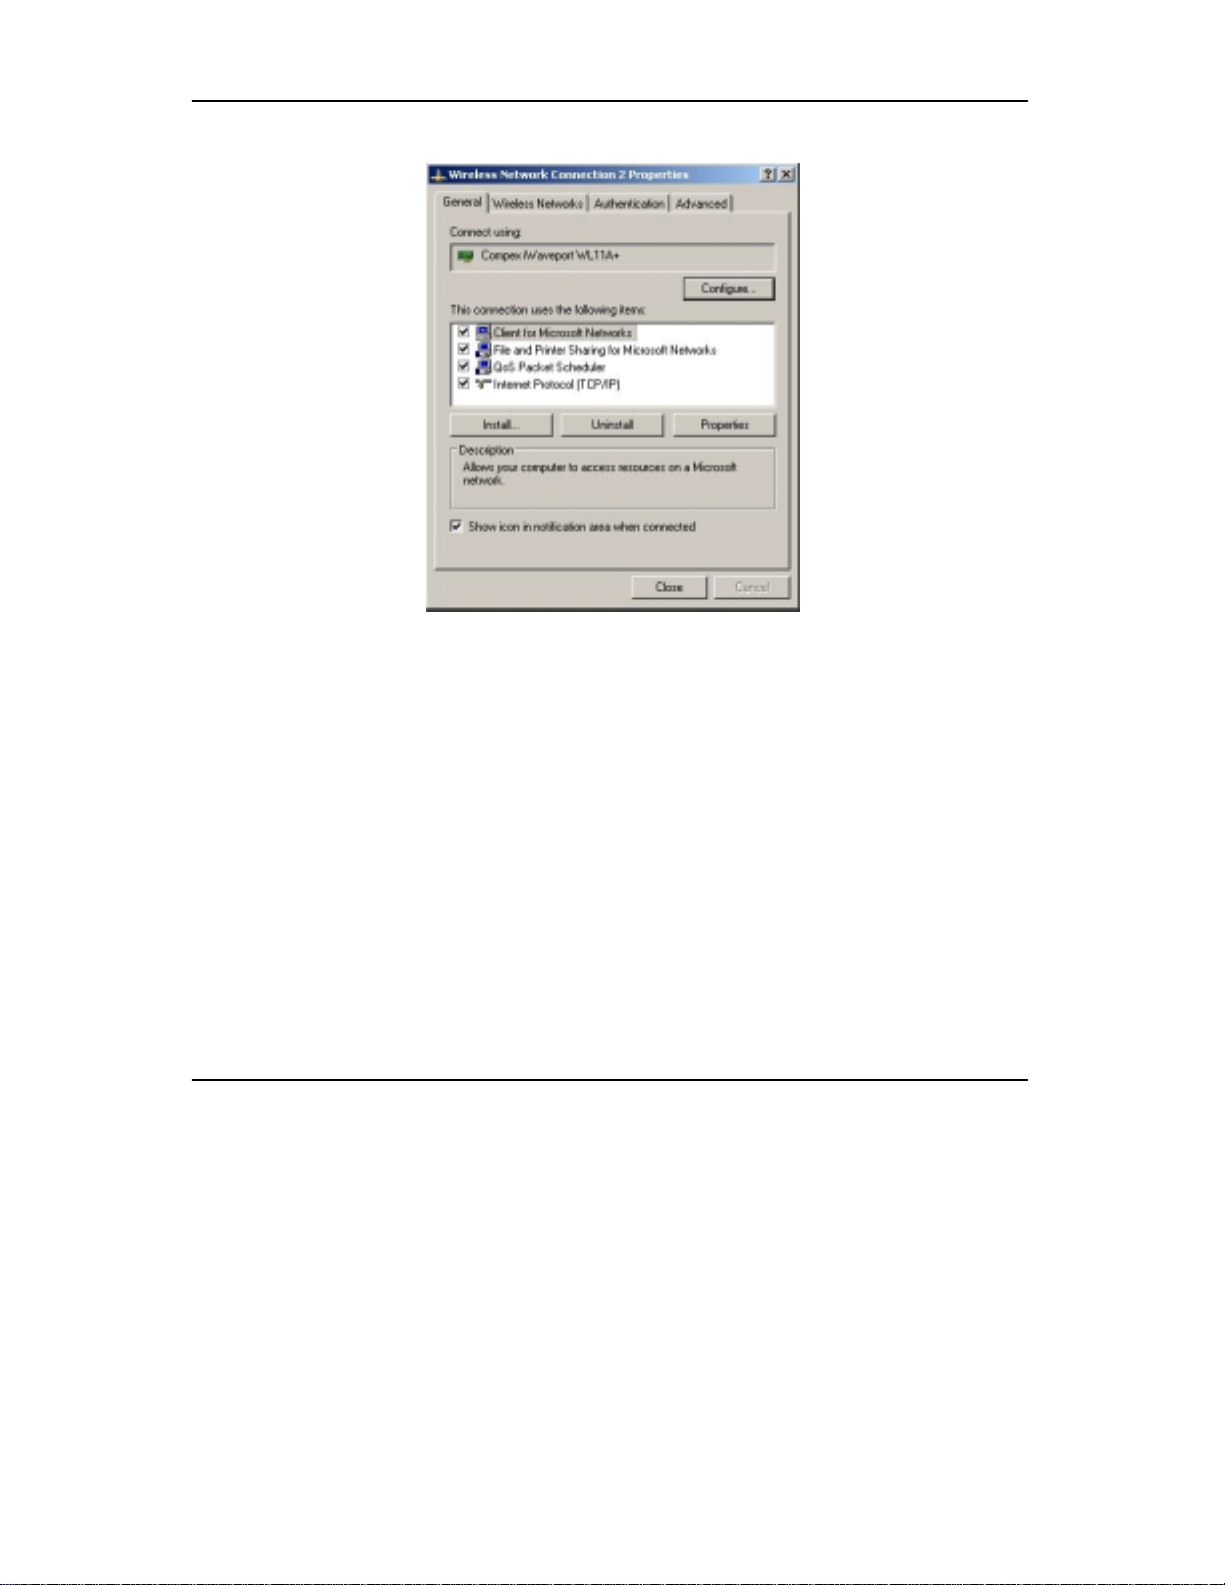
Figure 5.2b WL11A+ Network Connection
2. Right click on the Wireless Network Connections with the Compex
iWavePort WL11A+ and click on Properties. Select the Internet Protocol
(TCP/IP) and click Properties.
39
Page 47
Chapter 5 TCP/IP Configuration
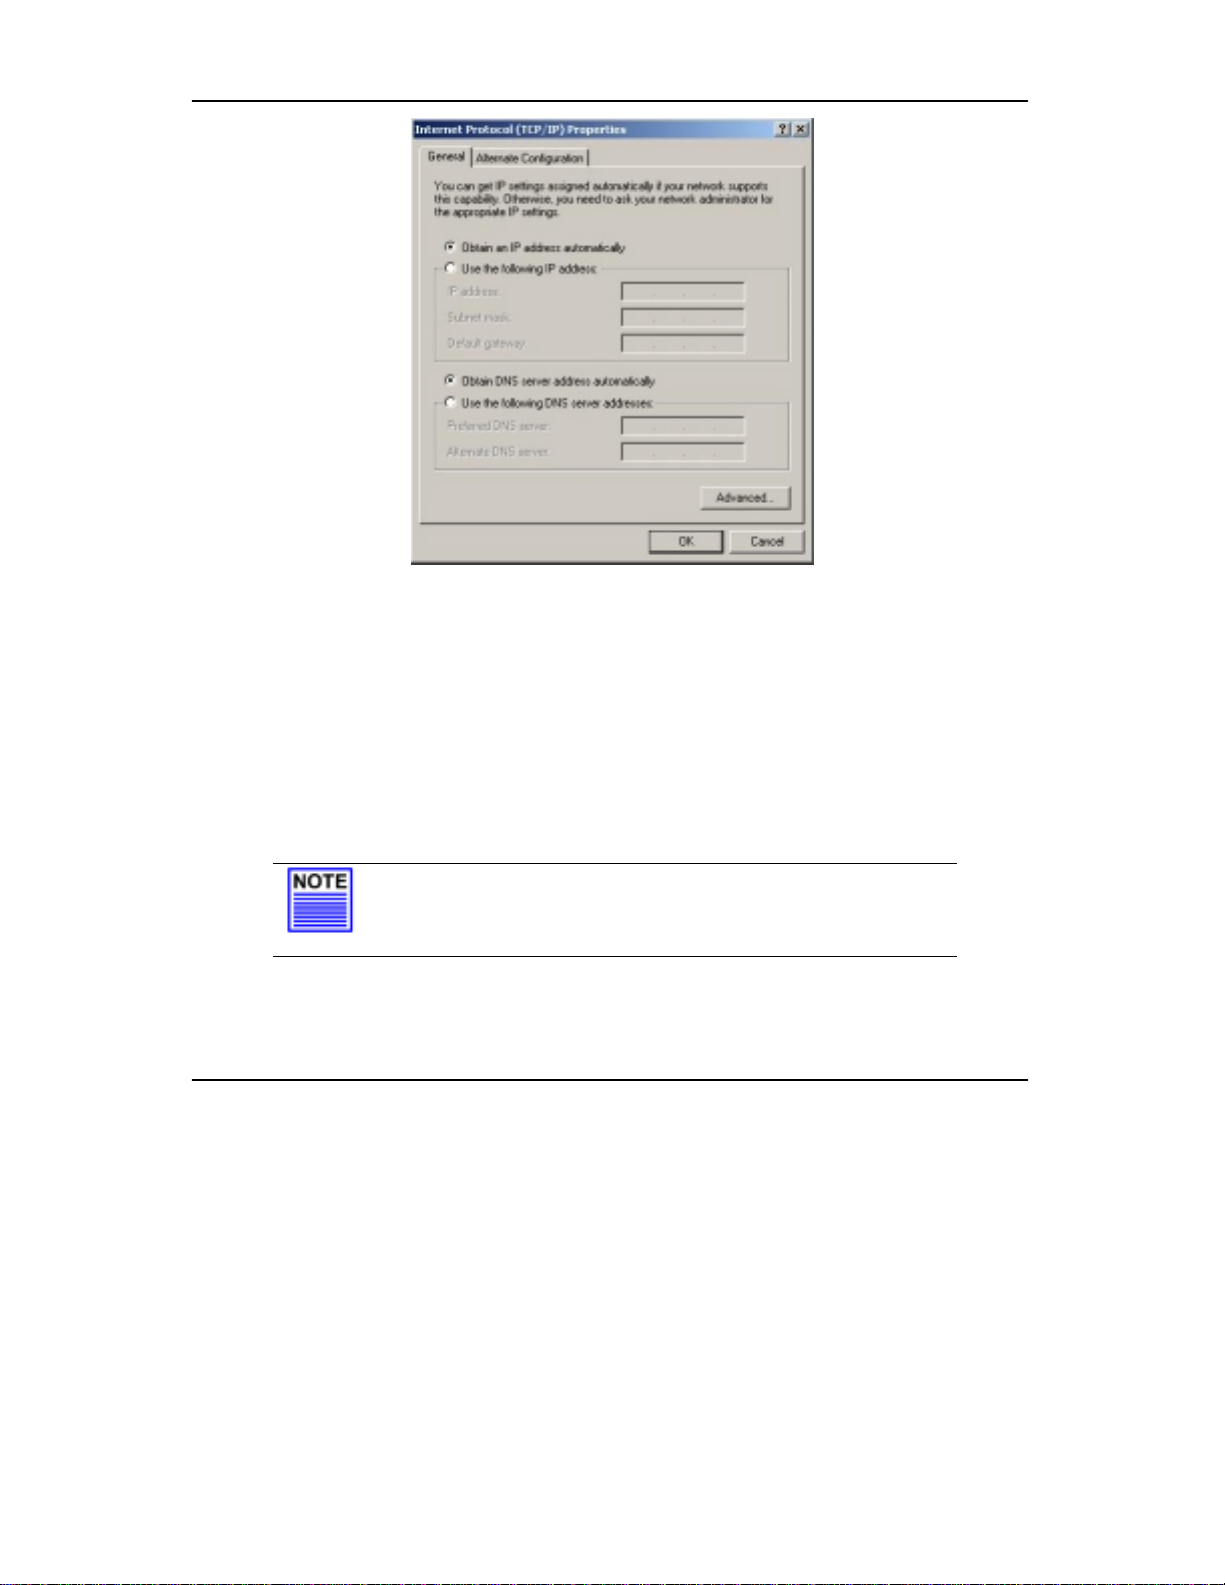
Figure 5.2c IP Address Configuration
3. Configure your IP address and the rest of the parameters so that you can be
connected to the network.
If your access point is configured as a DHCP server, you have to select Obtain
an IP address automatically.
If your access point (AP) has a certain IP address. In order to communicate with
the AP, you would have to assign an IP address with the same first 3 sets of
numbers and a different set of number for the last set to differentiate your laptop
and the access point in the network. The subnet mask would be 255.255.255.0
Note:
Please check with your system administrator or Internet Service
Provider for more information on the TCP/IP parameters.
40
Page 48
Chapter 6 Wireless Network Configuration in Windows XP
Chapter 6 Wireless Network Configuration in Windows XP
6.1 Configuring wireless connection profiles in Windows XP
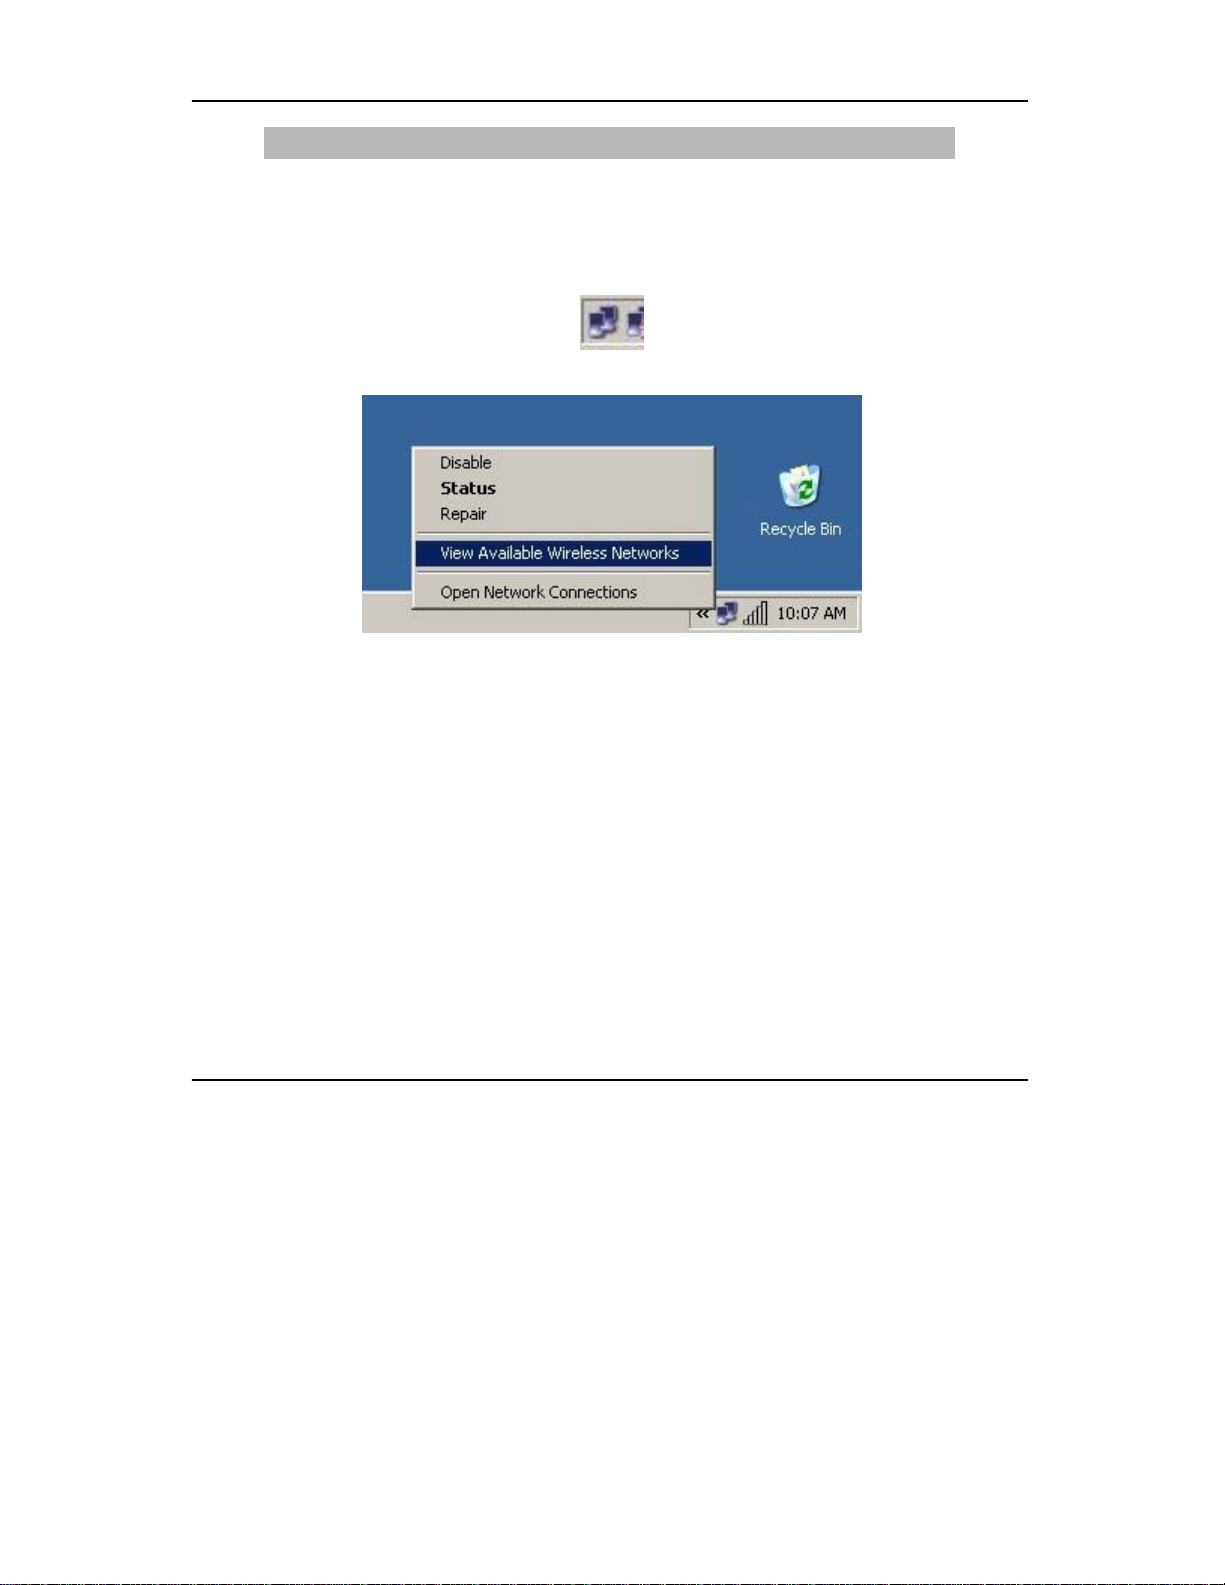
1. Look for the icon like the Figure 6.1a shown below on your taskbar and right
click on it.
Figure 6.1a Network Icon on Taskbar
Figure 6.1b Network Options on Taskbar
2. A window like Figure 6.1b above would be shown. Click on View Available
Wireless Networks.
41
Page 49

Chapter 6 Wireless Network Configuration in Windows XP
Figure 6.1c Available Networks
3. A screen like Figure 6.1c would appear with the available networks shown.
Highlight the appropriate network and click on Connect. You should be
connected to the network of your choice. If however your ne twork is not
shown, click on Advanced.
42
Page 50

Chapter 6 Wireless Network Configuration in Windows XP
Figure 6.1d Wireless Network Configuration
4. A screen like Figure 6.1d would be shown. Click on Configure and enter the
network SSID. Click on Refresh and your network should be shown. If your
network is not shown, it co uld be some network confi guration prob lems. Call
up for technical support. In addition, you can click on Learn about setting
up wireless network configuration in the same window. Windows XP has
good documentation on wireless network configuration.
43
Page 51

NOTES
44
 Loading...