


Solo
Solo and Duetto
Complete User Manual
Download the free Como Control iOS or Android App from iTunes or the Google Play store. The Como
Control App will allow you to control many functions along with multi-room.
1

Welcome to the Como Audio community and thank you for your purchase! We hope you will enjoy using
your “smart speaker” just as much as we enjoyed creating it for you. Please read this complete manual
to familiarize yourself with all the available features.
In addition to the unit itself, you will also find:
- Remote control
- 2 x AAA batteries for the remote control
- 9’ UL or EU & UK power cords depending on region
- 7” USB cable to provide power to a Chromecast for Audio dongle (not included) or Amazon Alexa model
(not included)
- Spotify insert sheet
- User Manual (abbreviated)
- Cleaning cloth (Piano High Gloss finishes only)
The Como Audio story
Hall of Fame member and 40-year consumer electronics veteran Tom DeVesto founded Como Audio LLC, his
third Boston, MA-based audio company, with the goal of simplifying and beautifying music streaming. Prior to
Como Audio, Tom was the founding CEO and Chief Designer of Tivoli Audio. He was also co-Founder,
President, CEO, and Head of R and D of Cambridge SoundWorks, a company he started in 1988 with
legendary audio inventor Henry Kloss. At CSW, Tom pioneered the concept of factory-direct selling via the
Internet.
2

Safety Instructions
1. Read these instructions.
2. Keep these instructions.
3. Heed all warnings.
4. Follow all instructions.
5. CAUTION- Danger of explosion if remote control’s batteries are incorrectly replaced. Replace only
with the same or equivalent type.
6. Remote control batteries must be disposed of in accordance with applicable laws and regulations on
the transport, shipping and disposal of batteries.
7. Warning: Batteries shall not be exposed to excessive heat such as sunshine, fire, or the like.
8. WARNING- To reduce the risk of fire or electric shock, do not expose this apparatus to rain or
moisture.
9. Apparatus shall not be exposed to dripping or splashing and no objects filled with liquids, such as
vases, shall be placed on the apparatus.
10. Clean only with a dry cloth.
11. Do not block any ventilation openings. Install in accordance with the manufacturer’s instructions.
12. Do not install near any heat sources such as radiators, heat registers, stoves, or other apparatus
(including amplifies) that produce heat.
13. Only use attachments/accessories specified by the manufacturer.
14. Use only with the cart, stand, tripod, bracket, or table, specified by the manufacturer, or sold with the
apparatus. When a cart is used, use caution when moving the cart/apparatus combination to avoid
injury from tip-over.
15. Operate this product only from the type of power source indicated on the rear panel. For products
using an external power supply, use an exact replacement if lost or damaged.
16. For added protection for this product during a lightning storm, or when it is left unattended and
unused for long periods of time, unplug it from the wall outlet. This will prevent damage to the
product from lightning storms and power line surges.
17. Unplug this product from the wall outlet and refer servicing to qualified personnel under the following
conditions:
a. When the power supply cord or plug is damaged.
b. If liquid has been spilled or objects have fallen into the product.
c. If the product has been exposed to water or rain.
d. If the product does not operate normally by following the operating instructions.
e. If the product has been dropped or damaged in any way.
f. When the product exhibits a distinctive change in performance.
18. When replacement parts are required, be sure your service technician has used replacement parts
specified by the manufacturer or have the same characteristics as the original part. Unauthorized
substitutions may result in fire, electric shock, or other hazards.
19. Upon completion of any service, ask the service technician to perform safety checks to confirm the
product is in proper operating condition.
20. Keep this product a safe distance away from naked flame.
21. The recommended operating temperature range is 5C – 40 C (41 F – 104 F).
22. In tropical and/or moderate climates, avoid operating the unit in conditions of excessive humidity and
or temperature.
23. Complies with Canadian ICES-003 & RSS-210.
24. Protect the power cord from being walked on or pinched particularly at plugs, convenience
receptacles, and the point where they exit from the apparatus.
25. The power cord plug serves as the disconnect device and should remain readily accessible.
26. WARNING- The mains are not disconnected in the standby position, but the circuits are de-powered.

Waste from Electrical and Electronic Equipment (WEEE): This directive mandates the collection and
recycling of electronics and component materials in order to reduce the amount going to landfills. Outside
North America, when the user decides to discard this product, it must be sent to a separate collection facility
for recycling. Please contact your point of purchase for more details.
Solo and Duetto comply with the RoHS (Restriction of Hazardous Substances) directive.
FCC Part 15: This equipment has been tested and found to comply with the limits for a Class B digital
device, pursuant to Part 15 of the FCC Rules. These limits are designed to provide reasonable protection
against harmful interference in a residential installation. This equipment generates, uses and can radiate
radio frequency energy and, if not installed and used in accordance with the instructions, may cause harmful
interference to radio communications. However, there is no guarantee that interference will not occur in a
particular installation. If this equipment does cause harmful interference to radio or television reception,
which can be determined by turning the equipment off and on, the user is encouraged to try to correct the
interference by one or more of the following measures:
· Reorient or relocate the receiving antenna.
· Increase the separation between the equipment and receiver.
· Connect the equipment to an outlet on a circuit different from that to which the receiver is connected.
· Consult the place of purchase or an experienced radio/TV technician for help.
This device complies with part 15 of the FCC Rules. Operation is subject to the following two conditions: (1)
This device may not cause harmful interference, and (2) this device must accept any interference received,
including interference that may cause undesired operation.
This equipment complies with FCC radiation exposure limits set forth for an uncontrolled environment. This
equipment should be installed and operated with minimum distance 20cm between the radiator & your body.
4

Table of Contents
Introduction…………………………………………………………………………………………..………………..…2
Safety Instructions……………………………………………………………………………………..……………..…3
Table of Contents………………………………………………………………………..…………………………..….5
Front panel controls………………………………………………………………..…………………………………...7
Remote control………………………………………………………………………..………………………………...8
Rear panel inputs/outputs…………………………………………………………..………………………………….9
Display………………………………………………………………………………..………………………………...10
Display off……………………………………………………………………………..……………………….….……10
Expanding album art………………………………………………………………………………………….….……11
Setup wizard………………..…………………………………………………………..………..…………………….12
Auto update, Time zone, DST, Keep network connected, Skip WPS…………..………………………….....…13
Selecting a network……………………………………………………………………………………………………14
Web-based configuration………………………………………………………………………………………….….16
Embedded web pages.……………………………………………………………………………………….……….18
Operation/Menu………………………………………………………………………………………………………..19
System settings
Equalizer…………………………………………………………………………….…………………….….…….…22
Network
Network wizard/WPS Wlan Setup/View settings/Wlan region/ Manual
settings………………………………………………………………………………..…………….….….………….23
NetRemote PIN………………………………………………………………………..……….………..…………...23
Network Profile…………………………………………………………………………………………..…………...23
Clear network settings…………………………………………………………………………………..……….….23
Keep network connected………………………………………………………………………………..…………..24
Time/Date/DST……………………………………………………………………………………….…..………….24
Auto update…………………………………………………………………………………………………………..24
Set clock format………………………………………… ……………………………………….……..……….….24
Standby clock format……………………………………………………………………………….….……………25
Language…………………………………………………………………………………………………..…………25
Factory reset……………………………………………………………………………………………..…………..25
Software update………………………………………………………………………………………….…….…….25
Info about source playing……….………………………………………………………………………..…….…..25
Backlight…………………………………………………………………………………………………………..….26
Multiroom…………………………………………………………………………………………………………..…26
Listening mode…………………………………………………………………………………………………..…..27
System reboot………………………………………………………………………………………………………..27
Internet radio
Station list…………………………………………………………………………………………………….…..….28
Last listened…………………………………………………………………………………………………………28
Favorites……………………………………………………………………………………………………………..29
Browse…………………………………………………………………………………………………………...…..29
Search………………………………………………………………………………………………………………..30
My added stations…………………………………………………………………………………………………..31
Now playing/HDi/Local stations/Highlighted stations/Popular stations/Connecting & Loading……………..31
Internet portal…………………………………………………………………………………………………….….32
Spotify Connect……………………………………………………………………………………………………33

Music Player
Shard media/UPnP…………………………………………………………………………………………………....36
Wake-on-lan/Prune servers……………………………………………………………………………………….….37
USB input/Charging.…………………………………………………………………………………………………..37
Browsing…………………………………………………………………………………………………………….….38
Meta data……………………………………………………………………………………………………………….38
My playlist…………………………………………………………………………………………………………...….38
Repeat and Shuffle………………………………………………………………………………………………….…39
Now playing……………………………………………………………………………………………………………..39
DLNA………………………………………………………………………………………………………………….....42
DAB/DAB+ (Non-North American units only)
Scanning………………………………………………………………………………………………………………...43
Tuning…………………………………………………………………………………………………………………...43
Now playing……………………………………………………………………………………………………………..43
Slideshow……………………………………………………………………………………………………………….44
Settings………………………………………………………………………………………………………………….44
Dynamic range………………………………………………………………………………………………………….44
Station order…………………………………………………………………………………………………………….44
FM
Tuning stations………………………………………………………………………………………………………….45
Now playing…………………………………………………………………………………………………………..…45
RDS/RBDS……………………………………………………………………………………………………………...45
Scan setting…………………………………………………………………………………………………………..…45
Audio settings………………………………………………………………………………………………………..…45
Bluetooth
Pairing…………………………………………………………………………………………………………………..46
Changing paired devices……………………………………………………………………………………………...46
Clearing all paired devices……………………………………………………………………………………………46
Track control……………………………………………………………………………………………………………46
Connection details…………………………………………………………………………………………………..…46
NFC……………………………………………………………………………………………………………………...47
aptX audio………………………………………………………………………………………………………………47
Auxiliary inputs………………………………………………….………………………………………………………48
Optical input.……………………………………………………………………………………………………………48
Alarms
Setting alarm…………………………………………………..………………………………………………………49
Stopping alarm and Snooze……………………………………..…………………………………………………..49
Power failure……………………………………………………………………………………………………………50
Sleep……………………………………………………………….…………………………………………………..50
Error messages………………………………………………………………………………………………….…….51
Troubleshooting………………………………………………………………………………………………….……52
About the wood cabinets, sound, and placement…………………………………………………………….…….53
Warranty……………………………………………………………………………………………………………..…53
Specifications……………………………………………………………………………………………………….…54
License information…………………………………………………………………………………………...……...54
More information/Contact……………………………………………………...………………………………….…55
6

D.O.C……………………………………………………………………….…….……………………………………56
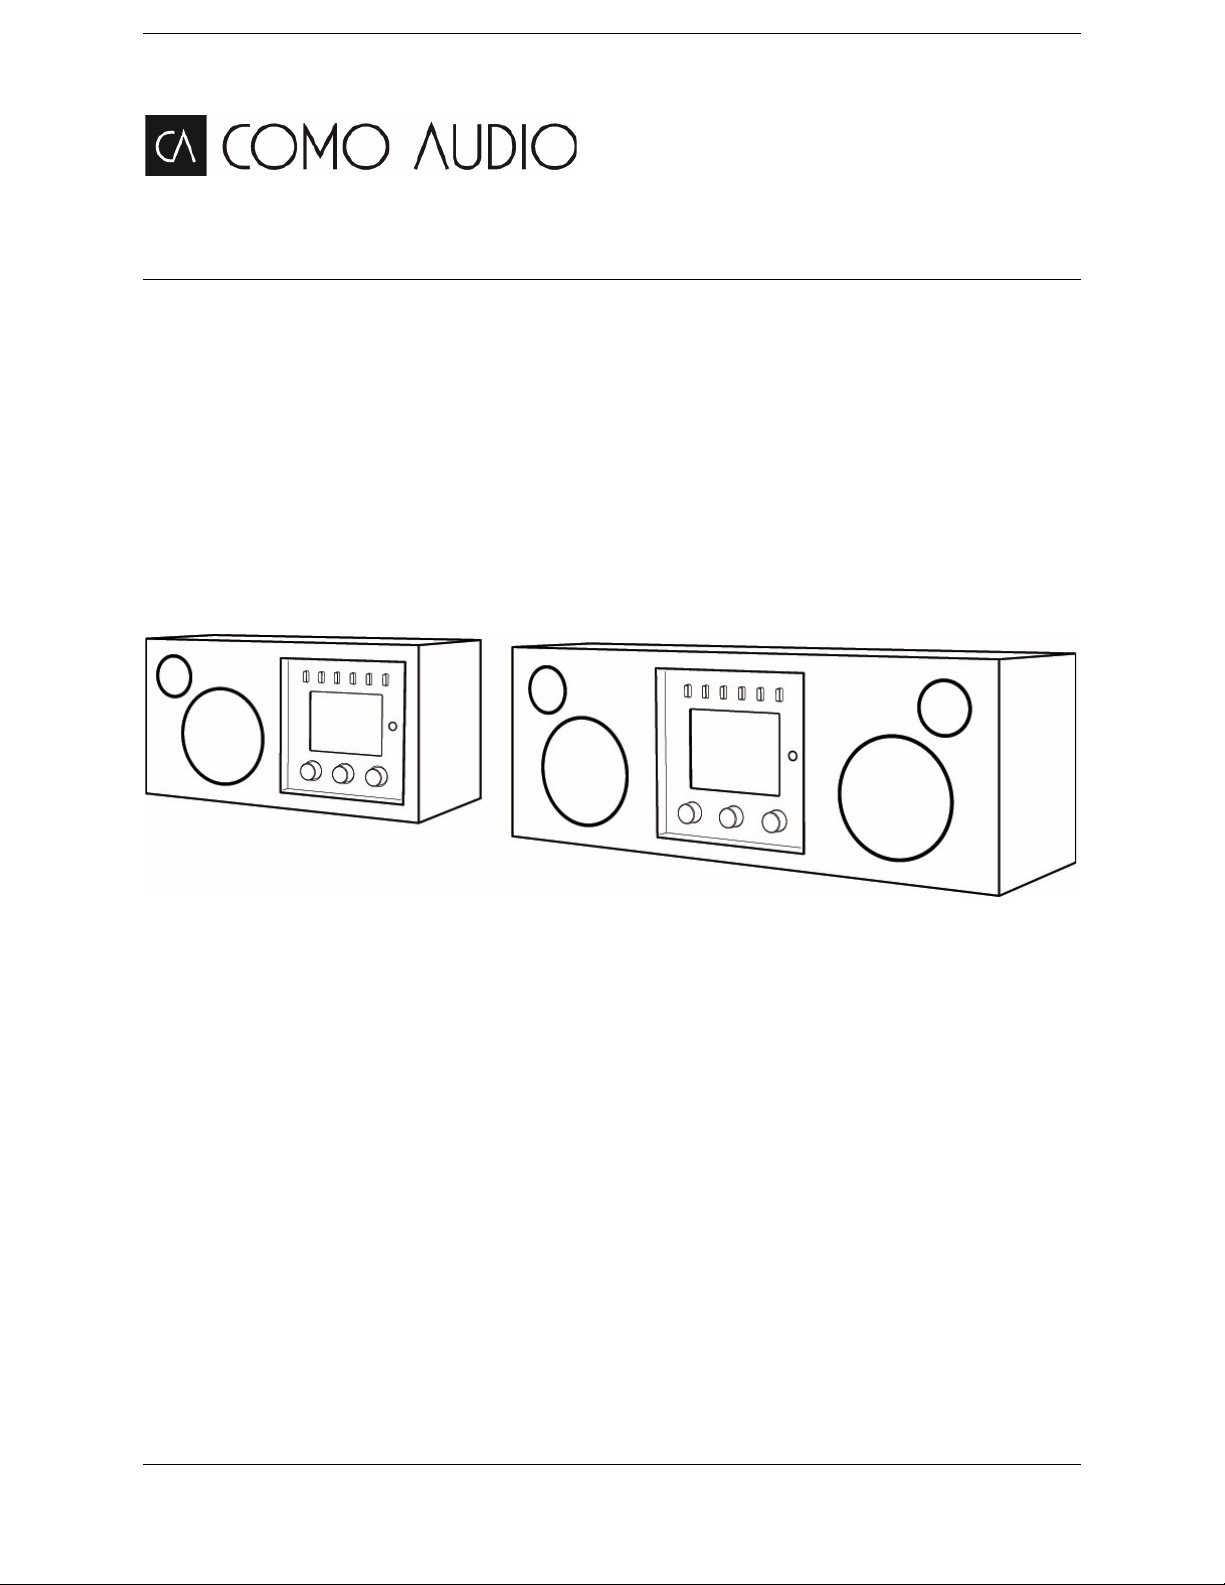
Front panel controls
The above illustration is of the Solo front panel. The Duetto front panel controls are identical.
1. Power/Volume: Push in briefly to turn on or off. Rotate to adjust the volume.
2. Menu: Press and hold to call up the main Menu. Rotate to navigate the Menu and push in briefly to
select.
In DAB mode (optional), rotate to call up the DAB station list and push in briefly to select a DAB station.
In FM mode, rotate to manually tune stations or push in briefly to auto seek to the next strongest FM
station.
When artwork is displayed, such as an album cover or station logo, push in briefly to expand the image
to fill the display. Push in briefly again to return to the standard display.
When the alarm activates, push in briefly to Snooze. Push in briefly again during Snooze to reset the
Snooze timer.
3. Source: Rotate to call up and navigate the source icon menu. Push in briefly to select the source.
When in the main Menu, push in briefly to go back one page with each push.
4. Presets: Press and hold to save a tuned station or a source. Push in briefly to recall the saved station
or source. The Presets are independent and recall is not restricted to whichever source is playing. There
are six diverse Internet radio stations already set for you to enjoy after you’ve connected Solo or Duetto
to your WiFi network.
Note: Presets do not function while in the Source icon menu.
Hint: The Presets will also power Solo and Duetto on from standby if a station or source has
been saved to that Preset.
5. NFC (top of cabinet): See Page 47 regarding how to use NFC.
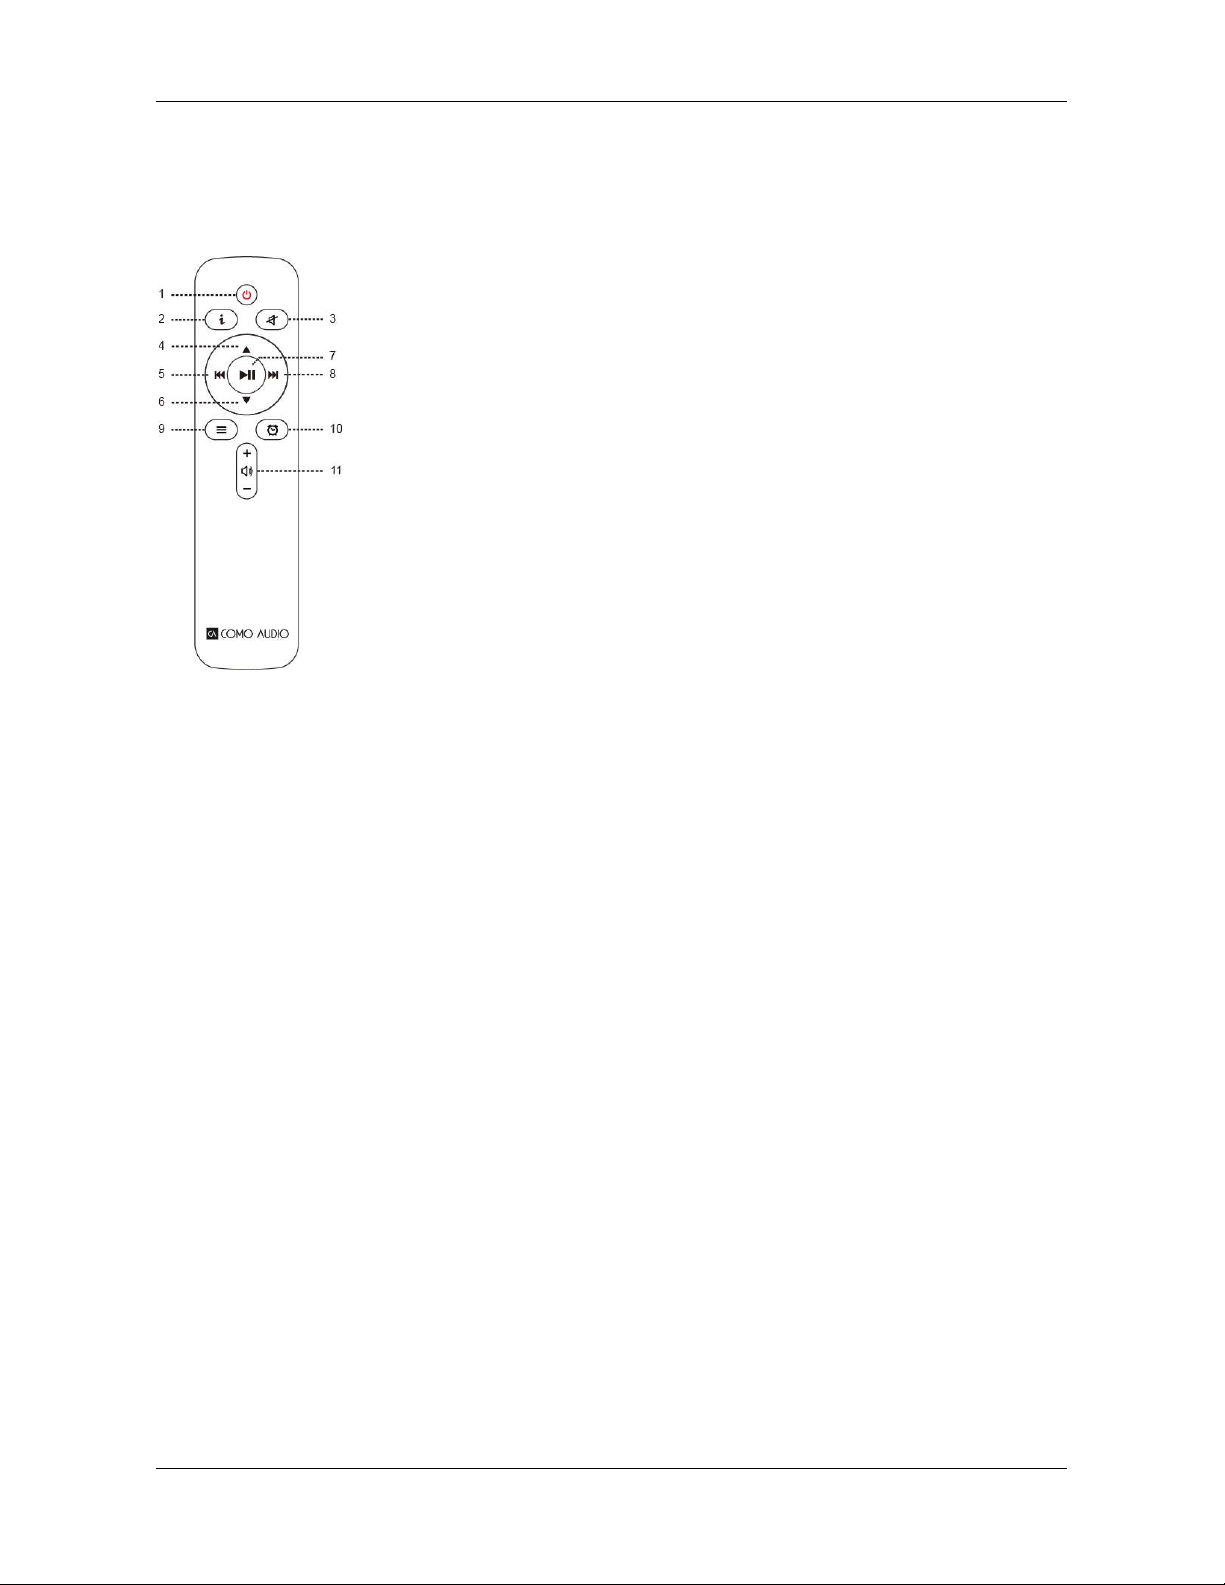
Remote control
1. Power icon = Power
2. “i” = Info: Press repeatedly to see more info about the current source playing.
3. Speaker icon with slash = Mute sound; Snooze when alarm sounds.
4. Up = Navigate up when in the menu; Seek up in FM mode; Shows station list in
Internet Radio and DAB mode (use up/down/play keys to navigate and select).
5. Left arrow = Track back; Page back; Move highlight left.
6. Down = Navigate down when in menu; Seek down in FM mode; Shows station
list in DAB mode (use up/down/play keys to navigate and select).
7. Play/Pause= Track Play/Pause; Long press brings up menu (except in Spotify,
Music Player, and Bluetooth modes); Brief press within menu acts as Select;
Brief press in Internet radio mode saves tuned station to Favorites.
8. Right arrow = Track forward; Next page; Move highlight right; Press and hold
to fast forward while playing a music track.
9. 3 Lines = Source icon menu (use up/down/play keys to navigate/select source).
10. Alarm clock icon = Alarm menu (use up/down/play keys to navigate and
select); Toggle alarms 1 & 2 on and off in standby.
11. Speaker icon = Volume up/down.
Remote’s display off feature:
Press any remote key twice except Power and Alarm in standby to toggle the display off/on. When the
display is off, press any key (except Power and Alarm) once to turn the display on for 7 seconds. If the
remote control isn’t nearby, you can also press the Menu or Source knob in twice briefly in standby mode to
turn the display off, twice again to turn it back on, and once while the display is off to turn it on temporarily.
Once Solo or Duetto is turned on, the display will return to the previous Backlight Menu setting when placed
in standby again.
Note: When it comes time to replace the batteries in the remote control, use new 2 x AAA 1.5V brand name
alkaline batteries.
8
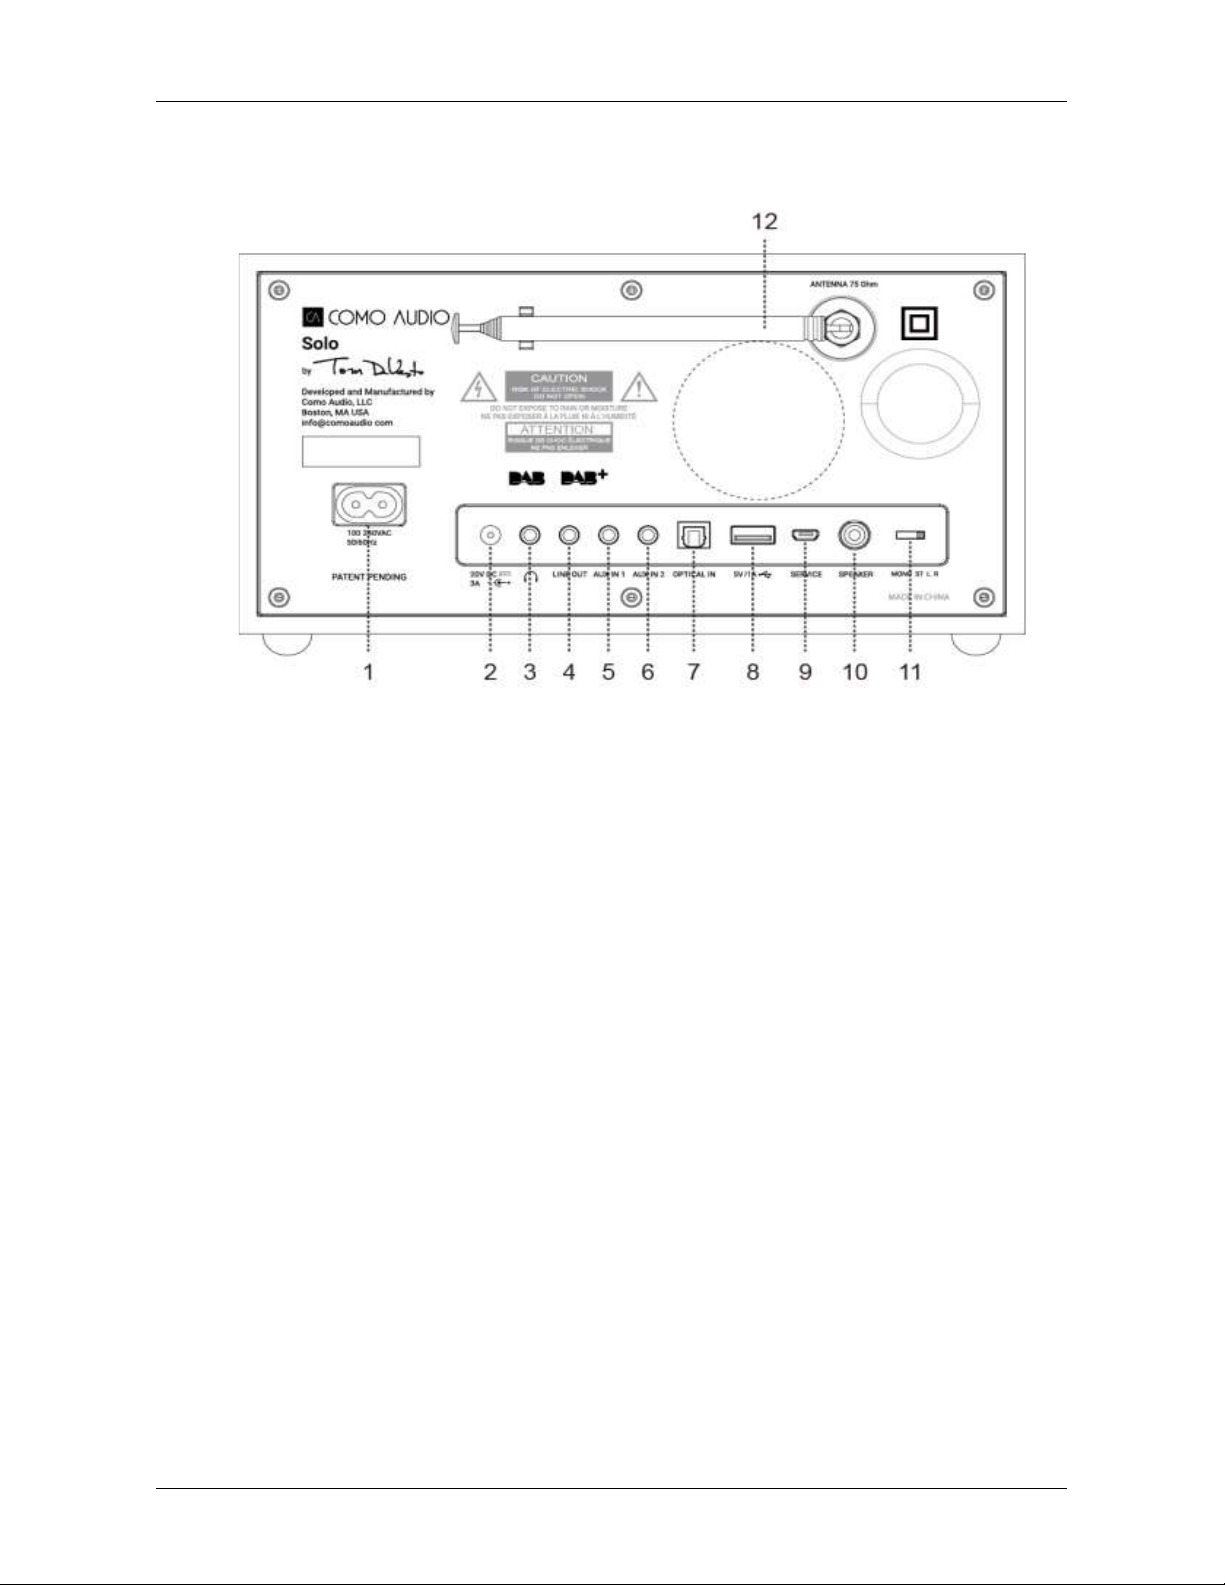
Rear panel Inputs/Outputs
The above illustration is of the Solo (with DAB) rear panel. The Duetto rear panel connections are
identical except for points 10 & 11.
1. AC power in, 100-240V, 50/60Hz: For use with included power cord. The correct voltage for your region
will be automatically detected.
2. DC power in (20VDC/3A) (external adapter not included):
simultaneously. The adapter connector should be 5.5mm/2.1mm, center positive.
3. Headphone out (level adjusted using volume knob/remote control), 3.5mm stereo. Long-term
exposure to loud music may cause hearing damage. It is best to avoid extreme volume levels when
listening via earbuds or headphones, especially for extended periods.
4. Line out (fixed level, not affected by volume control), 3.5mm stereo: Connect an analog audio cable to
another device’s analog audio input, such as a home stereo system, to hear the sound from Solo or
Duetto through another system.
5. Auxiliary 1 in, 3.5mm stereo, Hi-res: See Page 48.
6. Auxiliary 2 in, 3.5mm stereo, Hi-res: See Page 48.
7. Optical in: See Page 48.
8. USB in / 5V/1A: See Page 37.
9. Service: For use only by authorized repair agents. Do not connect anything to this input.
10. RCA out (Solo only): For connecting to the Ambiente Speaker as part of the Ambiente system.
11. Audio switch (Solo only): Set to ‘M’ for Mono, or; set to ‘ST’ if the Ambiente Speaker is connected; or
when using two Solos, set one to ‘L’ and the other to ‘R’ for dedicated wireless stereo if desired. Due to
the nature of WiFi, it is possible there may be some latency (delay) between the right and left channel
information. Stereo FM & DAB broadcasts will be indicated by 2 speaker icons in the lower right side of
the display.
12. DAB/FM Antenna: Extend and position for best reception. This antenna has no bearing on WiFi or
Bluetooth reception. Be sure the antenna is extended before performing a DAB station scan or tuning FM
stations. Signal strength will be indicated on the antenna icon in the lower right side of the display.
Never
use an adapter and the power cord
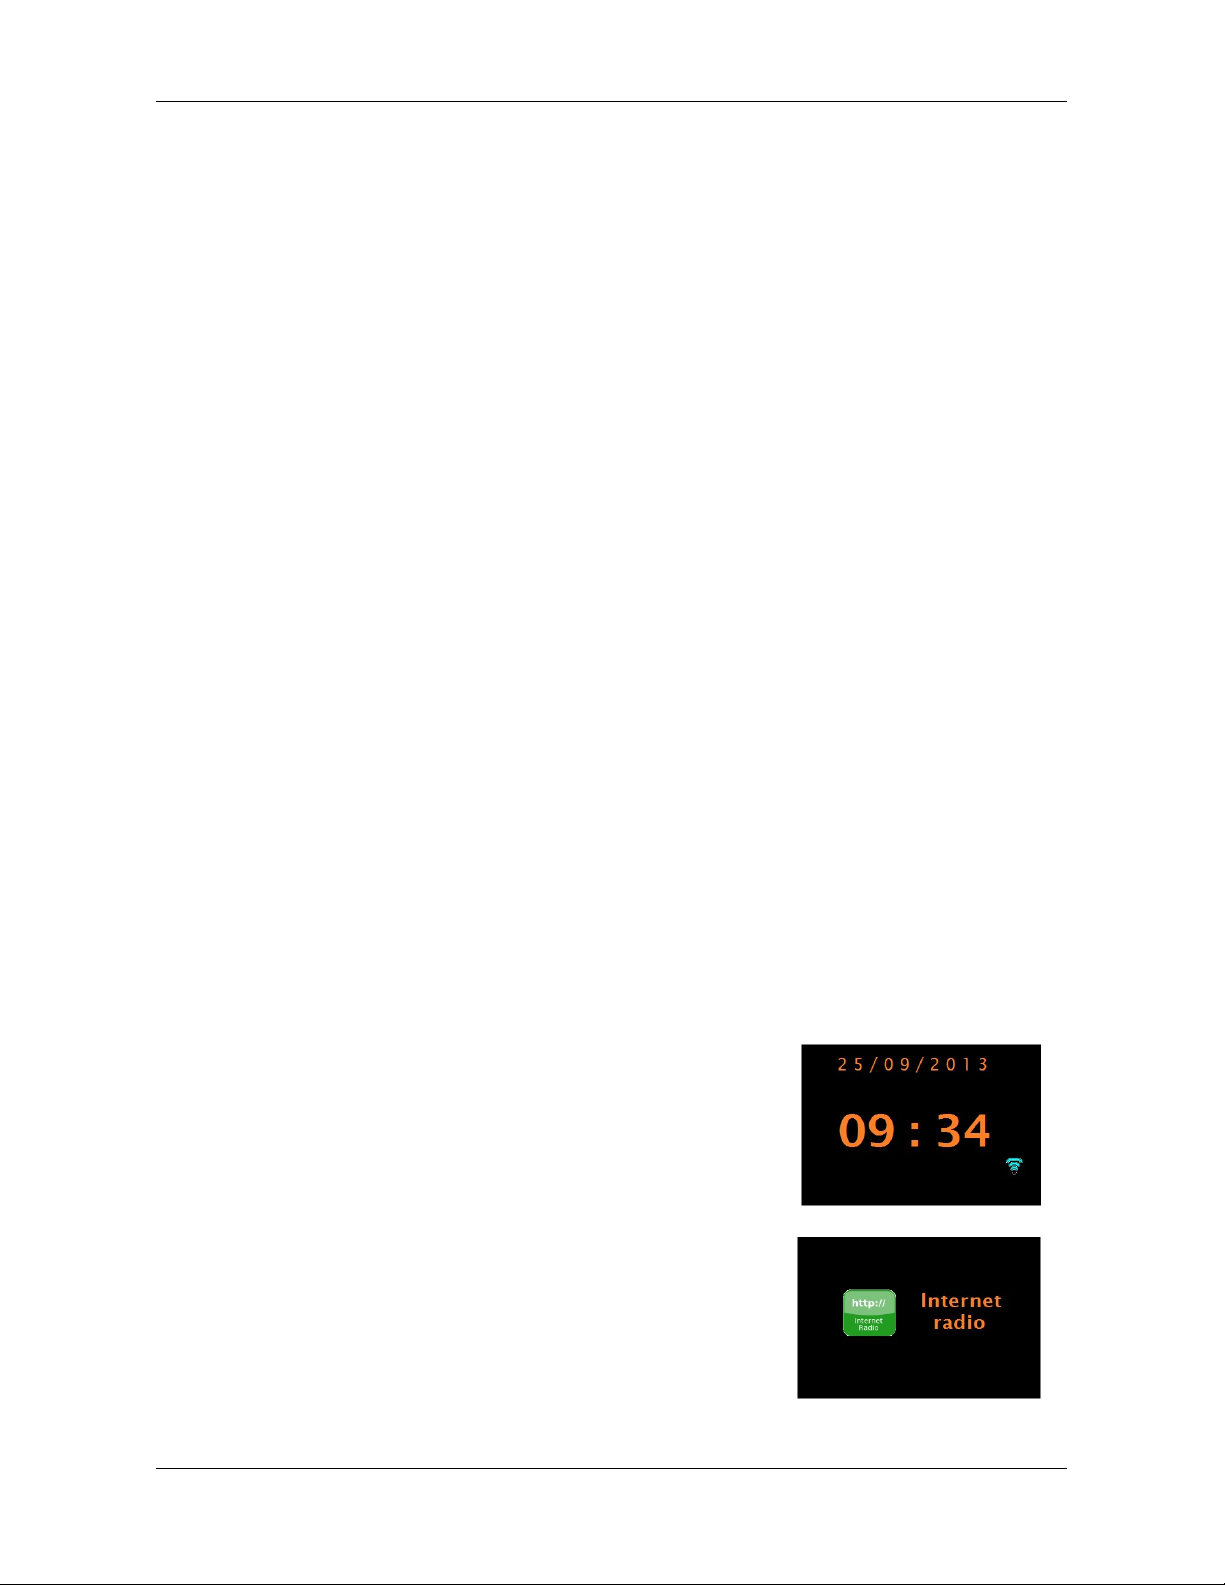
Standby screen
Display
The color TFT display shows various menus and displays as described below. The display is not a
touch screen. The front panel controls, remote, and App are used to control the functions. Remove
the clear protective strip across the LCD if it is present.
There are basically seven types of displays:
- Standby (clock)
- Splash (mode)
- Now playing
- Metadata (such as artist, track, and station information if available)
- Error/Information
- Menu
- Album artwork
Note: Where there is more text than can fit onto the screen, the text automatically scrolls right to
left after a brief pause.
Display Off:
To turn the display off in standby: Press any remote key twice except Power and Alarm in standby
to toggle the display off/on. When the display is off, press any remote key (except Power and Alarm) once to
turn the display on for 7 seconds. If the remote control isn’t nearby, you can also press the Menu or Source
knob in twice briefly in standby mode to turn the display off, twice again to turn it back on, and once while the
display is off to turn it on temporarily. Once Solo or Duetto is turned on, the display will return to the previous
Backlight Menu setting when placed in standby again.
Note: Some of the display illustrations used in his manual are generic and may not reflect the exact display
information as shown on your Solo or Duetto.
The
clock format is selected) and any active alarm times.
If the WiFi network is set to be active during Standby, the
WiFi icon is shown in the lower right corner.
A splash screen is displayed for each source mode.
shows the time and date (if digital
10
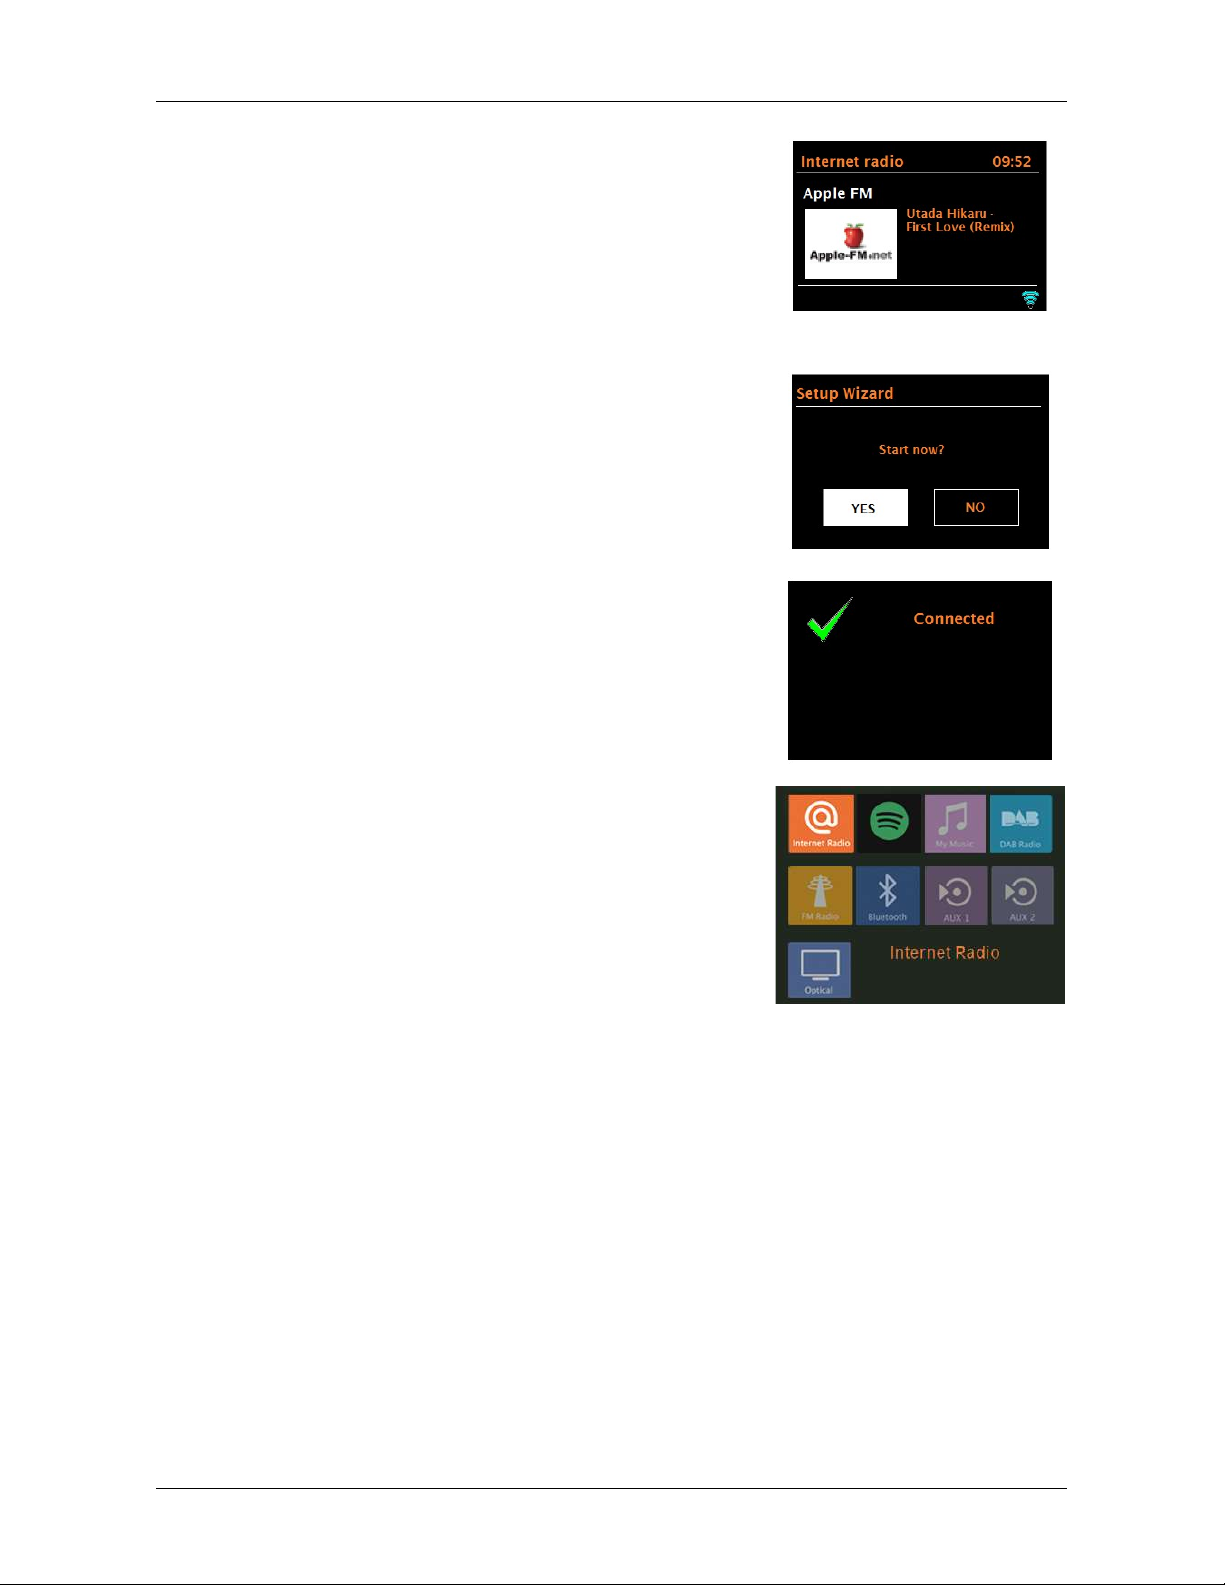
Now playing screens
Menu Screens
–
show information about the audio
source and track now playing, where available. When
artwork is displayed, such as an album cover or station
logo, push the Menu knob in briefly to expand the image
to fill the display. Push in briefly again to return to the
standard display.
Dialogue screens are shown to allow you to change
settings. They vary in complexity from simple Yes/No
options to the scrollable network password input screen.
The selected option is highlighted with a white background.
Dialogue screens mark the currently saved setting with an
asterisk (*).
Error/Information screens give specific messages for a
few seconds, then change automatically to the next screen.
for details of menu screens see Section 0
Menu .
Expanding artwork:
When album art or a DAB/Internet radio station logo is
presented, press the Menu button in briefly to expand the
artwork to fill the display. Briefly press the Menu knob in
again to return to the standard display.
Setup
Solo and Duetto are sophisticated multi-source media players. To simplify the setup process as
much as possible, when Solo and Duetto are first started, a “Setup wizard” helps walk you through
the basic steps to enable connections with the different audio sources.
The various listening modes have different requirements:
Internet Radio requires a suitable Internet broadband connection (usually via a local
wireless network).
Multi-room requires connection to a wireless network.
Spotify Connect requires connection to a wireless network connected to the internet
along with a paid Spotify Premium account.
Music Player requires connection to a wireless network and/or USB connected device.
DAB/DAB+ (where available)/FM requires a DAB/DAB+ or FM broadcast signal
received via the attached antenna.
Bluetooth requires a Bluetooth-capable device such as a smart phone or tablet.
Aux 1 & 2 in requires a connection via the Aux-in sockets with a stereo 3.5mm audio
cable (not included).
Optical in requires a connection via the Optical in socket with a Toslink cable (not
included).
To start Solo or Duetto, connect the unit to a suitable power source using the power cord provided.
The unit starts up after a slight delay before the display is initialized.
Solo and Duetto will normally enter the last used listening mode. The first time they are started (or
after being reset to factory settings) the setup wizard is launched automatically:
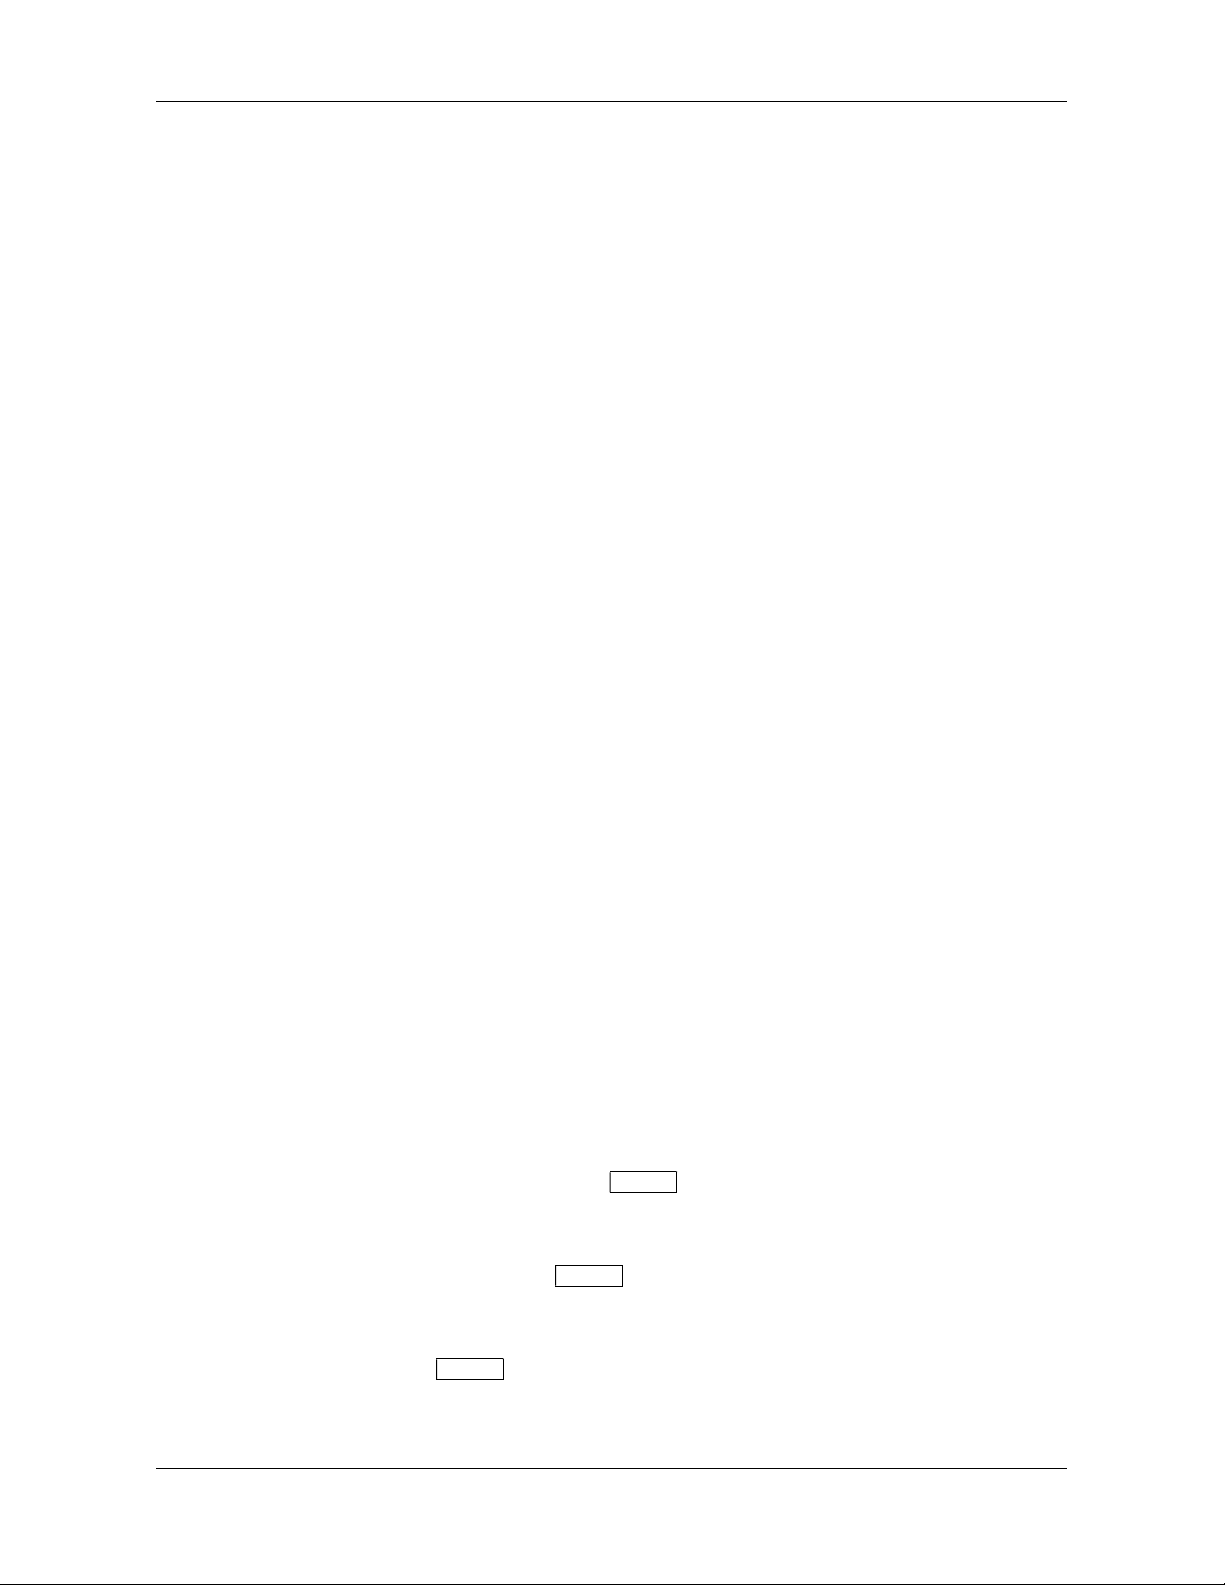
Setup wizard
When Solo and Duetto are started for the first time, they run
through a setup wizard to configure settings for date/time and
network. Once this has finished, the system is ready to use in
most modes.
Note: To change these settings later, select Menu >
System settings > and select the required settings option(s)
(see section 0 System settings for further details).
To run the setup wizard again, select Menu > System
settings > Setup wizard.
The Network settings can be reset later manually running the
Network wizard, select Menu > System settings >
Network wizard (see section 0 System settings for further
12
details).
Rotate the Menu knob to highlight the desired option and
briefly push the knob in to select.
Select Yes to start the setup wizard.
If you choose No, a second screen asks if you would like to
run the wizard next time the unit is started; select Yes or No.
The system then starts without configuring time/date and
network settings and enters the Main Menu.
Note: If power is removed while the wizard is in progress, the
wizard will run again next time the unit is started.
The Setup wizard guides you through the basic setup parameters and Network connection. To
change any settings later, all setting functions are accessible from the System settings Menu.
Set (clock format): 12/24 hour: Choose from 12 or 24 hour time.
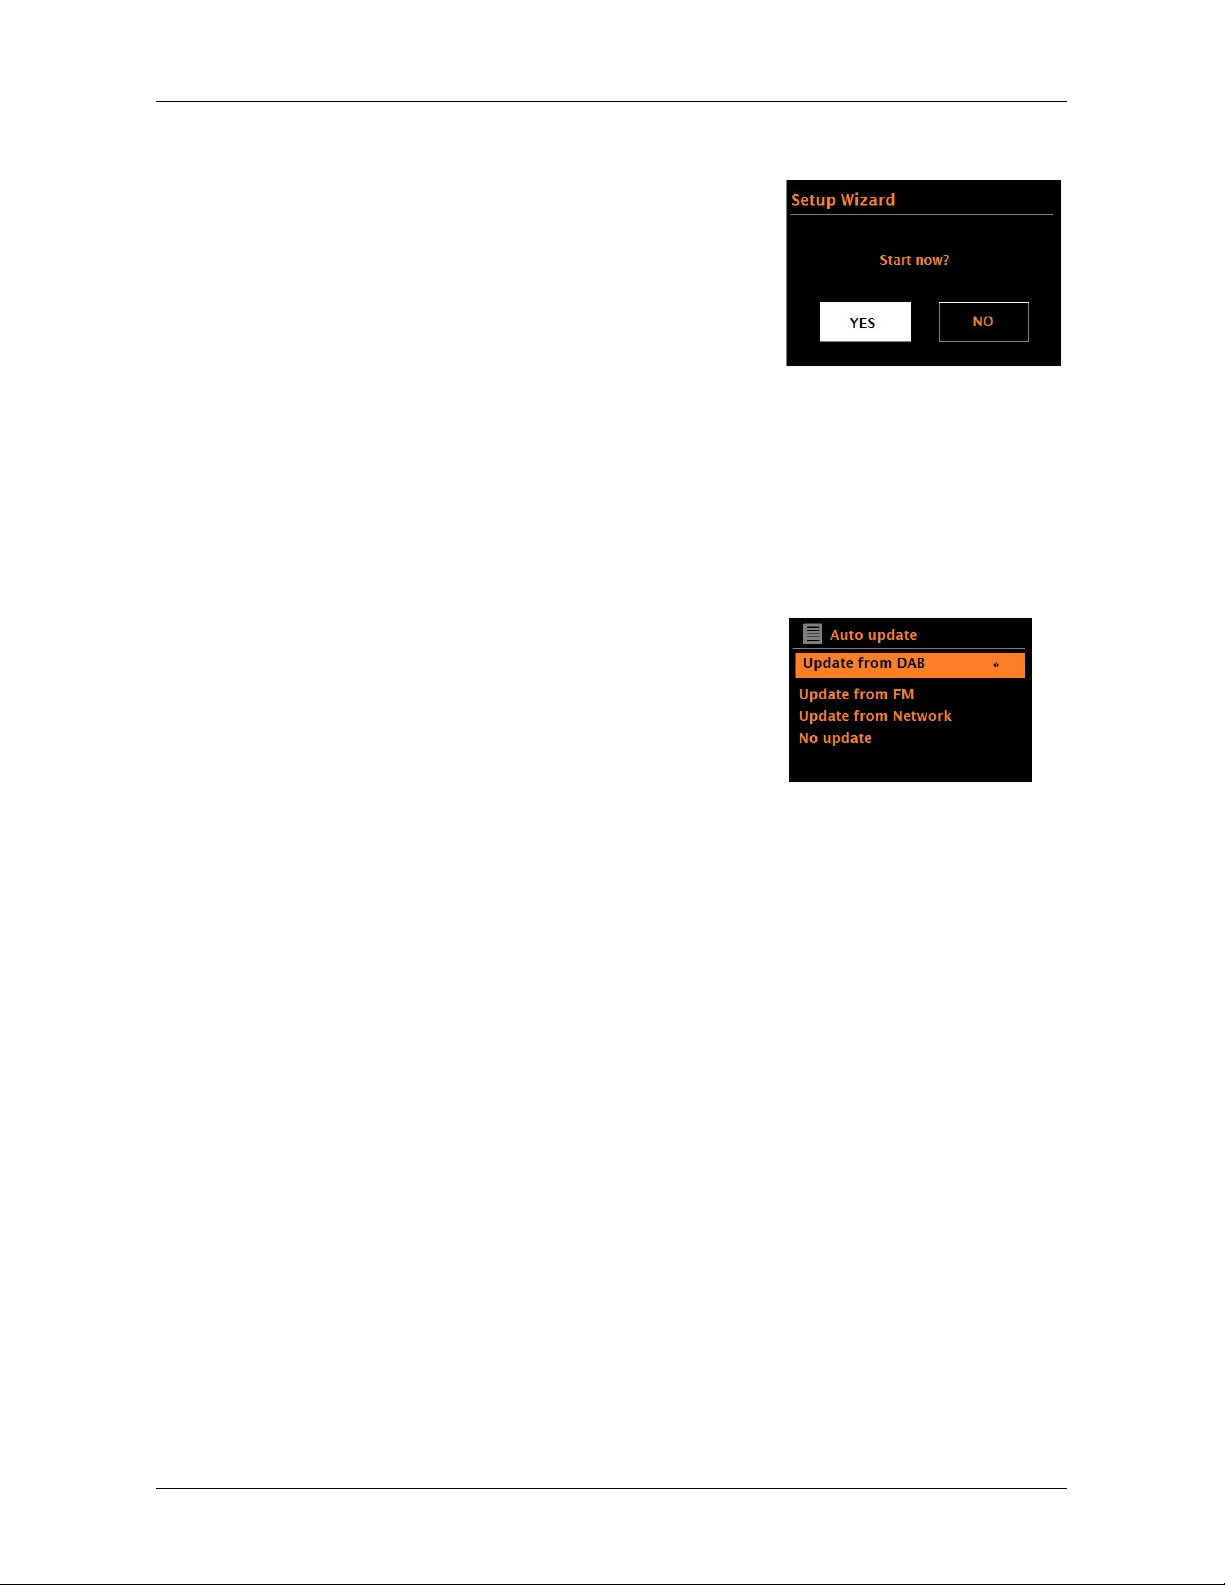
Auto update:
Auto-update works with data sent over
DAB, FM, or the Internet. The clock is
only updated when in the
corresponding mode, so it is best to
select a mode you use regularly.
DAB and FM use time signals
broadcast with radio transmissions.
Network uses a time signal sent from
the Internet radio portal when in any
network-connected mode.
Select “Update from DAB” (if your unit is so equipped), “Update from FM” (via RDS/RBDS), “Update from
Network”, or “No update” to set the time manually. We strongly suggest selecting “Update from
Network”.
Solo and Duetto will auto-update from the selected source when time information is available from
that source.
If you select “Update from DAB” (or FM) and find the time to be inaccurate (not all stations keep
their time information updated), set the Auto Update to “Update from Network”, or set the time
manually in the System settings menu.
Note: It can take 30-60 seconds for the time to update if “Update from FM” is selected. You must
tune an FM station with RDS/RBDS, and a time signal must exist for this option to work. Not all FM
stations using RDS/RBDS send a time signal.
Time Zone: If you are updating from the network, set your time zone.
DST: If your country uses daylight savings, the automatically updated time from the
network may be wrong by one hour. To adjust, select +1 or -1. See Page 24 for more.
If you are updating the time from DAB or FM, the Daylight savings option has no effect
on the clock’s time, but the time signal from DAB or FM may be inaccurate.
Keep network connected
This option allows you to define whether Solo and Duetto remain connected to its network in
standby mode. This is necessary for App operation, audio streaming in Music Player mode, and
recapturing the time after a power outage (if Auto Update from Network is selected). We strongly
recommend keeping the network connected.
Note: This option is forced to ‘Yes’ when Como or Duetto is part of a multi-room group.
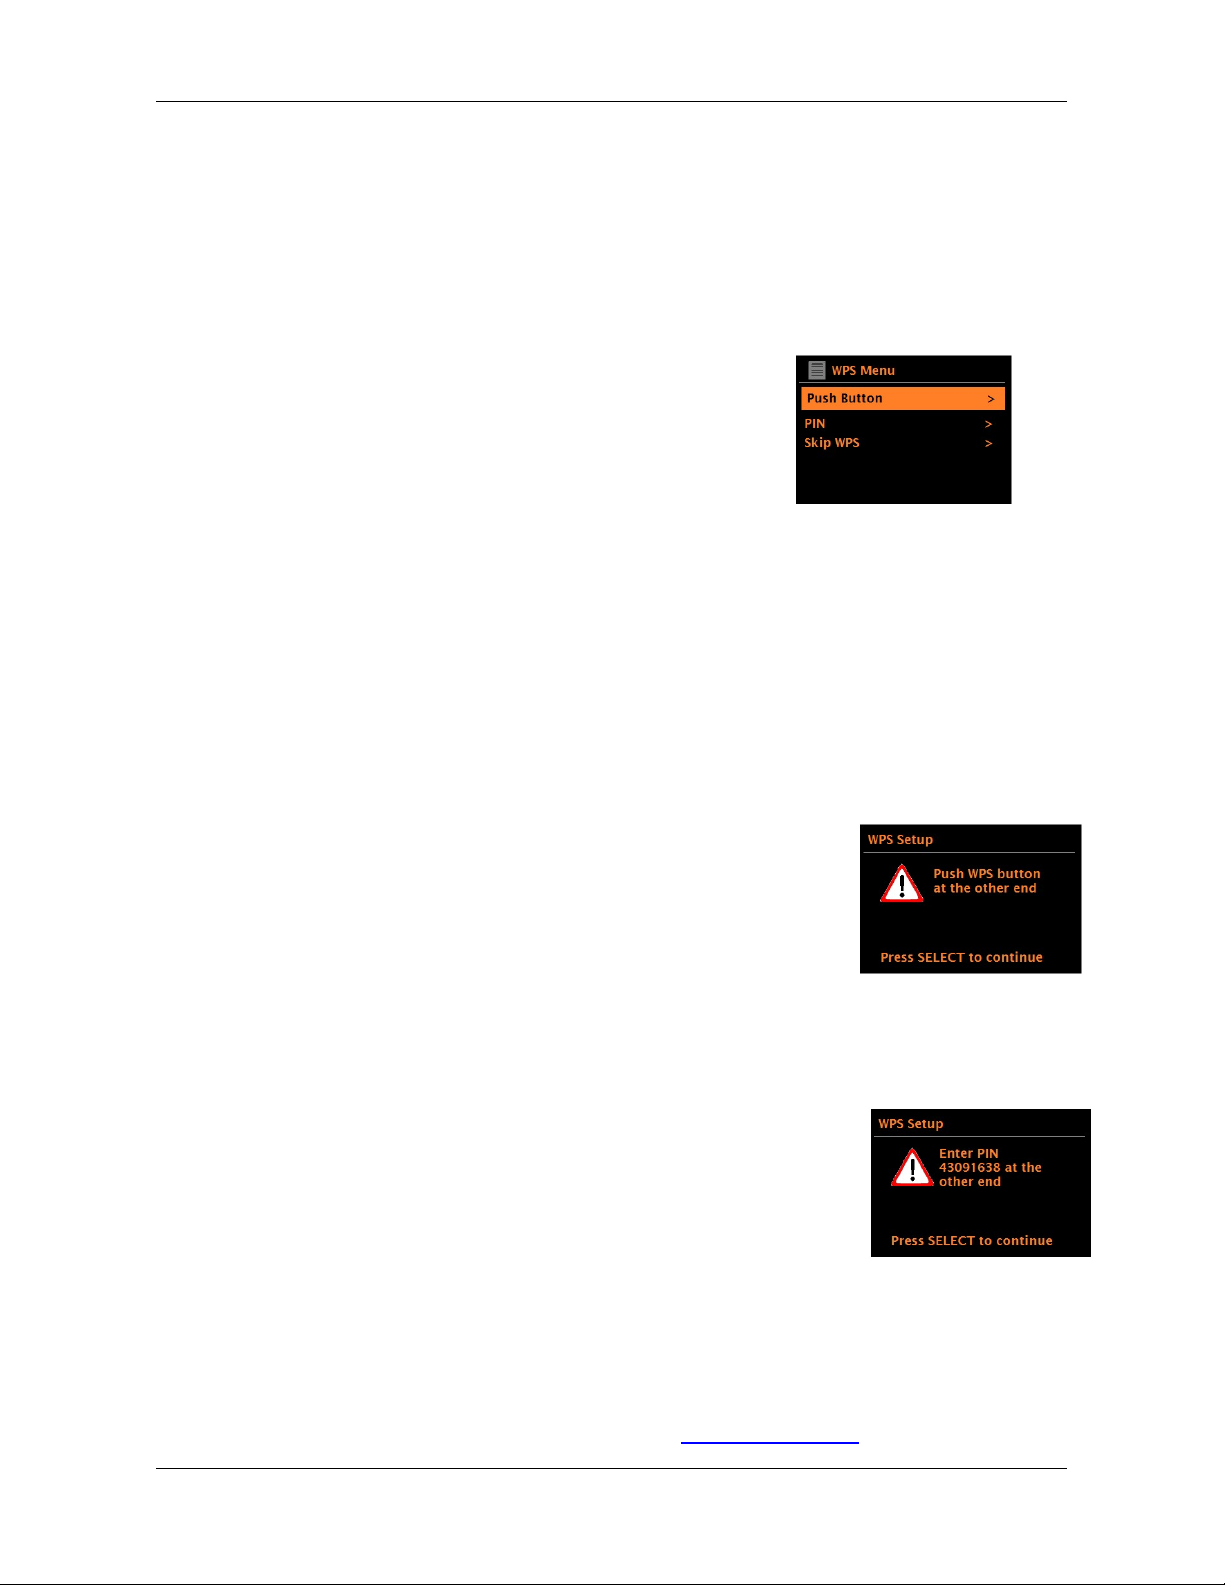
WPS (Wi-Fi Protected Setup)
WPS encrypted networks are identified by ‘[WPS]’ at the
start of the network name, and have two methods of
connection. Select one and follow the prompts. When
using the network wizard, an additional option to ‘Skip
WPS’ is available. Most users will select “Skip WPS”.
“Skip WPS >”:
Enter your password for a standard encrypted
network.
“Push Button >”:
You will be prompted to press the connect button on your router, then press the Menu knob in
briefly to select.
“Pin >
(code number)”:
Solo/Duetto generates an 8-digit code number which you enter into your wireless router access
point.
For more information on setting up a WPS encrypted network, see your WPS
router’s instructions.
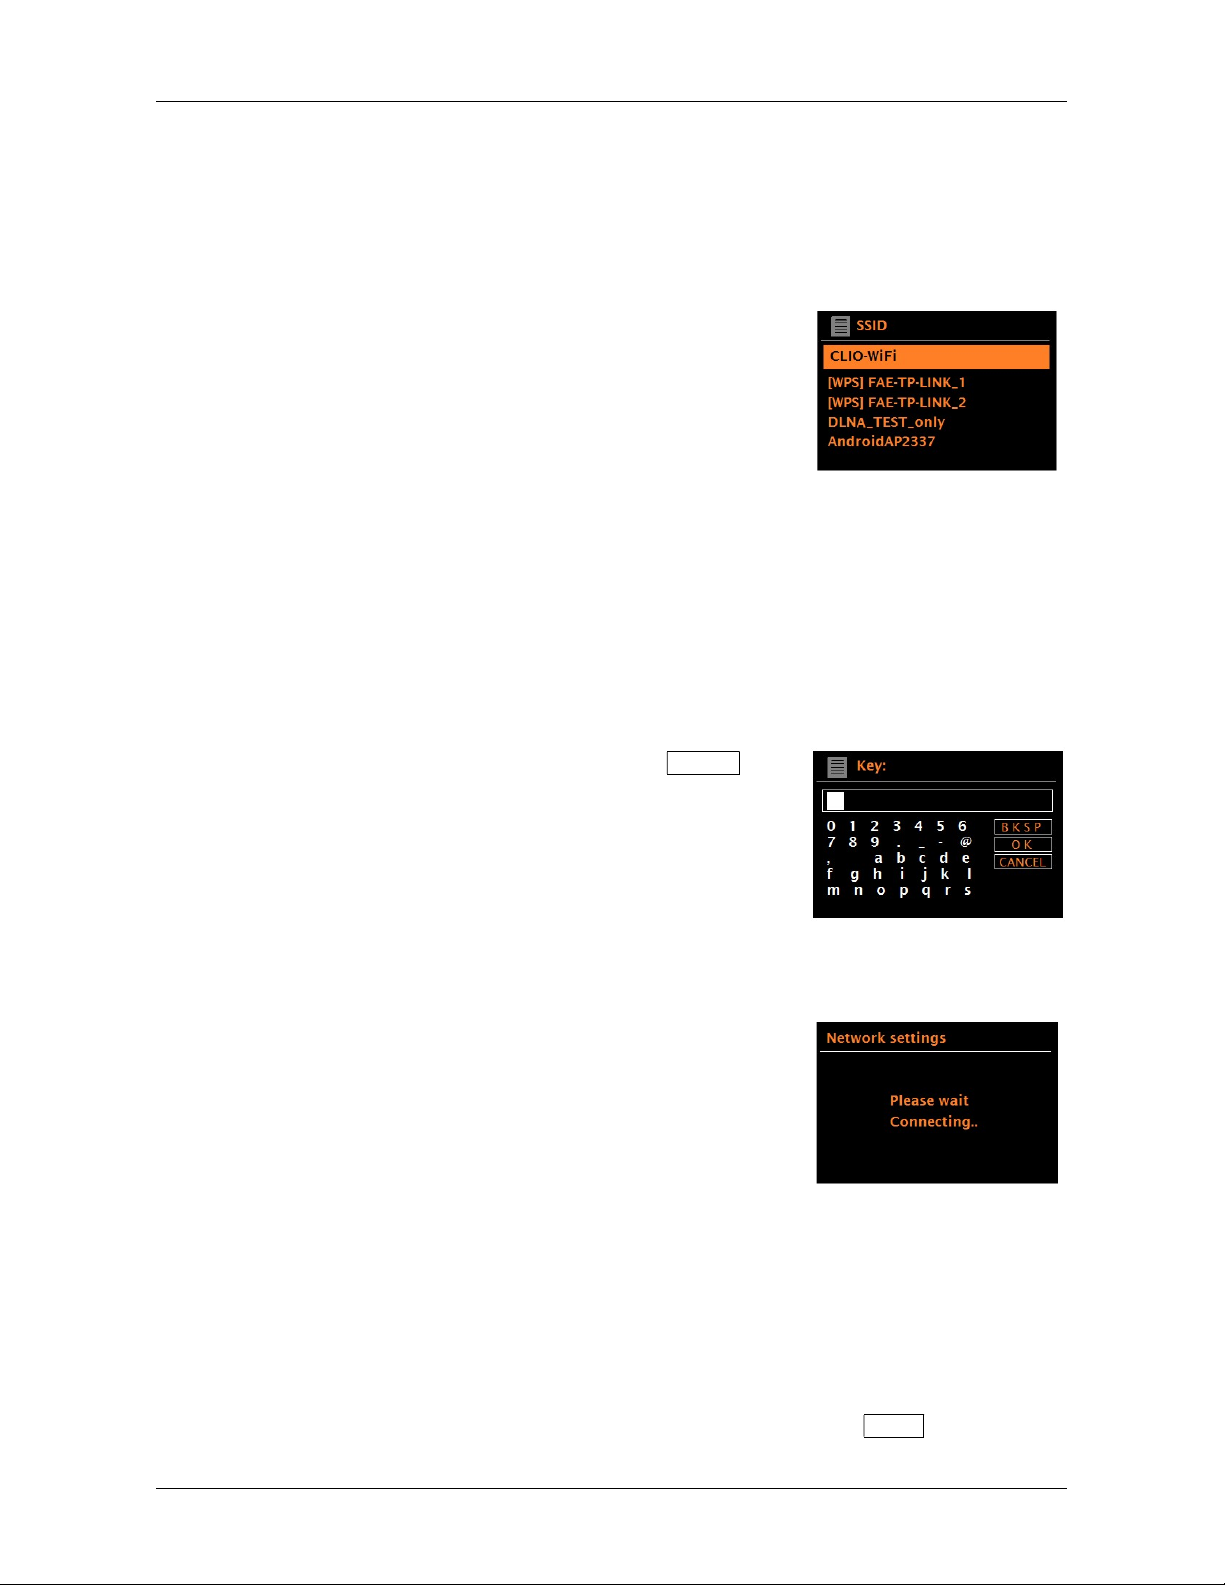
Selecting a network
When the Network wizard is activated, Solo and Duetto automatically scan for available wireless
networks and presents a list of SSID’s (Service Set IDentifier) for the networks. Those options,
starting with WPS in brackets, indicates encrypted networks offering Wi-Fi Protected Setup (WPS).
You can also visit our web site for setup help videos: www.comoaudio.com
14
Solo and Duetto remember login details for the last four wireless networks they have connected to
and will automatically connect to one of them when they are available. If connection to a network is
temporarily lost, Solo and Duetto will automatically reconnect, typically within 3 minutes or less,
from when the network becomes available again. If the network is lost, DAB (optional), FM,
Bluetooth, Auxiliary inputs, and the Optical input can all still be used.
Wi-Fi network (SSID), select your network from the list.
Open network
If the selected network is open (non-encrypted), Solo or Duetto connects and no further details are
required.
Standard encrypted network
If the wireless network is protected, the next screen presents options to enter the network key or
password.
Note: The default password for most wireless routers is printed on a label on the router itself.
To enter the network’s key (password), rotate the Menu
knob to highlight the relevant characters and briefly press in to
select each character in turn. As each character is selected,
the password is built up and displayed in the field at the top of
the display.
The three options – Backspace, OK, and Cancel are
included in the selection loop. These are accessed by
rotating the Menu knob until they are highlighted. You can also
use the remote’s left/right/up/down/play (enter) keys to input
your password.
On completion
Solo or Duetto connects to the selected network.
If connecting fails, the unit returns to a previous screen to try
again. To exit the process, briefly press the Source knob in.
Web Based Configuration
Using PCs, Mac OS, or Android smart devices to connect Solo or Duetto to your network:
1. Ensure Solo or Duetto is active, if in Standby or Sleep mode press the Power knob in briefly
or press the Power key on the remote..
2. Ensure Solo or Duetto is in Device Setup mode:
If Solo or Duetto have not already been configured, they enter Device Setup mode
automatically on start-up.
If Solo or Duetto have previously been configured and already connected to a network,
select Menu > System settings > Network > Clear network settings
This will clear any current network settings and the unit will automatically enter Device
Setup mode.
Note: While configuring the unit it is recommended that your computer be disconnected from all other
networks (both wired and wireless).
In Device Setup mode, Solo and Duetto are set to act as a micro Access Point (µAP) and
broadcasts its own network name (SSID):
CA SOLO (or DUETTO)_xx:xx:xx:xx:xx:xx
On your computer
3. Ensure the Wi-Fi interface of your computer or device is switched on.
4. Select the network: CA SOLO (or DUETTO)_xx:xx:xx:xx:xx:xx from your computers list of
available Wi-Fi networks.
5. In a Web browser on the computer or device, navigate to the Solo or Duetto Web configuration
page using the following address:
i. IP address 172.24.0.1
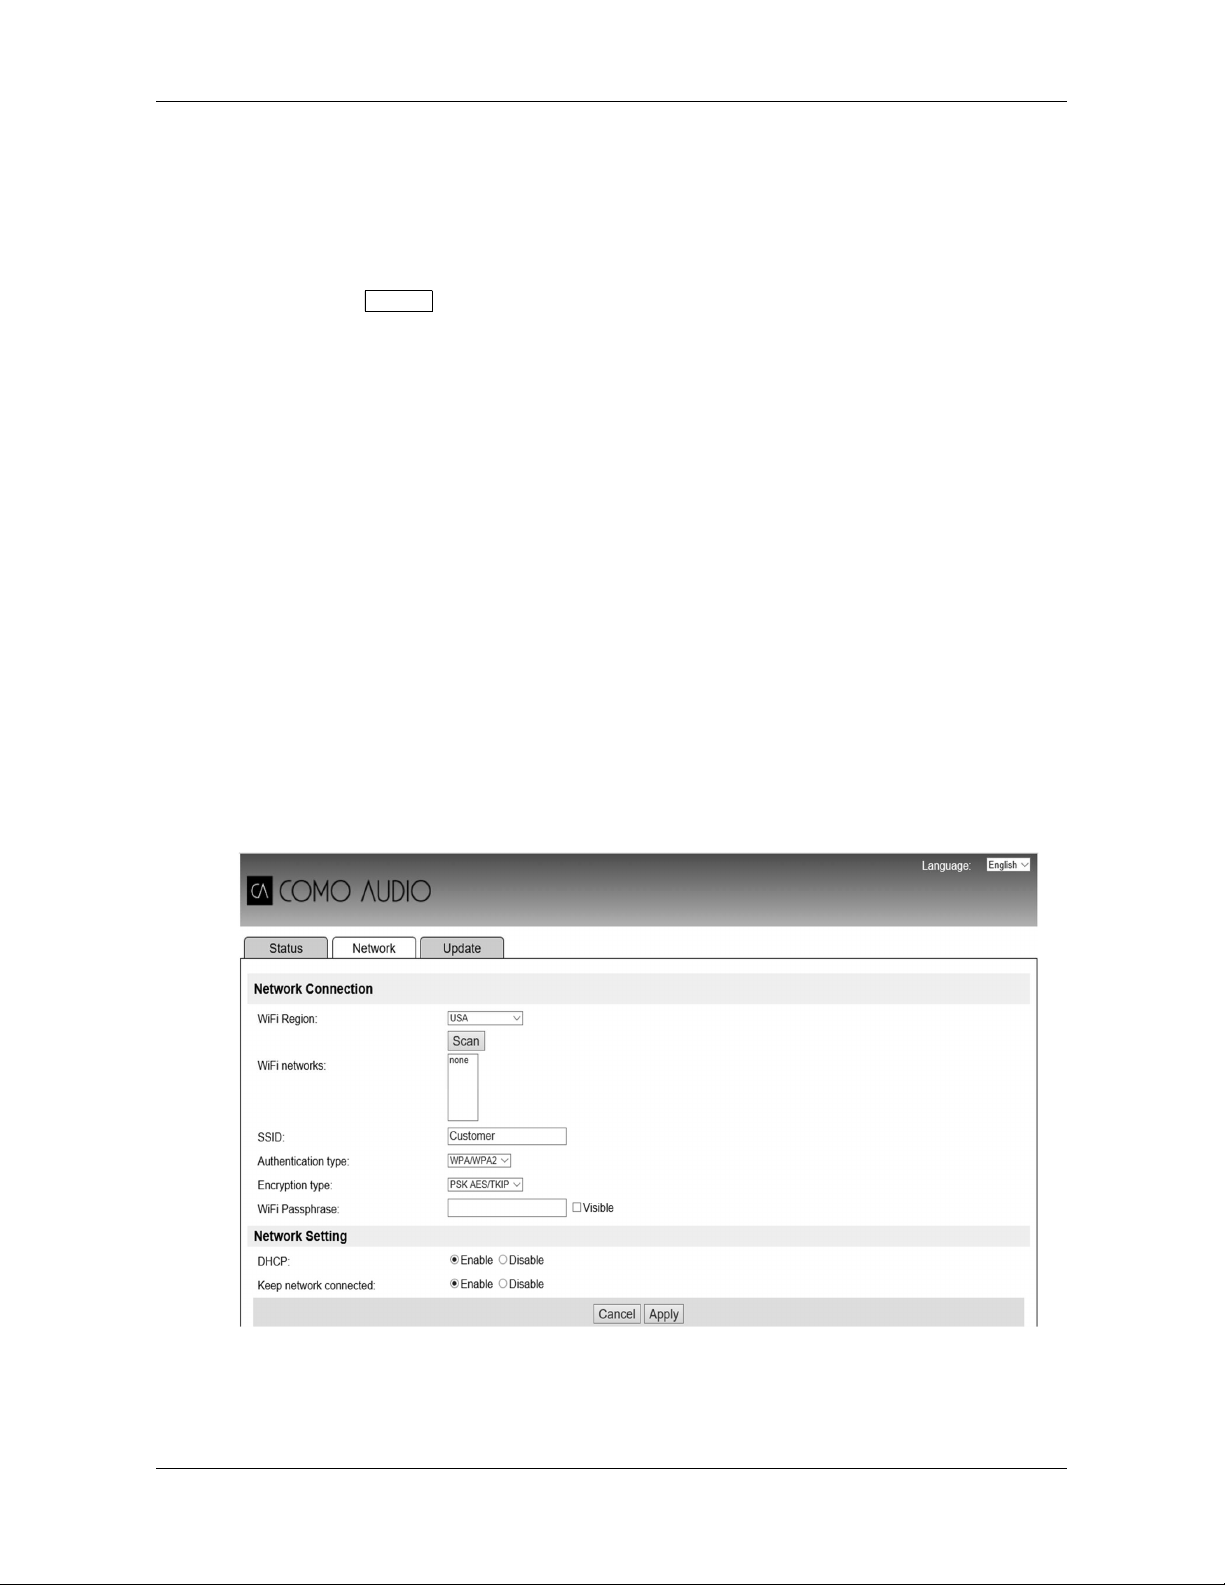
6. The Solo or Duetto Web Configuration page opens:
7. Click the Network tab.
8. Select Wi-Fi as the Network Type.
9. In the Wi-Fi Region box, select the Wi-Fi region closest to your location.
16

10. Click Scan.
11. The Wi-Fi Networks list updates to show available Wi-Fi networks.
12. Select your preferred network from the Wi-Fi Networks list. (Usually your normal home
network).
13. Type in the password (if required) for the network in the Wi-Fi Password box.
14. In the DHCP field, Enabled is selected by default to generate network settings automatically.
Only select ‘Disabled’ if you wish to set the following parameters manually:
a. IP Address
b. Subnet Mask Address
c. Gateway Address
d. DNS Address
15. Keep network Connected - When disabled the network connection is shut down when not in a
network mode. When enabled the network connection is maintained to allow activation/control
from network apps
16. Click Apply.
17. Click OK to confirm you wish to apply the selected settings. Solo or Duetto restarts and
connects to the preferred network.
18. Setup Complete
The Solo or Duetto’s wireless network is no longer available. Reconnect your computer to the
same preferred home network as you just specified for your Solo or Duetto (this may happen
automatically dependent on the computer set up).
Embedded web pages
Once Solo or Duetto is connected to your network a web page is available to view status
information and make limited changes via a web browser, run on a smart device or PC, connected
to your network.
To connect to the web page enter your Solo or Duetto’s IP address into your web browser. To view
the IP address, on Solo or Duetto’s menu, navigate to: Menu > System Settings > Network >
View Settings – IP address.
 Loading...