

Page 1
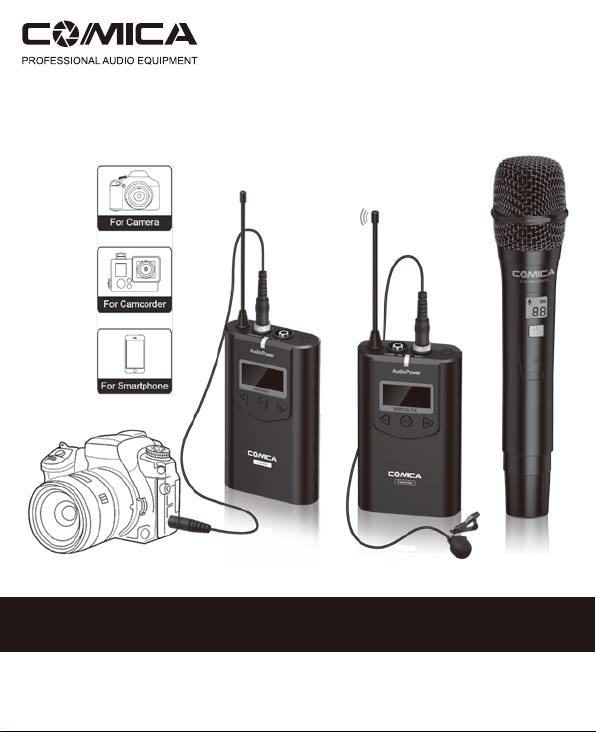
CVM-WM100
UHF Wireless Microphone
USER MANUAL
Page 2
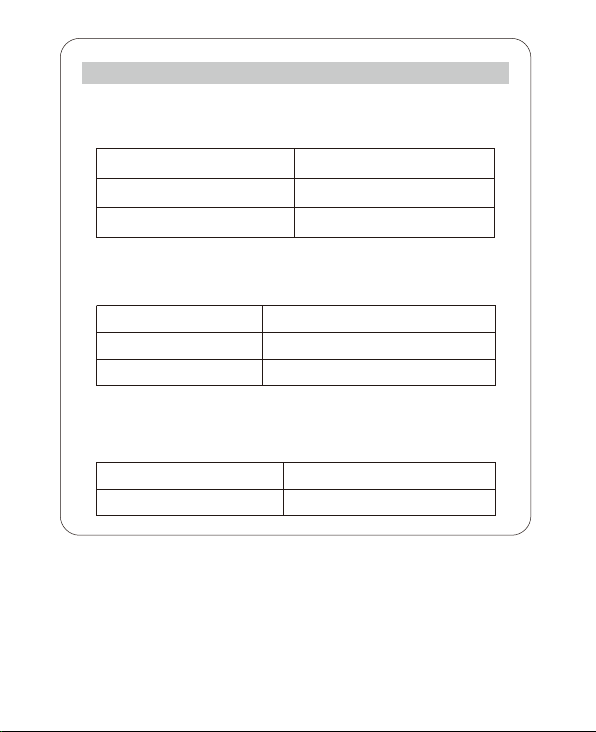
Specification
Hand-held Transmitter HTX
Channels
Wireless Frequency
Transmitting Power
Lavalier Transmitter TX
Channels
Wireless Frequency
Transmitting Power
Receiver RX
Channels
Wireless Frequency
48
520.000MHz ~ 534.100MHz
15dBm
48
520.000MHz~534.100MHz
15dBm
48
520.000MHz~534.100MHz
Page 3
Foreword
Thanks for purchasing the COMICA WM100 UHF wireless microphone.
WM100 utilizes UHF wireless technology and LCD lattice screen, it comes with
16-levels adjustable volume, built-in with ‘Adjustable RF Strength’, ‘Local Audio
Testing’, ‘Real-time Audio Monitor’ functions,etc., which takes you more
professional and convenient recording;
To ensure the security of the product, please carefully read the user
manual ,correctly install and operate the item.
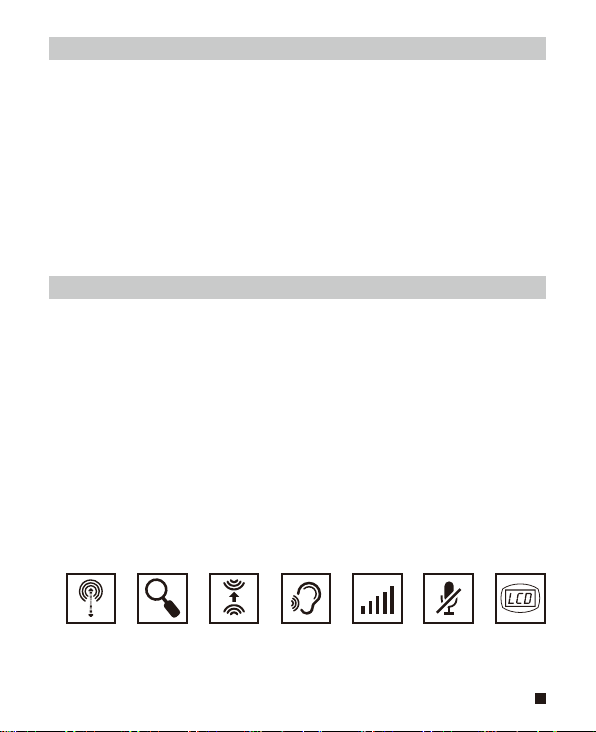
Main Features
. Multiple Channels for Serveral Devices Work Together;
. Working Distance Up to 100m; (100m in Open Area, 60m in Barrier Area)
. Local Audio Test in Transmitter End;
. Real-time Audio Status Monitor in Receiver End;
. Real-time Audio Monitor;
. 16-levels Adjustable Volume;
. RF Signal Strength Adjusted in Transmitter End;
. Muting Mode;
. Lattice LCD Display, High Resolution;
100m Working
Distance
Local Audio
Testing
Wireless Audio
Monitor
Monitor
Audio Volume
Muting Mode16-levels Adjustable
Lattice LCDReal-time
1
Page 4
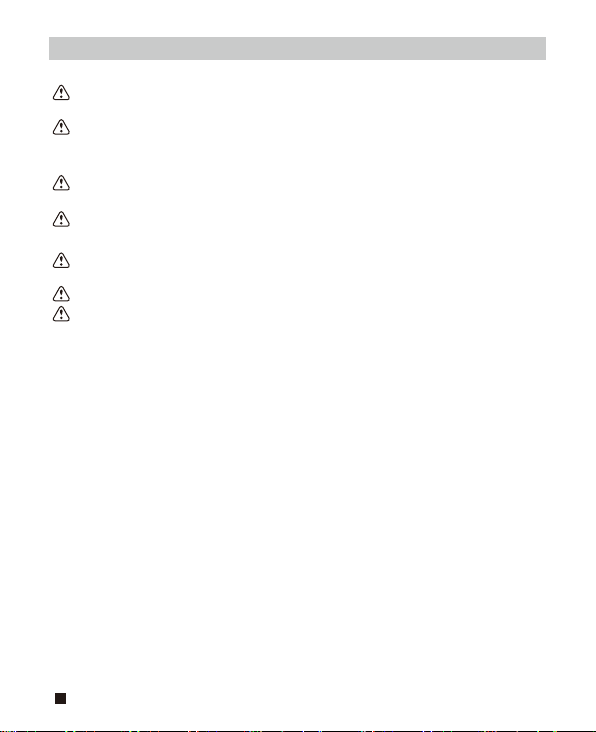
Notice
The antenna will affect working distance, be sure to protect it and avoid any
man-made damage;
Working distance will be affected by surround environment, make sure the
background is open with no interference, and turn off the device’s WIFI during
usage;
RF strength is advised to set to ‘Low’ for short working-distance request, which
can help decrease power consumption and increase power duration;
While working with smartphone, one must purchase the TRS-TRRS audio cable
adapter separately;
Take notice of the batteries’ ‘positive and negative poles’ to avoid reverse,
otherwise the product maybe damaged;
Keep the product in dry environment;
Don’t expose the product or work with it in Rain to avoid short-circuit;
2
Page 5
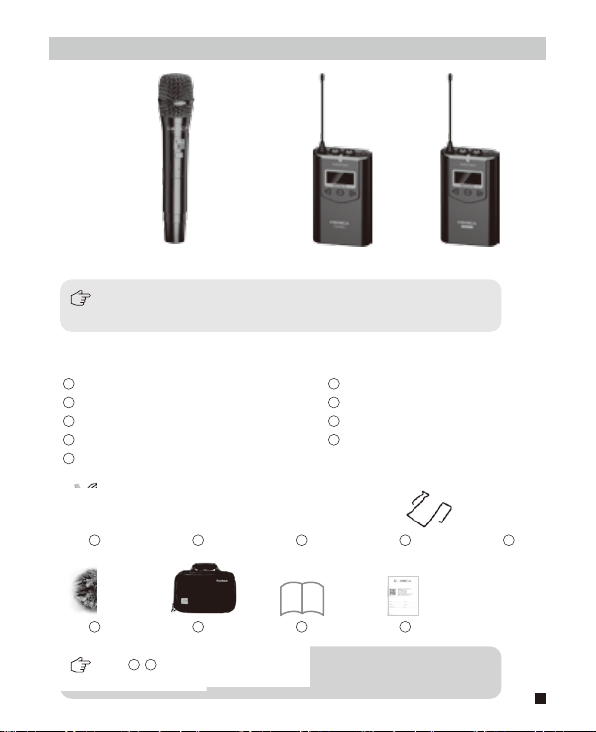
Main Body
In Packing List
WM100=Lavalier Transmitter+Receiver
WM100H=Handheld Transmitter+Receiver
Accessories
1
3.5mm Audio Mic
2
3.5mm-3.5mm Audio Output Cable
3
3.5mm-XLR Audio Output Cable
4
Waist Belt Clip x 2pcs
5
Camera Mount
1
166
Item is included only in WM100
2
7
Lavalier TransmitterHand-held Transmitter
6
Wind Muff
7
Portable Case
8
User Manual
9
Warranty Card
3
8
Receiver
4
9
5
3
Page 6
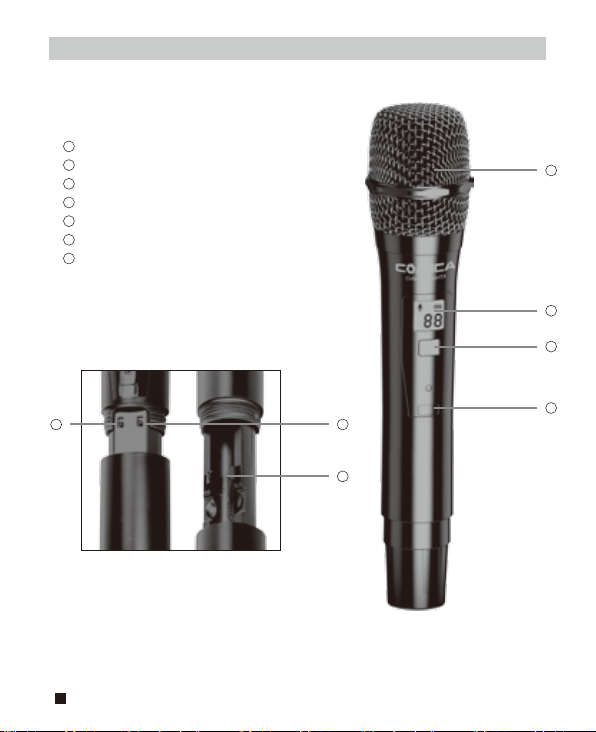
Components and Instruction
Components
Hand-held Transmitter
1
Microphone
2
LCD Display
3
Power/CH Setting Button
4
IR Screen
5
Low cut/Normal Audio Switch
6
Channel Sequence Switch
AA Battery Holder
7
1
2
3
65
7
4
4
Page 7

Lavalier Transmitter
1
Antenna
2
LINE IN Input
3
MIC Input
Power/Muting Button
5
Working Indication Light
6
Function Selection Button -
Function Setting Button
7
Function Selection Button +
8
AA Battery Holder
9
1
344
2
5
6
7
9
8
5
Page 8
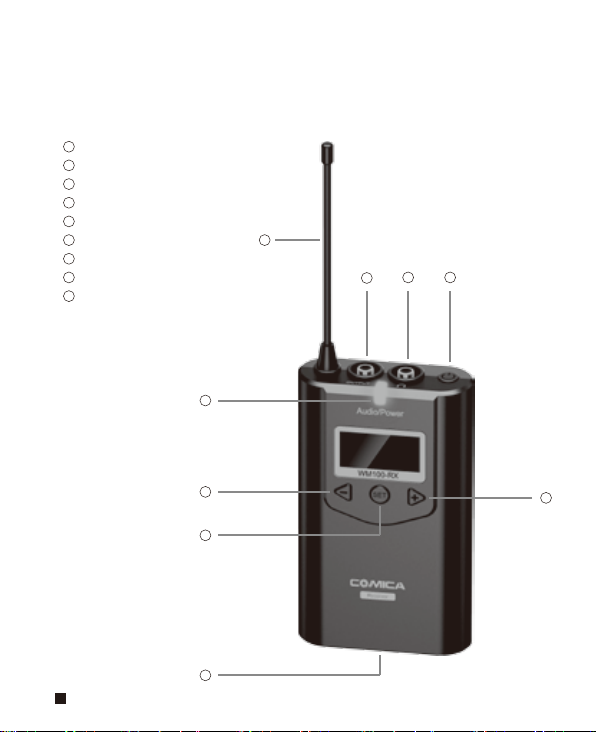
Receiver
1
Antenna
2
3.5mm Audio Output
3
3.5mm Audio Monitor Output
Power Button
5
Working Indication Light
6
Function Selection Button -
Function Setting Button
7
Function Selection Button +
8
AA Battery Holder
9
5
1
344
2
6
7
9
6
8
Page 9
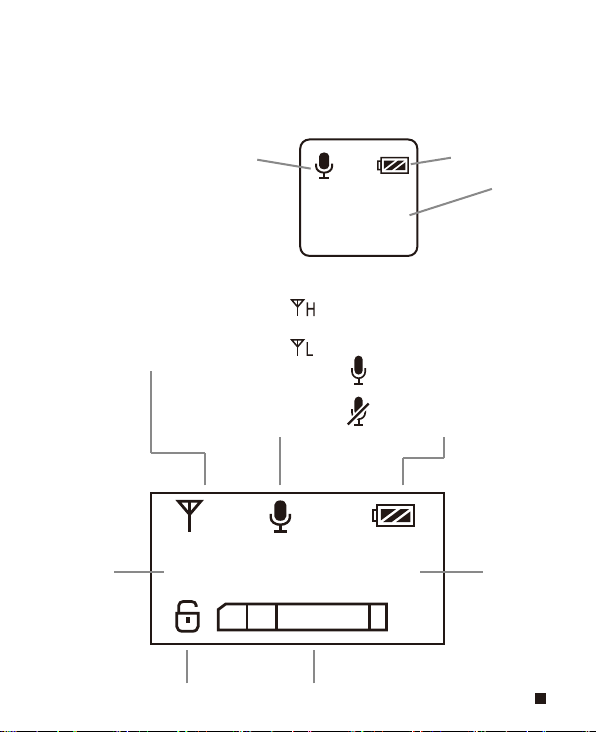
Screen Display Instruction
Hand-held Transmitter HTX:
Normal recording mode Power Indication
8 8
Lavalier Transmitter TX :
RF Transmitting Strength High Icon
:
Channel
RF Transmitting Strength Low Icon
Normal Audio Mode Icon:
Muting Mode Icon
:
:
Power Indication
H
Channel Channel
Locking/Unlocking Icon Audio Status Indication Bar
CH
00
AF
520. 000
MHz
Frequency
7
Page 10

Receiver RX:
Volume IndicationRF Receiving Strength
VOL 15
Power Indication
Channel Channel
CH
00
520. 000
MHz
Frequency
AF
Locking/Unlocking Icon Audio Status Indication Bar
Indication Light Instruction
Green Light Keeps On
Green Light Flicker
Only for Receiver
(
Red Light Keeps On
Red Light Flicker
8
)
Work Normally
Channels Not Match
Muting Mode
Low-power
Page 11

Function Button Instruction
Lavalier
Transmitter
and Receiver
Hand-held
Transmitter
Power/Muting Button
Set Button
+ Button
- Button
Power/CH Setting
Button
“Low cut/ Normal”
Sound Switch
-
LCF
Channel Sequence
+
-
CH
Long Press
Short Press
Long Press
Short Press
Short Press
Short Press
Long Press
Short Press Channel Sequence Switch
Push-up
Push-down
Push-up
Push-down
Power On/Off
Muting(Unlocking Mode)
Locking/Unlocking
Function Setting (Unlocking Mode)
Function Selection(Unlocking Mode)
Function Selection
Function Selection
Power On / Off
Low cut
Normal
Order-up
Order-down
Low-cut Function:
The low frequency part of the noise is reduced, and the sound is clearer and more
efficient;
9
Page 12

Installation and Usage
Hand-held Transmitter
Step 1. Install two AA batteries into the battery tray
according to the positive and negative
electrode
AA
AA
Step 2. Long press the button to turn on
the hand-held transmitter
10
Page 13

Step 3. Matching with the receiver
VOL 11
2 8
Hand-held transmitter’ channel Receiver’ channel
A. Short press power button to switch the channel
2 8 3 5
Channel switch
35
11
Page 14

B. Set HTX and RX into same channel
3 5
Hand-held transmitter’ channel Receiver’ channel
sync
Hand-held transmitter Receiver
VOL 11
35
12
Page 15

C. The green light of RX will turn on after successful match
+
-
LCF
-
CH
Low cut adjustment switch Channel sequence switch
For simple channel setting, please open the battery cover to
adjust the channel sequence
13
Page 16

Lavalier Transmitter
Install Batteries into Battery Holder by following the ‘+’ and ‘-’ Icon, and clip
Step 1:
the waist holder onto back of transmitter ;
Long-press the power button to open the transmitter;
Step 2:
According to your own requirement, to choose to connect the Mic cable
Step 3:
onto ‘Line in’ or ‘Mic’ Input ;
Record with the Mic , and pay attention to the ‘Audio Status Indication Bar’
Step 4:
to check if the transmitter works ;
520. 000
14
Volume dynamic display bar
Page 17

Step 5:
Refer to the Function Button Instruction to set the relative functions, for
example: CH Adjustment, RF Strength Adjustment, LCF Adjustment;
A. Unlock
:
520. 000
Lock
Long press SET button
520. 000
Unlock
15
Page 18

B. CH Adjustment
:
Short press SET button
Adjust the CH channel by - + button
Adjust CH channel
16
Page 19

C. RF Strength Adjustment
Short press SET button
Adjust the RF signal strength by - + button
D. LCF (Low-cut Filter)
:
Adjust RF
LCF OFF LCF ON
Choose thin voice with LCF ON or thick voice with LCF OFF.
17
Page 20

Receiver
Step 1:
Install the Receiver onto the device via cold-shoe, and connect one end
of the audio cable into Output socket, connect another end of the audio
cable into device’s audio input socket; And plug your earphone into the
audio monitor’s socket for audio monitor if you need;
Mount the cold shoe onto camera
Mount the Receiver onto
cold-shoe
The receiver is mounted on the device
Plug your earphone into the
audio monitor’s socket
Connect one end of the audio cable into Output socket,
Connect another end of the audio cable into device’s
audio input socket
18
Page 21

Set CH to match the channels, and adjust VOL to set the volume until you’re
Step 2:
satisfied;
A.Unlock
:
VOL 11
520. 000
Lock
Long press SET button
VOL 11
520. 000
Unlock
19
Page 22

B.Set CH to match the channels
Short press SET button
:
VOL 11
Adjust CH by - + to match the Transmitter
Adjust CH channel
The Green Light will keep on after channel matched.
20
Page 23

C.Set the volume until you’re satisfied
Short press SET button
VOL 11
:
VOL 11
Adjust volume by - + button
Step 3:
Go for the normal audio recording.
Adjust VOL
21
Page 24

Specification
Hand-held Transmitter HTX
Signal / Noise
Antenna
Stray Radiation
Sound Delay
Audio Distortion
Battery
Dimension
Operating Temperature
Storage Temperature
22
>65dB
PCB Antenna
<-60dBc
<20ms
<0.5%
AA Batteries x 2pcs
Φ53.5(MAX) x 253mm
0℃ ~ 50
℃
-20℃ ~ 60
℃
Page 25

Lavalier Transmitter TX
Signal / Noise
Antenna
Stray Radiation
Sound Delay
Audio Distortion
Audio Input Socket
Batteries
Size
Working Temperature
Storage Temperature
65dB
>
1/4 Wavelength Antenna
-60dBc
<
20ms
<
0.5%
<
3.5mm Socket
AA Batteries x 2pcs
111.5 x 65 x 25.3mm
0℃ ~ +50
℃
-20℃ ~ +60
℃
23
Page 26

Receiver RX
Signal / Noise
Antenna
Receiving Sensitivity
Sound Delay
Audio Distortion
Frequency Range
Audio Output
Batteries
Size
Working Temperature
Storage Temperature
65dB
>
1/4 Wavelength Antenna
-95dBm
20ms
<
0.5%
<
20Hz ~ 18KHz
3.5mm Port
AA Batteries x 2pcs
111.5 x 65 x 25.3mm
0℃ ~ +50
℃
-20℃ ~ +60
℃
24
Page 27

Email: support@comica-audio.com
 Loading...