

Page 1
For series /
Para la serie /
Pour la série
MID1042
Coby® Kyros® Internet Tablet
EN
ES
FR
Please read carefully before use • Léa el manual antes de usar • Veuillez lire ce livret avant utilisation
Quick Start Guide ................................................ Page 2
Tableta Internet con Pantalla Táctil
Guía de Inicio Rápido ........................................Pagina 41
Tablette Internet à Ecran Tactile
Guide de Démarrage Rapide ................................ Page 82
Page 2

 Table of Contents
THANK YOU .....................................................3
English
Package Contents ........................................................3
Features..........................................................................4
GETTING TO KNOW THE COBY INTERNET
TABLET .............................................................5
About the Touchscreen ...............................................8
Protective Film ........................................................8
Touchscreen Actions..............................................8
About the Orientation Sensor .....................................9
Charging the Tablet ...................................................10
Inserting a Memory Card or USB Flash Drive...........10
Resetting the Tablet ....................................................11
GETTING STARTED .........................................12
Turning the Tablet on and off ...................................12
Turning the Screen On and Off (Standby) .......13
Unlocking the Screen ..........................................13
Home Screen at a Glance ........................................14
About Applications ....................................................15
Preinstalled Applications .....................................16
Installing Applications .........................................17
About Widgets ............................................................18
About Notifi cations .....................................................18
CONNECTING TO THE INTERNET ................. 20
Requirements ............................................................. 20
Connect to a Wi-Fi network ......................................21
BROWSING THE WEB .....................................23
MANAGING APPLICATIONS ........................27
OPTIONAL CONNECTIONS ......................... 30
Connecting to a Computer .....................................30
Connecting to a TV ....................................................31
Connecting Headphones .........................................32
Using the USB Full-Size Adapter .................................32
Connecting a Keyboard .....................................32
Connecting a Storage Device .......................... 33
SETTING THE SYSTEM OPTIONS ....................34
SPECIFICATIONS ...........................................35
SUPPORT ........................................................36
SAFETY NOTICES ...........................................37
Page 2 Table Of Contents
Page 3
 Thank You
Congratulations on your purchase of a Coby® Kyros®
Internet Tablet. This guide is provided to help you get
English
started quickly with your player; please read it carefully
and save it for future reference.
For detailed instructions, up-to-date information, and helpful
tips, please visit the Coby website at www.cobyusa.com.
This manual is available for download from the
Coby website as a PDF fi le.
To view PDF documents, download and install
the free Adobe Acrobat reader from the Adobe
website at www.adobe.com.
Package Contents
Please make sure that the items shown below are
included in the package. Should an item be missing,
please contact the local retailer from which you purchased this product.
Coby® Kyros® Internet
Tablet
Protective pouch
USB cable
Professional stereo
Earphones
This package may contain plastic bags or other
materials that pose a hazard to children. Be
sure to safely dispose of all packi ng materials
after opening.
Power adapter
Page 3 Thank You
Page 4

Features
Browse the Web.
Visit your favorite websites
English
Check your e-mail
Keep in touch with friends and family
Watch YouTube™ videos
Browse the world’s most popular video-sharing community
Read your favorite books
Download thousands of books with the included
E-book reader *
Discover thousands of apps for Android™
Games, applications, and more with the installed
marketplace
HDMI™ output to your TV **
Enjoy videos, photos and more in the comfort of your
living room
Connect to the Internet wirelessly
High-speed Wi-Fi 802.11 b/g/n networking
microSDHC memory card reader
Increase your storage capacity (up to 32 GB sup-
ported)
Built-in camera
Convenient front-facing camera
Automatic orientation detection
Read any way you want; the display adjusts auto-
matically!
* Reading books in the ePub format requires the included
E-book reader application.
** Requires optional HDMI cable (Type A-to-Type C). 1080p
HD video playback requires a video fi le encoded at 1080p.
Streaming video quality will be affected by the source, and
the quality and condition of your network connection.
Enjoy your media library anywhere
Portable powerhouse plays popular music, video,
and photo formats
Page 4 Thank You
Page 5
 Getting to Know the Internet Tablet
English
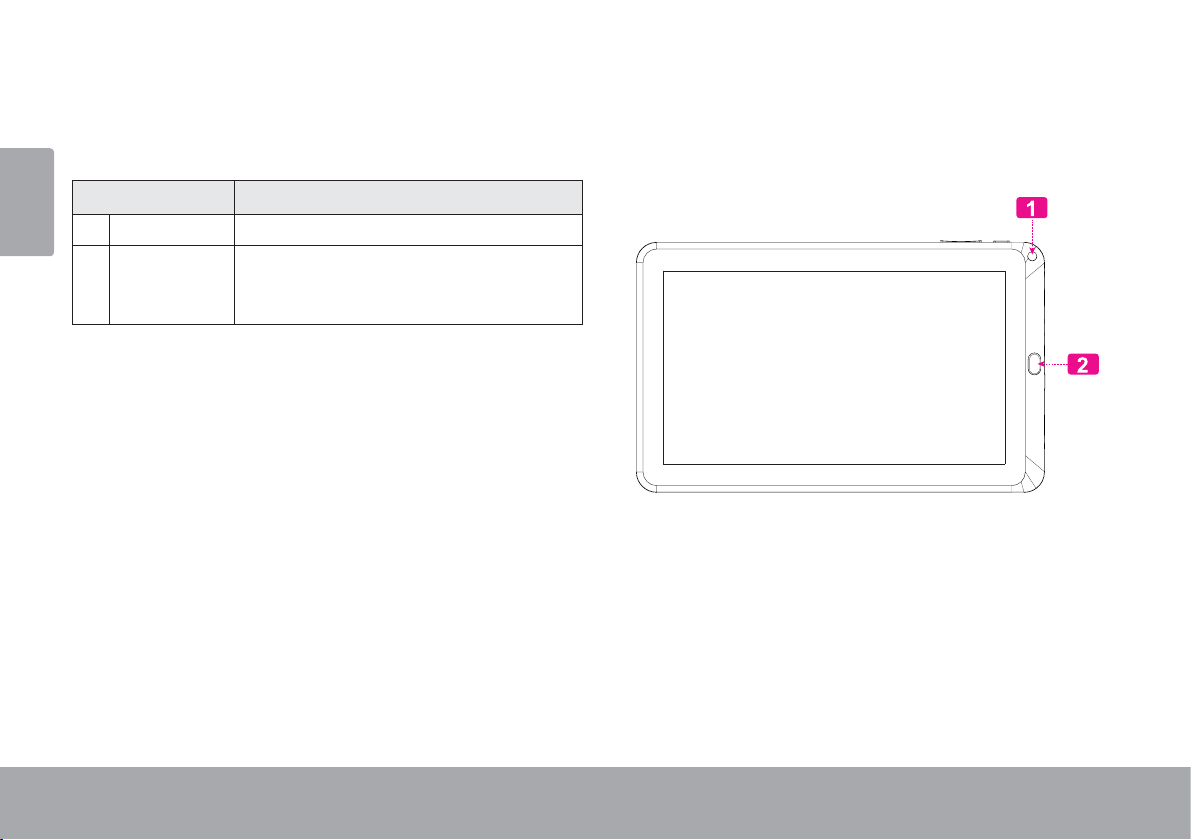
Unit at a Glance
Name Description
1Camera Front-facing camera
2 Back Key Press to return to the previous screen. If
the keyboard is on the screen, press to
close the keyboard.
Page 5 Getting To Know The Internet Tablet
Page 6
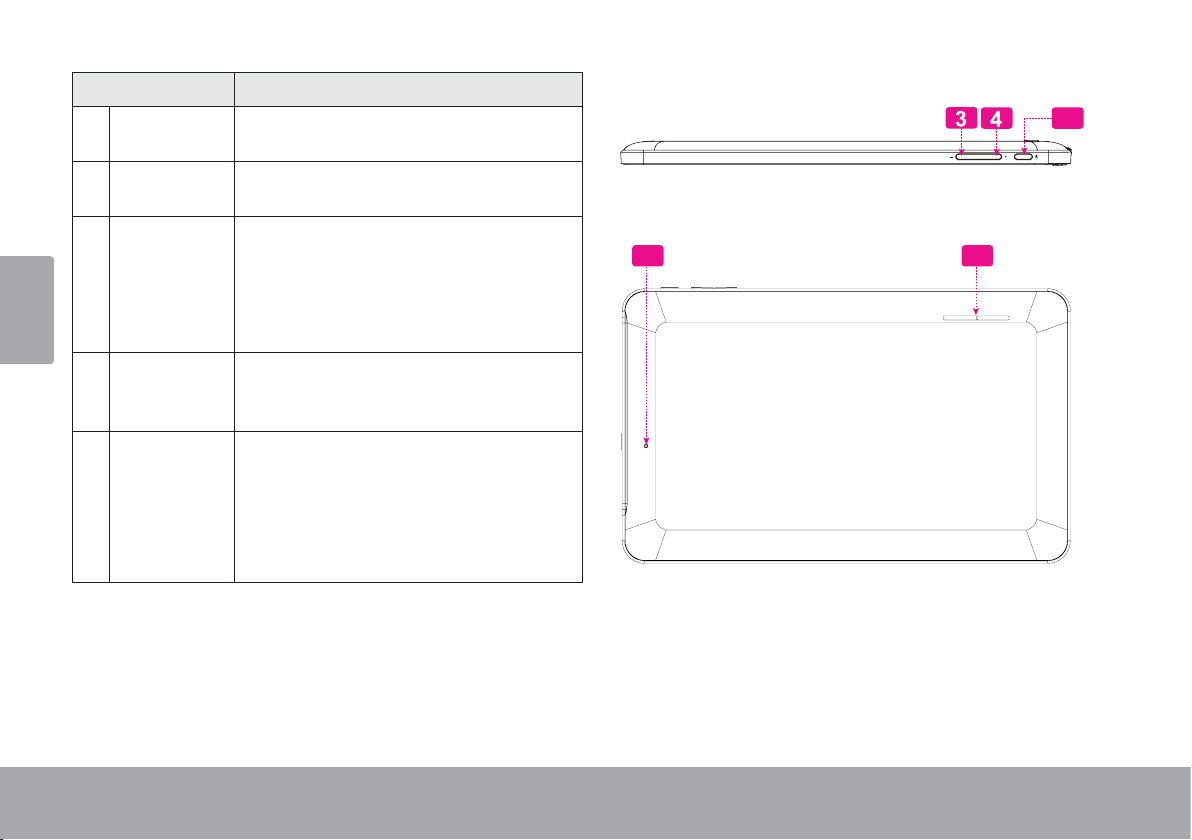
Name Description
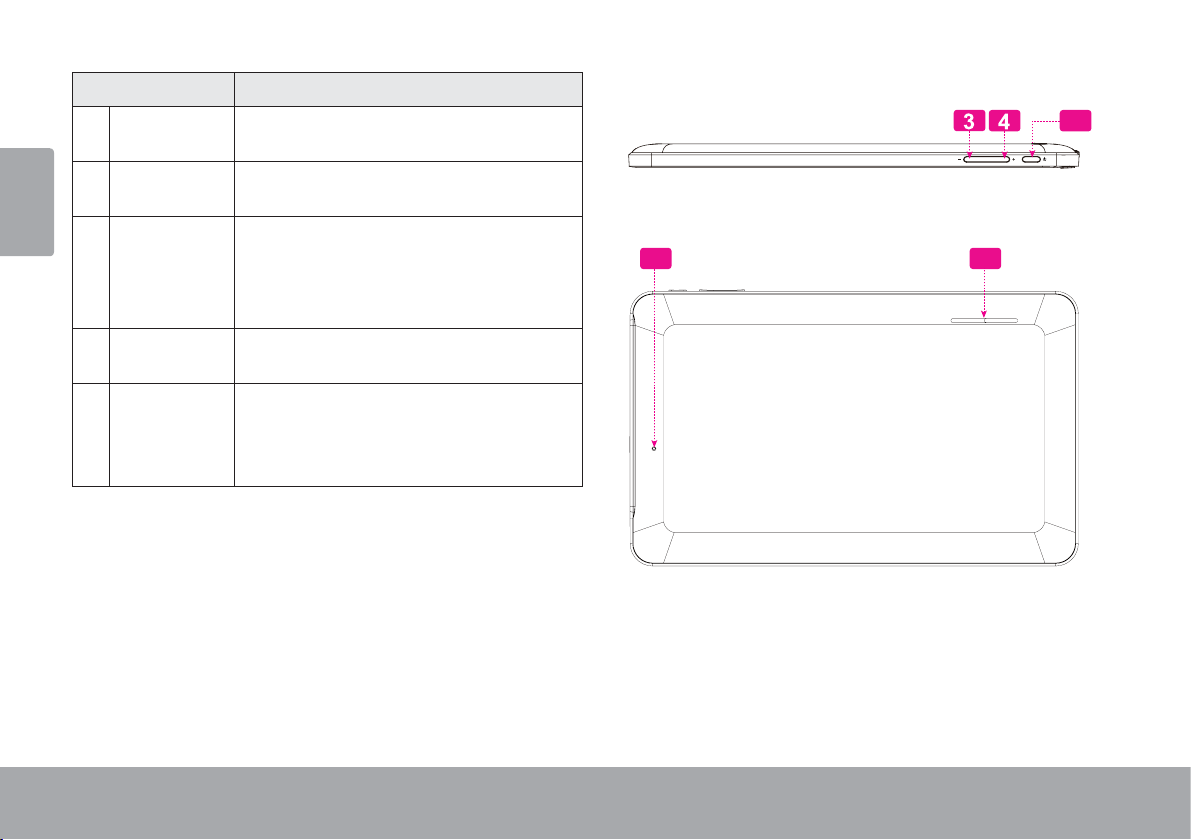
3 Volume –
key
English
4 Volume +
key
5 Power key Press to turn the unit on, or to turn the
6 Speaker Speaker output is automatically muted
7 Reset key Press to reset the tablet if it freezes or
Press to decrease the volume level.
Press to increase the volume level.
screen on and o .
Press and hold to access the Power O
menu.
when using headphone Jack.
otherwise behaves abnormally. (Use a
paperclip or other small object to gently press this key.)
5
67
RESET
Page 6 Getting To Know The Internet Tablet
Page 7
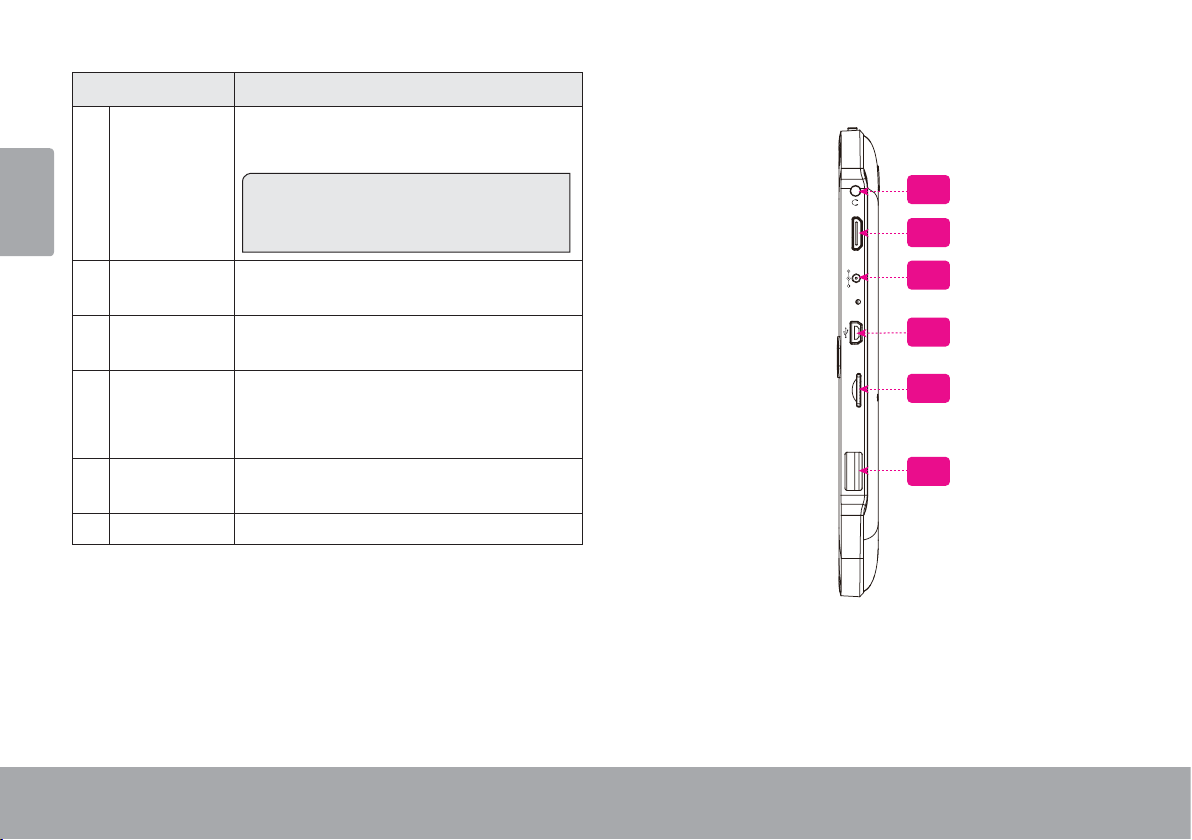
Name Description
8Headphone
jack
English
Audio output connection for headphones.
Note: Speaker output is automatically
disabled when headphones are connected to the player.
8
HDMI
9
9 HDMI jack
(mini Type C)
10 Power jack
(DC input)
11 USB 2.0 Hi-
speed port
12 m ic ro SD HC
card slot
13 USB Slot Connect to the USB ash drive.
Page 7 Getting To Know The Internet Tablet
Connect to a TV or other display.
Charge and power the tablet with the
included power adapter.
Connect to a computer to transfer data
(e.g., music, videos, photos, les).
Load external microSDHC memory
cards here.
DC IN 5V
MEMORY CARD
10
11
12
13
Page 8
About the Touchscreen
Your tablet comes equipped with an easy-to-use touchscreen.
English
Our capacitive multi-touchscreen requires gentle fi ngertip
touch on the glass screen to activate tablet’s functions.
Multiple fi ngers may be used to perform gestures (e.g.
2-fi nger picture zoom).
Please note: Your fi nger tips must not be covered. A
stylus may be used. Make sure it is for capacitive touchscreens.
To avoid damaging the screen, do not touch it
with excessive force or with any object other
than your fi nger. For best response, make sure
your hands are clean before using the touchscreen controls.
Protective Film
A thin fi lm has been applied to the touchscreen to protect
it during shipping. The protective fi lm should be removed
before use. To remove it, simply take a corner of the fi lm
and peel it away from the screen.
Touchscreen Actions
You can control the functions of the tablet by using
the touchscreen in combination with the three touch
keys located on the bezel. To control the tablet with the
touchscreen, use your fi ngertip to manipulate icons,
buttons, menu items, the on-screen keyboard, and other
items displayed on the screen.
You can perform the following actions on the touchscreen
using your fi ngertip or appropriate stylus.
Touch: To activate an on-screen item (e.g.,
application icons, buttons, menu
items, and the letter/symbols of the
on-screen keyboard), simply touch
them with your fi ngertip.
Touch and
Hold:
Some on-screen items have an
alternate action if you touch and hold
it (e.g., opening an alternate menu, or
to activate the drag function). To touch
and hold an item, touch the item and
do not lift your fi ngertip until the action
occurs.
Page 8 Getting To Know The Internet Tablet
Page 9
Drag: Drag an on-screen item to change its
position (e.g., an application icon on
the home screen).
English
Swipe: Swipe up/down on the screen to scroll
Double-tap: Quickly tap the screen twice on a
To drag an item, touch and hold it for
a moment, then without lifting your
fi ngertip, move your fi ngertip on the
screen until the item reaches its target
destination.
through a list. On some screens,
you may be able to swipe left/right to
change the view.
To swipe, touch the screen and then
quickly move your fi ngertip across the
screen without lifting your fi ngertip.
Do not pause on the screen with your
fi ngertip at the initial point of contact
or you may accidentally drag an item
instead.
webpage or other application screen
to zoom (the application must support
the double-tap/zoom function). Within
the browser, double-tapping a webpage section will cause the browser to
zoom and fi t that section to the width
of the screen.
About the Orientation Sensor
The tablet contains a sensor that will automatically
change the orientation of most screens as you rotate the
tablet. The sensor works best when the tablet is rotated
perpendicular to the ground (i.e., when the tablet is held
upright and not fat on its back).
The orientation sensor can be turned on and off in the
Display settings menu.
Page 9 Getting To Know The Internet Tablet
Page 10
Charging the Tablet
The tablet comes with a built-in rechargeable lithiumpolymer battery.
English
Before using the tablet, the battery should be charged
fully. Press lower right corner settings, next to battery
icon is charging percentage.
Inserting a Memory Card or USB
Flash Drive
The tablet accepts microSDHC memory cards and USB
fl ash drive. Insert a memory card into the microSDHC
card slot or USB fl ash drive into the USB slot to:
Increase the memory capacity of your tablet
To charge the battery:
Play media fi les stored on the memory card (e.g.,
music, video, or photo fi les) .
1. Plug one end of the included power adapter into an
AC 100-240V outlet.
2. Plug the other end of the included power adapter into
the Power jack on the tablet.
3. Disconnect the power adapter when the tablet is fully
charged.
The battery used in this device may present a
To insert a memory card or USB fl ash drive:
1. Align the memory card with the card slot. The metal
contacts of the memory card should face down away
from the LCD screen.
2. Slide the card into the spring-loaded slot. Push the
card in until it clicks into place.
3. Inset the USB fl ash drive into the USB slot.
fi re or chemical burn if mistreated. Do not
disassemble, incinerate, or heat the device. Do
not leave the de-vice in a place subject to direct
sunlight, or in a car with its windows closed. Do
not connect the device to a power source other
than that which is indicated here or on the label
as this may result in the risk of fi re or electric
shock.
Do not attempt to insert objects other than a microSDHC
memory card into the card slot. A compatible memory
card should fi t easily into the card slot; if you encounter
resistance, check the alignment of the card. Do not
attempt to force the card in.
Do not attempt to insert objects other than a USB fl ash
drive into the USB slot.
Avoid touching the go ld contacts of the mem ory card or
USB fl ash drive.
Page 10 Getting To Know The Internet Tablet
Page 11
To release and remove a memory card or USB fl ash
drive:
2. Push the card further into the slot until you hear a
click. The card will spring out of the slot.
1. UNMOUNT the memory card or USB fl ash drive.
English
a. From the home screen, tap the Launcher Tab,
and then touch Settings to show the settings
menu.
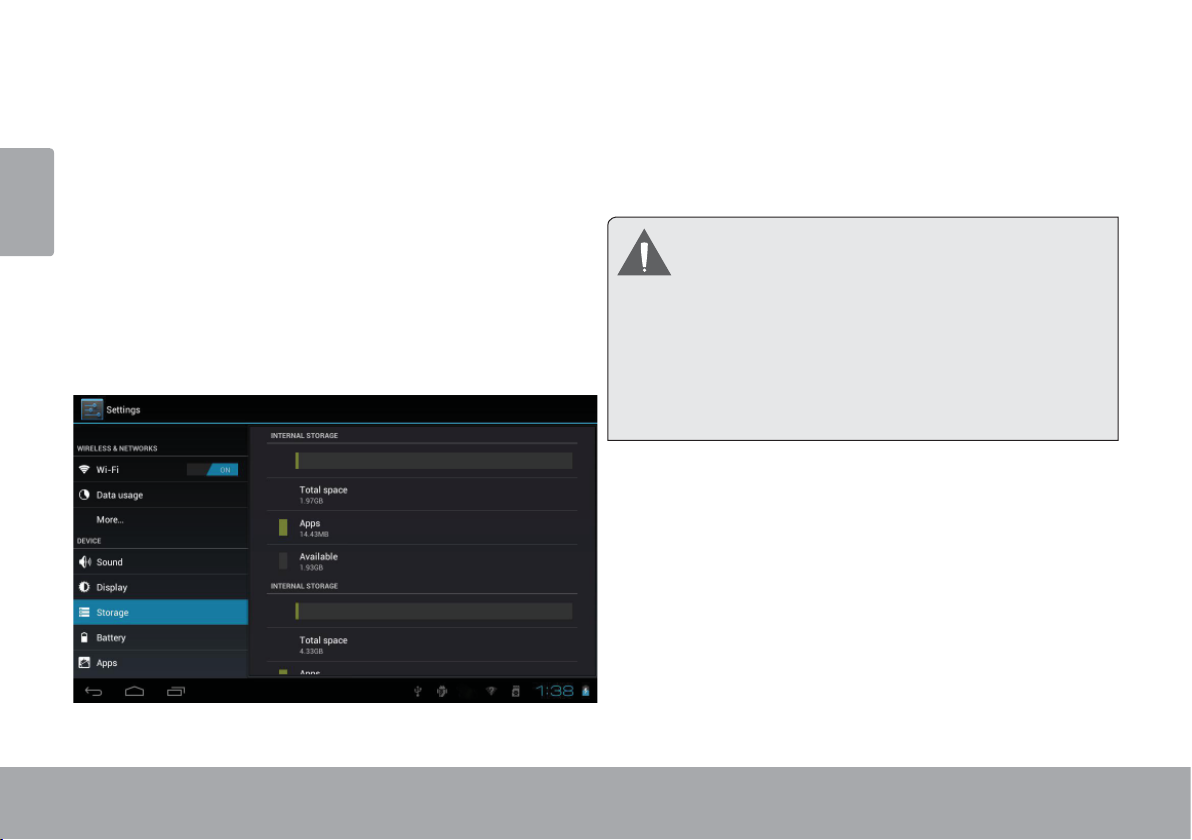
b. Touch Storage to show the storage settings.
c. Touch Unmount SD card or Unmount USB
fl ash drive to prepare the memory card or USB
fl ash drive for safe removal.
3. Grasp the card by its edge to remove it.
4. Remove the USB fl ash drive.
To avoid damage and data corruption, do not
remove a memory card or USB fl ash drive while
data is being written to or read from the card or
USB. For example, do not remove a card or
USB while playing a music fi le stored on the
card.
The available menu items are dependent on the
unit. All illustration is for reference only.
Resetting the Tablet
Reset the tablet if it should freeze and not respond or
otherwise malfunction.
1. Disconnect your tablet if it is connected to a computer.
2. Press and hold the POWER key for about 8 seconds
to turn off the tablet, and then press and hold the
POWER key until you see Coby logo.
Page 11 Getting To Know The Internet Tablet
Page 12
 Getting Started
Turning the Tablet on and off
English
To turn the tablet on:
Press and hold the Power key until the LCD screen
turns on and you see Coby Logo, then wait until you
see the Unlock screen.
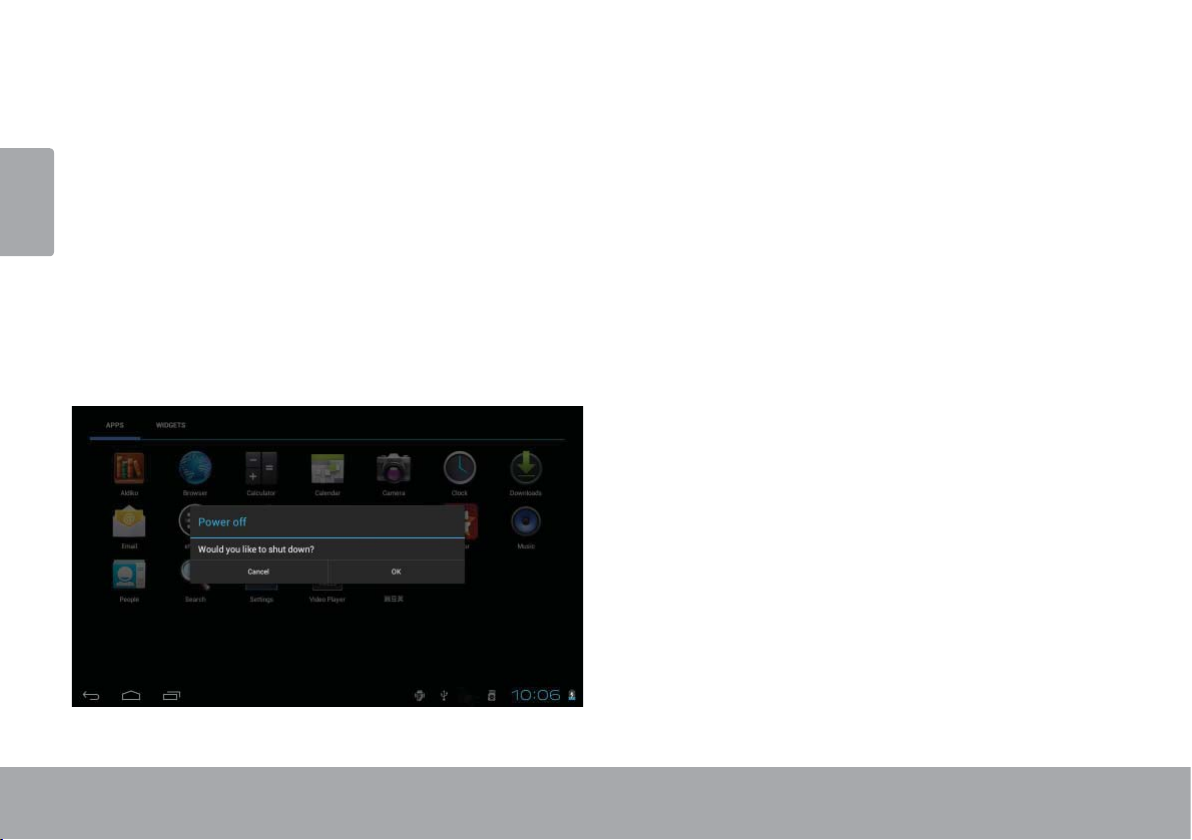
To turn the tablet off:
1. Press and hold the Power key until the confi rmation
message appears.
2. Touch OK to turn off the tablet.
Page 12 Getting Started
Page 13
Turning the Screen On and Off (Standby)
When the tablet is on, you can turn off the screen to
conserve battery power. Simply press the Power key
once to turn the screen off. Press the Power key again to
English
turn the screen back on.
To conserve bat tery power, the screen can be
set to turn off automatic ally when the tablet is
not in use (between 15 seconds and 30 minutes). This Sleep option can be found in the
Display menu.
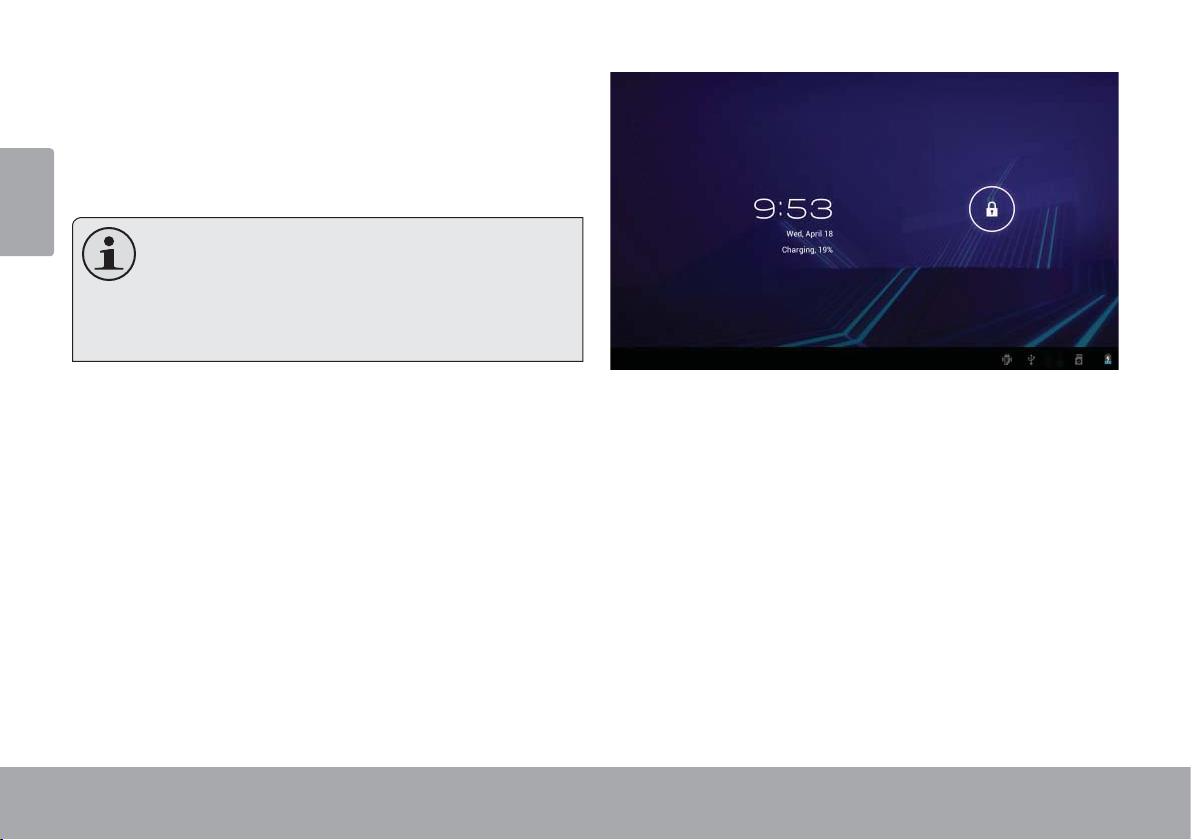
Unlocking the Screen
When the screen turns off, you will have to unlock the
screen when you turn it back on.
To unlock the screen, touch and drag the lock icon to the
edge of the circle that appears.
Page 13 Getting Started
Page 14
If a password has been set, enter the password to fi nish
unlocking the screen. The Screen Unlock password can
be set in the Security settings menu.
English
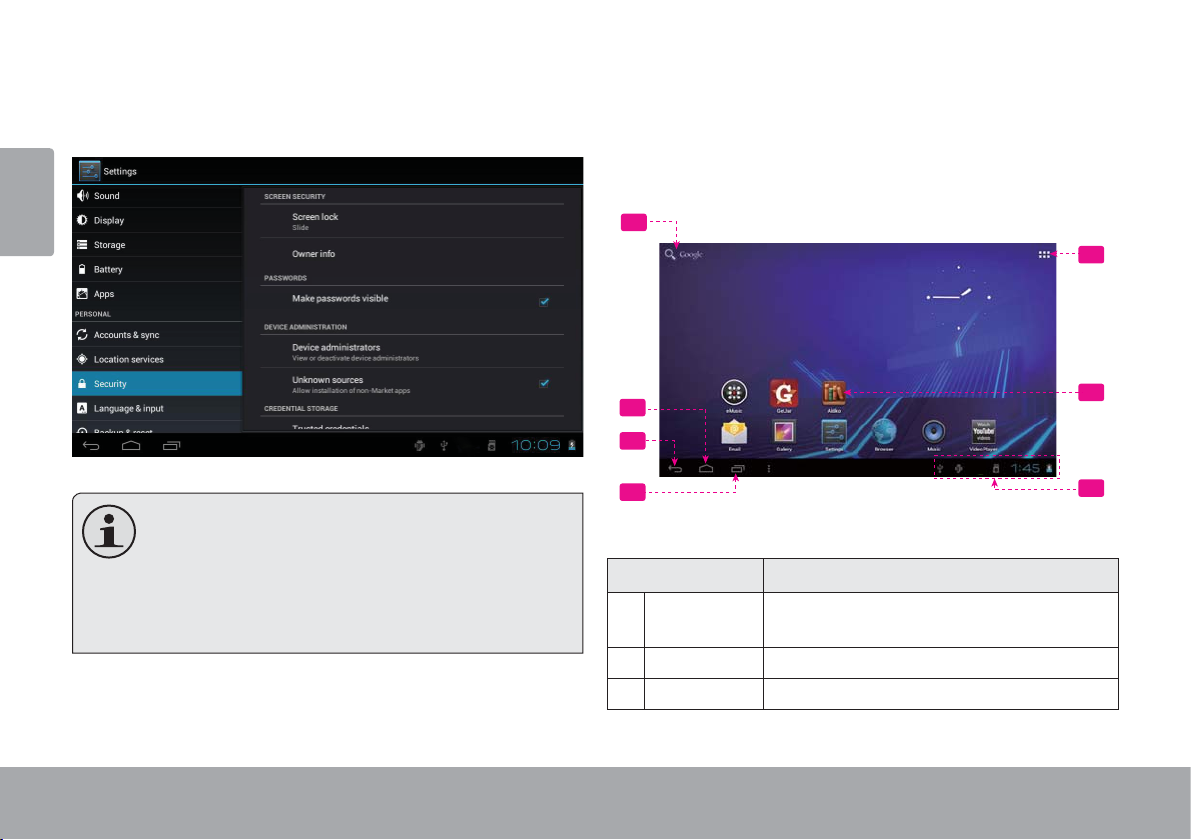
Home Screen at a Glance
The home screen is the starting point for all of the
features of your tablet.
1
5
2
3
4
WAR NING: Please write down your password
lock pattern/PIN/Password. Misplacing or forgetting this method will loc k the user out. Recovering the unit will reset the device back to
factory defaults. ALL YOUR DATA & PRO-
GRAMS WILL BE LOST.
Page 14 Getting Started
Name Description
1 Google
Search
2 Home icon Touch to back to the central Home Screen.
3 Back icon Touch to back to the previous screen.
Touch to search with Google browser.
6
7
Page 15

Name Description
4 Recent Apps Touch to display the list of thumbnail im-
English
5Launcher
Tab
6 Icons Touch an icon to open an application or
7Noti cation
bar
ages of apps you have worked recently.
Touch an App to open it.
Open the Launcher to view the list of all
Applications and Widgets installed on the
tablet. Touch the Launcher tab to open
the Launcher.
folder.
Shows noti cation icons such as time, bat-
tery level, and the network signal strength;
touch the bar to open the full Noti cations
panel. Touch a Noti cation icon to display
more detail.
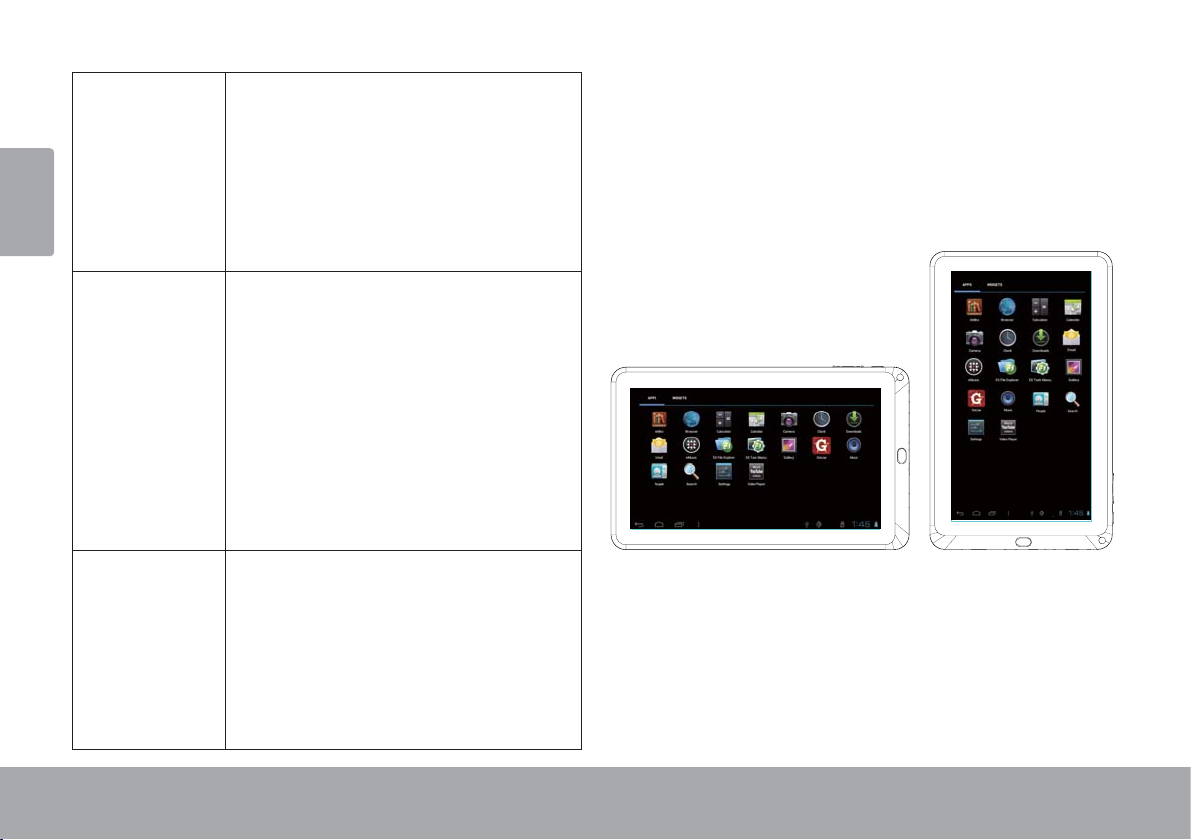
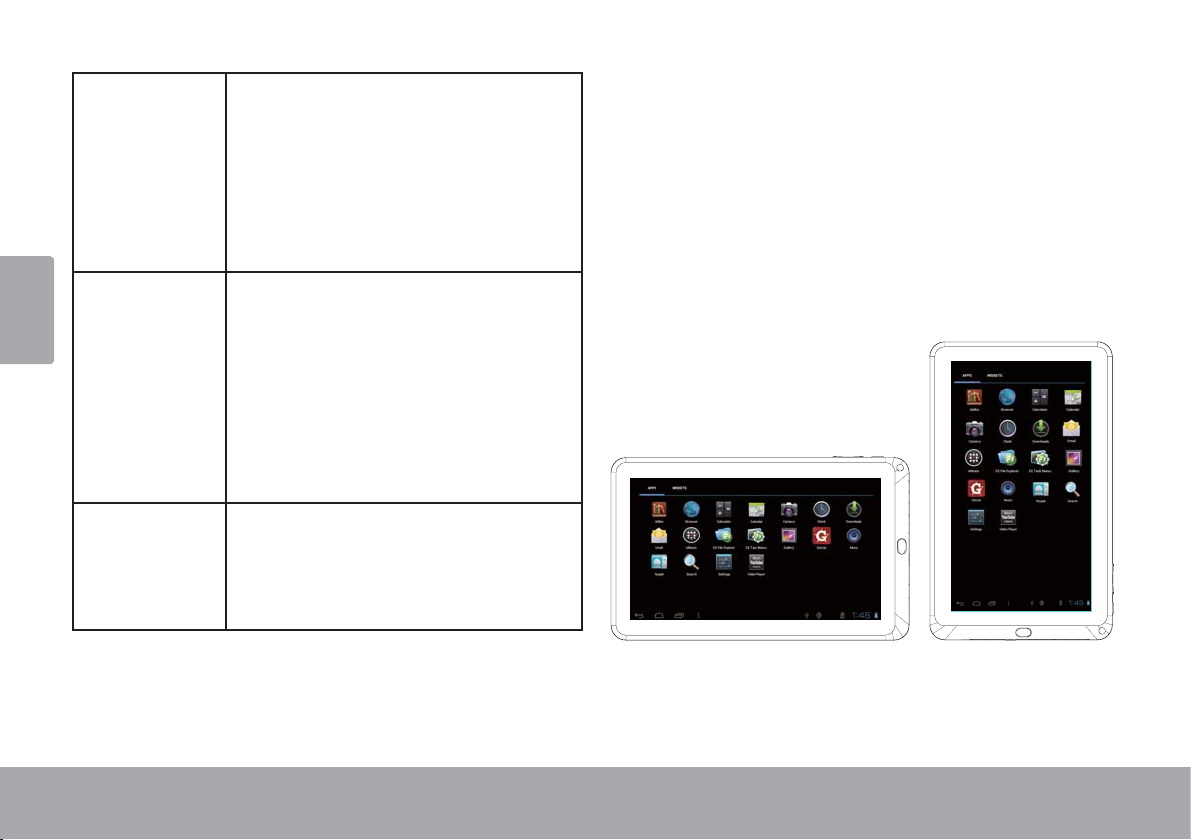
About Applications
To open an application, touch the application icon on the
home screen or in the Launcher.
Launcher screen:
The screen shown above is for illustrative
purposes only. Coby reserves the right to
modify and improve the fi nal list of applications
available on the tablet.
Page 15 Getting Started
Page 16
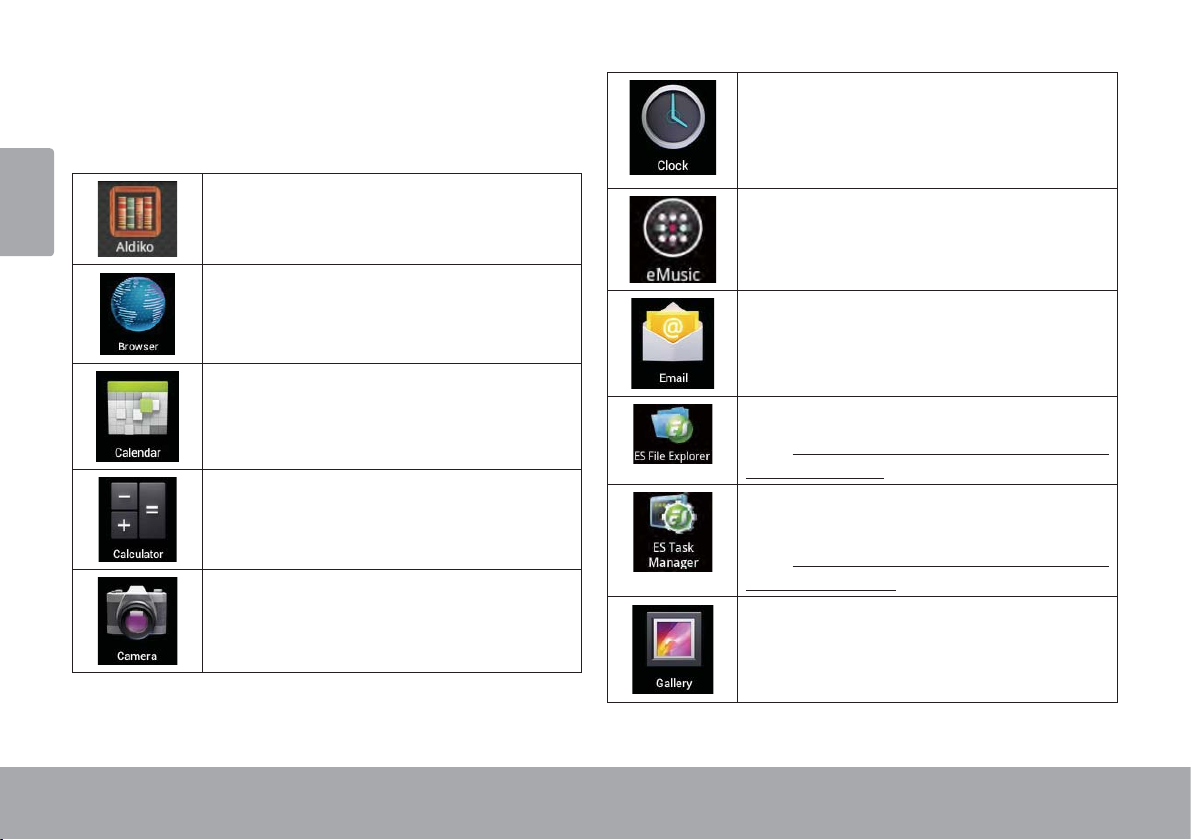
Preinstalled Applications
Some applications have been installed on your tablet for
your convenience. These applications include:
English
Download and read thousands of e-books.
Supports the ePub standard.
Browse the web.
Display the calendar or record events and
appointments to manage your schedule.
Perform simple mathematical operations.
Take pictures or videos with the frontfacing camera.
View the current time, or set an alarm.
Get $10 of music from eMusic.
Check your e-mail.
View and manage les stored on the tablet.
Visit http://www.estrongs.com/en/products/
le-explorer.html for more information.
Turn o background apps to conserve bat-
tery power.
Visit http://www.estrongs.com/en/products/
task-manager.html for more information.
View photos and videos, plus edit photos.
Page 16 Getting Started
Page 17

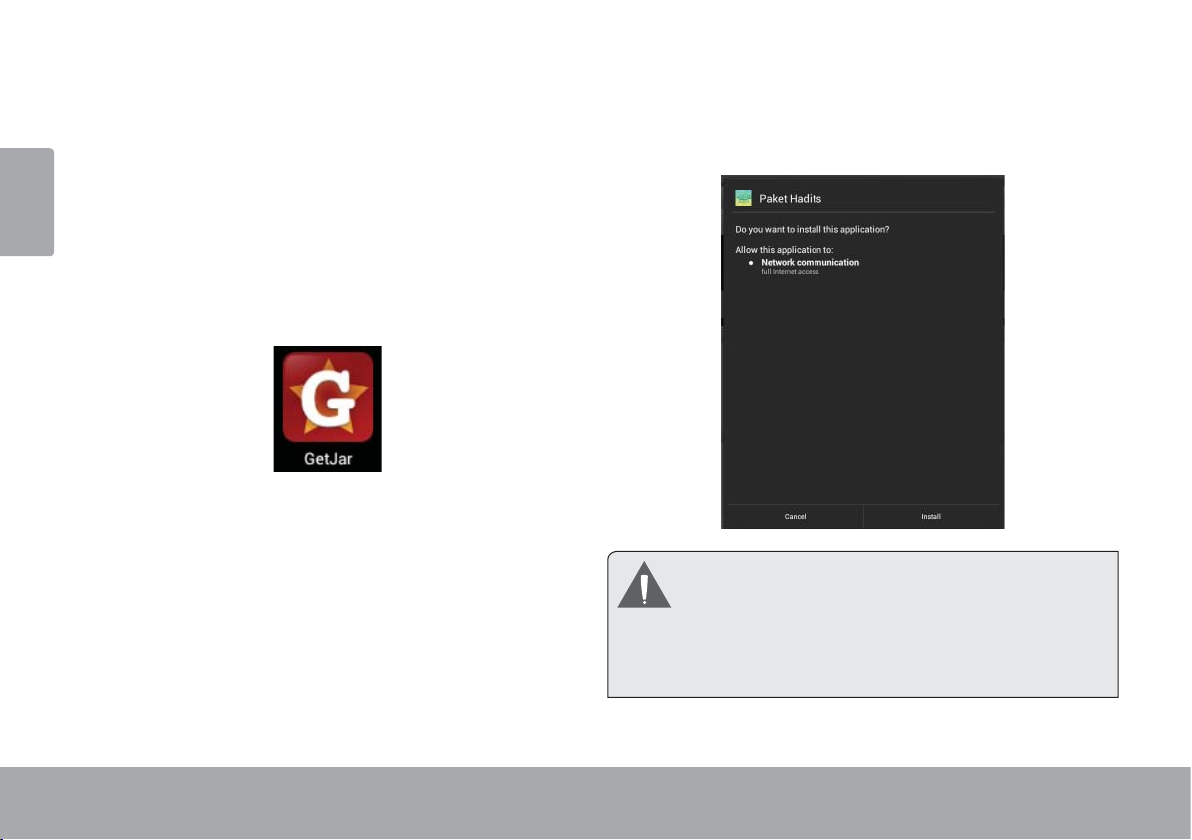
Access to thousands of apps with GetJar
Marketplace.
English
Play music.
Installing Applications
You can also download an install additional applications
from the device’s applications marketplace, the web
browser, or other sources.
The tablet must be set to allow installation of applications
from non-Market sources. The Unknown sources option
can be set in the Application settings menu.
Access the Settings menu to adjust the
tablet’s options.
Launch the mobile YouTube™ browser page
to watch internet videos.
Page 17 Getting Started
Your Coby Mobile Internet Device may include
access to, or information on, content, produc ts,
applications and services from third parties. Your
use of such third party content, products,
applications and services is at the discretion of
such third party and expressly governed by such
third party’s terms of use, including any such
third party’s privacy policies, for such content,
products, applications and services. Coby
Electronics Corporation is not responsible for
and expressly disclaims all warranties of any
kind with respect to all such thi rd par ty co ntent,
products, applications and services. Coby
Electronics Corporation wi ll not be responsible
for any loss, costs, or damages incurred due to
your access to or use of third party content,
products, applications or services.
Page 18
About Widgets
Widgets are self-contained applications that you can
place on the Home screens to access your favorite
English
features.
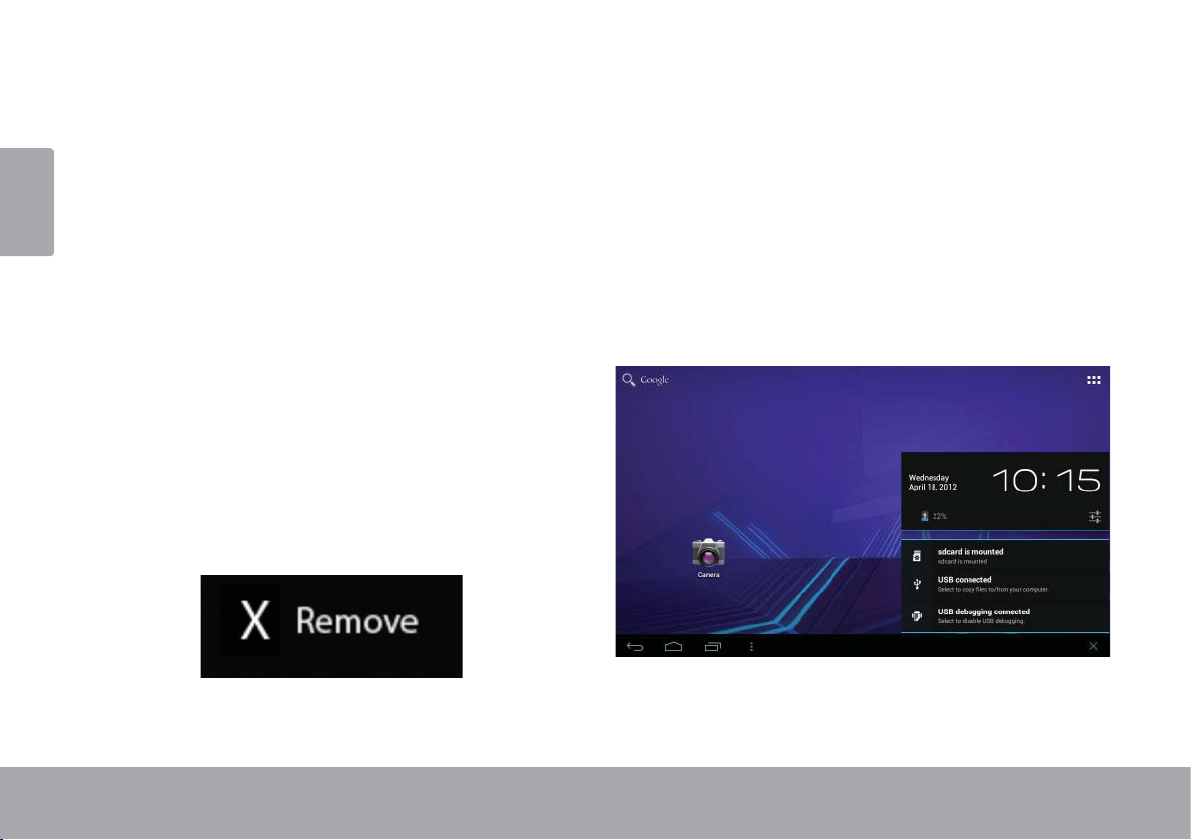
About Notifi cations
The icons that appear in the Notifi cation bar at the
bottom right corner of the screen alerts you when new
messages arrive or alarms or other application events
occur.
Adding Widgets to a Home Screen
1. Navigate to the Home screen which you want to
place the Widget on.
2. Touch the Launcher Tab.
3. Touch WIDGETS to show all widgets, and then hold
on a widget icon to add it to the Home screen.
View and respond to the notifi cations by opening the full
Notifi catio n s pa n el .
Touch the Notifi cation bar to open the Notifi catio n s
panel.
Removing Widgets
Touch and hold the Widget until Remove icon appears
at the top side of the screen, then drag the Widget to the
Remove icon to remove it.
Page 18 Getting Started
Page 19

To respond to a notifi cation:
Touch a notifi cation in the list; the Notifi cations panel will close and the application associated with the notifi cation wil l
launch.
English
To close the Notifi cations panel:
Touch any other area of screen except the Notifi cations panel , or;
Touch the Back icon.
Page 19 Getting Started
Page 20
 Connecting to the Internet
This tablet can utilize Wi-Fi data networks to connect to the Internet.
English
Wireless Wi-Fi technology can provide Internet access at distances of over 300 feet; however, this distance can be af-
fected by your surrounding environment and Wi-Fi router.In general, being closer to Wi-Fi router improve performance.
Requirements
In order to connect to the Internet, you will need either of
the following:
A wireless router or access point with a broadband Internet connection
The tablet has 802.11 b/g/n Wi-Fi radio. The tablet will also
work on wireless routers that only support 802.11 b/g.
A minimum connection speed of 64 Kbps is rec-
ommended. Faster speeds will enable a bet ter
Internet experience.
You will need to know the name of your network (SSID),
as well as the password or other credentials if your
network is secured. These settings can usually be found
on the administration webpage of your wireless router.
Please refer to your wireless router’s documentation for
help, or ask your network administrator for details.
You may encounter open Wi-Fi networks, or “hot
spots.” These networks are usually confi gured
so that you can simply connec t to them without
needing to know its settings; the tablet will obtain
all the information it needs from the router auto matically.
Page 20 Connecting To The Internet
Page 21
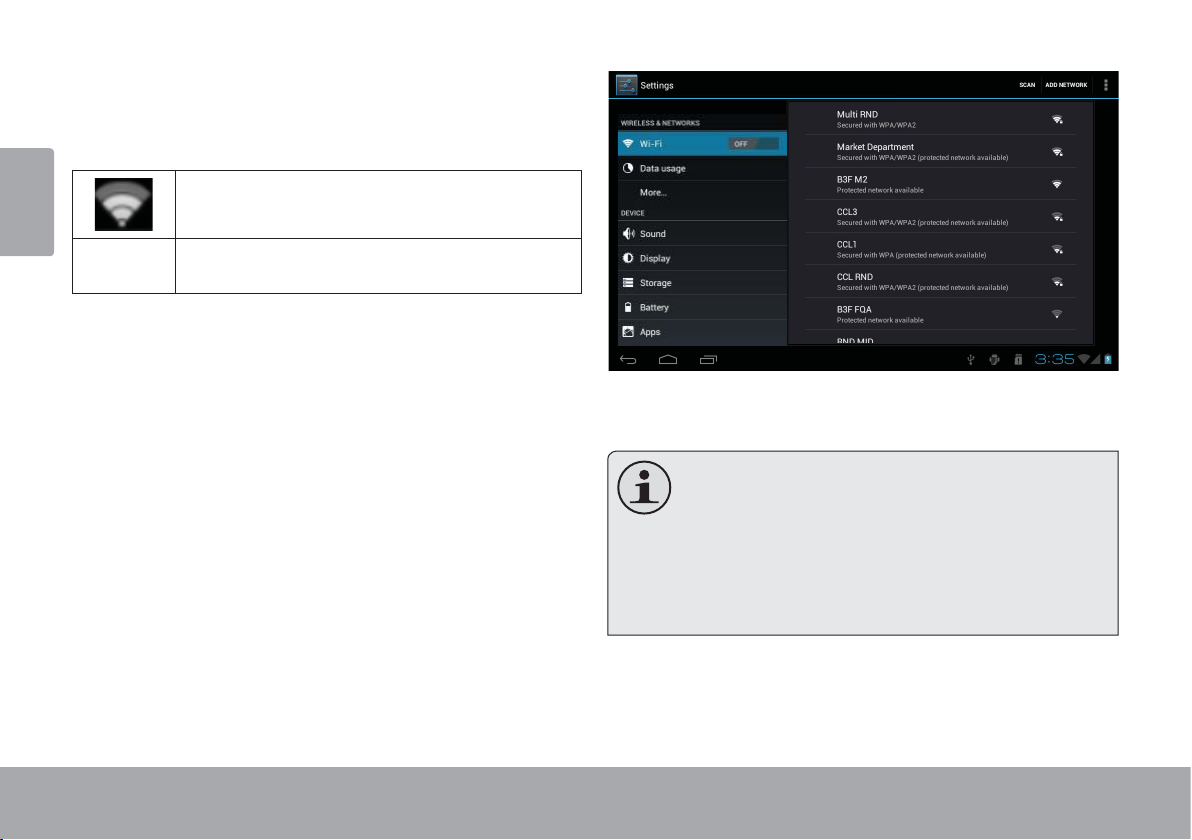
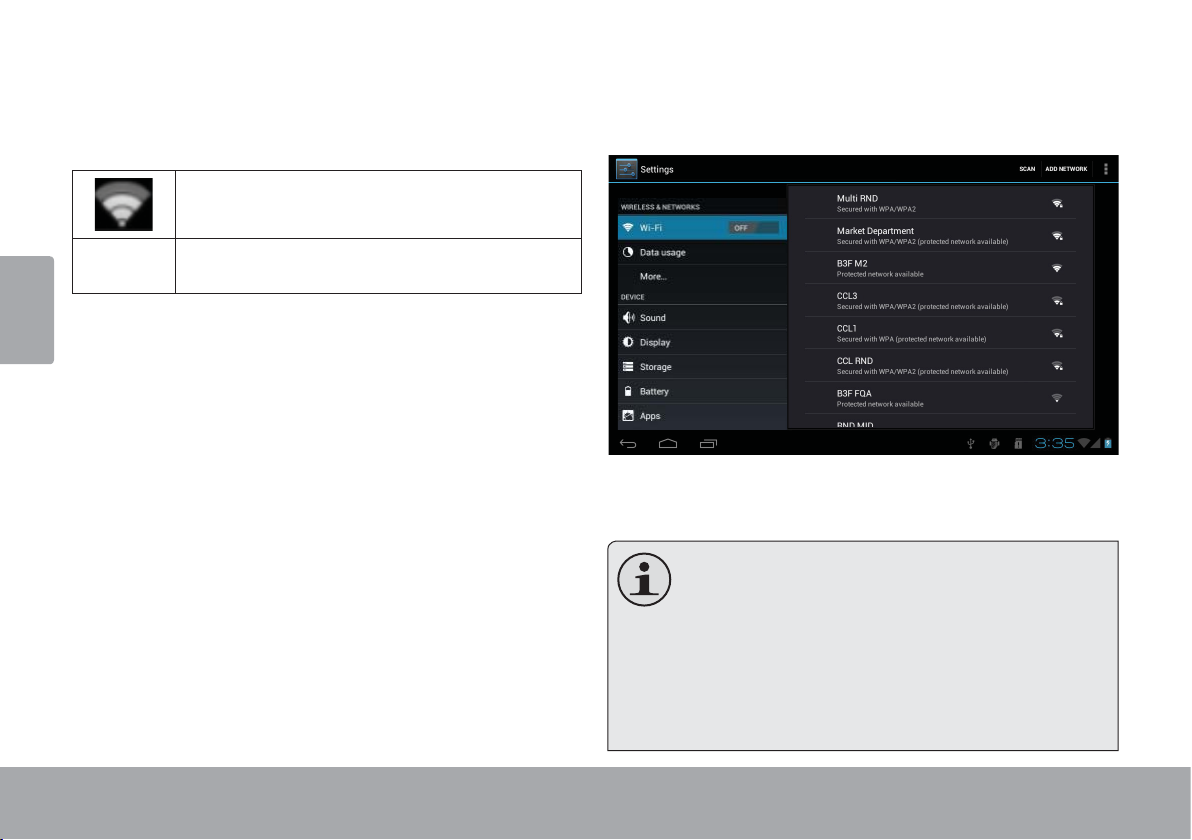
Connect to a Wi-Fi network
The Notifi cation bar displays icons that indicate your
tablet’s Wi-Fi status.
English
Connected to a Wi-Fi network (waves
indicate connection strength).
[no icon]
1. Turn on the Wi-Fi radio if it is not already on. To
turn on Wi-Fi:
a. Go to the Home screen:
b. Open the Launcher screen:
c. Open the Wireless & networks menu:
d. Open the Wi-Fi settings menu:
e. Make sure that the Wi-Fi option box is setted to
Page 21 Connecting To The Internet
There are no Wi-Fi networks in range, or
the Wi-Fi radio is off.
Touch the Home icon.
Touch the Launcher Tab, then touch Settings.
Touch WIRELESS & NETWORKS.
Touch WiFi.
ON: Touch and slide the block right to enable
the Wi-Fi connection.
When Wi-Fi is on, the tablet will look for and display a list
of available Wi-Fi networks.
If a net work that you have connected to previ-
ously is found, the tablet will connect to it.
If you don’t see your network in the list, you
can force the tablet to re -scan. To scan for networks, tap the SCAN icon that located on the
top right corner of the screen.
2. Select an available Wi-Fi network to connect to:
In the same Wi-Fi settings menu above, touch a network
in the list.
Page 22
If the network is open, the tablet will prompt you to
confi rm connection to the network. Touch Connect to
confi rm.
English
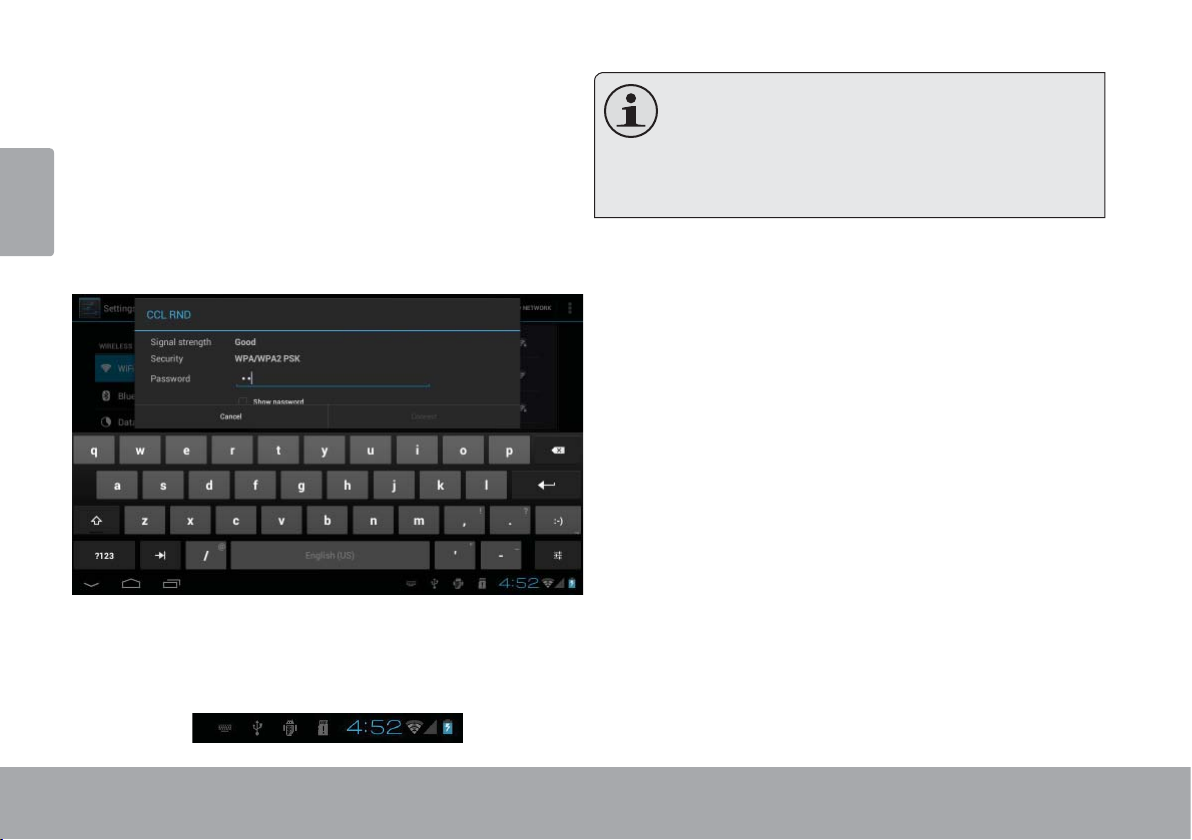
If the network is secured (as indicated by a Lock icon),
the tablet will prompt you to enter a password or other
credentials. Touch the Wireless password box to show
the on-screen keyboard and then use it to enter the
password. Touch Connect to confi rm.
When you have successfully connected to a Wi-Fi
network, the Notifi cations bar at the bottom of the screen
will show a Wi-Fi signal indicator.
To learn about how to add a Wi-Fi network when
it is not in range or when the router is set to ob scure the network name (SSID); or to confi gure
advanced Wi-Fi options, please refer to the manual.
Page 22 Connecting To The Internet
Page 23
 Browsing the Web
The Browser application lets you visit webpages and fi nd information on the web. Keep up with the news, your
English
friends, or enjoy video from YouTube™, the world’s most popular video-sharing community.
To use Browser, the tablet must be connected to the
Internet. Read the section “Connecting to the Internet” to
learn how to connect to the Internet.
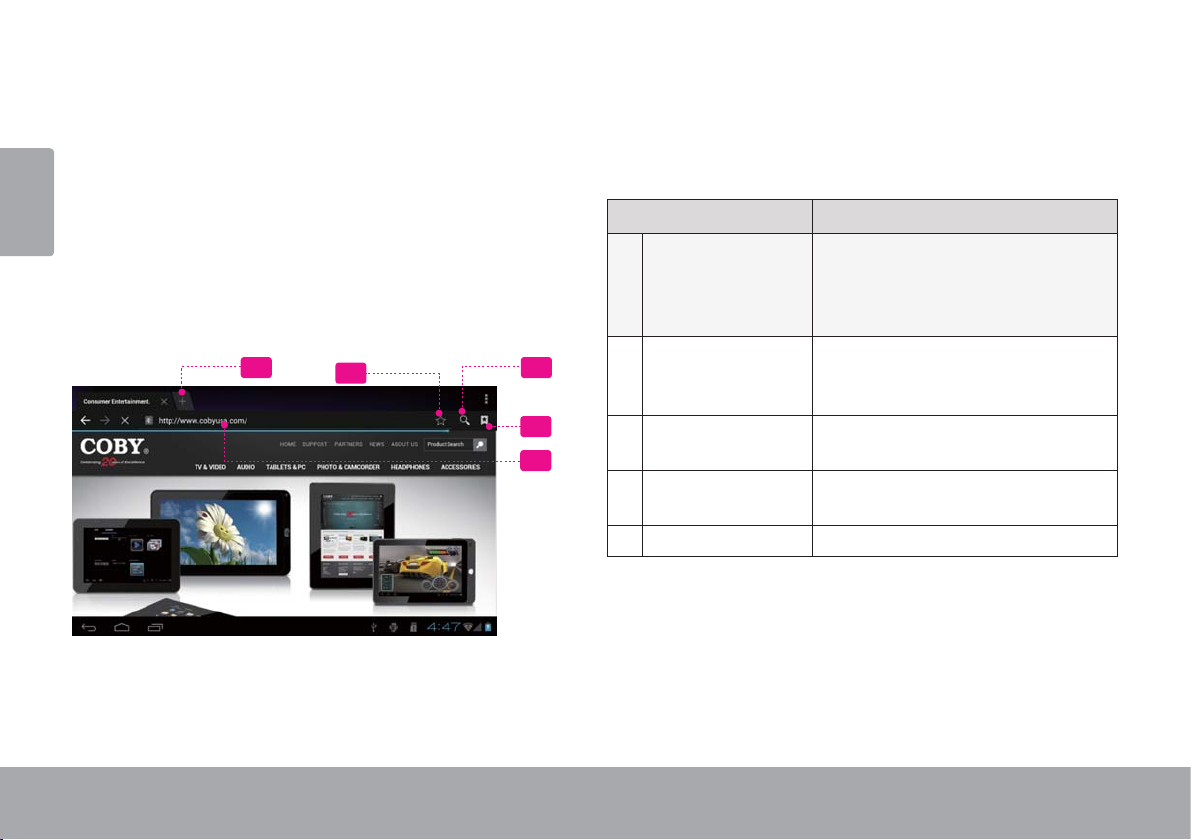
To open Browser, touch the Browser icon on the Home
screen or in the Launcher.
4
35
2
1 Address bar Displays the address (URL) of the
2 Goto Bookmarks
3 Search icon Touch to search with Google
1
4 Add Bookmark
5 New Window (+) Creates new browser window.
Page 23 Browsing The Web
Name Description
current page. Touch the bar to
enter a new address or to search
the web.
Touch to view bookmarks, to view
icon
icon
your most visited sites, or to view
your browser history.
browser.
Touch to add bookmarks.
Page 24
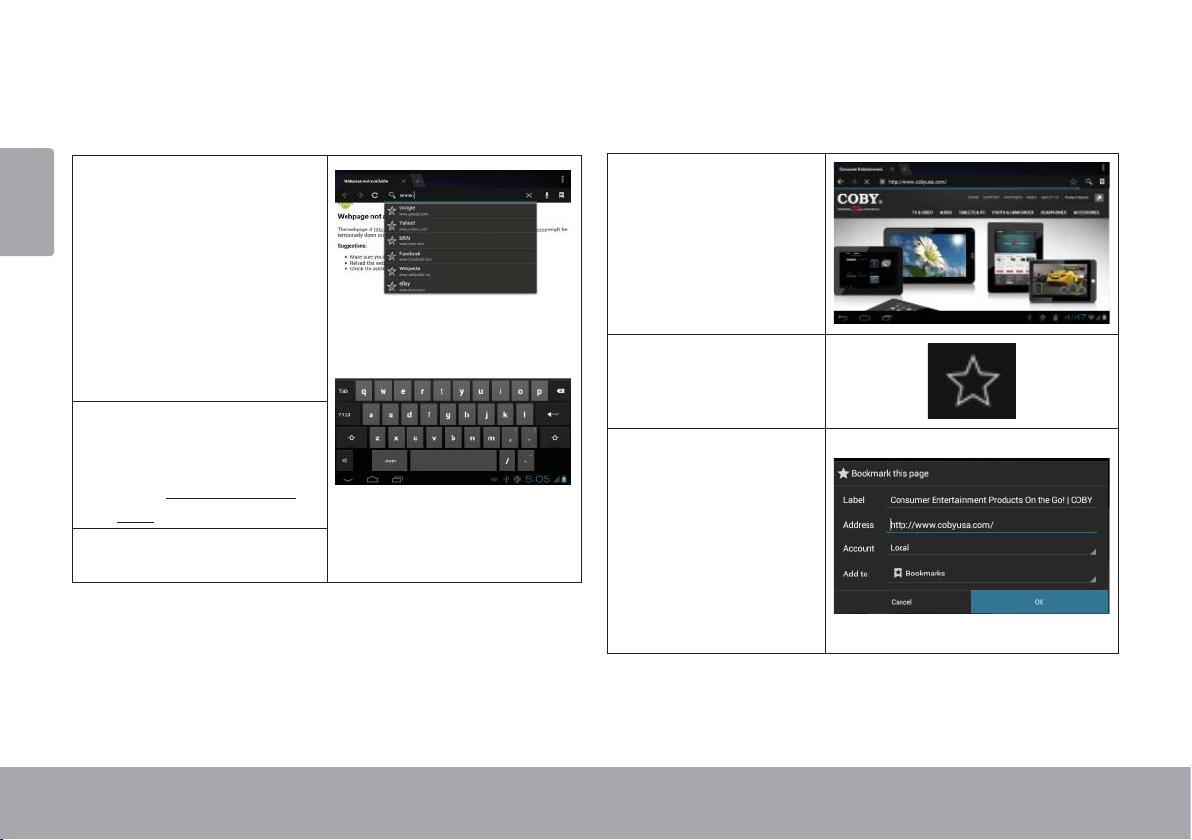
Some common Browser actions are described below.
To go to a webpage.
To bookmark a webpage.
Bookmark your favorite webpages in order to visit
them quickly without entering a URL.
English
1. Touch the Address
bar at the top of the
Browser screen. The
keyboard will open
automatically. (If the
Address bar is not
visible, drag the page
down to return to the
top of the Browser
screen.)
2. Use the keyboard to
enter the ad-dress
(URL) of the webpage
(e.g., www.cobyusa.
com).
3. Touch Enter key to
open the webpage.
1. Go to the webpage that you
want to bookmark
2. Touch the Add
Bookmark icon.
3. If desired, you can
modify the name
of the bookmark
or its location
(URL address).
Otherwise, touch
OK to fi nish
adding the bookmark.
Page 24 Browsing The Web
Page 25
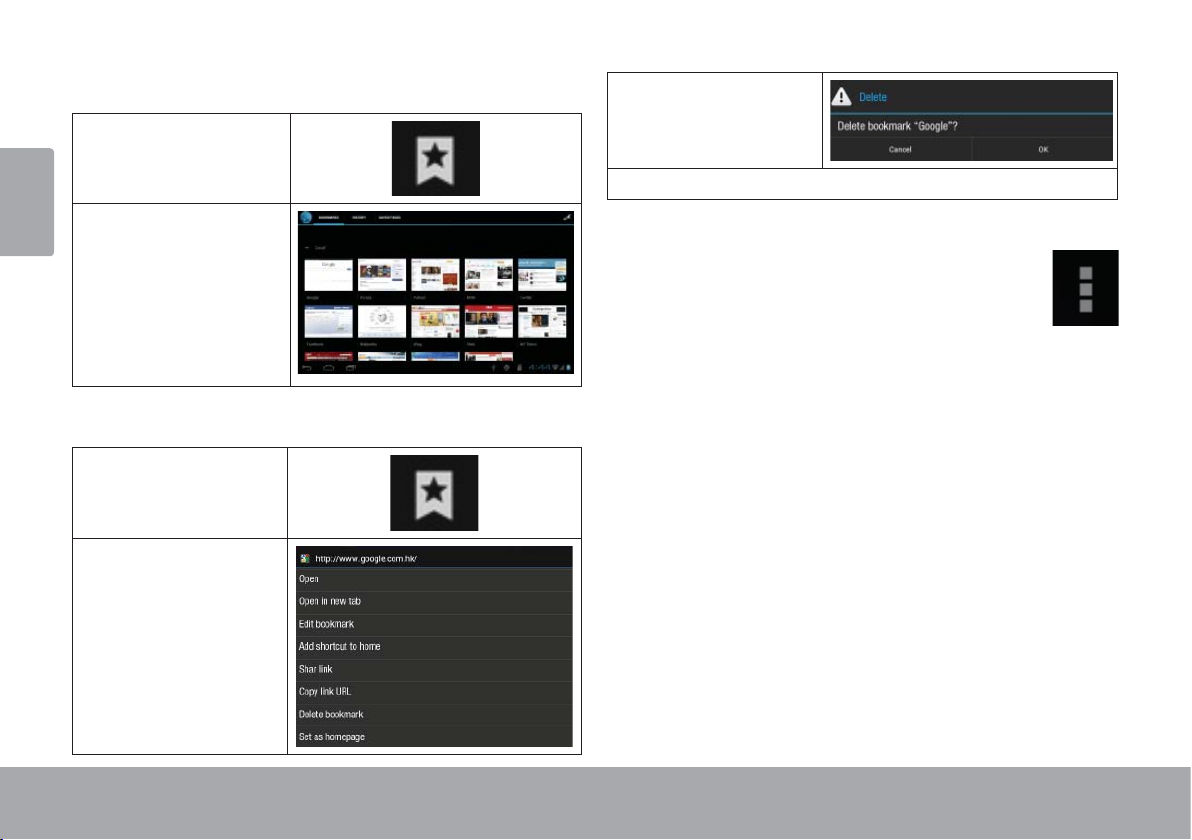
To go to a bookmarked webpage.
1. Touch the Goto
English
Bookmark icon.
3. Touch “Delete
bookmark“.
4. Touch “OK” to confi rm.
2. Touch a bookmark
tile to open it.
To delete a bookmarked webpage.
1. Touch the Goto
Bookmark icon.
2. Touch and hold a
bookmark tile to
open the option
menu.
Page 25 Browsing The Web
Browser menu
While viewing a webpage, touch the icon show
as right to open the Browser Menu, the icon is
locate on the top right corner of the screen, the
options are:
Refresh: Refresh the current webpage.
Forward: Go to the next webpage.
New tab: Open the webpage in a new window, under
a new tab.
New incognito tab: Open the webpage in a new win-
dow, under a new tab, and the pages you view in the
new window will not appear in your browser history
or search history. See the on-screen explanation of
going incognito.
Share page: Use Email to send the webpage URL.
Find on page: Search for content on the current
page.
Page 26

Request desktop site:
Save for offl ine reading: Save this page onto the in-
ternal memory, then you can read it when the internet
English
connection is disable.
Page info: View information about the current page,
including the URL.
Settings: Customize the Browser.
Page 26 Browsing The Web
Page 27
 Managing Applications
Downloading and installing new applications to your tablet can extend its functionality in many ways.
English
You can download and install applications from the
included Applications store. To open the Applications
store:
1. Touch the Launcher icon.
2. Touch the Apps Marketplace icon.
When installing an application, it will tell you what functions it needs to control and if it needs access to your
data. Make sure you review these access requirements
carefully before completing the installation.
Be especially cautious with applications that
request access to many functions or to a
signifi cant amount of your data. You are
responsible for the results of applications
installed on your tablet.
Page 27 Managing Applications
Page 28
You can learn more about GetJar, and browse for ap-
plications by visiting their website at www.getjar . com.
English
Some developers allow you to download and in-
stall applications directly from their website.
Your Coby Mobile Internet Device may include
access to, or information on, content, produc ts,
applications and services from third parties. Your
use of such third party content, products,
applications and services is at the discretion of
such third par ty and expressly governed by such
third party’s terms of use, including any such third
party’s privacy policies, for such content, products,
applications and services. Coby Electronics
Corporation is not responsible for and expressly
disclaims all warranties of any kind with respect to
all such third party content, products, applications
and services. Coby Electronics Corporation will
not be responsible for any loss, costs, or damages
incurred due to your access to or use of third party
content, products, applications or services.
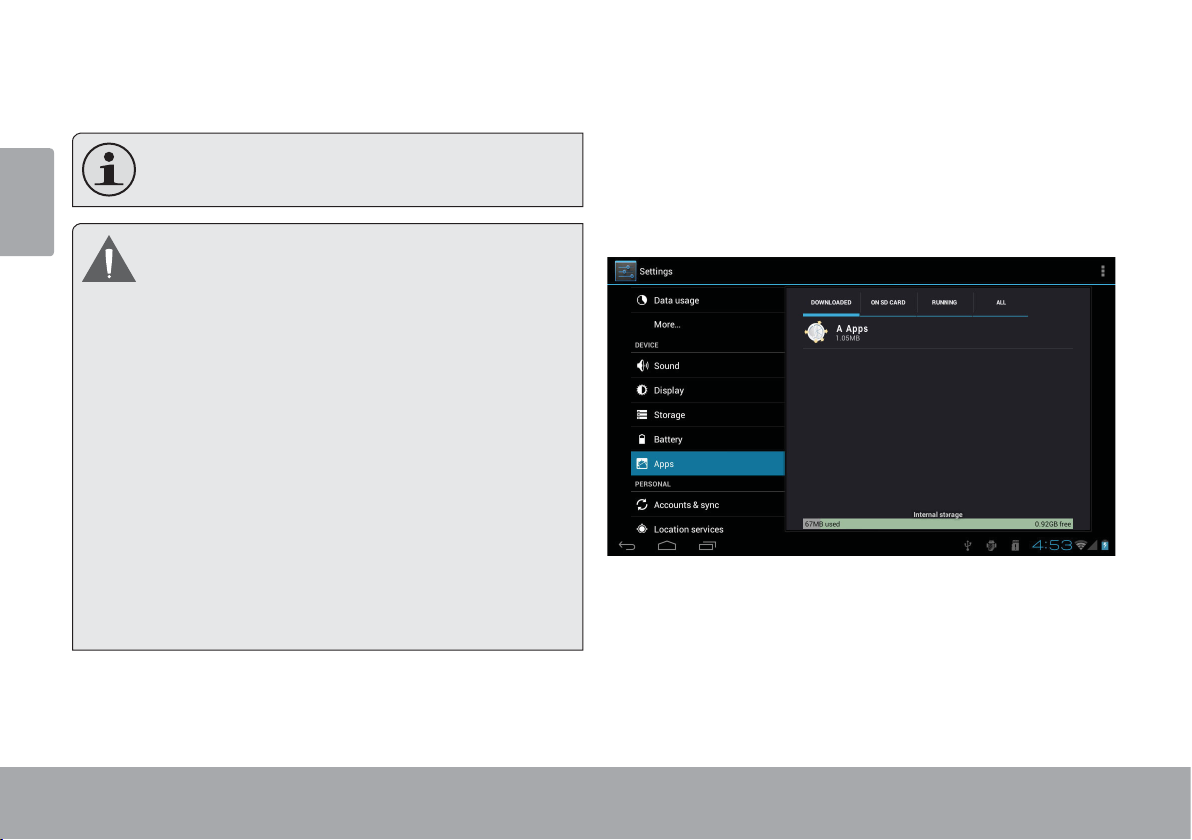
To uninstall an application:
1. From the Home screen, touch the Launcher Tab.
2. Touch Settings to open the Settings menu.
3. Touch Apps, a list of all applications installed on the
tablet will display on screen.
Page 28 Managing Applications
Page 29
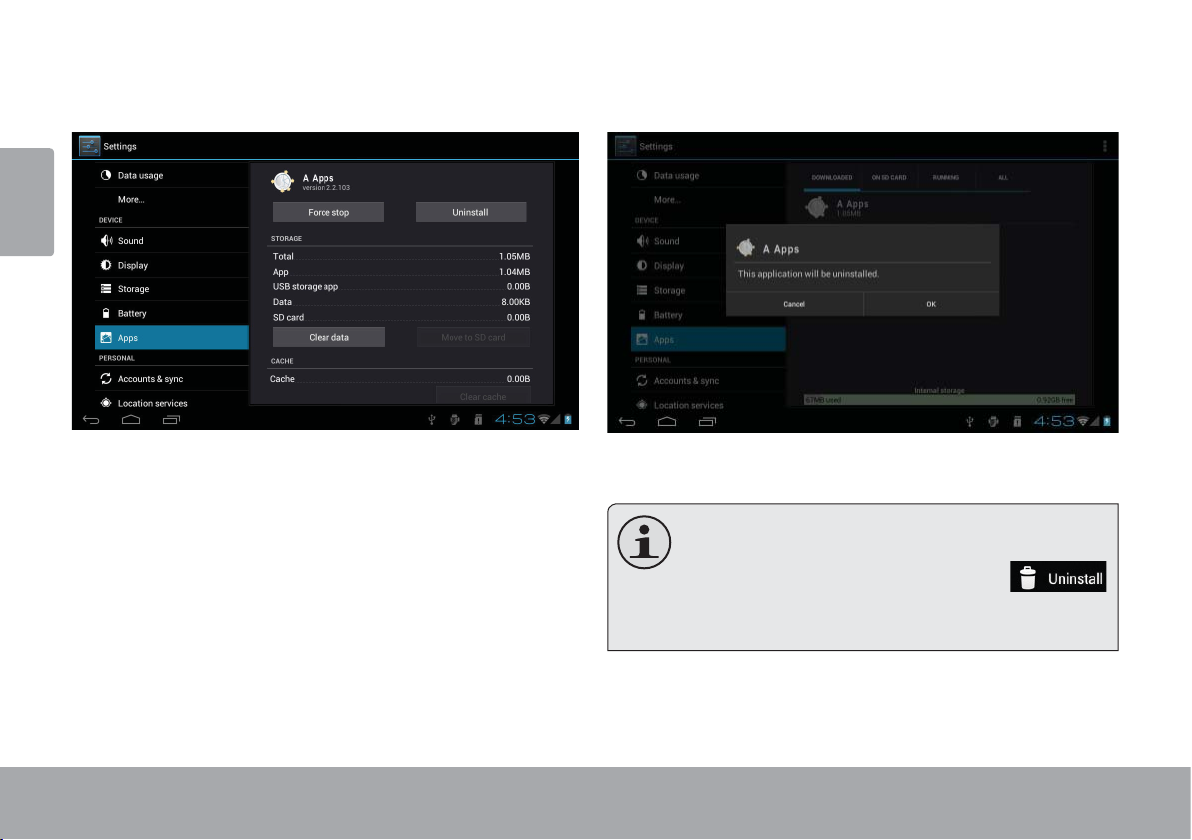
4. Touch the name of the application you want to
uninstall; the Application Info screen will open.
English
5. Touch Uninstall. The tablet will prompt you to
confi rm.
6. Touch OK to uninstall the application.
Or you can uninstall an application from the
Launcher screen directly. Touch and hold an application icon until the Uninstall icon
appears, drage the application icon to the Unin-
stall icon to uninstall the application.
Page 29 Managing Applications
Page 30
 Optional Connections
Connecting to a Computer
English
Connect the tablet to a computer to transfer fi les.
1. Connect your tablet to the computer.
With the included USB cable:
Plug the small end of the cable into the USB 2.0 Hi-
speed connector of the tablet.
Plug the large end of the cable into an available USB
2.0 Hi-speed port on the computer.
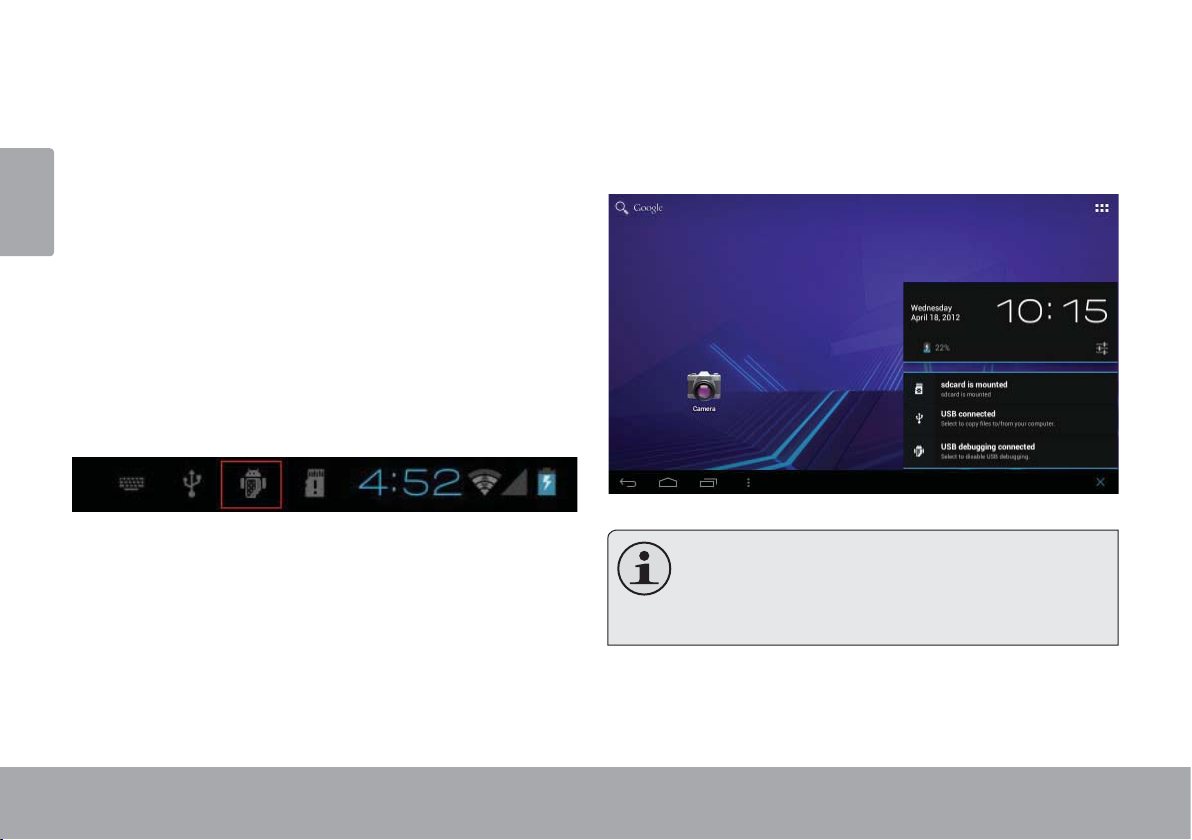
When your tablet is connected, a USB icon will
appear in the Notifi cation bar.
Touch the Notifi cation bar to open the notifi cations
panel.
The Tablet’s “mass storage mode” is compatible
with many operating systems including:
Microsoft® Windows® XP, Vista, 7 or higher and
Mac OS or Linux.
Page 30 Optional Connections
Page 31

2. Mount the storage drive.
Touch USB connected to mount the tablet’s built-in
English
storage, then touch “Turn on USB storage” and “OK”
when prompted to confi rm. When mounted, you can
copy fi les to/from your computer to it.
Your tablet will be recognized by the computer as a
Removable Storage drive. Drag and drop fi les between
your tablet and the computer. To learn more about copying fi les, please refer to the documentation included with
your computer or operating system.
Connecting to a TV
Connect to a TV to enjoy your tablet from the comfort of
your living room. An HDMI cable (Type A-to-Type C) is
required to connect the tablet to a TV.
The tablet will recoginze and match the capabilities of the
TV automatically.
To connect the tablet to the TV:
1. Plug the small end of the HDMI cable into the mini
HDMI connector of the tablet.
2. Plug the large end of the HDMI cable into the HDMI
port on the TV.
3. Turn on the TV, and set its display mode to the HDMI
port that the tablet is connected to.
The tablet’s display will be output to the TV screen.
I f you need help set ting the display mode of the
TV, please refer to the documentation provided
by the TV manufacturer.
Page 31 Optional Connections
Page 32

Connecting Headphones
Connect a pair of headphones (or earphones) to the
tablet to enjoy media in private.
English
Lower the volume level of the tablet before connecting
headphones, and then slowly raise the volume to a
comfortable listening level.
The headphones must have a 3.5 mm (1/8 in) plug.
When headphones are connected, speaker output
will be disabled automatically.
Using the USB Full-Size Adapter
The USB full-size adapter can be used to connect and
use USB devices with the tablet. The adapter converts
the mini USB port on the tablet into a USB On-the-Go
(OTG) connector.
HDMI
DC IN 5V
Hearing experts advise against the constant
use of personal stereos played at high volume.
MEMORY CARD
Constant exposure to high volumes can lead to
hearing loss. If you should experience ringing in
the ears or hearing loss, discontinue use and
seek medical advice.
Connecting a Keyboard
For times when you want to type for an extended period
of time, you may want to connect a full-size keyboard to
the tablet.
Use the included USB full-size (Type A) adapter to
connect a keyboard to the tablet.
Page 32 Optional Connections
Page 33

You may also use this connection to add a
English
The adapter supports one connection at a time.
mouse to the tablet.
To use a keyboard and mouse simultaneously,
you will need to add an external USB hub.
Connecting a Storage Device
Use the included USB full-size (Type A) adapter to
connect a storage device to the tablet (e.g., a USB fl ash
memory drive).
This connection suppor ts a maximum storage
size of 16 GB. For additional storage capacity,
a microSDHC card can be added to the tablet.
Page 33 Optional Connections
Page 34

 Setting the System Options
Open the system settings menu to adjust how the tablet looks and functions.
English
Many applications will have their own settings; refer to the documentation provided by the application developer
to learn more.
To open the Settings menu:
1. From the Home screen, touch the Launcher Tab.
2. Touch Settings to open the Settings menu.
The settings are grouped by category. Touch a category to open and adjust its set-
tings on the right side.
Please refer to the manual for a description of the items in the
Settings menu.
Page 34 Setting The System Options
Page 35

 Specifi cations
Please visit www.cobyusa.com for the latest product information. Design, specifi cations, and manual are subject to
English
change without notice.
Processor Cortex A8 (1 GHz)
RAM 1GB
Storage 8GB ash built-in
1
Power Rechargeable Li-poly battery Power
Adapter (DC 5V)
Playback Time
(hours)
2
Up to 20 hours music, 6 hours video, 5
hours web browsing
microSDHC card slot (max. 32GB sup-
1
ported)
Display 10.1” TFT LCD (1024 x 600), capacitive
touchscreen
Networking Wi-Fi IEEE 802.11 b/g/n
Video Output Mini HDMI, type C (1080p and 720p
1GB= 1 Billion bytes. Available storage capacity will be less due to
operating system and pre-installed software applications. Actual
formatted capacity will vary.
2
Battery life will vary based on settings, usage and other factors.
Average playback fi gures based on battery discharge while perform-
ing the following tasks: video and audio playback and web browsing.
supported)
Audio Output 3.5 mm headphone
PC Interface USB 2.0 Hi-speed
Additional Features
Front-facing camera
Built-in microphone
speaker
Operating Sys-
Android™ 4.0
tem
Page 35 Specifi cations
Page 36

 Support
If you have a problem with this device, please check our website at www.cobyusa.com for Frequently Asked
English
Questions (FAQ) and product updates. If these resources do not resolve the problem, please contact Technical
Support.
Coby Electronics Technical Support
Email: techsupport@cobyusa.com
Web: www.cobyusa.com
Phone: For US Residents: 877-302-2629, Monday-Friday (9:00AM-9:00PM EST)
For Canadian Residents: 855-542-8917, Monday-Friday (8:00AM-8:00PM EST)
Page 36 Support
Page 37

 Safety Notices
English
The lightning fl ash with arrowhead symbol within an
equilateral triangle is intended to alert the user to the
presence of uninsulated “dangerous voltage” within
the product’s enclosure that may be of suffi cient
magnitude to constitute a risk of electric shock.
The exclamation point within an equilateral triangle
is intended to alert the user to the presence of
important operation and servicing instructions in the
literature accompanying the appliance.
For recycling or disposal information about this prod-
uct, please contact your local authorities or the Electronics Industries Alliance: www.eiae.org.
For Customer Use:
Enter below the serial number that is located on the rear of the
unit. Retain this information for future reference.
Model No.
Serial No.
WARNING: To prevent fi re or shock hazard, do not expose this
device to rain or moisture. Dangerous high voltage is present inside
the enclosure. Do not open the cabinet.
Protect your hearing: Hearing experts advise against the constant use of personal stereos played at high volume. Constant exposure
to high volumes can lead to hearing loss. If you should experience
ringing in the ears or hearing loss, discontinue use and seek medical
advice.
Note: If the product suddenly has no response or powers off, an
electrostatic discharge may be the cause. In this circumstance,
please follow the procedures below for recovery:
• Turn o the unit by pushing and holding the slide button
at the right (Power o position) for 15 seconds.
• Turn on the unit again
Page 37 Safety Notices
Page 38

FCC Statement:
This device complies with Part 15 of the FCC Rules. Operation is subject to the following two conditions:
(1) This device may not cause harmful interference, and
English
(2) This device must accept any interference received, including interference that may cause undesired operation.
Note: This equipment has been tested and found to comply with the limits for Class B digital devices, pursuant to Part 15 of the FCC rules.
These limits are designed to provide reasonable protection against harmful interference in a residential installation. This equipment generates,
uses and can radiate radio frequency energy and, if not installed and used in accordance with the instructions, may cause harmful interference
to radio communications. However, there is no guarantee that interference will not occur in a particular installation. If this equipment does cause
harmful interference to radio or television reception, which can be determined by turning the equipment off and on, the user is encouraged to
try to correct the interference by one or more of the following measures:
• Reorient or relocate the receiving antenna.
• Increase the separation between the equipment and receiver.
• Connect the equipment into an outlet on a circuit different from that to which the receiver is connected.
• Consult the dealer or an experienced radio/TV technician for help
Use of shielded cable is required to comply with Class B limits in Subpart B of Part 15 of the FCC rules.
Do not make any changes or modifi cations to the equipment unless otherwise specifi ed in the manual. If such changes or modifi cations should
be made, you could be required to stop operation of the equipment.
Page 38 Safety Notices
Page 39

Important Safety Instructions
1. Read Instructions: All the safety and operating instructions should be read before the product is operated.
English
2. Retain Instruc tions: The safet y and oper ating instr uc tions should be retained for future reference.
3. Heed Warnings: All warnings on the product and in
the operating instructions should be adhered to.
4. Follow Instructi ons: All operating and usage instructions should be followed.
5. Cleaning: Unplug this product from th e wall outlet be fore cleaning. Do not use liquid cleaners or aerosol
cleaners. Use a damp cloth for cleaning.
6. Attachments: Use only attachments recommended by
the manufacturer. Use of other attachments may be
hazardous.
7. Water and Moisture: Do not use this product near
water (e.g., near a bath tub, washbowl, kitchen sink,
laundry tub, in wet basements, or near a swimming
pool and the like).
8. Ventilation: Slots and openings in the cabinet are
provided for ventilation to ensure reliable operation of
the product and to protect it from overheating. These
openings should never be blocked by placing the
product on a bed, sofa, rug, or other similar sur face.
This product should not be placed in a built-in installation such as a bookcase or rack unless proper ventila-
Page 39 Safety Notices
tion is provided or the manufacturer instructions have
been adhered to.
9. Power Sources: This product should be operated only
from the type of p ower source indicate d on the rating
label. If you are not sure of the type of power supply to
your home, consult your product dealer or local power
company. For products intended to operate from battery power or other sources, refer to the operating
instructions.
10. Overloading: Do not overload wall outlets, extension
cords, or integral convenience receptacles as this can
result in a risk of fi re or electric shock.
11. Object and Liquid Entry: Never push objects of any
kind into this product through openings as they may
touch dangerous voltage points or shout-out parts that
could result in a fi re or electric shock. Never spill liquid
of any kind on the product.
12. Servicing: Do not attempt to service this product yourself as opening or removing covers may expose you to
dangerous voltage or other hazards. Refer all servic ing to qualifi ed service personnel.
13. Damage Requiring Ser v ice: Unplug this product from
the wall outlet and refer servicing to qualifi ed service
personnel under the following co nditi ons: a) when the
power-supply or plug is damaged; b) if liquid has been
spilled or if objects have fallen into the product; c) if
the product has been exposed to rain or water; d) if
Page 40

the product does not operate normally by following the
operating instructions. Adjust only those controls that
are covered by the operating instructions as improp er
English
adjustment of other controls may result in damage and
will often require extensive work by a qualifi ed techni-
cian to restore the product to its nor mal operation; e)
if the product has been dropped or damaged in any
way; f) when the product exhibits a distinct change in
performance—this indicates a need for service.
14. Replac ement Parts: When replacement part s are required, be sure that your service tec hnician has used
replacement parts specifi ed by the manufacturer or
have the same characteristics as the original part.
Unauthorized substitutions may result in fi re, electric
shock, or other hazards.
15. Safety Check: Upon completion of any service or
repairs to this product, ask the ser vice technician to
perfor m s afet y c hec ks to ensure that t he pro duc t is in
proper operating condition.
16. Heat: The produc t should be situated away from heat
sources such as radiators, heat registers, stoves, or
other products (including amplifi ers) that produce
heat.
Legal and Trademark Notices
Coby is trademarks of Coby Electronics Corporation.
Android is a trademark of Google Inc. Use of this trademark is subject
to Google Permissions.
Portions of the artwork used for this package are modifi catio n s ba s ed
on work created and shared by Google and used according to terms
described in the Creative Commons 3.0 Attribution License.
HDMI, the HDMI Logo and High-Defi nition Multimedia Interface are
trademarks or registered trademarks of HDMI Licensing LLC.
microSDHC Logo is a trademark of SD-3C, LLC.
USB is a registered trademark of USB Implementers Forum, Inc.
YouTube™ is a trademark of Google, Inc.
All other trademarks and logos are property of their respective owners
unless indicated otherwise.
Page 40 Safety Notices
Page 41

 Índice de Contenidos
MUCHAS GRACIAS ......................................42
Contenidos del paquete ...........................................42
Características ........................................................... 43
CONOZCA LA TABLETA COBY KYROS .........44
Español
Breve descripción de la unidad .............................. 44
Acerca de la pantalla táctil......................................47
Película protectora ..............................................47
Acciones posibles de la pantalla táctil ............47
Acerca del sensor de orientación .......................... 48
Carga de la tableta ...................................................49
Insertar una Tarjeta de Memoria o Unidad Flash USB
.......................................................................................49
Reajuste de la tableta ...............................................51
PRIMEROS PASOS .........................................52
Có m o e n c e n de r y a p ag a r la tab leta ...........................52
Cómo encender y apagar la pantalla (Standby)
............................................................................... 53
Cómo desbloquear la pantalla ........................ 53
Breve descripción de la pantalla de inicio ............ 54
Las aplicaciones ........................................................ 55
Aplicaciones que vienen instaladas .................56
Cómo instalar las aplicaciones ..........................57
Acerca de los Widgets .............................................. 58
Las notifi caciones .......................................................59
CONECTAR A INTERNET ...............................60
Requisitos .................................................................... 60
Conectar a una red Wi-Fi ..........................................61
NAVEGAR POR LA WEB ................................63
ADMINISTRACIÓN DE APLICACIONES ........67
CONEXIONES OPCIONALES ........................70
Conectar a un ordenador ........................................70
Conectar al TV ............................................................71
Conectar auriculares .................................................72
Usar el adaptador USB grande .................................72
Conectar un teclado ..........................................72
Conectar un dispositivo de almacenamiento
...73
C O N FI G U R A R L A S O P C I O NE S D E L S IS T E MA ......74
ESPECIFICACIONES ......................................75
SOPORTE .......................................................76
AVISOS DE SEGURIDAD ................................77
Page 41 Índice De Contenidos
Page 42

 Muchas gracias
Felicitaciones por su compra de la tableta con acceso a
internet Coby® Kyros®. Esta guía le ayudará a comenzar
a usar la tableta rápidamente; léala cuidadosamente y
guárdela para referencia futura.
Para obtener instrucciones detalladas, información actu-
Español
alizada y consejos útiles, visite la página Web de Coby en
www.cobyusa.com.
El manual está disponible para su descarga
desde la página Web de Coby como archivo
PDF.
Para visualizar los documentos en formato PDF,
descargue e instale el visualizador gratuito Adobe
Acrobat, desde el sitio web www.adobe.com.
Contenidos del paquete
Asegúrese de que los elementos que se muestran más
abajo estén incluidos en el paquete. Si faltara algún
artículo, comuníquese con el minorista local a quien
compró el producto
Tableta con acceso a
internet Coby® Kyros®
Estuche protector
Cable USB
Audífonos estéreo
profesionales
.
Este paquete puede contener bolsas plásticas u
otros materiales que son riesgosos para los niños.
Asegúrese de eliminar todo el material de empaque de forma segura luego de abrir el paquete.
Adaptador de alimen-
tación
Page 42 Muchas Gracias
Page 43

Características
Navegue la Web
Visite sus sitios web favoritos
Disfrute de su biblioteca multimedia en cualquier
lugar
La tableta portátil reproduce los formatos más popu-
lares de música, video, y fotos
Revise su correo electrónico
Manténgase en contacto con su familia y amigos
Vea videos de YouTube™
Español
Navegue la comunidad más popular en el mundo
para compartir videos
Lea sus libros favoritos
Descargue miles de libros—el lector de libros electrónicos incluido*
Descubre miles de aplicaciones para el sistema
Android™
Juegos, aplicaciones, y mucho más con el mercado
instalado
Conéctese a Internet inalámbricamente
Conexión Wi-Fi 802.11 b/g/n de alta velocidad
Salida HDMI™ para su TV **
Disfrute de videos, fotos y más en la comodidad de
su sala de estar
Lector de memoria microSDHC
Incremente su capacidad de almacenamiento (hasta
32 GB)
Cámara integrada|
Conveniente cámara ubicada en el panel frontal
Detección automática de orientación
Lea de la manera en que lo desee; ¡La pantalla se
ajustará automáticamente!
* La lectura de libros en el formato ePub requiere de la
aplicación incluida E-book reader.
** Requiere de un cable HDMI opcional La reproducción de
video con resolución 1080p HD requiere de un archivo
de video codifi cado a 1080p. La calidad del streaming
de video se verá afectada por la calidad, el estado de la
fuente y la conexión de red.
Page 43 Muchas Gracias
Page 44

 Conociendo la tableta para Internet
Breve descripción de la unidad
Nombre Descripción
1 Cámara Cámara frontal
2 Tecla Volver Presione esta tecla para volver a la
Español
pantalla anterior. Si aparece el teclado
en la pantalla, presione esta tecla para
apagar el teclado.
Page 44 Conociendo La Tableta Para Internet
Page 45
Nombre Descripción
3Tecla volu-
men (-)
4Tecla
volumen (+)
5 Tecla Power
Español
(encendido/
apagado)
6 Altavoz La salida del altavoz se silencia au-
7Tecla de
Reinicio
Púlselo para bajar el nivel de volumen.
Púlselo para subir el nivel de volumen.
Presione esta tecla para encender la
unidad o para encender y apagar la
pantalla.
Presione y mantenga presionada esta
tecla para ingresar al menú de apagado.
tomáticamente cuando se usa la cha
para auriculares.
Presione esta tecla para reiniciar la
tableta si se congela o presenta alguna
clase de comportamiento anormal.
(Utilice un sujetapapeles u otro objeto
pequeño para presionar suavemente
esta tecla.)
5
67
RESET
Page 45 Conociendo La Tableta Para Internet
Page 46

Nombre Descripción
8 Entrada para
audífonos
Español
9Ficha HDMI
(tipo C mini)
10 Conector de
entrada DC
11 USB 2.0
Puerto de
alta velocidad
12 Ranura para
tarjeta microSDHC
13 Ranura USB Conectarlo a la unidad ash USB.
Conexión de salida de audio para audífonos.
Nota: la salida de los parlantes se desactiva automáticamente cuando los
audífonos están conectados al reproductor.
Conexión a un TV o a otra pantalla.
Cargue y conecte la tableta con el adaptador que viene incluido.
Conexión a un computador para transferir datos (p.ej., música, videos, fotos,
archivos).
Introduzca una tarjeta de memoria
externa microSDHC en esta ranura.
HDMI
DC IN 5V
MEMORY CARD
8
9
10
11
12
13
Page 46 Conociendo La Tableta Para Internet
Page 47

Acerca de la pantalla táctil
El comprimido viene equipado con una pantalla táctil fácil
de usar.
Nuestra multitáctil capacitiva táctil requiere tocar la yema
del dedo suavemente sobre la pantalla de vidrio para
activar las funciones de tableta. Varios dedos pueden ser
utilizados para realizar gestos (por ejemplo, dos dedos
Español
de zoom de la imagen).
Atención: Su punta de los dedos no deben estar cubier-
tos.
Para evitar dañar la pantal la, no la toque con
fuerza excesiva ni con ningún objeto que no
sea un dedo o un lápiz óptico. Para obtener una
mejor respuesta, asegúrese de tener las manos
limpias antes de utilizar los controles de la pantalla táctil.
Película protectora
Se le ha aplicado a la pantalla táctil una película protectora
para protegerla durante el envío. La película protectora
debe quitarse antes de la utilización de la tableta. Para retirarla, simplemente tome una de las esquinas de la película
y tire suavemente de ella para retirarla de la pantalla.
Acciones Sobre la Pantalla Táctil
Puede controlar las funciones de la tableta utilizando la
pantalla táctil en combinación con las tres teclas situadas
en el marco. Para el control de la tableta con la pantalla
táctil, usar la punta del dedo para accionar iconos,
botones, menú, el teclado en pantalla, y otros elementos
que aparecen en la pantalla.
Puede realizar las siguientes acciones en la pantalla
táctil usando la punta de su dedo.
Toque (Touch) Para activar un elemento de la
pantalla (por ejemplo, iconos de aplicaciones, botones, menús elementos,
y la letra y símbolos de la teclado en
pantalla), sólo tiene que tocar con la
punta del dedo.
Tocar y
Sostener
Algunos iconos que aparecen en
pantalla tienen varias funciones si se
tocan y sostienen por unos segundos
(por ejemplo, abrir un menú, o activar
la función de arrastre). Al tocar y no
levantar el dedo se acciona la función
de arrastre. no levante la punta del
dedo hasta que la acción se produzca.
Page 47 Conociendo La Tableta Para Internet
Page 48
Arrastre: Arrastre un icono de la pantalla para
cambiar suposición (por ejemplo, una
aplicación en la pantalla de inicio).
Para arrastrar un Icono, tóquelo y
manténgalo sostenido por un momento, luego sin levantar el dedo,
muévalo sobre la pantalla hasta que
Español
Deslizar: Deslice hacia arriba / abajo la pan-
Pulse dos
veces:
el Icono llegue a la posición deseada.
talla para desplazarse a través de las
diferentes aplicaciones. En algunas
pantallas, es posible que pueda deslizar hacia la izquierda / derecha .
Para accionar el deslizamiento toque
y mueva rápidamente, no se detenga
en la pantalla hasta localizar la aplicación desea.
Rápidamente tocar en la pantalla dos
veces en una página web o en una
aplicación activa el Zoom o aumento de
tamaño. Lo cual se puede realizar hasta
determinar el tamaño deseado.
Acerca del sensor de
orientación
La tableta incorpora un sensor que cambiará automáticamente la orientación de la mayoría de las pantallas en
el momento en el que gire la tableta. El sensor funcionará mejor cuando la tableta sea girada en posición
perpendicular al piso (por ejemplo: cuando la tableta
sea sostenida en posición vertical y no sobre su parte
trasera).
El sensor de orientación puede activarse y desactivarse
desde el menú de confi guraciones Display de la pantalla.
Page 48 Conociendo La Tableta Para Internet
Page 49

Carga de la tableta
La tableta viene equipada con una batería recargable
incorporada de litio-polímero.
Antes de utilizar la tableta, la batería debe encontrarse
cargada por completo. Presione la confi guración de la
esquina inferior derecha. junto al ícono de batería se
encuentra el porcentaje de carga.
Español
Para cargar la batería:
1. Enchufe uno de los extremos del adaptador de
alimentación incluido en un tomacorriente de pared
de 100-240 VCA.
La batería utilizada en este dispositivo puede
producir incendios o quemaduras químicas si
se la trata de manera incorrecta. No desarme,
incinere ni caliente las baterías. No deje el
dispositivo en lugares con luz solar directa o en
un vehículo con las ventanas cerradas. No
conecte el dispositivo a una fuente de
alimentación que no sea la indicada en este
manual o en la etiqueta, ya que puede provocar
incendio o descarga eléctrica
Insertar una Tarjeta de Memoria
2. Enchufe el otro extremo del adaptador de alimentación incluido en el enchufe de alimentación de la
tableta.
3. Desconecte el adaptador de alimentación cuando
la batería de la tableta se encuentre cargada por
completo.
Page 49 Conociendo La Tableta Para Internet
o Unidad Flash USB
La tablet acepta tarjetas de memoria microSDHC y
unidades fl ash USB. Inserte una tarjeta de memoria en la
ranura para tarjetas microSDHC o una unidad fl ash USB
en la ranura USB para:
Aumentar la capacidad de memoria de su tableta
Reproducir archivos de medios almacenados en la
tarjeta de memoria (p.ej., música, video o archivos
de fotos).
Para introducir una tarjeta de memoria:
Page 50

1. Alinee la tarjeta de memoria con la ranura para
tarjeta. Los contactos metálicos de la tarjeta de
memoria deberán mirar hacia abajo, alejados de la
pantalla LCD.
2. Introduzca la tarjeta en la ranura, que incluye
resortes. Empuje la tarjeta hasta que encaje en su
lugar y suene un clic.
Español
3. Inserte la unidad fl ash USB en la ranura USB.
Para soltar y extraer una tarjeta de memoria o
unidad fl ash USB:
1. DESMONTE la tarjeta de memoria o la unidad
fl ash USB.
a. Desde la pantalla principal, toque la so-
lapa Launcher (Lanzador) y luego Settings
(Confi guraciones) para mostrar el menú de
confi guraciones.
No intente introducir otros ob jetos que no sea
una tarjeta de memoria microSDHC en la
ranura para tarjeta. Una tarjeta de memoria
compatible debe encajar fácilmente en la
ranura para tarjeta. Si encuentra resistencia,
verifi que si la tarjeta está alineada. No intente
forzar la tarjeta hacia adentro.
b. Toque Storage (Almacenamiento) para mostrar las
confi guraciones de almacenamiento.
c. Toque en Desmontar tarjeta SD o Desmontar
unidad fl ash USB para preparar la tarjeta de
memoria o la unidad fl ash USB para una extrac-
ción segura.
No trate de insertar otros objetos que no sean
una unidad fl ash USB en la ranura USB.
Evite tocar los contactos dorados de la tarj eta
de memoria o de la unidad fl ash USB.
Page 50 Conociendo La Tableta Para Internet
Page 51

2. Presione la tarjeta dentro de la ranura hasta que
sienta un clic. Entonces, la tarjeta saldrá de la ranura
por los resortes.
3. Tome la tarjeta por los bordes para extraerla.
4. Para soltar y extraer una tarjeta de unidad fl ash USB.
2. Pulse y lleve a cabo la tecla de la Power por 8
segundos para apagar la tableta, luego, presione y
mantenga la tecla de ENCENDIDO hasta que vea el
logo de Coby.
Español
Para evitar daños y corrupción de datos, no
extraiga una tarjeta de memoria ni una unidad
fl ash USB mientras se estén escribiendo o
leyendo datos de la tarjeta o USB. Por ejemplo,
no retire una tarjeta o USB mientras esté
reproduciendo música almacenada en ese
dispositivo.
Los elementos disponibles del menú dependen
de la unidad. T odas las ilustraciones sirven sólo
como referencia.
Reajuste de la tableta
Reajuste la tableta si congela y no responde ni funciona
incorrectamente de otra manera.
1. Desconecte su tableta si está conectada con una
computadora.
Page 51 Conociendo La Tableta Para Internet
Page 52

 Primeros pasos
Cómo ence nder y apagar la tableta
Para encender la tableta haga lo siguiente:
Presione y mantenga la tecla ENCENDIDO hasta
que la pantalla LCD se encienda y vea el logo de
Español
Coby, luego espere hasta que vea la pantalla de
desbloqueo.
Para apagar la tableta haga lo siguiente:
1. Presione la tecla Power y manténgala presionada
hasta que aparezca el mensaje de confi rmación.
2. Toque OK para apagar la tableta.
Page 52 Primeros Pasos
Page 53

Cómo encender y apagar la pantalla
(Standby)
Si la tableta está encendida, puede apagar la pantalla
para ahorrar batería. Simplemente presione la tecla
Power una vez para apagar la pantalla. Presione la tecla
Power nuevamente para volver a encender la pantalla.
Cómo desbloquear la pantalla
Cuando la pantalla se apague, deberá desbloquearla
para volver a encenderla.
Para desbloquear la pantalla, toque y arrastre el ícono
lock hacia el extremo del círculo que aparece.
Español
Page 53 Primeros Pasos
Para ahorrar batería, puede confi gurar la table-
ta para que se apague automáticamente cuando no esté en uso (entre 15 y 30 minutos). Esta
opción Sleep se puede encontrar en el menú
Display.
Page 54

Si se ha confi gurado una contraseña, ingrésela para
fi nalizar el desbloqueo de la pantalla. La contraseña
Desbloqueo de Pantalla puede confi gurarse en el menú
Security Settings (Confi guraciones de Seguridad).
Español
Breve descripción de la pantalla
de inicio
La pantalla de inicio es el punto de partida para todas las
funciones de su tableta.
1
5
2
3
4
ADVERTENCIA: T enga a bien escribir el patrón
de bloqueo con contraseña/PIN/contraseña.
Extraviar u olvidar este método bloqueará al
usuario. Recuperar la unidad reiniciará el dispositivo nuevamente a las confi guraciones de
fábrica. TODOS SUS DA T OS Y PROGRAMAS
SE PERDERÁN.
Page 54 Primeros Pasos
Nombre Descripción
1 Búsqueda
en Google
2Ícono Home
(Inicio)
3Ícono Back
(Volver)
Toque para buscar con el navegador de
Google.
Toque para volver a la Pantalla Home central.
Toque para volver a la pantalla anterior.
6
7
Page 55

Nombre Descripción
4Aplicaciones
recientes
5Solapa
Launcher
Español
(Lanzador)
6 Íconos Toque un ícono para abrir una apli-
7Barra de
noti cación
Toque para mostrar la lista de imágenes
en miniatura de las aplicaciones con las
que ha trabajado recientemente. Toque
una aplicación para abrirla.
Abra el Launcher para ver la lista de todas
las aplicaciones y widgets instalados en
la tableta. Presione la tecla Launcher para
abrir el launcher.
cación o archivo.
Muestra íconos de noti cación, como la
hora, el nivel de batería y la potencia de la
señal de red; toque la barra para abrir el
panel de noti caciones completo. Toque
un ícono de Noti cación para mostrar más
detalles.
Las aplicaciones
Para abrir una aplicación, toque el ícono de la aplicación
en la pantalla de inicio o en el Launcher.
Pantalla Launcher:
La pantalla arriba indicada es para propósi tos
ilustrativos solamente. Coby se reserva el
derecho de modifi car y mejorar la lista fi nal de
aplicaciones disponibles en la tableta.
Page 55 Primeros Pasos
Page 56

Aplicaciones que vienen instaladas
Algunas aplicaciones han sido instaladas en su tableta
para su conveniencia. Estas aplicaciones incluyen las
siguientes:
Visualizar la hora actual o con gurar una
alarma.
Descargar y leer miles de libros electrónicos. Compatibilidad con el estándar ePub.
Español
Navegar por la Web.
Mostrar el calendario o grabar eventos y citas para administrar su agenda.
Realizar operaciones matemáticas simples.
Tomar fotos o vídeos con la cámara frontal.
Page 56 Primeros Pasos
Obtener $10 de música de eMusic.
Revisar el correo electrónico.
Ver y gestionar los archivos almacenados en
la tabla.
Visita http://www.estrongs.com/en/products/
le-explorer.html para más información.
Apague aplicaciones para ahorrar batería.
Visita http://www.estrongs.com/en/products/
task-manager.html para más información.
Ver fotos y vídeos, y además editar fotos.
Page 57

Español
Acceder a miles de aplicaciones con GetJar
Marketplace.
Reproducir música.
Entrar al menú de con guraciones para
seleccionar las opciones de su tableta.
Ingresar a la página del navegador móvil de
YouTube™ para ver videos por la internet.
Cómo instalar las aplicaciones
También puede descargar e instalar aplicaciones adicionales desde la tienda de aplicaciones del dispositivo,
desde el navegador de Internet o desde otras fuentes.
La tableta debe estar confi gurada para permitir la
instalación de aplicaciones de fuentes que no se encuentren en el mercado. Puede seleccionar la opción Fuente
Desconocida del menú Application settings (confi gura-
ción de aplicaciones).
Su Coby Mobile Internet Device (dispositivo de
Internet móvil Coby) puede incluir acceso a
contenido, a productos, a aplicaciones y a
servicios de ter ceros o informac ión sobre ellos.
El uso que haga de contenidos, de productos ,
de aplicaciones y de servicios de dichos terceros
queda a discreción de ellos y se rige
expresamente por sus términos y condiciones
de uso, lo que comprende cualquier política de
privacidad de ellos para tales contenidos,
productos, aplicaciones y servicios.
Page 57 Primeros Pasos
Page 58

Coby Electronics Corporation no es responsable
y deniega todas las garantías de cualquier tipo
con respecto a todo contenido, producto,
aplicación y servicio de dichos terceros. Coby
Electronics Corporation no será responsable por
cualquier pérdida, costo o daño incurrido debido
al acceso o al uso de contenidos, productos,
Español
aplicaciones o servicios de terceros.
Acerca de los Widgets
Los Widgets son aplicaciones autónomas que puede
colocar en las pantallas Home para acceder a sus
funciones favoritas.
Agregar Widgets a la pantalla Home
1. Navegue a la pantalla Home en la que desea colocar
el Widget.
2. Toque la solapa Launcher.
3. Toque WIDGETS para mostrar todos los widgets y
luego mantenga un ícono de widget presionado para
agregarlo a la pantalla Home.
Eliminar Widgets
Toque y mantenga presionado el Widget hasta que
aparezca el ícono Remove (quitar) en la parte superior
de la pantalla. Luego, arrastre el Widget hacia el ícono
Remove para eliminarlo.
Page 58 Primeros Pasos
Page 59

Las notifi caciones
Los íconos que aparecen en la barra de notifi cación en la
esquina inferior derecha de la pantalla le alertan cuando
llegan mensajes nuevos o cuando tienen lugar alarmas u
otros eventos de aplicaciones.
Visualice y responda a las notifi caciones abriendo el
panel de notifi caciones com pl e ta m en t e.
Español
Toque la barra de notifi cación para abrir el panel de
notifi cacion es .
Cómo contestar una notifi cación:
Haga un toque sobre una notifi cación de la lista, se cer-
rará el panel de notifi caciones y se activará la aplicación
asociada a la notifi cación.
Cómo cerrar el panel de notifi caciones:
Toque cualquier otra área de la pantalla, excepto el
panel de notifi caciones, o
Toque el ícono Back.
Page 59 Primeros Pasos
Page 60

 Conectar a Internet
Esta tableta puede utilizar redes de datos Wi-Fi para conectarse a Internet.
La tecnología inalámbrica Wi-Fi puede proporcionar acceso a Internet a distancias de más de 300 pies; no obstante, esta distancia puede
verse afectada por el entorno y por el enrutador Wi-Fi.En general, la proximidad a enrutadores de Wi-Fi mejora el funcionamiento.
Requisitos
Español
A fi n de conectarse a Internet, necesitará cualquiera de
los siguientes:
Remítase a la documentación de su enrutador inalámbrico para asistencia o consulte con su administrador de
redes para más detalles.
Un enrutador o punto de acceso inalámbrico con
conexión a Internet de banda ancha
La tablet tiene radio Wi-Fi 802.11 b/g/n. La tablet también
funcionará con enrutadores inalámbricos que sólo admitan
802.1 1 b /g.
S e rec omienda una velocidad de c onexión mín-
ima de 64 Kbps. Velocidades más rápidas permitirán una mejor experiencia en Internet.
Necesitará conocer el nombre de su red (SSID) así como
la contraseña u otras credenciales si su red es segura.
En general, estas confi guraciones pueden encontrarse
en la página web de administración de su enrutador
inalámbrico.
Page 60 Conectar A Internet
Puede encontrar redes Wi-Fi abiertas o “hot
spots” (puntos de acceso). En general, estas redes están confi guradas para que usted pueda
simplemente conectarse a ellas sin necesidad
de saber sus confi guraciones. La tableta obten-
drá toda la información que necesita del enrutador en forma automática.
Page 61
Conectar a una red Wi-Fi
La barra de notifi cación muestra íconos que indican el
estado del Wi-Fi de su tableta.
Conectado a una red Wi-Fi (las ondas
indican la potencia de conexión).
e. Asegúrese de que el cuadro de opción Wi-Fi
esté en ON (activado): Toque y deslice el bloque
a la derecha para activar la conexión Wi-Fi.
Español
[sin
ícono]
1. Encienda la radio Wi-Fi si todavía no está encendida. Para encender el Wi-Fi:
a. Vaya a la pantalla Home:
b. Abra la pantalla Launcher:
c. Abra el menú Wireless & networks (Conexiones
d. Abra el menú Wi-Fi settings (Confi guraciones de
Page 61 Conectar A Internet
No hay redes Wi-Fi en el rango o la radio
Wi-Fi está apagada.
Toque el ícono Home.
Toque la solapa Launcher, luego toque Settings.
inalámbricas y redes):
Toque WIRELESS & NETWORKS.
Wi-Fi):
Toque WiFi.
Cuando el Wi-Fi está activado, la tableta buscará y
mostrará una lista de redes Wi-Fi disponibles.
Si se encuentra una red a la que se ha conecta-
do anteriormente, la tableta se conectará a ella.
Si no ve su red en la lista, puede forzar a la
tableta a que realice una nueva búsqueda. Para
buscar redes, toque el ícono SCAN que se ubica
en la esquina superior derecha de la pantalla.
Page 62

2. Seleccione una red Wi-Fi disponible para conectarse:
En el mismo menú de confi guraciones Wi-Fi anterior,
toque una red de la lista.
Cuando se ha conectado con éxito a una red Wi-Fi, la
barra de notifi cación en la parte inferior de la pantalla
mostrará un indicador de señal Wi-Fi.
Si la red está abierta, la tableta le solicitará que confi rme
la conexión a la red. Toque Connect (conectar) para
confi rmar.
Español
Si la red es segura (como se indica con un ícono Lock),
la tableta le solicitará que ingrese una contraseña u otras
Para saber cómo agregar una red Wi-Fi cuando
no está en el rango o cuando el enrutador está
confi gurado para ocultar el nombre de la red
(SSI D) o par a confi gurar las opc iones avanza-
das de Wi-Fi, tenga a bien remitirse al manual.
credenciales. Toque el cuadro de contraseña de red
inalámbrica para mostrar el teclado en pantalla y luego
utilícelo para ingresar la contraseña. Toque Connect
para confi rmar .
Page 62 Conectar A Internet
Page 63

 Navegar por la Web
La aplicación Browser (navegador) le permite visitar páginas web y encontrar información en la red. Manténgase al
tanto de las noticias, de sus amigos o disfrute de vídeo desde YouTube™, la comunidad para compartir vídeos más
popular del mundo.
Para utilizar Browser, la tableta debe estar conectada a
Internet. Lea la sección “Conectar a Internet” para saber
Español
cómo con e c t a r s e a In terne t .
Para abrir Browser, toque el ícono Browser en la pantalla
Home o en el Launcher.
4
35
2
1 Barra de dirección Muestra la dirección (URL) de la
2Ícono Go to
3Ícono Search
1
4Ícono Add Book-
5 Nueva ventana (+) Crea una ventana de navegador
Page 63 Navegar Por La Web
Nombre Descripción
página actual. Toque la barra para
ingresar una nueva dirección o
para buscar en la web.
Toque para ver marcadores, los
Bookmarks (Ir a
marcadores)
(Buscar)
mark (Agregar
marcador)
sitios más visitados o su historial
de navegación.
Toque para buscar con el navega-
dor de Google.
Toque para agregar marcadores.
nueva.
Page 64

Algunas acciones comunes de Browser se describen a
continuación.
Para ir a una página web.
1. Toque la barra de
dirección en la parte
superior de la pantalla
Español
de Browser. El teclado
se abrirá automáticamente. (Si la barra
de dirección no está
visible, arrastre la
página hacia abajo
para volver a la parte
superior de la pantalla
de Browser).
2. Utilice el teclado para
ingresar la dirección
(URL) de la página
web (por ejemplo,
www.cobyusa.com).
3. Toque la tecla Enter
para abrir la página
web.
Para marcar una página web.
Marque sus páginas web favoritas para visitarlas
rápidamente sin ingresar una URL.
1. Vaya a la página
web que desee
marcar.
2. Toque el ícono
Add Bookmark.
3. Si lo desea,
puede modifi car
el nombre del
marcador o su
ubicación (dirección URL). De lo
contrario, toque
OK para terminar
de agregar el
marcador.
Page 64 Navegar Por La Web
Page 65

Para ir a una página web marcada.
1. Toque el ícono Go
to Bookmark.
3. Toque “Delete
bookmark” (borrar
marcador).
4. Toque “OK” para confi rmar.
2. Toque el título de
un marcador para
Español
abrirlo.
Para borrar una página web marcada.
1. Toque el ícono
Go to Bookmark.
2. Toque y mantenga presionado un
título de marcador
para abrir el menú
de opciones.
Page 65 Navegar Por La Web
Menú de Browser
Mientras ve una página web, toque el ícono que
se muestra a la derecha para abrir el menú de
Browser. El ícono está ubicado en la esquina
superior derecha de la pantalla. Las opciones
son:
Actualizar: Actualiza la pantalla web actual.
Adelante: Vaya a la página web siguiente.
Nueva solapa: Abra la página web en una nueva
ventana, debajo de una nueva solapa.
Nueva solapa de incógnito: Abra la página web en
una ventana nueva, debajo de una nueva solapa;
y las páginas que ve en la nueva ventana no aparecerán en su historial de navegación o de búsqueda. Vea en la explicación en pantalla de la solapa de
incógnito activa.
Compartir página: Utilice el correo electrónico para
enviar la URL de la página web.
Page 66

Encontrar en la página: Busque un contenido en la
página actual.
Solicitar sitio de escritorio:
Guardar para lectura fuera de línea: Guarda esta
página en la memoria interna. Luego, puede leerla
cuando la conexión a Internet esté desactivada.
Español
Información de página: Ve información acerca de la
página actual, lo que incluye la URL.
Confi guraciones: Personalice el Browser.
Page 66 Navegar Por La Web
Page 67

 Administración de aplicaciones
La descarga y la instalación de nuevas aplicaciones en su tableta puede extender su funcionalidad de muchas
maneras diferentes.
Puede descargar, e instalar aplicaciones desde la tienda
Aplicaciones incluida. Para abrir la tienda electrónica
Aplicaciones:
Español
1. Toque el icono Launcher (activador).
2. Toque el icono GetJar.
Cuando instale una aplicación, la misma le informará
acerca de cuales funciones del teléfono requiere controlar y si requiere acceso a sus datos. Asegúrese de
revisar cuidadosamente estos requerimientos de acceso
antes de completar la instalación.
Sea especialmente cuidadoso con aquellas
aplicaciones que requieran muchas funciones o
una cantidad importante de sus datos. Usted es
el responsable por los resultados de las
aplicaciones instaladas en la tableta.
Page 67 Administración De Aplicaciones
Page 68

Usted puede aprender más acerca de GetJar, y
navegar por las aplicaciones, visite su sitio web en
www.getjar.com.
Algunos desarrolladores permiten la descarga
e instalación de las aplicaciones directamente
desde su sitio web.
Español
Su dispositivo de Internet móvil Coby puede incluir el
acceso a, o información sobre, contenidos, productos,
aplicaciones y servicios de terceros. Su uso de
dichos contenidos de terceros, los productos,
aplicaciones y servicios es a discreción del tercero, y
expresamente regulado por los términos de dicho
tercero de uso, incluyendo las políticas de privacidad
de cualquier dicho tercero, de dicho contenido,
productos, aplicaciones y servicios. Coby Electronics
Corporation no se hace resp onsable y niega todas
las garantías de ningún tipo con respecto a todo el
contenido de dichos terceros, productos, aplicaciones
y servicios. Coby Electronics Corporation no será
responsable por cualquier pérdida, gastos o daños
sufridos debido a su acceso o uso de los contenidos
de terceros, los productos, aplicaciones o servicios.
Para desinstala una aplicación:
1. Desde la pantalla de inicio, toque la tecla Launcher
Tab.
2. Toque Settings (confi guraciones) para abrir el menú
de confi guraciones.
3. Toque Apps (aplicaciones) para mostrar una lista de
todas las aplicaciones instaladas en la tableta.
Page 68 Administración De Aplicaciones
Page 69

4. Toque el nombre de la aplicación que desea desinstalar; la pantalla de información de la aplicación se
abrirá.
Español
5. Toque Uninstall (desinstalar). La tableta le solicitará
una confi rmación.
6. Toque OK para desinstalar la aplicación.
O puede desinstalar una aplicación desde la
pantalla Launcher directamente. Toque y mantenga presionado el ícono de una aplicación has-
ta que el ícono Uninstall aparezca .
Arrastre el ícono Uninstall para desinstalar la
aplicación.
Page 69 Administración De Aplicaciones
Page 70

 Conexiones opcionales
Conectar a un ordenador
Conecte la tableta a un ordenador para transferir archivos.
1. Conecte su tableta al ordenador.
Español
Con el cable USB incluido:
Conecte el extremo pequeño del cable en el conec-
tor USB 2.0 de alta velocidad de la tableta.
Conecte el extremo grande del cable en un puerto
USB 2.0 de alta velocidad disponible en el ordenador.
Cuando su tableta esté conectada, aparecerá un
ícono de USB en la barra de notifi cación.
Toque la barra de notifi cación para abrir el panel de
notifi cacion es .
El “modo de almacenamiento masivo” de la tablet
es compatible con muchos sistemas operativos,
incluyendo: Microsoft® Windows® XP, Vista, 7 o
superior y Mac OS o Linux.
Page 70 Conexiones Opcionales
Page 71

2. Monte la unidad de almacenamiento.
Toque USB connected (conectado por USB) para
montar el almacenamiento integrado de la tableta.
Luego, toque “Turn on USB storage” (encender
almacenamiento USB) y “OK” cuando se le solicite
confi rmar. Al montarse, puede copiar archivos a su
ordenador o desde éste.
Español
Su tableta será reconocida por el ordenador como
una Unidad de Almacenamiento Extraíble. Arrastre y
suelte los archivos entre su tableta y el ordenador. Para
saber más acerca de la copia de archivos, remítase a
la documentación incluida con su ordenador o con su
sistema operativo.
Conectar al TV
Conecte al TV para disfrutar de su tableta desde la
comodidad de su sala de estar. Se requiere un cable
HDMI (tipo A a tipo C) para conectar la tableta al TV.
La tableta reconocerá e igualará las funciones del TV
automáticamente.
Para conectar la tableta al TV:
1. Conecte el extremo pequeño del cable HDMI al
conector mini HDMI de la tableta.
2. Conecte el extremo grande del cable HDMI al puerto
HDMI en el TV.
3. Encienda el TV y confi gure el modo de visualización
al puerto HDMI al que la tableta está conectada.
La pantalla de la tableta se enviará a la pantalla del TV.
Si necesita ayuda para confi gurar el modo de vi-
sualización del TV, remítase a la documentación
proporcionada por el fabricante del TV.
Page 71 Conexiones Opcionales
Page 72

Conectar auriculares
Conecte un par de auriculares (o audífonos) a la tableta
para disfrutar la multimedia en privado.
Baje el nivel de volumen de la tableta antes de conectar
los auriculares, y luego aumente el volumen lentamente
a un nivel de audición cómodo.
Español
Los auriculares deben tener un conector de 3,5 mm
(1/8 pulgadas).
Cuando se conecten los auriculares, la salida del
altavoz se desactivará automáticamente.
Los especialistas en el oído no recomiendan
una audición continuada de reproductores
personales a volúmenes elevados. La
exposición constante a volúmenes altos puede
provocar pérdida de la audición. Si experimenta
zumbido en los oídos o pérdida de audición,
discontinúe el uso y solicite ayuda médica.
Usar el adaptador USB grande
El adaptador USB grande puede utilizarse para conectar
y para usar dispositivos USB con la tableta. El adaptador
convierte el puerto mini USB de la tableta en un conector
USB On-the-Go (OTG).
HDMI
DC IN 5V
MEMORY CARD
Conectar un teclado
Cuando desee teclear durante un período prolongado,
puede querer conectar un teclado de tamaño real a la
tableta.
Utilice el adaptador USB grande (tipo A) incluido para
conectar un teclado a la tableta.
Page 72 Conexiones Opcionales
Page 73

También puede utilizar esta conexión para
agregar un ratón a la tableta.
El adaptador soporta una conexión a la vez.
Para utilizar un teclado y un ratón simultánea mente, necesitará agregar un concentrador
Español
USB externo.
Conectar un dispositivo de
almacenamiento
Utilice el adaptador USB grande (tipo A) incluido para
conectar un dispositivo de almacenamiento a la tableta
(por ejemplo, una unidad de memoria fl ash USB).
Esta conexión soporta un tamaño máximo de
almacenamiento de 16 GB. Para capacidad de
almacenamiento adicional, se puede agregar
una tarjeta micro SDHC a la tableta.
Page 73 Conexiones Opcionales
Page 74

 Confi gurar las opciones del sistema
Abra el menú de confi guraciones del sistema para ajustar la apariencia y el funcionamiento de la tableta.
Muchas aplicaciones tendrán sus propias confi guraciones. Para sabe r má s, re mítase a la documentación pro-
porcionada por el desarrollador de dichas aplicaciones.
Español
Para abrir el menú Settings (confi guraciones):
1. Desde la pantalla Home, toque la solapa Launcher.
2. Toque Settings para abrir el menú de confi guraciones.
Las confi guraciones están agrupadas por categoría. Toque una categoría para abrir
y para ajustar sus confi guraciones en el lado derecho.
Tenga a bien remitirse al manual para una descripción de las
opciones en el menú de confi guraciones.
Page 74 Confi gurar Las Opciones Del Sistema
Page 75

 Especifi caciones
Visite nuestro sitio web www.cobyusa.com para obtener información actualizada acerca del producto. El diseño, las
especifi caciones y el manual están sujetos a cambios sin previa notifi cación.
Procesador Cortex A8 (1 GHz)
Memoria RAM 1G B
Español
Almacenamiento Memoria ash integrada de 8GB
Ranura para tarjeta microSDHC
(máximo soportado: 32GB)
Pantalla TFT LCD de 10.1” (1024 x 600) con touch-
screen capacitivo
Conexión a redes
IEEE 802.11 b/g/n
Wi-Fi
Salida de video Mini HDMI, tipo C (soporta 1080p y
720p)
1
Alimentación Batería recargable de Li-Po
Adaptador de alimentación (CC 5V)
Tiempo de utilización (horas)
1
1 GB= Mil millones de bytes. La capacidad de almacenamiento dis
ponible será menor debido al sistema operativo y a las aplicaciones
de software preinstaladas. La capacidad formateada real variará.
2
La vida útil de la batería variará en función de las confi guraciones,
del uso y de otros factores. Los valores de reproducción promedio
están basados en la descarga de la batería mientras realiza las
siguientes tareas: reproducción de audio y video y navegación en la
Web.
Hasta 20 horas de música, 6 horas de
2
video, 5 horas de navegación web
Salida de audio Auriculares de 3.5 mm
Interfaz para PC USB 2.0 de alta velocidad
Características
adicionales
Cámara ubicada en el panel frontal
Micrófono integrado
Altavoz
Sistema opera-
Android™ 4.0
tivo
Page 75 Especifi caciones
Page 76
 Soporte
Si tiene algún problema con este dispositivo, verifi que nuestro sitio web en www.cobyusa.com para obtener respues-
tas a preguntas frecuentes (FAQ) y las actualizaciones de productos. Si estos recursos no resuelven el problema, por
favor, póngase en contacto con Soporte Técnico.
Español
Soporte técnico de Coby Electronics
Correo electrónico: techsupport@cobyusa.com
Sitio web: www.cobyusa.com
Teléfono: Los residentes de US: 877-302-2629, De Lunes a viernes (9:00–21:00 EST)
Residentes de Canadá: 855-542-8917, De lunes a viernes (8:00–20:00 EST)
Page 76 Sopor te
Page 77

 Avisos de Seguridad
Para uso de los clientes:
Ingrese a continuación el número de serie que se encuentra en la
parte trasera de la unidad. Conserve esta información para referencias
futuras.
Español
La fi gura de relámpago que termina en punta de fl echa
dentro de un triángulo equilátero tiene por fi nalidad aler-
tar al usuario de la presencia de “voltaje peligroso” sin
aislamiento dentro de la caja del producto que podría
tener potencia sufi ciente para constituir un riesgo de
choque eléctrico.
El signo de exclamación dentro de un triángulo
equilátero tiene el propósito de advertir al usuario
de la presencia de instrucciones de funcionamiento
y reparación importantes en el material impreso que
acompaña al artefacto.
Para obtener informaci ón de rec iclaje o el iminac ión
sobre este producto, comuníquese con sus autoridades locales o c on la Alianza de Industr ias Elec trónicas: www.eiae.org.
Page 77 Avisos De Seguridad
Nº de Model
Nº de S e ri e
ADVERTENCIA: Para prevenir el riesgo de descarga eléctrica, no
exponga este dispositivo a la lluvia ni a la humedad. Dentro del gabinete se encuentra presente alto voltaje peligroso. No abra el gabinete.
Proteja su capacidad de audición: Los expertos en audición
advierten contra el uso constante de reproductores personales de
audio a volumen alto. La exposición constante al volumen alto puede
llevar a la pérdida de la audición. Si le zumban los oídos o sufre una
pérdida de audición, suspenda el uso y busque asesoramiento médico.
Nota: Si el producto repentinamente no responde o se apaga, es
posible que la causa sea una descarga electrostática. En tal caso,
siga los procedimientos que se detallan a continuación para la
recuperación:
• Apague el dispositivo presionando suavemente el botón RESET
(reinicio).
• Encienda nuevamente la unidad.
Page 78

Declaración de la FCC
Este dispositivo cumple con la Parte 15 de las Normas de la FCC. El funcionamiento está sujeto a las siguientes dos condiciones:
(1) Este dispositivo puede no causar interferencias perjudiciales, y
(2) Este dispositivo debe aceptar cualquier interferencia recibida, inclusive aquella que podría causar funcionamiento no deseado.
Nota: Este equipo fue probado y cumple con todos los límites para dispositivos digitales clase B, conforme a la Parte 15 de las normas de la
FCC. Estos límites fueron diseñados para brindar protección razonable contra la interferencia perjudicial en una instalación residencial. Este
equipo genera, emplea y puede irradiar energía de frecuencia de radio y, si no se instala y emplea según las instrucciones, puede ocasionar
Español
interferencia perjudicial para las comunicaciones de radio. Sin embargo, no hay ninguna garantía de que no ocurrirá en una instalación en particular. Si este equipo causa interferencia perjudicial para la recepción de radio o televisión, lo cual puede determinarse al apagar o encender
el equipo, el usuario puede tratar de corregir la interferencia con una o más de las siguientes medidas:
• Reorientar o reubicar la antena receptora.
• Aumentar la distancia entre el equipo y el receptor.
• Conectar el equipo en un tomacorriente en un circuito diferente del que está conectado el receptor.
• Consultar al distribuidor o a un técnico con experiencia en radio y TV para obtener ayuda.
Se requiere el uso de cable blindado, para cumplir con los límites de la clase B, en la sub parte B de la Parte 15 de las normas de la FCC.
No efectúe cambios ni modifi caciones al equipo, excepto en caso de que así lo especifi que el manual. Si se deben efectuar tales cambios o
modifi caciones, se le solicitará que detenga el funcionamiento del equipo.
Page 78 Avisos De Seguridad
Page 79

Consignes de Sécurité Importantes
1. Lea las instr ucciones: Deberá leer todas las instruc ciones de seguridad y funcionamiento, antes de poner
en funcionamiento este producto.
2. Conserve las instrucciones: Deberá conservar las
instrucciones de seguridad y funcionamiento para
referencia futura.
Español
3. Preste atenci ón a las advertencias: Deberá respetar
todas las advertencias contenidas en el producto y en
las instrucciones de funcionamiento.
4. Siga las instrucciones: Deberá seguir todas las instrucciones de uso y funcionamiento.
5. Limpieza: Desconecte este producto del tomacorriente de pared antes de la limpieza. No utilice productos de limpieza líquidos o en aerosol. Utilice un paño
húmedo para limpiar.
6. Complementos: Utilice sólo complementos recomendados por el fabricante. El uso de otros complemen tos puede ser peligroso.
7. Agua y humedad: No utilic e este producto cerca del
agua (por ejemplo: cerca de una bañera, lavatorio,
lavaplatos o tina para lavar ropa, en un sótano mojado
ni cerca de una piscina o similar).
8. Ventilación: El gabinete posee ranuras y aberturas
para asegurar la correct a ventilación del producto y
para protegerlo del recalentamiento. Nunca se debe
Page 79 Avisos De Seguridad
bloquear estos orifi cios al colocar el producto sobre
una cama, sofá, alfombra u otras superfi cies simil-
ares. No se debe colocar este producto en un mueble
empotrado, tal como biblioteca o estante, salvo que
se proporcione una ventilación correcta o se cumplan
las instrucciones del fabricante del producto.
9. Fuentes de alimentación: Este producto debe utilizarse
sólo con el tipo de fuente de alimentación indicada
en la etiqueta de clasifi cación. Si no está seguro del
tipo de fuente de alimentación de su hogar, consulte
con el distribuidor del producto o con la compañía
eléctrica local. Para los productos que funcionan a
batería o con otras fuentes de alimentació n, consulte
las instrucciones de funcionamiento.
10. Sobrecarga: No sobrecargue los tomacor rientes, alargues o enchufes de pared, ya que esto puede tener
como resultado un riesgo de incendio o descarga
eléctrica.
11. Entrada de objetos y líquido: Nunca introduzca o bjetos de ningún tipo dentro de este producto a través
de las aberturas, ya que pueden ponerse en contacto
con puntos de voltaje peligrosos o provocar cortocircuitos que ocasionarían incendios o desc argas eléctricas. No derrame nunca líquido de ningún tipo sobre
el producto.
Page 80

12. Reparaciones: No intente reparar este producto usted
mismo, ya que al abrir o quitar las cubiertas se expondría a voltaje peligroso u otros peligros. Para cualquier reparación, póngase en contacto c on el personal
técnico califi cado.
13. Daños que requieran servicio técnico: Desconecte
este producto del enchufe de pared y contác tese con
Español
personal técnico califi cado en las siguientes situacio-
nes: a) cuando la fuente de alimentación o el enchufe
estén dañados; b) si se ha derramado líquido, han
caído objetos dentro del producto; c) si el producto
ha sido expuesto a lluvia o al agua; d) si el producto
no funciona normalmente al seguir las instruc ciones
de funcionamiento. Ajuste sólo aquellos controles
incluidos en las instrucc iones de funcionamiento, ya
que el ajuste inadecuado de otros controles puede
ocasionar daños y requerir c on frecuenc ia un trabajo
extenso por parte de un técnic o califi cado para res-
taurar el funcionamiento normal del producto; e) si el
producto se ha caído o ha sufrido algún daño; f) cu ando el producto presenta un cambio marcado en su
rendimiento; esto indica que necesita mantenimiento.
14. Piezas de reemplazo: Cuando se requieren piezas de
reemplazo, asegúrese de que el servicio técnico haya
utilizado las piezas de reemplazo especifi cadas por el
fabricante o que posean las mismas característic as que
la pieza original. Las sustituciones no autorizadas pueden
provocar incendio, descarga eléctrica u otros riesgos.
15. Controles de segur idad: Una vez completado el servicio o las reparaciones de este producto, solic ite al
servicio técnico que realice controles de seguridad
para asegurar que se encuentra en condición de funcionamiento correcto.
16. Calor: El producto debe ubicarse lejos de fuentes de
calor tales com o radiadores, rejillas de aire caliente,
estufas u otros productos (incluidos amplifi cadores)
que produzcan calor.
Page 80 Avisos De Seguridad
Page 81

Avisos de Legales y Marcas
Coby y Kyros son marcas registradas de Coby Electronics Corporation.
Android es una marca registrada Google Inc. El uso de esta marca registrada está sujeto a los permisos de Google.
Partes de la obra de arte utilizado en este paquete son modifi caciones basadas en el trabajo creado y compartido por Google y se utilizan de
acuerdo a los términos descritos en la Atribución de licencia Creative Commons 3.0.
HDMI, el logotipo HDMI y High-Defi nition Multimedia Interface son marcas o marcas registradas de HDMI Licensing LLC.
microSDHC logotipo es una marca registrada de SD-3C, LLC.
Español
USB es una marca registrada de USB Implementers Forum, Inc.
YouTube™ es marca registrada de Google, Inc.
Todas las demás marcas registradas y logotipos pertenecen a sus respectivos propietarios, salvo que se indique lo contrario
Page 81 Avisos De Seguridad
Page 82

 Table des Matières
MERCI............................................................83
Contenu de l’emballage .......................................... 83
Caractéristiques ......................................................... 84
MIEUX CONNAÎTRE LA TABLETTE INTERNET
L’appareil en un coup d’oeil .................................... 85
A propos de l’écran tactile ...................................... 88
Pellicule de Protection........................................ 88
Actions relatives à l’écran tactile ...................... 88
A propos du Capteur d’Orientation ........................90
Français
Recharge de la Tablette............................................90
Pour insérer une carte mémoire ou clé USB ...........91
Rajustement du comprimé .......................................92
DÉMARRAGE .................................................93
Mise en marche et arrêt de la tablette .................93
Pour allumer et éteindre l’écran (veille) ..........94
Déverrouillage de l’écran ...................................94
L’Ecran d’Accueil en un Coup d’Oeil ......................95
A propos des applications ..................................96
Applications préinstallées ...................................97
A propos des widgets ...............................................99
A propos des notifi cations .........................................99
CONNEXION À INTERNET ..........................101
Conditions requises ..................................................101
Connexion à un réseau Wi-Fi ..................................102
NAVIGUER SUR LE WEB ...............................104
..85
GESTION DES APPLICATIONS .....................108
CONNEXIONS OPTIONNELLES ................... 111
Connexion à un ordinateur ..................................... 111
Connexion à un téléviseur .......................................112
Connexion de casque d’écoute ............................113
Utilisation de l’adaptateur USB grande taille .......113
Connexion d’un clavier .....................................113
Connexion d’un dispositif de stockage ..........114
CONFIGURATION DES OPTIONS DU SYSTÈME .. 1 15
SPÉCIFICATIONS .........................................116
ASSISTANCE ................................................117
NOTICES DE SÛRETÉ ....................................118
Page 82
Page 83

 Merci
Félicitations pour votre achat d’une T able tte Internet de
Coby® Kyros®. Ce guide est fourni pour vous aider à utiliser
votre lecteur sans tarder ; veuillez le lire attentivement et le
conserver pour pouvoir vous y référer ultérieurement.
Pour des instructions détaillées, des informations récentes
et des conseils utiles, veuillez visiter le site Web de Coby
sur www.cobyusa.com.
Vous pouvez également télécharger le manuel
Français
Pour visualiser les documents PDF, té-
sur le site Web de Coby sous forme de fi chier
PDF.
léchargez et installez gratuitement le lecteur
Adobe Acrobat à par tir du s i te Web Adobe sur
www.adobe.com.
Contenu de l’emballage
Vérifi ez que les articles mentionnés ci-dessous sont
présents dans l’emballage. Si l’un de ces articles est
manquant, veuillez contacter votre revendeur.
Tablette Internet de
Coby® Kyros
Etui de protection
Câble USB
Ecouteurs stéréo
professionnels
Cet emballage peut c ontenir des sacs en plas -
tique ou autres matériaux qui présentent un
danger pour les enfants. Veillez à éliminer en
toute sécurité tous les matériaux d’emballage
après l’ouverture.
®
Adaptateur
d’alimentation
Page 83
Page 84

Caractéristiques
Naviguez le Web
Visitez vos sites web favoris
Vérifi ez vos e-mails
Gardez contact avec vos amis et votre famille
Regardez des vidéos YouTube™
Parcourez la communauté de partage de vidéos la
plus populaire du monde
Lisez vos livres favoris
Français
Téléchargez des milliers de livres avec le comprenait
lecteur E-book**
Lecteur de carte mémoire microSDHC
Augmentez votre capacité de stockage (jusqu’à 32
Go pris en charge)
Caméra intégrée
Caméra pratique avant-face
Détection de l’orientation automatique
Lisez comme vous le souhaitez ; l’écran s’ajuste
automatiquement !
* Nécessite un câble HDMI facultatif. La lecture vidéo HD
1080p nécessite un fi chier vidéo codé à 1080p. La qualité
de contenu vidéo sur Internet sera affecté par la qualité et
la condition de la source et de votre connexion au réseau.
Découvrez de milliers d’applications pour Android™
Jeux, applications, et plus encore avec le marché
** Si vous voulez lire des livres dans le format ePub, cela
nécessite l’application de lecteur électronique incluse.
installé
Branchez-vous à l’Internet sans fi l
Réseautage Haut Débit Wi-Fi 802.11 b/g/n
Sortie HDMI™ à votre téléviseur *
Profi tez de vidéos, de photos et plus dans le confort
de votre salon
Profi tez de votre bibliothèque multimédia n’importe où
Une centrale portable lit des formats musique, vidéo
et photo populaires
Page 84
Page 85

 Mieux co nnaître la T ablette Internet
L’appareil en un seul coup d’œil
Nom Description
1 Caméra Caméra frontale
2Touche
Retour
Français
Appuyez pour retourner à l’écran précédent. Si le clavier est a ché sur l’écran,
appuyez pour fermer le clavier.
Page 85
Page 86

Nom Description
3Touche
Volume –
4Touche
Volume +
5 Touche Al-
lumage
6 Haut-parleur Le son est automatiquement coupé au
Français
7 Touche Ré-
initialisation
Appuyez pour baisser le niveau du
volume.
Appuyez pour augmenter le niveau du
volume.
Appuyez pour allumer l’appareil, ou
pour allumer et éteindre l’écran.
Maintenez la pression sur la touche
pour accéder au menu Extinction.
haut-parleur dès qu’on utilise la prise
casque.
Appuyer pour réinitialiser la tablette
si elle se gèle ou ne se comporte pas
normalement. (Utilisez un trombone ou
autre petit objet pour appuyer délicatement sur cette touche.)
5
67
RESET
Page 86
Page 87

Nom Description
8Prise jack
pour casque.
Point de sortie audio pour casques.
Remarque: la sortie haut-parleur se
coupe automatiquement lorsque l’on
relie des écouteurs ou un casque au
lecteur.
8
HDMI
9
9Connecteur
HDMI (mini
Type C )
Prise jack
10
Français
d’alimentation
(entrée DC)
11 Po rt G ra nd e
Vitesse USB
2.0
12 L og em en t
microcarte
SDHC
13 Fente USB Connectez au lecteur de clé USB.
Page 87
Pour connecter un téléviseur ou un
autre écran.
Permet la charge et l’allumage de la
tablette grâce au transformateur fourni.
Relié à un ordinateur, permet le transfert de données (par ex., musique,
vidéos, photos, chiers.)
C’est à cet endroit que vous chargerez
vos microcartes mémoire SDHC.
DC IN 5V
MEMORY CARD
10
11
12
13
Page 88

A propos de l’écran tactile
Votre tablette est équipée d’un écran tactile facile à
utiliser.
Notre capacitif multi-tactile exige toucher du bout des
doigts doux sur l’écran de verre pour activer des fonctions de la tablette.
Actions relatives à l’écran tactile
Il est possible de contrôler les fonctions de la tablette
à l’aide de l’écran tactile. Pour cela, manipulez du doigt
les icônes, les touches, les lignes des menus, le clavier
à l’écran, et autres éléments apparaissant sur l’écran. Il
vous est possible d’effectuer les actions suivantes par
simple placement du bout du doigt sur l’écran.
Plusieurs doigts peuvent être utilisés pour effectuer des
gestes (zoom par exemple d’image à 2 doigts). S’il vous
plaît noter: vos doigts ne doivent pas être couverts. Un
stylet peut être utilisé. Assurez-vous que c’est pour les
écrans tactiles capacitifs.
Français
Afi n d’éviter d’endommager l’écran, ne touchez
pas ce dernier trop for tement, ni en utilisant un
objet autre que votre doigt. Afi n d’obtenir le meil-
leur fonctionnement de l’appareil, assurez-vous
que vos mains sont propres avant d’utiliser les
touches de l’écran tactile.
Pellicule de protection
Une pellicule fi ne est appliquée sur l’écran tactile pour le
protéger durant l’expédition. Il convient d’ôter cette pellicule de plastique avant utilisation. Pour ce faire, saisissez
simplement un angle de la pellicule et tirez doucement
dessus pour la décoller de l’écran.
Page 88
Toucher : Permet d’activer un élément
fi gurant sur l’écran (tels que icônes
d’applications, touches, options de
menu, et lettres ou symboles du
clavier apparaissant sur l’écran) ; il
suffi t de les toucher du doigt.
Pression
continue :
Certains éléments fi gurant sur l’écran
induisent une autre action lorsqu’on
maintient la touche appuyée (par
exemple : ouverture d’un sous-menu,
ou activation de la fonction « Déplacer
»). Pour provoquer le maintien sur
un élément, touchez ce dernier et ne
levez pas le doigt jusqu’au déclenchement de l’action.
Page 89

Déplacer : Permet de faire déplacer un élément
affi ché sur l’écran pour lui faire chang-
er de position. (Par exemple, déplacement sur l’écran d’accueil de l’icône
de lancement d’une application.) Pour
déplacer un élément, maintenez la
pression sur ce dernier pendant un
instant, puis sans le relâcher, faites
bouger votre doigt le long de l’écran
jusqu’à ce que l’article atteigne la
destination que vous lui avez choisie.
Balayer : Permet de parcourir l’écran verticale-
Français
ment pour faire défi ler une liste. Il
est possible sur certains écrans de
procéder à cette manipulation horizontalement pour changer de vue.
Pour effectuer la manœuvre, touchez
l’écran puis, sans lever le doigt,
déplacez rapidement ce dernier le
long de l’écran. N’arrêtez pas votre
doigt sur l’écran au point de contact
initial, car un tel mouvement pourrait
entraîner la saisie accidentelle d’un
élément.
Doublefrappe :
Pour agrandir une page web ou une
autre application, frappez rapidement
l’écran deux fois à l’emplacement de
celle-ci (l’application concernée doit
pouvoir supporter la fonction double
frappe/zoom). Lorsque l’on se trouve
au sein du navigateur, la double
frappe sur une portion de page web
déclenchera un agrandissement de
cette portion par le navigateur puis
son ajustement à la largeur de l’écran.
Page 89
Page 90
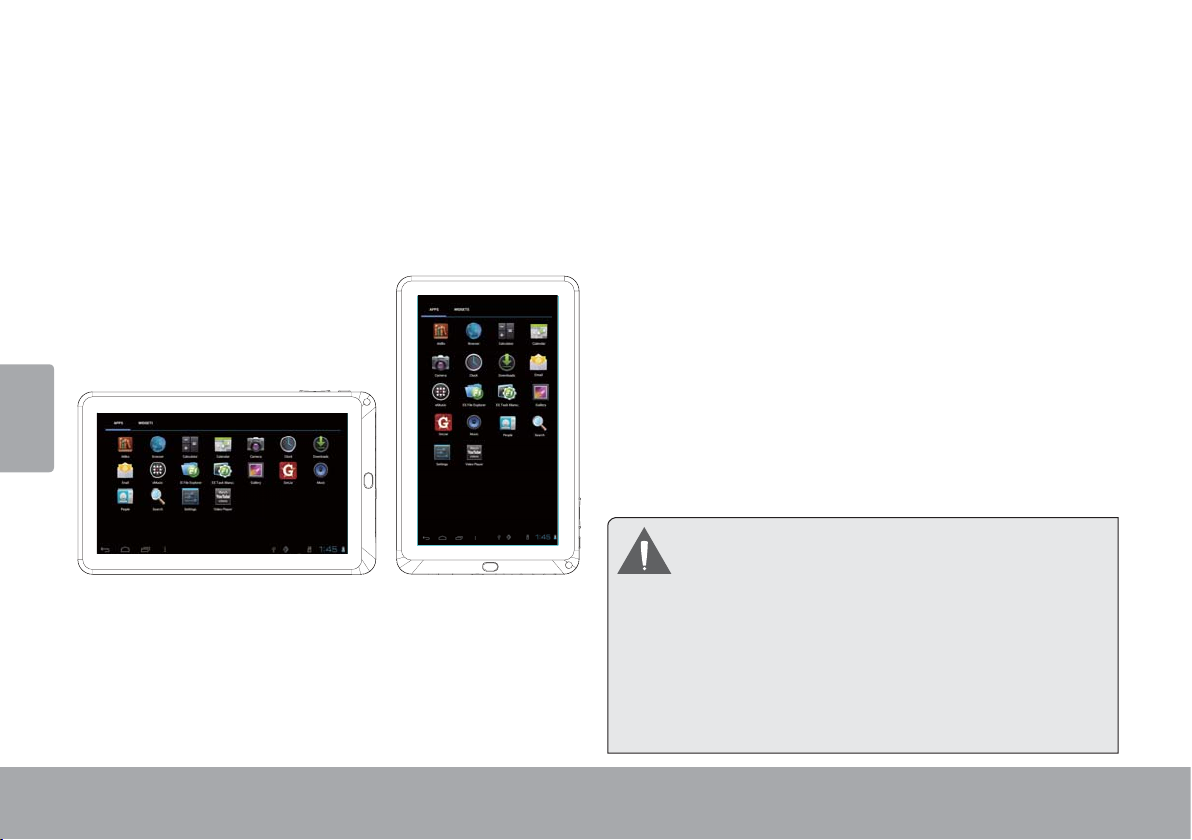
A propos du Capteur d’Orientation
La tablette contient un capteur qui changer a automatiquement l’orientation de la plupart des écrans quand
vous faites pivoter la tablette. Le capteur fonctionne
mieux quand la tablette est pivotée perpendiculairement
au sol (par ex., quand la tablette est maintenue debout et
non à plat sur son dos).
Français
e capteur d’orientation peut être allumé ou éteint dans le
menu de paramètres de Display (Affi chage) .
Recharge de la Tablette
La tablette a une batterie rechargeable intégrée lithiumpolymère.
Avant d’utiliser la tablette, la batterie devrait être complètement rechargée. Appuyez sur les réglages inférieurs
droits. a côté de l’icône de batterie, vous trouverez le
pourcentage de charge.
Pour charger la batterie :
1. Branchez une extrémité de l’adaptateur
d’alimentation inclus dans une prise CA 100-240V.
2. Branchez l’autre extrémité de l’adaptateur d’alimentation
inclus dans la prise d’Alimentation sur la tablette.
3. Débranchez l’adaptateur d’alimentation quand la
tablette est complètement chargée.
La pile utilisée dans cet appareil peut présenter un
risque d’i ncendi e ou de brûlure chi miq ue en cas d e
mauvaise manipulation. Ne pas démonter, incinérer
ou chauffer le dispositif. Ne laissez pas l’appareil
dans un endroit exposé à la lumière directe du soleil,
ou dans une voiture aux fenêtres fermées. Ne
branchez pas l’appareil à une source de courant
autre que celle indiquée sur l’étiquette car cela
pourrait entraîner un incendie ou une électrocution.
Page 90
Page 91

Pour insérer une carte mémoire
ou clé USB
Cette tablette accepte les cartes mémoire microSDHC
et les clés USB. Insérez une carte mémoire dans
l’emplacement pour carte microSDHC ou une clé USB
dans la fente USB pour:
Ne cherchez pas à insérer le moindre objet
autre qu’une microcar te mémoire SDHC dans
la fente prévue. Une carte mémoire compatible
pénètre facilement dans la fente prévue à cet
effet ; si vous rencontrez une résistance, vérifi ez
l’alignement de la carte. N’essayez pas de faire
entrer la carte de force.
Accroître la capacité de mémoire de votre tablette.
Lire des fi chiers média stockés sur la carte mémoire
(par ex. des fi chiers de musique, de vidéo ou de
Français
photos).
Pour mettre en place une carte mémoire :
1. Alignez la carte mémoire sur l’emplacement prévu.
Les contacts métalliques de la carte mémoire doivent
se trouver tournés vers le bas, et éloignés de l’écran
LCD.
2. Faites glisser la carte dans la fente équipée d’un
ressort. Poussez sur la carte jusqu’à ce que vous
entendiez un clic indiquant que la carte est bien
installée.
3. Insérez la clé USB dans la fente USB.
Page 91
N’essayez pas d’insérer un objet autre qu’une
clé USB dans la fente USB.
Evitez de toucher les contacts dorés sur la carte
mémoire ou sur la clé USB.
Pour débloquer et retirer une carte mémoire ou une
clé USB:
1. DEMONTER la carte mémoire ou la clé USB.
a. Pour affi cher le menu des Paramètres, toucher
l’onglet Lanceur, puis touchez Paramètres dans
l’écran accueil
b. Touchez Stockage pour affi cher les paramètres
de stockage.
c. Touchez Démonter la carte SD ou Démonter la
clé USB pour préparer le retrait en toute sécurité
de la carte mémoire ou de la clé USB.
Page 92
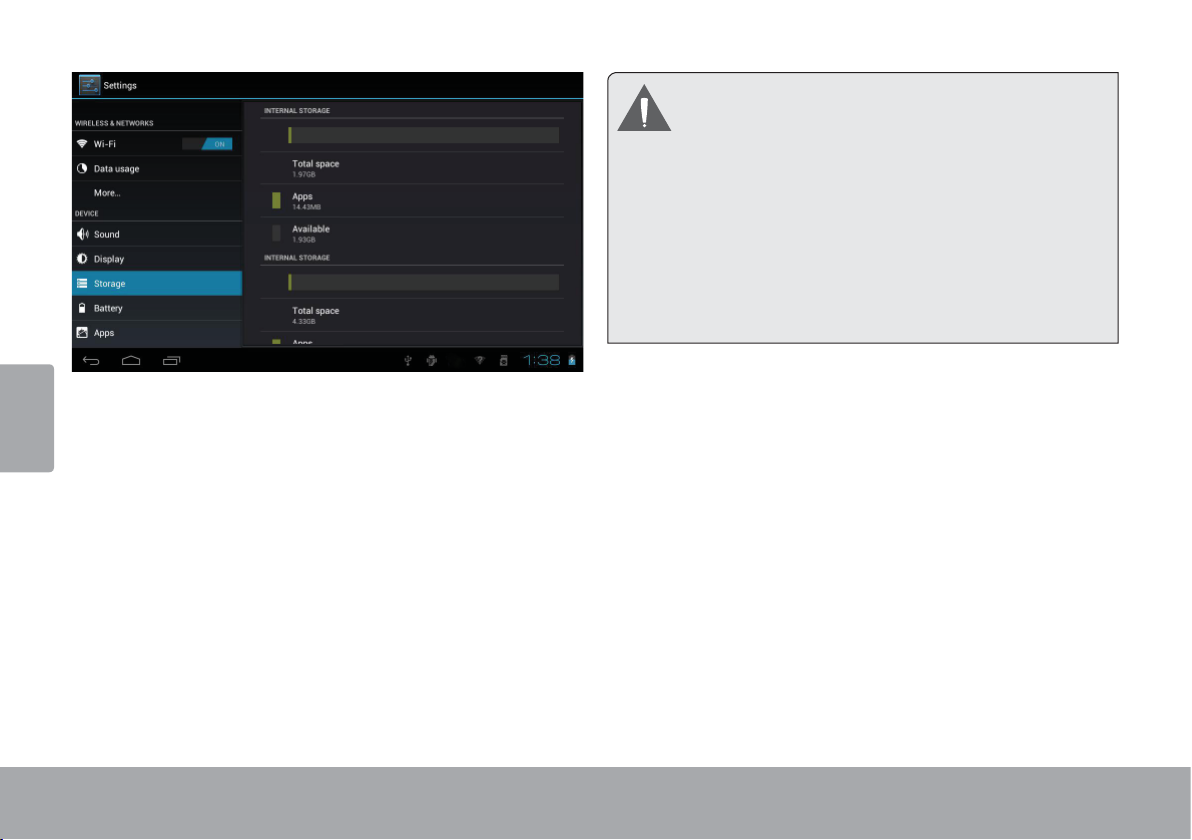
Français
2. Enfoncez plus profondément la carte dans son logement jusqu’à ce que vous entendiez un clic. La carte
sera éjectée de la fente d’insertion.
Pour éviter tout dommage ou corruption des
données, ne retirez pas la carte mémoir e ou la
clé USB lors de l’écriture ou de la lecture de
données sur la carte ou la clé. Par exemple, ne
retirez pas une carte ou une clé US B lor s de la
lecture de fi c hiers musicaux enregistrés sur la
carte.
Les éléments du menu disponibles varient selon
l’appareil. Les illustrations servent de référence
uniquement.
Rajustement du comprimé
Remettez à zéro le comprimé s’il gèle et ne répond pas
ou ne fonctionne pas mal autrement.
3. Saisissez la carte par les bords pour l’enlever.
4. Pour débloquer et retirer une clé USB.
Page 92
1. Déconnectez votre comprimé s’il est relié à un
ordinateur.
2. Appuyez sur et tenez la touche de Power pendant
8 secondes pour arrêter le comprimé, et ensuite appuyez sur POWER (MARCHE/ARRÊT) et maintenez
cette touche enfoncée jusqu’à ce que vous voyez le
logo Coby.
Page 93
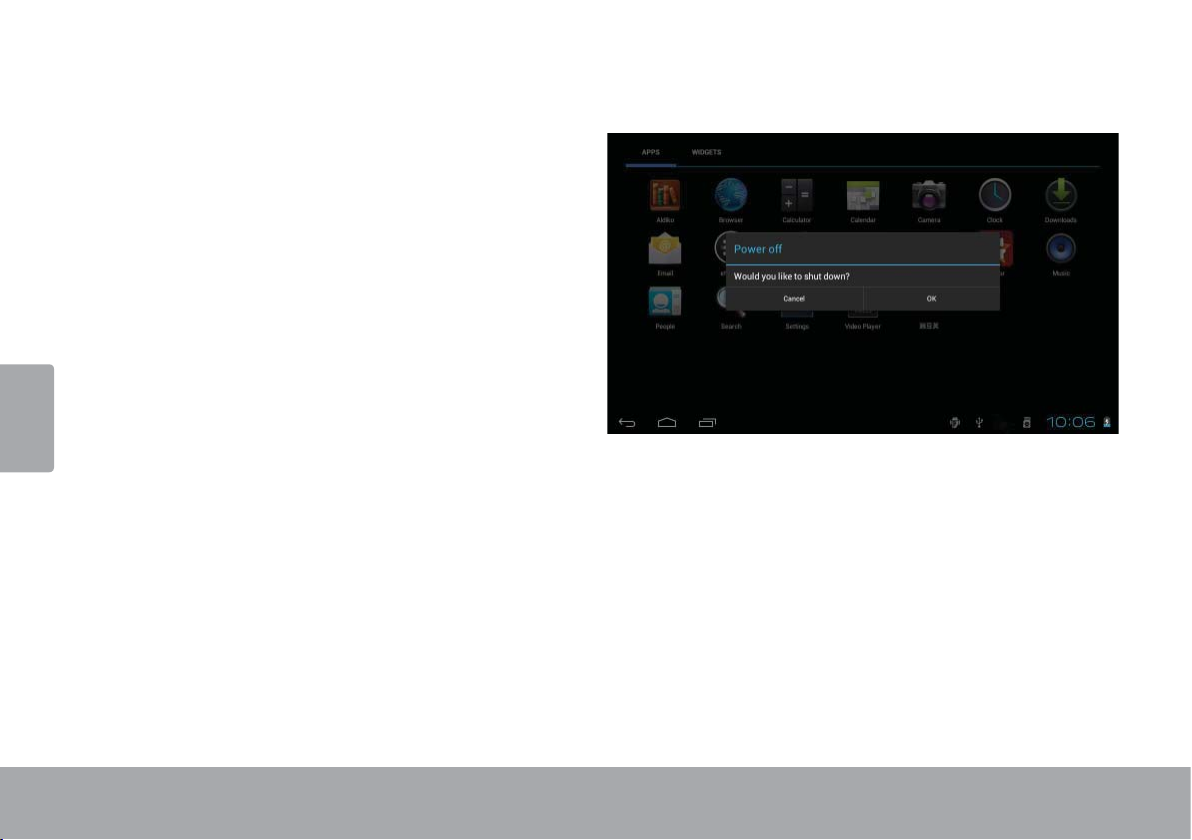
 Démarrage
Mise en marche et arrêt de la
tablette
Pour mettre la tablette en marche :
Appuyez sur la touche marche/arrêt et maintenez
cette touche enfoncée jusqu’à ce que l’écran LCD
(ACL) s’allume et que le logo Coby soit affi ché, et
ensuite attendez jusqu’à ce que vous voyez l’écran
de Déverrouillage.
Français
Pour éteindre la tablette :
1. Maintenez appuyée la touche Power jusqu’à ce que
le message de confi rmation apparaisse.
2. Touchez OK pour éteindre la tablette.
Page 93 Démarrage
Page 94
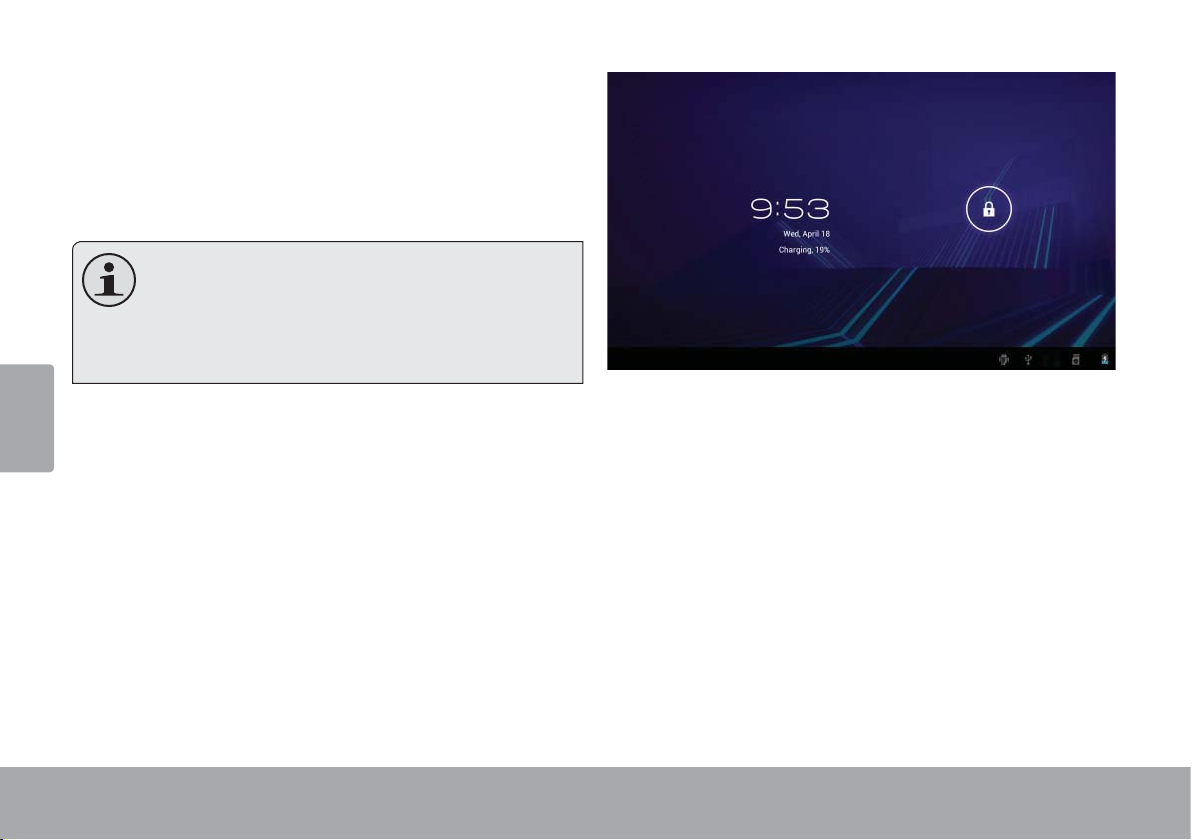
Pour allumer et éteindre l’écran (veille)
Lorsque la tablette est allumée, on peut éteindre l’écran
pour sauvegarder la charge de la batterie. Appuyez
simplement une nouvelle fois sur la touche Power pour
éteindre l’écran. Pour rallumer l’écran, appuyez de
nouveau sur la touche Power.
Pour préserver la charge de la batterie, on peut
régler l’écran de telle sorte qu’il s’éteigne automatiquement lorsque la tablette n’est pas utilisée
(avec un délai de 15 à 30 minutes). On trouve
Français
cette option Sleep sous le menu Display .
Déverrouillage de l’écran
Lorsque l’écran s’éteint, vous devez le déverrouiller au
moment où il se rallume.
Pour déverrouiller l’écran, touchez et faites glisser l’icône
de verrouillage sur le bord du cercle qui apparaît.
Page 94 Démarrage
Page 95

Si un mot de passe a été défi ni, entrez ce dernier pour
terminer le déverrouillage de l’écran. Un mot de passe de
déverrouillage de l’écran peut être défi ni dans le menu
Paramètres de sécurité.
L’écran accueil en un clin d’œil
L’écran accueil est le point de départ de toutes les
caractéristiques de votre tablette.
1
5
Français
AVERTISSEMENT: Il convient de noter le
mot de passe de verrouillage/code PIN/mot
de passe. En cas de perte ou d’oubli de ces
données interdit l’accès à l’utilisateur. Il sera
obligé de réinitialiser l’appareil pour rétablir les
paramètres par défaut. TOUTES VOS DON-
NÉES ET PROGRAMMES SERONT PERDUES
Page 95 Démar rage
2
3
4
Nom Description
1 Recherche
Google
2Icône Ac-
cueil
3Icône re-
tour
Touchez pour e ectuer une recherche
via le navigateur Google.
Touchez pour retourner à l'écran accueil
principal.
Touchez pour retourner à l'écran précédent.
6
7
Page 96

Nom Description
4Apps récen-
tes
5 Onglet de
lancement
6 Icônes Touchez un icône pour ouvrir une ap-
Français
7Barre de
Noti cation
Touchez pour a cher la liste des applications, en miniatures, que vous avez
récemment utilisées. Touchez une application pour l'ouvrir.
Ouvrez le Lanceur pour a cher la liste de
toutes les applications et widgets installés
dans la tablette. Touchez l'onglet de lancement pour ouvrir le lanceur.
plication ou un dossier.
A che les icônes de noti cation tels que
l'heure, le niveau de la batterie et la force du
signal réseau ; touchez la barre pour ouvrir
complètement le panneau Noti cations.
Touchez un icône de noti cation pour af cher plus de détails.
A propos des applications
Pour ouvrir une application, touchez l’icône de
l’application sur l’écran accueil ou sur le Lanceur.
Ecran Lanceur :
L’écran ci-dessus ne fi gure dans la
documentation qu’à titre informatif. La société
Coby se réserve le droit de modifi er et
d’améliore la liste défi nitive des applications
disponibles avec la tablette.
Page 96 Démar rage
Page 97

Applications préinstallées
Certaines applications ont été installées sur votre tablette
pour votre confort. Ces applications comprennent :
Voir l'heure actuelle, ou régler une alerte.
Télécharger et lire des centaines d’eBooks
(livres électroniques). Prend en charge le
format ePub.
Naviguer sur le web.
Français
A cher le calendrier ou événements et rendez-vous pour gérer son programme.
Exécuter des calculs mathématiques
simples.
Prendre des photos ou vidéos avec la caméra frontale.
Obtenez de la musique d’eMusic pour 10 $.
Lire vos e-mails.
Voir et gérer les chiers stockés sur la
tablette.
Visitez http://www.estrongs.com/en/
products/ le-explorer.html pour plus
d’informations.
Éteignez applications pour économiser la
batterie.
Visitez http://www.estrongs.com/en/
products/task-manager.html pour plus
d’informations.
Page 97 Démarrage
Page 98

Voir les photos et vidéos et éditer les photos.
L'accès à des milliers d'applications avec
GetJar Marketplace.
Lire de la musique.
Français
Accéder au menu Réglages (Settings) pour
régler les options de la tablette.
Lancer la page de navigation YouTube™
mobile pour regarder des vidéos internet.
Installation d’applications
Vous pouvez également télécharger et installer d’autres
applications à partir de la boutique d’applications de
l’appareil, via le navigateur web et d’autres sources.
La tablette doit être confi gurée de façon à permettre
l’installation d’applications qui ne proviendraient pas du
Marché. On peut régler l’option Sources inconnues dans
le menu Application settings.
Votre appareil Internet portable Coby peut donner
accès à, ou offrir des informations sur, des
contenus, produits, appl ications et services tiers.
L’utilisation de contenus, pro duits, applications et
services tiers est à la discrétion du tiers et est
expressément régie par les conditions d’utilisation
du tiers, y compris les pol itiques de con fi dentialité
pour de tels contenus, produits, applications et
services. Coby Electronics Corporation ne peut
pas être tenue pour responsable et décline
expressément toute garantie de toute sorte à
l’égard de tous les contenus, produits, applications
et services de tiers. Coby Electronics Corporation
ne sera pas tenu pour responsable de toute perte,
coûts ou dommages résultant de votre accès ou
utilisation de contenus, produits, applications ou
services de tiers.
Page 98 Démar rage
Page 99

A propos des widgets
Les widgets sont des applications autonomes que vous
pouvez placer sur des écrans accueil pour accéder à vos
fonctions préférées.
A propos des notifi cations
Les icônes qui apparaissent dans la barre de notifi ca-
tion du coin inférieur droit de l’écran vous avertissent
de l’arrivée de nouveaux messages, alarmes ou autres
événements d’application.
Ajout de widgets à l’écran accueil
1. Accédez à l’écran accueil sur lequel vous souhaitez
placer un widget.
2. Touchez l’onglet Lanceur.
3. Touchez WIDGETS pour affi cher tous les widgets,
Français
puis maintenez touché l’icône d’un widget pour
l’ajouter à l’écran accueil.
Découvrez-les et répondez aux notifi cations en ouvrant
en entier le panneau de Notifi cation s .
Touchez la barre de Notifi cation pour ouvrir le pan-
neau de notifi catio n .
Supprimer des widgets
Maintenez touché un Widget jusqu’à ce que l’icône
Supprimer apparaisse en haut de l’écran, puis faites
glisser l’icône du Widget vers l’icône Supprimer pour le
supprimer.
Page 99 Démar rage
Page 100

Pour répondre à une notifi cation :
Touchez une notifi cation sur la liste ; le panneau de
Notifi cations se ferme et l’application associée à la
notifi cation dém a rr e .
4. Pour fermer le panneau de Notifi cations :
Touchez toute autre zone de l’écran à l’exception du
panneau de notifi cation, ou ;
Touchez l’icône Back.
Français
Page 100 Démarrage
 Loading...