

Page 1
Bead Sealer Accessory
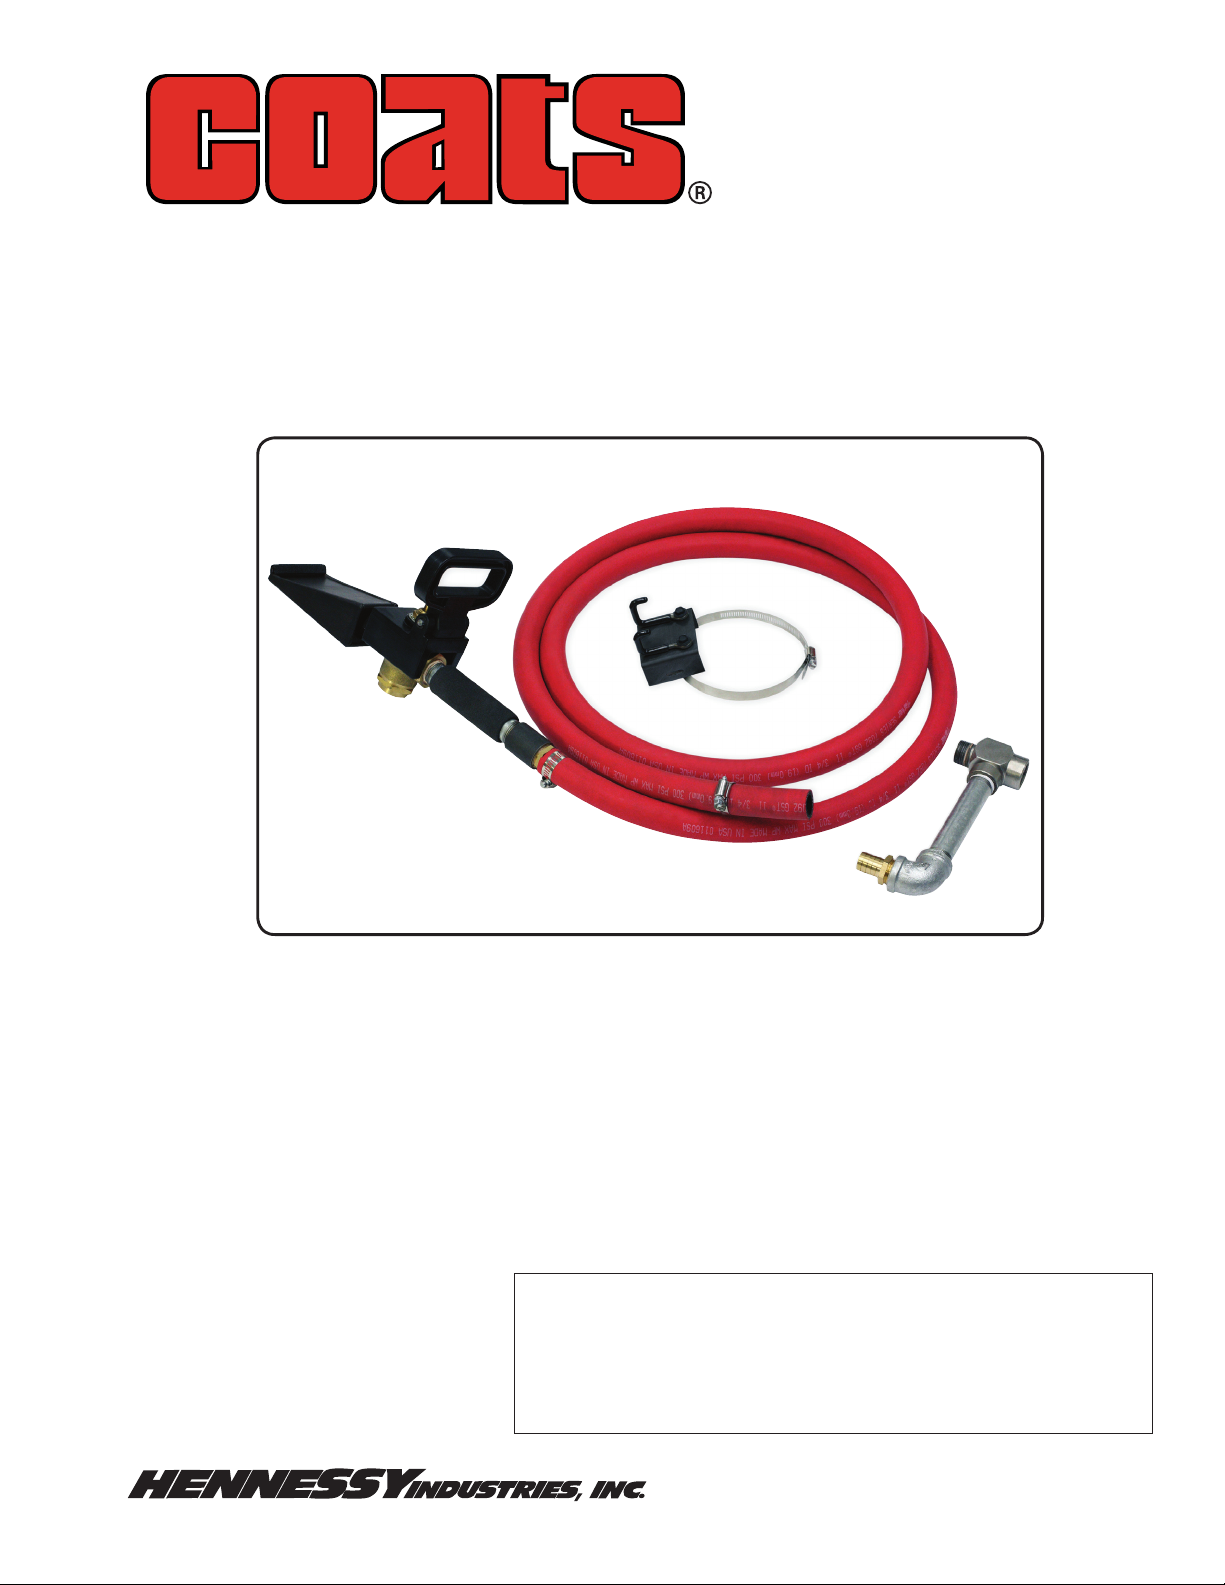
Kit 85606545 For use with COATS Rim Clamp® Tire Changers
Kit 85606739 For use with COATS ProGuard™ Leverless Tire Changers
This is a supplement to your operating manual and covers the installation and use of the bead sealer accessory.
If you do not have your original operating manual, please call COATS at 1-800-688-6359 to request an additional
copy.
Installation Instructions
with Parts Identifi cation
READ these instructions before placing unit in
service. KEEP these and other materials delivered
with the unit in a binder near the machine for ease
of reference by supervisors and operators.
1601 J. P. Hennessy Drive, LaVergne, TN USA 37086-3565 615/641-7533 800/688/6359 www.ammcoats.com Manual Part No.: 85606396 06
HENNESSY INDUSTRIES INC. Manufacturer of AMMCO
®
, COATS® and BADA® Automotive Service Equipment and Tools. Revision: 05/11
Page 2

CAUTION
Always DISCONNECT THE ELECTRICAL
POWER before servicing equipment. This
prevents electrical shock or accidental
movement of the systems operated by the
electrical power.
CAUTION
Always DISCONNECT AIR SUPPLY before
servicing equipment. This prevents accidental movement of systems operated by compressed air which may result in personal
injury. BLEED THE AIR SYSTEM by actuating
all the valves.
CAUTION
Always wear safety goggles to protect your
eyes.
Installation for Rim Clamp® Tire Changers
1. Disconnect tire changer from power source and
from its air supply. Bleed off all air pressure. Verify the
stored air pressure is zero by observing the air pressure
gauge.
2. Remove the tee gauge assembly (A) from top of
air receiver.
3. Install the fitting assembly (B) into top of air
receiver. Be sure to use pipe sealant on pipe threads
to prevent leakage.
4. Reinstall the gauge assembly (A) into fitting
assembly (B) top.
5. Attach hose (C) to bead sealer accessory assem-
bly (B).
6. Next, reconnect the air pressure source and check
for air leakage at fittings.
7. Using the 6-inch hose clamp, secure the hanger
to the tower.
A
B
C
2 • COATS
Page 3

Installation for ProGuard™ Tire Changers
1. Disconnect tire changer from power source and
from its air supply. Bleed off all air pressure. Verify the
stored air pressure is zero by observing the air pressure
gauge.
2. Install tank support plate on back of the ProGuard
chassis. When attaching support plate, be sure to
remove and discard the two existing screws from the
chassis and use the two longer screws provided.
Bead Sealer Accessory Operation
1. To perform a bead sealing operation, attach the
inflation hose air chuck to the valve stem of the tire and
wheel assembly.
2. Hold the nozzle against the outer rim lip of the
wheel, aiming it between the rim and tire bead as
shown.
3. Depress the foot pedal to initiate tire inflation
through the valve stem. At the same time push forward on the handle momentarily expanding the tire to
mate the tire bead and rim to complete the bead sealing process.
Air Chuck
3. Next, attach air tank to the tank support plate
using provided screws and washers.
D
E
T
G
H
4. Assemble fittings at top of air tank (D) as shown
in parts diagram. Apply thread sealant to all joints.
5. Locate and cut in half the tube (E) from the filter
assembly, install the union tee (T) and hose (G), as
shown in diagram.
6. Thread 3/4-inch staight fitting on hose assembly
(H) into elbow at bottom of air tank.
7. Install hanger. Drill two holes (drill size #1 ø.228)
about 2-inches apart in tool tray. Remove two hooks
and screws from hanger assembly. Attach hooks to
tool tray.
Place the nozzle against the outer rim lip.
8. Next, reconnect the air pressure source and check
for air leakage at fittings.
COATS • 3
Page 4

Parts Identifi cation
Kit 85606545 Bead Sealer Accessory
ITEM PART NO. DESCRIPTION
1 85606382 Nozzle
1a 85607722 Nozzle Hook Cover
2 8766116 Quick Closing Valve
3 85606334 Bead Sealer Bracket
4 85606329 E-ring, Truarc 5144-25
5 8104610 3/4-16 Jam Nut
6 85606326 Actuator Handle
7 85606332 Pivot Pin
8 85606330 Grip
9 85606333 3/4 NPT Pipe Nipple
10 85606327 3/4 NPT Merchant Coupling
11 85607192 Hose Assembly
12 85606386 Fitting Assembly
13 8182221 6-inch Hose Clamp
14 85606646 Hanger
6
6
5
5
4
4
13 14
For use with Rim Clamp®
Tire Changers
11
11
12
12
7
7
3
3
2
2
8
8
1a
1a
1
1
Kit 85606739 Tank for ProGuard Tire Changers
(includes Bead Sealer Accessory)
17
16
15
19
18
21
24
22
23
24
26
20
25
10
10
9
9
ITEM PART NO. DESCRIPTION
15 84198703 1/4” Safety Valve
16 84199197 1/4” Union
17 84198908 1/4” Union
18 84198884 Quick 1/4” Union
19 83099335 Hose 8x6 L=750
20 84198978 Union
21 84399229 Screw 6x10
22 84398848 Washer 6 (6,6x18x1,5)
23 82019192 Air Tank
24 84399951 Screw 10x35
25 83031243 Tank Support Plate
26 83018120 Hanger
85606396 06 05/11 © Copyright 2009 Hennessy Industries and COATS All Rights Reserved
 Loading...