

Page 1
181-VL
Quick Setup
Instructions
WARNING: Electrical and plumbing
connections need to be made by a
qualified service technician and
comply with all available Federal, State
and Local Health, Electrical, Plumbing
and Safety codes.
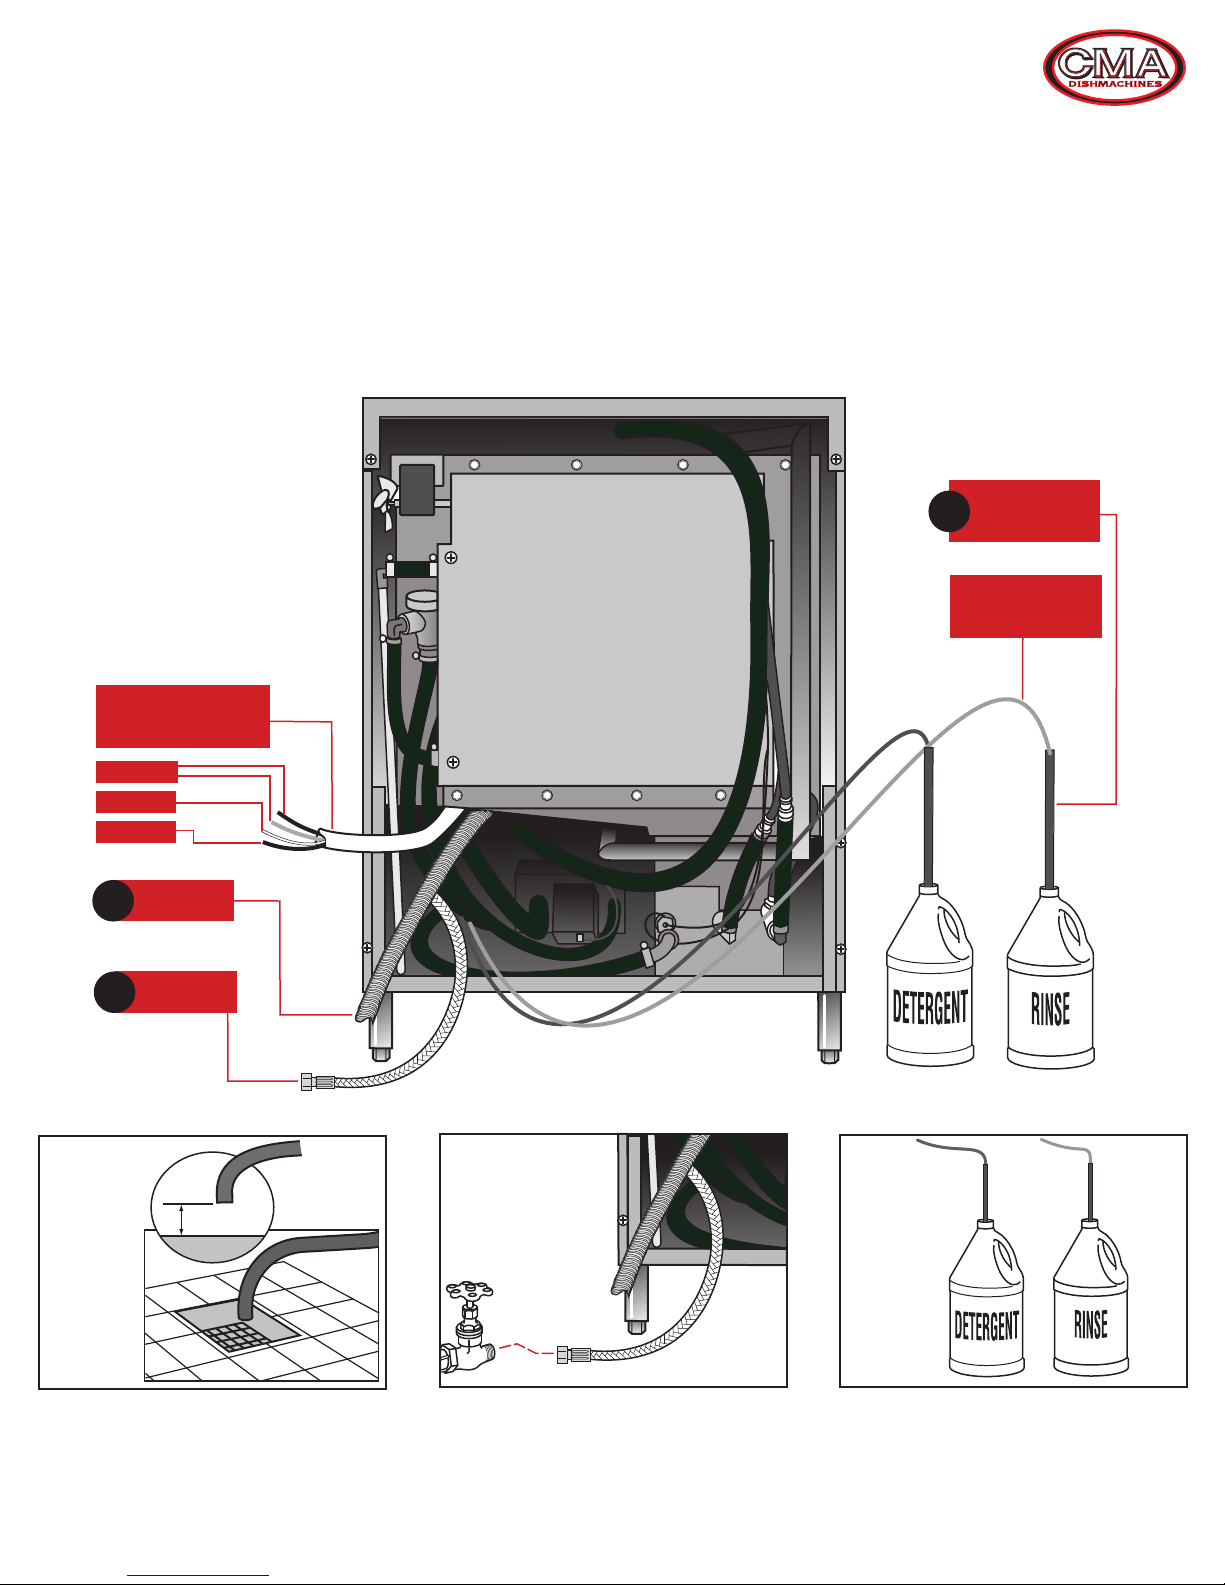
181-VL REAR VIEW
HARD WIRE
FOUR WIRE
POWER SUPPLY
HOT
NEUTRAL
GROUND
DRAIN HOSE
1
COLD WATER
2
LINE
RED
3
TUBE
STIFFENER
CHEMICAL
TUBING
BLUE
STEP
1
Connect the drain hose to floor drain. The floor
drain must have a 1 inch air gap between drain
hose and floor drain.
1"AIR GAP
FLOOR DRAIN
STEP
2
Connect dishmachine to cold water source.
STEP
3
Insert tube stiffener with chemical tubing into
corresponding chemical dispensers.
RED
BLUE
4-2018PN: 10130.00
Page 2
181-VL
Quick Setup
Instructions
WARNING: Electrical and plumbing
connections need to be made by a
qualified service technician and
comply with all available Federal, State
and Local Health, Electrical, Plumbing
and Safety codes.
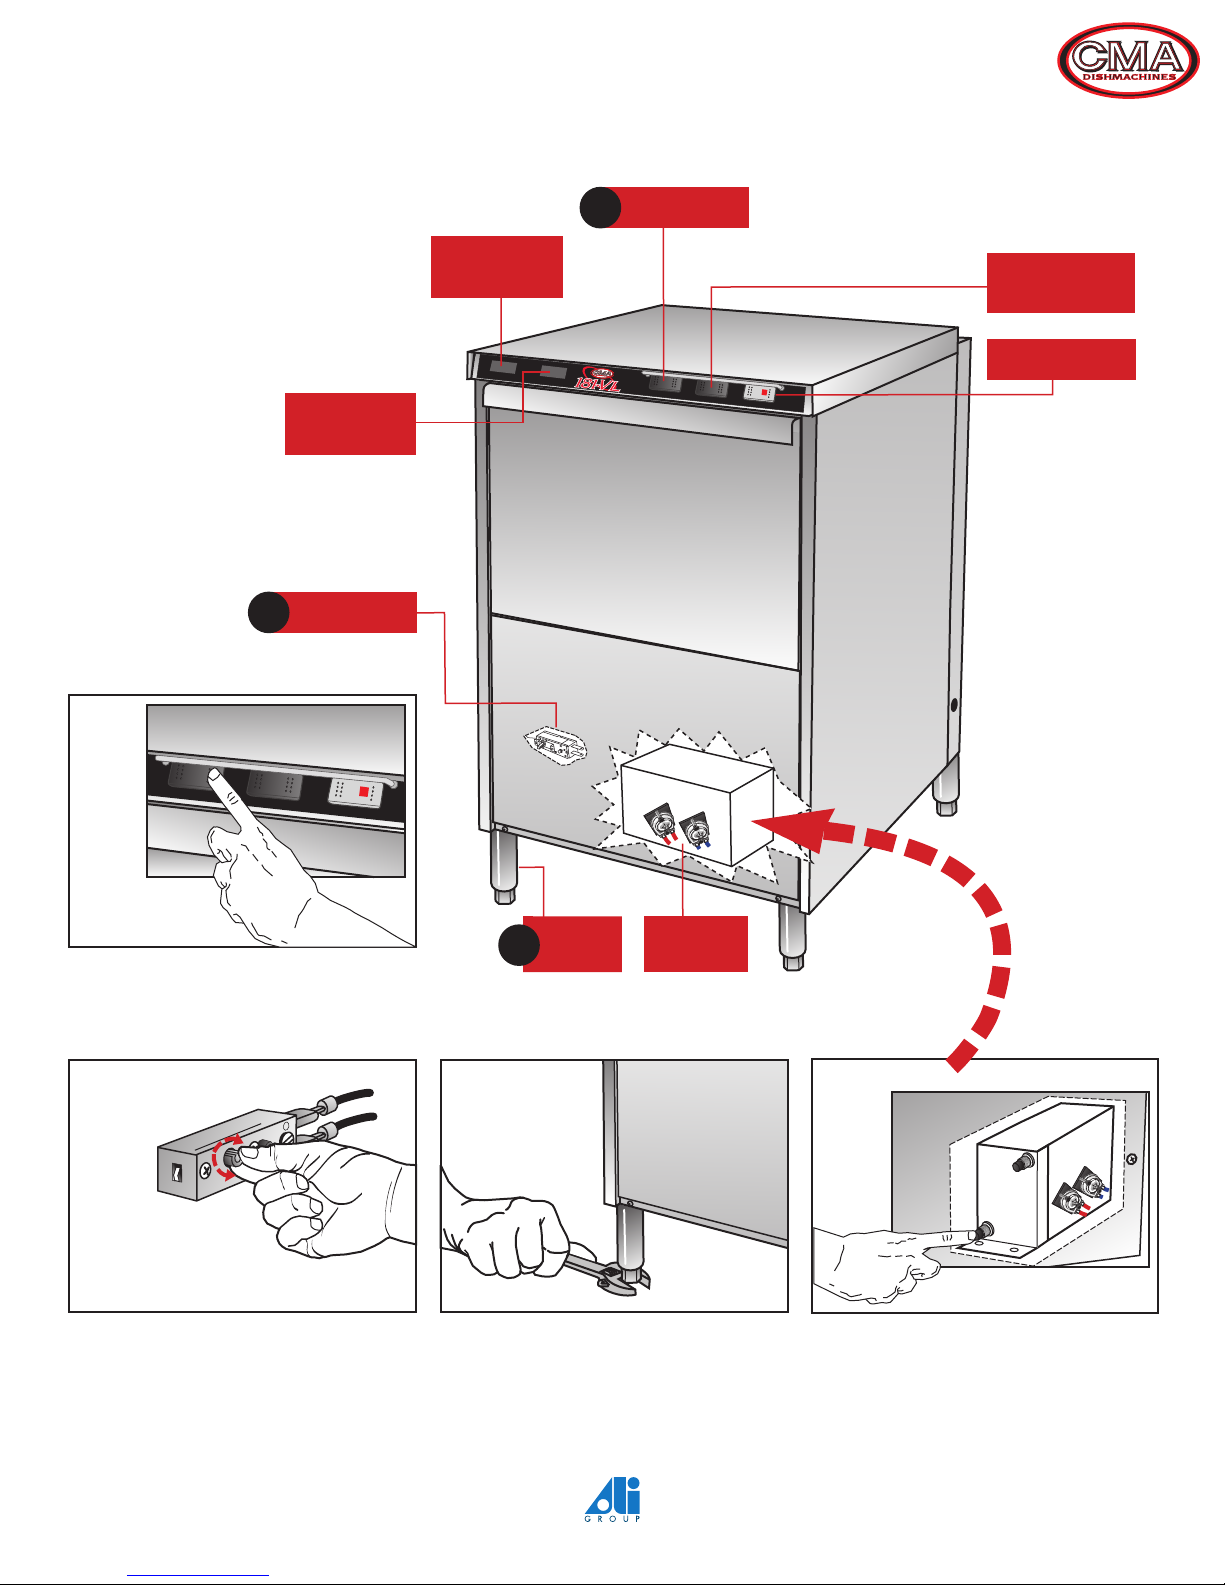
RINSE
TEMPERATURE
DISPLAY
THERMOSTAT
5
WASH
TEMPERATURE
DISPLAY
WASH TEMP 150°-160°
FINAL RISE TEMP 180°-195°
181-VL FRONT VIEW
POWER
4
OFF ON
POWER
DRAIN
START
CYCLE
DRAIN
CYCLE
STEP
4
Turn on power and the machine will be automatically
filled to correct level. No need to hold. Due to
slow fill rate this step may have to be repeated.
STEP
5
OFF ON
POWER
DRAIN
START
CYCLE
LEVELING
6
LEGS
STEP
6
CHEMICAL
PUMPS
STEP
7
If necessary adjust the temperature by turning the
adjustment stem on the thermostat clockwise to
increase.
PN: 10130.00
Level dishmachine by adjusting leveling legs.
Dishmachine must be level front to back and side
to side.
an Ali Group Company
The Spirit of Excellence
Press and hold down primer switches until product
is discharging into the dishmachine.
4-2018
 Loading...