

Page 1
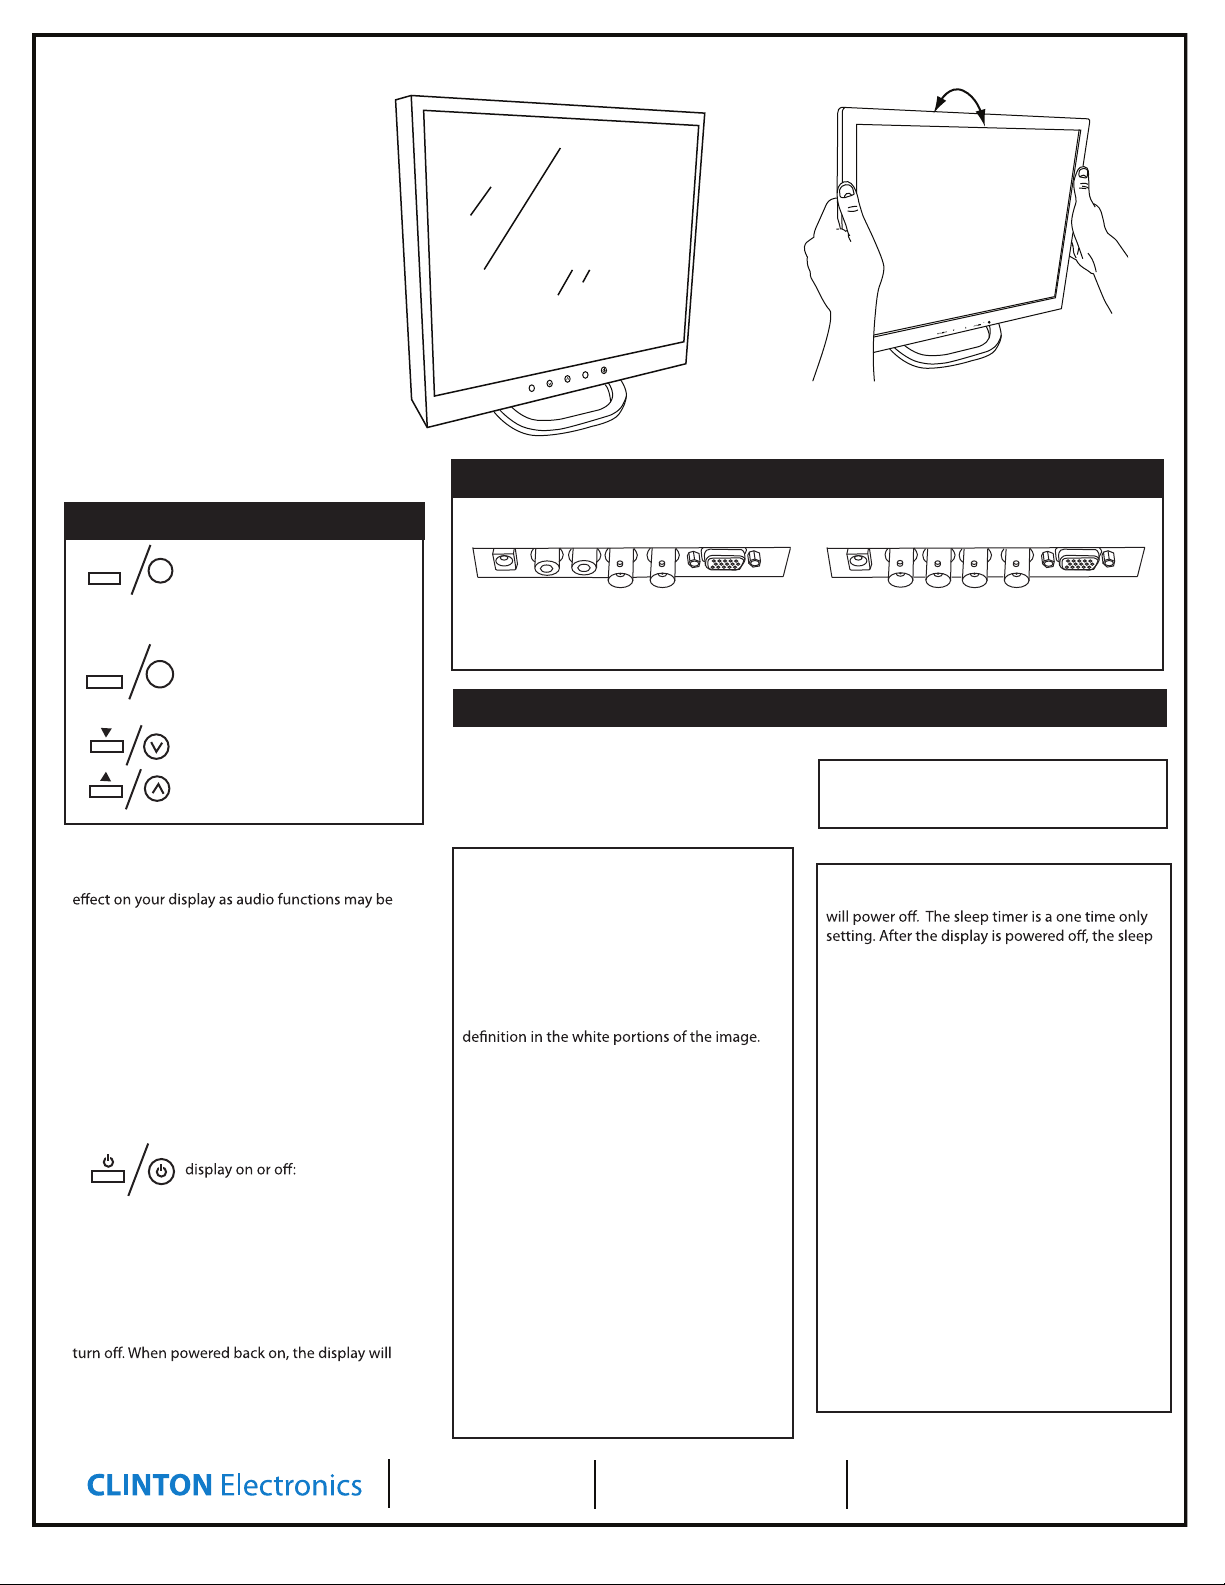
Tilt display by grabbing the sides and rotating
backwards or forwards.
Included Items:
• Monitor
• Stand and screw
• Instruction Sheet
• Power Supply and Power Brick
1
2
Tilt display by grabbing the sides and rotating
backwards or forwards.
Tilt display by grabbing the sides and rotating
backwards or forwards.
Included Items:
• Monitor
• Stand and screw
• Instruction Sheet
Tilt display by grabbing the sides and rotating
backwards or forwards.
Included Items:
• Monitor
• Stand and screw
• Instruction Sheet
DC IN
BNC 2
IN
BNC 1
IN
BNC 2
OUT
BNC 1
OUT
VGA IN
Display
CE-VT288 / CE-VT588
CE-VT568 / CE-VT768
CE-VT988 / CE-VT968
User Manual
Included Items
• Monitor
• Stand
• Instruction Sheet
• Power Supply
• VGA Cable
Tilt display by grabbing the sides and rotating
backwards or forwards.
2
1
Included Items:
• Monitor
• Stand and screw
• Instruction Sheet
• Power Supply and Power Brick
To tilt the display grab the sides and rotate
backwards of forwards.
Back Panel - Inputs vary by model
Using the Buttons
Pressing the “MENU/SELECT” or “1”
MENU/SELECT
button on the unit will enter the
menu. Pressing it again will enter
the current selection. Also used to toggle between
available settings for certain menu selections.
AUTO/EXIT
Press the “AUTO/EXIT” or “2” button
to back out to the previous screen
or to exit the menu.
Navigate to items in each menu
item by pressing the down or up
buttons. These buttons will also
adjust settings. Ex: raise or lower
contrast.
AUDIO
Pressing the Down button (when not in the menu)
will mute/unmute the audio
unsupported on your device.
Pressing the Up button (when not in the menu) will
open the volume menu and raise the volume.
SOURCE
Pressing the “AUTO/EXIT” or “2” button (when not in
the menu) will change the input source.
RGB: VGA input
AV1: BNC input 1
AV2: BNC input 2 (select models only)
POWER
The power button will toggle the
• Power button/light not illuminated: Unit is o
• Power button/light illuminated green: Unit is on
• Power button/light illuminated orange: Unit is in
standby mode. Will remain in standby until source
is changed to an active input. If you press the
power button while in standby mode the unit will
return on the last input used. If no source is
connected, you will see a “No Signal” message
followed by “Source#] Enter Sleeping Mode”.
1
2
. This may have no
CLINTON Electronics
6701 Clinton Road
Loves Park, IL 61111
CE VT-288 / 588 / 988
DC IN
DC IN
BNC Out: Connect an external display to display BNC
Input. BNC input must selected in order to display on
external monitor.
DC IN
OSD Menus
OSD MENUS:
BNC 2
IN
L AUDIO R
L AUDIO R
BNC 2
OUT
BNC 1
IN
BNC 1
BNC 1
BNC 1
IN
IN
VGA IN
OUT
BNC 1
BNC 1
VGA IN
OUT
VGA IN
OUT
The display should be pre-set for most
installations, however if some adjustment is
necessary, you may adjust by pressing the
“MENU/SELECT” or “1” button on the display
Video Menu:
BRIGHTNESS: Set the black level so that the
images are at their brightest while the black
images are still black. Do not adjust too high
where the black portions of the image become
gray or the image will have a “washed out”
appearance.
CONTRAST: Set the white level so that the
images are at their brightest without losing
COLOR: Adjust to achieve a realistic image of the
items within the viewing area.
TINT: Adjust if the image has bluish or reddish
tint to the white portions of the image.
SHARPNESS: Lower the sharpness if the image
appears too grainy or pixelated. Increase the
sharpness if the image appears too soft. Note:
Adjust only after adjusting the camera lens for
optimum focus.
VIDEO MODE: Change to preset display modes:
Vivid, Normal, Nature, Cinema, or Sport.
RESET: This can be used to return the Video
settings back to the default settings. Pressing
the “MENU/SELECT” or “1” button will return all
video settings back to the factory defaults.
1.800.447.3306 Sales
1.800.549.6393 Support
1.800.633.8712 Fax
CE VT-568 / 768 / 968
BNC 1
BNC 1
IN
VGA IN
OUT
v.04.06.11
DC IN
BNC 1 Out: Connect an external display to display BNC 1 Input.
BNC 2 Out: Connect an external display to display BNC 2 Input.
OUT
IN
BNC 2
BNC 2
Audio Menu:
VOLUME: Raise or lower the volume on device that
is connected to RCA audio inputs. Available on
supported models only.
Feature Controls Menu:
SLEEP TIMER: Adjustable from 0 to 90min (in 10
minute increments). After which time the display
timer will reset to “OFF”.
LANGUAGE: Select from one of the following:
English, French, German, Spanish, Italian, Dutch,
Greek, Swedish.
OSD CONTROL: Here you can set the horizontal
and vertical position of the OSD menu, rotate or
mirror the menu, and control the duration the
menu is on screen; 2-16 seconds (adjustable in 2
second increments).
PARENTAL CONTROLS: Function not supported on
units that do not include a remote control.
CLOSE CAPTION: Activate close caption and
change settings for mode and channel. Source
must have close caption capabilities to function.
*FACTORY RECALL: Pressing the “MENU/SELECT” or
“1” button will return all settings back to factory
defaults. Doing so will void all of your custom
settings. Ensure this is your intention before
proceeding.
www.clintonelectronics.com
 Loading...