

Page 1
USER GUIDE
Included Items:
• Test Monitor x 1
• Monitor Bag x 1
• Battery Pack x 1
• Battery Charger x 1
• DC12V Power Supply x 1
• BNC to RCA adapter x 1
•Instructions x 1
• Power/Video Adapter Cable x 1
• Shoulder/Neck Strap
Optional Items:
• BNC Jumper
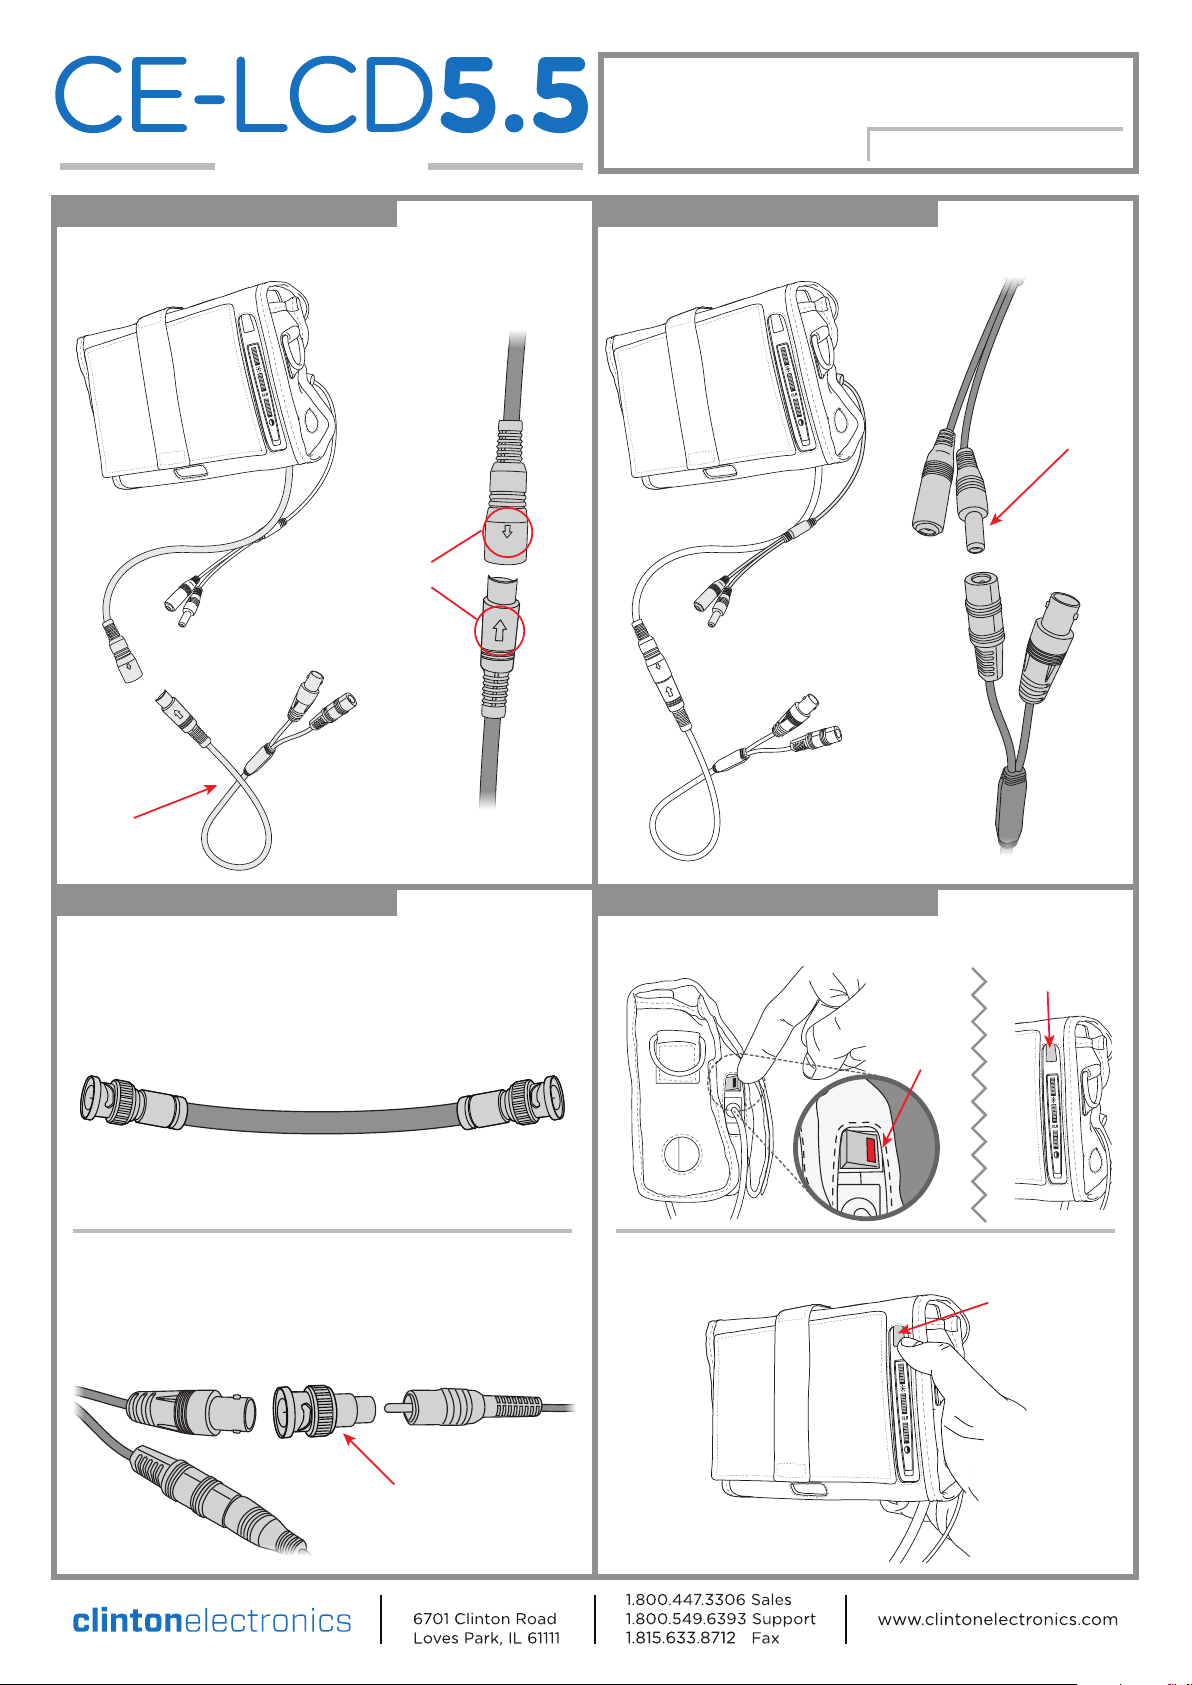
1. CONNECT CABLES
Connect the cable from the monitor to the power/video adapter cable. Align the arrows
on the connection ends to ensure proper connection of the pins.
TO MONITOR
ALIGN
ARROWS
2. CONNECT POWER
Connect the power lead from the adapter cable to the power source; either the battery
or the DC12V power supply.
POWER LEAD
ADAPTER
CABLE
TO ADAPTER
CABLE
3. CONNECT VIDEO
BNC.
To attach the BNC end of a camera to the BNC end of the monitor you will need
a BNC (male) to BNC (male) adapter or a BNC Jumper Cable.
To make a BNC Jumper Cable; attach 2 BNC (male) connectors to either ends of a length
of RG59 coax cable.
BNC JUMPER CABLE
RCA.
Use the supplied BNC to RCA Adapter if attaching to a camera with a RCA lead.
BNC LEAD
FROM
ADAPTER
CABLE
RCA CABLE
TO ADAPTER
CABLE
4. POWER ON
Battery.
switch). Then press the grey POWER button on the face of the monitor.
DC12V.
First set the switch on the battery to the ON position (red LED down on
POWER ‘ON’
POSITION
Push the grey POWER button on the face of the monitor.
POWER BUTTON
POWER BUTTON
BNC TO RCA
ADAPTER
Clinton Electronics
*Information in this document is subject to change
v.06.26.13
Page 2
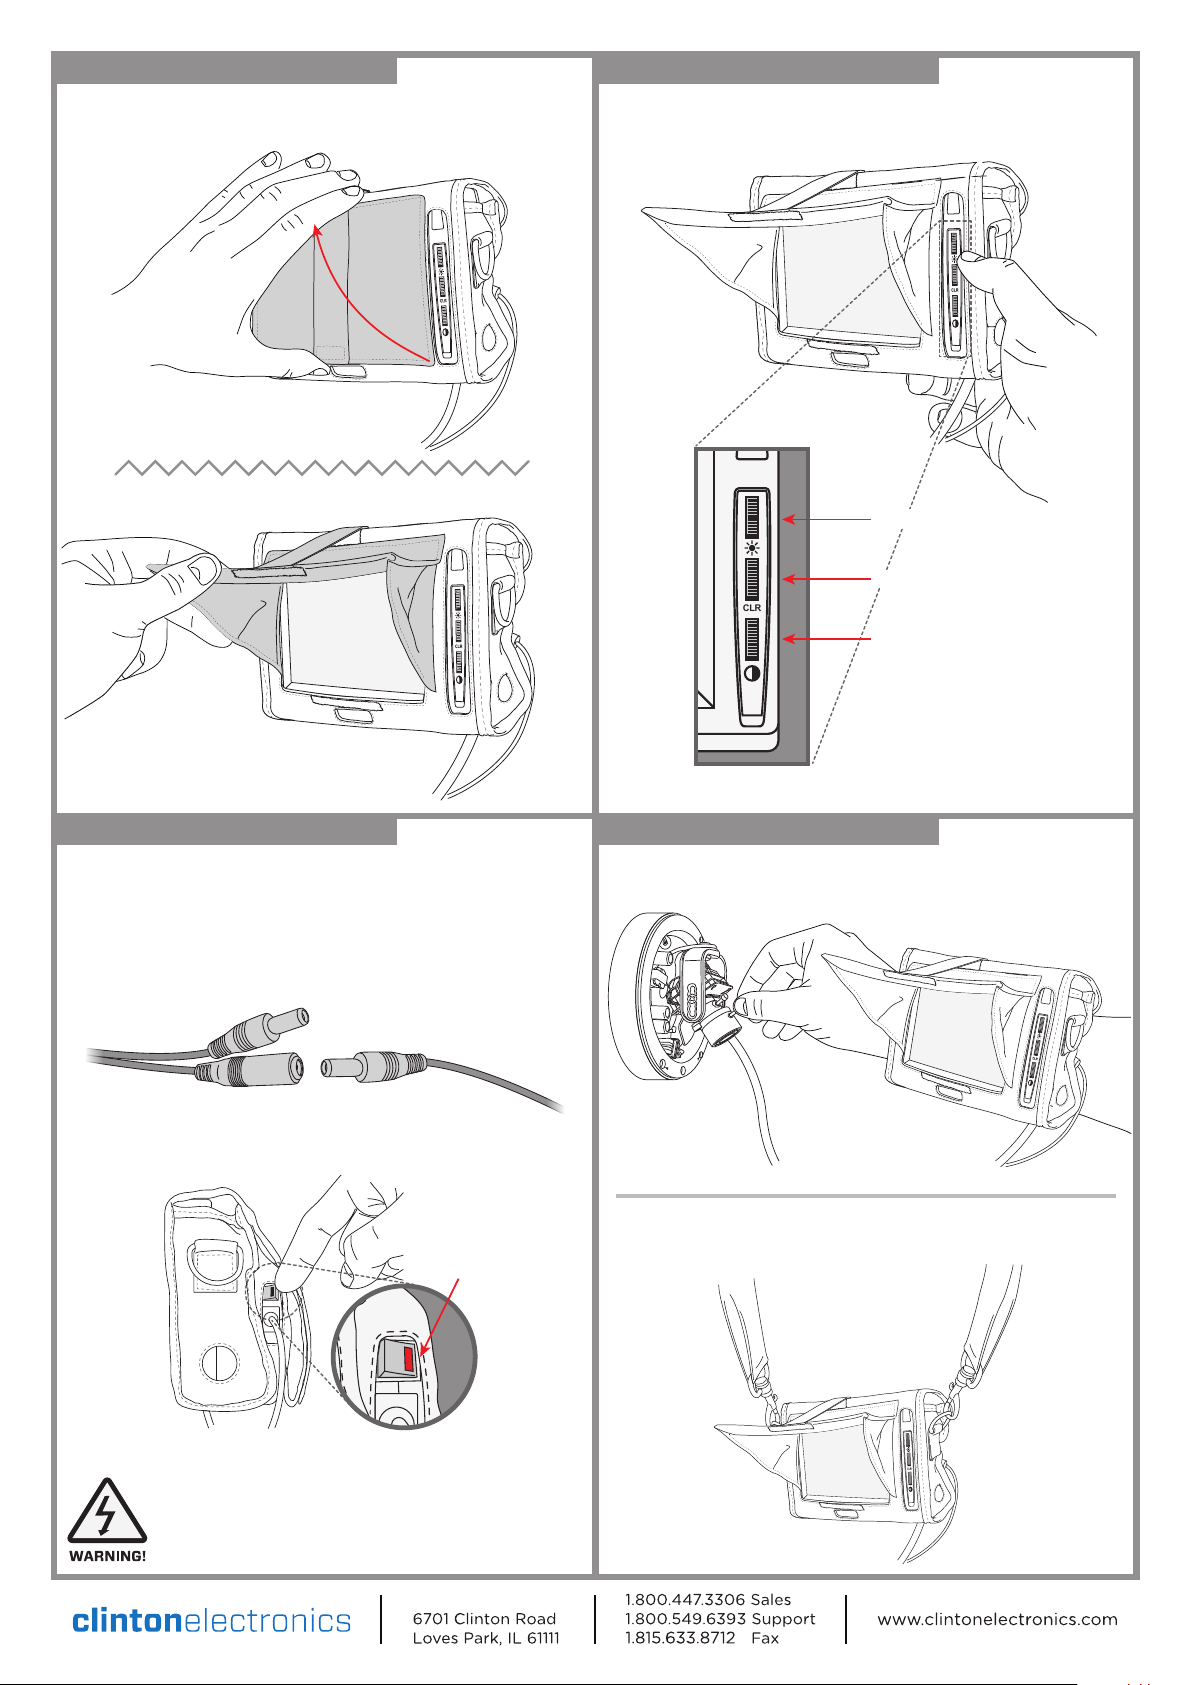
5. SUNSHIELD
Open the sunshield on the monitor bag and secure the position by using the
velcro-backed strap. Remove protective film from monitor.
6. SCREEN ADJUSTMENTS
Adjust the monitor settings as needed by using the dials on the front of the monitor.
Brightness, Color and Contrast are adjustable.
BRIGHTNESS
COLOR
CLR
CONTRAST
7. BATTERY CHARGING
To charge the battery, plug the battery charger cable into the battery cable from the
battery. Set the battery switch to the ON position (red LED down on switch). When
connected properly the LED on the charger will change from GREEN to RED. When fully
charged (after approximately 8 hours) the LED on the charger will go back to GREEN.
BATTERY
CABLE
TO BATTERY
CHARGER
POWER ‘ON’
POSITION
8. WRIST or SHOULDER STRAP
WRIST STRAP.
tighten.
SHOULDER/NECK STRAP.
carrying the monitor or as a neck strap for hands-free viewing of the monitor.
Place wrist in wrist strap on the back of the monitor bag and
The strap doubles as a shoulder strap for
While it is possible to power the monitor using the battery charger
and/or charge the battery with the DC12V power supply, doing so could
damage the product and will void the warranty.
Clinton Electronics
*Information in this document is subject to change
v.06.26.13
 Loading...