

Page 1

XAP®Net User Manual
ClearOne Communications, Inc. ~ 1825 Research Way, Salt Lake City, UT 84119 ~ tel 1-800-945-7730 ~ fax 1-800-933-5107
Page 2

XAP Net — Introduction
ii
Introduction . . . . . . . . . . . . . . . . . . . . . . . . . . . . . . . . . . . . . . . . . . . . . . . . . . . . . . . . . .1
Service and support . . . . . . . . . . . . . . . . . . . . . . . . . . . . . . . . . . . . . . . . . . . . . . . . . . . . . . . . . . . . .1
Product returns . . . . . . . . . . . . . . . . . . . . . . . . . . . . . . . . . . . . . . . . . . . . . . . . . . . . . . . . . . . . . . . .1
Unpacking . . . . . . . . . . . . . . . . . . . . . . . . . . . . . . . . . . . . . . . . . . . . . . . . . . . . . . . . . . . . . . . . . . . .2
Product overview . . . . . . . . . . . . . . . . . . . . . . . . . . . . . . . . . . . . . . . . . . . . . . . . . . . . . . . . . . . . . . .2
Before You Install . . . . . . . . . . . . . . . . . . . . . . . . . . . . . . . . . . . . . . . . . . . . . . . . . . . . .3
System requirements . . . . . . . . . . . . . . . . . . . . . . . . . . . . . . . . . . . . . . . . . . . . . . . . . . . . . . . . . . . .3
Network information . . . . . . . . . . . . . . . . . . . . . . . . . . . . . . . . . . . . . . . . . . . . . . . . . . . . . . . . . . . .3
Use strategy . . . . . . . . . . . . . . . . . . . . . . . . . . . . . . . . . . . . . . . . . . . . . . . . . . . . . . . . . . . . . . . . . .3
Upgrading G-Ware . . . . . . . . . . . . . . . . . . . . . . . . . . . . . . . . . . . . . . . . . . . . . . . . . . . . . . . . . . . . .4
Upgrading XAP and PSR unit bootcode and firmware . . . . . . . . . . . . . . . . . . . . . . . . . . . . . . . . . . .4
Connecting and Configuring . . . . . . . . . . . . . . . . . . . . . . . . . . . . . . . . . . . . . . . . . . . . . .7
Assigning a static IP address . . . . . . . . . . . . . . . . . . . . . . . . . . . . . . . . . . . . . . . . . . . . . . . . . . . . . .7
DHCP networks . . . . . . . . . . . . . . . . . . . . . . . . . . . . . . . . . . . . . . . . . . . . . . . . . . . . . . . . . . . . . . . .7
Connecting to a non-DHCP network . . . . . . . . . . . . . . . . . . . . . . . . . . . . . . . . . . . . . . . . . . . . . . . .9
XAP Net Locator . . . . . . . . . . . . . . . . . . . . . . . . . . . . . . . . . . . . . . . . . . . . . . . . . . . . . . . . . . . . .11
Connecting to LAN subnet . . . . . . . . . . . . . . . . . . . . . . . . . . . . . . . . . . . . . . . . . . . . . . . . . . . . . . .12
Site Properties . . . . . . . . . . . . . . . . . . . . . . . . . . . . . . . . . . . . . . . . . . . . . . . . . . . . . . . . . . . . . . .12
Unit Properties . . . . . . . . . . . . . . . . . . . . . . . . . . . . . . . . . . . . . . . . . . . . . . . . . . . . . . . . . . . . . . .13
Firmware upgrades . . . . . . . . . . . . . . . . . . . . . . . . . . . . . . . . . . . . . . . . . . . . . . . . . . . . . . . . . . . .14
Web Access . . . . . . . . . . . . . . . . . . . . . . . . . . . . . . . . . . . . . . . . . . . . . . . . . . . . . . . . .16
Connecting through the web interface . . . . . . . . . . . . . . . . . . . . . . . . . . . . . . . . . . . . . . . . . . . . . .16
XAP Net web page . . . . . . . . . . . . . . . . . . . . . . . . . . . . . . . . . . . . . . . . . . . . . . . . . . . . . . . . . . . .16
XAP 800 and PSR1212 web pages . . . . . . . . . . . . . . . . . . . . . . . . . . . . . . . . . . . . . . . . . . . . . . . .17
XAP 400 web page . . . . . . . . . . . . . . . . . . . . . . . . . . . . . . . . . . . . . . . . . . . . . . . . . . . . . . . . . . . .18
XAP TH2 web page . . . . . . . . . . . . . . . . . . . . . . . . . . . . . . . . . . . . . . . . . . . . . . . . . . . . . . . . . . . .19
Troubleshooting . . . . . . . . . . . . . . . . . . . . . . . . . . . . . . . . . . . . . . . . . . . . . . . . . . . . . .20
Security . . . . . . . . . . . . . . . . . . . . . . . . . . . . . . . . . . . . . . . . . . . . . . . . . . . . . . . . . . . .20
Appendix . . . . . . . . . . . . . . . . . . . . . . . . . . . . . . . . . . . . . . . . . . . . . . . . . . . . . . . . . . .21
Specifications . . . . . . . . . . . . . . . . . . . . . . . . . . . . . . . . . . . . . . . . . . . . . . . . . . . . . . . . . . . . . . . .21
Pinouts . . . . . . . . . . . . . . . . . . . . . . . . . . . . . . . . . . . . . . . . . . . . . . . . . . . . . . . . . . . . . . . . . . . . .22
Compliance . . . . . . . . . . . . . . . . . . . . . . . . . . . . . . . . . . . . . . . . . . . . . . . . . . . . . . . . . . . . . . . . . .23
Warranty . . . . . . . . . . . . . . . . . . . . . . . . . . . . . . . . . . . . . . . . . . . . . . . . . . . . . . . . . . . . . . . . . . . .24
XAP Net commands . . . . . . . . . . . . . . . . . . . . . . . . . . . . . . . . . . . . . . . . . . . . . . . . . . . . . . . . . . .25
Technical Services Group ~ 1-800-283-5936 (USA) ~ 1-801-974-3760
XAP Net — Introduction
1
Thank you for purchasing the ClearOne XAP®Net, an advanced control interface that easily
connects to XAP and PSR systems to provide remote system management through local
area networks or over the Internet.The XAP Net features an Ethernet port and support for
common network control and management protocols for easy integration into your corporate
local area network (LAN).
• Solve problems faster with less downtime. Remotely access unit status and programming
to quickly identify and resolve problems.
• Increase productivity. Complete upgrades and system configuration more quickly with
increased access speeds for larger systems.
• Upgrade unit firmware remotely. Perform firmware upgrades remotely through the
network, eliminating the need to connect serially to each unit in the site.
• Reduce costly on-site visits. Program or make adjustments to your system without sending
a technician on-site by using G-Ware configuration software across the network.
Service and support
If you need additional information on setting up or operating your XAP Net, please contact
us. We welcome and encourage your comments so we can continue to improve our products
and better meet your needs.
Product returns
All product returns require a return materials authorization (RMA) number. Please contact
ClearOne Technical Support before attempting to return your product. Make sure you return
all the items that shipped with your product.
Technical Services Group ~ 1-800-283-5936 (USA) ~ 1-801-974-3760
Table of Contents
© 2004 ClearOne Communications Inc.All rights reserved.No part of this document may be reproduced in any form or
by any means without written permission from ClearOne Communications. ClearOne Communications reserves specific
privileges.Information in this document is subject to change without notice.
XAP Net User Manual
ClearOne Part No. 800-151-150 June 2005 (Rev. 2.0)
Introduction
Technical support Sales and customer service
tel: 1-800-283-5936 (USA)
1-801-974-3760
tel: 1-800-945-7730 (USA)
1-801-975-7200
fax: 1-801-977-0087 fax: 1-800-933-5107 (USA)
1-801-977-0087
e-mail: tech.support@clearone.com e-mail: sales@clearone.com
web: www.clearone.com
Page 3
Before you connect and configure your XAP Net unit, please review the system requirements,
network information and use strategy.You will need to install G-Ware
™
5.0 and upgrade the
bootcode and firmware on existing XAP and PSR units before the XAP Net can be used.
System requirements
G-Ware software must be installed on a PC that meets the following minimum requirements.
Network information
To use XAP Net over a local area network (LAN), you need to know if the LAN uses
Dynamic Host Configuration Protocol (DHCP) or if you need a static IP address.
If the LAN uses DHCP, enable Dynamic DNS if it is available.
If the LAN does not use DHCP, gather the following information prior to LAN setup:
• The IP address to be assigned to the XAP Net
• The subnet mask
• The IP address of the default gateway
Operating System and RAM Windows 95 OSR 2/98/ME 64 MB RAM
Windows NT 64 MB RAM
Windows 2000 128 MB RAM
Windows XP 256 MB RAM
Processor PII 200 MHz or AMD equivalent
Monitor 1024x768 SVGA (16 bit) high color
Video Card 8 MB video card
Free Hard Disk Space 20 MB
Web Browser Internet Explorer 5.0, Java Virtual Machine 1.4
RS-232 COM port 1
CD-ROM drive 1
XAP Net — Before You Install
3
Technical Services Group ~ 1-800-283-5936 (USA) ~ 1-801-974-3760
XAP Net — Introduction
2
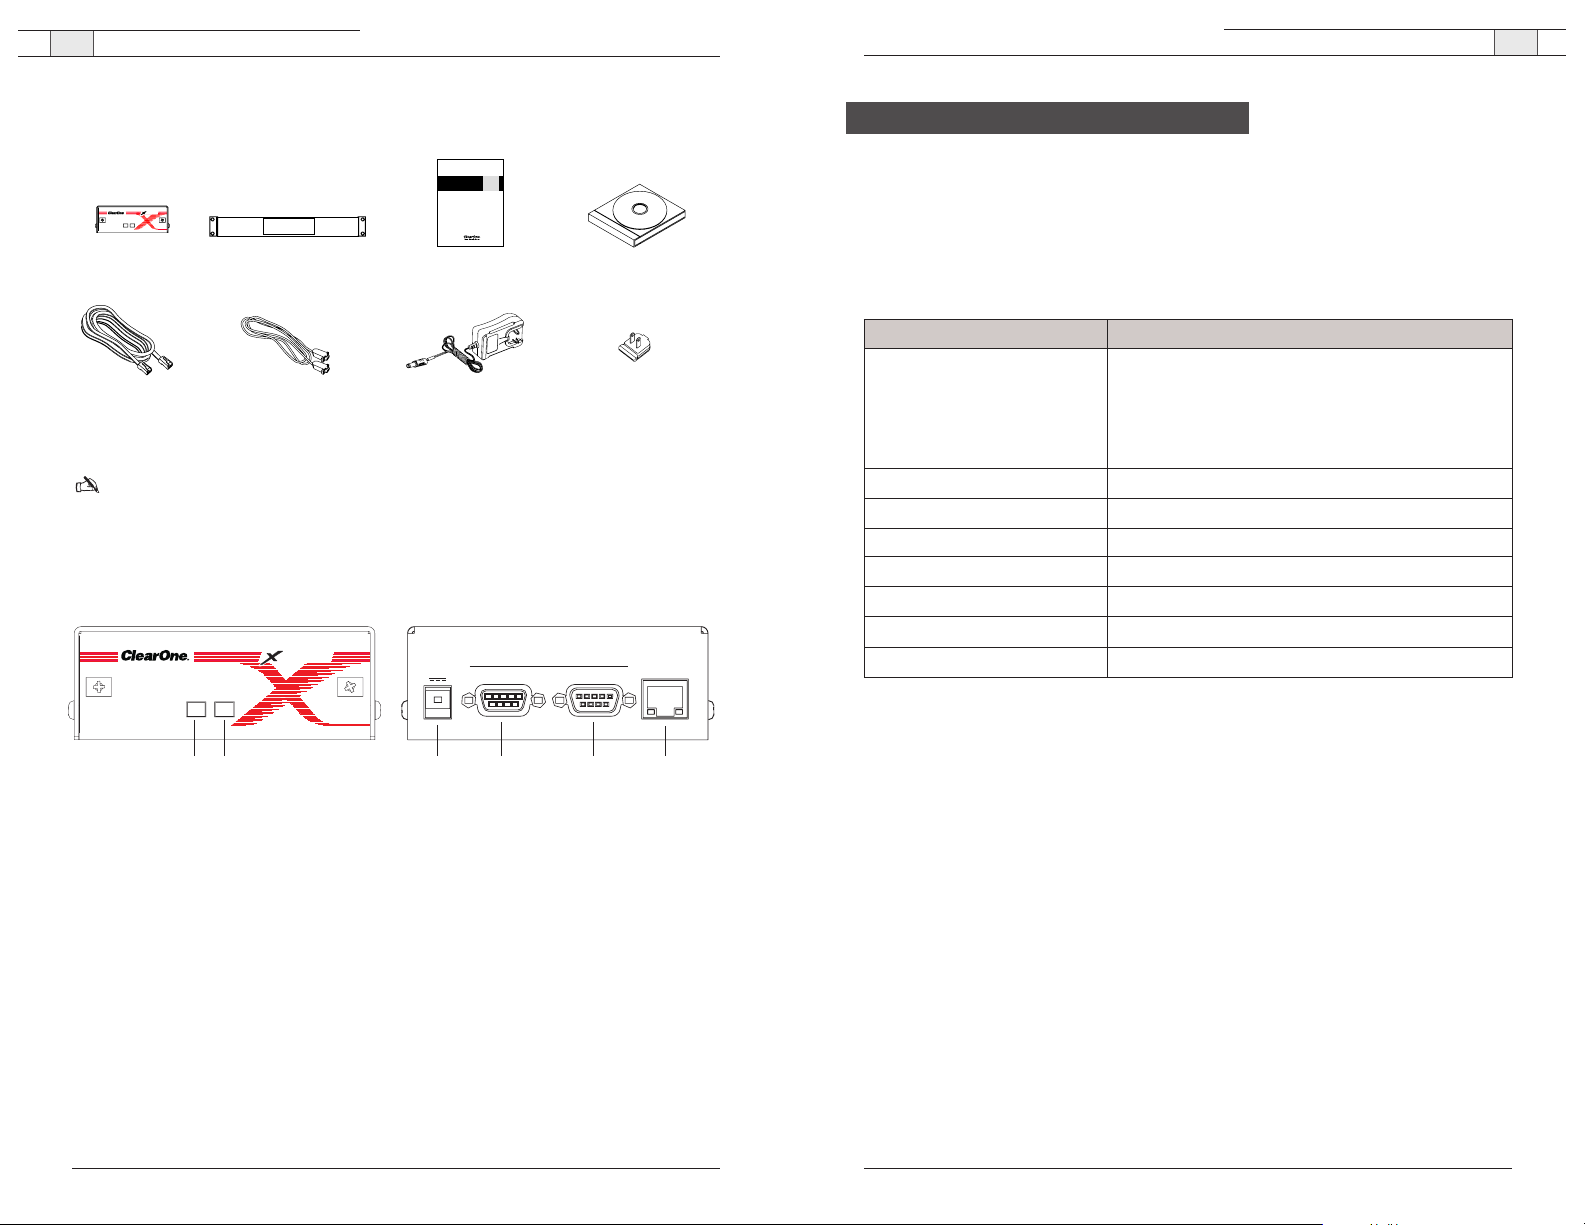
Unpacking
Ensure that the following items were received with your shipment.
Note: ClearOne is not responsible for product damage incurred during shipment.You must
make claims directly with the carrier. Inspect your shipment carefully for obvious signs of damage.
If the shipment appears damaged, retain the original boxes and packing material for inspection by
the carrier. Contact your carrier immediately.
Product overview
A. Status. A green LED indicates that the unit is connected to a XAP system. A red LED
indicates that the unit is disconnected. Flashing red indicates there is an error log message.
B. Active. A green LED indicates the XAP Net is actively processing commands.
C. 5 VDC. The power connector is only compatible with the provided 5 VDC power supply.
D. Control.This DB-9 serial port has a selectable transfer rate: 9.6, 19.2, 38.4 or 57.6 Kbps.
Use this port to connect to a PC or other serial control device.
E. To XAP.This DB-9 serial port is auto-configured to work with XAP units. Use this port to
connect to a XAP system.
F. LAN. This 10/100 BaseT auto-detecting Ethernet port features two LEDs.
~ Link. A green LED indicates connection to an active network.
~ Speed. A yellow LED indicates connection to a 100 Mbps network. If the LED is
not lit, the connection speed is 10 Mbps.
Technical Services Group ~ 1-800-283-5936 (USA) ~ 1-801-974-3760
CONTROL TO XAP
RS-232
LAN5 VDC
AB C D E F
STATUS ACTIVE
A
ENPT
Before You Install
Component Minimum Requirements
Figure 1. XAP Net packing list
Figure 2. XAP Net front and back panels
XAP Net User Manual
A
ENPT
STATUS ACTIVE
XAP Net unit
Part 910-151-150
7' RJ-45 cable
Part 830-000-023
Rack ears
Part 740-151-150-02
6' DB9 F/DB9 M cable
Part 830-151-150
Installation manual
Part 800-151-150
Power supply
Part 551-158-004
Audio Product CD
Part 800-000-001
Power plug clips (3)
Part 551-171-001-01 (NA)
551-171-001-02 (Euro)
551-171-001-03 (UK)
Page 4

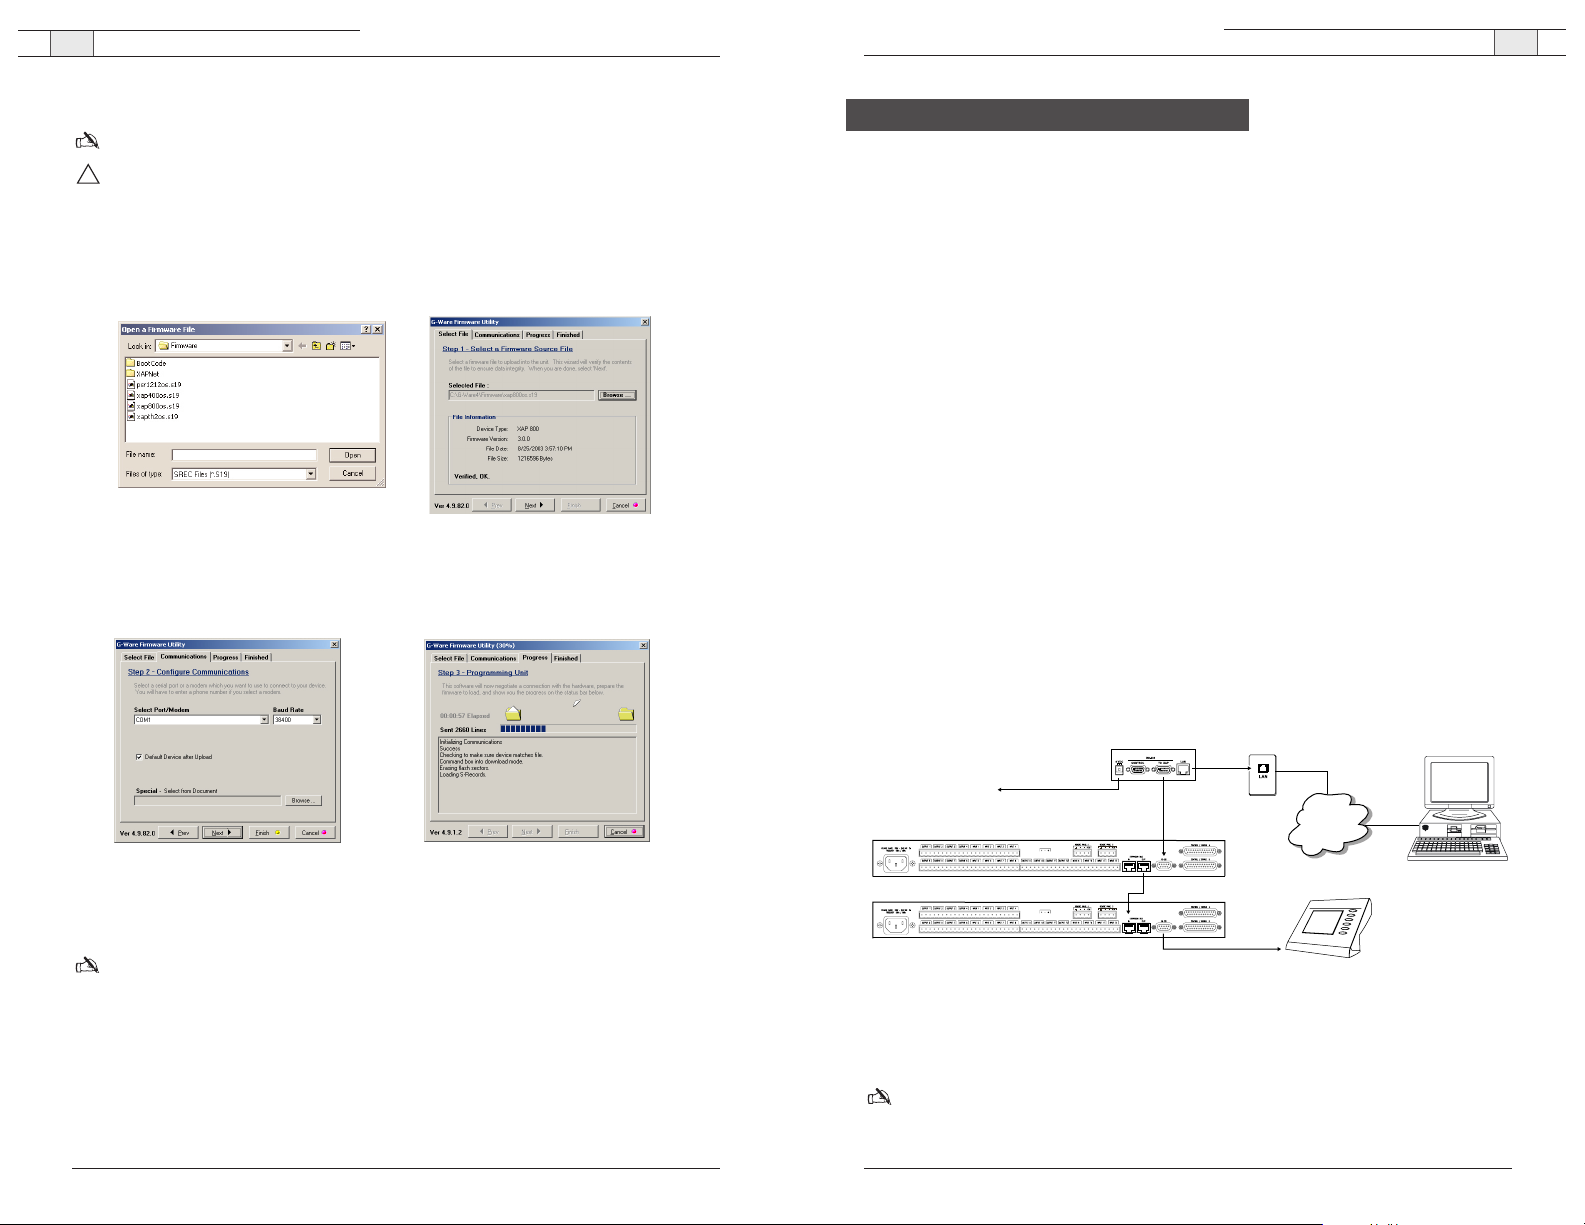
5. Open the G-Ware Firmware Utility by clicking the
G-Firm
button located on the
G-Ware toolbar.
6. Click
Browse
to display the upgrade folders. Select the
Bootcode
folder and click
Open
.
7. Select the bootcode that corresponds with the unit you are upgrading. Click
Open
.
8. The selected bootcode file will self-verify and display the message Verified, OK. Ensure that
you have selected the correct bootcode file and click
Next
to advance to the
Communications tab.
9. Select the PC
COM port
you are using to connect to the unit. Confirm that the
Baud Rate
matches the baud rate of the selected unit.
10. Click
Next
. You may be prompted to save site files. If you have saved your site files, click
Yes, Continue
to begin bootcode upload.
Note:When the bootcode upload is finished,the unit should automatically reboot. If it doesn't,
power cycle the unit before continuing with the firmware upgrade procedure.
11. On the Finished screen, click
Start Over
.
You are now ready to upgrade the unit firmware. Refer to the "To upgrade unit firmware"
section on the following page.
XAP Net — Before You Install
5
XAP Net — Before You Install
4
Upgrading G-Ware
Before you can use XAP Net, you must install G-Ware 5.0. G-Ware is the configuration
software for the XAP and PSR products.While some configuration can be done using the
XAP Net web interface, G-Ware is required to complete the custom configuration of your
audio conferencing system. Please ensure that you have administrative privileges before
attempting to install on computers running Windows 2000 or later.
Note: If you work with multiple XAP systems and need to keep previous versions of G-Ware
installed on your PC/laptop, change the directory name where the new version will be installed.
Otherwise, you will overwrite the previous version. Use G-Ware Switcher to alternate between
versions. See the XAP_G-WARE 109 technical note on the ClearOne web site at www.clearone.com,
for more information on G-Ware Switcher.
To install G-Ware 5.0
1. Close all programs or applications running on your PC or laptop and insert the Audio
Product CD that shipped with your XAP Net into the CD-ROM drive.
• If the Autorun feature is enabled on the PC,the CD will run automatically.
• If the Autorun window does not open, select
Run
from the Start menu.Type
<drive>:\\clearone.exe
where <drive> is the letter of the CD-ROM drive (e.g.,
D:\\clearone.exe).
2. Click the
G-Ware 5.0
link.
3. Click
INSTALL NOW
on the G-Ware page.
4. Follow the onscreen instructions.You must restart your computer once installation is
complete.You can start G-Ware by double-clicking the desktop icon. If you did not create a
desktop icon during the installation process, you can also start G-Ware from the Start menu.
Upgrading XAP and PSR unit bootcode and firmware
After installing G-Ware 5.0, you must upgrade
both
the unit bootcode and firmware. These
are separate upgrades and require a direct serial connection to each unit. Once the unit
bootcode is updated, you can upgrade the unit firmware to the versions shown below.
Note:Turn off your screensaver before beginning the upgrade procedure.
To upgrade unit bootcode
1. Save your site file before beginning the bootcode upload procedure.
2. Turn down amplifiers.The units will be reset to default settings, which may affect output
levels and routing.
3. Disconnect from the site in G-Ware and remove all expansion bus connections.
4. Use a 9-pin serial cable to connect your PC to the first unit.
Technical Services Group ~ 1-800-283-5936 (USA) ~ 1-801-974-3760
Technical Services Group ~ 1-800-283-5936 (USA) ~ 1-801-974-3760
Figure 3. Bootcode folder in Browse window
Figure 4. Bootcode files in Browse window
Figure 5. File verifications
Figure 6. File upload options
XAP 800 XAP 400 XAP TH2 PSR1212
New Firmware 3.0 2.0 3.0 4.0
Page 5
XAP Net — Connecting and Configuring
7
Technical Services Group ~ 1-800-283-5936 (USA) ~ 1-801-974-3760
Connecting and Configuring
The initial XAP Net connection procedure is determined by your network configuration. If
you have a DHCP network, you can connect directly to the network. If you have a non-DHCP
network, you will need connect to your XAP Net serially to configure network settings.
You will need to assign a static IP address if you will be using the XAP Net on a non-DHCP
network, connecting it to a single computer or if you need a fixed IP address on a DHCP
network.Your network administrator can provide a static IP address. See page 10 for configuration instructions.
If you are connecting to a single computer using a cross-over cable, please read the
XAP_Net 103 technical note on the ClearOne web site at www.clearone.com before
proceeding with the installation.
DHCP networks
A DHCP network automatically assigns an IP address to detected devices. If you have a
DHCP network, you will need to connect the XAP Net serially to retrieve the IP address or
network name and then establish a connection.
To connect the XAP Net
1. Place your unit in a standard 19" rack and attach it securely. Rack ears are included.
2. Connect a 9-pin serial cable from the
To XAP
port on the XAP Net to the
RS-232
port on the
XAP or PSR unit.The baud rate on the XAP RS-232 port will automatically be changed to
57,600 bps.
3. Connect the XAP Net to your LAN using a Cat. 5 network cable (included).
4. Connect the
5 VDC power supply
to the XAP Net. Use only the provided power supply.
Note: The status light on the XAP Net will illuminate green when the XAP Net is properly
connected to a XAP/PSR unit.
Figure 11. Connecting to the network
XAP Net — Before You Install
6
To upgrade unit firmware
Note: If you closed the G-Ware Firmware Utility, click the G-Firm button on the G-Ware toolbar.
Attention:The firmware upgrade will reset the unit to factory defaults.The only way to
restore custom settings after you upgrade the firmware is from site files you have saved. Save
a copy of your site files before upgrading your current firmware version; otherwise, you will
need to reprogram your site files from the default factory settings.
1. Click
Browse
to access a list of available firmware updates. Select the file that matches the
type of unit you are upgrading and click
Open
.
2. The selected firmware file will self-verify and display the message Verified, OK. Ensure that
you have selected the correct firmware file and click
Next
to advance to the
Communications tab.
3. Select the PC
COM port
you are using to connect to the unit. Confirm that the
Baud Rate
matches the baud rate of the selected unit.
Note:The upgrade will take approximately 5-15 minutes per unit depending on baud rate. It
is important not to interrupt the upgrade process or remove the cable.
4. Click
Next
. You may be prompted to save site files. If you have saved your site files, click
Yes, Continue
to begin the firmware upload.
5. When the upgrade is finished, click
Start Over
and connect the serial cable to the next unit
and upgrade bootcode and firmware. If you have no other units to upgrade, click
OK
to
close the window.
Technical Services Group ~ 1-800-283-5936 (USA) ~ 1-801-974-3760
Figure 7. Available firmware files
!
Figure 8. File verification
Figure 9. Communication settings
Figure 10. Firmware upgrade status
XAP Net
XAP 800
XAP 800
To 5 VDC
power supply
Serial connection
to XAP system
LAN
connection
TCP/IP
network
PC running G-Ware
Serial control
device
Page 6

XAP Net — Connecting and Configuring
9
Technical Services Group ~ 1-800-283-5936 (USA) ~ 1-801-974-3760
XAP Net — Connecting and Configuring
8
Technical Services Group ~ 1-800-283-5936 (USA) ~ 1-801-974-3760
!
Connecting to a non-DHCP network
This procedure requires two 9-pin serial cables (one is included with your XAP Net). Once
you have properly configured XAP Net with the correct IP address through a serial
connection, you can connect it to your LAN.
To connect serially to XAP Net
1. Place your unit in a standard 19" rack and attach it securely. Rack ears are included.
2. Connect the power supply to the XAP Net. Use only the provided power supply.
3. Connect a 9-pin serial cable from the
To XAP
port to the
RS-232
port on the XAP 800,
XAP 400, XAP TH2 or PSR unit.The status light on the XAP Net will turn green when
the XAP Net is properly connected to a XAP/PSR unit.
Note:The XAP Net will change the baud rate on the XAP RS-232 port to 57,600 bps.
4. Connect a 9-pin serial cable from the
Control
port to a
COM
port on the PC or laptop that
has G-Ware 5.0 installed.
5. Start G-Ware.
6. Click the
New Site
button on the G-Ware toolbar
to open the Site Properties window.
7. Click the
Comm
tab. Select the COM port your PC
is using to connect to XAP Net. Ensure the Rate is
38,400
and that Flow is set to
Hardware
.
8. Click
OK
to close the Site Properties window.
9. Click the
Connect
button on the G-Ware toolbar to
connect to the XAP Net. Icons representing the
XAP Net and other connected XAP/PSR units
appear in the Site pane.
Serial connection
to XAP system
To 5 VDC
power supply
PC running G-Ware
XAP 800
XAP Net
Serial connection
to PC/laptop
XAP 800
Serial control device
Figure 15. Making the initial serial connection
Figure 16. Site Properties, serial settings
To retrieve the XAP Net IP address
1. Connect a 9-pin serial cable from the
Control
port on the XAP Net to the PC COM port.
2. Start G-Ware and create a new site.Verify the
Baud Rate
is set to 38,400 and
Flow
is on.
3. Click the
Connect
button on the G-Ware toolbar to connect to the XAP Net. Upon
successful connection, a XAP Net icon will appear in the Site pane.
4. Right-click on the XAP Net icon to open the Unit Properties window.
5. Make a note of the
IP address
and default
network name
. If you want to use a different
unique network name, enter it in the Network Name field.You will use either the IP address
or the network name when you establish a connection through the network.
To connect through the network with G-Ware
1. Click the
New Site
button on the G-Ware toolbar to
open the Site Properties window.
2. Click the
Comm
tab.
3. Select
Use Networking.
In the
IP Address
box, type
the IP address or the unique network name for the
XAP Net.
4. Click
OK
to close the Site Properties window.
5. Click the
Connect
button on the G-Ware toolbar to
connect to the XAP Net.
6. You will be prompted to enter a user name and
password.The default user name is
clearone
and
the password is
xapnet
.The password and user
name are not case sensitive.
If the connection is successful, the XAP Net status light will turn green and icons
representing the XAP Net and other connected XAP/PSR units will appear in the Site
pane. If the connection is not successful, refer to the troubleshooting section on page 20.
Figure 12. Connected XAP Net unit Figure 13. XAP Net IP settings
Figure 14. Site Properties
Page 7

XAP Net — Connecting and Configuring
11
Technical Services Group ~ 1-800-283-5936 (USA) ~ 1-801-974-3760
XAP Net — Connecting and Configuring
10
Technical Services Group ~ 1-800-283-5936 (USA) ~ 1-801-974-3760
XAP Net Locator
G-Ware features a new utility called the XAP Net Locator.This utility enables G-Ware to
detect all XAP Net units on the same subnetwork and display their IP addresses.You can
select and then connect to any XAP Net unit that appears in the window.
To connect to XAP Net using the XAP Net Locator
1. Click the
XAP Net Locator
button on the G-Ware toolbar to open the utility.
2. Click
Refresh
to update the list of detected units.
3. Select the desired unit.The Create Site
button and Use IP Address check box
are now active.
4. Select
Use IP Address
if your network
does not support name recognition
and you need to use the IP Address to
connect.
5. Click
Create Site
.The unit network settings are imported into G-Ware and the Site
Properties window opens.
6. Click
OK
to close the Site Properties window.
7. Click the
Connect
button on the G-Ware toolbar to connect to the XAP Net. Icons repre-
senting the XAP Net and units connected to the XAP Net appear in the Site pane.
8. You will be prompted to enter a user name and password.The default user name is
clearone
and the password is
xapnet
.The password and user name are not case sensitive.
If the connection is successful, icons representing the XAP Net and other connected
XAP/PSR units appear in the Site pane. If the connection is not successful, refer to the
Troubleshooting section on page 20.
Figure 19. XAP Net Locator utility
To configure settings for network connection
Note: Contact the network administrator for network settings.
1. Open the Unit Properties window by right-clicking on
the XAP Net icon in the Site pane and selecting
Unit
Properties
from the shortcut menu.
2. Click the
Comm
tab.
3. In the IP Settings section, you will see the default
network name. If you want to use a different unique
network name, enter it in the
Network Name
field.
4. Enter the static
IP address
for the XAP Net.Your
network administrator can provide the IP address.
5. Click
OK
to close the window.
Connecting through the network with G-Ware
1. Using a Cat. 5 network cable (included), connect the XAP Net to your LAN.
2. Click the
New Site
button on the G-Ware toolbar to open the Site Properties window.
3. Click the
Comm
tab.
4. Select
Use Networking
. In the
IP Address
box, type the IP address or the unique network
name for the XAP Net.
5. Click
OK
to close the Site Properties window.
6. Click the
Connect
button on the G-Ware toolbar to
connect to the XAP Net.
7. You will be prompted to enter a user name and
password.The default user name is
clearone
and
the password is
xapnet
.The password and user
name are not case sensitive.
If the connection is successful icons representing
the XAP Net and other connected XAP/PSR units
will appear in the Site pane. If the connection is not
successful, refer to the Troubleshooting section on
page 20.
Figure 17. Unit Properties
Figure 18. Site Properties
Page 8

XAP Net — Connecting and Configuring
13
Technical Services Group ~ 1-800-283-5936 (USA) ~ 1-801-974-3760
12
Technical Services Group ~ 1-800-283-5936 (USA) ~ 1-801-974-3760
Unit Properties
In the Unit Properties window, you can configure the IP settings and communication rates,
enter a time server address and access the XAP Net firmware utilities.
To add a unit description
1. Open the Unit Properties window by right-clicking on the
XAP Net icon in the Site pane and selecting
Unit
Properties
from the shortcut menu.
2. The General tab displays the Unit Identification number,
MAC Address and Firmware Version. If you have not
connected to the unit, this area is blank. Click the
Site
tab.
3. Enter descriptive information about your unit including
Company Name, Location, and Room. Click
OK
to save and
close the window.
To set up IP filters
1. Click the
Comm
tab in the Unit Properties window.
2. In the IP Filters section, enter specific IP addresses that
will be allowed to access the XAP Net system.
You can specify a range of IP addresses by using zeros. For
example, entering 192.168.105.0 will allow any IP
addresses in the 192.168.105.1 to 192.168.105.254 range
to access the XAP Net.
3. Click
OK
to save the settings and close the window.
To specify a time server
Note: You should specify a time serve to ensure an accurate
time stamp on log files.
1. Open the Unit Properties window and click the
Misc
tab.
2. Enter the
IP address
for the time server. Two addresses can
be specified.
3. Select
Use Daylight Savings
if your region observes
daylight savings time.
4. Select your
Time Zone
and click OKto save settings.
Figure 23. Unit description
Figure 24. Network settings
Figure 25.Time server
XAP Net — Connecting and Configuring
Site Properties
In the Site Properties window, you can configure communication settings, add site
descriptions and set the file access and site passwords.
To add a site description
1. Open the Site Properties window by right-clicking on the
XAP Net icon in the Site pane and selecting
Site
Properties
from the shortcut menu.
2. The General tab displays the site file name, path and
creation date. Click the
Site
tab.
3. Enter descriptive information about your site including
Company Name, Location and Room. Click
OK
to save
and close the window.
To configure site communication properties
1. Click the
Comm
tab in the Site Properties window.
2. Select the connection option you will be using.
• If connecting serially, select
Use Local Port
and
specify the baud rate and flow control.
For the initial connection to XAP Net, the Baud Rate
must be set to 38,400 bps with Flow set to Hardware.
• If connecting through the network, select
Use
Networking
and enter the IP Address.The default Port
is 23, which is the port XAP Net uses for Telnet client.
To set site passwords
1. Click the
Security
tab.
2. Click
File Access Password
to create a password for the
site file. Users attempting to open the site file will need
to supply this password.
3. Click
OK
to save settings and close the window.
Figure 20. Site description
Figure 21. Comm properties
Figure 22. Security settings
Page 9

XAP Net — Connecting and Configuring
15
Technical Services Group ~ 1-800-283-5936 (USA) ~ 1-801-974-3760
XAP Net — Connecting and Configuring
14
Technical Services Group ~ 1-800-283-5936 (USA) ~ 1-801-974-3760
To upgrade XAP or PSR firmware through XAP Net
Note: This feature is available only to units that have been upgraded to the firmware versions
shown below.
1. Click the
Connect
button on the G-Ware toolbar to connect to the XAP Net.
2. Right-click on the XAP Net icon and select
Unit Properties
.
3. Click the
Misc
tab.
4. Click
XAP Firmware
to open the
Firmware Uploader. Active units are
displayed in the top section of the window.
5. Select the units that you want to upgrade
(selected units are shown with a checkmark).
6. Click
Add File
to open the browse window.
Select the firmware file and click
Open
.
If you have selected different unit types,
repeat this step until all necessary
firmware files appear in the Firmware files
list.
7. Click
Start Firmware Update
. Units of the
same type will be upgraded at the same
time. For example, all XAP 800s will be upgraded simultaneously, then XAP TH2s and then
XAP 400s.The progress bar will show the status for the unit type being upgraded as well
as the entire site.
Note: You cannot cancel the firmware upgrade once it begins. The Close button will close the
window but will not end the process.
Figure 29. Selecting firmware files
XAP 800 XAP 400 XAP TH2 PSR1212
Current Firmware 3.0 2.0 3.0 4.0
To create a log file
1. Open the Unit Properties window and click the
Misc
tab.
2. Select the items you want to include in the log.
• Select
Log user access
(security) to include a list of
users who have accessed the XAP Net.
• Select
Log Expansion Bus output
to include activity on
the expansion bus.
• Select
Log debug tracking
to include error messages.
3. Click
Log File
to create and view the log.You can print,
save or clear the log file.
To change remote access password
1. Open the Unit Properties window and click the
Misc
tab.
2. Click
User/Password
to open the User Name and Password
window.
3. Type in a new password and confirm it.Password is limited
to 12 alphanumeric characters.
4. Click
OK
to save the change and close the window.
Firmware upgrades
The Unit Properties, Misc tab provides two firmware options: XAP Net Firmware and XAP
Firmware. XAP Net Firmware allows you to upgrade the firmware on your XAP Net unit,
while XAP Firmware allows you to perform firmware upgrades on your XAP and PSR
systems through XAP Net.
To upgrade XAP Net firmware
1. Click the
Connect
button on the G-Ware tool-
bar to connect to the XAP Net.
2. Open the Unit Properties window and click the
Misc
tab (see Figure 26).
3. Click
XAP Net Firmware
to open the XAP Net
Firmware Loader.
4. Click
File
to open the browse window.
5. Select the XAP Net firmware file and click
Open
.
6. Click
Update
to begin the firmware upgrade.
The progress bar will show the status of the
upgrade.
Figure 26. Log files
Figure 27. Changing password
Figure 28. XAP Net firmware screens
Page 10

XAP Net — Web Access
17
Technical Services Group ~ 1-800-283-5936 (USA) ~ 1-801-974-3760
XAP Net — Web Access
16
The XAP Net has a built-in web server that provides a remote access interface to your XAP Net
system. Not all programming and metering functions are available.To use the web interface from
outside your network, your firewall must be properly configured. If you are accessing XAP Net
from within the network, you may use the network name.The web interface uses port 80.
Connecting through the web interface
Note: If you do not have Java Virtual Machine 1.4 installed on your computer, you will be
prompted to download and install it.You will need to do this before you can use the web interface.
You can download JVM 1.4 from the Sun Microsystems web site at www.sun.com.
To connect to XAP Net through the web interface
1. Open a web browser and enter the
IP address
or
network name
of the XAP Net in the
address bar.
2. Enter your
user name
and
password
.
3. Connected units are shown in the left channel navigation. Use the unit links to access the
unit pages.
4. Use the buttons in the top navigation to access help, log out, or return to the home page.
XAP Net web page
The XAP Net web page displays site information and XAP Net unit information including
firmware version, IP address, and time server. From this page, you can run Safety Mute.
To enable/disable Safety Mute
•Click
Safety Mute On
to mute and
Safety Mute Off
to unmute.
Technical Services Group ~ 1-800-283-5936 (USA) ~ 1-801-974-3760
Web Access
Figure 30. XAP Net web page
XAP 800 and PSR1212 web pages
From the XAP 800 and PSR1212 web pages, you can mute or change the input and output
gain, view Post Gain and Output meter levels, and run presets and macros.
To run a preset
• Select the desired preset from the list and click
Run
.
To run a macro
• Select the desired macro from the list and click
Run
.
To mute and input or output
• Select the
Mute
checkbox that corresponds with the input or output you want to mute.
To change a gain setting
• Type the new level in the
Gain
box.This will change the fine gain setting on the unit.
To view post-gain meter
• To view the post-gain meter on an input, select the corresponding
Post-Gain Meter
checkbox.
To view output meter
• To view the meter on an output, select the corresponding
Output Meter
checkbox.
Figure 31. XAP 800 web page
Page 11

XAP Net — Web Access
19
XAP Net — Web Access
18
Technical Services Group ~ 1-800-283-5936 (USA) ~ 1-801-974-3760
Technical Services Group ~ 1-800-283-5936 (USA) ~ 1-801-974-3760
XAP 400 web page
From the XAP 400 web page, you can dial out, send a hook flash signal, mute or change
input and output gain, view Post Gain and Output meter levels, and run presets and macros.
To run a preset
• Select the desired preset from the list and click
Run
.
To run a macro
• Select the desired macro from the list and click
Run
.
To mute and input or output
• Select the
Mute
checkbox that corresponds with the input or output you want to mute.
To change a gain setting
• Type the new level in the
Gain
box.This will change the fine gain setting on the unit.
To view post-gain meter
• To view the post-gain meter on an input, select the corresponding
Post-Gain Meter
checkbox.
To view output meter
• To view the meter on an output, select the corresponding
Output Meter
checkbox.
To dial out
1. Activate the telephone interface by clicking
Connect
.
2. Enter the number you want dialed, including any dial-out prefixes.
3. Click
Dial
.
4. When you are finished with the call, click
Disconnect
to end the call.
To send a hook flash signal
•Click
Flash
to send a momentary interruption in the line seizure.This allows you to use
options such as 3-way calling, call waiting and call hold.This feature is dependent on the
services offered by your telephone company.
Figure 32. XAP 400 web page
XAP TH2 web page
From the XAP TH2 web page, you can dial out and send a hook flash signal.
To dial out
1. Activate the telephone interface by clicking
Connect
.
2. Enter the number you want dialed, including any dial-out prefixes.
3. Click
Dial
.
4. When you are finished with the call, click
Disconnect
to end the call.
To send a hook flash signal
• Click
Flash
to send a momentary interruption in the line seizure.This allows you to use
options such as 3-way calling, call waiting and call hold.This feature is dependent on the
services offered by your telephone company.
Figure 33. XAP TH2 web page
Page 12

XAP Net — Appendix
21
XAP Net — Troubleshooting
20
Technical Services Group ~ 1-800-283-5936 (USA) ~ 1-801-974-3760
Technical Services Group ~ 1-800-283-5936 (USA) ~ 1-801-974-3760
Troubleshooting
Security
Your XAP Net has been designed to be a secure addition to your network. XAP Net cannot
access file systems and does not provide peer-to-peer information. In addition, XAP Net
does not have any protocols for file sharing and can only create an outbound connection to a
time server.
G-Ware also provides IP Filtering to allow you to limit access to your XAP Net system by
entering up to four partial or complete IP addresses. See page 13.
Specifications
Dimensions (W x D x H)
4" x 4.25" x 1.5"
(10.2 cm x 10.8 cm x 3.8 cm)
Power
External power supply
100-240VAC; 50/60 Hz; 5 W
RS-232
DB9 Female
BPS selectable
9.6k/19.2k/38.4k/57.6k
CTS/RTS Flow control
DB9 Male
Auto configured for XAP
Ethernet
Type: 10/100 BASE T
Auto sensing
Connector: RJ-45
LAN LEDs
Link: Green when active network
Speed: Yellow when 100 Mb network
LAN Support
Network protocols: TCP/IP, DNS,
UDP, DHCP, ARP, HTTP, ICMP
Front Panel LEDs
Active: Green when active
Status: Green when connected to XAP
Red when no XAP connection
Environmental
Operating Temperature: 32–122° F
(0–50° C)
Humidity: 15%–80%
Compliance
FCC
CSA
CE
Model Number
910-151-150
Appendix
Problem
I can't connect through the network.
Connection is refused by remote
server.
I can't pull up the web interface.
I'm prompted to log in twice when
accessing the web interface.
The Status and Activity LEDs are red
and blinking when I power up.
Try this
Verify that you are using the correct IP address.
You can connect serially to check the address.
See page 8.
Check the network LEDs on the LAN port of
the XAP Net. The green LED indicates a good
physical connection to an active network.
Power cycle your XAP Net. You must connect
to the network before powering the unit.
Verify that you are using the correct IP address.
You can connect serially to check the address.
See page 8.
Check IP Filtering settings and ensure your IP
address is not blocked.
Make sure you have downloaded Java
Virtual Machine 1.4. See page 16.
Check the IP address and firewall settings. The
web interface runs on port 80.
Make sure cookies are enabled.
The log file in G-Ware provides error details.
Start G-Ware, access XAP Net Unit Properties,
Misc tab and click Log File.
Page 13

XAP Net — Appendix
23
XAP Net — Appendix
22
Technical Services Group ~ 1-800-283-5936 (USA) ~ 1-801-974-3760
Technical Services Group ~ 1-800-283-5936 (USA) ~ 1-801-974-3760
Pinouts
RS-232 Control port (female)
Pin Number Control Pin Number Control
1 DCD 6 DSR
2 TXD 7 CTS
3 RXD 8 RTS
4 DTR 9 NA
5 Ground
RS-232 To XAP port (male)
Pin Number Control Pin Number Control
1 DCD 6 DSR
2 RXD 7 RTS
3 TXD 8 CTS
4 DTR 9 NA
5 Ground
Ethernet RJ-45 connector
Pin Number Control Pin Number Control
1 TX+ 5 Not used
2 TX - 6 RX 3 RX + 7 Not used
4 Not used 8 Not used
Compliance
FCC Part 15/ICES-003 Compliance
This equipment has been tested and found to comply with the limits for a Class A digital device, pursuant to Part 15 of the FCC rules and Industry Canada ICES-003.These limits are designed to provide reasonable protection against harmful interference when the equipment is operated in a commercial environment.This equipment generates,uses, and can radiate radio frequency energy and, if not
installed and used in accordance with the instruction manual, may cause harmful interference to radio
communications. Operation of this equipment in a residential area is likely to cause harmful interference, in which case the user will be required to correct the interference at his/her own expense.
Operation is subject to the following two conditions: (1) This device may not cause interference, and
(2) This device must accept any interference including interference that may cause undesired operation of the device.
Changes or modifications not expressly approved by ClearOne Communications could void the user's
authority to operate the equipment.
European Compliance
This equipment has been approved in accordance with Council Directive 1999/5/EC "Radio
Equipment and Telecommunications Equipment" Compliance of the equipment with the Directive is
attested by the application of the CE mark on the equipment.
EC Declaration of Conformity
Application of Council Directive(s): 1999/5/EC Radio equipment and Telecommunications
Terminal Equipment (R&TTE) Directive
Manufacturer's Name: ClearOne Communications
Manufacturer's Address: 1825 West Research Way
Salt Lake City, Utah 84119 U.S.A.
Model No.: XAP Net (910-151-150)
Standard(s) to which Conformity is declared:
89/336/EEC "Electromagnetic Compatibility (EMC) Directive":
EN 55022: 1994 (Emissions) Specification for limits and methods of measurement of
radio interference characteristics of information
technology equipment.
EN 61000-3-2:2000 Part 3: Limits - Section 2: Limits for harmonic current
emissions.
EN 61000-3-3:1996 Section 3: Limitation of voltage fluctuations and flicker
in low voltage supply systems for equipment with rated
current up to and including 16 A.
EN 55024: 1998 (Immunity) Information technology equipment - Immunity
characteristics - Limits and methods of measurement.
EN 61000-4-2: 2001 Electrostatic Discharge
EN 61000-4-3: 2001 Radiated RF Immunity
EN 61000-4-4: 2001 Electrical Fast Transients
EN 61000-4-5: 2001 Lightning Surge
EN 61000-4-6: 2001 Conducted RF Immunity
EN 61000-4-11: 2001 Voltage Dips and Voltage Interruptions
73/23/EEC "Low Voltage Directive (LVD)":
IEC/EN 60950: 1999 Safety of Information Technology Equipment, Electrical
Business Equipment
Page 14

XAP Net — Appendix
25
XAP Net — Appendix
24
Technical Services Group ~ 1-800-283-5936 (USA) ~ 1-801-974-3760
Warranty
ClearOne Communications, Inc. (Manufacturer) warrants that this product is free of defects in both
materials and workmanship.For warranty information and coverage, refer to the ClearOne website at
www.clearone.com.
ClearOne Communications, Inc.
1825 Research Way
Salt Lake City, Utah 84119
Technical Services Group ~ 1-800-283-5936 (USA) ~ 1-801-974-3760
XAP Net commands
Note: The device type for the XAP Net is F0. You will need to reboot XAP Net before the
commands will take effect.
ENETADDR - Ethernet port IP address
This command selects/reports the IP address of the Ethernet port on the unit.
ARGUMENT DETAILS
Name Type Size Values Units
Value IP Address 4 (Null to query in text)
BINARY FORM DETAILS
Command ID: 71
Number of Arguments: 1
Argument Form: <Value>
TEXT FORM DETAILS
Command Form: DEVICE ENETADDR [Value]
RETURN VALUES
Unit will return the updated state of the last selection in the same form as the command.
ENETSUBN - Ethernet subnet mask
This command selects/reports the Subnet mask of the Ethernet port on the unit.
ARGUMENT DETAILS
Name Type Size Values Units
Value IP Address 4 (Null to query in text)
BINARY FORM DETAILS
Command ID: 72
Number of Arguments: 1
Argument Form: <Value>
TEXT FORM DETAILS
Command Form: DEVICE ENETSUBN [Value]
RETURN VALUES
Unit will return the updated state of the last selection in the same form as the command.
Page 15

XAP Net — Appendix
27
XAP Net — Appendix
26
ENETDHCP - Ethernet DHCP Selection
This command selects/reports the use of DHCP of the Ethernet port on the unit.
ARGUMENT DETAILS
Name Type Size Values Units
Value Unsigned Integer 4 0 = Off
1 = On
2 = Toggle
(Null to query in text)
BINARY FORM DETAILS
Command ID: 77
Number of Arguments: 1
Argument Form: <Value>
TEXT FORM DETAILS
Command Form: DEVICE ENETDHCP [Value]
RETURN VALUES
Unit will return the updated state of the last selection in the same form as the command.
ENETGATE - Ethernet default Gateway address
This command selects/reports the default gateway of the Ethernet port on the unit.
ARGUMENT DETAILS
Name Type Size Values Units
ValueIP Address 4 (Null to query in text)
BINARY FORM DETAILS
Command ID: 73
Number of Arguments: 1
Argument Form: <Value>
TEXT FORM DETAILS
Command Form: DEVICE ENETGATE [Value]
RETURN VALUES
Unit will return the updated state of the last selection in the same form as the command.
ENETDNSA - Ethernet DNS Server Addresses
This command selects/reports the DNS servers IP addresses of the Ethernet port on the unit.
ARGUMENT DETAILS
Name Type Size Values Units
Value IP Address 4 (Null to query in text)
BINARY FORM DETAILS
Command ID: 74
Number of Arguments: 1
Argument Form: <Value>
TEXT FORM DETAILS
Command Form: DEVICE ENETDNSA [Value]
RETURN VALUES
Unit will return the updated state of the last selection in the same form as the command.
Technical Services Group ~ 1-800-283-5936 (USA) ~ 1-801-974-3760
Technical Services Group ~ 1-800-283-5936 (USA) ~ 1-801-974-3760
ENETDNS - Ethernet DNS Selection
This command selects/reports the use of DNS of the Ethernet port on the unit.
ARGUMENT DETAILS
Name Type Size Values Units
Value Unsigned Integer 4 0 = Off
1 = On
2 = Toggle
(Null to query in text)
BINARY FORM DETAILS
Command ID: 78
Number of Arguments: 1
Argument Form: <Value>
TEXT FORM DETAILS
Command Form: DEVICE ENETDNS [Value]
RETURN VALUES
Unit will return the updated state of the last selection in the same form as the command.
ENETNAME - Ethernet Host Name
This command selects/reports the host name of the Ethernet port on the unit.
ARGUMENT DETAILS
Name Type Size Values Units
Value String 24 CLEAR = clear current value
1 – 24 characters
(Null to query in text)
BINARY FORM DETAILS
Command ID: 75
Number of Arguments: 6
Argument Form: <Value>
TEXT FORM DETAILS
Command Form: DEVICE ENETNAME [Value]
RETURN VALUES
Unit will return the updated state of the last selection in the same form as the command.
Page 16

XAP Net
29
Technical Services Group ~ 1-800-283-5936 (USA) ~ 1-801-974-3760
XAP Net
28
Technical Services Group ~ 1-800-283-5936 (USA) ~ 1-801-974-3760
 Loading...