

Clearaudio Magnify User Manual
User manual
Bedienungsanleitung
© clearaudio
electronic GmbH, 2018/10 Made in Germany
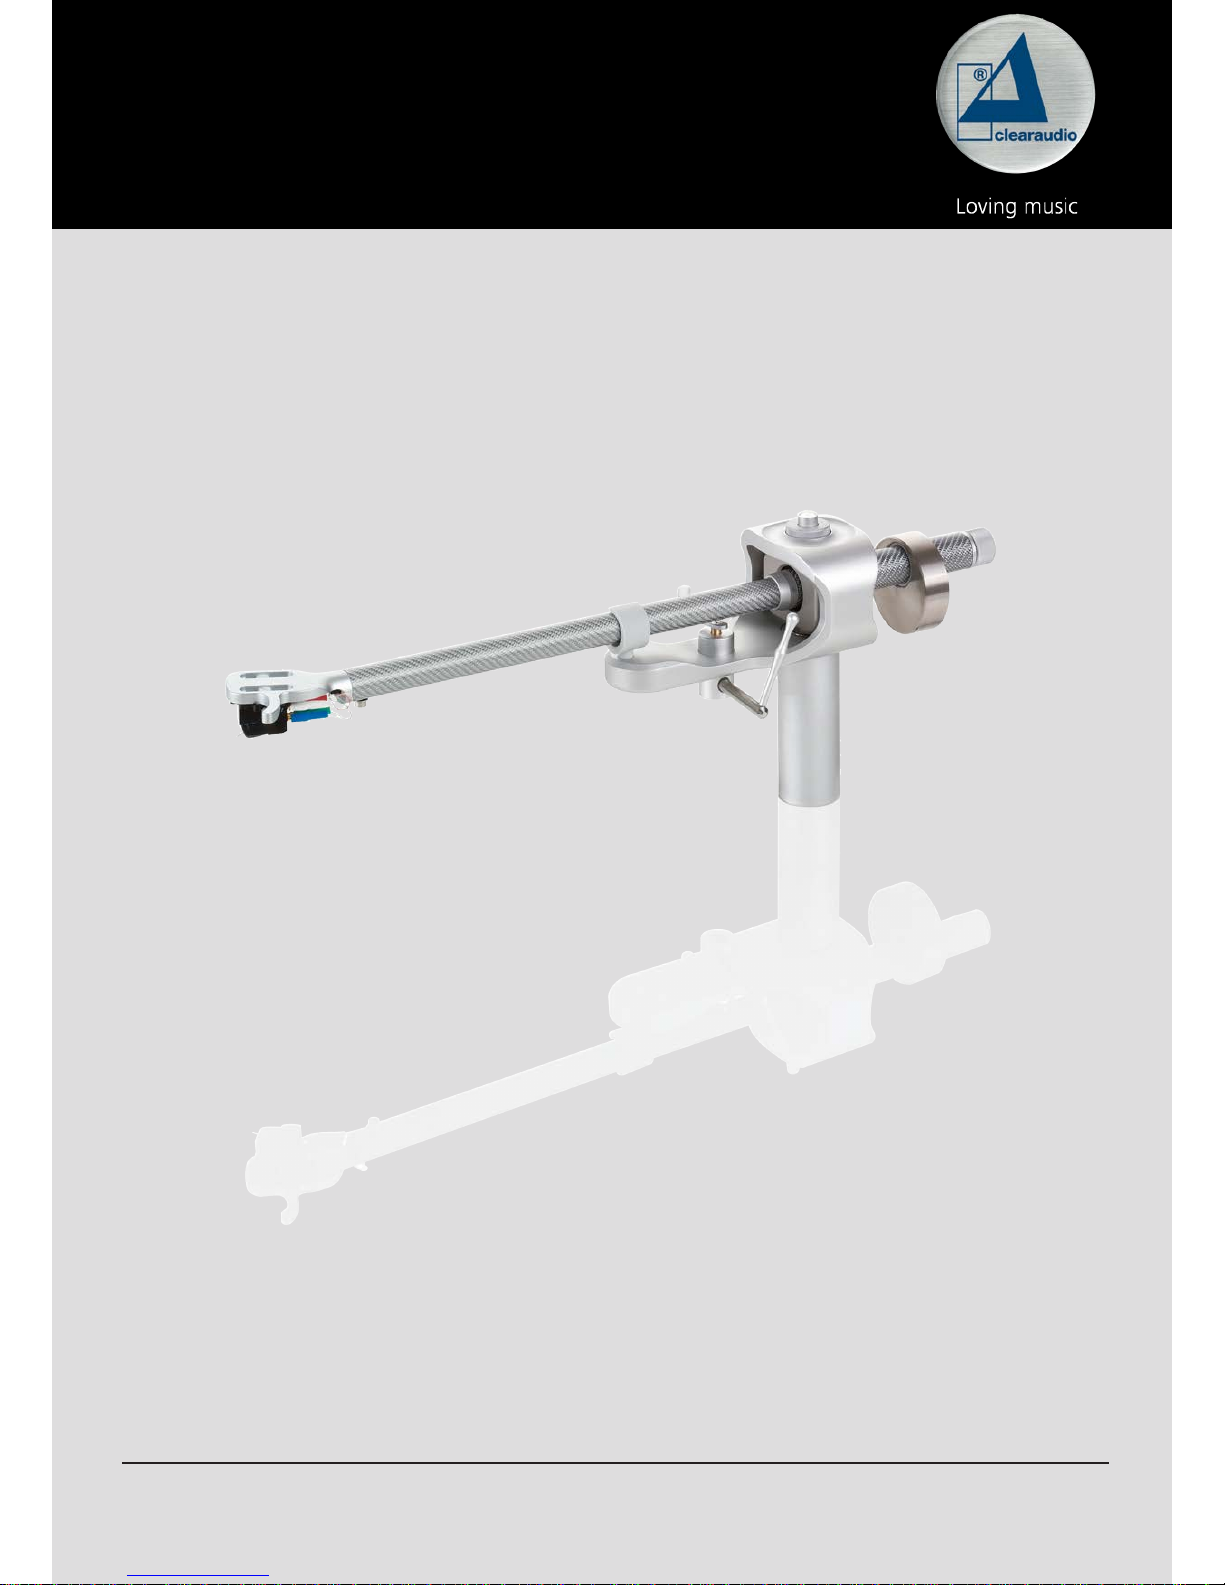
Magnify

User manual / Bedienungsanleitung
2 © clearaudio electronic GmbH, 2018/10
User manual .......................................................2 - 11
Bedienungsanleitung .........................................12 - 21
Dear audio enthusiast,
Congratulations ! You have purchased one of the best radial tonearm`s available in the World of
High-End Audio. The
Magnify
tonearm is manufactured to the highest degree of tolerance and
quality.
This innovative radial tonearm f eatures the from Clearaudio developed unique ball bearing magnet
hybrid technology. This enhances a high quality sound reproduction and in addition many options of
ne adjustments like vertical tracking force (VTF), vertical tracking adjustment (VTA optional) and
the azimuth.
To achieve the full performance and to avoid any damages to this product, please take your time to
get familiar with your Clearaudio
Magnify
tonearm.
Please enjoy listening to music with the
Magnify
tonearm!
Your Clearaudio - team
Warning
Do not expose the equipment to rain or moisture.
Do not remove the cover from the equipment.
Do not insert anything into the equipment through the ventilation holes.
Do not handle the mains lead with wet hands.
No naked ame sources, such as lighted candles, should be placed on the equipment.
Only for use on turntables.
CE-MARKIERUNG

User manual / Bedienungsanleitung
Made in Germany 3
Contents
1. List of components .......................................................4
2.
Magnify
tonearm mounting .........................................5
2.1 Magnify - tonearm with VTA – Lifter: ........................................ 5
2.2
Magnify
tonearm without VTA – Lifter: ..................................... 7
2.3
Magnify
tonearm mounting on a non Clearaudio turntable ...... 8
3.
Magnify
tonearm adjustments .....................................9
3.1 Adjustment of the Tracking force .............................................. 9
3.2 Azimuth adjustment .................................................................. 9
3.3 Anti-skating adjustment ............................................................ 10
3.4 Adjustment of the damping ....................................................... 10
4. Special notes .................................................................11
4.1 Maintenance .............................................................................. 11
4.2 Transportation ........................................................................... 11
4.3 Service ....................................................................................... 11
5. Technical data ...............................................................12
Warranty ...........................................................................24-25
User manual / Bedienungsanleitung
4 © clearaudio electronic GmbH, 2018/10
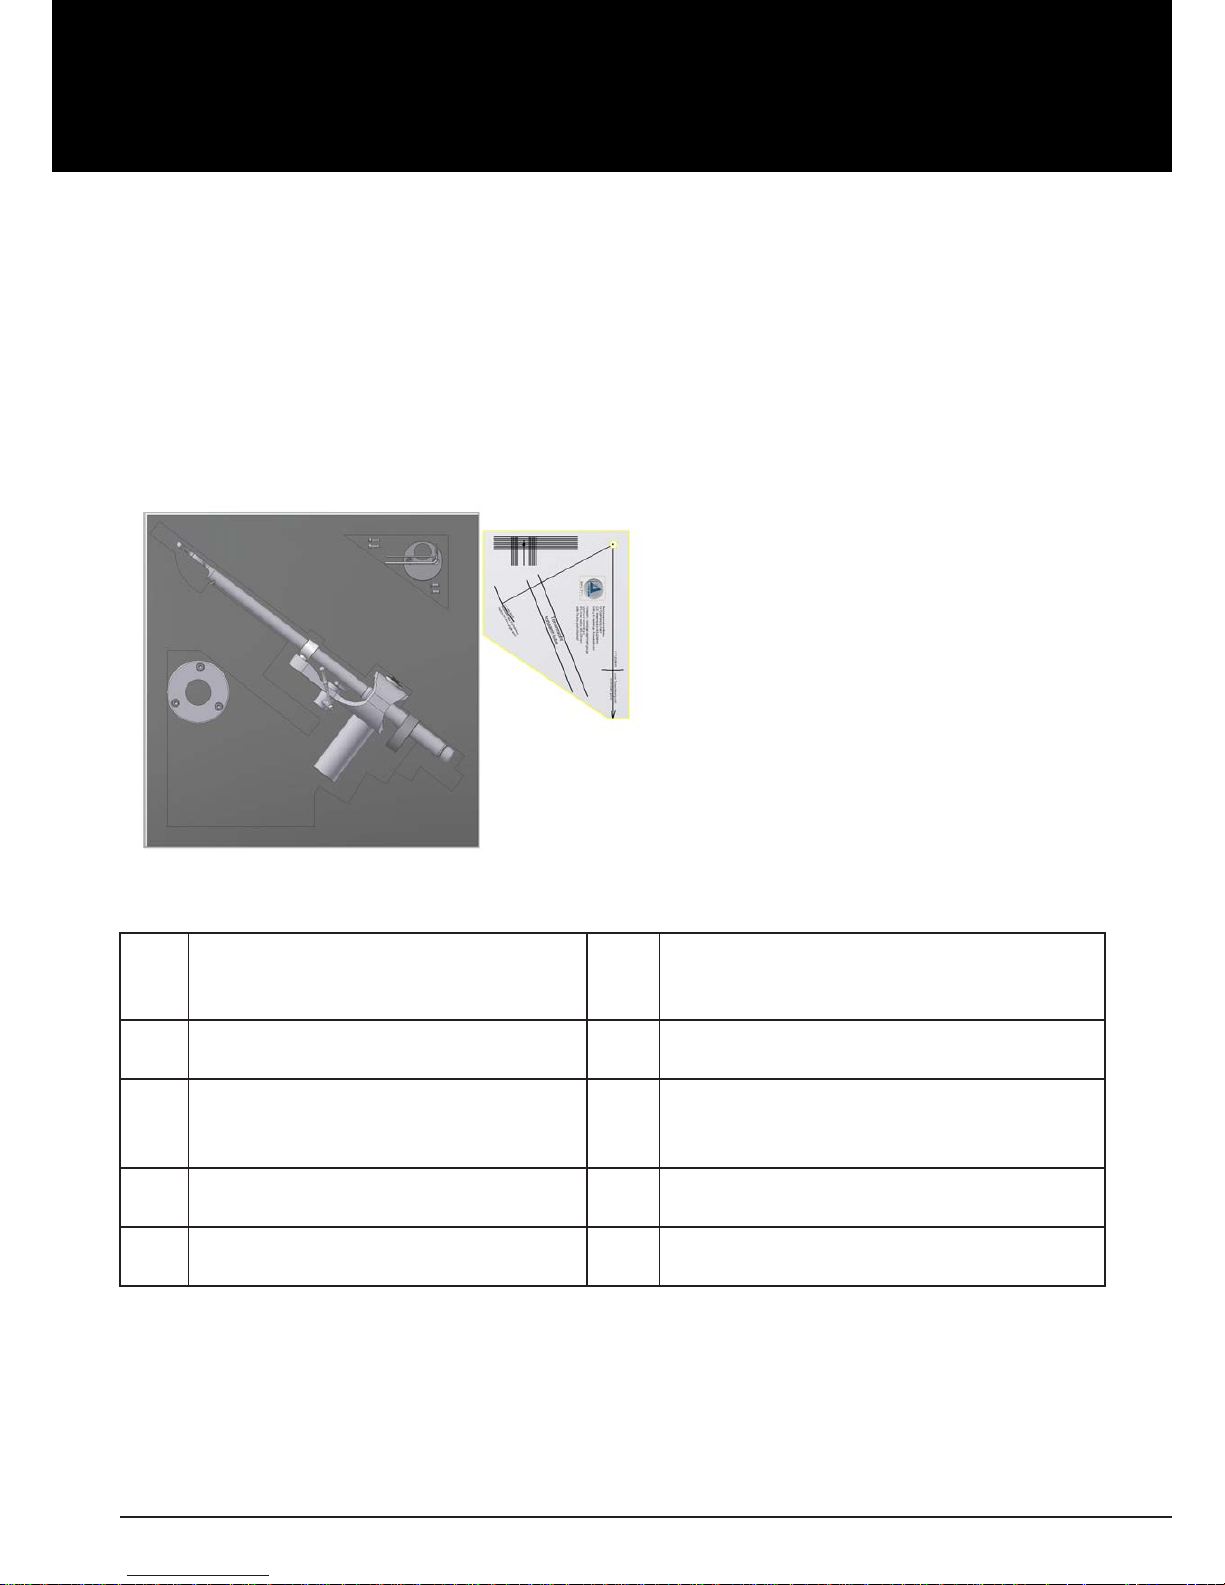
1. List of components
The Clearaudio
Magnify
tonearm is delivered in a customized packing to ensure its safe transport.
Please check the contents as shown in the pictures below:
Magnify
tonearm (optional with VTA-Lifter):
1.
Magnify
tonearm
Magnify
installation base
(VTA-Lifter optional)
6. Paper alignment gauge
2. 3 x Hex wrencch
(# 1,5 , # 2 , # 3)
7. Not shown:
User manual
3. 1 pcs. additional counter weight:
- 36 g
- 2x at head screw 3 x 8
8. Not shown: Warranty card, Clearaudio
quality card, sales return paper
4. Screw driver 9. Not shown:
stainless steel shim
5.
Magnify
tonearm base an screws:
- 3 x M4 x 10
Recommended tools for most precise adjustment:
• Clearaudio
Cartridge alignment gauge
(Art. No: AC005 / IEC)
• Clearaudio
Weight Watcher
(for the adjustment of the cartridge tracking force (Art. No.: AC094)
Available at www.analogshop.de
Pic. 1: List of components
1
2-4
5
6
User manual / Bedienungsanleitung
Made in Germany 5
2.
Magnify
tonearm mounting
Please keep in mind that the following instructions are covering the mount of the
Magnify
tonearm
on any Clearaudio turntable. Installation on other brand turntables is possible, but not covered in
this manual.
Please refer to the turntable manufacturer´s user manual.
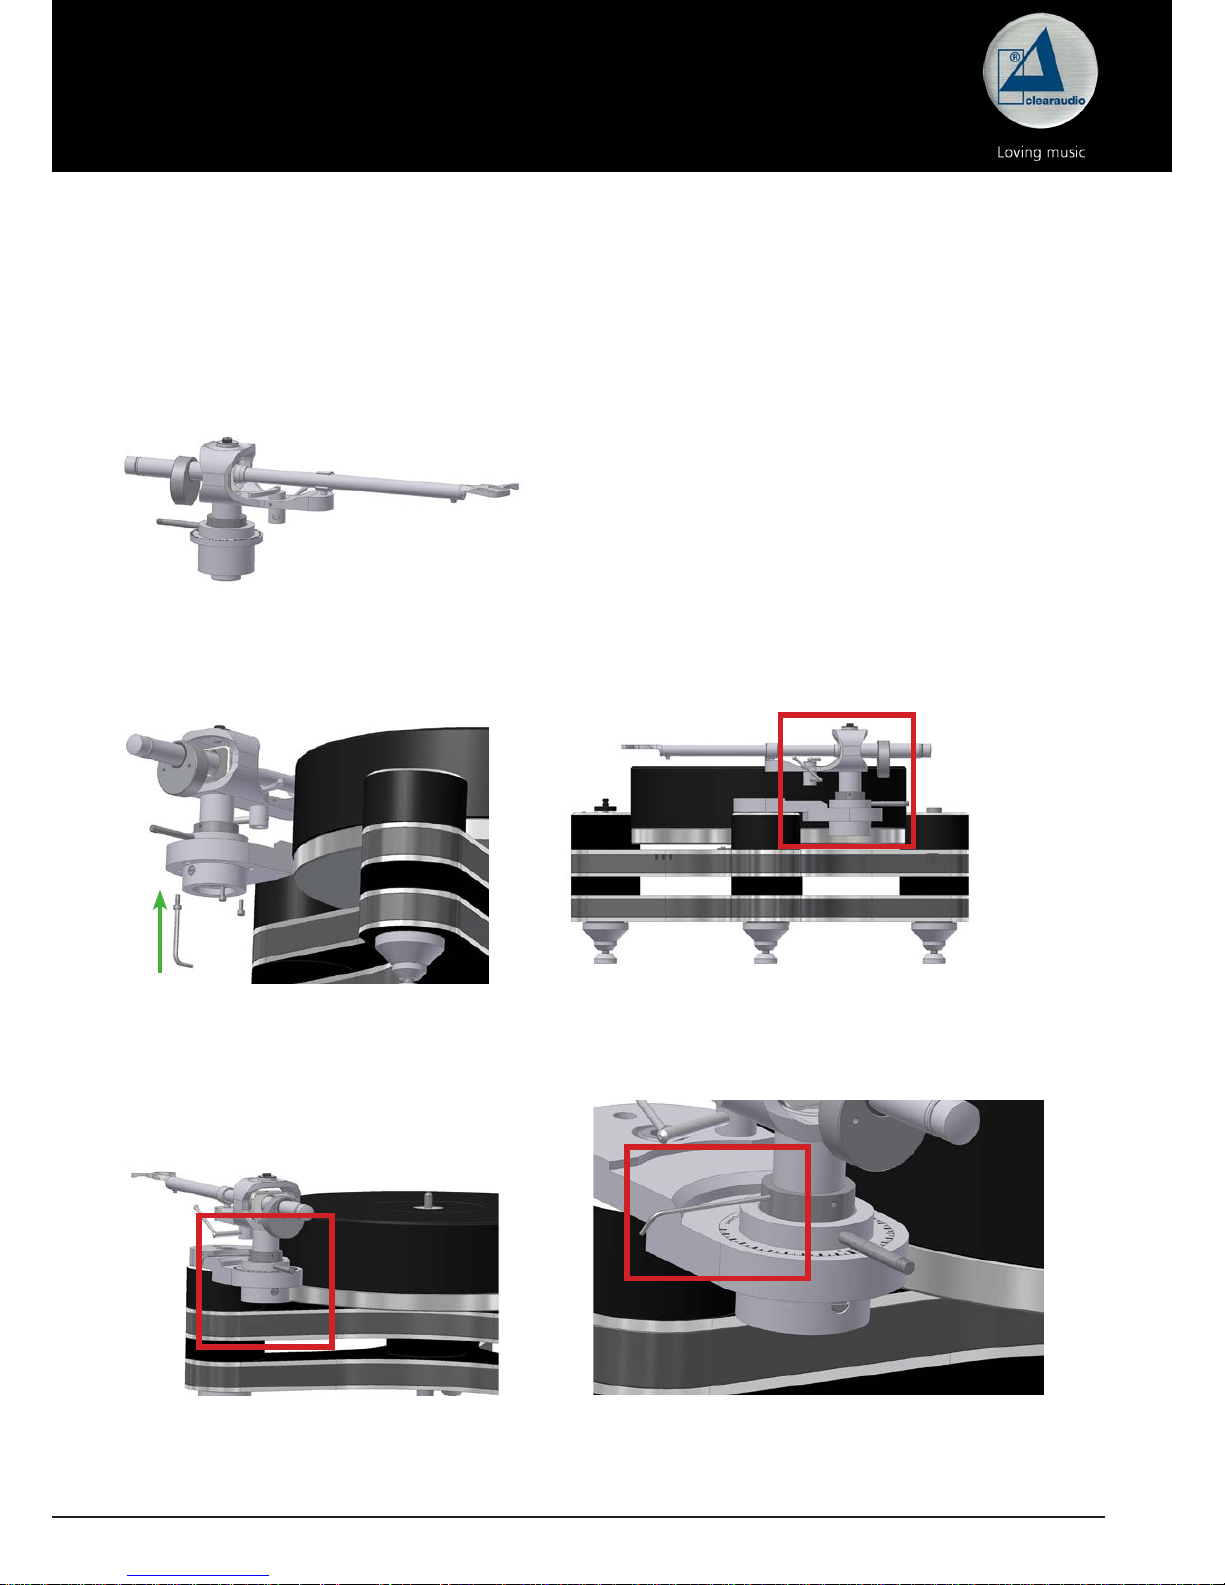
2.1 Magnify - tonearm with VTA – Lifter:
1).
Slide the VTA-Lifter into the drilling of the tonearm base. Lock the VTA-Lifter with the delivered
screws on the bottomside of the tonearm base (pic. 3 ).
Pic. 2:
Magnify
tonearm with VTA-Lifter
Pic. 3: Set up of tonearm base with VTA-Lifter
To pre-adjust the height of the tonearm in the VTA-Lifter, lift the VTA-Lifter up and loosen the screws
and slide the tonearm shaft to the required position.
Pic. 4: Adjustment of the height of tonearm with VTA-Lifter
After adjustment of the tonearm height tighten the screw again. For the nal height adjustment the
cartridge should be mounted.
User manual / Bedienungsanleitung
6 © clearaudio electronic GmbH, 2018/10
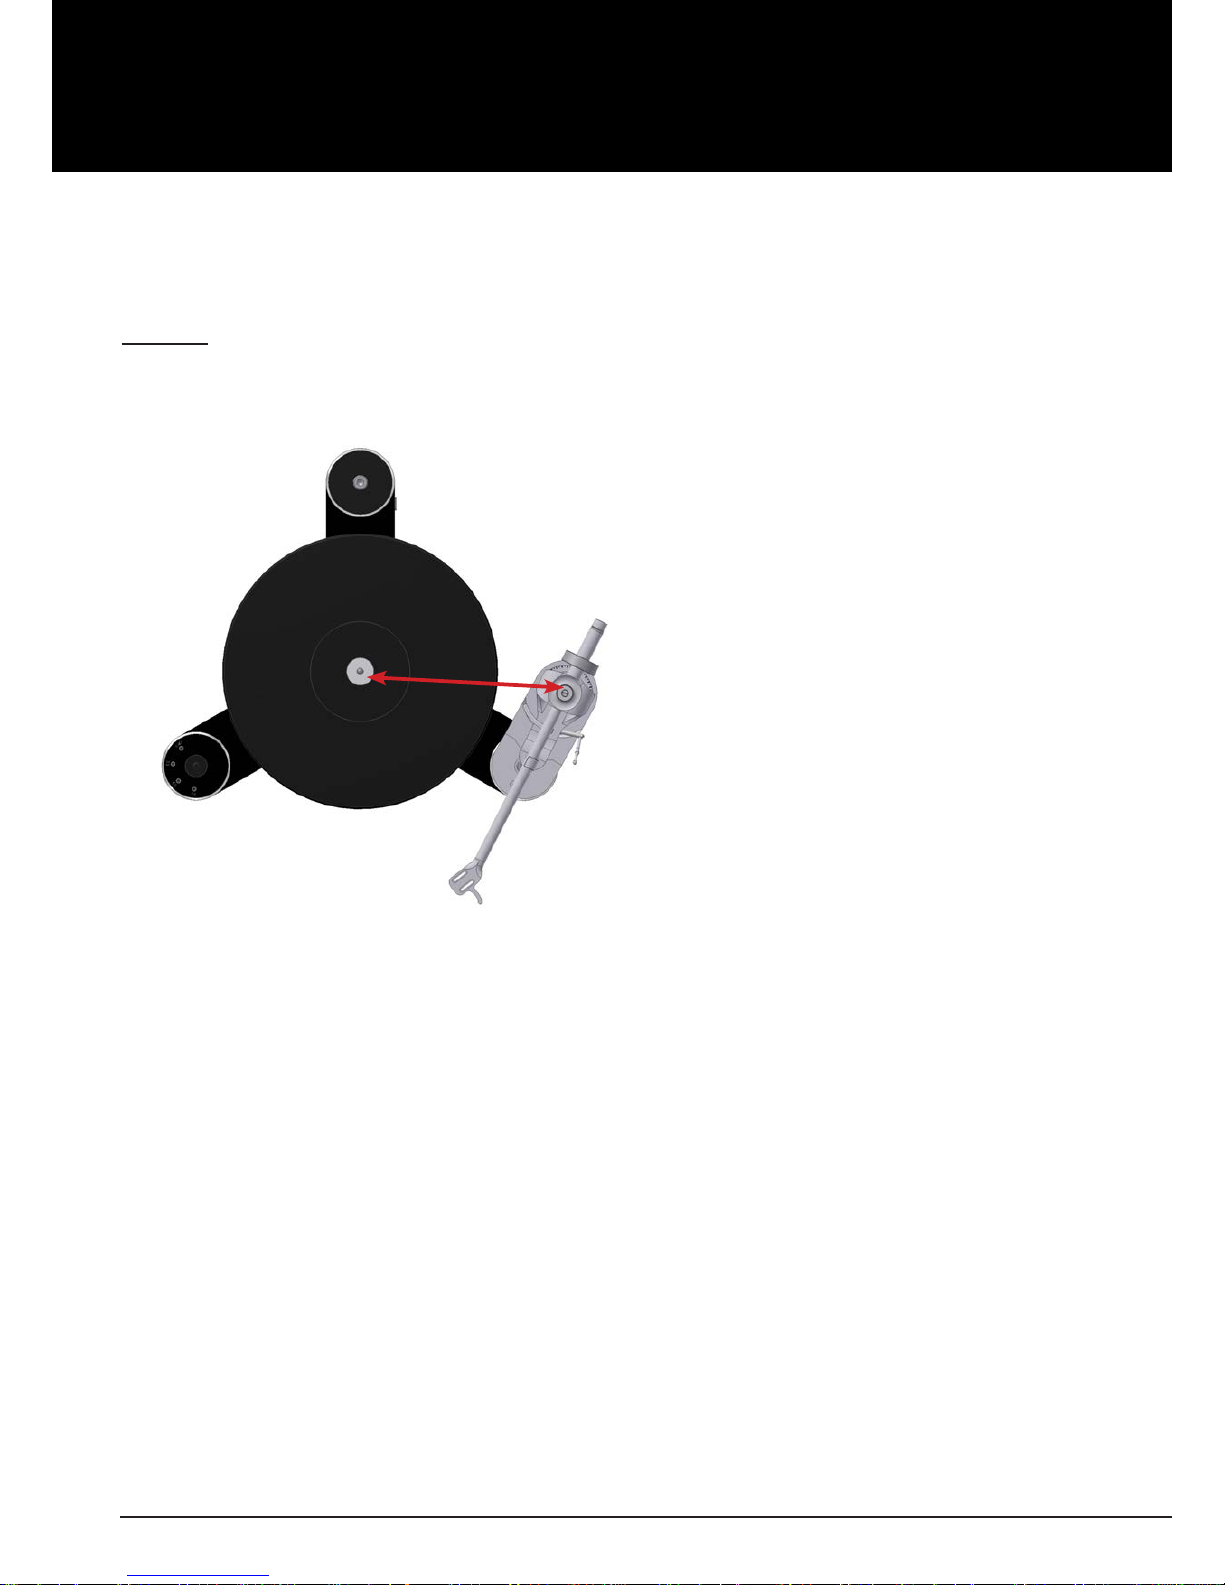
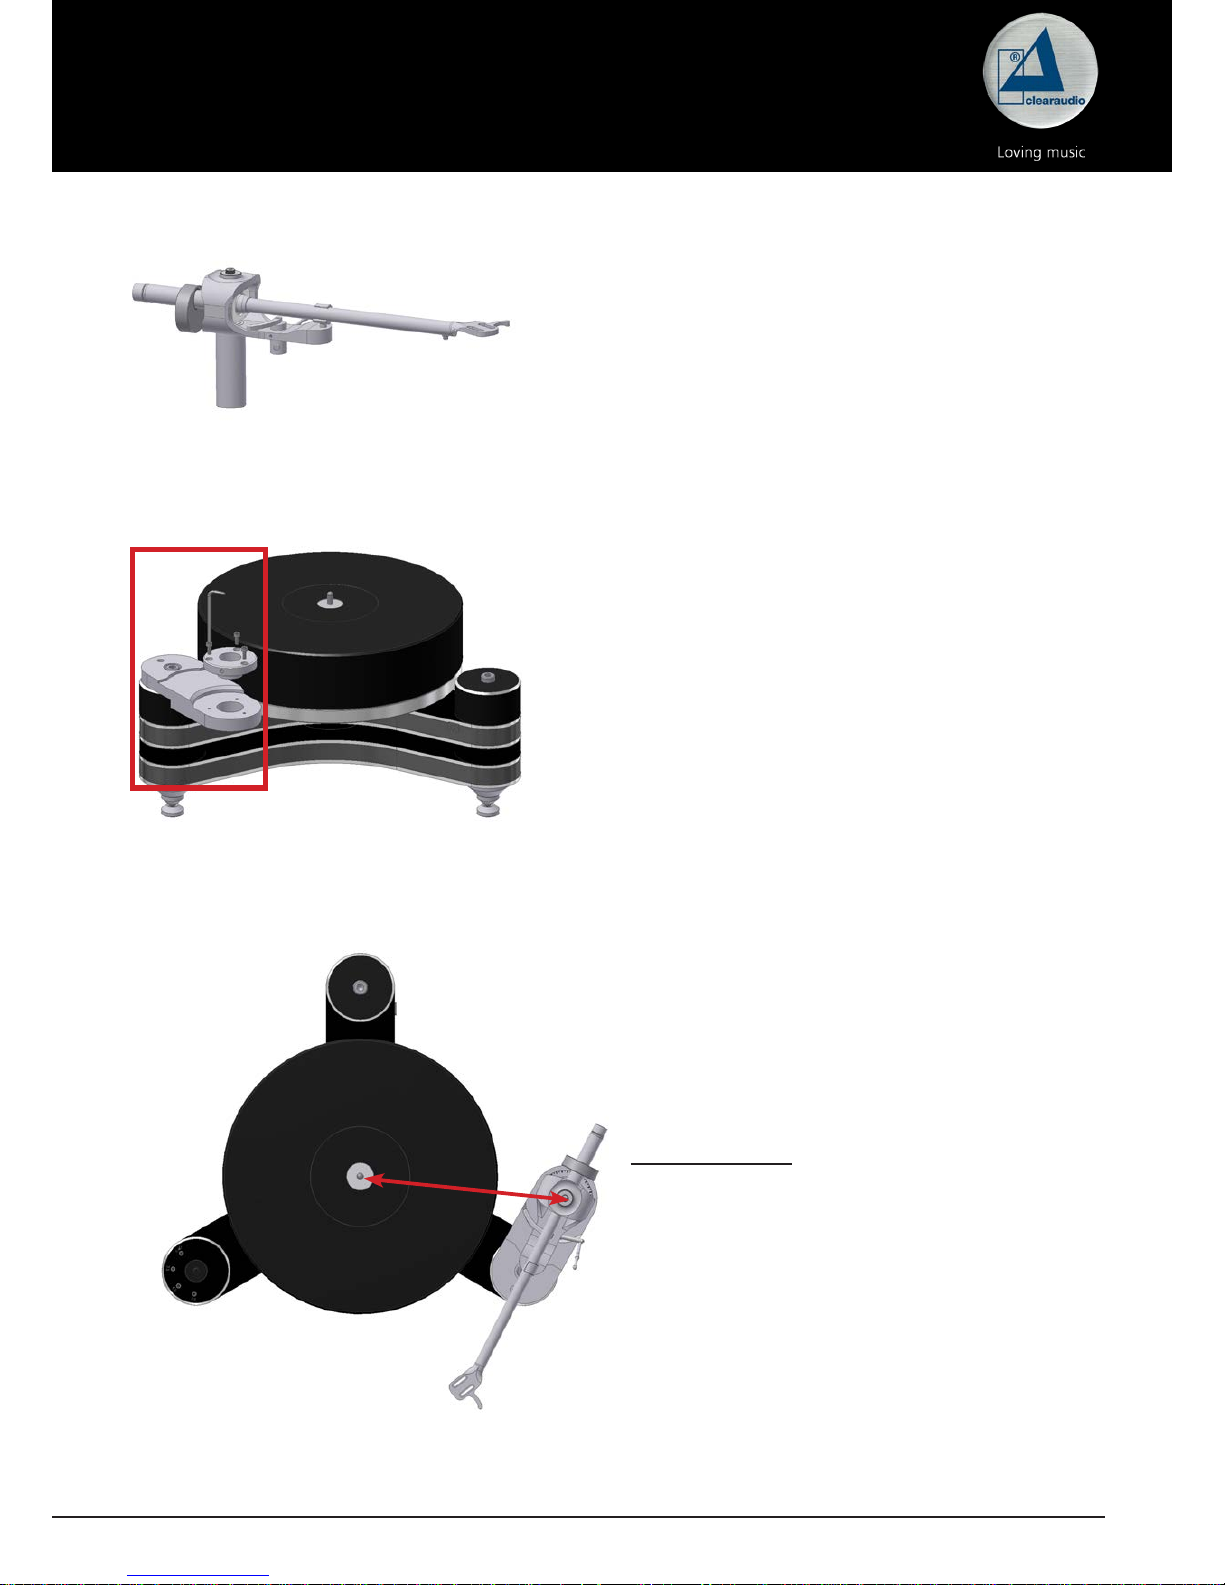
Pic. 5: Distance from spindle to the pivot (222 mm)
2).
To adjust the distance of the tonearm Clearaudio recommends the Clearaudio IEC alignment
gauge (Art. No.: AC005 / IEC; also available at www.analogshop.de).
Make sure that the distance from the spindle to the pivot point (center) of the tonearm is exact
222mm. When moving the armboard in one or another direction you can set the correct distance.
After distance is adjusted, tighten the screw of the armboard.
222 mm
Adjustment of the tonearm height with VTA – Lifter:
Please follow hereby the user manual of the VTA – Lifter.
The height of the tonearm ist adjusted correct, if the upper side of the mounted cartridge is parallel
to the surface of the record (when the cartridge is lifted down).
User manual / Bedienungsanleitung
Made in Germany 7
Pic. 6:
Magnify
tonearm without VTA-Lifter
Pic. 8: Distance from spindle to the pivot (222 mm)
2.2
Magnify
tonearm without VTA – Lifter:
1).
Tighten the mounting plate for the
Magnify
tonearm with the screws onto the mounted tonearm
base. Please take the delivered screws.
Feed the tonearm cable through the mounting plate
and slide the tonearm feet through the drilling of the
mounting plate.
Pic. 7: Placing the tonearmbase
2).
To adjust the pivot of the tonearm Clearaudio
recommends the Clearaudio IEC alignment
gauge (Art. No.: AC005 / IEC; also available at
www.analogshop.de).
Make sure that the distance from the spindle
to the pivot point (center) of the tonearm is
exact 222mm. When moving the armboard in
one or another direction you can set the correct
distance. After distance is adjusted, tighten the
screw of the armboard.
222 mm
User manual / Bedienungsanleitung
8 © clearaudio electronic GmbH, 2018/10
Adjustment of the tonearm height without VTA – Lifter:
By loosen the screws on the side of the intallation tonearm base you can adjust the height of the
tonearm.
The height of the tonearm is adjusted correct, when the upper side of the mounted cartridge is
parallel to the surface of the record (when the cartridge is lifted down).
2.3
Magnify
tonearm mounting on a non-Clearaudio turntable
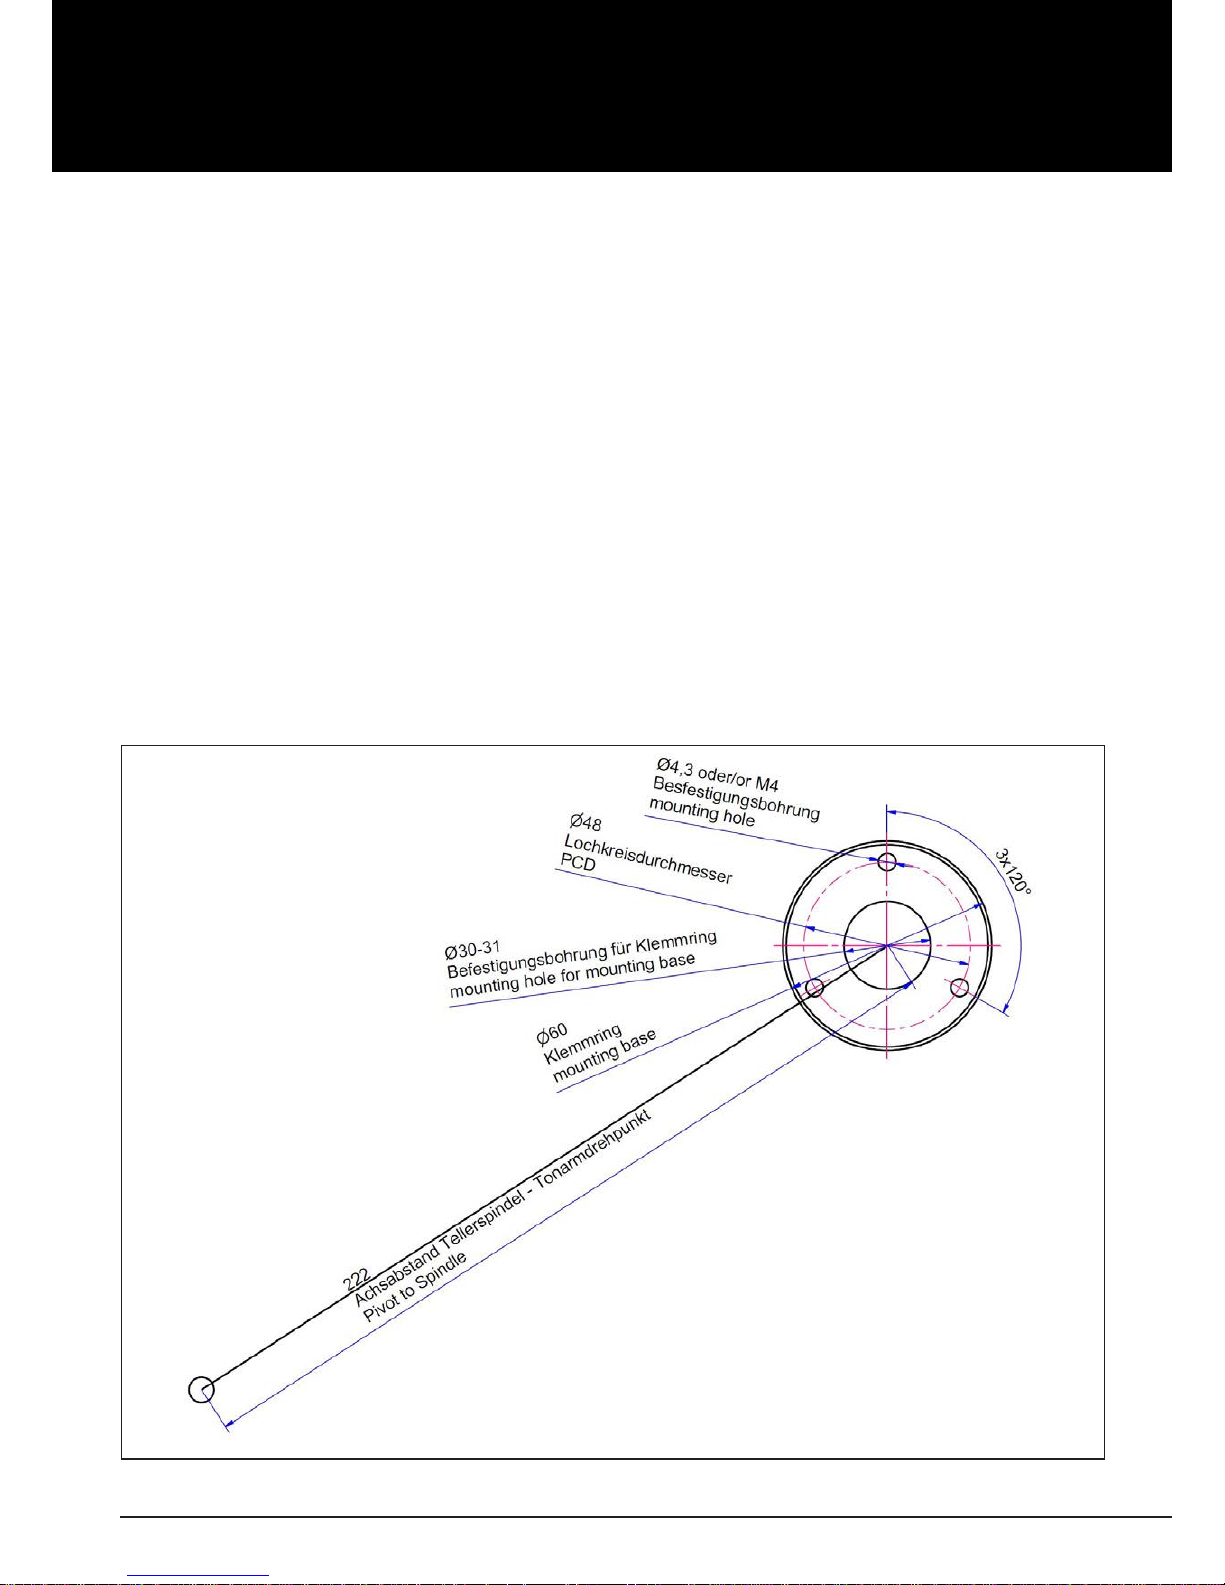
To install the aluminum clamping ring on the turntable chassis, you will need to drill the required
holes. Please refer to the drilling template shown below (Picture 9) for the measurements to mark
the exact drilling holes.
Please be informed, that this drawing is not suitable for use as a mounting tool.
Use a 3.3 mm HSS drill bit, then cut an M4 thread into each hole using an appropriate tap cutting
tool.
If the turntable chassis material is not suitable for cutting threads, please use a 4.5 mm HSS drill bit
to drill the holes through the material. In this case use standard bolts and nuts to x the arm base.
Pic. 9: Dimensions for the correct positions of the boreholes
 Loading...