

Page 1

DVD/MPEG4 Player with HDMI
Dvd-/MPEG4-soitin ja HDMI
SUOMI ENGLISH
Art.no. Model
38-2446 M829
Ver. 200901
www.clasohlson.com
Page 2
ENGLISH
DVD/MPEG4 Player with HDMI
Article number: 38-446 Model: M89
Please read the entire instruction manual before using the product and save it for future reference.
We reserve the right for any errors in the text or images and any necessary changes made to technical data.
If you have any questions regarding technical problems please contact our Customer Services (see address
on reverse).
Safety
Caution:
• Do not open the casing! Certain components within the product’s casing contain dangerous currents.
Contact with these may give you an electric shock.
• The product should only be repaired by qualied service personnel.
• The product should not be disassembled or modied.
• The product is designed for indoor use only.
• Never expose the device to high temperatures, blows, damp or moisture.
• Do not place the product where it could fall into water or other types of liquid. Do not place containers
with liquid on the product e.g. ower vases, coffee cups, zzy drink bottles, etc.
• Do not place the device in a damp, dusty environment or where there are heavy vibrations.
• Shut off the standby function at night or when travelling.
• The standby switch on the front of the device does not disconnect the device from the mains.
To completely turn off the device the switch on the back of the player must be set to the OFF position
or the plug must be removed from the power point.
CLASS 1 LASER PRODUCT
Caution: Do not open the casing! Product contains invisible laser beams which can
cause eye damage. Do not look directly into the laser beam or look directly at it through
an optical instrument.
Page 3
SC A RT
COA XI AL
Cr /P r
S-V ID EO
VID EO
HD MI
Cb /P b
R
L
CE NT
SL
SW
SR
FR
FL
Y
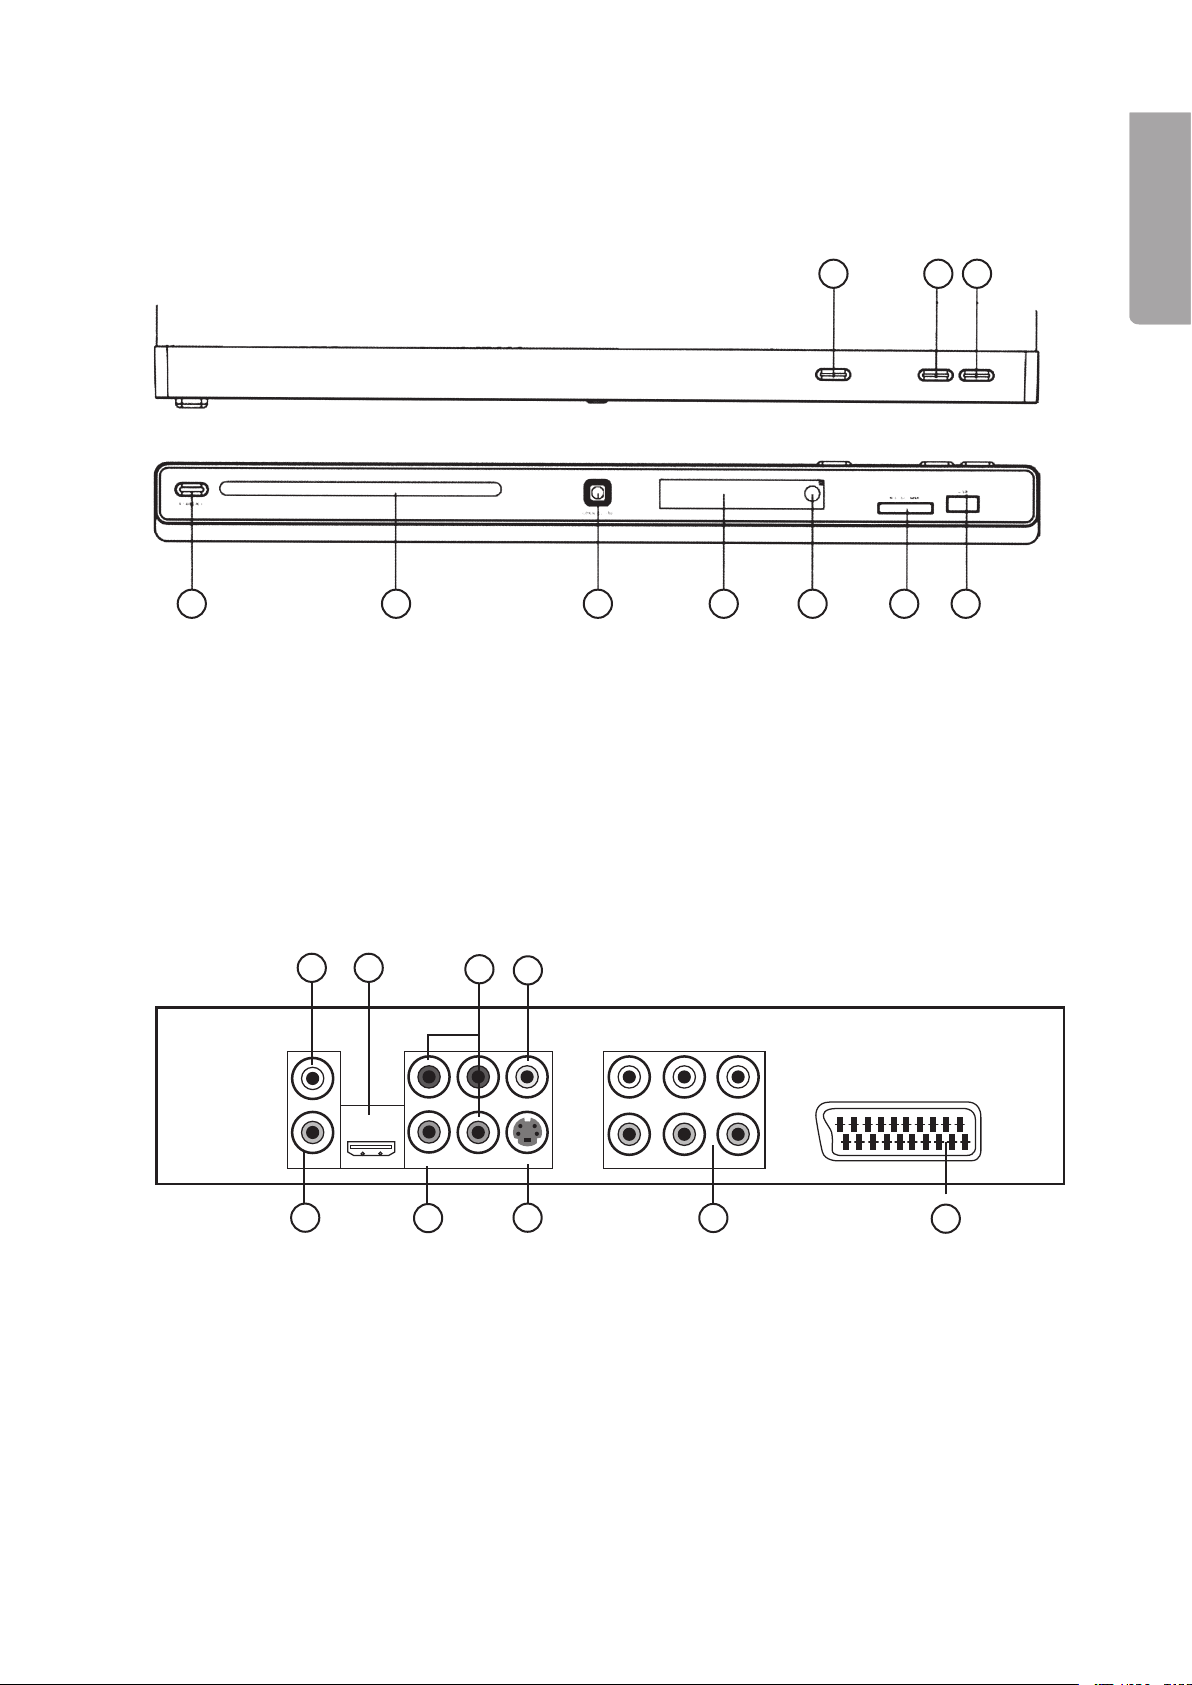
1. Buttons and Functions
1.1 Front panel
1
1. STANDBY (ON/OFF)
2. Disc drawer
3. OPEN/CLOSE
4. Display
5. IR sensor
6 7 8
ENGLISH
3 4 5 9 10
6. PLAY
7. PAUSE
8. STOP
9. MS/SD/MMC – Memory card slot
10. USB – USB memory slot
1.2 Back panel
1 3
1. L – Analogue audio output. Left channel via RCA connection.
2. R– Analogue audio output. Right channel via RCA connection.
3. HDMI output.
4. COAXIAL – Digital audio output. SPDIF via RCA-coaxial connection.
5. Y / Pb/Cb / Pr/Cr – Component video output (3 x RCA).
6. VIDEO – Composite video output. CVBS via RCA connection.
7. S-VIDEO – S-VIDEO output via 4-pin mini-DIN.
8. 5.1 audio output– 5.1 speaker connection.
9. SCART output.
5
6
4
7
8
9
3
Page 4

ENGLISH
1.3 Remote control
1. [ STANDBY ] – Turns the system on/off
2. USB/CARD – Switch between USB
and memory card
3. [ AUDIO ]
4. [ 0-9 ] – Numerical buttons
5. [ CLEAR ] – Clears entry
6. [ SETUP ] – Opens settings menu
7. [
▲ ] – Up
8. [
◄ ] – Left
9. [
▼ ] – Down
10. [
◄◄ ] – Rewind
11. [
►► ] – Fast forward
12. [ STEP ]
13. [
■ ] – Stops playback
14. [ VOL + - ] – Volume up/down
15. [ L/R ]
16. [ N/P ]
17. [ SLOW ] – Slow motion playback
18. [ V-MODE ]
19. [ HD/Res ] (HD mode)
20. [ PROGRAM ] – Programmed playback
21. [ OPEN/CLOSE ] – Opens/closes
disc drawer
22. [ SEARCH ] – Searches for section
23. [ SUBTITLE ] – Selects subtitles
24. [ MENU ] – Selects the DVD disc menus
25. [ TITLE ]
26. [ DISPLAY ]
27. [
► ] – Right
28. [ ENTER ] – Conrms settings
29. [
►►I ] – Next track/chapter
30. [
I◄◄ ] – Previous track/chapter
31. [
►II ] – Starts/pauses playback
32. [ A-B ] – Plays back a section
33. [ REPEAT ] – Activates repeated playback
3 4. [ MUTE ] – Turns off volume
35. [ ANGLE ] – Selects picture angle
36. [ PBC ]
37. [ RETURN ]
38. [ ZOOM ] – Increases picture size
1
3
4
5
6
7
8
9
10
11
1
13
14
15
16
17
18
19
0
1
3
4
5
6
7
8
9
30
31
3
33
34
35
36
37
38
4
Page 5

1.4 Compatible media types
DVD: Single/double sided with one or two layers: DVD+R/DVD+RW, DVD-R/DVD-RW
CD-DA (CD-Digital Audio)
MP3
MPEG4
CD-R / CD-RW
Photo CD (JPEG)
Memory cards: USB memory, MS (Memory Stick), SD (Secure Digital), MMC (Multimedia Card)
Region codes
DVD players and DVDs are equipped with region codes. If the DVD’s code is not the same as the player’s
it cannot be played. If you should attempt to play a disc with mismatched codes the “WRONG REGION”
message will appear on the display.
Region codes Region
1 Canada, USA
2 Europe, Japan, Middle East (incl. Saudi Arabia, Egypt, Iran, South Africa)
ENGLISH
3 East Asia (incl. Hong Kong, Taiwan, South Korea), Southeast Asia
4 Australia, Caribbean, Central- and South America, Mexico, New Zealand
5 Africa, former Soviet states, India, North Korea, Pakistan
6 China
2. Care
2.1 Cleaning
• Always unplug from the wall socket before cleaning.
• Make sure that no liquids penetrate the player.
• Use only a damp cloth when cleaning the exterior.
• Never use strong solvents or detergents.
2.2 Caring for discs
• Hold the disk by the hole and edge when handling in order to avoid ngerprints and dirt
from contaminating the disk.
• Do not bend the disk or expose it to direct sunlight or heat.
• Store the discs upright in their cases.
• Clean the disks with soft dry cloth starting from the centre and working outwards.
Never use solvents or strong detergents.
5
Page 6
SC A RT
COA XI AL
Cr /P r
S-V ID EO
VID EO
HD MI
Cb /P b
R
L
CE NT
SL
SW
SR
FR
FL
Y
3. Preparations
3.1 Unpacking the product
Contents
ENGLISH
• DVD Player
• Remote control
• Instruction manual
3.2 Inserting the remote’s batteries
1. Remove the battery cover.
2. Insert 2 x AAA/LR03-batteries (not included) in the battery compartment.
3. Ensure the batteries are inserted correctly according to the markings in the battery compartment.
Replace the battery cover.
N.B.
• Always change both batteries simultaneously.
• Always remove batteries from the remote if it will not be used for an extended period in order to avoid
possible battery leakage.
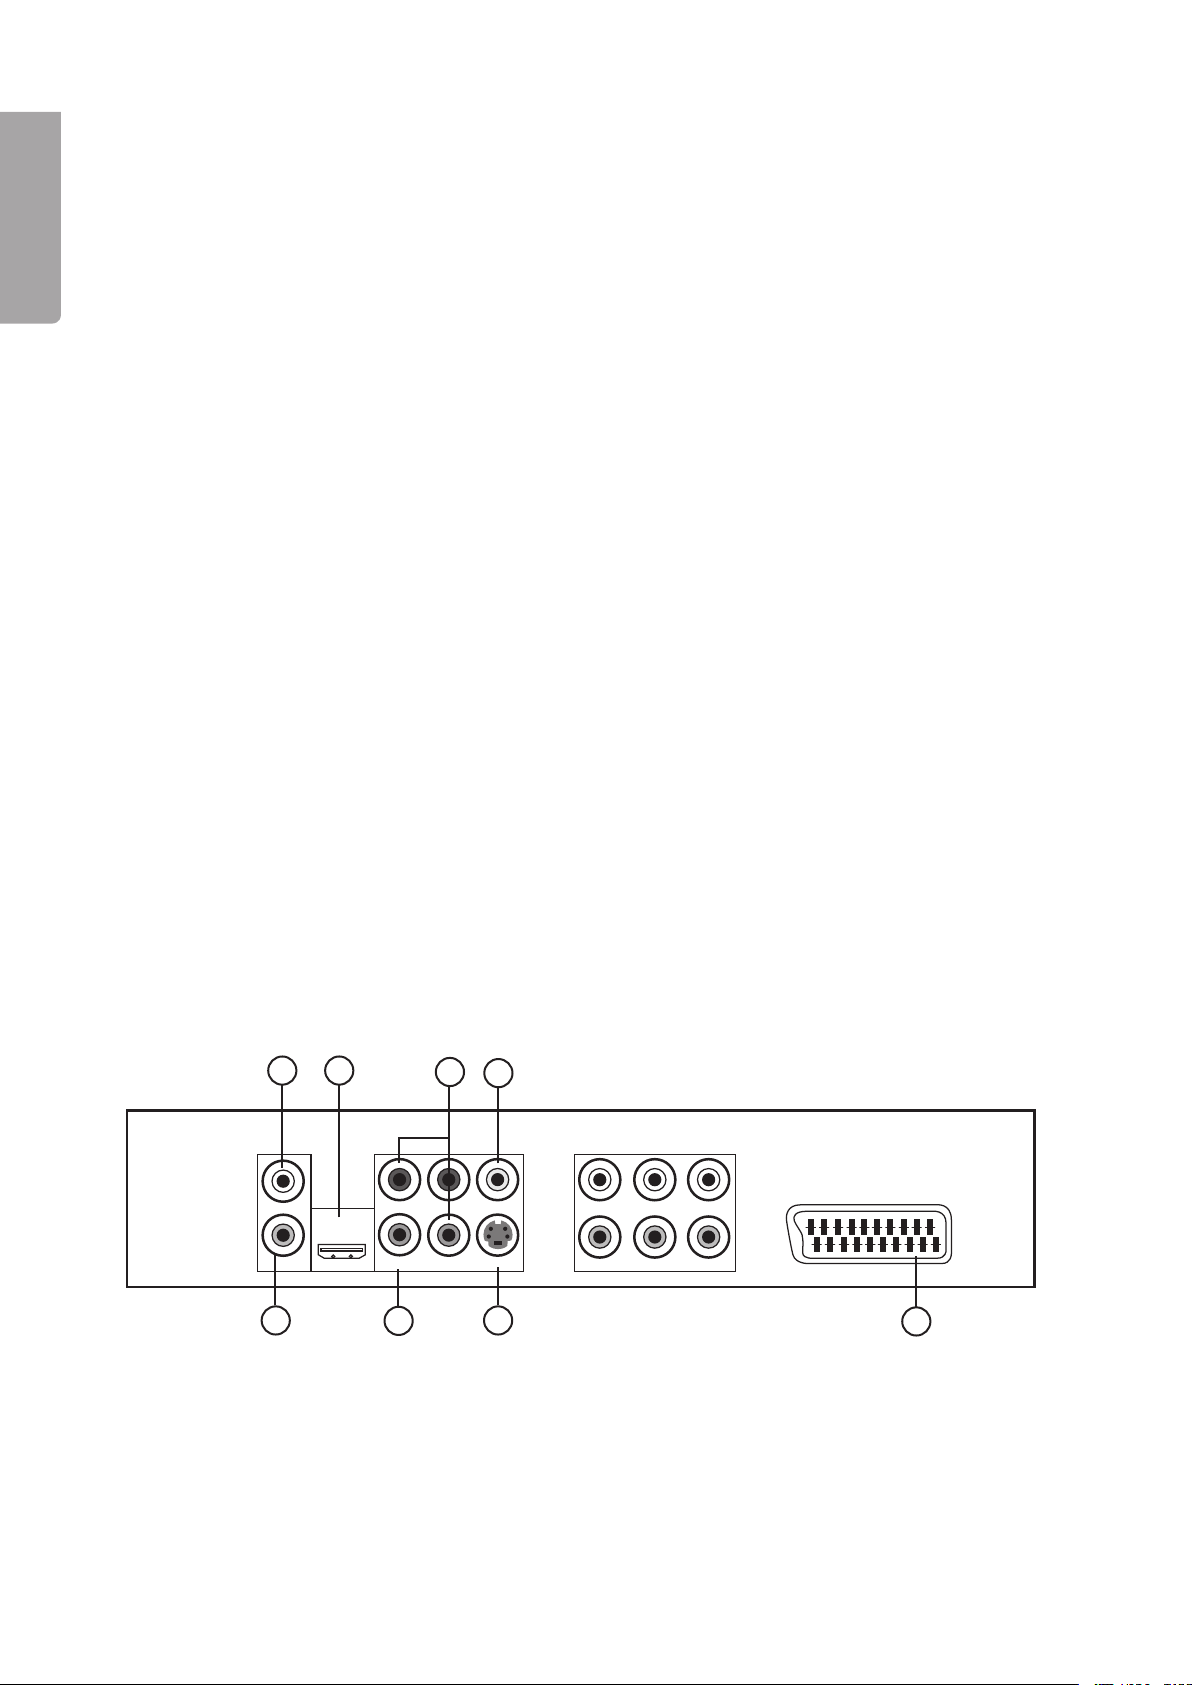
4. Connections
When transferring images by cable there are different signals and connections to choose from.
N.B.
• Turn off the DVD player and TV before making any connections.
• Read your TV or stereo manual before connecting.
4.1 Connecting to the TV
The DVD player can be connected to the TV in several ways depending on the connections on your TV.
1 3
5
6
4
7
9
6
Page 7

The most common and simplest connection is with a SCART cable
SCART (9) Both audio and video are transferred to the TV. Connect a SCART cable (not included)
between the SCART output on the DVD player and the TV’s SCART input.
• The cable transfers both audio and video.
• Select the TV’s AV channel.
• Press the V-MODE button on the remote to change the DVD player’s outgoing signal for
the best possible signal for your particular TV.
• For most users this type of installation will sufce.
ENGLISH
Other connections
Besides the SCART cable the DVD player can be connected in several different ways. Below is a short
description of the different DVD signal formats.
Important. In the below example we use a TV for connecting the DVD player to but it works just as well to
connect the player to a projector, plasma TV or other video displaying equipment with similar connections.
Refer to your TV’s instruction manual about which signals and connections are possible for you to use.
We refer to different image qualities which are theoretical and can differ greatly in practice since the various
combinations of different products can give inconsistent results.
PAL and NTSC are different TV systems. NTSC is used mostly in the USA. PAL is normally used in
Western Europe.
Image quality can differ depending if the DVD is recorded in PAL or NTSC and if the DVD player is set to
PAL or NTSC.
ENGLISH
Most TVs and DVDs in the Nordic countries are designed for PAL. This is preferable because this gives a
higher resolution than NTSC.
HDMI (3) – Digital connection for the transferring of audio and video. Connects the TV to the HDMI input.
Composite video (6) and L-R (1)(2) (analogue audio output).
The composite video output must be activated in the menu.
• Composite video signals (CVBS) can be handled by all TVs. The easiest solution is to use a SCART
cable since SCART is capable of transferring both video (composite video) and audio. Composite video
can even be sent by a separate cable from the DVD player’s composite video output on the back panel.
• The cable is connected to the equivalent input on the TV (normally Video In).
• Press the V-MODE button on the remote to change the DVD player’s outgoing signal for the best possible
signal for your particular TV.
S-VIDEO (7) and L-R (1)(2) (analogue audio output). S-video (Y/C) gives a higher image quality than
composite video and is preferable if your TV supports this type of signal. (Refer to your TV manual.)
• S-VIDEO is connected via a 4-pin mini-DIN (normally called an s-video contact). The DVD player’s
settings may possibly need to be changed in the menu in order to send an S-video signal.
• Press the V-MODE button on the remote in order to change the DVD player’s outgoing signal to S-VIDEO.
N.B. If your TV does not support S-VIDEO the picture will be black and white.
•
Component video (5) and L-R (1)(2) (analogue audio output). Component video (YPbPr) is the highest
image quality that the DVD player can give and is preferred if your TV has support for component video.
The DVD player can send a component signal as interlace or as progressive scan. Refer to your TV manual
to see if interlace or progressive scan is supported.
• Component video signals uses the three RCA contacts on the DVD player’s back panel and is connected
to the equivalent input on the TV.
• Press the V-MODE button on the remote in order to change the DVD player’s outgoing signal between
interlace and progressive scan.
7
Page 8
Language
Language : English
Subtitle : Swedish
DivX Subtitle : Central European
Audio : Swedish
DVD Menu : Swedish
Aspect Ratio : 16:9
View Mode : Original
TV System : PAL
Video Out : RGB
HD Resolution : Auto
Video
Audio
Rating
Misc
Language
Video
Audio
Rating
Misc
SC A RT
CO AXI AL
Cr /P r
S- VID EO
VI DEO
HD MI
Cb /P b
R
L
CE NT
SL
SW
SR
FR
FL
Y
4.2 Connecting to an amplier
The DVD player can be connected to an amplier in the following ways:
Connection alternatives:
• Stereo via L-R (1)(2)
ENGLISH
• Surround sound via the 5.1-outputs (8).
• Digital audio output via COAXIAL (4).
1
8
4
Caution!
Never connect an amplier to the digital audio output if it does not have Dolby Digital AC3 or a DTS decoder.
This can damage the amplier, speakers, or cause hearing damage during DVD playback.
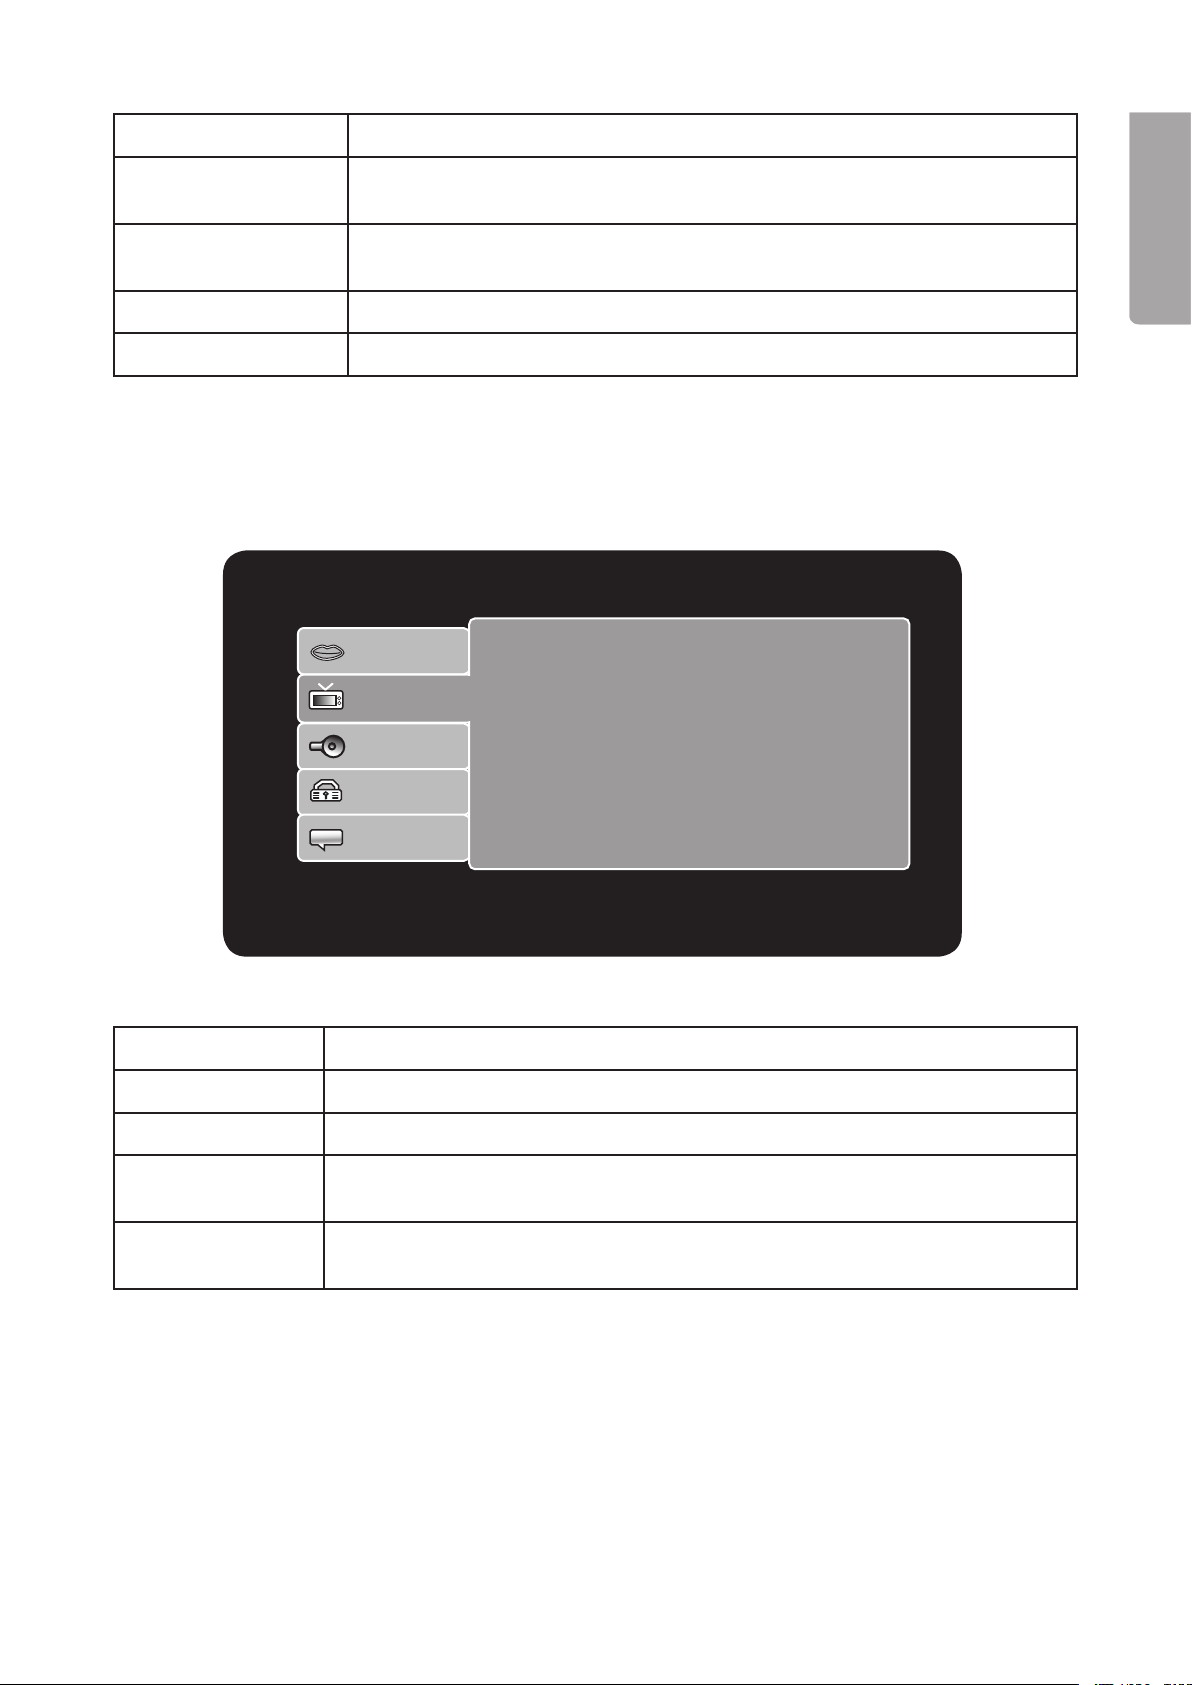
5. System settings
To open the menu:
1. Press SETUP on the remote.
2. Use the arrow keys to navigate through the menus.
3. Press ENTER to conrm your settings.
nish and exit the menu: Press SETUP again.
4. To
N.B. In order to have access to all menus your DVD player must be in stop mode i.e. the video must be
completely stopped by pressing the stop button twice.
5.1 LANGUAGE SETUP
8
Page 9
Aspect Ratio : 16:9
View Mode : Original
TV System : PAL
Video Out : RGB
HD Resolution : Auto
Language
Video
Audio
Rating
Misc
Language Menu languages: English, Swedish, Norwegian, Finnish or Danish.
Subtitles Subtitle language: English, Swedish, Norwegian, Finnish, Danish,
Auto or OFF.
DivX subtitles MPEG4 Setting for the alphabet used for subtitles (only for XviD)
Western European, Turkish, Central European or Cyrillic.
Audio Speech settings: English, Swedish, Norwegian, Finnish or Danish.
DVD Menu DVD language settings: English, Swedish, Norwegian, Finnish or Danish.
E
5.2 VIDEO SETUP
Changes video settings.
ENGLISH
TV Form Aspect ratio: 16:9 or 4:3
Display settings Fill, Original, Auto Fit or Pan Scan (only for DVD)
TV System Selects TV system: NTSC, PAL or Auto
Video Out Selects the outgoing signal for the video output: S-Video, Component, RGB,
P-Scan or HD
HD Resolution Selects resolution (Only valid if you have selected HD as Video Out). Auto,
480/576p, 720p, 1080i or 1080p
9
Page 10
ENGLISH
Language
Language : English
Subtitle : Swedish
DivX Subtitle : Central European
Audio : Swedish
DVD Menu : Swedish
Aspect Ratio : 16:9
View Mode : Original
TV System : PAL
Video Out : RGB
HD Resolution : Auto
Bass Management : Off
Front Speakers : Large
Center Speakers : None
Surround Speakers : None
Subwoofer : None
Test Tones : Off
Center Delay : No Delay
Surr. Delay : No Delay
Digital Output : PCM
Video
Audio
Rating
Misc
Language
Video
Audio
Rating
Misc
Language
Video
Audio
Rating
Misc
Language
Video
Audio
Rating
Misc
Language
Language : English
Subtitle : Swedish
DivX Subtitle : Central European
Audio : Swedish
DVD Menu : Swedish
Aspect Ratio : 16:9
View Mode : Original
TV System : PAL
Video Out : RGB
HD Resolution : Auto
Bass Management : Off
Front Speakers : Large
Center Speakers : None
Surround Speakers : None
Subwoofer : None
Test Tones : Off
Center Delay : No Delay
Surr. Delay : No Delay
Digital Output : PCM
Video
Audio
Rating
Misc
Language
Video
Audio
Rating
Misc
Language
Video
Audio
Rating
Misc
Language
Video
Audio
Rating
Misc
Parental Control : 1. Kid Safe
Language
Video
Audio
Rating
Misc
Set Password
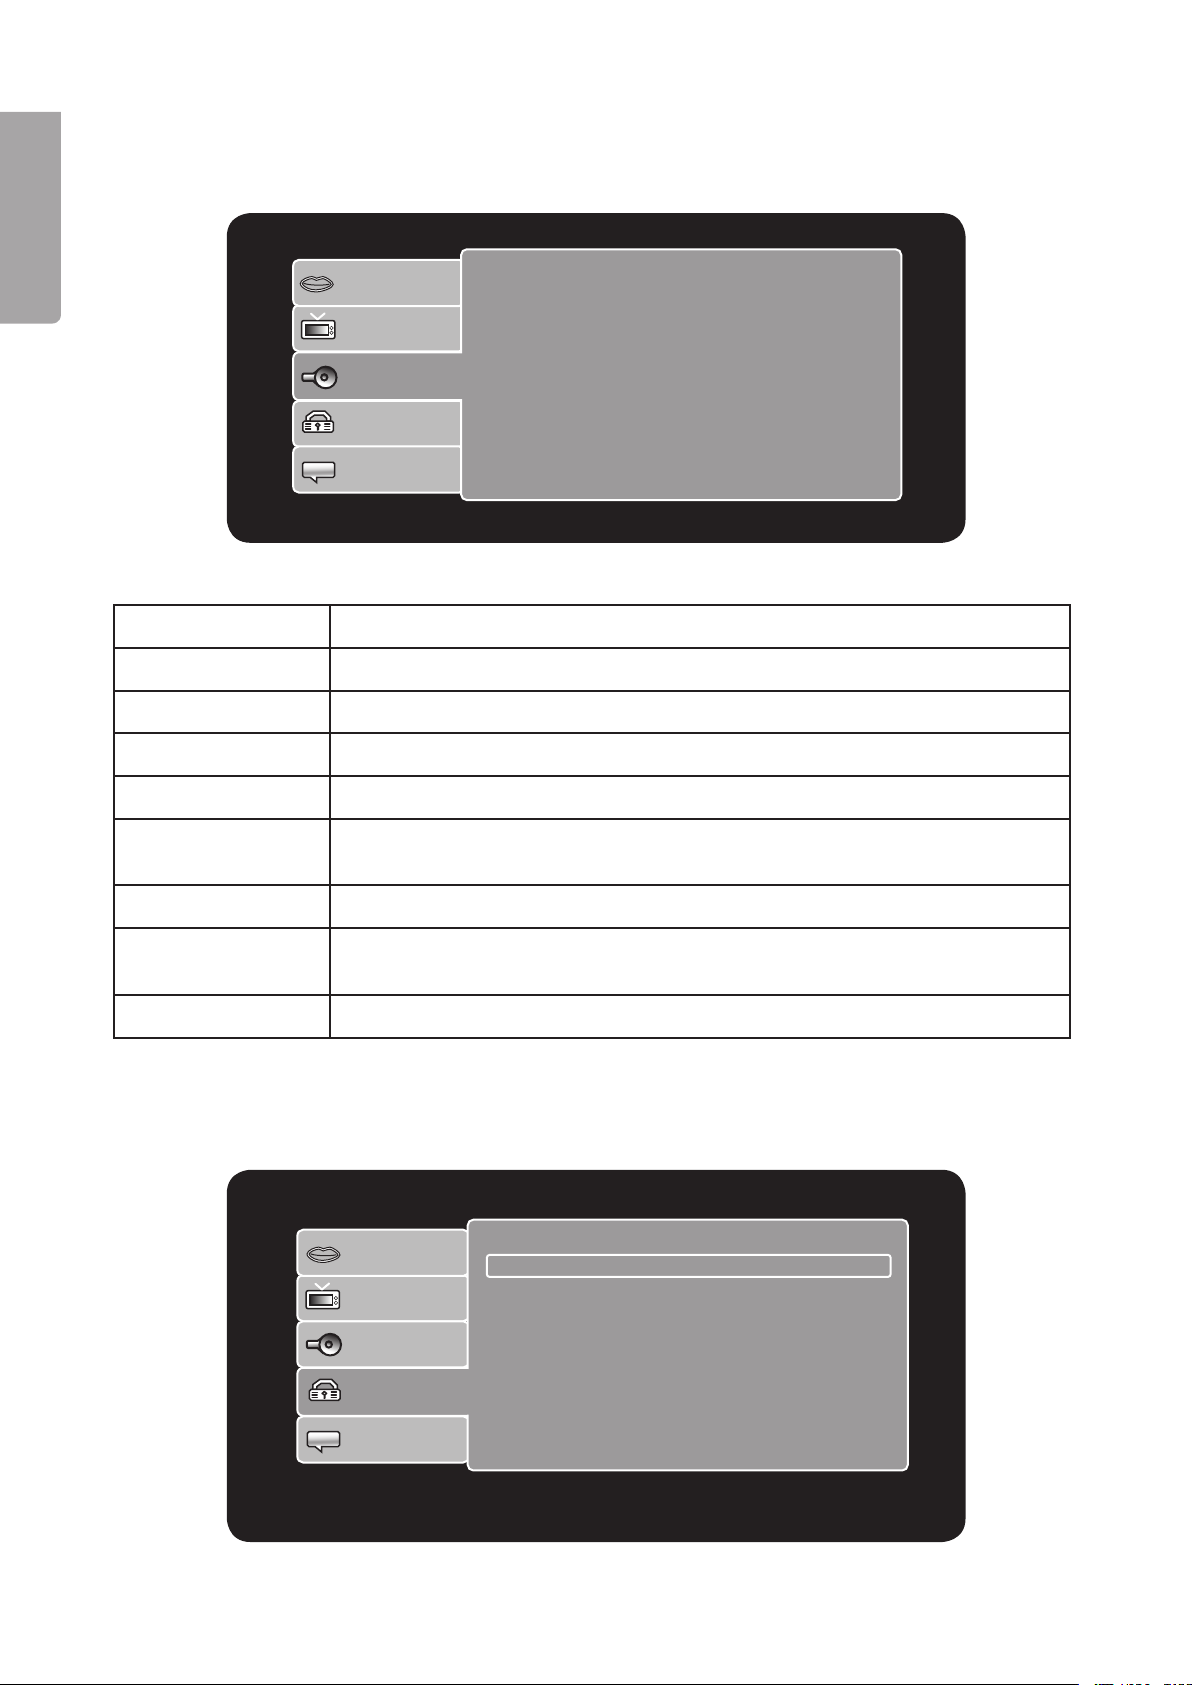
5.3 AUDIO SETUP (Audio settings)
Changes audio settings.
Bass management Activates or deactivates bass control: ON or OFF
Front speakers Selects the large or small front speakers: Large or Small
Centre speaker Selects the type of centre speaker: Large, Small or None
Surround speakers Selects type of surround speakers: Large, Small or None
Subwoofer Selects type of subwoofer: None or Current
Test Tones Sends a short test signal to the selected channel: Off, Left, Right, Centre,
Left Surr, Right Surr and Subwoofer
CNTR DELAY Adjusts the delay between the speakers: No delay, 0.3 – 0.6 – 1 – 1.4, etc.
SURR. DELAY Adjusts the delay between the centre and back speakers:
No delay, 1 – 2 – 3 – 4, etc.
Digital output Selects digital outputs: OFF, PCM or RAW
5.4 RATING (Settings for parental control)
10
Page 11
Aspect Ratio : 16:9
View Mode : Original
TV System : PAL
Video Out : RGB
HD Resolution : Auto
Language
Video
Audio
Rating
Misc
Language
Video
Audio
Rating
Misc
Use Default Settings
A. Parental control – Selects the restriction level to prevent children from viewing inappropriate lms.
Select between: Kid safe, G, PG, PG-13, PG-R, R, NC-17 or Adult.
B. Set Password: The preset password is set to 8888.
Changing the password:
1. Highlight Parental control.
ENGLISH
2. Press
► to open a submenu and select Set Password.
3. Press ENTER, enter the password using the remote (The preset password is
4. Highlight
Set Password.
5. Press ENTER.
6. Enter a new password at
Press ENTER in order to conrm the new password for Parental control.
7.
New Password.
ENGLISH
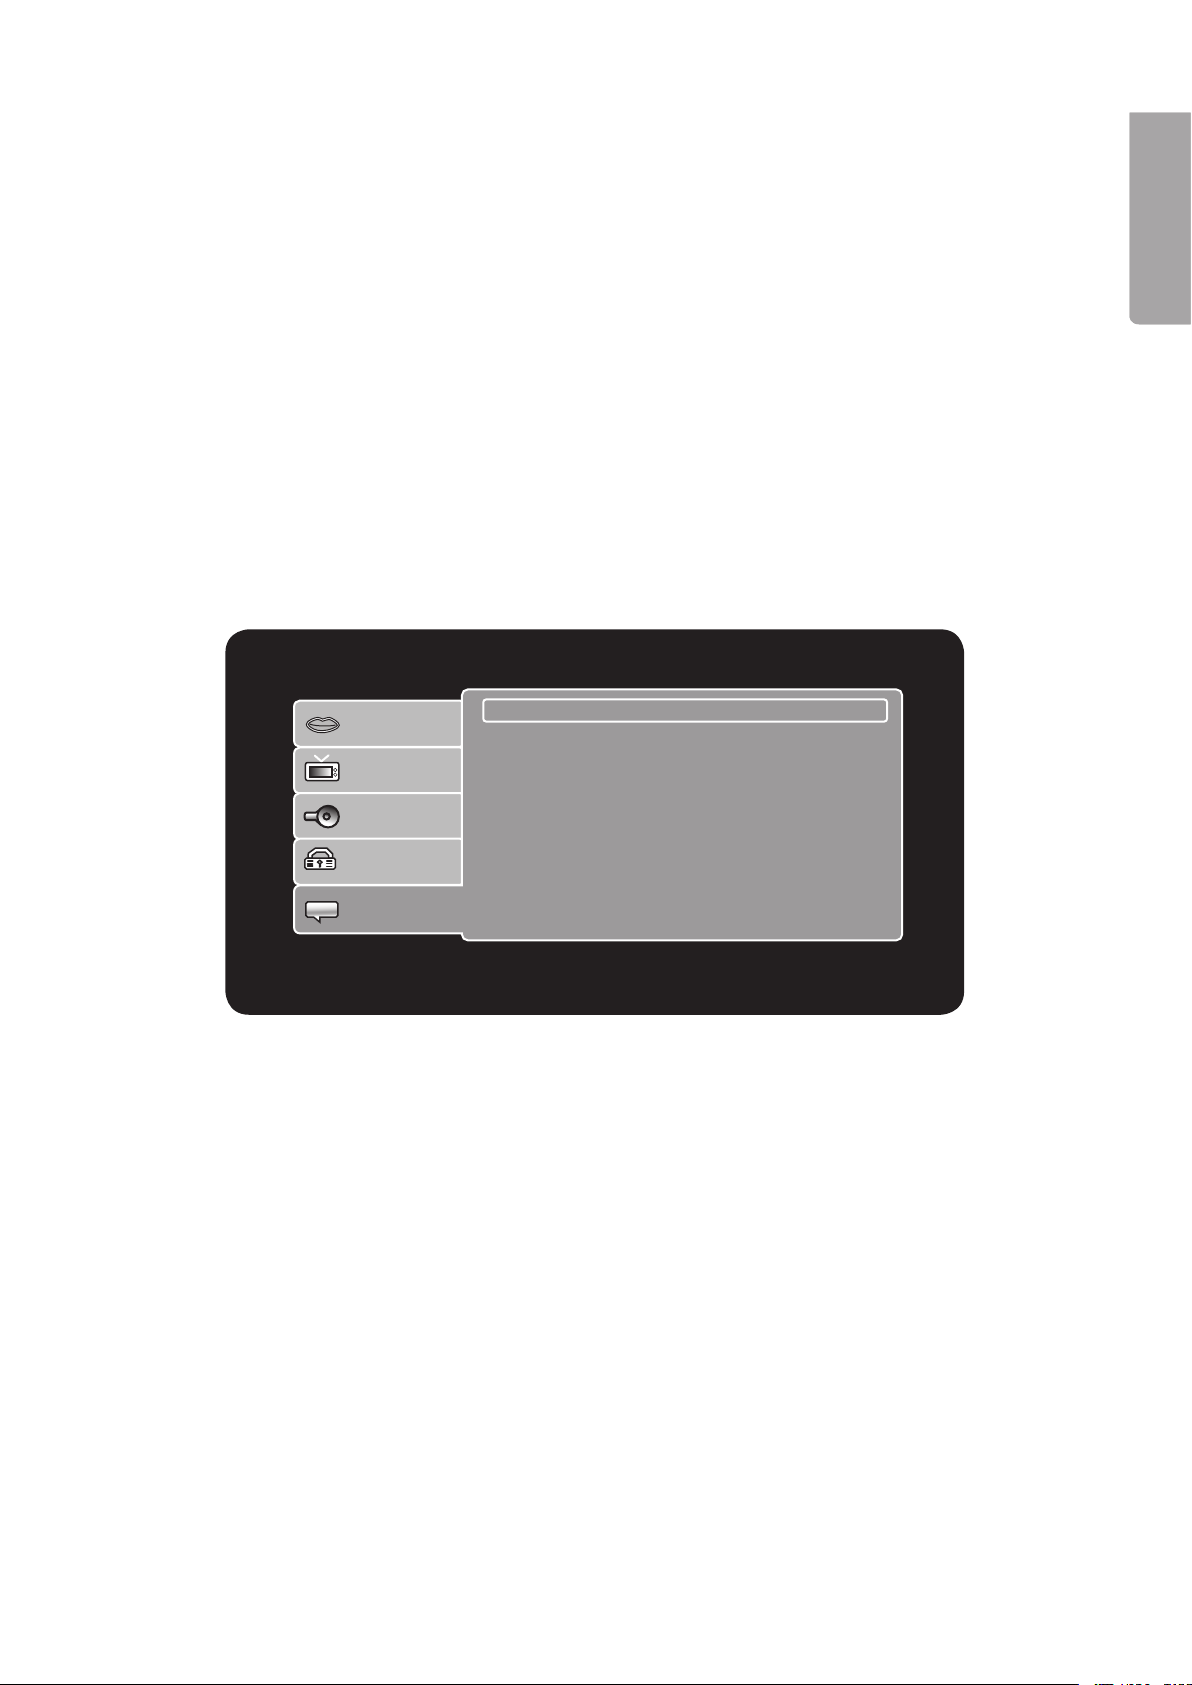
5.5 MISC (Resetting default settings)
8888).
Resetting the default settings
1. Go to MISC.
2. Press
3. Press ENTER, then highlight
4. Press ENTER.
5. The DVD player will start using the original factory settings.
► to open a submenu and select Use Default Settings.
Yes in the window “Do you want to use the default setting?”
11
Page 12

►
Music P laying
Name: On e Way Ti cket
Edi t mo d e
Pro g r a m v i e w
Add t o p r o gram
123 /159 / O asis − Do n’t I.MP 3
00: 0 0:1 1
Nirvana − Rape
No Mercy − Whe
Oasis − Don’t
Oasis − Wonderw
Offspring − Pro
Offspring − Sel
Offspring − The
Offspring − Why
6. Playback
6.1 DVD playback
1. Place in a DVD with the label facing up and close the drawer.
ENGLISH
2. The disc’s main menu will be automatically loaded.
3. Use the arrow keys on the remote to make your selections on the DVD’s main menu, or press PLAY
to start immediate playback.
4. Press
I◄◄ or ►►I to select a chapter.
5. To return to the DVD main menu during playback: Press TITLE or MENU.
6.2 MP3 playback
When a disc containing MP3 les is inserted the contents of the disc are displayed.
• Use the arrow keys to choose a folder or track to be played. Press ENTER to conrm and start playback.
• Press
• Press SEARCH to go to enter the track number directly. Enter the track number using the numerical keys.
Screen display key:
I◄◄ or ►►I to select a track.
1
3
1. Actual time for the current track
2. Current track/Total number of tracks
3. File list
1
Page 13

Filter Selects the le types to be listed in the le list: Audio, Photo and Video.
Repeat Sets playback: OFF (no repetition), Single (repeats current track) and Folder
(repeats the entire folder).
Mode Normal (normal playback), Shufe (random playback) and Music Intro (plays the
rst 10 seconds of each track).
Edit mode Creates programme lists/ playlists.
1. First press Edit, then OK.
2. Press ◄ to reach the le list.
3. Select the les to be included in the playlist with ▲ ▼.
Press ENTER to conrm your selection.
4. Press ► to reach Add to program. Press ENTER to create a playlist.
5. Press STOP then press ►II to start playback.
Program view Program View displays the entire le list, Browser View displays the playlist.
Add to program Adds selected tracks to the playlist.
6.3 MPEG 4 playback
1. Use the arrow keys to select les for playback. Press ◄ to move up a folder.
2. Press PLAY to start playback.
3. Press STOP to return to the le list.
ENGLISH
Using subtitles
In order for subtitles to function the le containing the subtitles must have the right format and be in the same
folder as the video shown.
• If the folder contains subtitles in more than one language press SUBTITLE in order to select a language.
• If the folder contains several audio tracks (dubbed) for the video press LANGUAGE to select the
appropriate track.
Searching for a section in a lm
• Press SEARCH and use the number buttons to enter the playback time in the lm you wish to go to.
6.4 USB memory/Memory card playback
DVD player supports playback from USB memory or SD, MMC or MS memory cards.
1. Insert a USB memory or a memory card into the respective slot on the front of the device.
2. Press once or several times on the USB/CARD button on the remote to select playback from the USB
memory from the memory card (if both a USB and memory card are connected simultaneously).
3. Use the arrow keys in order to select a folder or a specic le to be played/shown. Press ENTER to
conrm and start playback.
13
Page 14

ENGLISH
6.5 Playback alternatives
Repeat (repeated playback)
During playback press REPEAT several times to activate repeated playback.
Press repeatedly to choose a repeat mode:
OFF – No repetition
Repeat Single – Repeats current playback (CD and DVD)
Repeat Folder – Repeats entire folder/video/all tracks (CD and DVD)
Repeat A-B (repeats one section)
• During playback press A-B to mark the beginning of a section (A), Press again to mark the end of the
section (B) to be repeated. Playback of the marked section will now occur automatically. Press A-B again
to cancel repetition for the section and to erase the marking points.
N.B. For CD playback the marking points A and B must lie within the same track. For DVD playback the
•
marking points can be in different chapters/sections.
ENGLISH
Fast forward/rewind speed selections 2- 4 – 8 – 16x
• Press ◄◄ once or several times to rewind within a track. The display will indicate the chosen rewind
speed.
• Press
• To return to normal playback, press
►► once or several times to fast forward within a track. The display will indicate the chosen fast
forward speed.
► twice.
Zoom (Enlarge image)
• Press the ZOOM button once or several times to enlarge the image. Use the arrow buttons to position the
enlarged area.
• Press ZOOM until a normal image is displayed.
Angle (Camera angle)
• Press the ANGLE button (if the chosen DVD lm supports this).
Display – (Displays time/info)
• Press the DISPLAY button to display time or information for the disc/track being played.
Subtitles (Selecting subtitles)
• Press the SUBTITLE to change the subtitle language (only DVDs with subtitles).
Audio (Selecting a track)
DVD: Press AUDIO to change track/language (only with DVDs which have different tracks/languages).
CD: Press AUDIO to select an audio mode:
Stereo
Left-Mono (only the left speaker)
Right-Mono (only the right speaker)
Mix-mono (mono audio from both speakers)
14
Page 15

33
►
Music P laying
Name: On e Way Ti cket
Edi t mo d e
Pro g r a m v i e w
Add t o p r o gram
123 /159 / O asis − Do n’t I.MP 3
00: 0 0:1 1
Nirvana − Rape
No Mercy − Whe
Oasis − Don’t
Oasis − Wonderw
Offspring − Pro
Offspring − Sel
Offspring − The
Offspring − Why
W: 2406 H: 1794
Name: On e Way Ti cket
Fil t er
Re p e at : O f f
Mod e : N o r m al
2 /28 / … / J PG / 080 914 − 001C .JPG
. .
080914 − 001C
080914 − 002
080914 − 003
080914 − 004
080914 − 005
080914 − 006
080914 − 007
▼
7. Converting music to MP3 files
The DVD player can copy music from a CD and automatically convert and save it as an MP3 le
on a USB memory.
1. Insert a USB memory or memory card on the front side DVD player and insert a CD
to copy from.
2. Highlight
3. Highlight
4. Highlight those tracks/songs you wish to copy using the arrow keys and conrm with ENTER
Ripping using the arrow keys and press ENTER.
Destination: and press ENTER, highlight USB or SD/MMC and press ENTER.
for every selection.
5. Highlight
Rip Quality to select the desired bit rate for copying. Choose between Low, Medium, High
and Best by pressing ENTER several times.
6. Highlight
Ripping Start and press ENTER to start copying.
8. Displaying JPEG images
Insert a CD, DVD, USB memory, SD/MMC/MS memory card which contains JPEG images and press MENU
to display the le list.
1. Use the arrow keys to select a folder containing images or a specic image to be displayed.
2. Press ENTER or PLAY to display the image or start a slideshow.
3. To hold an image still in a slideshow press PAUSE. Press PLAY to continue the slideshow.
4. Press STOP to completely stop the slideshow and show the images in thumbnail size.
ENGLISH
5. Use the arrow keys to select an image or any other menu options. Press ENTER to conrm.
Describing the screen menu:
1
1. Current image number/Total number of images in the folder
2. File list
3. Preview window
4. Image information (picture size)
15
3
4
Page 16

ENGLISH
9. Troubleshooting guide
Problem and possible cause/solution
No picture or sound.
1. Are all device’s power cables connected correctly?
2. Are all devices turned on?
3. Is video and audio turned off in the TV menu?
4. Is the TV correctly connected to the DVD player?
Playback does not start.
1. Is the disc correctly inserted?
2. Make sure that the disc is not dirty or smudged with ngerprints.
3. The disc has the wrong region code.
4. The disc’s contents have the wrong format.
5. Change the settings for parental control.
6. Turn off the player. Pull out the plug. Set it in again and restart.
7. There is moisture on the laser. Let the player rest for a couple of hours before turning it on again.
No picture.
1. Is the TV on?
2. Check the connections.
3. Press V-MODE to change outgoing signals.
Picture ickers or is coarse.
1. Connect the DVD player directly to the TV and not through other devices. Interference can depend
on the DVD’s copy protection (a requirement on all DVD players).
2. Purchase an RF adaptor if the TV does not have a video input.
3. Check the DVD’s and TV’s colour settings.
4. Bad quality or scratched disc.
The picture is smaller than the screen.
1. Choose the correct aspect ratio: (Press SETUP and select TV Form 4:3 or 16:9).
2. Select the aspect ratio from the menu on the DVD itself.
It is not possible to search either forwards or backwards.
1. Certain discs are programmed to prevent searching.
2. The disc only has one track.
No sound or minimal sound.
1. Make sure that the TV and amplier are turned on and correctly set.
2. Make sure that the TV and amplier are correctly connected and that the contacts are pushed in securely.
3. Press AUDIO to select another audio track.
4. Make sure that the Mute function is not activated on the DVD player, TV or amplier.
5. There is no sound during searching, pausing, stop and slow motion mode.
Disc containing MP3’s produce no sound or noise.
1. If the MP3 disc contains les MP3 les mixed with data les there will be no sound when the data les
are being read.
2. Make sure that the CD contains MP3 les.
3. Try playing the next MP3 le.
16
Page 17

The remote control doesn’t work.
1. The batteries are bad or incorrectly inserted.
2. The remote is too far away from the DVD player or there are obstructions in the way.
3. The DVD player is in standby mode.
No Dolby Digital or DTS Audio via the digital audio outputs.
1. Make sure the amplier supports Dolby Digital or DTS.
2. Make sure that a coaxial audio cable is used between the DVD player’s digital audio output and the
ampliers digital audio input.
3. Make sure that the disc supports Dolby Digital or DTS and that this has been chosen on the disc’s menu.
The DVD player does not react to the remote control’s signals.
1. The remote control’s batteries need to be changed. Insert new batteries.
2. The remote’s signals don’t reach. Point the remote control towards the DVD player.
3. The distance is too far between the remote and DVD player. Reduce the distance.
10. Disposal
Follow local ordinances when disposing of this product. If you are unsure of how to dispose
of this product, please contact your municipality.
11. Specifications
General properties:
Compatible memory cards: USB, SD, MMC, MS
ENGLISH
TV system: PAL/NTSC/MULTI
Frequency range: DVD Video (MIP 96 kHz): 20 Hz ~ 44 kHz (+ 1 dB)
DVD Video (MIP 48 kHz): 20 Hz ~ 22 kHz (+ 0.5 dB)
CD: 20 Hz ~ 22 kHz (+ 0.5 dB)
S/N-ratio: > 90 dB (at 1 kHz, 0 dB)
Connections: SCART, S-video, component video, HDMI, coaxial digital
and analogue audio output
Power supply: 220 – 240 V AC, 50/60 Hz
Power consumption: 20 W
Size: 430 x 38 x 260 mm
Weight: 2.4 Kg
Outputs:
Video output: 1.0 Vpp (at 75 Ohms)
Analogue audio output: 2.0 V RMS
S-Video output: (Y) 1.0 Vpp (at 75 Ohms) (C) 286 mVpp (at 75 Ohms)
Component video output: (Y) 1.0 Vpp (at 75 Ohms) 0.7 Vpp (at 75 Ohms)
Coaxial video output: 0.5 Vpp (at 75 Ohms)
17
Page 18

Dvd-/MPEG4-soitin ja HDMI
Tuotenumero: 38-446 Malli: M89
Lue käyttöohjeet ennen tuotteen käyttöönottoa. Säilytä käyttöohjeet tulevaa tarvetta varten. Pidätämme oikeuden teknisten tietojen muutoksiin. Emme vastaa mahdollisista teksti- tai kuvavirheistä. Jos laitteeseen tulee
teknisiä ongelmia, ota yhteys myymälään tai asiakaspalveluun (yhteystiedot käyttöohjeen lopussa).
Turvallisuus
Varoitus
SUOMI
• Älä avaa laitteen koteloa! Kotelon sisällä on vaarallista jännitettä sisältäviä suojaamattomia
komponentteja, jotka voivat aiheuttaa sähköiskun.
• Laitteen saa korjata vain valtuutettu huoltoliike.
• Älä pura tai muuta laitetta.
• Tuote on tarkoitettu vain sisäkäyttöön.
• Älä altista laitetta liian korkeille lämpötiloille, iskuille, kosteudelle tai vedelle.
• Älä sijoita laitetta sellaiseen paikkaan, josta se voi tippua veteen tai muuhun nesteeseen. Älä laita laitteen
päälle nesteitä sisältäviä esineitä, kuten maljakoita tai limsapulloja.
• Älä käytä laitetta kosteissa tai pölyisissä tiloissa tai paikoissa, joissa siihen kohdistuu voimakasta
värähtelyä.
• Sammuta mahdollinen valmiustila yön ajaksi ja poistuessasi kotoa.
• Valmiustilan valintakytkimellä ei voi erottaa laitetta verkkovirrasta. Sammuta laitteesta virta kokonaan
asettamalla virtakytkin laitteen takapuolella OFF-asentoon tai irrottamalla pistoke verkkovirrasta.
LUOKAN 1 LASERLAITE
Varoitus! Älä avaa laitteen koteloa! Näkymätön lasersäde voi aiheuttaa silmävaurioita.
Älä katso säteeseen edes optisten instrumenttien läpi.
18
Page 19

SC A RT
COA XI AL
Cr /P r
S-V ID EO
VID EO
HD MI
Cb /P b
R
L
CE NT
SL
SW
SR
FR
FL
Y
1. Painikkeet ja toiminnot
1.1 Laitteen etupuoli
6 7 8
SUOMI
1
3 4 5 9 10
1. STANDBY (valmiustila päällä/pois päältä)
2. Levykelkka
3. OPEN/CLOSE (avaa/sulje levykelkka)
4. Näyttö
5. Infrapuna-anturi
1.2 Laitteen takapuoli
1 3
5
6. PLAY (toisto)
7. PAUSE (tauko)
8. STOP (pysäytys)
9. MS/SD/MMC – Liitäntä muistikortille
10. USB – USB-muistiliitäntä
6
4
7
8
1. L – Analoginen ääniulostulo. Vasen kanava RCA-liitännällä.
2. R – Analoginen ääniulostulo. Oikea kanava RCA-liitännällä.
3. HDMI-liitäntä
4. KOAXIAL – Digitaalinen ääniliitäntä. SPDIF RCA-koaksiaaliliitännällä.
5. Y / Pb/Cb / Pr/Cr – Komponenttivideoliitäntä (3 x RCA)
6. VIDEO – Komposiittivideoliitäntä. CVBS RCA-liittimillä.
7. S-VIDEO – S-video -liitäntä 4-napaisella mini-DIN -liittimellä.
8. 5.1-kanavainen ääniliitäntä – Liitäntä 5.1-vahvistimelle.
9. SCART-liitäntä
19
9
Page 20

1.3 Kaukosäädin
1. [ STANDBY ] – Kytkee laitteen päälle
ja sammuttaa sen
1
2. [ USB/CARD ] – Vaihtaa USB-muistin
ja muistikortin välillä
3. [ AUDIO ]
3
4. [ 0-9 ] – Numeropainikkeet
5. [ CLEAR ] – Mitätöi syötetyn tekstin
6. [ SETUP ] – Avaa asetusvalikon
7. [
▲ ] – Ylös
8. [
◄ ] – Vasemmalle
SUOMI
9. [
▼ ] – Alas
10. [
◄◄ ] – Pikakelaus taaksepäin
11. [
►► ] – Pikakelaus eteenpäin
4
5
12. [ STEP ]
13. [
■ ] – Pysäyttää toiston
14. [ VOL + - ] – Äänenvoimakkuuden
6
7
lisäys/vähennys
15. [ L/R ]
16. [ N/P ]
8
9
17. [ SLOW ] – Toisto hitaalla nopeudella
18. [ V-MODE ]
19. [ HD/Res ] (HD-tila)
20. [ PROGRAM ] – Ohjelmoitu toisto
21. [OPEN/CLOSE] – Avaa/sulje levykelkka
10
11
1
13
22. [ SEARCH ] – Etsii haluamasi kohdan
23. [ SUBTITLE ] – Valitsee tekstityksen
14
24. [ MENU ] – Valitsee dvd-levyn valikot
25. [ TITLE ] – Otsikko
26. [ DISPLAY ]
27. [
► ] – Oikea
28. [ ENTER ] – Vahvistaa asetukset
29. [
►►I ] – Seuraava raita/luku
30. [
I◄◄ ] – Edellinen raita/luku
31. [
►II ] – Pysäyttää/keskeyttää toiston
32. [ A-B ] – Yhden kohdan toisto
15
16
17
18
19
0
33. [ REPEAT ] – Aktivoi uudelleentoiston
3 4. [ MUTE ] – Äänen mykistys
35. [ ANGLE ] – Valitsee kuvakulman
36. [ PBC ]
37. [ RETURN ]
38. [ ZOOM ] – Suurentaa kuvan
SUOMI
1
3
4
5
6
7
8
9
30
31
3
33
34
35
36
37
38
0
Page 21

1.4 Soitin toistaa seuraavia medioita
DVD: Yksi- ja kaksipuoliset yksi- ja kaksikerroksiset: DVD+R/DVD+RW/DVD-R/DVD-RW
Cd-DA (Cd-Digital Audio)
Mp3
MPEG4
Cd-R/cd-RW
Photo cd (JPEG)
Muistikortti: USB-muisti, MS (Memory Stick), SD (Secure Digital), MMC (Multimedia Card)
Aluekoodi
Dvd-soittimessa ja dvd-levyissä on aluemerkintä. Soitin ei tunnista levyä, mikäli soittimen ja levyn merkinnät
eivät vastaa toisiaan. Teksti ”WRONG REGION” ilmestyy ruutuun, jos yrität soittaa väärän alueen levyä.
Aluekoodi Alue
1 Kanada, USA
2 Eurooppa, Japani, Lähi-Itä (Saudi-Arabia, Egypti, Iran, Etelä-Afrikka)
3 Itä-Aasia (Hong Kong, Taiwan, Etelä-Korea), Kaakkois-Aasia
SUOMI
4 Australia, Karibia, Keski- ja Etelä-Amerikka, Meksiko, Uusi-Seelanti
5 Afrikka, entiset neuvostomaat, Intia, Pohjois-Korea, Pakistan
6 Kiina
2. Hoito
2.1 Puhdistaminen
• Irrota aina virtajohdon pistoke verkkovirrasta ennen puhdistusta.
• Varmista, että laitteeseen ei pääse kosteutta.
• Käytä kosteaa liinaa, kun puhdistat laitteen koteloa.
• Älä käytä voimakkaita puhdistusaineita tai liuottimia.
2.2 Käsittele levyjä oikein
• Pitele levyä reiästä ja reunasta. Näin vältät sormenjälkien ja lian kertymisen levyn pintaan.
• Älä taivuta levyä äläkä altista sitä suoralle auringonvalolle tai muulle lämmönlähteelle.
• Säilytä levyjä koteloissaan.
• Puhdista levyt kuivalla ja pehmeällä liinalla keskeltä ulospäin. Älä käytä puhdistusaineita
tai vahvoja liuottimia.
1
Page 22

SC A RT
COA XI AL
Cr /P r
S-V ID EO
VID EO
HD MI
Cb /P b
R
L
CE NT
SL
SW
SR
FR
FL
Y
3. Esivalmistelut
3.1 Ota tuote pakkauksesta
Pakkauksen sisältö
• Dvd-soitin
• Kaukosäädin
• Käyttöohje
3.2 Aseta paristot kaukosäätimeen
1. Irrota paristolokeron kansi.
SUOMI
2. Aseta lokeroon 2 kpl AAA/LR03 –paristoa (eivät sisälly).
3. Varmista, että paristot tulevat lokeroon oikein päin. Pane paristolokeron kansi takaisin paikalleen.
Huom.
• Vaihda aina molemmat paristot samalla kertaa.
• oista paristot kaukosäätimestä vuotojen estämiseksi, mikäli et aio käyttää sitä vähään aikaan.
4. Liitännät
Kun kuvaa siirretään johdoilla, voit valita eri signaaleja ja liittimiä.
Huom.!
• Sammuta dvd-soitin ja televisio, ennen kuin teet liitäntöjä.
• Lue television tai vahvistimen käyttöohje ennen dvd-soittimen liittämistä.
4.1. Liittäminen televisioon
Dvd-soitin voidaan liittää televisioon monella eri tavalla riippuen television liitännöistä.
1 3
5
6
7
9
4
Page 23

Yleisin ja yksinkertaisin liitäntä on SCART-johto
SCART (9) – Sekä kuva että ääni siirtyvät televisioon. Liitä SCART-johto (ei sisälly) dvd-soittimen
SCART-ulostulon ja television SCART-sisäänmenon välille.
• Johto siirtää sekä kuvan, että äänen.
• Valitse television AV-kanava.
• Vaihda dvd-soittimen ulostulosignaalia painamalla kaukosäätimen V-MODE -painiketta saavuttaaksesi
parhaan mahdollisen kuvan televisioosi.
• Useimmille käyttäjille tämä asennus riittää.
SUOMI
Muut liitännät
SCART-kaapelin lisäksi voidaan dvd-soitin kytkeä usealla eri tavalla. Seuraavat kohdat selittävät vaihtoehtoisia dvd-soittimen signaalinsiirtotapoja.
Tärkeää. Seuraavat esimerkit ovat dvd-soittimen ja television välillä olevia, mutta ne toimivat myös muiden
laitteiden (plasma-tv, videoprojektori yms.) kuvansiirrossa, kun vain tarvittavat liittimet ovat käytettävissä.
Katso television käyttöohjeesta, mitä liittimiä ja signaaleja on käytettävissä.
Tekstissä viitataan eri kuvanlaadun teoreettisiin tasoihin, mutta käytännössä kuvanlaatu voi vaihdella eri laitekokoonpanojen mukaan.
PAL ja NTSC ovat erilaisia tv-järjestelmiä. NTSC:tä käytetään lähinnä USA:ssa. PAL:ää käytetään yleisesti
läntisessä Euroopassa.
Kuvanlaatu voi vaihdella dvd-lmin tallennusmuodon (PAL tai NTSC) mukaan ja dvd-soittimen asetuksen
(PAL tai NTSC) mukaan.
SUOMI
Useimmat televisiot ja dvd-lmit Pohjoismaissa sopivat PAL:lle. Sitä pidetään parempana, koska sillä on
parempi erottelukyky kuin NTSC:llä.
HDMI (3) – Digitaalinen liitäntä sekä äänen että kuvan siirtoon. Liitäntä televisioon HDMI-liitännällä.
Komposiittivideo (6) sekä L–R (1) (2) (analoginen ääniliitäntä).
• Komposiittivideoliitäntä täytyy aktivoida valikosta.
• Komposiittivideo (CVBS) toimii kaikilla normaaleilla televisioilla. Yksinkertaisinta on käyttää SCARTjohtoa, koska SCART siirtää sekä kuvan (komposiittivideon) että äänen. Komposiittivideo voidaan siirtää
myös omalla johdollaan dvd-soittimen komposiittivideoulostulosta.
• Johto liitetään television vastaavaan sisäänmenoon (yleensä Video In).
• Vaihda dvd-soittimen ulostulosignaalia painamalla kaukosäätimen V-MODE -painiketta saavuttaaksesi
parhaan mahdollisen kuvan televisioosi.
S-VIDEO (7) sekä L–R (1)(2) (analoginen ääniliitäntä). S-video (Y/C) mahdollistaa paremman kuvanlaadun
kuin komposiittivideo ja on suositeltavampi, jos television ominaisuudet mahdollistavat sen käytön. (Katso
television käyttöohjeesta.)
• S-video liitetään 4-napaisella mini-DIN -liittimellä (kutsutaan s-videoliittimeksi). Dvd-soitin täytyy ehkä
asettaa valikosta, jotta se pystyy lähettämään s-video -signaalia.
• Paina kaukosäätimen V-MODE -painiketta muuttaaksesi dvd-soittimen ulostulosignaalin s-video -signaaliksi.
HUOM.! Kuva muuttuu mustavalkoiseksi, jos televisio ei tue s-video -signaalia.
•
Komponenttivideo (5) sekä L-R (1) (2) (analoginen ääniliitäntä). Komponenttivideo (YPbPr) antaa parhaan kuvanlaadun, mitä dvd-soitin lähettää. Sitä suositellaan käytettäväksi, jos television ominaisuudet tukevat komponenttivideota.
• Dvd-soitin voi lähettää komponenttisignaalin joko interlace- tai progressive scan -tilassa. Katso television
käyttöohjeesta kumpaa tapaa televisiosi tukee.
• Komponenttivideosignaali voidaan liittää kolmella RCA-liittimellä dvd-soittimen takaa ja kytkeä television
vastaaviin liittimiin.
• Paina kaukosäätimen V-MODE -painiketta vaihtaaksesi dvd-soittimen ulostulosignaalia interlace- ja
progressive scan -tilojen välillä.
3
Page 24

Language
Language : English
Subtitle : Swedish
DivX Subtitle : Central European
Audio : Swedish
DVD Menu : Swedish
Aspect Ratio : 16:9
View Mode : Original
TV System : PAL
Video Out : RGB
HD Resolution : Auto
Video
Audio
Rating
Misc
Language
Video
Audio
Rating
Misc
SC A RT
CO AXI AL
Cr /P r
S- VID EO
VI DEO
HD MI
Cb /P b
R
L
CE NT
SL
SW
SR
FR
FL
Y
4.2 Liittäminen vahvistimeen
Dvd-soitin voidaan liittää vahvistimeen seuraavalla tavalla:
Kytkentävaihtoehdot:
• Stereoääni L-R:n (1)(2) kautta.
• Surroundääni 5.1-liitännän (8) kautta.
• Digitaalinen ääniliitäntä KOAXIAL:in (4) kautta.
1
8
SUOMI
Varoitus!
Älä koskaan liitä vahvistinta digitaaliseen ääniliitäntään, jos sillä ei ole Dolby digital AC3- tai DTS-dekooderia.
Dvd-levyjä toistettaessa voi tämä vahingoittaa vahvistimia ja kaiuttimia tai aiheuttaa kuulovaurioita.
4
5. Järjestelmän asetukset
Avaa valikko:
1. Paina kaukosäätimen SETUP-painiketta.
2. Käytä nuolipainikkeita liikkuaksesi valikoissa.
3. Hyväksy valinta painamalla ENTER.
4. Lopeta ja poistu valikosta painamalla uudestaan SETUP.
Huom.! Jotta voit käyttää kaikkia valikoita, täytyy dvd-soittimen olla pysäytystilassa. Elokuvan katselun on
oltava kokonaan keskeytetty (paina kaksi kertaa pysäytyspainiketta).
5.1 LANGUAGE SETUP (Kieliasetukset)
4
Page 25

Aspect Ratio : 16:9
View Mode : Original
TV System : PAL
Video Out : RGB
HD Resolution : Auto
Language
Video
Audio
Rating
Misc
Language Valikoiden kielet: englanti, ruotsi, norja, suomi tai tanska
Subtitle Tekstitysten kielet: englanti, ruotsi, norja, suomi, tanska, Auto tai suljettu
DivX subtitle MPEG4 Tekstityksen kirjaintyyppi (vain XviD) länsieurooppalainen,
turkkilainen, keskieurooppalainen tai kyrillinen
Audio Kielen ääniaasetukset: englanti, ruotsi, norja, suomi tai tanska
DVD Meny Toistettavan lmin kieliasetukset: englanti, ruotsi, norja, suomi tai tanska
5.2 VIDEO SETUP (Videoasetukset)
Muuta kuva-asetuksia.
SUOMI
TV Form Kuvasuhde, kuvan mittasuhteet: 16:9 tai 4:3
Näkymä Kuva-asetukset: Fill, Original, Auto Fit tai Pan Scan (vain dvd)
TV System Valitse tv-järjestelmä: NTSC, PAL tai Auto
Video Out Valitse videoulostulon ulostulosignaali: S-Video, Component, RGB, P-Scan tai HD
HD Resolution Valitse erottelukyky (ainoastaan, jos olet valinnut HD:n tai Video Out:in)
Auto, 480/576p, 720p, 1080i tai 1080p
5
Page 26

Language
Language : English
Subtitle : Swedish
DivX Subtitle : Central European
Audio : Swedish
DVD Menu : Swedish
Aspect Ratio : 16:9
View Mode : Original
TV System : PAL
Video Out : RGB
HD Resolution : Auto
Bass Management : Off
Front Speakers : Large
Center Speakers : None
Surround Speakers : None
Subwoofer : None
Test Tones : Off
Center Delay : No Delay
Surr. Delay : No Delay
Digital Output : PCM
Video
Audio
Rating
Misc
Language
Video
Audio
Rating
Misc
Language
Video
Audio
Rating
Misc
Language
Video
Audio
Rating
Misc
Language
Language : English
Subtitle : Swedish
DivX Subtitle : Central European
Audio : Swedish
DVD Menu : Swedish
Aspect Ratio : 16:9
View Mode : Original
TV System : PAL
Video Out : RGB
HD Resolution : Auto
Bass Management : Off
Front Speakers : Large
Center Speakers : None
Surround Speakers : None
Subwoofer : None
Test Tones : Off
Center Delay : No Delay
Surr. Delay : No Delay
Digital Output : PCM
Video
Audio
Rating
Misc
Language
Video
Audio
Rating
Misc
Language
Video
Audio
Rating
Misc
Language
Video
Audio
Rating
Misc
Parental Control : 1. Kid Safe
Language
Video
Audio
Rating
Misc
Set Password
5.3 AUDIO SETUP (Ääniasetukset)
Muuta ääniasetuksia.
SUOMI
Bas Kontroll Aktivoi tai sammuta bassonsäätö: pois päältä tai päällä
Etukaiuttimet Valitse isot tai pienet etukaiuttimet: Isot tai Pienet
Keskikaiuttimet Valitse haluamasi keskikaiuttimet: Isot, Pienet tai ei mitään
Surround-kaiuttimet Valitse haluamasi surround-kaiuttimet: Isot, Pienet tai ei mitään
Subwoofer Valitse subwoofer: ei mitään tai nykyinen
Test Tones Lähettää lyhyen testisignaalin valitulle kanavalle: pois päältä, vasen, oikea,
keskikaiutin, vasen surroundkaiutin, oikea surroundkaiutin ja subwoofer.
CNTR CTRL Valitse haluamasi ääniviive kaiuttimien välille: ei viivettä, 0,3 – 0,6 – 1 – 1,4 jne.
TAAEMPI CTRL Valitse haluamasi ääniviive takakaiuttimien välille: ei viivettä,
Digitaalinen ulostulo Valitse digitaalinen ulostulo: pois päältä, PCM tai RAW
5.4 RATING (Lapsilukon asetukset)
1 – 2 – 3 – 4 jne.
6
Page 27

Aspect Ratio : 16:9
View Mode : Original
TV System : PAL
Video Out : RGB
HD Resolution : Auto
Language
Video
Audio
Rating
Misc
Language
Video
Audio
Rating
Misc
Use Default Settings
A. Luokitus – Muuta rajoituksia estääksesi sopimattomien elokuvien näytön esim. lapsille.
Valitse seuraavista: Lapsiturvallinen, G, PG, PG-13, PG-R, R, NC-17 tai aikuinen.
B. Set Password: Esiasetettu salasana on 8888.
Voit muuttaa salasanan seuraavalla tavalla:
1. Mene kohtaan Luokitus.
2. Avaa alavalikko painamalla
► ja valitse Set Password.
3. Paina ENTER ja syötä salasana kaukosäätimeen (esiasetettu salasana on
4. Valitse
Set Password.
5. Paina ENTER.
6. Syötä uusi salasana kohtaan
New Password.
7. Vahvista luokituksen uusi salasana painamalla ENTER.
SVENSKA
5.5 MISC (Tehdasasetusten palautus)
8888).
SUOMI
Palauta tehdasasetukset näin:
1. Mene kohtaan Misc.
2. Avaa alavalikko painamalla
3. Paina ENTER, valitse
► ja valitse Lataa tehdasasetukset.
Yes ikkunassa ”Do you want to use the default setting?”
4. Paina ENTER.
5. Dvd-soitin käynnistyy uudestaan alkuperäisillä tehdasasetuksilla.
7
Page 28

►
Music P laying
Name: On e Way Ti cket
Edi t mo d e
Pro g r a m v i e w
Add t o p r o gram
123 /159 / O asis − Do n’t I.MP 3
00: 0 0:1 1
Nirvana − Rape
No Mercy − Whe
Oasis − Don’t
Oasis − Wonderw
Offspring − Pro
Offspring − Sel
Offspring − The
Offspring − Why
6. Toisto
6.1 Dvd-levyn toisto
1. Aseta levykelkkaan dvd-levy etikettipuoli ylöspäin ja sulje levykelkka.
2. Levyn päävalikko latautuu automaattisesti.
3. Käytä kaukosäätimen nuolinäppäimiä valitaksesi haluamasi vaihtoehdon päävalikosta.
Voit myös painaa PLAY, jos haluat aloittaa toiston välittömästi.
4. Paina
I◄◄tai ►►I valitaksesi kappaleen eteenpäin tai taaksepäin .
5. Jos haluat palata dvd-levyn päävalikkoon toiston aikana, paina TITLE tai MENU.
SUOMI
6.2 MP3-tiedostojen toisto
• Kun soittimeen asetetaan mp3-tiedostoja sisältävä levy, ilmestyy levyn sisältö näytölle.
• Valitse soitettava luettelo tai raita nuolipainikkeiden avulla. Vahvista ohjelmointi ja aloita toisto
painamalla ENTER.
• Paina
I◄◄ tai ►►I valitaksesi raitoja eteenpäin tai taaksepäin .
• Syötä raidan numero suoraan painamalla SEARCH. Anna sitten raidan numero numeropainikkeilla.
Näytön selitykset:
1
3
1. Toistettavan raidan senhetkinen aika
2. Toistettava raita/Kaikki raidat
3. Tiedostolista
8
Page 29

Filter Valitse, mikä tiedostotyyppi näkyy luettelossa: Audio, Photo ja Video.
Uudelleentoisto Valitse toisto: Off (ei uudelleentoistoa), Singel (uudelleentoista senhetkinen raita) ja
Folder (uudelleentoista koko kansio).
Tila Normal (normaali toisto), Shufe (toisto satunnaisessa järjestyksessä) ja
Music Intro (kaikkien kappaleiden ensimmäisten 10 sekunnin toisto).
Edit mode Luo ohjelmalista/soittolista.
1. Paina ensin Edit ja sitten OK.
2. Palaa luetteloon painamalla ◄.
3. Valitse haluamasi tiedostot soittoluetteloon painikkeilla ▲ ja ▼, vahvista valintasi
painamalla ENTER.
4. Mene kohtaan Add to program painamalla ►, luo soittoluettelo painamalla
ENTER.
5. Aloita toisto painamalla ensin STOP ja sitten ►II.
Program view Program View:llä näet koko luettelon, Browser View:llä soittoluettelon.
Add to program Lisää haluamiasi raitoja soittoluetteloon.
6.3 MPEG4-tiedostojen toisto
1. Valitse toistettava tiedosto nuolinäppäimillä. Jos haluat liikkua ylöspäin luetteloissa, paina ◄.
2. Aloita toisto painamalla PLAY.
3. Palaa takaisin tiedostolistaan painamalla STOP.
Tekstityksen käyttö
• Tekstitys toimii, jos sen sisältävä tiedosto on oikean tyyppinen ja se sijaitsee samassa kansiossa
kuin elokuva.
• Jos kansiossa on tekstitykset monella eri kielellä, voidaan kieli valita painamalla SUBTITLE.
• Jos kansiossa on lmille monta eri ääniraitaa, voidaan ääniraita valita painamalla LANGUAGE.
SUOMI
Siirry lmin tiettyyn kohtaan
• Paina SEARCH ja syötä haluamasi kohdan aika numeropainikkeilla.
6.4 Toisto USB-muistista/muistikortilta
Dvd-soitin tukee USB-muistin tai SD-, MMC- tai MS-tyyppisen muistikortin toistoa.
1. Aseta USB-muisti tai muistikortti dvd-soittimen etupuolella oleviin vastaaviin liitäntöihin.
2. Paina kaukosäätimen USB/CARD-painiketta yhden tai useamman kerran ja valitse toisto USB-muistista
tai muistikortilta (jos sekä USB-muisti ja muistikortti ovat liitettyinä samanaikaisesti).
3. Valitse toistettava kansio tai tiedosto nuolipainikkeiden avulla. Vahvista ohjelmointi ja aloita toisto
painamalla ENTER.
9
Page 30

6.5 Toistomahdollisuudet
Repeat (Uudelleentoisto)
• Aktivoi uudelleentoisto painamalla REPEAT-painiketta toiston aikana.
• Valitse seuraavista vaihtoehdoista painamalla useita kertoja:
Pois päältä – Ei uudelleentoistoa
Repeat Single – Senhetkisen kohdan/raidan uudelleentoisto (cd ja dvd)
Repeat Folder – Koko luettelon/lmin/kaikkien raitojen uudelleentoisto (cd ja dvd)
Repeat A–B (yhden kohdan toisto)
• Paina A–B -painiketta tavallisen toiston aikana merkitäksesi toistettavan kohdan alun (A). Paina
SUOMI
toistamiseen merkitäksesi toistettavan kohdan lopun (B). Soitin toistaa nyt näiden kahden kohdan välisen
kohdan ja toistaa sen uudelleen automaattisesti.
• Paina A–B -painiketta uudelleen kun haluat keskeyttää toiston ja poistaa merkinnät.
Huom. Toistettaessa esim. cd-levyjä täytyy merkintöjen A ja B olla samassa raidassa. Dvd-levyä toistettaessa voivat merkinnät olla eri kappaleissa/kohdissa.
SUOMI
Pikakelaus eteenpäin/taaksepäin x2 – 4 – 8 – 16
• Kelaa raitaa taaksepäin painamalla yhden tai useamman kerran ◄◄. Näyttö kertoo pikakelauksen
nopeuden.
• Kelaa raitaa eteenpäin painamalla yhden tai useamman kerran
nopeuden.
• Kun haluat palata takaisin normaaliin toistonopeuteen, paina kaksi kertaa
►►. Näyttö kertoo pikakelauksen
►.
Zoom (suurenna kuvaa)
• Paina ZOOM-painiketta yhden tai useamman kerran suurentaaksesi kuvaa. Siirrä suurennettua kohtaa
kuvassa nuolipainikkeilla.
• Palaa normaalikokoiseen kuvaan painamalla monta kertaa ZOOM-painiketta, kunnes kuva on normaali.
Angle (Kuvakulma)
• Valitse kuvakulma painamalla ANGLE (jos dvd-lmi tukee toimintoa).
Display (Ajan/tietojen näyttö)
• Kun haluat nähdä ajan tai tietoa toistettavasta levystä/raidasta, paina DISPLAY.
Subtitle (Tekstityksen valitseminen)
• Vaihda tekstitysten kieltä painamalla SUBTITLE-painiketta (ainoastaan tekstitystä tukevissa
dvd-levyissä).
Audio (Ääniraidan valinta)
DVD: Vaihda ääniraitaa/kieltä painamalla AUDIO (ainoastaan tätä tukevissa dvd-levyissä).
Valitse äänitila AUDIO-painikkeella:
CD:
Stereo
Left-Mono (ainoastaan vasen kaiutin)
Right-Mono (ainoastaan oikea kaiutin)
Mix-Mono (monoääni kummassakin kaiuttimessa)
30
Page 31

33
►
Music P laying
Name: On e Way Ti cket
Edi t mo d e
Pro g r a m v i e w
Add t o p r o gram
123 /159 / O asis − Do n’t I.MP 3
00: 0 0:1 1
Nirvana − Rape
No Mercy − Whe
Oasis − Don’t
Oasis − Wonderw
Offspring − Pro
Offspring − Sel
Offspring − The
Offspring − Why
W: 2406 H: 1794
Name: On e Way Ti cket
Fil t er
Re p e at : O f f
Mod e : N o r m al
2 /28 / … / J PG / 080 914 − 001C .JPG
. .
080914 − 001C
080914 − 002
080914 − 003
080914 − 004
080914 − 005
080914 − 006
080914 − 007
▼
7. Kopioi musiikkia mp3:lle
Dvd-soitin kopioi musiikkia cd-levyltä, ja muuntaa ja tallentaa sen automaattisesti mp3-tiedostoiksi
USB-muistiin.
1. Aseta dvd-soittimen etupuolella olevaan USB-liitäntään USB-muisti tai muistikortti ja aseta sitten
soittimeen se cd-levy, jolta haluat kopioida.
2. Valitse
3. Valitse
4. Merkitse nuolipainikkeilla ne raidat/kappaleet, jotka haluat kopioida ja vahvista jokainen valinta
Ripping nuolipainikkeiden avulla ja paina ENTER.
Destination: ja paina ENTER, valitse USB tai SD/MMC ja paina ENTER.
painamalla ENTER.
5. Valitse kopioinnille haluamasi bittinopeus valitsemalla
Rip Quality. Voit valita seuraavista vaihtoehdoista
painamalla useaan kertaan ENTER: Low, Medium, High ja Best.
6. Valitse
Ripping Start ja aloita kopiointi painamalla ENTER.
8. JEPG-kuvien katseleminen
Aseta tai liitä dvd-soittimeen JPEG-kuvia sisältävä cd-levy, dvd-levy, USB-muisti, SD-muistikortti,
MMC-muistikortti tai MS-muistikortti ja paina MENU nähdäksesi tiedostolistan.
1. Valitse nuolipainikkeiden avulla kuvakansio tai tietty kuva, jonka haluat nähdä.
2. Paina ENTER tai PLAY näyttääksesi valitun kuvan tai aloittaaksesi kuvaesityksen.
3. Jos haluat katsoa jotain kuvaa pidemmän aikaa, keskeytä kuvaesitys hetkeksi painamalla PAUSE.
Jatka kuvaesitystä painamalla PLAY.
4. Paina STOP kun haluat lopettaa kuvaesityksen kokonaan. Kuvat näkyvät näytöllä pienoiskoossa.
5. Valitse kuva tai jokin valikon vaihtoehdoista nuolipainikkeita apuna käyttäen. Vahvista painamalla ENTER.
SUOMI
Näytön selitykset:
1
1. Kuvan numero/Luettelon kuvien kokonaismäärä
2. Tiedostolista
3. Tarkasteluikkuna
4. Kuvan tiedot (kuvan mitat)
31
3
4
Page 32

9. Vianhakutaulukko
Ei kuvaa/ääntä.
1. Onko kaikki yksiköt liitetty verkkovirtaan?
2. Ovatko kaikki yksiköt päällä?
3. Ovatko kuva ja ääni television valikossa kytketty pois päältä?
4. Onko televisio kytketty dvd-soittimeen oikein?
Toisto ei käynnisty.
1. Onko levy asetettu oikein?
2. Onko levy likainen tai onko siinä sormenjälkiä?
3. Levyssä on väärä aluekoodi.
SUOMI
4. Levyn formaatti on väärä.
5. Muuta sisällönsuojauksen asetuksia.
6. Sulje soitin, irrota pistoke hetkeksi ja aseta se takaisin. Käynnistä laite.
7. Kosteutta lukupäässä. Anna soittimen olla käyttämättä muutaman tunnin ajan.
Ei kuvaa.
1. Onko televisio päällä?
2. Tarkista liitännät.
3. Paina V-MODE ja vaihda ulostulosignaalia.
Kuva värähtelee tai on rakeinen.
1. Älä liitä dvd-soitinta muiden laitteiden kautta, vaan liitä se suoraan televisioon. Häiriöt saattavat johtua
dvd-soittimen sisäisestä kopiointisuojauksesta (tulee olla kaikissa dvd-soittimissa).
2. Käytä RF-adapteria, jos televisiossa ei ole videoliitäntää.
3. Tarkista dvd-soittimen ja television väriasetukset.
4. Levy on heikkolaatuinen tai naarmuinen.
Kuva on näyttöä pienempi.
1. Muuta näytön kuvasuhdetta: (Paina SETUP ja valitse TV Form 4:3 tai 16:9).
2. Valitse kuvasuhde dvd-levyn valikosta.
Askeltaminen eteen- tai taaksepäin ei onnistu.
1. Tietyt levyt on ohjelmoitu niin, ettei niissä voi siirtyä eteen- tai taaksepäin.
2. Levyllä on vain yksi raita.
Ei ääntä tai äänenlaatu on huono.
1. Varmista, että televisio ja vahvistin ovat päällä ja oikein asennetut.
2. Varmista, että televisio ja vahvistin on liitetty oikein ja että liittimet ovat kunnolla kiinni.
3. Valitse toinen ääniraita painamalla AUDIO-painiketta.
4. Varmista, ettei ”Mute”-toiminto ole aktivoituna dvd:ssä, televisiossa tai vahvistimessa.
5. Takaisinkelauksen, tauon, askelluksen, hitaan toiston ja eteenpäinkelauksen aikana ei kuulu ääntä.
Mp3-levystä ei kuulu ääntä, tai siitä kuuluu häiriöääniä.
1. Mikäli mp3-levyllä on mp3-tiedostoja ja ohjelmatiedostoja sekaisin, ohjelmatiedostot eivät kuulu oikein.
2. Varmista, että levyllä on pelkästään mp3-tiedostoja.
3. Kokeile seuraavaa mp3-tiedostoa.
3
Page 33

Kaukosäädin ei toimi.
1. Paristojen varaustaso on alhainen tai paristot on asetettu väärin.
2. Kaukosäädin on liian kaukana dvd-soittimesta tai yksiköiden välillä on esteitä.
3. Dvd-soitin on valmiustilassa.
Ei Dolby digital- tai DTS-ääntä digitaalisten ääniliitäntöjen kautta.
1. Varmista, että vahvistin tukee Dolby Digital- tai DTS-ääntä.
2. Tarkista, että dvd-soittimen digitaalisen ääniulostulon ja vahvistimen digitaalisen sisäänmenon välillä on
koaksiaaliäänikaapeli.
3. Varmista, että levyssä on Dolby Digital- tai DTS-tuki, ja että se on valittuna levyn valikosta.
Dvd-soitin ei reagoi kaukosäätimeen.
1. Kaukosäätimen paristot on vaihdettava. Vaihda vanhojen paristojen tilalle uudet.
2. Kaukosäätimen signaalit eivät ulotu perille. Osoita kaukosäätimellä suoraan dvd-soitinta kohti.
3. Kaukosäädin ja dvd-soitin ovat liian kaukana toisistaan. Pienennä välimatkaa.
10. Kierrätys
Kierrätä tuote asianmukaisesti, kun poistat sen käytöstä. Ota yhteys kuntasi jäteneuvontaan,
mikäli olet epävarma.
SUOMI
11. Tekniset tiedot
Yleiset ominaisuudet:
Yhteensopivat muistikortit: USB, SD, MMC, MS
Värijärjestelmä: PAL/NTSC/MULTI
Taajuusalue: Dvd Video (MIP 96 kHz): 20 Hz ~ 44 kHz (+ 1 dB)
Dvd Video (MIP 48 kHz): 20 Hz ~ 22 kHz (+ 0,5 dB)
CD: 20 Hz ~ 22 KHz (+ 0,5 dB)
Taajuusvaste: > 90 dB (kun 1 kHz, 0 dB)
Liitännät: SCART, S-video, komponenttivideo, HDMI, koaksiaalinen digitaalinen
ja analoginen ääniliitäntä
Virtalähde: 220 – 240 V AC,
Virrankulutus: 20 W
Mitat: 430 x 38 x 260 mm
Paino: 2,4 kg
Ulostuloliitännät:
Videoulostulo: 1,0 Vpp (75 ohmia)
Analoginen ääniulostulo: 2,0 V rms
50/60 Hz
S-videoulostulo: (Y) 1,0 Vpp (75 Ohmia) (C) 286 mVpp (75 Ohmia)
Komponenttivideoulostulo: (Y) 1,0 Vpp (75 Ohmia) 0,7 Vpp (75 Ohmia)
Koaksiaali videoulostulo: 0,5 Vpp (75 Ohmia)
33
Page 34

34
Page 35

35
Page 36

SVERIGE
KUNDTJÄNST Tel: 0247/445 00
Fax: 0247/445 09
E-post: kundtjanst@clasohlson.se
INTERNET www.clasohlson.se
BREV Clas Ohlson AB, 793 85 INSJÖN
NORGE
KUNDESENTER Tlf.: 23 21 40 00
Faks: 23 21 40 80
E-post: kundesenter@clasohlson.no
INTERNETT www.clasohlson.no
POST Clas Ohlson AS, Postboks 485 Sentrum, 0105 OSLO
SUOMI
ASIAKASPALVELU Puh: 020 111 2222
Faksi: 020 111 2221
Sähköposti: info@clasohlson.fi
INTERNET www.clasohlson.fi
OSOITE Clas Ohlson Oy, Yrjönkatu 23 A, 00100 HELSINKI
GREAT BRITAIN
For consumer contact, please visit
www.clasohlson.co.uk and click on
customer service.
INTERNET www.clasohlson.co.uk
 Loading...