

Clas Ohlson KW-1009 Installation Manual
18-8036/38-2362
Stereo System
Musikanläggning
Musikkanlegg
Ministereo
SVENSKANORSKSUOMI ENGLISH
Model: KW-1009
www.clasohlson.com
Ver. 200807


Stereo System
Article number 18-8036/38-2362 • Model KW-1009
Please read the entire instruction manual before using the product and save it for future reference. We
apologise for any text or photographic errors and any changes of technical data. If you have any questions
concerning technical problems please contact our Customer Service Department (see address on reverse).
Table of Contents
1. Safety
2. Product Description
. Buttons and Functions
4. Installation
5. Mounting
6. Basic Operation
7. Playing a CD
8. MP Playback
9. Listening to the Radio
10. Advanced Functions
11. Setting the Clock
12. Automatic Activation
1. Sleep Timer
14. Using Headphones
15. Care and Maintenance
16. Troubleshooting
17. Disposal
18. Specications
ENGLISH
ENGLISH
ENGLISH
1. Safety
• The product should only be repaired by qualied service personnel.
• The product should not be taken apart or modied.
• Do not place the product where it could fall into water or other type of liquid. Do not place any objects
which contain liquid on the product, e.g. vases or drinks.
• Make sure that the electrical outlet the device is plugged into is easily accessible since the plug is used to
disconnect the device from the mains.
• Do not cover the product. Adequate ventilation with a distance of at least 15 cm between ventilation holes
and the surrounding area is necessary to prevent the device from becoming too warm.
• Do not place the device in a damp, dusty environment or where there are heavy vibrations.
• The standby switch on the front of the device does not disconnect the device from the mains.
To completely disconnect the device from the mains the plug has to be removed from the socket.
• Use only the included or recommended adaptor.
• Remove the batteries if the product is not to be used for a longer period of time. The batteries can begin
to leak and damage the device or cause personal injury.
• Prolonged exposure to high volume can damage your hearing.
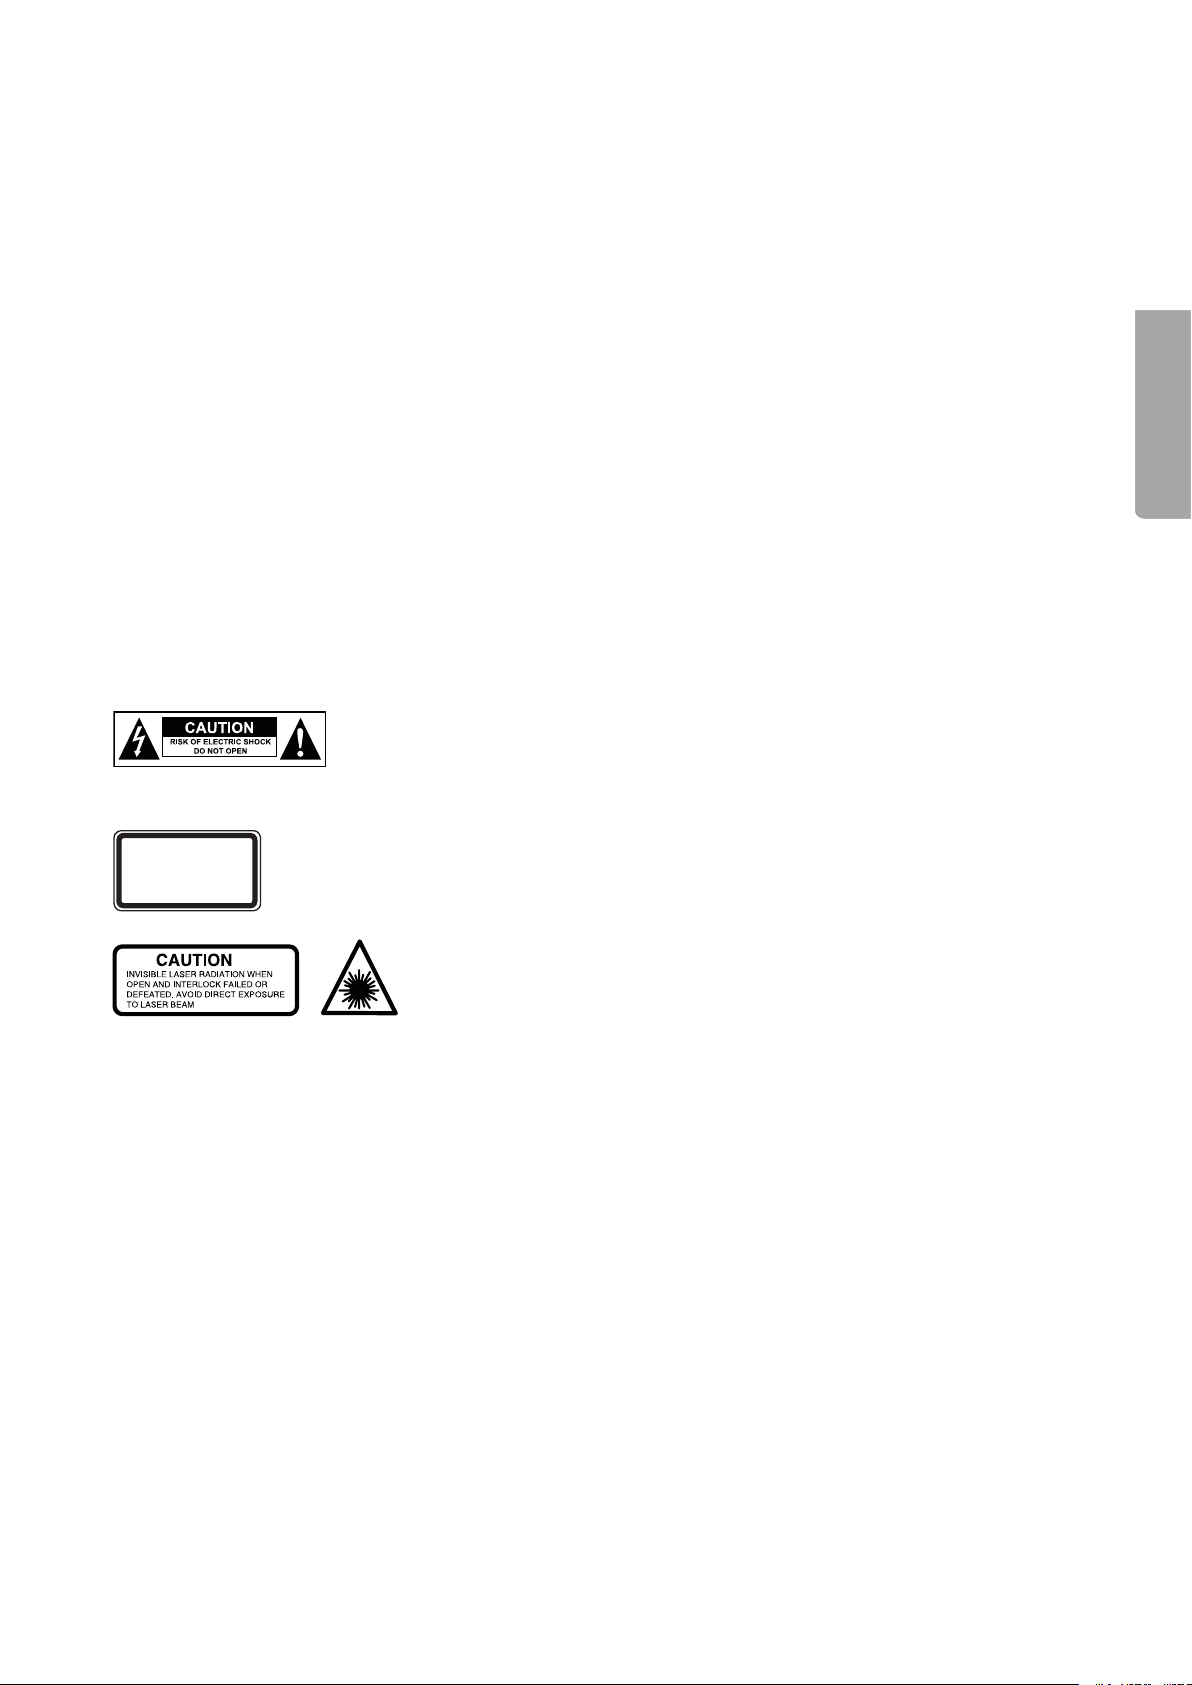
Note the following safety symbols
Caution: Do not open the casing! Certain unprotected components
within the product’s casing carry dangerous currents. Contact with
these can lead to re or give electric shocks.
CLASS 1
LASER PRODUCT
CLASS 1 LASER PRODUCT
Caution: Do not open the casing! Product contains invisible laser
beams which can cause eye damage. Do not look directly into the
laser beam or look directly at it through an optical instrument.
2. Product Description
• USB and SD memory card
connection.
• Reads MP les’ ID tags.
• Extra bass amplication switch.
• Stereo headphone outlet.
• .5 mm low level input.
• Remote control included.
• Can even be wall mounted.
4
3. Buttons and Functions
1
2
3
5 7 9
4 6
8
20181614
1210
11 13
15 17 19
23
22
22
3.1 Stereo System
ENGLISH
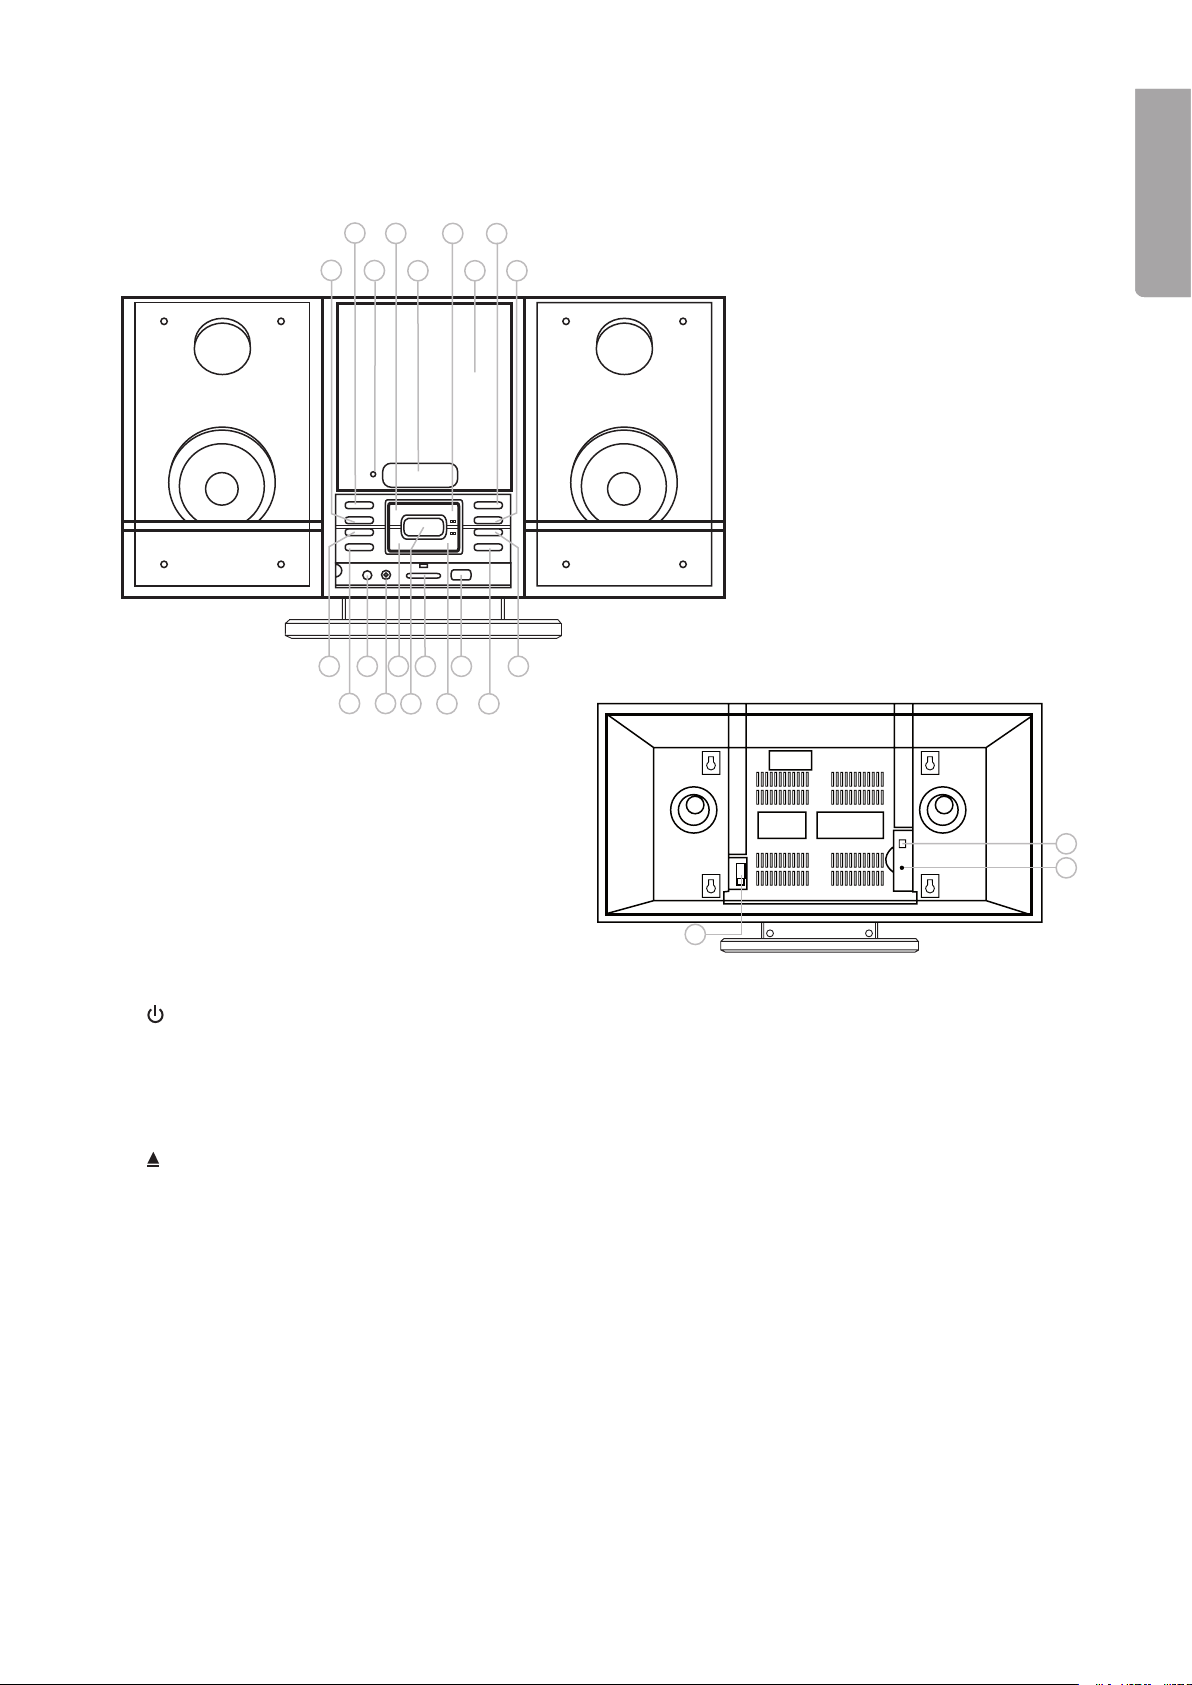
1. FUNCTION – Function selector (TUNER/CD/USB/CARD/AUX)
2. (On/off) – Turns the device on or off
. Remote control IR receiver
4. ■ / BAND – Stop/Band selector
5. Display
6. ►/II – Play/Pause
7. CD door
8. – Opens and closes the CD door
9. ▲ – Increases volume
10. TIMER – Automatic activation
11. MEMORY/CLOCK – Stores radio channel/Sets the time
12. LINE IN – External audio source connection (,5 mm stereo)
1. PHONES - Headphone socket (.5 mm stereo)
14. |◄◄ – Previous
15. DBBS – Dynamic bass boost system
16. SD/MMC – SD/MMC memory cards slot
17. ►►|– Next
18. USB memory connection
19. PLAY MODE – Changes playback settings
20.▼ – Decreases volume
21. Adaptor connection (12 V DC, 1.5 A)
22. Telescopic FM aerial
2. AM aerial connection for included AM aerial
5
3.2 Remote control
OPEN/
CLOSE
STANDBY
MUTE
TIMERFUNCTION
MEMORY/
CLOCK
BAND
STOP
FOLDER
UP
1
4
7
SLEEP
2
5
8
0
3
6
9
DN
EQ
PLAY
MODE
ST/MO
/D3
DBBB
UP
DN
VOLUME
1
3
4
2
5
8
9
6
7
10
11 20
18
16
14
13
12
17
15
19
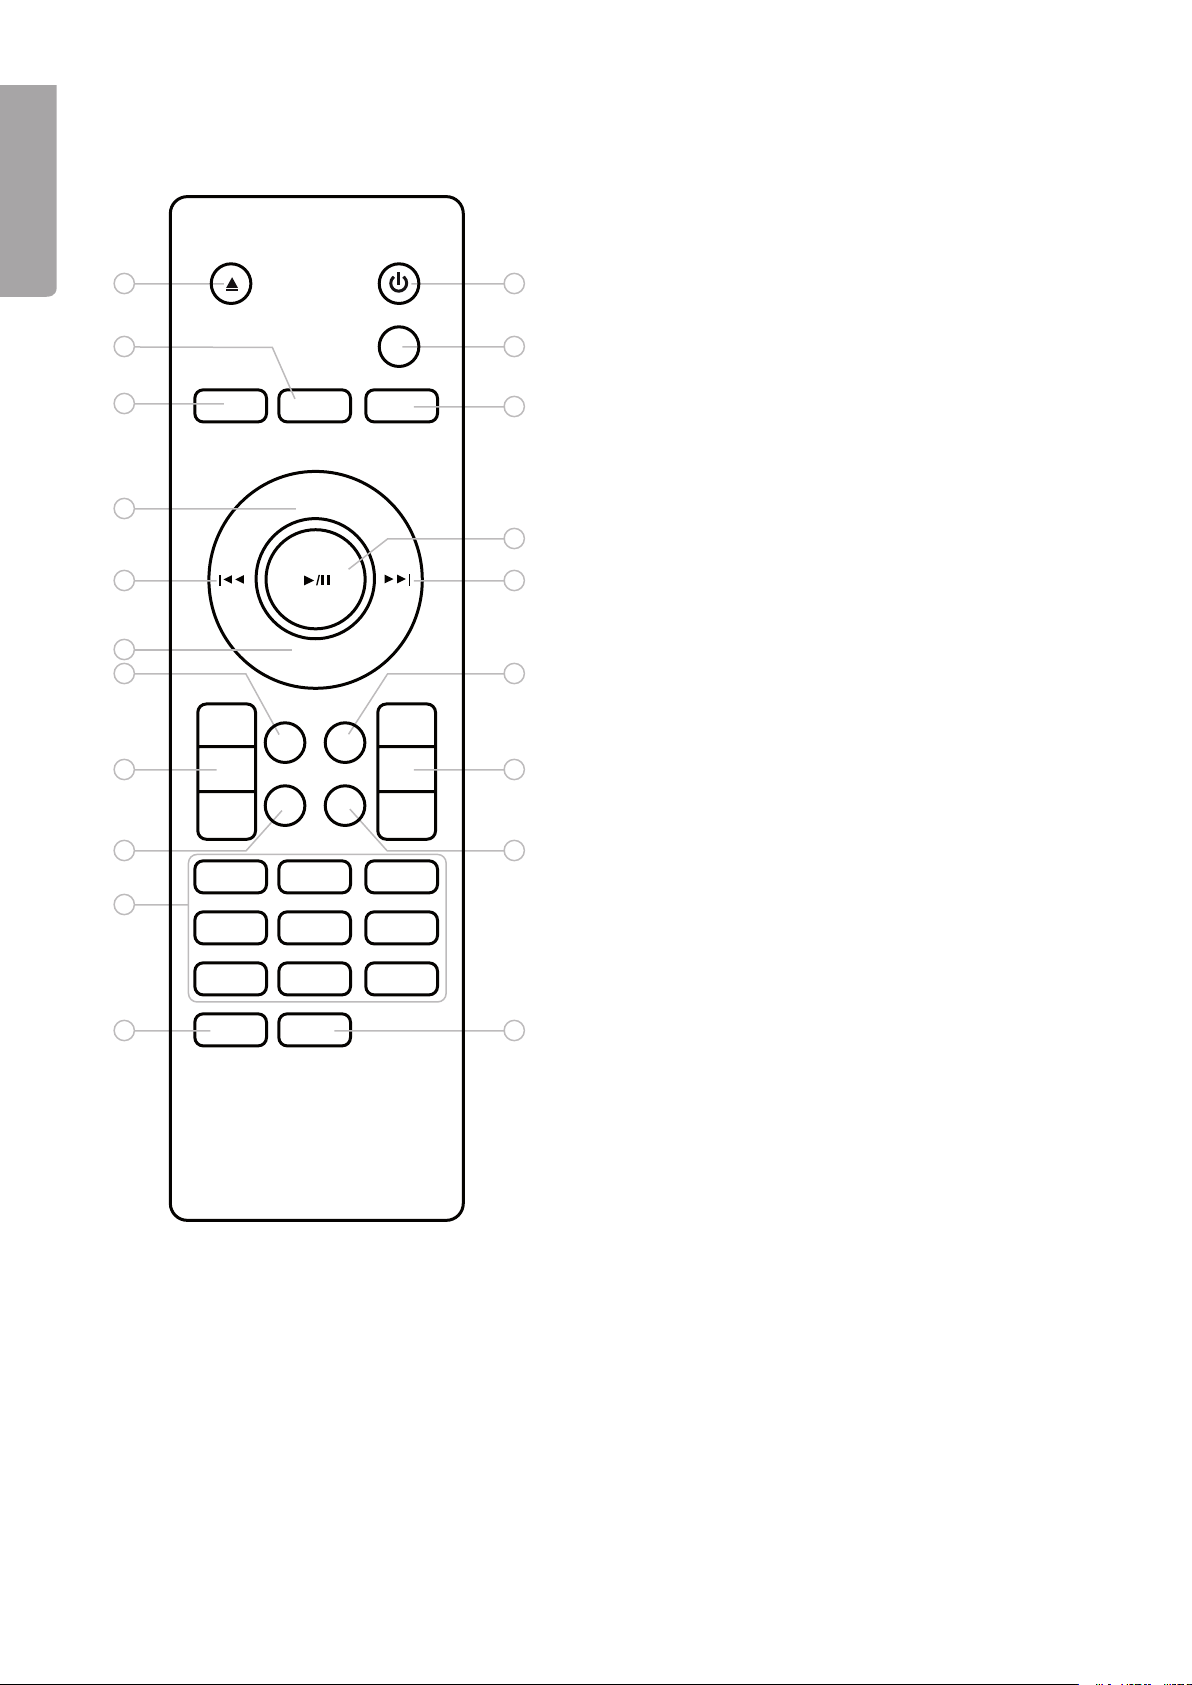
1. OPEN/CLOSE -Opens/Closes the CD door
ENGLISH
2. MEMORY/CLOCK – Stores radio channel/Sets
the time
. FUNCTION – Function selector (TUNER/CD/USB/
CARD/AUX)
4. BAND – Frequency band control
5. |◄◄– Previous
6. ■ – Stop
7. PLAY MODE – Changes playback settings
8. FOLDER UP/DN – Moves upward/downward
to a new folder
9. EQ – Electronic equalizer (changes settings)
10. 1-9 – Number keys
11. SLEEP – Set the time for automatic shut-off
12. STANDBY – Turns the system on/off
1. MUTE – Turns off volume
14. TIMER – Automatic activation
15. ►/II– Play/Pause
16. ►►| – Next
17. ST/MO/ID3 – Select stereo/mono radio reception.
Displays ID tag during MP playback
18. VOLUME UP/DN – Volume up/down
19. DBBS – Dynamic bass boost system
20. 0 – Number key
6
4. Installation
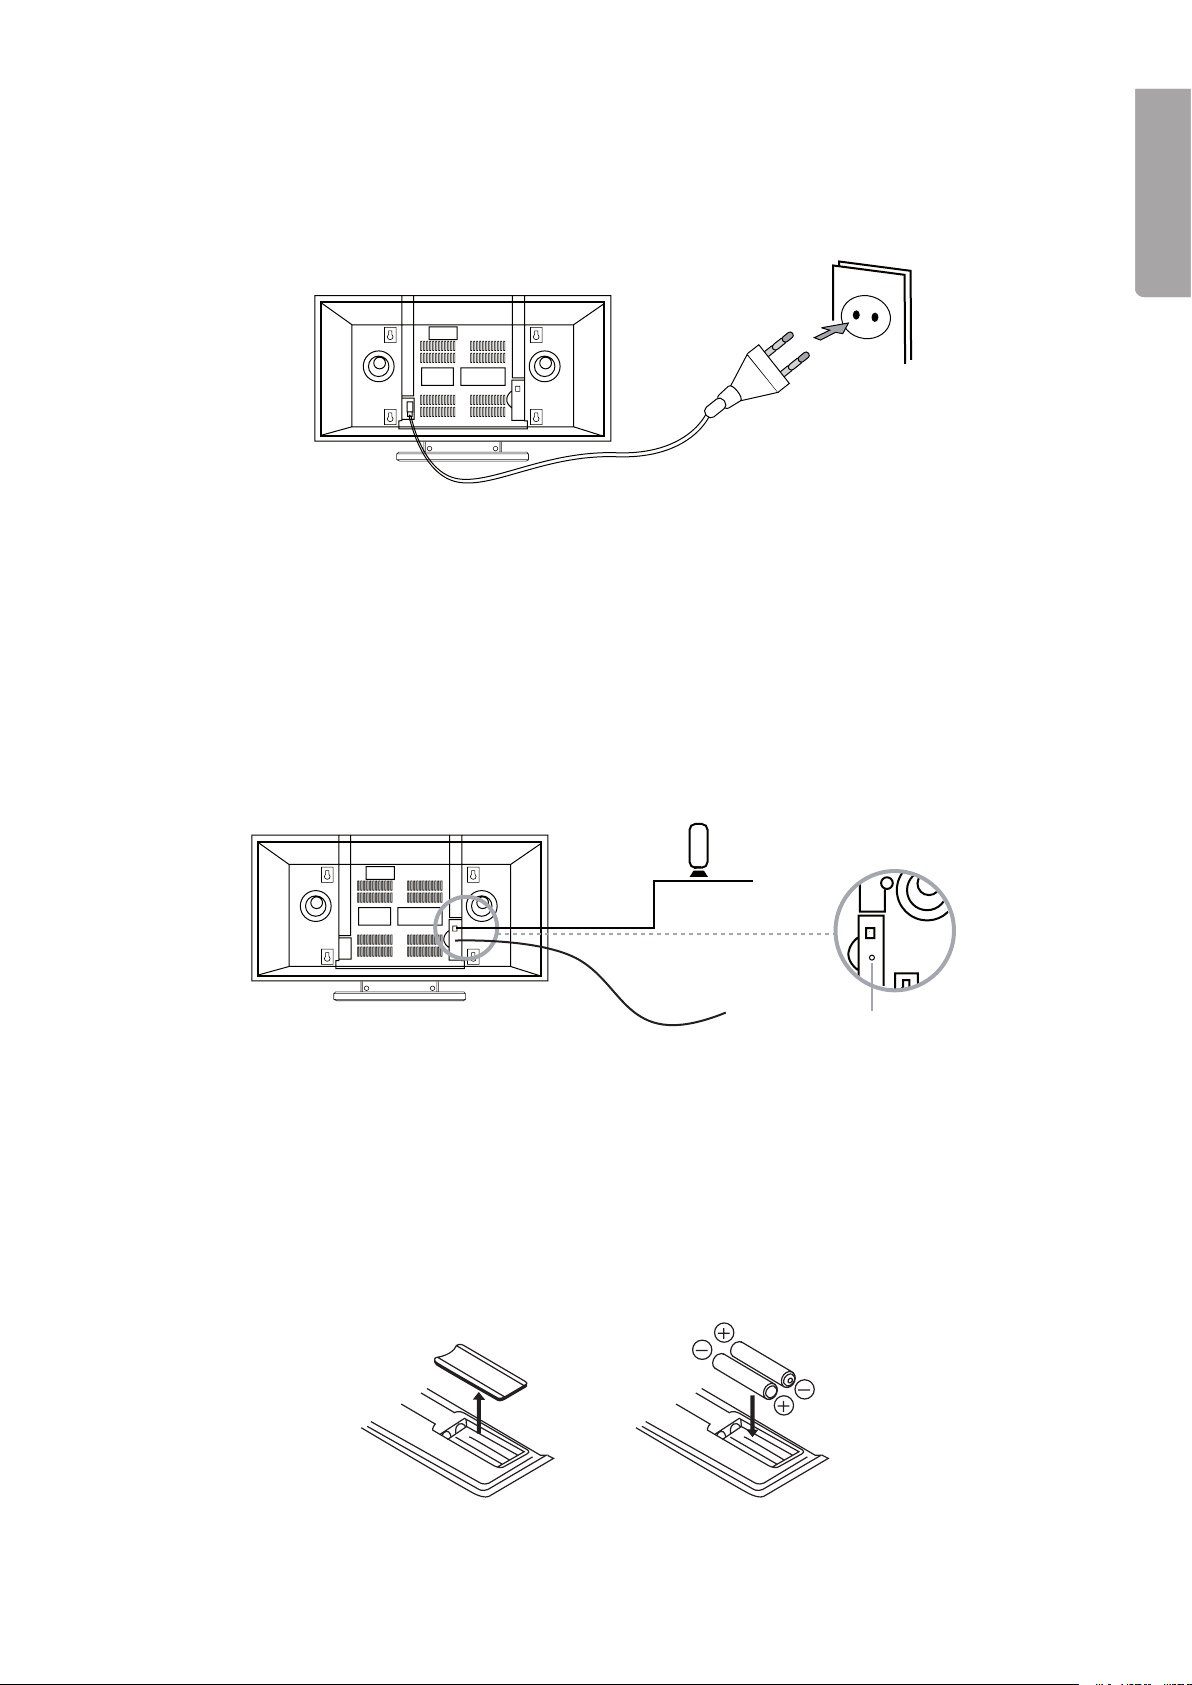
4.1 Connecting to the mains
Connect the adaptor’s DC adaptor plug to the stereo’s DC socket (21).
Then plug the adaptor’s power plug into a wall socket.
4.2 Aerial
FM
The FM aerial (22) is found on the back of the stereo.
- Unravel the wire aerial and position it until you receive the best reception.
ENGLISH
AM
The included AM aerial connects to the socket (2) on back of the stereo.
- Position the AM aerial for the best possible reception.
AM aerial
FM aerial
FM aerial
4.3 Remote control – Inserting batteries
1. Open the battery compartment by pressing the cover and lifting it up.
2. Insert 2 x LR0/AAA batteries according to the markings in the battery compartment
and replace the battery cover.
7
ENGLISH
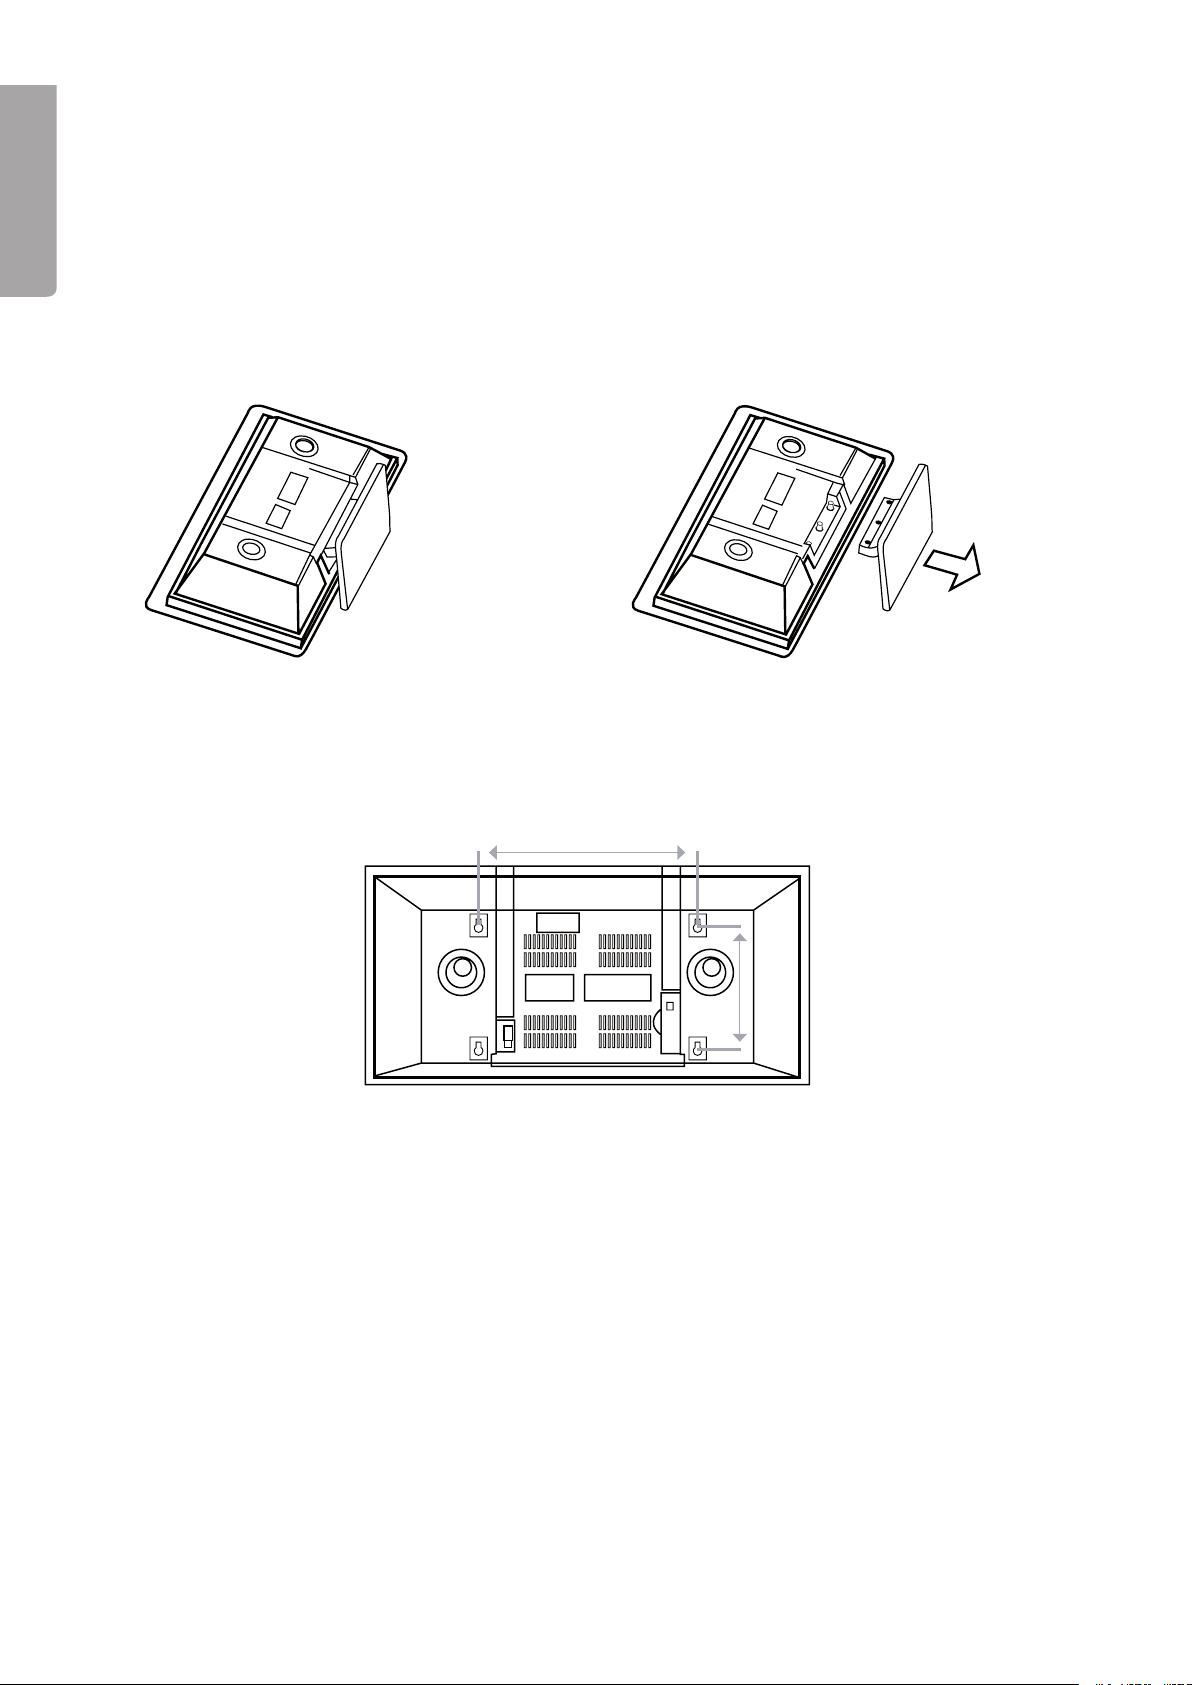
5. Mounting
5.1 Wall mounting
The stereo can be used standing upright or be wall mounted according to your preference.
1. First remove the stand (which must be removed before mounting it to the wall).
a. Lay the stereo down according to the gure.
b. Use a Phillips screwdriver to remove the stand from the stereo’s underside.
c. Remove the stand by pulling it directly outward from the stereo. Keep the stand and screws for future use.
A C
2. Connect the adaptor to the stereo’s DC connection (21).
. Measure the distance between the mounting holes on back of the stereo and use these
measurements to securely screw 4 screws into the wall.
N.B.
• Make sure that the wall and mounting xings are enough to support the stereo’s weight.
• Incorrect mounting can damage the product or property and cause possible injury.
8
6. Basic Operation
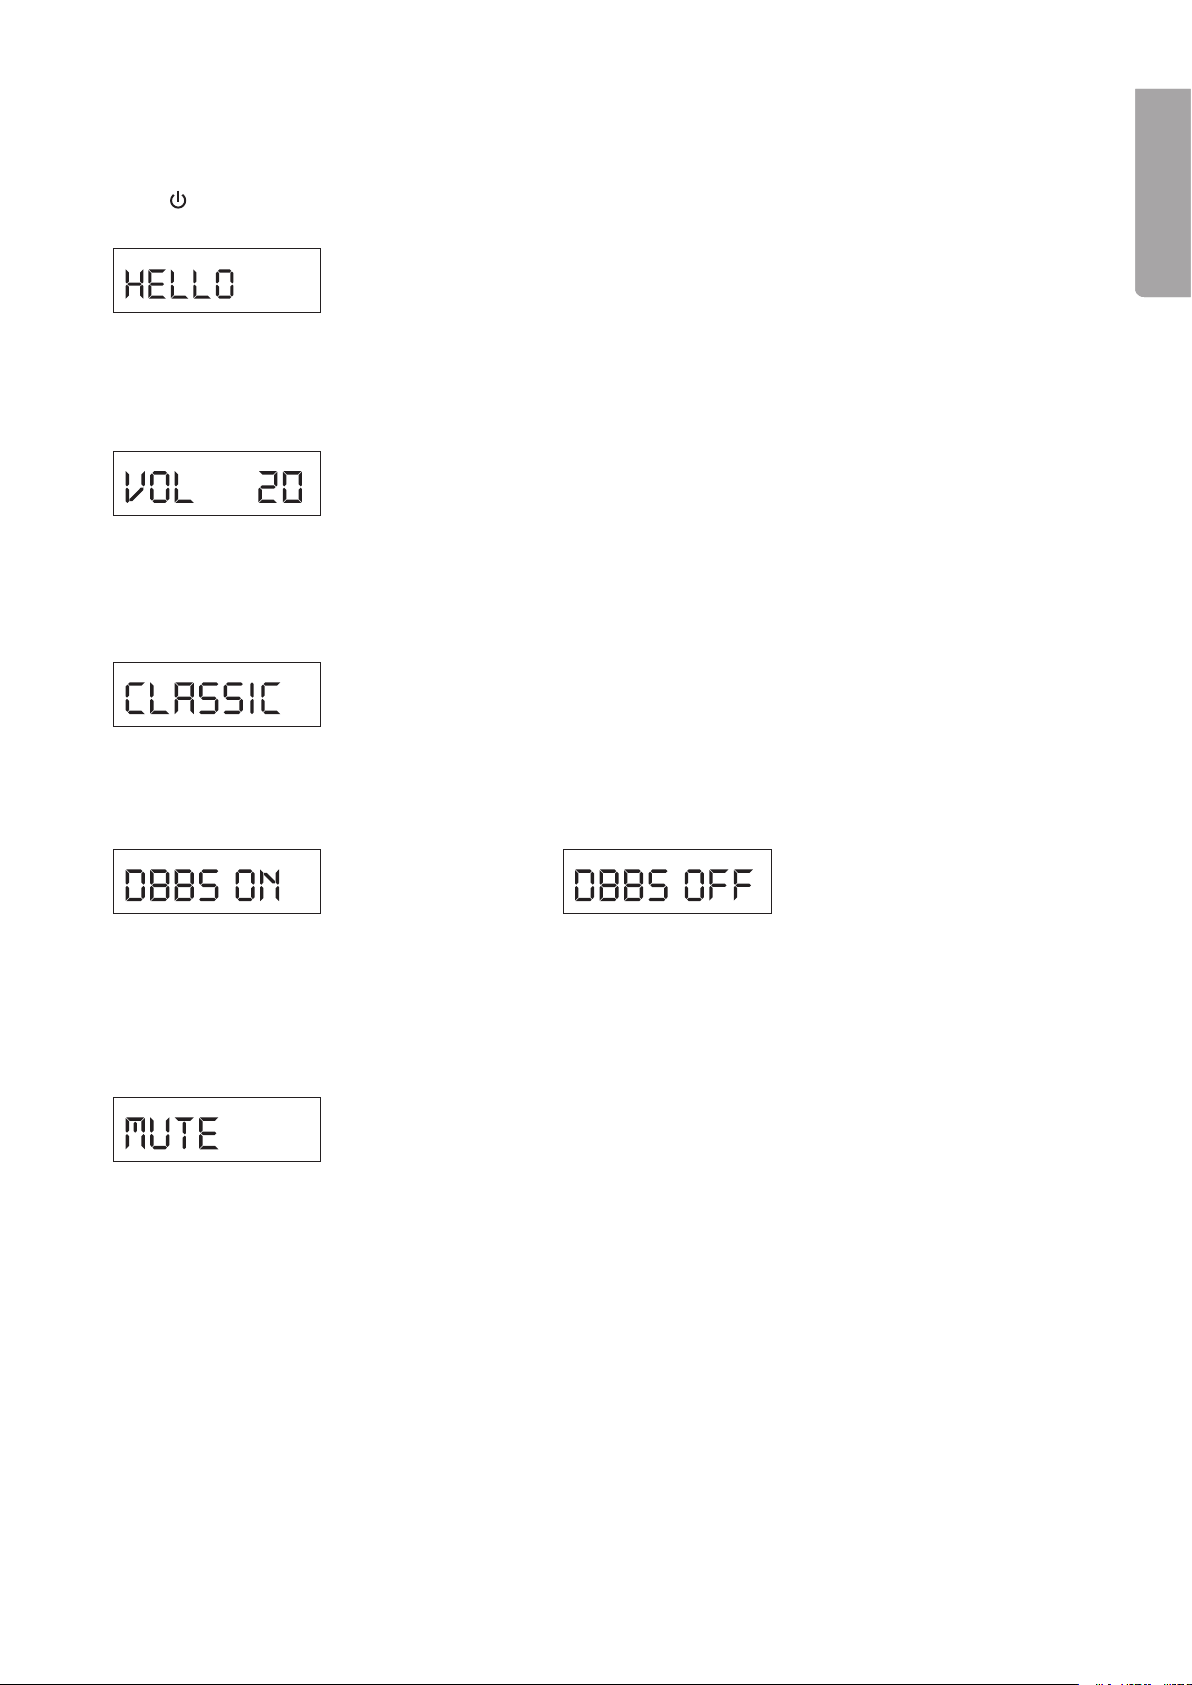
6.1 Turning the device on and off
Press /STANDBY on the stereo or remote in order to turn it on/off. The display will be lit once the stereo is
turned on.
6.2 Adjusting the volume
Press VOLUME UP/▲or VOLUME DOWN/▼in order to adjust the volume. The display shows the current
volume setting.
6.3 EQ – Electronic equalizer (changes settings)
Repeated press EQ (9) on the remote in order to select an equalizer setting: FLAT, CLASSIC, ROCK, POP,
JAZZ. The display will show the current equalizer setting:
ENGLISH
6.4 DBBS (Dynamic Bass Boost) – Increases bass reproduction
Press DBBS (19) on the remote to activate/deactivate. The display will show the current setting:
DBBS activated DBBS deactivated
6.5 MUTE – Turns the volume off
Press MUTE (1) on the remote to turn off the volume. Press again to turn on the volume. The volume
is turned on when any of the volume controls are pressed. MUTE will be shown in the display when this
function is activated:
9
ENGLISH
7. Playing a CD
The stereo can play CD-, CD-R and CD-RW discs along with discs which contain mp-les.
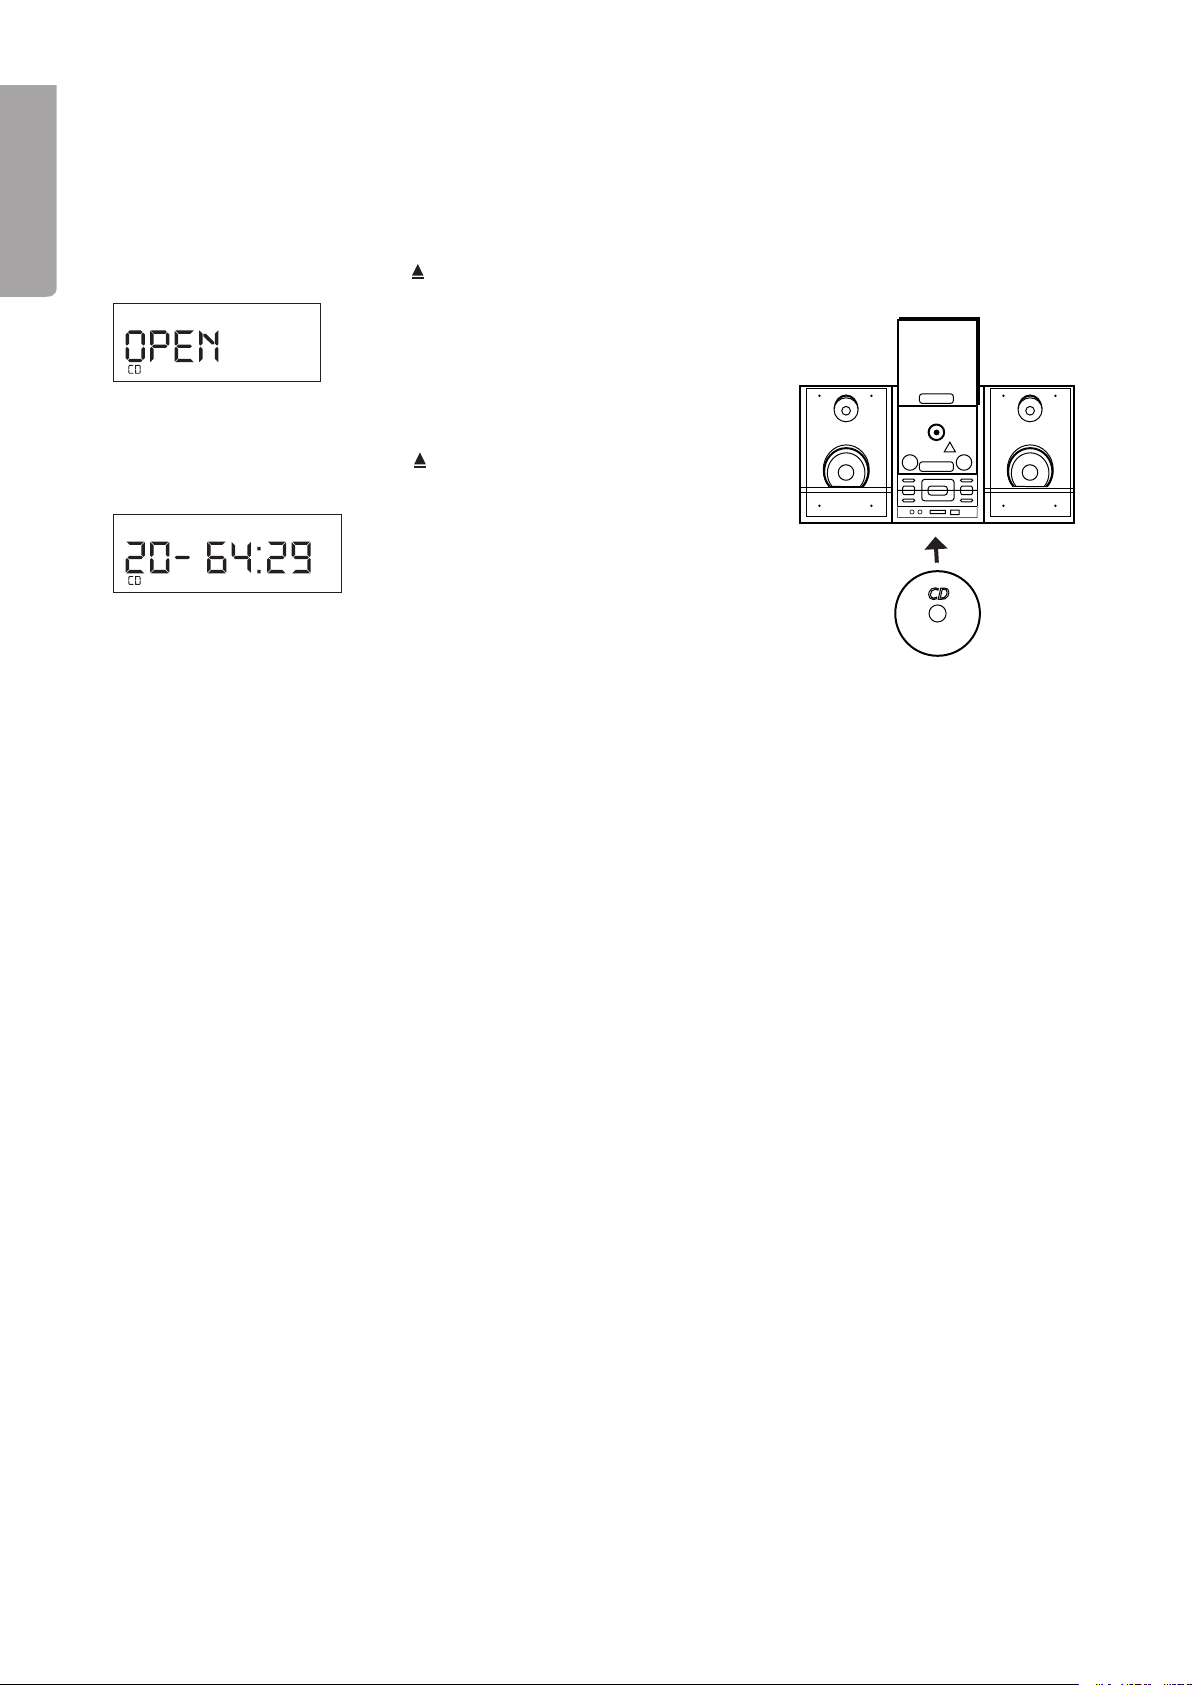
7.1 Inserting a CD and starting playback.
1. Press FUNCTION once or repeatedly to select CD mode. CD is shown in the display.
2. Open the CD door by pushing
. Insert a CD into the CD compartment with the text/label facing up.
4. Close the CD door by pushing
the total tracks and play time are shown on the display.
5. Press►/II to start playback.
6. Stop playback by pressing
N.B.
The CD player will also stop when:
• The CD door is opened.
• Another audio source is chosen.
• The entire CD has been played.
/OPEN/CLOSE.
/OPEN/CLOSE. After a moment
■.
7.2 Selecting a different track
Pressing I◄◄/►►I during playback allows you to choose particular tracks. If a track has been selected
whilst in the stop or pause mode, playback can be restarted by pressing►II.
• Press
• Press
►►| once to advance to the next track, or press repeatedly until the desired track number is
shown on the display.
|◄◄ to return to the beginning of the current track. Press more than once to return to previous
tracks.
7.3 Fast search
1. Press I◄◄or ►►I and hold the button down. The CD will be played at fast search speed.
2. Releasing the button resumes normal playback.
10
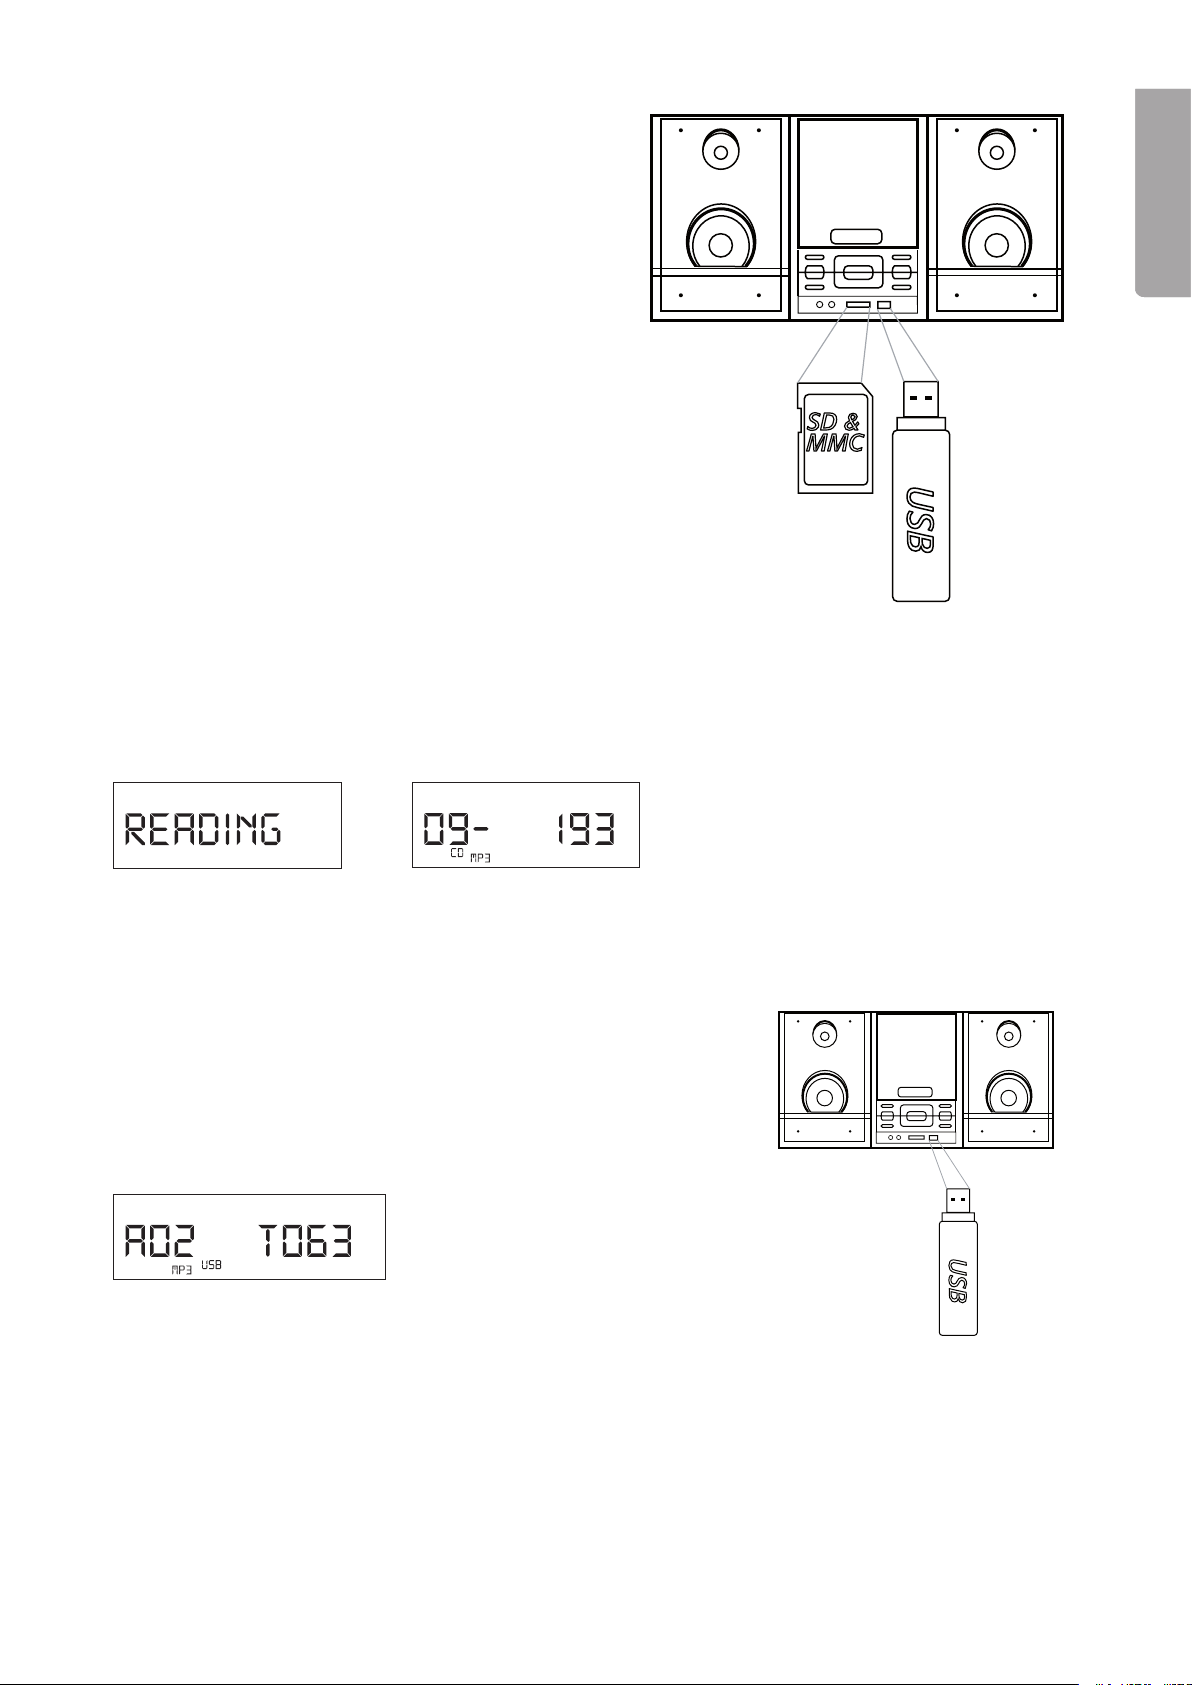
8. MP3 Playback
The stereo can play MP les stored on a CD, a USB
memory or a SD/MMC memory card.
The connections for the USB and memory cards are
found behind the door on the front bottom portion of
the stereo.
• Flip the door down by gently pulling on one of
door’s sides.
8.1 Playing a CD containing MP3 les
1. Press FUNCTION once or repeatedly to select CD mode.
ENGLISH
2. Place a CD containing MP les into the CD compartment. After a moment the track total
will appear on the display.
Example: The CD contains a total of 9 albums/folders and 193 tracks/files .
. Press►/II
to start playback on the rst track of the album/folder.
8.2 Playing MP3 les from a USB memory
1. Connect either a USB memory (18) or a SD/MMC card (16).
2. Press
. After a moment the display shows the total amount of albums and
Example: The USB contains a total of 2 albums/folders and 63 tracks/files.
FUNCTION once or repeatedly to select USB for playback
from the USB or CARD for memory card playback.
tracks contained in memory.
4. Press ►/IIto start playback on the rst track of the album/folder.
11

ENGLISH
8.3 Playing MP3 les from a SD/MMC card
1. Connect a SD/MMC card to the socket (16).
2. Press FUNCTION once or repeatedly to select USB for playback
from the USB or CARD for memory card playback.
. After a moment the number of tracks in memory will be displayed.
Example: The memory card contains a total of 8 albums/folders
and 49 tracks/files.
4. Press►/II
to start playback on the rst track of the album/folder.
8.4 Selecting an album/folder
1. Press FOLDER UP or FOLDER DN to advance to the next or previous album/folder.
The current album-/folder number is shown on the display (i.e. A002).
2. If playback has been stopped press►/II to resume playback.
8.5 Selecting a different track
PressingI◄◄/►►I during playback allows you to choose particular tracks. If a track has been selected
whilst in the stop or pause mode, playback can be restarted by pressing ►II.
• Press ►►| once to advance to the next track, or press repeatedly until the desired track number is
shown on the display.
• Press|◄◄
tracks.
to return to the beginning of the current track. Press more than once to return to previous
8.6 Fast search
1. Press I◄◄or ►►I during playback and hold the button down. The track will be played at fast
search speed.
2. Releasing the button resumes normal playback.
12
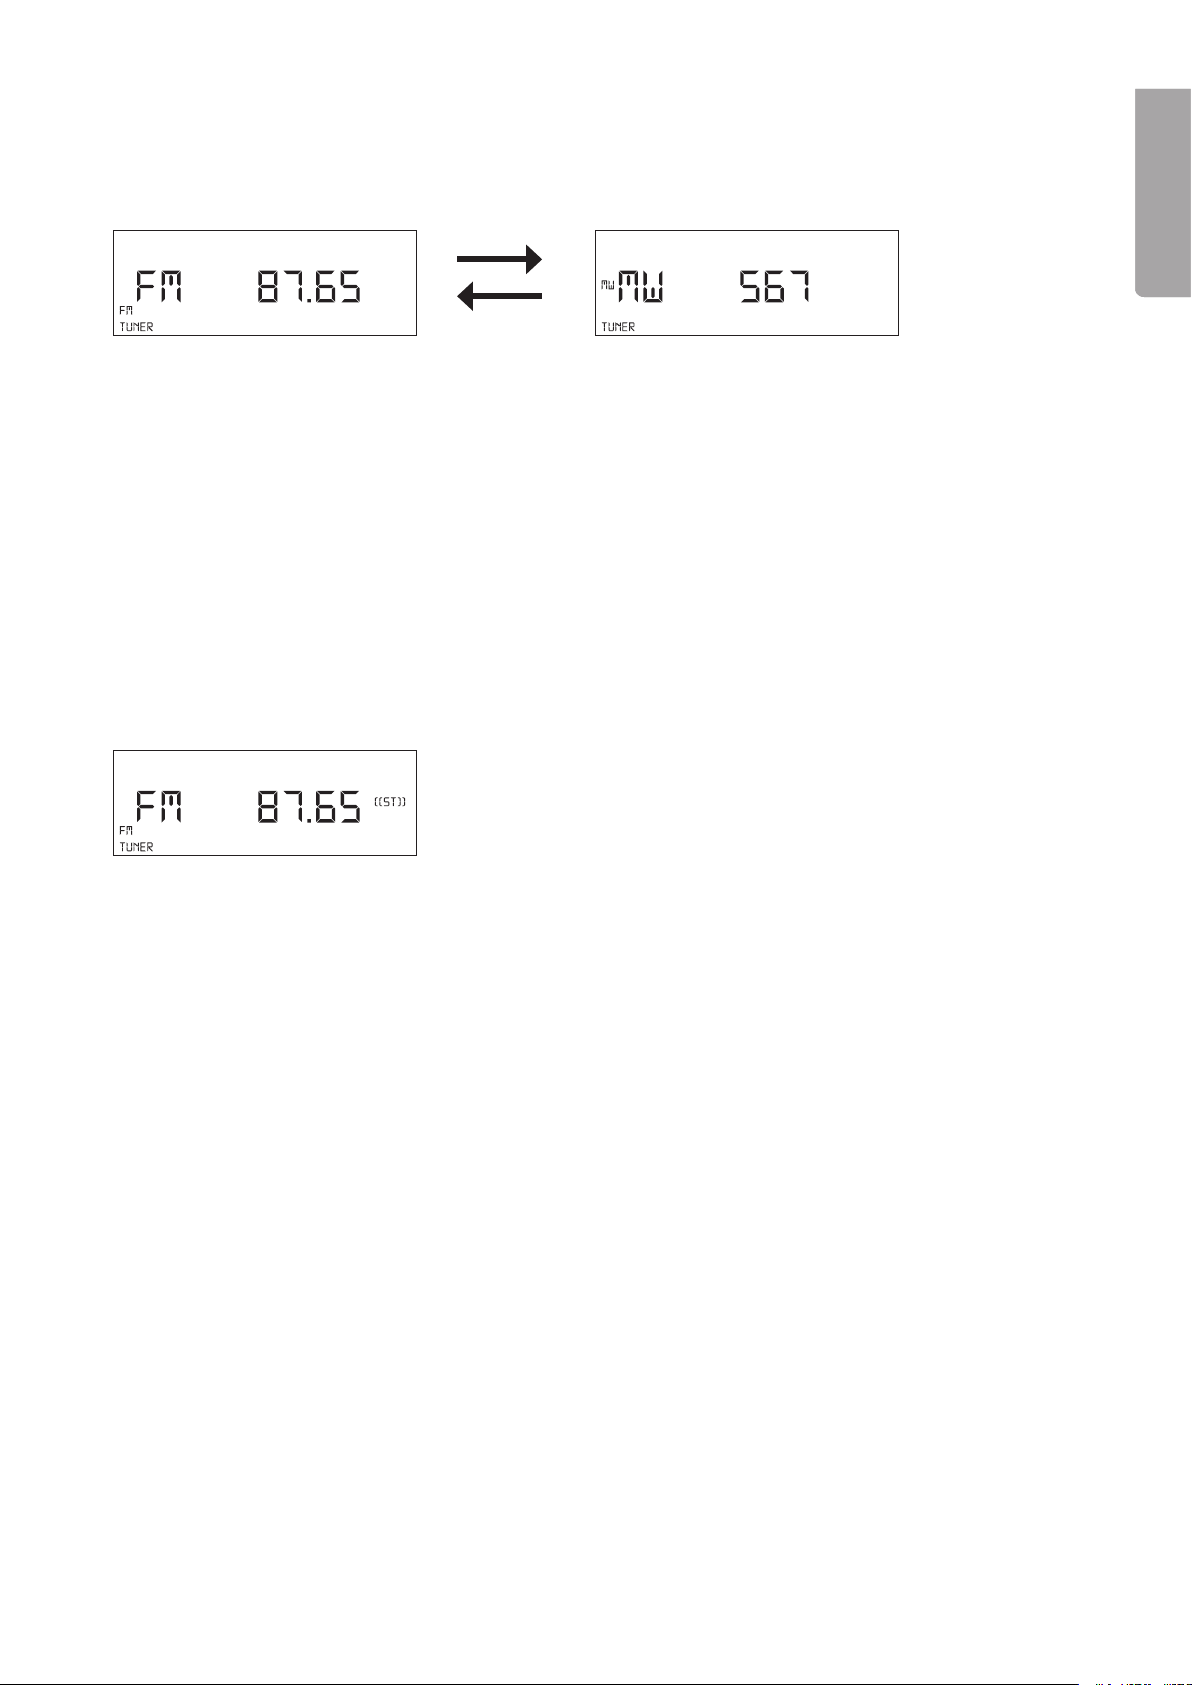
9. Listening to the Radio
1. Press FUNCTION once or repeatedly to select the TUNER used for the radio.
ENGLISH
2. Press■
/BAND to select the desired band (FM or MW):
9.1 Manual station selecting
• Press I◄◄or ►►I repeatedly to select the desired station.
9.2 Automatic station search
• Press and holdI◄◄or ►►Ito start the automatic station search function for an upward/downward
search. The radio will automatically search for the rst, best and strongest station and remain there.
• Press and hold the button again to nd the next station.
9.3 FM-Stereo
When a radio station is received in stereo the stereo indicator ((ST)) is shown on the display.
• If reception is distorted in stereo mode ((ST)), press ST/MO/ID3 on the remote to select mono mode.
The stereo indicator turns off and reception should be improved.
How to get the best reception
FM
The FM aerial (22) is found on the back of the stereo.
• Unravel the wire aerial and position it until you receive the best reception.
AM
The included AM aerial connects to the socket (2) on back of the stereo.
• Position the AM aerial for the best possible reception.
9.4 Programming stations
You can store up to 0 FM radio stations and 10 AM stations in the memory.
1
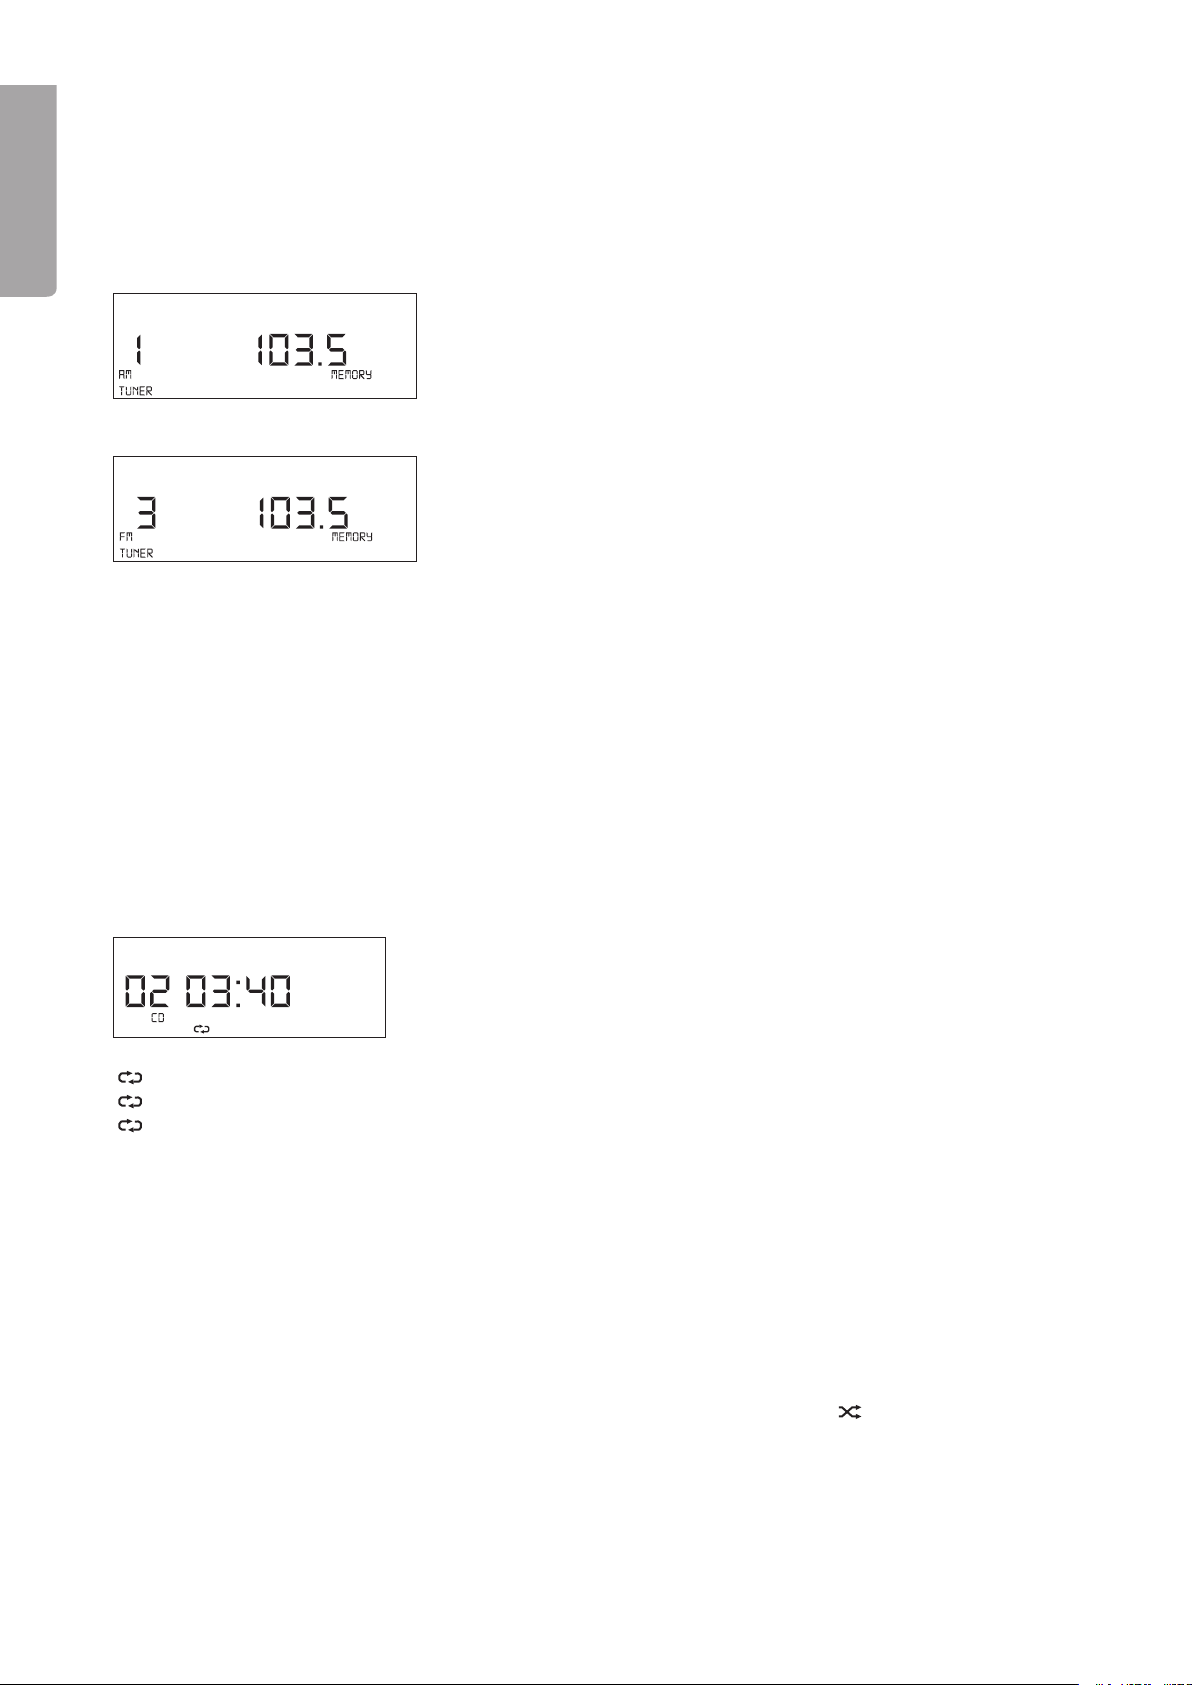
1. Select the desired band (AM or FM) by pressing BAND.
ENGLISH
2. Select the desired station by following steps
. Press
4. Press
Example: Store the station in memory slot 3.
5. Press MEMORY/CLOCK to conrm storage of the station for the designated memory slot.
6. Repeat steps 1 – 5 to store more tracks into memory.
MEMORY/CLOCK once. Memory slot “1” ashes on the display.
FOLDER UP or FOLDER DN to select the memory slot on which you wish to store the station on.
The number designating the memory slot will stop ashing.
9.3 or 9.4.
10. Advanced Functions
10.1 Repeated playback (CD/MP3)
During playback, activate repeated playback by pressing PLAY MODE once or repeatedly until the following
symbols are shown on the display. The numbers will differ according to the tracks on your CD/MP.
Repeats the current track only.
ALBUM Repeats the current album/folder.
ALL Repeats all tracks.
Cancelling repeated playback
Press PLAY MODE once or repeatedly until the repeated playback symbol is no longer seen in the display.
Repeated playback is cancelled even if you should open the CD door or choose another audio source.
N.B. Repeated playback can even be used when programming playback. Follow the above instruction to
activate repeated playback.
10.2 Random playback (CD/MP3)
Press PLAY MODE once or repeatedly to activate random playback. The symbol is displayed when the
function is activated. The tracks will now be played in random order.
Press PLAY MODE again or■ to turn off random playback.
14

10.3 Programmed playback (CD/MP3)
You can store up to 40 tracks in any order. Programming can only be done once playback has stopped.
ENGLISH
1. In stop mode press
The display will show “01” and the programme number “PR 01”.
2. Select the album/folder with FOLDER UP and FOLDER DN (only during MP playback).
. Select the track number with
4. When the track you want to store is shown press MEMORY/CLOCK to store the track in memory slot
“01”. The programme number advances to “PR 02”.
MEMORY/CLOCK once.
I◄◄ and ►►I. For example track “07”.
5. If several tracks are to be programmed, repeat steps 1 and 4 to programme tracks for memory slots
P02 – P40.
6. When the programming has been completed, press
Deleting programmed tracks
You can erase the contents of the memory by:
• Pushing
• Choosing another audio source.
• Opening the CD door.
■ twice.
►II to start playback.
10.4 ID3 information (mp3)
While playing back MP les press ST/MO/ID3 on the remote to display the MP le’s ID-information
in the following order:
Press ST/MO/ID3 again to return to the displaying of playback time.
N.B. In order to display ID information the current MP le must contain this information.
15
ENGLISH
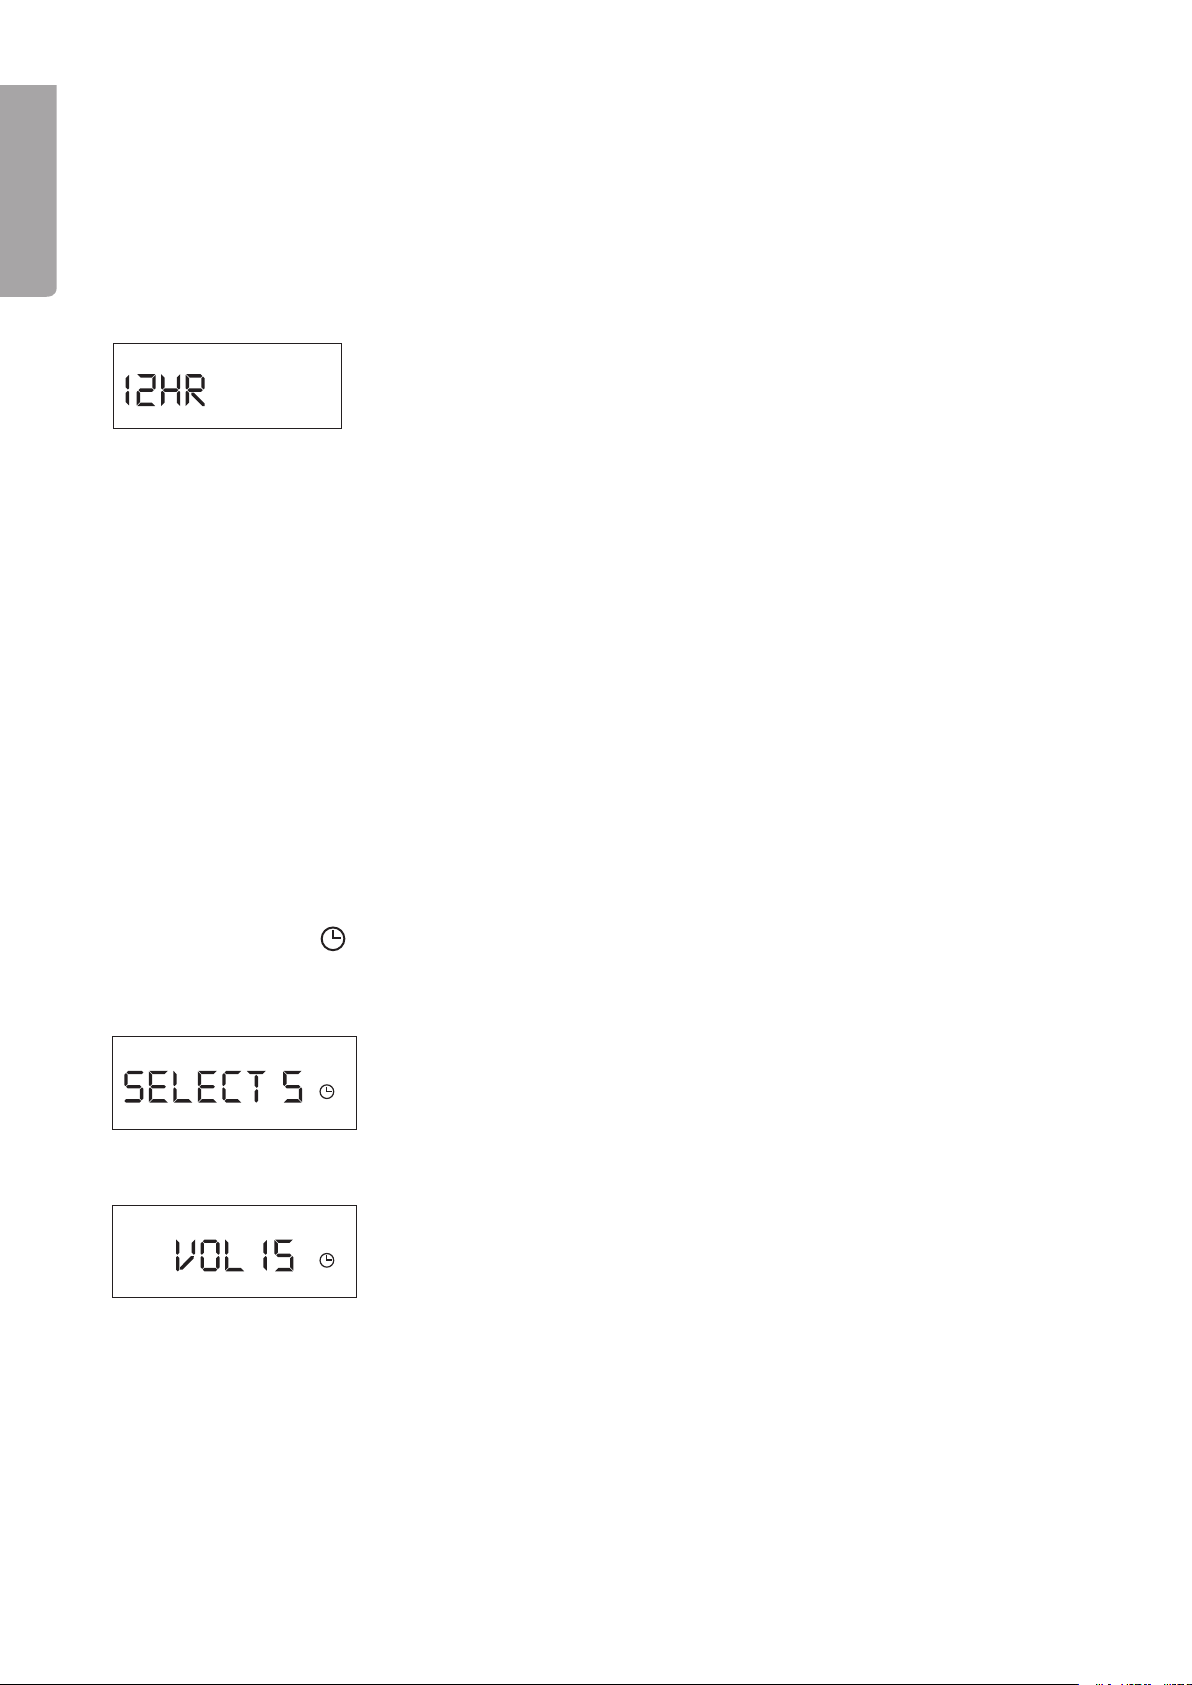
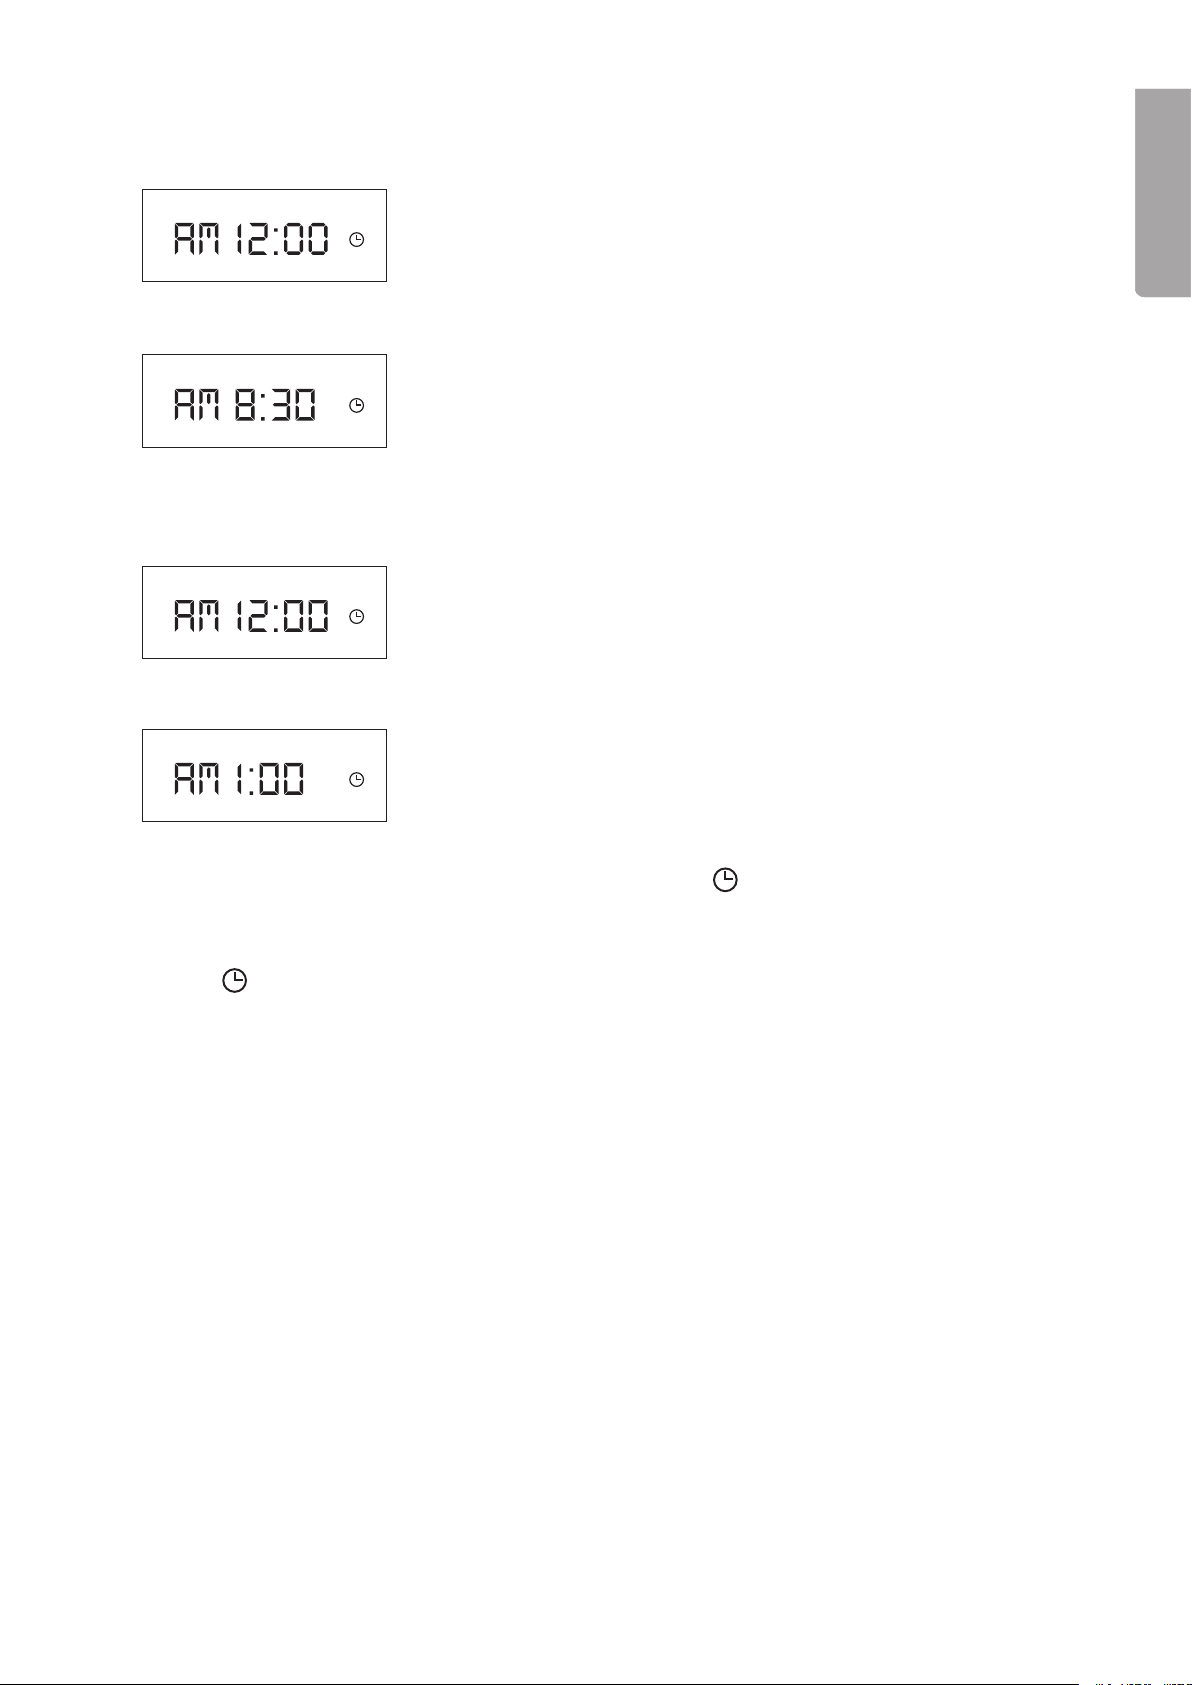
11. Setting the Clock
The clock has to be reset once the stereo has been disconnected from the mains.
N.B. The clock can only be set when the stereo is turned off.
1. Make sure that the stereo is shut off.
2. Press
. PressI◄◄
Example: 12 hour display chosen.
4. Press
5. Set the clock using I◄◄
6. Set the clock using
AM/PM (only for the 12 hour clock display)
AM = Before noon, PM = Afternoon
MEMORY/CLOCK once. The display will show “SET CLOCK”.
or ►►I to select a 12 or 24 hour clock display.
MEMORY/CLOCK again. The hour display will ash.
or ►►I and conrm with MEMORY/CLOCK, while the minute display ashes.
I◄◄ or►►I and conrm with MEMORY/CLOCK.
12. Automatic Activation (timer)
Set the time for automatic activation/deactivation.
N.B.
• Make sure the clock is set before inputting new settings.
• The clock can only be set when the stereo is turned off.
1. Make sure that the stereo is shut off.
2. Press
. Press
4. Press TIMER again. Volume level will be shown in the display.
TIMER once. is shown on the display.
FUNCTION to select audio source, in other words the audio source
used when the stereo is activated.
5. Adjust the volume with VOLUME UP or VOLUME DN.
16
6. Conrm with TIMER to set the start time. “SET ON TIMER” will be displayed.
a. Press TIMER, the clock display will ash. Set the hours withI◄◄ or►►I.
b. Press TIMER, the minutes display will ash. Set the minutes with I◄◄or ►►I.
7. Conrm with TIMER to set the stop time. “SET OFF TIMER” will be displayed.
a. Press TIMER, the clock display will ash. Set the hours withI◄◄or ►►I.
b. Press TIMER. The minutes display will ash. Set the minutes withI◄◄ or ►►I.
ENGLISH
8. Conrm with TIMER. The display returns to the current time and remains lit on the display.
Turn off automatic activation
To turn off automatic activation, press TIMER once while the stereo is turned off.
The symbol will disappear.
17

13. Sleep Timer (Sleep)
The sleep timer shuts the stereo off automatically at the set time.
The sleep time can be set from 10 to 90 minutes.
ENGLISH
This function can only be activated using the remote.
Setting the sleep timer
1. Turn on the stereo.
2. Press
SLEEP repeatedly on the remote and follow these steps: 90, 80, 70, 60, 50, 40, 0, 20, 10 minutes
or OFF. is displayed when the function is activated.
. To turn off the sleep time press SLEEP until ”OFF” is shown in the display.
N.B.
• The sleep timer deactivates when you turn off the stereo and turn it on again.
• If you have chosen a CD that has a shorter playback time than the sleep timer, all tracks will be played
but not repeated to ll the remaining time.
14. Using Headphones
Connect a pair of headphones with a .5 mm stereo plug to the stereo’s headphone socket (1).
The stereo’s speakers automatically disconnect when the headphones are connected.
N.B. Prolonged exposure to high volume can damage your hearing.
15. Care and Maintenance
General Care
Use a soft, dry cloth to clean the player. Do not use cleaning liquids which contain alcohol, ammonia,
benzene or abrasives that can damage the casing.
CD and CD player maintenance
• The CD player’s lens must not be touched!
• Sudden changes in the surrounding temperature can cause condensation and the lens can become with
obstructed moisture. In these cases it is impossible to play a CD.
• Do not try to dry off the lens. Instead, let the device stand in a warm room until the moisture has
evaporated.
• Always close the CD door to keep the CD compartment free from dust. Use a soft, dry cloth to remove
dust from the CD compartment when needed.
• If the CD needs to be cleaned, use a clean, soft, lint-free cloth and wipe in a straight line from the centre
towards the outer edge. Do not use cleaning liquids as it can damage the CD.
• Never attach stickers to the CD.
• Never store the player near heat sources or expose it to direct heat.
• Lift the CD from its case by pressing the centre holding ring and lifting it up by its edges..
18

16. Troubleshooting
The stereo doesn’t turn on
• Make sure that all connections and the connected power point are functioning.
The stereo does not react to commands from the remote
• Make sure that there are no obstructions in the signal path between the remote and the stereo.
• Remove the plug from the power point and reconnect it after a short period.
No sound
• The volume has been turned down too low. Try raising the volume.
• The headphones are connected. Disconnect them.
There is interference on the radio station I am listening to
• AM:
- The aerial is not properly connected.
- The aerial is located too close to the stereo. Move the aerial.
• FM:
- The aerial is not fully extended. Fully extend the aerial and adjust its position.
The CD does not play
• The CD is upside down. Insert the disc with the text/label facing up.
• The CD is scratched or dirty. Clean or replace the CD.
ENGLISH
17. Disposal
Follow local ordinances when disposing of this product. If you are unsure how to dispose of the product,
please contact your municipality.
18. Specications
Power supply 12 V DC, 1,500 mA
via included adaptor
Adaptor input voltage 20 V AC, 50 Hz
Adaptor output voltage 12 V DC, 1500 mA, 18 V A
(positive centre pin)
Power consumption 18 W (during use)
1.1 W (standby)
Radio
Frequency Range 87.5 – 108 MHz (FM)
522 – 1.620 kHz (AM)
Total memory slots 0 (FM), 10 (AM)
CD player
D AC 8 x oversampling
1 bit D/A converter
Frequency Range 100 Hz – 20,000 Hz
Compatible discs CD Audio
CD-R
CD-RW
Memory cards
Compatible memory cards Secure Digital (SD)
miniSD (only with
an adaptor, which is
not included)
microSD (only with
an adaptor, which is
not included)
Multimedia Card (MMC)
USB memory
Speakers
Speaker power output 2 x 5 W
Impedance 4 ohms
Measurements
Dimensions 480 x 150 x 280 mm
Weight 2.8 kg
19

Musikanläggning
Artikelnummer 18-8036/38-2362 • Modell KW-1009
Läs igenom hela bruksanvisningen före användning och spara den sedan för framtida bruk. Vi reserverar oss
för ev. text- och bildfel samt ändringar av tekniska data. Vid tekniska problem eller andra frågor, kontakta vår
kundtjänst (se adressuppgifter på baksidan).
Innehållsförteckning
1. Säkerhet
2. Produktbeskrivning
SVENSKA
. Knappar och funktioner
4. Installation
5. Montering
6. Grundläggande användning
7. Spela en cd-skiva
8. MP-uppspelning
9. Lyssna till radion
10. Avancerade funktioner
11. Ställa in klockan
12. Automatisk aktivering
1. Insomningstimer
14. Använda hörlurar
15. Skötsel och underhåll
16. Felsökning
17. Avfallshantering
18. Specikationer
20
1. Säkerhet
ENGLISH
• Produkten får endast repareras av kvalicerad servicepersonal.
• Produkten får inte demonteras eller ändras.
• Placera inte produkten så att den kan falla ner i vatten eller annan vätska. Ställ inte heller några föremål
som innehåller vätska på produkten, t.ex. en blomvas eller dryck.
• Se till att uttaget där stickproppen sitter är lätt tillgängligt då stickproppen på apparatens nätsladd
används som frånkopplingsanordning från nätet.
• Täck inte över anläggningen. Tillräcklig ventilation, med ett minsta avstånd på ca 15 cm mellan
ventilationshålen och omgivande ytor, är nödvändig för att förhindra att anläggningen blir för varm.
• Placera inte apparaten i en fuktig, dammig miljö eller där det förekommer starka vibrationer.
• Standbyomkopplaren på apparatens framsida skiljer inte apparaten från elnätet. För att fullständigt skilja
apparaten från elnätet måste apparatens stickpropp tas ur vägguttaget.
• Använd endast medföljande eller rekommenderad nätadapter.
• Ta alltid ur batterierna om klockan inte ska användas under längre perioder. Batterierna kan börja läcka
och orsaka skada på apparat, person eller egendom.
• Långvarig exponering av hög ljudvolym från hörlurar kan orsaka skador på din hörsel.
Lägg märke till dessa säkerhetssymboler
Varning! Öppna inte höljet! Farlig spänning nns oskyddat på
komponenter inuti produktens hölje, kontakt med dessa kan
leda till brand eller ge elektriska stötar.
CLASS 1
LASER PRODUCT
KLASS 1 LASERAPPARAT
Varning! Öppna inte höljet! Osynlig laserstrålning som kan
orsaka ögonskador. Rikta inte blicken in mot strålen och titta
inte direkt på den genom optiska instrument.
SVENSKA
2. Produktbeskrivning
• Anslutning för USB-minne och SD-kort
• Läser mp-lernas ID-information
• Omkopplare för extra basförstärkning
• Uttag för stereohörlurar
• ,5 mm lågnivåingång
• Fjärrkontroll medföljer
• Kan även väggmonteras
21

3. Knappar och funktioner
1
2
3
5 7 9
4 6
8
20181614
1210
11 13
15 17 19
23
22
22
3.1 Musikanläggning
SVENSKA
1. FUNCTION – Funktionsväljare (TUNER/CD/USB/CARD/AUX)
2. (On/off) – Slår på och av anläggningen
. IR-sensor för fjärrkontrollens signaler
4. ■ / BAND – Stopp/Väljer frekvensband
5. Display
6. ►/II – Play/Pause
7. Cd-lucka
8. – Öppnar och stänger cd-luckan
9. ▲ – Volym upp
10. TIMER – Automatisk aktivering
11. MEMORY/CLOCK – Lagrar radiokanaler/Ställer in tiden
12. LINE IN – Anslutning för extern ljudkälla (,5 mm stereo)
1. PHONES – Hörlursanslutning (,5 mm stereo)
14. |◄◄ – Föregående
15. DBBS – Förstärkt basåtergivning
16. SD/MMC – Anslutning för minneskort (SD/MMC)
17.►►| – Nästa
18. Anslutning för usb-minne
19. PLAY MODE – Ändra uppspelningsalternativ
20. ▼ – Volym ner
21. Anslutning för medföljande nätadapter (12 V DC, 1500 mAh)
22. Trådantenn för FM-mottagning
2. Anslutning för medföljande AM-antenn
22
 Loading...