

Page 1
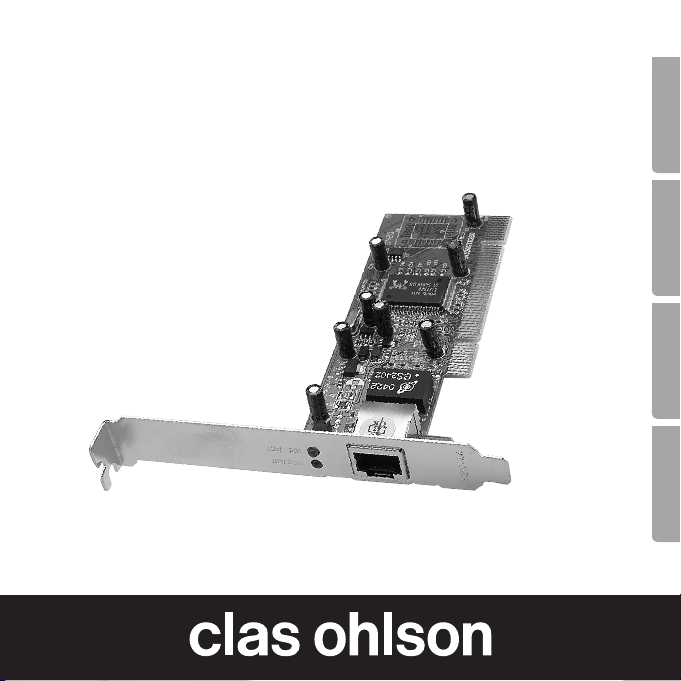
Network Card, Gigabit
Nätverkskort, Gigabit
Nettverkskort, Gigabit
Verkkokortti, Gibabit
Art.no. Model
38-1505 BL-8169
Ver. 201006
EnglishSvenskaNorskSuomi
Page 2

Page 3

Network Card, Gigabit
Art.no 38-1505 Model BL-8169
Please read the entire instruction manual before use and save it for future
reference. We reserve the right for any errors in text or images and for making any
necessary technical changes to this document. If you should have any questions
concerning technical problems please contact our Customer Services.
Description
• Ethernet PCI, TP connector (RJ-45)
• Transfer rate10/100/1000 Mbps
• Compatible with Windows 7 (32/64-bit)/ Vista (32/64-bit) and XP
• Plug-and Play
• Equipped with LED for visual status control
• Supports Auto MDI/MDIX
Contents
• Network card
• CD-ROM software disc with drivers for Windows XP
• Instruction manual
3
English
Page 4

5
Card installation
NOTE!
• Computer parts are very sensitive to static electricity. Keep the parts in the anti-
English
static bags that they came with until the time they are ready for installation.
• Use an anti-static wristband and earth it when installing. If you don’t have an
anti-static wristband you can do this instead: Divert your anti-static charge by
holding the computer chassis right before and while handling the card.
1. Shut off the computer and all connected units and pull out the plug to
the computer.
2. Open the computer casing and so that the motherboard becomes accessible.
3. Install the PCI card in a vacant PCI slot. Do not press the card too hard while
installing since the motherboard can be damaged.
4. Secure the card with a screw or other compatible fastening device. The PCI card
shall be pushed in equally far through the entire row when properly installed.
5. Screw the computer casing together again making sure wires or cables are
not trapped.
4
Page 5

Installation
Windows XP: The operative system finds the network card and automatically
starts the installation if you have installed a device with this chipset before,
otherwise the drivers must be installed manually.
1. Windows XP automatically identifies the PCI card when the computer
is started and Welcome to the Found New Hardware Wizard opens.
2. Check No, not this time and then click Next.
3. Insert the supplied CD into the computer’s CD-ROM.
4. Check the Install from list... option.
5. Press Browse to open the Explorer menu.
6. Select CD/DVD device / LAN Card / PCI / RTL8169.
7. Highlight Win XP folder.
8. Click OK.
9. Click Next.
10. Click Finish.
Windows Vista and Windows 7 will install the network card automatically.
5
English
Page 6

7
Properties and Configuration
The network card will appear as follows: Click on Start/Settings/Control panel.
Double-click on “System” and select “Hardware”. Select “Device Manager” and
right-click on the network card. Select “Properties” and chose to configure or
English
troubleshoot the network card.
Creating a Network Connection
Click on Start/Settings/Network Connections. At this stage it is possible to create
a new network connection.
Indicator Lights
The network card has two LEDs for control and troubleshooting:
• 10 M (green), flashes when the network card transfers data at a rate of
10Mbps via the RJ-45 outlet.
• 100/1000 M (white), flashes when the network card transfers data at
a rate of 100/1000 Mbps via the RJ-45 outlet.
Disposal
Follow local ordinances when disposing of this product. If you are unsure about
how to dispose of this product contact your municipality.
6
Page 7

Specifications
Standard: IEEE 802.3u (100 BASE-TX)
IEEE 802.3ab (1000 BASE-T)
IEEE 802.3 Auto-Negotiation
Interface: 32-bit PCI 33/66 MHz Bus Master
Connection: RJ-45
LEDs: 10 M and 100/1000 M
7
English
Page 8

9
Nätverkskort, Gigabit
Art.nr 38-1505 Modell BL-8169
Läs igenom hela bruksanvisningen före användning och spara den sedan för
framtida bruk. Vi reserverar oss för ev. text- och bildfel samt ändringar av tekniska
data. Vid tekniska problem eller andra frågor, kontakta vår kundtjänst (se adressuppgifter på baksidan).
Beskrivning
Svenska
• Ethernet PCI, TP-anslutning (RJ-45)
• Överföringshastighet 10/100/1000 Mbps
• Passar Windows 7 (32/64-bit), Vista (32/64-bit) och XP
• Plug-and-play
• Försedd med lysdioder för kontroll och övervakning
• Stöder Auto-MDI/MDIX
Förpackningen innehåller
• Nätverkskort
• Cd-skiva med drivrutiner för Windows XP
• Bruksanvisning
8
Page 9

Montering av kortet
OBS!
• Datorkomponenter är mycket känsliga för statisk elektricitet. Förvara komponenterna i antistatpåsen som de ligger i vid leverans ända tills de ska monteras.
• Använd antistatarmband som ansluts till en jordad punkt vid montering. Om du
inte har ett antistatarmband kan du göra såhär: Avled din egen laddning genom att ta i datorchassit precis innan och under tiden du hanterar kortet.
1. Stäng av datorn och alla anslutna enheter samt dra datorns stickpropp
ur vägguttaget.
2. Öppna datorlådan så att moderkortet blir åtkomligt.
3. Montera PCI-kortet på en ledig PCI-plats. Tryck inte för hårt när kortet
monteras eftersom moderkortet kan skadas.
4. Fixera kortet med skruv eller annan typ av låsning. Kortet ska vara intryckt
lika långt längs hela kontaktraden när det är rätt monterat.
5. Se till att inga kablar kommer i kläm och skruva sedan ihop datorlådan.
9
Svenska
Page 10

11
Installation
Windows XP: Operativsystemet hittar nätverkskortet helt automatiskt när datorn
startas och installationen sker automatiskt om någon komponent med detta chip
har installerats i datorn tidigare, annars måste drivrutinerna installeras manuellt,
gör då så här:
1. Windows XP identierar automatiskt PCI-kortet vid datorns start och
”Välkommen till guiden Ny maskinvara” öppnas.
2. Markera ”Nej, inte den här gången” och klicka sedan på Nästa.
3. Sätt i den bifogade cd-skivan i datorns cd-läsare.
4. Markera alternativet ”Installera från en lista...”.
Svenska
5. Klicka på Bläddra för att öppna Utforskaren.
6. Välj CD/DVD-enheten / LAN Card / PCI / RTL8169.
7. Markera mappen Win XP på cd-skivan.
8. Klicka på OK.
9. Klicka på Nästa.
10. Klicka på Slutför.
Windows Vista och Windows 7 installerar automatiskt nätverkskortet.
10
Page 11

Egenskaper och konfiguration
Nätverkskortet visas på följande sätt: Klicka först på Start/Inställningar/Kontrollpanelen. Dubbelklicka sedan på ”System”-ikonen och välj fliken ”Maskinvara”. Välj
sedan ”Enhetshanteraren” och högerklicka sedan på nätverkskortet. Då väljer du
”Egenskaper”, och där kan du konfigurera eller felsöka nätverkskortet.
11
Svenska
Page 12

Skapa nätverksanslutning
Klicka på Start/Inställningar/Nätverksanslutningar.
Där kan du välja att skapa en ny anslutning.
Indikatorlampor
Nätverkskortet har två lysdioder för kontroll och felsökning:
• 10M (grön), blinkar när nätverkskortet överför data med en hastighet
av 10Mbps via RJ-45-uttaget.
• 100/1000M (vit), blinkar när nätverkskortet överför data med en hastighet
Svenska
av 100/1000 Mbps via RJ-45-uttaget.
Avfallshantering
När du ska göra dig av med produkten ska detta ske enligt lokala föreskrifter.
Är du osäker på hur du ska gå tillväga, kontakta din kommun.
Specifikationer
Standard IEEE 802.3u (100 BASE-TX)
IEEE 802.3ab (1000 BASE-T)
IEEE 802.3 Auto-Negotiation
Interface 32-bit PCI 33/66 MHz Bus Master
Anslutning RJ-45
Lysdioder 10 M och 100/1000M
12
Page 13

Nettverkskort, Gigabit
Art.nr. 38-1505 Modell BL-8169
Les nøye igjennom hele bruksanvisningen og ta vare på den til senere bruk.
Vi reserverer oss mot ev. tekst- og bildefeil, samt forandringer av tekniske data.
Ved tekniske problemer eller andre spørsmål, ta kontakt med vårt kundesenter
(se opplysninger på baksiden).
Beskrivelse
• Ethernet PCI, TP-tilkobling (RJ-45)
• Overføringshastighet 10/100/1000 Mbps
• Passer Windows 7 (32/64-biter), Vista (32/64-biter) og XP
• Plug-and-play
• Utstyrt med lysdioder for kontroll og overvåkning
• Støtter Auto-MDI/MDIX
Forpakningen inneholder
• Nettverkskort
• Cd-plate med driver for Windows XP
• Bruksanvisning
13
Norsk
Page 14

15
Montering av kortet
OBS!
• Datakomponenter er meget følsomme for statisk elektrisitet. Oppbevar komponentene i antistatposen, som de ligger i ved leveransen, helt til de skal monteres.
• Bruk antistatarmbånd, som er koblet til et jordet punkt, ved montering. Dersom
du ikke har et antistatarmbånd kan du gjøre slik: Avled din egen ladning ved
åta på datachassisen like før og mens du jobber med kortet.
1. Skru av PC-en og alle de tilkoblede enhetene, og dra ut dens stikkontakt
fra vegguttaket.
2. Åpne harddisken slik at hovedkortet blir tilgjengelig.
3. Monter PCI-kortet på en ledig PCI-plass. Ikke trykk for hardt når kortet settes
på plass. Da kan hovedkortet skades.
4. Fest kortet. Det skal være inntrykt like mye langs hele kortkanten, når det er
riktig montert.
5. Påse at ingen kabler kommer i klem og skru deretter sammen harddisken.
Norsk
14
Page 15

Installasjon
Windows XP: Operativsystemet finner nettverkskortet helt automatisk når
PC-en startes og installasjonen skjer automatisk dersom en komponent med
denne chippen er installert i PC-en tidligere, ellers må driverne installeres manuelt.
Gjør på denne måten:
1. Windows XP finner automatisk PCI-kortet ved PC-ens oppstart og
”Velkommen til guiden Ny maskinvare” åpnes.
2. Velg ”Nei, ikke denne gangen” og trykk på ”Fortsett”.
3. Legg den medfølgende CD-platen i PC-ens CD-leser.
4. Marker alternativet ”Installer fra en liste...”.
5. Klikk på Bla for å åpne innstillingene.
6. Velg CD/DVD-enheten / LAN Card / PCI / RTL8169.
7. Marker mappen Win XP.
8. Klikk på OK.
9. Klikk på Fortsett.
10. Klikk på Fullfør.
Windows Vista og Windows 7 installerer nettverkskortet automatisk.
15
Norsk
Page 16

17
Egenskaper og konfigurasjon
Nettverkskortet vises på følgende måte: Klikk først på Start/Innstillinger/Kontrollpanelet. Dobbeltklikk deretter på ”System”-ikonet og velg fliken ”Maskinvare”.
Velg deretter ”Enhetsbehandling” og høyreklikk deretter på nettverkskortet.
Velg så ”Egenskaper”, og der kan du konfigurere eller feilsøke nettverkskortet.
Norsk
16
Page 17

Opprett nettverkstilkobling
Klikk på Start/Innstillinger/Nettverkstilkoblinger.
Der kan du velge å opprette en ny tilkobling.
Indikatorlamper
Nettverkskortet har to lysdioder for kontroll og feilsøking:
10M (grønn), blinker når nettverkskortet overfører data med en hastighet
av 10 Mbps via RJ-45-uttaket.
100/1000M (hvit), blinker når nettverkskortet overfører data med en hastighet
av 100/1000 Mbps via RJ-45-uttaket.
Avfallshåndtering
Når du skal kassere dette produktet, skal det skje i henhold til gjeldende
forskrifter. Dersom du er usikker på reglene, ta kontakt med lokale myndigheter for mer informasjon.
Spesifikasjoner
Standard IEEE 802.3u (100 BASE-TX)
IEEE 802.3ab (1000 BASE-T)
IEEE 802.3 Auto-Negotiation
Interface 32-bit PCI 33/66 MHz Bus Master
Anslutning RJ-45
Lysdioder 10 M og 100/1000M
17
Norsk
Page 18

19
Verkkokortti, Gibabit
Tuotenro 38-1505 Malli BL-8169
Lue käyttöohjeet ennen tuotteen käyttöönottoa. Säilytä käyttöohjeet tulevaa tarvetta varten. Pidätämme oikeuden teknisten tietojen muutoksiin. Emme vastaa
mahdollisista teksti- tai kuvavirheistä. Jos laitteeseen tulee teknisiä ongelmia, ota
yhteys myymälään tai asiakaspalveluun (yhteystiedot käyttöohjeen lopussa).
Kuvaus
• Ethernet PCI, TP-liitäntä (RJ-45)
• Tiedonsiirtonopeus 10/100/1000 Mbps
• Sopivat käyttöjärjestelmät Windows 7 (32/64), Vista (32/64) ja XP
• Plug-and-Play
• Merkkivalo toiminnan seurantaa varten
• Auto MDI/MDIX-tuki
Pakkauksen sisältö
• Verkkokortti
• Cd- levy, jolla ajurit Windows XP:lle
• Käyttöohje
Suomi
18
Page 19

Kortin asennus
HUOM.!
• Tietokoneen komponentit ovat hyvin herkkiä staattiselle sähkölle. Säilytä
komponentit antistaattisessa pussissa siihen asti kunnes ne asennetaan.
• Käytä asennuksen aikana antistaattista ranneketta, joka on liitetty maadoitettuun kohtaan. Mikäli sinulla ei ole antistaattista ranneketta, tee seuraavasti:
Johda oma sähköisyytesi pois koskettamalla jotakin tietokoneen kotelon jännitteetöntä metalliosaa ennen asennusta ja korttia käsitellessäsi.
1. Sulje tietokone ja sen yksiköt, irrota pistoke pistorasiasta.
2. Avaa tietokoneen kotelo päästäksesi käsiksi emolevyyn.
3. Asenna PCI-kortti vapaaseen PCI-paikkaan. Älä paina liian lujaa
korttia asentaessasi, emolevy saattaa vahingoittua.
4. Kiinnitä kortti ruuvilla tai vastaavalla kiinnikkeellä. Kortti on oikein
asennettu, kun kontaktirivi on painettu yhtä syvälle joka kohdasta.
5. Varmista, ettei johtoja jää puristuksiin. Sulje tietokoneen kotelo.
19
Suomi
Page 20

21
Asennus
Windows XP: Käyttöjärjestelmä löytää verkkokortin automaattisesti, kun
käynnistät tietokoneen. Asennus tapahtuu automaattisesti, jos tietokoneeseen
on aikaisemmin asennettu jokin samalla sirulla varustettu komponentti. Muussa
tapauksessa ajurit on asennettava manuaalisesti. Toimi näin:
1. Windows XP tunnistaa PCI-kortin automaattisesti, kun tietokone
käynnistetään ja Uuden laitteen asennus käynnistyy.
2. Valitse ”Ei tällä kertaa” ja napsauta Seuraava.
3. Aseta pakkaukseen sisältyvä cd-levy tietokoneesi cd-asemaan.
4. Valitse ”Asenna luettelosta...”.
5. Napsauta ”Selaa” avataksesi Resurssienhallinnan.
6. Valitse CD/DVD- yksikkö / LAN Card / PCI / RTL8169.
7. Valitse kansio Win XP.
8. Napsauta OK.
9. Napsauta Seuraava.
10. Napsauta Valmis.
Windows Vista ja Windows 7 asentavat verkkokortin automaattisesti.
Suomi
20
Page 21

Ominaisuudet ja konfiguraatio
Verkkokortin sijainti: Avaa Käynnistä/Asetukset/Ohjauspaneeli. Kaksoisnapsauta
”Järjestelmä”-kuvaketta ja valitse sivu ”Laitteisto”. Valitse ”Laitehallinta” ja napsauta verkkokorttia hiiren oikealla painikkeella. Määrittele ja etsi virheitä kohdassa
”Ominaisuudet”.
21
Suomi
Page 22

Verkkoyhteyden muodostaminen
Avaa Käynnistä/Asetukset/Puhelinverkkoyhteydet.
Nyt voit muodostaa uuden yhteyden.
Merkkivalot
Verkkokortissa on kaksi merkkivaloa valvontaa ja vianhakua varten:
• 10M (vihreä) vilkkuu, kun verkkokortti siirtää tietoa nopeudella10 Mbps
RJ-45-liitännän kautta.
• 100/1000M (valkoinen) vilkkuu, kun verkkokortti siirtää tietoa nopeudella
100/1000 Mbps RJ-45-liittimen kautta.
Kierrätys
Kierrätä tuote asianmukaisesti, kun poistat sen käytöstä.
Ota yhteys kuntasi jäteneuvontaan, mikäli olet epävarma.
Tekniset tiedot
Standardi: IEEE 802.3u (100 BASE-TX)
IEEE 802.3ab (1000 BASE-T)
IEEE 802.3 Auto-Negotiation
Liitäntä: 32-bit PCI 33/66 MHz Bus Master
Suomi
Liitäntä: RJ-45
Merkkivalot: 10 M ja 100/1000M
22
Page 23

Page 24

Sverige
Kundtjänst Tel: 0247/445 00
Fax: 0247/445 09
E-post: kundtjanst@clasohlson.se
Internet www.clasohlson.se
Post Clas Ohlson AB, 793 85 INSJÖN
Norge
Kundesenter Tlf.: 23 21 40 00
Faks: 23 21 40 80
E-post: kundesenter@clasohlson.no
Internett www.clasohlson.no
Post Clas Ohlson AS, Postboks 485 Sentrum, 0105 OSLO
Suomi
Asiakaspalvelu Puh.: 020 111 2222
Sähköposti: info@clasohlson.fi
Internet www.clasohlson.fi
Osoite Clas Ohlson Oy, Annankatu 34 –36 A, 00100 HELSINKI
Great Britain
For consumer contact, please visit
www.clasohlson.co.uk and click on
customer service.
Internet www.clasohlson.co.uk
 Loading...