

Page 1
Network Card
Nätverkskort
Nettverkskort
Verkkokortti
Art.no. Model
38-5000 BL-8139D
EnglishSvenskaNorsk
Suomi
Ver. 201006
Page 2

2 3
Page 3

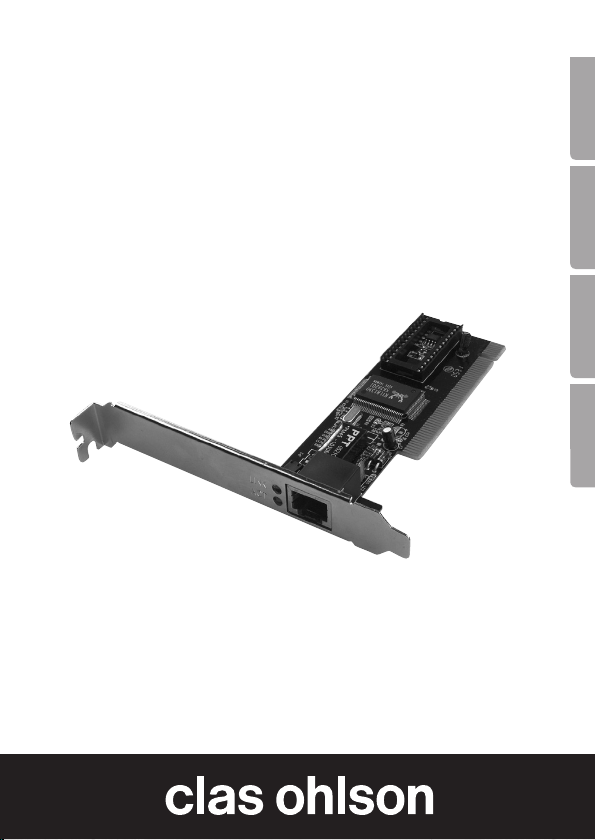
Network card
Art.no 38-5000 Model BL-8139D
Please read the entire instruction manual before use and save it for
future reference. We reserve the right for any errors in text or images
and for making any necessary technical changes to this document.
If you should have any questions concerning technical problems
please contact our Customer Services.
Product Description
• 100 Base-TX with transfer speed up to 10/100 Mbps (full duplex).
• The network card connects to the network via a TP cable with
aRJ-45 modular connector.
• Compatible with Windows 7 (32/64-bit), Vista (32/64-bit) and XP.
• Plug-and-Play.
• Equipped with LED for visual status control.
Contents
• Network card
• Instruction manual
English
Page 4

5
Card installation
• Note! When the PCI card is being installed, it is very important
English
that the computer is shut off.
• Computer parts are very sensitive to static electricity. Keep the
parts in the anti-static bags that they came with until the time
they are ready for installation.
• Use an anti-static wristband and earth it when installing. If you
don’t have an anti-static wristband you can do this instead:
Hold the computer case before, during and after installation.
1. Shut off the computer and all connected units and pull out the
plug to the computer.
2. Open the computer case and so that the motherboard
becomes accessible.
3. Install the PCI card in a vacant PCI port. Do not press the card
too hard while installing since the motherboard can be damaged.
4. Secure the card with a screw or other compatible fastening
device. The PCI card ´s contacts should fit evenly in the slot
when properly installed.
5. Re-assemble the computer case (being careful that no wires
are obstructing).
6. Install the drivers etc.
Installation
Note! The following instructions are for Windows XP installed
with service pack 2. Small differences can occur depending
on user’s settings.
Windows XP will find and install the network card automatically
when the computer is turned on. No external drivers needed.
4
Page 5

Controlling the status of the network card
The network card is shown in “Device Manager” when it is installed.
Click on Start/Settings/Control panel/System/Computer hard-
ware/Device Manager. Select Network card from the list and
then right click on the network card you have installed.
Indicator lamp
The network card has two LED’s for control and for troubleshooting:
• The LED lights up when the card is functioning and has contact
with the network.
• The LED blinks when the network card is transferring data via
the RJ45 outlet.
English
5
Page 6

Disposal
Follow local ordinances when disposing of this product. If you are unsure about how to dispose of this product contact your municipality.
English
Specifications
Standard: IEEE802.3, 802.3u (10Base-T)
(100Base-TX)
Circuit: RTL8139D
Interface: 32-bit PCI 2.2, BusMaster
Connection: 1x RJ45
Operating temperature: 0°C to 50°C
Storage temperature: -10°C to 70°C
Humidity: 10 % to 90 % non-condensing
Dimensions: 120 x 40 mm (without mounting bracket)
Power Consumption: 0,8 W max
Certifications: FCC Class B
Compatibility: CE Class B, VCCI Class B
6
Page 7

Nätverkskort
Art.nr 38-5000 Modell BL-8139D
Läs igenom hela bruksanvisningen före användning och spara den
sedan för framtida bruk. Vi reserverar oss för ev. text- och bildfel
samt ändringar av tekniska data. Vid tekniska problem eller andra
frågor, kontakta vår kundtjänst (se adressuppgifter på baksidan).
Produktbeskrivning
• 100Base-TX med överföringshastighet upp till 10/100 Mbps
(full duplex).
• PCI-kortet ansluts till nätverket med TP-kabel med
RJ-45 modularkontakt.
• Passar Windows 7 (32/64-bit), Vista (32/64-bit) och XP.
• Plug-and-Play.
• Försedd med lysdiod för kontroll och övervakning.
Förpackningen innehåller
• Nätverkskort
• Bruksanvisning
Svenska
Page 8

9
Montering av kortet
• Obs! När PCI-kortet ska monteras, är det mycket viktigt att
datorn är avstängd.
• Datorkomponenter är mycket känsliga för statisk elektricitet.
Förvara komponenterna i antistatpåsen som de ligger i vid
leverans ända tills de monteras.
• Använd antistatarmband som ansluts till en jordad punkt vid
montering. Om du inte har antistatarmband, kan du göra så här:
Svenska
Ta i datorchassit strax innan, och under tiden du hanterar kortet.
1. Stäng av datorn och alla anslutna enheter, dra ur stickproppen
till datorn.
2. Dela datorlådan så att moderkortet blir åtkomligt.
3. Montera PCI-kortet i en ledig PCI-plats. Tryck inte för hårt
när kortet monteras, moderkortet kan skadas.
4. Fixera kortet med skruv eller annan typ av låsning.
Kortet ska vara intryck lika långt längs hela kontaktraden
när det är rätt monterat.
5. Skruva ihop datorlådan (se till att inga kablar kommer i kläm).
6. Installera ev. drivrutiner etc.
Installation
Obs! Följande instruktioner gäller för Windows XP med servicepack 2
installerat och kan skilja sig lite beroende på användarens inställningar.
Windows XP hittar och installerar nätverkskortet helt automatiskt när
datorn startas. Inga externa drivrutiner behövs.
8
Page 9

Kontrollera nätverkskortets status
Nätverkskortet visas i ”Enhetshanteraren” när det är installerat.
Klicka på Start/Inställningar/Kontrollpanelen/System/Maskinva-
ra/Enhetshanteraren. Välj ”Nätverkskort” i listan och högerklicka
sedan på det nätverkskort du installerat.
Indikatorlampa
Nätverkskortet har en lysdiod för kontroll och felsökning:
• Lysdioden lyser när kortet fungerar och har kontakt med nätverket.
• Lysdioden blinkar när nätverkskortet överför data via RJ45-uttaget.
Svenska
9
Page 10

Avfallshantering
När du ska göra dig av med produkten ska detta ske enligt lokala föreskrifter. Är du osäker på hur du ska gå tillväga, kontakta din kommun.
Specifikationer
Standard: IEEE802.3, 802.3u (10Base-T)
(100Base-TX)
Krets: RTL8139D
Svenska
Interface: 32-bit PCI 2.2, BusMaster
Anslutning: 1st. RJ45
Användningstemperatur: 0°C till 50°C
Förvaringstemperatur: -10°C till 70°C
Luftfuktighet: 10 % till 90 % icke kondenserande
Mått: 120 x 40 mm (utan monteringsfäste)
Strömförbrukning: 0.8 W (max)
Certifiering: FCC Class B
Kompabilitet: CE Class B, VCCI Class B
10
Page 11

Nettverkskort
Artikkelnummer 38-5000 Modell BL-8139D
Les nøye igjennom hele bruksanvisningen og ta vare på den til senere bruk. Vi reserverer oss mot ev. tekst- og bildefeil, samt forandringer av tekniske data. Ved tekniske problemer eller andre spørsmål,
ta kontakt med vårt kundesenter (se opplysninger på baksiden).
Produktbeskrivelse
• 100Base-TX med overføringshastighet opptil 10/100 Mbps
(full duplex).
• PCI-kortet kobles til nettverket med TP-kabel med RJ-45
modularkontakt.
• Passer Windows 7 (32/64-biter), Vista (32/64-biter) og XP.
• Plug-and-Play.
• Utstyrt med lysdiode for kontroll og overvåking.
Forpakningen inneholder
• Nettverkskort
• Bruksanvisning
Norsk
Page 12

13
Montering av kortet
• Obs! Når PCI-kortet skal monteres, er det viktig at
PC-en er avstengt.
• Komponentene til PC-en er meget følsomme for statisk
elektrisitet. Forpakningen, som komponentene blir levert i,
beskytter dem mot dette, og det er derfor viktig at de blir
oppbevart i originalforpakningen til de skal monteres.
• Bruk antistatarmebånd, som er tilsluttet jord, ved montering.
Dersom du ikke har dette, kan du gjøre på følgende måte:
Ta i datachassien umiddelbart før og mens du monterer kortet.
1. Skru av PC-en og alle tilkoblede enheter og dra ut stikkontakten
til PC-en.
2. Åpne PC-en, slik at moderkortet blir tilgjengelig.
Norsk
3. Monter PCI-kortet på en ledig PCI-plass. Ikke trykk for hardt
når kortet monteres. Da kan du skade moderkortet.
4. Fest kortet med skrue eller en annen festemetode.
Kortet skal trykkes like langt inn langs hele kontaktflaten
for å være riktig montert.
5. Skru sammen PC-en igjen (påse at ingen kabler blir
liggende i klem).
6. Installere ev. drivere etc.
Installasjon
Obs! Følgende instruksjoner gjelder for Windows XP med servicepack
2 installert og kan variere litt, avhengig av brukerens innstillinger.
Windows XP finner og installerer nettverkskortet automatisk når
maskinen startes. Det trengs ingen eksterne drivere.
12
Page 13

Kontroller nettverkskortets status
Nettverkskortet kommer opp under ”Enhetsbehandling” når det
er installert. Klikk på Start/Kontrollpanel/System/Maskinvare/
Enhets behandling. Velg ”Nettverkskort” i listen, og høyreklikk
deretter på det nettverkskortet som du har installert.
Indikatorlampe
Nettverkskortet har en lysdiode for kontroll og feilsøking:
• Lysdioden lyser når kortet fungerer og har kontakt med
nettverket.
• Lysdioden blinker når nettverkskortet overfører data
via RJ45-uttaket.
Norsk
13
Page 14

Avfallshåndtering
Når du skal kassere dette produktet, skal det skje i henhold til
gjeldende forskrifter. Dersom du er usikker på reglene, ta kontakt
med lokale myndigheter for mer informasjon.
Spesifikasjoner
Standard: IEEE802.3, 802.3u (10Base-T)
(100Base-TX)
Krets: RTL8139D
Tilkobling: 32-bit PCI 2.2, BusMaster
Tilkobling: 1stk. RJ45
Temperatur ved bruk: 0 °C til 50 °C
Norsk
Temperatur ved oppbevaring: -10 °C til 70 °C
Luftfuktighet: 10 % til 90 % ikke kondenserende
Mål: 120 x 40 mm (uten monteringsfeste)
Strømforbruk: 0.8 W (maks.)
Sertifisering: FCC Klasse B
Kompabilitet: CE Klasse B, VCCI Klasse B
14
Page 15

Verkkokortti
Tuotenumero 38-5000 Malli BL-8139D
Lue käyttöohjeet ennen tuotteen käyttöönottoa. Säilytä käyttöohjeet
tulevaa tarvetta varten. Pidätämme oikeuden teknisten tietojen
muutoksiin. Emme vastaa mahdollisista teksti- tai kuvavirheistä.
Jos laitteeseen tulee teknisiä ongelmia, ota yhteys myymälään tai
asiakaspalveluun (yhteystiedot käyttöohjeen lopussa).
Tuotekuvaus
• 100 Base-TX -liitännän tiedonsiirtonopeus jopa 10/100 Mbps
(Full Duplex).
• PCI-kortti liitetään verkkoon TP-kaapelilla RJ45modulaariliitännällä.
• Sopivat käyttöjärjestelmät Windows 7 (32/64), Vista (32/64) ja XP.
• Plug-and-Play.
• Merkkivalo toiminnan seurantaa varten.
Pakkauksen sisältö
• Verkkokortti
• Käyttöohje
Suomi
Page 16

17
Kortin asennus
• Huom.! On erittäin tärkeää, että tietokone on pois päältä PCIkorttia asennettaessa.
• Tietokoneen komponentit ovat hyvin herkkiä staattiselle
sähkölle. Säilytä komponentit antistaattisessa pussissa siihen
asti kunnes ne asennetaan.
• Käytä asennuksen aikana antistaattista ranneketta, joka on
liitetty maadoitettuun kohtaan. Mikäli sinulla ei ole antistaattista
ranneketta, tee seuraavasti: Kosketa tietokoneen koteloa ennen
asennusta ja korttia käsitellessäsi.
1. Sulje tietokone ja sen yksiköt, irrota pistoke pistorasiasta.
2. Avaa tietokoneen kotelo päästäksesi käsiksi emolevyyn.
3. Asenna PCI-kortti vapaaseen PCI-paikkaan. Älä paina liian lujaa
korttia asentaessasi, emolevy saattaa vahingoittua.
4. Kiinnitä kortti ruuvilla tai vastaavalla kiinnikkeellä. Kortti on oikein
asennettu, kun se on yhtä syvällä joka kohdasta.
5. Ruuvaa tietokonekotelo kiinni. Varmista, että johtoja ei
Suomi
jää puristuksiin.
6. Asenna mahdolliset ajurit ym.
Asennus
Huom.! Seuraavat asennusohjeet koskevat käyttöjärjestelmää
Windows XP, jossa servicepack 2. Asennus saattaa erota hieman
alla olevasta tietokoneen asetuksista riippuen.
Windows XP tunnistaa ja asentaa verkkokortin automaattisesti, kun
tietokone käynnistetään. Erillisiä ajureita ei tarvita.
16
Page 17

Tarkasta verkkokortin status
Asennettu verkkokortti löytyy Laitehallinnasta. Valitse ”Käynnistä/
Asetukset/Ohjauspaneeli/Järjestelmä/Laitteisto/Laitehallinta”
Valitse listalta ”Verkkokortti” ja napsauta asentamaasi verkkokorttia
hiiren oikealla painikkeella.
Merkkivalo
Verkkokortissa on merkkivalo valvontaa ja vianhakua varten:
• Merkkivalo palaa, kun kortti toimii ja on yhteydessä verkkoon.
• Merkkivalo vilkkuu kun verkkokortti siirtää tietoa RJ45-liitännän
kautta.
Suomi
17
Page 18

Kierrätys
Kierrätä tuote asianmukaisesti, kun poistat sen käytöstä.
Ota yhteys kuntasi jäteneuvontaan, mikäli olet epävarma.
Tekniset tiedot
Standardit: IEEE802.3, 802.3u (10Base-T)
(100base-TX)
Piiri: RTL8139D
Liitäntä: 32-bittinen PCI 2.2, BusMaster
Liitäntä: 1 kpl RJ45
Käyttölämpötila: 0 °C…50 °C
Säilytyslämpötila: -10 °C…70 °C
Ilmankosteus: 10–90 % tiivistymätön
Mitat 120 x 40 mm (ilman asennuskiinnikkeitä)
Virrankulutus: 0,8 W (maks.)
Hyväksynnät: FCC Class B,
Suomi
Yhteensopivuus: CE Class B, VCCI Class B
18
Page 19

Page 20

Sverige
Kundtjänst Tel: 0247/445 00
Fax: 0247/445 09
E-post: kundtjanst@clasohlson.se
Internet www.clasohlson.se
Post Clas Ohlson AB, 793 85 INSJÖN
Norge
Kundesenter Tlf.: 23 21 40 00
Faks: 23 21 40 80
E-post: kundesenter@clasohlson.no
Internett www.clasohlson.no
Post Clas Ohlson AS, Postboks 485 Sentrum, 0105 OSLO
Suomi
Asiakaspalvelu Puh.: 020 111 2222
Sähköposti: info@clasohlson.fi
Internet www.clasohlson.fi
Osoite Clas Ohlson Oy, Annankatu 34–36 A, 00100 HELSINKI
Great Britain
For consumer contact, please visit
www.clasohlson.co.uk and click on
customer service.
Internet www.clasohlson.co.uk
 Loading...