

Page 1
Microwave Grill Oven
Mikrovågsugn
Mikrobølgeovn
Mikroaaltouuni
SVENSKANORSKSUOMI ENGLISH
Art.no. Model
34-4059 AG820CRL
www.clasohlson.com
Ver. 200903
Page 2

Page 3

Microwave Grill Oven
Art.no 4-4059 Model AG80CRL
Please read the entire instruction manual before using the product and save it for future reference.
We reserve the right for any errors in text or images and any necessary changes made to technical data.
If you have any questions regarding technical problems please contact Customer Services (see address
on reverse).
Safety
Caution:
To avoid the risk of exposure to harmful microwaves:
- The microwave oven should not be used if the door or casing is damaged.
- The microwave may only be disassembled and repaired by qualied service personnel.
- Never open the casing. Certain components inside the casing carry dangerous currents.
Contact with these may cause electric shock.
- The microwave oven should not be taken apart or modied.
- The product should not be used by unsupervised children if they do not have the required knowledge of
how to use it.
- Never heat drinks or other food items in closed containers since it might cause them to explode.
- Only use microwave-safe containers.
- Never leave the microwave unattended while heating food items in plastic or paper containers since there
may be a risk of re.
ENGLISH
- If smoke is detected, immediately shut off or unplug the microwave oven. Keep the door shut to suffocate
possible ames.
- The contents of feeding bottles or similar baby food containers should always be well stirred or shaken
before serving. Always check the temperature before serving to avoid burns.
- Do not heat or cook eggs in the microwave. They may explode during or after heating.
- Clean the microwave regularly. Make sure to wipe up any food spills.
- Place the microwave oven on a dry and even surface.
- Do not place the microwave oven where it could fall into water or any other type of liquid.
- Check that your power supply is 230 V and that the microwave oven is connected to an earthed socket.
- Always unplug the microwave oven from the wall socket before cleaning it.
- Do not expose the microwave to knocks or blows.
- Make sure that the lead does not come in contact with warm surfaces, e.g. a warm hob.
- Do not us the microwave oven if the cable or plug is damaged.
- The microwave should only be used and kept indoors.
- Be aware that food containers heated in the microwave become very hot so take care when removing
them. Use an oven cloth or oven glove to avoid burning yourself.
- Do not use the microwave oven when it is empty. Sparks may be produced and the microwave may
become damaged.
Page 4
4
ENGLISH
T
i
m
e
r
W
e
i
g
h
t
A
u
t
o
M
e
n
u
000 0
Micro ./
Grill /Comb i.
W.T./Ti me
Defro st
Clock /
Pre-S et
Stop/ Clear
Start /
+30Se c./Co nfirm
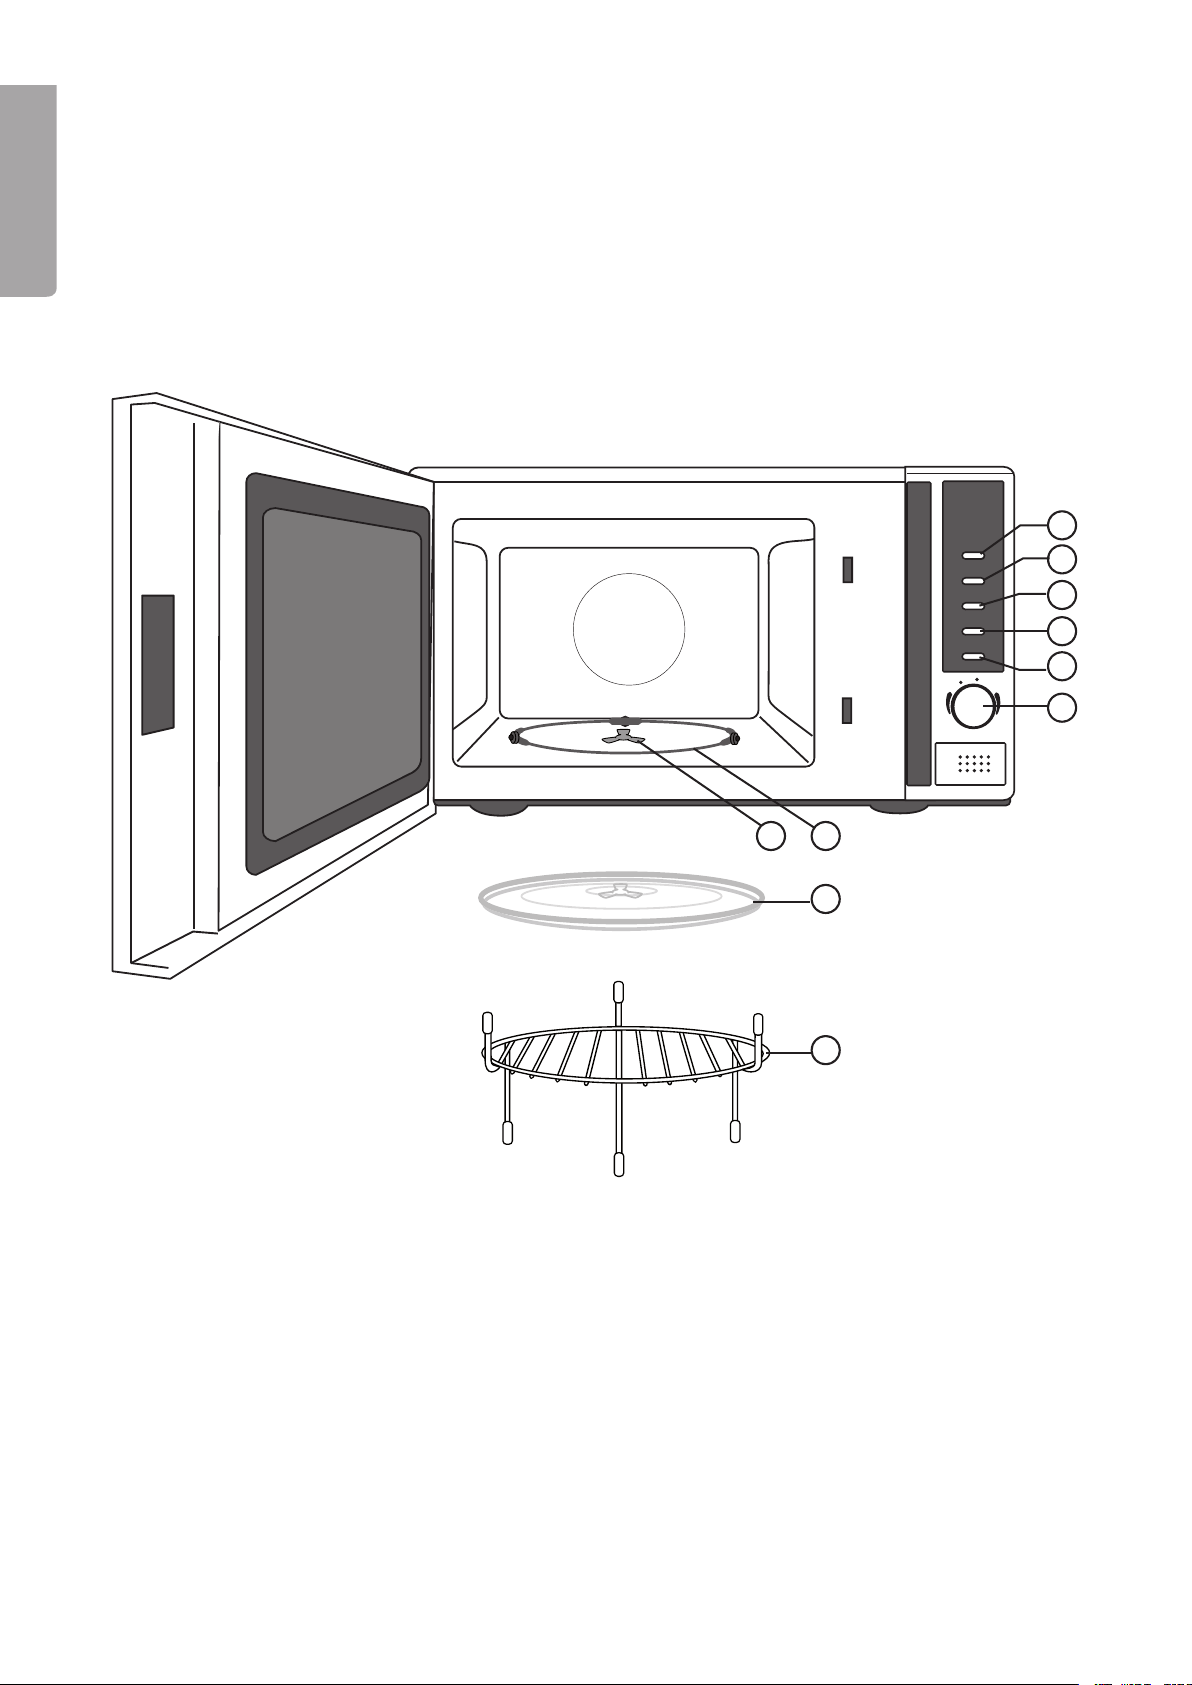
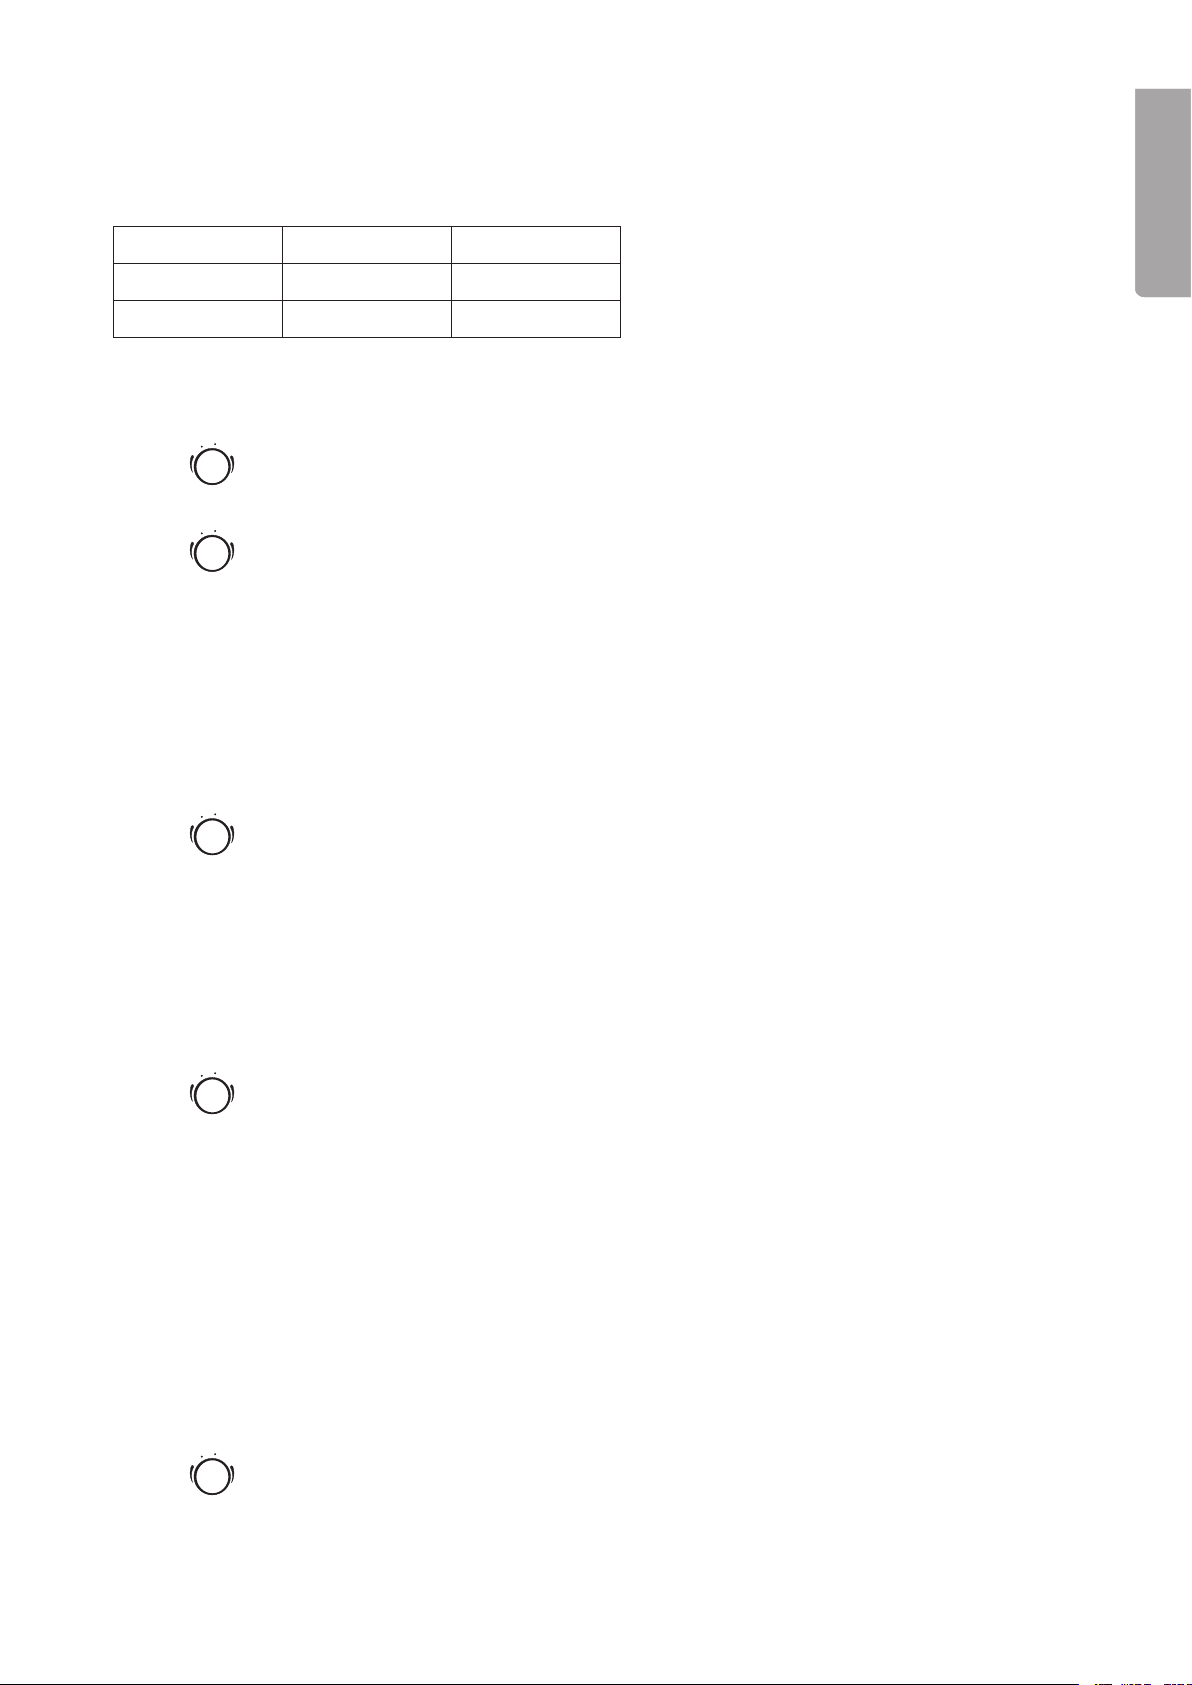
Product description
Suitable containers for microwave use
We recommend that microwave-safe tableware is used. Suitable materials are glass, porcelain and certain
plastic materials. Never use metal containers or containers with gold or silver trim. Even containers of wood
or with wooden parts are unsuitable since the wood will dry in the microwave and may even crack.
Buttons and functions
1. Micro/Grill/Combi – Selector
2. W.T./Time Defrost – Automatic defrost programme
3. Clock/Pre-Set – Sets the clock/Preset start time
4. Stop/Clear – Turns the microwave off /Clears settings/Button lock
5. Start/+30Sec./Con rm – Turns the microwave on/Con rms settings
6. Setting dial
7. Turntable drive
8. Turntable support ring
9. Turntable
10. Metal grill rack
1
4
5
7 8
6
9
10
Page 5
5
ENGLISH
Installation & preparations
Unpack all parts and check that they are intact. Package contents:
- Microwave oven
- Turntable
- Turntable support ring
- Grill rack
- Instruction manual
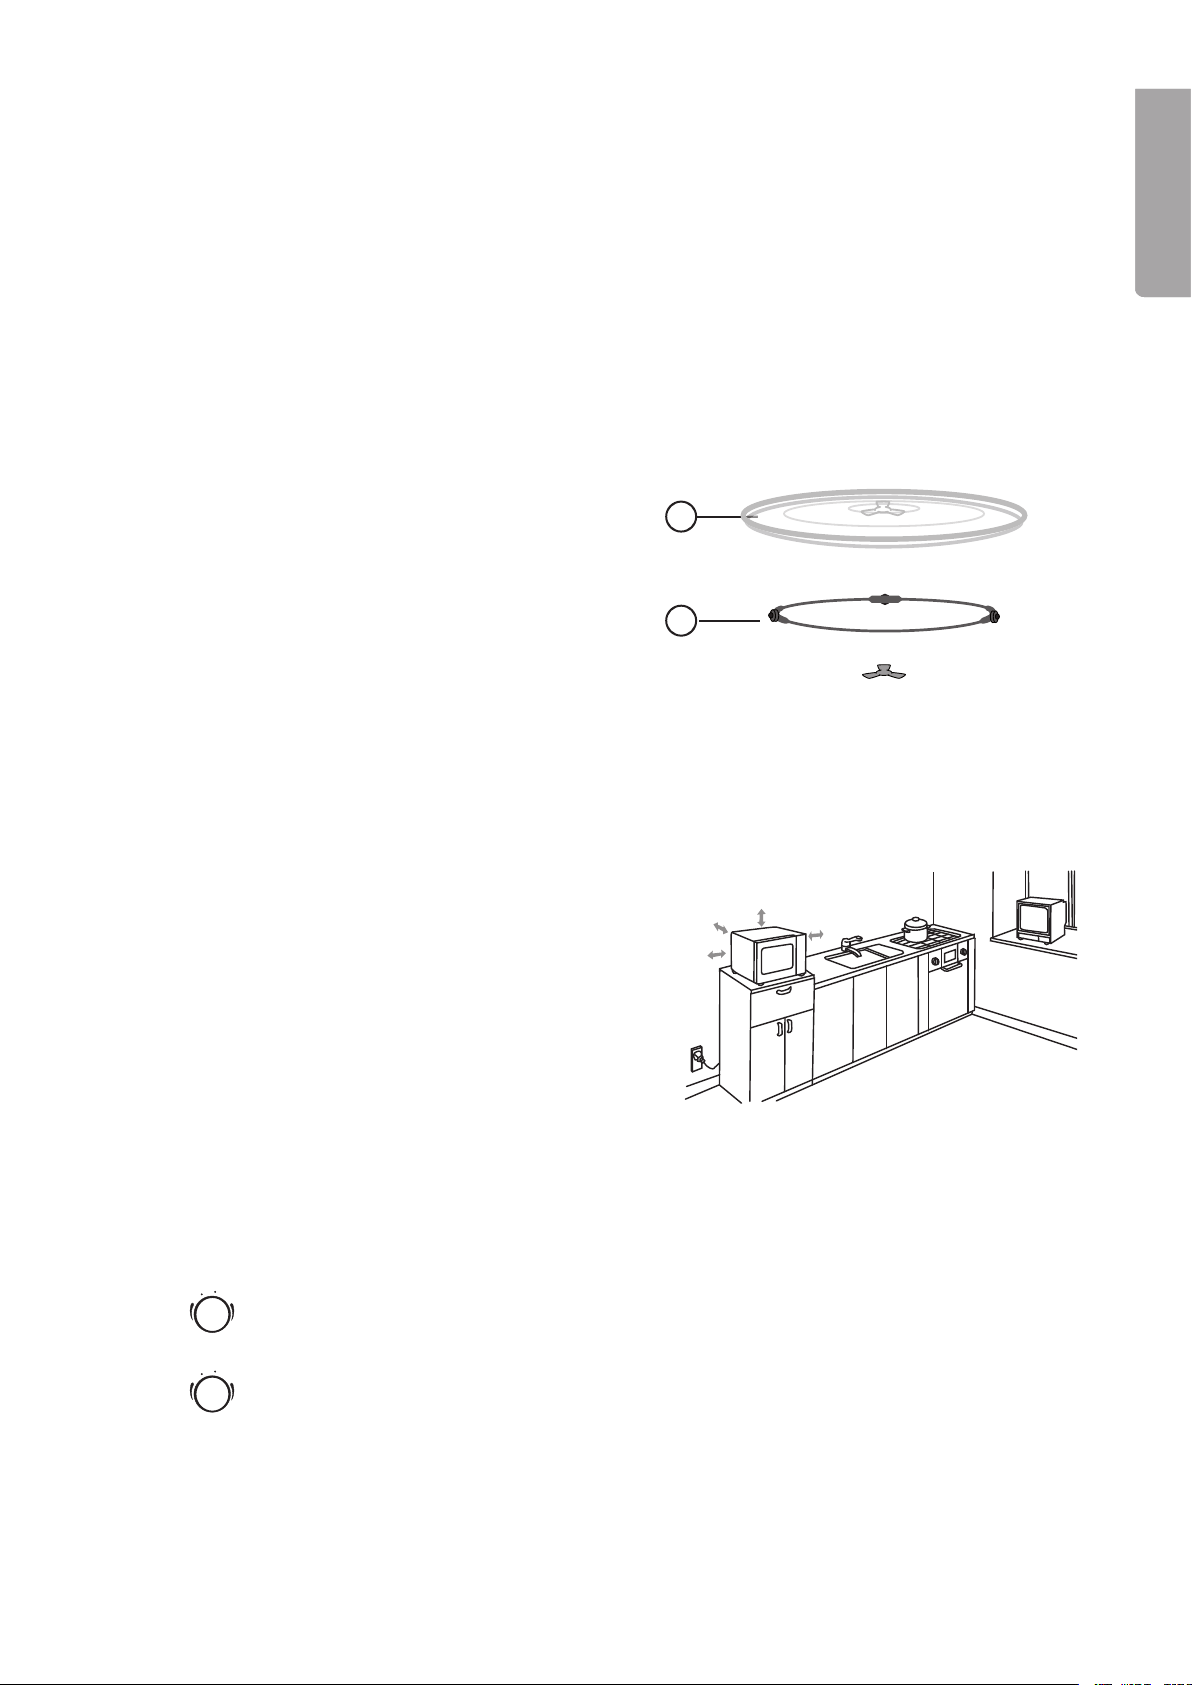
Installing the rotating turntable
- Never place the turntable (9) upside down (the 3
middle “feet” should be facing downwards).
- Both the turntable (9) and the support ring (8) must be
in place every time the microwave oven is used.
- All food items and containers should be placed on the
turntable when defrosting or heating.
- If the turntable or support ring is damaged, contact
Customer Services.
Selecting a good location
- Place the microwave on a at and dry surface.
- Make sure that the microwave oven has plenty of
space so that no air inlet/outlet ports are blocked.
The minimum free area around the oven should be
about 7.5 cm and 30 cm above.
- Do not remove the microwave oven’s feet. These are
needed to provide enough ventilation underneath the
microwave.
- Place the appliance as far away from TVs and radios
as possible. Microwaves can cause interference to
TV reception and radio broadcasts.
Setting the clock
Once the microwave is connected to the mains a signal will be emitted and “0:00” will show in the display.
1. Push Clock/Pre-Set once or twice. The time display will begin ashing.
2. Turn
T
i
m
e
r
W
e
i
g
h
t
A
u
t
o
M
e
n
u
00 0 0
Micro ./
Grill /Combi.
W.T./Tim e
Defro st
Clock /
Pre-S et
Stop/ Clear
Start /
+30Se c./Conf irm
T
i
m
e
r
W
e
i
g
h
t
A
u
t
o
M
e
n
u
Start /
+30Se c./Conf irm
to set the hours.
3. Push once again on Clock/Pre-Set to come to the minutes setting.
4. Turn
T
i
m
e
r
W
e
i
g
h
t
A
u
t
o
M
e
n
u
00 0 0
Micro ./
Grill /Combi.
W.T./Tim e
Defro st
Clock /
Pre-S et
Stop/ Clear
Start /
+30Se c./Conf irm
T
i
m
e
r
W
e
i
g
h
t
A
u
t
o
M
e
n
u
Start /
+30Se c./Conf irm
to set the minutes.
5. Push Clock/Pre-Set to con rm and save your settings.
7,5 cm
7,5 cm
7,5 cm
30 cm
8
9
Page 6
6
ENGLISH
Operation
Using the microwave
1. Place the item to be heated into the microwave.
2. Press Micro/Grill/Combi repeatedly or turn
T
i
m
e
r
W
e
i
g
h
t
A
u
t
o
M
e
n
u
00 0 0
Micro ./
Grill /Combi.
W.T./Tim e
Defro st
Clock /
Pre-S et
Stop/ Clear
Start /
+30Se c./Conf irm
T
i
m
e
r
W
e
i
g
h
t
A
u
t
o
M
e
n
u
Start /
+30Se c./Conf irm
to select the desired power level. The display will
show, in order, “P 100”, “P 80”, “P 50”, “P 30” and “P 10”.
Examples of suitable power settings:
Defrosting P 30
Cooking/reheating P 80
Boiling water P 100
Con rm power settings by pressing Start/+30Sec/Con rm.
3. Then set the desired time by turning
T
i
m
e
r
W
e
i
g
h
t
A
u
t
o
M
e
n
u
00 0 0
Micro ./
Grill /Combi.
W.T./Tim e
Defro st
Clock /
Pre-S et
Stop/ Clear
Start /
+30Se c./Conf irm
T
i
m
e
r
W
e
i
g
h
t
A
u
t
o
M
e
n
u
Start /
+30Se c./Conf irm
(up to 95 minutes).
4. Close the oven door and push Start/+30Sec/Con rm to start the microwave oven.
N.B. The preset time setting intervals
are as follows:
0 -1 min 5 seconds
1-5 min 10 seconds
5-10 min 30 seconds
10-30 min 1 minute
30-95 min 5 minutes
Using the grill
1. Place the item to be heated into the microwave.
2. Push Micro/Grill/Combi once. The display will begin ashing “100”.
3. Turn
T
i
m
e
r
W
e
i
g
h
t
A
u
t
o
M
e
n
u
00 0 0
Micro ./
Grill /Combi.
W.T./Tim e
Defro st
Clock /
Pre-S et
Stop/ Clear
Start /
+30Se c./Conf irm
T
i
m
e
r
W
e
i
g
h
t
A
u
t
o
M
e
n
u
Start /
+30Se c./Conf irm
to select the grill. The icon ”G” in the display means the grill is active.
4. When the ”G” icon shows, press Start/+30Sec/Con rm to con rm your choice.
5. Turn
T
i
m
e
r
W
e
i
g
h
t
A
u
t
o
M
e
n
u
00 0 0
Micro ./
Grill /Combi.
W.T./Tim e
Defro st
Clock /
Pre-S et
Stop/ Clear
Start /
+30Se c./Conf irm
T
i
m
e
r
W
e
i
g
h
t
A
u
t
o
M
e
n
u
Start /
+30Se c./Conf irm
to set the desired cooking time (up to 95 minutes).
6. Close the oven door and press Start/+30Sec/Con rm to start the oven.
N.B.
When half the grilling time has elapsed the microwave oven will emit two beeps. This is completely normal
and is merely signalling that only half the cooking time remains.
To grill the food evenly it should be turned at this time. Close the oven door and push Start/+30Sec/Con rm
to continue grilling.
Power levels:
Display Power
P100 100 %
P80 80 %
P50 50 %
P30 30 %
P10 10 %
Page 7
7
ENGLISH
Combined use
Choose from two combinations C-1 and C-2.
Combinations:
Selection Microwave Grill
C-1 55 % 45 %
C-2 36 % 64 %
1. Place the item to be heated into the microwave.
2. Push Micro/Grill/Combi once. The display will begin ashing “100”.
3. Turn
T
i
m
e
r
W
e
i
g
h
t
A
u
t
o
M
e
n
u
00 0 0
Micro ./
Grill /Combi.
W.T./Tim e
Defro st
Clock /
Pre-S et
Stop/ Clear
Start /
+30Se c./Conf irm
T
i
m
e
r
W
e
i
g
h
t
A
u
t
o
M
e
n
u
Start /
+30Se c./Conf irm
to select either C-1 or C-2.
4. Push Start/+30Sec/Con rm once to con rm the chosen setting.
5. Turn
T
i
m
e
r
W
e
i
g
h
t
A
u
t
o
M
e
n
u
00 0 0
Micro ./
Grill /Combi.
W.T./Tim e
Defro st
Clock /
Pre-S et
Stop/ Clear
Start /
+30Se c./Conf irm
T
i
m
e
r
W
e
i
g
h
t
A
u
t
o
M
e
n
u
Start /
+30Se c./Conf irm
to set the desired cooking time (up to 95 minutes).
6. Close the oven door and press Start/+30Sec/Con rm to start the oven.
Defrosting
Defrosting by weight
1. Put the item to be defrosted into the microwave.
2. Press W.T./Time Defrost once. The display will show “def1”.
3. Turn
T
i
m
e
r
W
e
i
g
h
t
A
u
t
o
M
e
n
u
00 0 0
Micro ./
Grill /Combi.
W.T./Tim e
Defro st
Clock /
Pre-S et
Stop/ Clear
Start /
+30Se c./Conf irm
T
i
m
e
r
W
e
i
g
h
t
A
u
t
o
M
e
n
u
Start /
+30Se c./Conf irm
to set the weight of the item to be defrosted. Select the appropriate weight from
100 to 2000 grams.
4. Close the oven door and push Start/+30Sec/Con rm to begin defrosting.
Defrosting by time
1. Put the item to be defrosted into the microwave.
2. Push DEFROST BY W.T/TIME twice. The display will show “def2”.
3. Turn
T
i
m
e
r
W
e
i
g
h
t
A
u
t
o
M
e
n
u
00 0 0
Micro ./
Grill /Combi.
W.T./Tim e
Defro st
Clock /
Pre-S et
Stop/ Clear
Start /
+30Se c./Conf irm
T
i
m
e
r
W
e
i
g
h
t
A
u
t
o
M
e
n
u
Start /
+30Se c./Conf irm
to set the defrost time (5 seconds to 95 minutes).
4. Close the oven door and push Start/+30Sec/Con rm to begin defrosting.
Additional features
Multi-function
The multi-function feature can be use when you want to use the various automatic functions of the microwave oven in a sequence. The cooking method can be set for two functions at the most.
Example: You wish to defrost your food for 5 minutes and continue cooking it at 80% power for 7 minutes.
1. Place the item to be heated into the microwave.
2. Press W.T./TIME DEFROST once. The display will show ”def1” (100 %).
3. Turn
T
i
m
e
r
W
e
i
g
h
t
A
u
t
o
M
e
n
u
00 0 0
Micro ./
Grill /Combi.
W.T./Tim e
Defro st
Clock /
Pre-S et
Stop/ Clear
Start /
+30Se c./Conf irm
T
i
m
e
r
W
e
i
g
h
t
A
u
t
o
M
e
n
u
Start /
+30Se c./Conf irm
to set the defrost time to 5 minutes.
4. Push Micro/Grill/Combi once.
Page 8
8
ENGLISH
5. Turn
T
i
m
e
r
W
e
i
g
h
t
A
u
t
o
M
e
n
u
00 0 0
Micro ./
Grill /Combi.
W.T./Tim e
Defro st
Clock /
Pre-S et
Stop/ Clear
Start /
+30Se c./Conf irm
T
i
m
e
r
W
e
i
g
h
t
A
u
t
o
M
e
n
u
Start /
+30Se c./Conf irm
to set the power setting to 80%. The display will show “P80”.
6. Push Start/+30Sec/Con rm once to con rm the chosen setting.
7. Turn
T
i
m
e
r
W
e
i
g
h
t
A
u
t
o
M
e
n
u
00 0 0
Micro ./
Grill /Combi.
W.T./Tim e
Defro st
Clock /
Pre-S et
Stop/ Clear
Start /
+30Se c./Conf irm
T
i
m
e
r
W
e
i
g
h
t
A
u
t
o
M
e
n
u
Start /
+30Se c./Conf irm
to set the cooking time to 7 minutes.
8. Close the oven door and press Start/+30Sec/Con rm to start the oven.
Preset start times
The microwave oven can be programmed to start at a preset time.
1. Make sure that the microwave oven clock is set correctly (see the Setting the clock section).
2. Set the desired method of cooking according to the instruction manual (do not use this for defrosting).
Cooking methods can be set for two functions at the most.
Example: You wish to prepare food at 80% power for 7 minutes.
1. Push Micro/Grill/Combi once.
2. Turn
T
i
m
e
r
W
e
i
g
h
t
A
u
t
o
M
e
n
u
00 0 0
Micro ./
Grill /Combi.
W.T./Tim e
Defro st
Clock /
Pre-S et
Stop/ Clear
Start /
+30Se c./Conf irm
T
i
m
e
r
W
e
i
g
h
t
A
u
t
o
M
e
n
u
Start /
+30Se c./Conf irm
to set the power setting to 80%. The display will show “P80”.
3. Push Start/+30Sec/Con rm once to con rm the chosen setting.
4. Turn
T
i
m
e
r
W
e
i
g
h
t
A
u
t
o
M
e
n
u
00 0 0
Micro ./
Grill /Combi.
W.T./Tim e
Defro st
Clock /
Pre-S et
Stop/ Clear
Start /
+30Se c./Conf irm
T
i
m
e
r
W
e
i
g
h
t
A
u
t
o
M
e
n
u
Start /
+30Se c./Conf irm
to set the cooking time to 7 minutes.
5. Push Clock/Pre-Set once. The hour display will start to ash.
6. Turn
T
i
m
e
r
W
e
i
g
h
t
A
u
t
o
M
e
n
u
00 0 0
Micro ./
Grill /Combi.
W.T./Tim e
Defro st
Clock /
Pre-S et
Stop/ Clear
Start /
+30Se c./Conf irm
T
i
m
e
r
W
e
i
g
h
t
A
u
t
o
M
e
n
u
Start /
+30Se c./Conf irm
to set the hours.
7. Push Clock/Pre-Set again. The current time will be shown and the minute display will begin ashing.
Turn
T
i
m
e
r
W
e
i
g
h
t
A
u
t
o
M
e
n
u
00 0 0
Micro ./
Grill /Combi.
W.T./Tim e
Defro st
Clock /
Pre-S et
Stop/ Clear
Start /
+30Se c./Conf irm
T
i
m
e
r
W
e
i
g
h
t
A
u
t
o
M
e
n
u
Start /
+30Se c./Conf irm
to set the minutes.
8. Close the oven door and push Start/+30Sec/Con rm to con rm and save settings.
9. At the preset time a signal will be emitted and the oven will start according to the preset programme.
N.B.
- The oven door has to be closed when the preset time occurs or the oven will not start.
- The clock has to be set for this function to be used.
Quick start
1. Put what you want to cook/heat into the oven and close the door.
2. Push Start/+30Sec/Con rm to run the oven for 30 seconds at full power (100%).
3. To increase the time, push Start/+30Sec/Con rm once or repeatedly. Each press increases the time
by 30 seconds.
N.B.
- When defrosting, using the preset start time or multi-function feature, the time cannot be increased by
pushingStart/+30Sec/Con rm.
- It is even possible to quick-start the oven in normal mode by turning
T
i
m
e
r
W
e
i
g
h
t
A
u
t
o
M
e
n
u
00 0 0
Micro ./
Grill /Combi.
W.T./Tim e
Defro st
Clock /
Pre-S et
Stop/ Clear
Start /
+30Se c./Conf irm
T
i
m
e
r
W
e
i
g
h
t
A
u
t
o
M
e
n
u
Start /
+30Se c./Conf irm
clockwise to set the time
directly. Start the oven by pressing Start/+30Sec/Con rm. Power level at 100%.
Page 9
9
ENGLISH
Automatic cooking programmes
1. Place the item that you wish to cook/reheat into the microwave.
2. Turn
T
i
m
e
r
W
e
i
g
h
t
A
u
t
o
M
e
n
u
00 0 0
Micro ./
Grill /Combi.
W.T./Tim e
Defro st
Clock /
Pre-S et
Stop/ Clear
Start /
+30Se c./Conf irm
T
i
m
e
r
W
e
i
g
h
t
A
u
t
o
M
e
n
u
Start /
+30Se c./Conf irm
clockwise to select a cooking programme (A-1 to A-8).
Refer to the table for various food items.
3. Push Start/+30Sec/Con rm once to con rm your selection.
4. Turn
T
i
m
e
r
W
e
i
g
h
t
A
u
t
o
M
e
n
u
00 0 0
Micro ./
Grill /Combi.
W.T./Tim e
Defro st
Clock /
Pre-S et
Stop/ Clear
Start /
+30Se c./Conf irm
T
i
m
e
r
W
e
i
g
h
t
A
u
t
o
M
e
n
u
Start /
+30Se c./Conf irm
to set the variables for the food item and its weight/portion.
5. Close the oven door and press Start/+30Sec/Con rm to start cooking.
6. When the time has elapsed the oven will emit a signal.
Menu Weight Display Power
A-1
Reheat
200 g 200 100 %
400 g 400 100 %
600 g 600 100 %
A-2
Vegetables
200 g 200 100 %
300 g 300 100 %
400 g 400 100 %
A-3
Fish
250 g 250 80 %
350 g 350 80 %
450 g 450 80 %
A-4
Meat
250 g 250 100 %
350 g 350 100 %
450 g 450 100 %
A-5
Pasta
50 g (with water 450 g) 50 80 %
100 g (with water 800 g) 100
80 %
A-6
Potatoes
200 g 200
100 %
400 g 400
100 %
600 g 600
100 %
A-7
Pizza
200 g 500 100 %
750 g 750
100 %
A-8
Soup
200 g 200 80 %
400 g 400
80 %
Checking your settings
You may always check your settings during use.
- During cooking press Micro/Grill/Combi to check the current active feature.
- For preset start times press Clock/Pre-Set to check the preset start time.
- When cooking press Clock/Pre-Set to display the time.
Button lock
The button lock is ideal for preventing children from accidentally starting the oven.
Locking the buttons
- Depress STOP/CLEAR for about 3 seconds while the oven is in standby mode. A signal will be emitted
and the key icon
will be displayed.
Unlocking the buttons
- Depress STOP/CLEAR for about 3 seconds. A signal will be emitted and the key icon should disappear.
Page 10
ENGLISH
N.B.
- The microwave will beep ve times when the cooking time has elapsed.
- If the door should open during use Start/+30Sec/Conrm must be pressed again to continue cooking.
- If Start/+30Sec/Conrm is not pushed within a minute after setting a programme/feature, the microwave
will return to standby mode. You then have to reset the feature.
Care and maintenance
Always unplug the product from the wall socket before cleaning. Never immerse the microwave in water to
clean it. Wipe both the inside and outside of the oven with a soft, damp cloth using a mild cleaning solution.
Avoid using solvents and abrasive cleaning agents. Wash the glass turntable, support ring and grill rack in
warm water with washing up liquid.
Troubleshooting guide
Problem Possible cause Possible solution
Oven does not
start.
Arcing or small
sparks occur.
Food is heated
unevenly.
Power cable not connected. Connect the plug to the wall socket.
Door is open. Close the door.
Unsuitable materials, e.g. metal is
used in the microwave oven.
The microwave oven is being used
while empty.
Unsuitable materials, e.g. metal is
used in the microwave oven.
The food has not been turned over
or mixed.
Use only microwave-safe materials
such as glass or porcelain.
Do not use the microwave oven
while it is empty.
Use only microwave-safe materials
such as glass or porcelain.
Turn over or mix the food.
Disposal
Follow local ordinances when disposing of this product. If you are unsure of how to dispose of this product,
please contact your municipality.
Specifications
Model AG820CRL
Power supply 230 V AC, 50 Hz
Microwave power consumption 1270 W
Microwave power output 800 W
Grill power consumption 1000 W
Capacity 20 litres
Glass turntable diameter 24.5 cm
External dimensions 43.3 x 25.8 x 33.5 cm
Weight (ca) 10.5 kg
10
Page 11

Mikrovågsugn
Art.nr 4-4059 Modell AG80CRL
Läs igenom hela bruksanvisningen före användning och spara den sedan för framtida bruk.
Vi reserverar oss för ev. text- och bildfel samt ändringar av tekniska data.
Vid tekniska problem eller andra frågor, kontakta vår kundtjänst (se adressuppgifter på baksidan).
Säkerhet
Varning!
För att undvika risken för att utsättas för skadliga mikrovågor:
- Mikrovågsugnen får inte användas om dess dörr eller hölje blivit skadade.
- Mikrovågsugnen får endast tas isär och repareras av kunnig och kvalicerad servicepersonal.
- Öppna aldrig höljet! Farlig spänning nns oskyddat på vissa komponenter inuti produktens hölje.
Kontakt med dessa kan ge upphov till elektriska stötar.
- Mikrovågsugnen får inte ändras eller demonteras.
- Mikrovågsugnen får inte användas av barn utan vuxens tillsyn om de inte har tillräckliga kunskaper om
användningen av mikrovågsugnen.
- Värm aldrig drycker eller andra livsmedel i förslutna behållare då det nns risk att dessa exploderar.
- Använd endast kärl lämpliga för användning i mikrovågsugn.
- Lämna aldrig mikrovågsugnen utan uppmärksamhet vid värmning av livsmedel i plast- eller
pappersförpackningar då det nns risk för antändning.
- Om rök upptäcks, stäng genast av mikrovågsugnen eller drag ur stickproppen. Låt luckan vara stängd för
att kväva eventuella lågor.
- Innehållet i nappaskor och liknande behållare för barnmat bör alltid röras eller skakas före servering.
Kontrollera alltid innehållets temperatur före servering för att undvika brännskador.
- Oskalade ägg samt hårdkokta ägg bör ej värmas i mikrovågsugn. Risk för att de exploderar, även efter
avslutad värmning.
SVENSKA
- Rengör mikrovågsugnen regelbundet. Se till att avlägsna eventuella matrester.
- Placera mikrovågsugnen på ett torrt och jämt underlag.
- Placera inte mikrovågsugnen så att den kan falla ner i vatten eller annan vätska.
- Se till att spänningen i elnätet är 230 V och att du ansluter mikrovågsugnen till ett jordat uttag.
- Drag alltid ur stickproppen ur vägguttaget innan du rengör mikrovågsugnen.
- Utsätt inte mikrovågsugnen och dess nätsladd för slag eller stötar.
- Se till så att nätsladden inte kommer i kontakt med varma ytor, t.ex. en varm spisplatta.
- Använd inte mikrovågsugnen om nätsladden eller stickproppen är i skadat skick.
- Mikrovågsugnen får endast användas och förvaras inomhus.
- Tänk på att kärlen kan vara heta när du ska ta ut dem efter att du har värmt mat i dem i mikrovågsugnen.
Använd gärna grytlapp eller annat skydd för att inte bränna dig.
- Sätt aldrig igång mikrovågsugnen när den är tom. Det kan uppstå gnistor och ugnen kan gå sönder.
11
Page 12

1
SVENSKA
T
i
m
e
r
W
e
i
g
h
t
A
u
t
o
M
e
n
u
000 0
Micro ./
Grill /Comb i.
W.T./Ti me
Defro st
Clock /
Pre-S et
Stop/ Clear
Start /
+30Se c./Co nfirm
Produktbeskrivning
Lämpliga kärl vid användning av mikrovågsugn
Vi rekommenderar att en mikrovågssäker servis används för tillagningen. Lämpliga material är glas, porslin
och särskilda plastmaterial. Använd aldrig kärl av metall eller kärl med guld- eller silverkant. Även kärl av trä
eller med trädetaljer är olämpliga eftersom träet torkar i mikrovågsugnen och kan spricka.
Knappar och funktioner
1. Micro./Grill/Combi – Funktionsväljare
2. W.T./Time Defrost – Automatiska upptiningsprogram
3. Clock/Pre-Set – Ställ in klockan/Tidsinställd start
4. Stop/Clear – Stoppar ugnen/Raderar inställningar/Knapplås
5. Start/+30Sec./Con rm – Startar ugnen/Bekräftar inställningar
6. Inställningsratt
7. Drivning till glastallriken
8. Stödring till glastallriken
9. Glastallrik
9. Metallgaller/Grillgaller
1
4
5
7 8
6
9
10
Page 13

1
SVENSKA
Installation & förberedelser
Packa upp alla delar och kontrollera att de är hela. Kartongen innehåller följande:
- Mikrovågsugn
- Glastallrik
- Stödring till glastallriken
- Grillgaller
- Instruktionsbok
Installera den roterande glastallriken
- Placera aldrig glastallriken (9) upp och ned (de tre
”klackarna” i mitten ska vara nedåt).
- Både glastallriken (9) och stödringen (8) måste vara
på plats varje gång du använder mikrovågsugnen.
- All mat och kärl ska alltid placeras på glastallriken
vid upptining och värmning.
- Om glastallriken eller stödringen går sönder,
kontakta kundtjänst.
Placering av mikrovågsugnen
- Välj ett jämt och torrt underlag att placera mikrovågsugnen på.
- Se till så att mikrovågsugnen har gott om utrymme
så att inga luftintag eller luftutblås blockeras.
Minimimåtten runt ugnen är 7,5 cm och 30 cm
ovanför ugnen.
- Ta inte bort mikrovågsugnens fötter. Dessa behövs
för att ge tillräcklig ventilation under apparaten.
- Placera mikrovågsugnen så långt ifrån tv- och
radioapparater som möjligt. Mikrovågsugnen kan
under användning orsaka störningar i mottagningen
av tv- och radiosändningar.
Att ställa klockan
När mikrovågsugnen ansluts till elnätet hörs en signal och displayen visar ”0:00”.
1. Tryck en eller två gånger på Clock/Pre-Set. Timangivelsen kommer att blinka.
2. Vrid på
T
i
m
e
r
W
e
i
g
h
t
A
u
t
o
M
e
n
u
00 0 0
Micro ./
Grill /Combi.
W.T./Tim e
Defro st
Clock /
Pre-S et
Stop/ Clear
Start /
+30Se c./Conf irm
T
i
m
e
r
W
e
i
g
h
t
A
u
t
o
M
e
n
u
Start /
+30Se c./Conf irm
för att ställa in timmarna.
3. Tryck åter på Clock/Pre-Set för att ställa in minuter.
4. Vrid på
T
i
m
e
r
W
e
i
g
h
t
A
u
t
o
M
e
n
u
00 0 0
Micro ./
Grill /Combi.
W.T./Tim e
Defro st
Clock /
Pre-S et
Stop/ Clear
Start /
+30Se c./Conf irm
T
i
m
e
r
W
e
i
g
h
t
A
u
t
o
M
e
n
u
Start /
+30Se c./Conf irm
för att ställa in minuter.
5. Tryck på Clock/Pre-Set för att bekräfta och spara inställningarna.
7,5 cm
7,5 cm
7,5 cm
30 cm
8
9
Page 14

14
SVENSKA
Användning
Att använda mikrovågsugnen
1. Sätt in det du vill tillaga.
2. Tryck upprepade gånger på knappen Micro/Grill/Combi eller vrid på
T
i
m
e
r
W
e
i
g
h
t
A
u
t
o
M
e
n
u
00 0 0
Micro ./
Grill /Combi.
W.T./Tim e
Defro st
Clock /
Pre-S et
Stop/ Clear
Start /
+30Se c./Conf irm
T
i
m
e
r
W
e
i
g
h
t
A
u
t
o
M
e
n
u
Start /
+30Se c./Conf irm
för att välja önskad effektnivå.
Displayen visar i tur och ordning ”P 100”, ”P 80”, ”P 50”, ”P 30” och ”P 10”.
Exempel på lämpliga effektinställningar:
Att tina mat P 30
Att värma mat P 80
Att koka vatten P 100
Bekräfta effektinställningen genom att trycka på Start/+30Sec/Con rm.
3. Ställ sedan in önskad tid genom att vrida på
T
i
m
e
r
W
e
i
g
h
t
A
u
t
o
M
e
n
u
00 0 0
Micro ./
Grill /Combi.
W.T./Tim e
Defro st
Clock /
Pre-S et
Stop/ Clear
Start /
+30Se c./Conf irm
T
i
m
e
r
W
e
i
g
h
t
A
u
t
o
M
e
n
u
Start /
+30Se c./Conf irm
(upp till 95 minuter).
4. Stäng ugnsluckan och tryck på knappen Start/+30Sec/Con rm för att starta mikrovågsugnen.
OBS! De inställbara tidsintervallen
på kodkontakten är enligt följande:
0-1 min 5 sekunder
1-5 min 10 sekunder
5-10 min 30 sekunder
10-30 min 1 minut
30-95 min 5 minuter
Att använda grillfunktionen
1. Sätt in det du vill tillaga.
2. Tryck en gång på knappen Micro/Grill/Combi. ”100” blinkar i displayen.
3. Vrid på
T
i
m
e
r
W
e
i
g
h
t
A
u
t
o
M
e
n
u
00 0 0
Micro ./
Grill /Combi.
W.T./Tim e
Defro st
Clock /
Pre-S et
Stop/ Clear
Start /
+30Se c./Conf irm
T
i
m
e
r
W
e
i
g
h
t
A
u
t
o
M
e
n
u
Start /
+30Se c./Conf irm
för att välja grillfunktionen. ”G” i displayen symboliserar grillfunktion.
4. När ”G” visas, tryck på Start/+30Sec/Con rm för att bekräfta ditt val.
5. Vrid på
T
i
m
e
r
W
e
i
g
h
t
A
u
t
o
M
e
n
u
00 0 0
Micro ./
Grill /Combi.
W.T./Tim e
Defro st
Clock /
Pre-S et
Stop/ Clear
Start /
+30Se c./Conf irm
T
i
m
e
r
W
e
i
g
h
t
A
u
t
o
M
e
n
u
Start /
+30Se c./Conf irm
för att för att ställa in önskad tillagningstid (upp till 95 minuter).
6. Stäng ugnsluckan och tryck på knappen Start/+30Sec/Con rm för att starta ugnen.
Obs!
När halva grillningstiden gått avger mikrovågsugnen två ljudstötar. Detta är helt normalt och uppmärksammar att halva tiden har gått.
För att få en jämn grillning bör maten vändas efter halva tiden. Stäng sedan luckan och tryck igen på
Start/+30Sec/Con rm för att fortsätta grillningen.
Effektlägen
Displayen visar Effekt
P100 100 %
P80 80 %
P50 50 %
P30 30 %
P10 10 %
Page 15

15
SVENSKA
Kombinerad användning
Två kombinationer nns att välja på: C-1 och C-2.
Beskrivning av kombinationerna:
Funktion Mikrovågsugn Grill
C-1 55 % 45 %
C-2 36 % 64 %
1. Sätt in det du vill tillaga.
2. Tryck en gång på knappen Micro/Grill/Combi. ”100” blinkar i displayen.
3. Vrid på
T
i
m
e
r
W
e
i
g
h
t
A
u
t
o
M
e
n
u
00 0 0
Micro ./
Grill /Combi.
W.T./Tim e
Defro st
Clock /
Pre-S et
Stop/ Clear
Start /
+30Se c./Conf irm
T
i
m
e
r
W
e
i
g
h
t
A
u
t
o
M
e
n
u
Start /
+30Se c./Conf irm
för att välja funktion (C-1 eller C-2).
4. Tryck en gång på knappen Start/+30Sec/Con rm för att bekräfta vald funktion.
5. Vrid på
T
i
m
e
r
W
e
i
g
h
t
A
u
t
o
M
e
n
u
00 0 0
Micro ./
Grill /Combi.
W.T./Tim e
Defro st
Clock /
Pre-S et
Stop/ Clear
Start /
+30Se c./Conf irm
T
i
m
e
r
W
e
i
g
h
t
A
u
t
o
M
e
n
u
Start /
+30Se c./Conf irm
för att för att ställa in önskad tillagningstid (upp till 95 minuter).
6. Stäng ugnsluckan och tryck på knappen Start/+30Sec/Con rm för att starta ugnen.
Upptining
Upptining efter vikt
1. Sätt in det du vill tina upp.
2. Tryck en gång på W.T./Time Defrost. Displayen visar ”def1”.
3. Vrid på
T
i
m
e
r
W
e
i
g
h
t
A
u
t
o
M
e
n
u
00 0 0
Micro ./
Grill /Combi.
W.T./Tim e
Defro st
Clock /
Pre-S et
Stop/ Clear
Start /
+30Se c./Conf irm
T
i
m
e
r
W
e
i
g
h
t
A
u
t
o
M
e
n
u
Start /
+30Se c./Conf irm
för att ställa in vikten för det som skall tinas. Välj vikt från 100 till 2000 gram.
4. Stäng ugnsluckan och tryck på knappen Start/+30Sec/Con rm för att starta upptiningen.
Upptining efter tid
1. Sätt in det du vill tina upp.
2. Tryck två gånger på DEFROST BY W.T/TIME. Displayen visar ”def2”.
3. Vrid på
T
i
m
e
r
W
e
i
g
h
t
A
u
t
o
M
e
n
u
00 0 0
Micro ./
Grill /Combi.
W.T./Tim e
Defro st
Clock /
Pre-S et
Stop/ Clear
Start /
+30Se c./Conf irm
T
i
m
e
r
W
e
i
g
h
t
A
u
t
o
M
e
n
u
Start /
+30Se c./Conf irm
för att ställa in upptiningstid (5 sekunder till 95 minuter).
4. Stäng ugnsluckan och tryck på knappen Start/+30Sec/Con rm för att starta upptiningen.
Avancerad användning
Multifunktion
Multifunktionen kan användas när du vill använda mikrovågsugnens olika funktioner automatiskt i en följd
efter varandra. Tillagning kan ställas in i högst två steg.
Exempel: Du vill tina upp maten i 5 minuter och sedan fortsätta tillagningen med 80 % effekt i 7 minuter.
1. Sätt in det du vill tillaga.
2. Tryck en gång på knappen W.T./TIME DEFROST. Displayen visar ”def1” (100 %).
3. Vrid på
T
i
m
e
r
W
e
i
g
h
t
A
u
t
o
M
e
n
u
00 0 0
Micro ./
Grill /Combi.
W.T./Tim e
Defro st
Clock /
Pre-S et
Stop/ Clear
Start /
+30Se c./Conf irm
T
i
m
e
r
W
e
i
g
h
t
A
u
t
o
M
e
n
u
Start /
+30Se c./Conf irm
för att ställa upptiningstiden på 5 minuter.
4. Tryck en gång på knappen Micro/Grill/Combi.
Page 16

16
SVENSKA
5. Vrid på
T
i
m
e
r
W
e
i
g
h
t
A
u
t
o
M
e
n
u
00 0 0
Micro ./
Grill /Combi.
W.T./Tim e
Defro st
Clock /
Pre-S et
Stop/ Clear
Start /
+30Se c./Conf irm
T
i
m
e
r
W
e
i
g
h
t
A
u
t
o
M
e
n
u
Start /
+30Se c./Conf irm
för att ställa in mikrovågseffekten på 80 %. Displayen visar ”P80”.
6. Tryck en gång på knappen Start/+30Sec/Con rm för att bekräfta vald funktion.
7. Vrid på
T
i
m
e
r
W
e
i
g
h
t
A
u
t
o
M
e
n
u
00 0 0
Micro ./
Grill /Combi.
W.T./Tim e
Defro st
Clock /
Pre-S et
Stop/ Clear
Start /
+30Se c./Conf irm
T
i
m
e
r
W
e
i
g
h
t
A
u
t
o
M
e
n
u
Start /
+30Se c./Conf irm
för att ställa tillagningstiden på 7 minuter.
8. Stäng ugnsluckan och tryck på knappen Start/+30Sec/Con rm för att starta ugnen.
Tidsinställd start av ugnen
Mikrovågsugnen kan programmeras att starta vid en förinställd tid.
1. Se till att mikrovågsugnens klocka är rätt inställd (se avsnittet Att ställa klockan).
2. Ställ in mikrovågsugnen för tillagning enligt instruktionerna i denna bruksanvisning (bör ej användas vid
upptining). Tillagning kan ställas in i högst två steg.
Exempel: Du vill tillaga mat med 80 % effekt i 7 minuter.
1. Tryck en gång på knappen Micro/Grill/Combi.
2. Vrid på
T
i
m
e
r
W
e
i
g
h
t
A
u
t
o
M
e
n
u
00 0 0
Micro ./
Grill /Combi.
W.T./Tim e
Defro st
Clock /
Pre-S et
Stop/ Clear
Start /
+30Se c./Conf irm
T
i
m
e
r
W
e
i
g
h
t
A
u
t
o
M
e
n
u
Start /
+30Se c./Conf irm
för att ställa in mikrovågseffekten på 80 %. Displayen visar ”P80”.
3. Tryck en gång på knappen Start/+30Sec/Con rm för att bekräfta vald funktion.
4. Vrid på
T
i
m
e
r
W
e
i
g
h
t
A
u
t
o
M
e
n
u
00 0 0
Micro ./
Grill /Combi.
W.T./Tim e
Defro st
Clock /
Pre-S et
Stop/ Clear
Start /
+30Se c./Conf irm
T
i
m
e
r
W
e
i
g
h
t
A
u
t
o
M
e
n
u
Start /
+30Se c./Conf irm
för att ställa tillagningstiden på 7 minuter.
5. Tryck en gång på Clock/Pre-Set. Timangivelsen blinkar.
6. Vrid på
T
i
m
e
r
W
e
i
g
h
t
A
u
t
o
M
e
n
u
00 0 0
Micro ./
Grill /Combi.
W.T./Tim e
Defro st
Clock /
Pre-S et
Stop/ Clear
Start /
+30Se c./Conf irm
T
i
m
e
r
W
e
i
g
h
t
A
u
t
o
M
e
n
u
Start /
+30Se c./Conf irm
för att för att ställa in timmarna.
7. Tryck igen på Clock/Pre-Set. Aktuell tid visas och minutangivelsen blinkar. Vrid på
T
i
m
e
r
W
e
i
g
h
t
A
u
t
o
M
e
n
u
00 0 0
Micro ./
Grill /Combi.
W.T./Tim e
Defro st
Clock /
Pre-S et
Stop/ Clear
Start /
+30Se c./Conf irm
T
i
m
e
r
W
e
i
g
h
t
A
u
t
o
M
e
n
u
Start /
+30Se c./Conf irm
för att ställa in
minuterna.
8. Stäng luckan och tryck på knappen Start/+30Sec/con rm för att bekräfta och spara inställningarna.
9. När den inställda tiden inträffar avges en ljudsignal och ugnen startar enligt inställt program.
Anm.
- Luckan måste vara stängd när den inställda tiden inträffar, annars startar ej ugnen.
- Klockan måste vara inställd för att denna funktion ska kunna användas.
Snabbstart
1. Sätt in det du vill tillaga/värma och stäng luckan.
2. Tryck på knappen Start/+30Sec/Con rm för att starta ugnen i 30 sekunder med full effekt (100 %).
3. För att öka tiden, tryck en eller era gånger på Start/+30Sec/Con rm. Varje tryck ökar tiden med 30
sekunder.
Anm.
- Vid upptining, automatiska återuppvärmningsprogram samt multifunktion kan tiden ej ökas genom att
trycka på knappen Start/+30Sec/Con rm.
- Du kan även snabbstarta ugnen genom att i normalläge vrida moturs på
T
i
m
e
r
W
e
i
g
h
t
A
u
t
o
M
e
n
u
00 0 0
Micro ./
Grill /Combi.
W.T./Tim e
Defro st
Clock /
Pre-S et
Stop/ Clear
Start /
+30Se c./Conf irm
T
i
m
e
r
W
e
i
g
h
t
A
u
t
o
M
e
n
u
Start /
+30Se c./Conf irm
för att ställa in tid direkt.
Starta ugnen genom att trycka på knappen Start/+30Sec/Con rm. Effektnivån är 100 %.
Page 17

17
SVENSKA
Automatiska tillagningsprogram
1. Sätt in det du vill tillaga/värma.
2. Vrid medurs på
T
i
m
e
r
W
e
i
g
h
t
A
u
t
o
M
e
n
u
00 0 0
Micro ./
Grill /Combi.
W.T./Tim e
Defro st
Clock /
Pre-S et
Stop/ Clear
Start /
+30Se c./Conf irm
T
i
m
e
r
W
e
i
g
h
t
A
u
t
o
M
e
n
u
Start /
+30Se c./Conf irm
för att välja tillagningsprogram (A-1 till A-8). Se tabellen för olika livsmedel/maträtter.
3. Tryck på knappen Start/+30Sec/Con rm för att bekräfta ditt val.
4. Vrid på
T
i
m
e
r
W
e
i
g
h
t
A
u
t
o
M
e
n
u
00 0 0
Micro ./
Grill /Combi.
W.T./Tim e
Defro st
Clock /
Pre-S et
Stop/ Clear
Start /
+30Se c./Conf irm
T
i
m
e
r
W
e
i
g
h
t
A
u
t
o
M
e
n
u
Start /
+30Se c./Conf irm
för att ställa in livsmedlets/maträttens vikt/portion.
5. Stäng luckan och tryck på knappen Start/+30Sec/Con rm för att starta tillagningen.
6. När tillagningen är klar ljuder en signal.
Meny Vikt Displayen visar Effekt
A-1
Återuppvärmning
200 g 200 100 %
400 g 400 100 %
600 g 600 100 %
A-2
Grönsaker
200 g 200 100 %
300 g 300 100 %
400 g 400 100 %
A-3
Fisk
250 g 250 80 %
350 g 350 80 %
450 g 450 80 %
A-4
Kött
250 g 250 100 %
350 g 350 100 %
450 g 450 100 %
A-5
Pasta
50 g (med vatten 450 g) 50 80 %
100 g (med vatten 800 g) 100
80 %
A-6
Potatis
200 g 200
100 %
400 g 400
100 %
600 g 600
100 %
A-7
Pizza
200 g 500 100 %
750 g 750
100 %
A-8
Soppa
200 g 200 80 %
400 g 400
80 %
Efterhandskontroll av de inställningar du har gjort
Under användning kan du alltid kontrollera vilka inställningar du har gjort.
- Under tillagning, tryck på Micro/Grill/Combi för att kontrollera vilken funktion som är aktiverad.
- Vid tidsinställd start av ugnen, tryck på knappen Clock/Pre-Set för att kontrollera den inställda tiden
för start av ugnen.
- Vid tillagning, tryck på Clock/Pre-Set för att visa klockan.
Knapplås
Knapplås är idealiskt för att förhindra att barn av misstag sätter igång ugnen.
För att låsa knapparna
- Håll knappen STOP/CLEAR intryckt i ca 3 sekunder när ugnen är i vänteläget. En signal hörs, och en
nyckelsymbol
kommer upp på displayen.
För att låsa upp
- Håll knappen STOP/CLEAR intryckt i ca 3 sekunder. En signal hörs och nyckelsymbolen försvinner.
Page 18

Anm.
- Mikrovågsugnens inbyggda summer avger fem signaler när tillagningen/funktionen är avslutad.
- Om luckan öppnas under tillagning måste alltid knappen Start/+30Sec/Conrm tryckas in igen för att
fortsätta tillagningen.
- Om knappen Start/+30Sec/Conrm inte tryckts in under 1 minut efter inställning av tillagningsprogram/
funktion återgår mikrovågsugnen till vänteläget. Du måste då ställa in önskad funktion igen.
Skötsel och underhåll
Drag alltid ur stickproppen ur vägguttaget före rengöring. Sänk aldrig ned mikrovågsugnen i vatten för att
göra ren den. Torka ugnens insida och utsida med en mjuk fuktad trasa samt ett milt rengöringsmedel.
SVENSKA
Undvik lösningsmedel eller slipande rengöringsmedel. Diska glastallriken, stödringen och grillgallret
i varmt vatten med diskmedel.
Felsökningsschema
Problem Möjlig orsak Möjlig lösning
Ugnen startar inte. Nätsladden är inte ansluten. Sätt i stickproppen i vägguttaget.
Luckan är öppen. Stäng luckan.
Det uppstår ljusbågar eller små
blixtar.
Maten värms ojämt. Olämpliga material, t.ex. metall,
Olämpliga material, t.ex. metall,
används i mikrovågsugnen.
Mikrovågsugnen används tom. Använd inte mikrovågsugnen tom.
används i mikrovågsugnen.
Maten har inte vänts eller rörts om. Vänd eller rör om maten.
Används endast mikrovågssäkra material,
t.ex. glass eller porslin.
Används endast mikrovågssäkra material,
t.ex. glass eller porslin.
Avfallshantering
När du ska göra dig av med produkten ska detta ske enligt lokala föreskrifter.
Är du osäker på hur du ska gå tillväga, kontakta din kommun.
Specifikationer
Modell AG820CRL
Strömförsörjning 230 V AC, 50 Hz
Mikrovågsugnens ineffekt 1270 W
Mikrovågsugnens uteffekt 800 W
Grillens ineffekt 1000 W
Rymd 20 liter
Glastallrikens diameter 24,5 cm
Yttermått 43,3 x 25,8 x 33,5 cm
Vikt (ca) 10,5 kg
18
Page 19

Mikrobølgeovn
Art.nr. 4-4059 Modell AG80CRL
Les bruksanvisningen nøye før bruk av produktet, og ta vare på den for ev. framtidig bruk.
Vi reserverer oss mot ev. tekst- og bildefeil, samt forandringer av tekniske data.
Ved tekniske problemer eller andre spørsmål, ta kontakt med vårt kundesenter. (Se opplysninger
om kundesenteret i denne bruksanvisningen).
Sikkerhet
Advarsel!
For å unngå fare for å bli utsatt for skadelige mikrobølger:
- Mikrobølgeovnen må ikke brukes dersom dør eller deksel er skadet.
- Mikrobølgeovnen skal kun repareres av kvaliserte fagpersoner.
- Åpne ikke dekselet! Farlig spenning ligger ubeskyttet på visse komponenter under produktets deksel.
Kontakt med disse kan gi elektrisk støt.
- Produktet må ikke demonteres eller endres.
- Mikrobølgeovnen må ikke brukes av barn uten tilsyn av voksne, hvis de ikke har tilstrekkelige kunnskaper
om bruk av mikrobølgeovn.
- Varm ikke mat og drikke som er i lukkede beholdere i ovnen. Det er fare for at disse kan eksplodere.
- Bruk kun utstyr som er beregnet for mikrobølgeovn.
- Forlat aldri mikrobølgeovnen uten tilsyn, når du varmer mat i plast- eller papirforpakninger, da det er fare
for at dette kan antennes.
- Dersom du oppdager røyk, skru av ovnen umiddelbart eller trekk ut stikkontakten. Hold døren stengt slik
at ammene kveles.
- Innholdet i tåteasker og liknende beholdere for barnemat bør alltid røres om eller ristes godt før
servering. Kontroller alltid innholdets temperatur før servering for å unngå brannskader.
- Rå eller hardkokte egg bør ikke varmes i mikrobølgeovn. Det er fare for at de kan eksplodere selv etter
avsluttet varming.
- Mikrobølgeovnen bør rengjøres regelmessig. Fjern ev. gamle matrester.
- Plasser mikrobølgeovnen på et tørt og jevnt underlag.
- Plasser ikke produktet slik at det kan komme i berøring med vann eller annen væske.
- Påse at spenningen i strømnettet er 230 V, og at du kobler mikrobølgeovnen til et jordet uttak.
- Dra alltid støpselet ut av strømuttaket før rengjøring av mikrobølgeovnen.
- Utsett ikke ovnen eller støpselet for slag eller støt.
NORSK
- Påse at strømledningen ikke kommer i kontakt med varme ater, som f.eks. en varm kokeplate.
- Bruk ikke mikrobølgeovnen dersom strømledningen eller stikkontakten er skadet.
- Mikrobølgeovnen må kun brukes og oppbevares innendørs.
- Husk at beholderen/utstyret kan være varmt når du tar det ut etter oppvarming i ovnen. Bruk grytekluter
eller annen beskyttelse slik at du ikke brenner deg.
- Sett aldri i gang mikrobølgeovnen når den er tom. Det kan oppstå gnister og ovnen kan gå i stykker.
19
Page 20

0
NORSK
T
i
m
e
r
W
e
i
g
h
t
A
u
t
o
M
e
n
u
000 0
Micro ./
Grill /Comb i.
W.T./Ti me
Defro st
Clock /
Pre-S et
Stop/ Clear
Start /
+30Se c./Co nfirm
Produktbeskrivelse
Passende utstyr til bruk i mikrobølgeovn
Vi anbefaler at det brukes et mikrobølgesikkert servise i ovnen. Passende materiale er glass, porselen og
spesielle plastmaterialer. Bruk aldri utstyr av metall eller som har gull- eller sølvkant. Utstyr/boller av tre er
heller ikke egnet til bruk fordi dette tørker i mikrobølgeovnen og kan sprekke.
Knapper og funksjoner
1. Micro./Grill/Combi – Funksjonsvelger
2. W.T./Time Defrost – Automatisk opptiningsprogram
3. Clock/Pre-Set – Still inn klokken/Tidsinnstilt start
4. Stop/Clear – Stopper ovnen/Sletter innstillinger/Tastelås
5. Start/+30Sec./Con rm – Starter ovnen/Bekrefter innstillinger
6. Innstillingsbryter
7. Drev for glasstallerken
8. Støtte til glasstallerken
9. Glasstallerken
10. Metallgitter/grillgitter
1
4
5
7 8
6
9
10
Page 21

1
NORSK
Installasjon og forberedelser
Pakk ut alle deler og påse at de er hele og uskadet. Forpakningen inneholder følgende:
- Mikrobølgeovn
- Glasstallerken
- Støtte til glasstallerken
- Grillrist
- Instruksjonsbok
Installere den roterende glasstallerken
- Plasser aldri glasstallerkenen (9) opp ned (de tre
”knottene” i midten skal vende nedover).
- Både glasstallerkenen (9) og støtteringen (8) må
være på plass når du bruker mikrobølgeovnen.
- Alt utstyr med mat oppi skal plasseres på
glasstallerkenen ved opptining og varming.
- Kontakt vår kundetjeneste hvis glasstallerkenen eller
støtteringen går i stykker.
Plassering av mikrobølgeovnen
- Velg et jevnt og tørt underlag til mikrobølgeovnen.
- Påse at mikrobølgeovnen har rikelig med luft rundt
utvendig, så ingen av luftinntakene eller utblåsningen
blokkeres. Minimumsavstand fra ovnen til andre
gjenstander eller vegger er: sideveis 7,5 cm og over
ovnen 30 cm.
- Fjern ikke ovnens føtter. Disse er viktige for å gi
tilstrekkelig ventilasjon under apparatet.
- Plasser mikrobølgeovnen så langt bort fra TV- og
radioapparater som mulig. Når mikrobølgeovnen
er i bruk kan den forårsake forstyrrelser i mottaket
av TV- og radiosendinger.
Å stille klokken
Når mikrobølgeovnen kobles til strømnettet vil du høre et signal og displayet viser ”0:00”.
1. Trykk en eller to ganger på Clock/Pre-Set. Timeangivelsen begynner å blinke.
2. Vri på
T
i
m
e
r
W
e
i
g
h
t
A
u
t
o
M
e
n
u
00 0 0
Micro ./
Grill /Combi.
W.T./Tim e
Defro st
Clock /
Pre-S et
Stop/ Clear
Start /
+30Se c./Conf irm
T
i
m
e
r
W
e
i
g
h
t
A
u
t
o
M
e
n
u
Start /
+30Se c./Conf irm
for å stille inn timene.
3. Trykk på Clock/Pre-Set igjen for å stille inn minutter.
4. Vri på
T
i
m
e
r
W
e
i
g
h
t
A
u
t
o
M
e
n
u
00 0 0
Micro ./
Grill /Combi.
W.T./Tim e
Defro st
Clock /
Pre-S et
Stop/ Clear
Start /
+30Se c./Conf irm
T
i
m
e
r
W
e
i
g
h
t
A
u
t
o
M
e
n
u
Start /
+30Se c./Conf irm
for å stille inn minutter.
5. Trykk på Clock/Pre-Set for å bekrefte og å lagre innstillingene.
7,5 cm
7,5 cm
7,5 cm
30 cm
8
9
Page 22

NORSK
Bruk
Å bruke mikrobølgeovnen
1. Sett inn det du skal tilberede.
2. Trykk gjentatte ganger på knappen Micro/Grill/Combi eller vri på
T
i
m
e
r
W
e
i
g
h
t
A
u
t
o
M
e
n
u
00 0 0
Micro ./
Grill /Combi.
W.T./Tim e
Defro st
Clock /
Pre-S et
Stop/ Clear
Start /
+30Se c./Conf irm
T
i
m
e
r
W
e
i
g
h
t
A
u
t
o
M
e
n
u
Start /
+30Se c./Conf irm
for å velge ønsket effektnivå.
Displayet viser ”P 100”, ”P 80”, ”P 50”, ”P 30” og ”P 10” i rekkefølge.
Eksempler på passende innstillinger for effekt:
Tine mat P 30
Varme mat P 80
Koke vann P 100
Bekreft innstillingen ved å trykke på Start/+30Sec/Con rm.
3. Still deretter inn ønsket tid ved å vri på
T
i
m
e
r
W
e
i
g
h
t
A
u
t
o
M
e
n
u
00 0 0
Micro ./
Grill /Combi.
W.T./Tim e
Defro st
Clock /
Pre-S et
Stop/ Clear
Start /
+30Se c./Conf irm
T
i
m
e
r
W
e
i
g
h
t
A
u
t
o
M
e
n
u
Start /
+30Se c./Conf irm
(inntil 95 minutter).
4. Lukk igjen døren og trykk på Start/+30Sec/Con rm-knappen for å starte mikrobølgeovnen.
OBS! Tidsintervallene er som følger:
0 – 1 min 5 sekunder
1 – 5 min 10 sekunder
5 – 10 min 30 sekunder
10 – 30 min 1 minutt
30 – 95 min 5 minutter
Bruk av grillfunksjonen
1. Sett inn det du skal tilberede.
2. Trykk en gang på Micro/Grill/Combi-knappen. ”100” blinker i displayet.
3. Vri på
T
i
m
e
r
W
e
i
g
h
t
A
u
t
o
M
e
n
u
00 0 0
Micro ./
Grill /Combi.
W.T./Tim e
Defro st
Clock /
Pre-S et
Stop/ Clear
Start /
+30Se c./Conf irm
T
i
m
e
r
W
e
i
g
h
t
A
u
t
o
M
e
n
u
Start /
+30Se c./Conf irm
for å velge grillfunksjon. ”G” i displayet symboliserer grillfunksjon.
4. Når ”G” vises, trykk på knappen Start/+30Sec/Con rm for å bekrefte ditt valg.
5. Vri på
T
i
m
e
r
W
e
i
g
h
t
A
u
t
o
M
e
n
u
00 0 0
Micro ./
Grill /Combi.
W.T./Tim e
Defro st
Clock /
Pre-S et
Stop/ Clear
Start /
+30Se c./Conf irm
T
i
m
e
r
W
e
i
g
h
t
A
u
t
o
M
e
n
u
Start /
+30Se c./Conf irm
for å stille inn ønsket tilberedelsestid (inntil 95 minutter).
6. Lukk igjen døren og trykk på Start/+30Sec/Con rm-knappen for å starte mikobølgeovnen.
Obs!
Når halve grilltiden er gått vil mikrobølgeovnen avgi to lydstøt. Dette er helt normalt og gjør deg oppmerksom
på at halve tiden er gått.
For å få en jevn grilling bør maten snus etter halve tiden. Lukk døren igjen og trykk på
Start/+30Sec/Con rm-knappen for å fortsette grillingen.
Effektposisjoner:
Displayet viser Effekt:
P100 100 %
P80 80 %
P50 50 %
P30 30 %
P10 10 %
Page 23

NORSK
Kombinert bruk
Det er två kombinasjoner å velge mellom: C-1 og C-2.
Beskrivelse av kombinasjonene:
Funksjon Mikrobølgeovn Grill
C-1 55 % 45 %
C-2 36 % 64 %
1. Sett inn det du skal tilberede.
2. Trykk en gang på Micro/Grill/Combi-knappen. ”100” blinker i displayet.
3. Vri på
T
i
m
e
r
W
e
i
g
h
t
A
u
t
o
M
e
n
u
00 0 0
Micro ./
Grill /Combi.
W.T./Tim e
Defro st
Clock /
Pre-S et
Stop/ Clear
Start /
+30Se c./Conf irm
T
i
m
e
r
W
e
i
g
h
t
A
u
t
o
M
e
n
u
Start /
+30Se c./Conf irm
for å velge funksjon (C-1 eller C-2).
4. Trykk en gang på knappen Start/+30Sec/Con rm for å bekrefte funksjon.
5. Vri på
T
i
m
e
r
W
e
i
g
h
t
A
u
t
o
M
e
n
u
00 0 0
Micro ./
Grill /Combi.
W.T./Tim e
Defro st
Clock /
Pre-S et
Stop/ Clear
Start /
+30Se c./Conf irm
T
i
m
e
r
W
e
i
g
h
t
A
u
t
o
M
e
n
u
Start /
+30Se c./Conf irm
for å stille inn ønsket tilberedelsestid (inntil 95 minutter).
6. Lukk igjen døren og trykk på Start/+30Sec/Con rm-knappen for å starte mikrobølgeovnen.
Opptining
Opptining etter vekt
1. Sett inn det du skal tine.
2. Trykk en gang på W.T./Time Defrost. Displayet viser ”def1”.
3. Vri på
T
i
m
e
r
W
e
i
g
h
t
A
u
t
o
M
e
n
u
00 0 0
Micro ./
Grill /Combi.
W.T./Tim e
Defro st
Clock /
Pre-S et
Stop/ Clear
Start /
+30Se c./Conf irm
T
i
m
e
r
W
e
i
g
h
t
A
u
t
o
M
e
n
u
Start /
+30Se c./Conf irm
for å stille inn vekten på det som skal tines. Velg vekt fra 100 til 2000 gram.
4. Lukk døren igjen og trykk på Start/+30Sec/Con rm-knappen for å starte opptiningen.
Opptining etter tid
1. Sett inn det du skal tine.
2. Trykk to ganger på DEFROST BY W.T/TIME. Displayet viser ”def2”.
3. Vri på
T
i
m
e
r
W
e
i
g
h
t
A
u
t
o
M
e
n
u
00 0 0
Micro ./
Grill /Combi.
W.T./Tim e
Defro st
Clock /
Pre-S et
Stop/ Clear
Start /
+30Se c./Conf irm
T
i
m
e
r
W
e
i
g
h
t
A
u
t
o
M
e
n
u
Start /
+30Se c./Conf irm
for å stille inn opptiningstid (5 sekunder til 95 minutter).
4. Lukk døren igjen og trykk på Start/+30Sec/Con rm-knappen for å starte opptiningen.
Avansert bruk
Multifunksjon
Multifunksjonen kan brukes når du vil bruke mikrobølgeovnens forskjellige funksjoner automatisk i en
bestemt rekkefølge. Tilberedningen kan stilles inn på to forskjellige trinn.
Eksempel: Du ønsker å tine opp maten i 5 minutter og deretter fortsette tilberedning med 80 % effekt
i 7 minutter.
1. Sett inn det du skal tilberede.
2. Trykk en gang på W.T./Time Defrost. Displayet viser ”def1” (100 %).
3. Vri på
T
i
m
e
r
W
e
i
g
h
t
A
u
t
o
M
e
n
u
00 0 0
Micro ./
Grill /Combi.
W.T./Tim e
Defro st
Clock /
Pre-S et
Stop/ Clear
Start /
+30Se c./Conf irm
T
i
m
e
r
W
e
i
g
h
t
A
u
t
o
M
e
n
u
Start /
+30Se c./Conf irm
for å stille inn opptiningstiden på 5 minutter.
4. Trykk en gang på Micro/Grill/Combi-knappen.
5. Vri på
T
i
m
e
r
W
e
i
g
h
t
A
u
t
o
M
e
n
u
00 0 0
Micro ./
Grill /Combi.
W.T./Tim e
Defro st
Clock /
Pre-S et
Stop/ Clear
Start /
+30Se c./Conf irm
T
i
m
e
r
W
e
i
g
h
t
A
u
t
o
M
e
n
u
Start /
+30Se c./Conf irm
for å stille inn mikrobølgeeffekten på 80 %. Displayet viser ”P80”.
Page 24

4
NORSK
6. Trykk en gang på knappen Start/+30Sec/Con rm for å bekrefte funksjon.
7. Vri på
T
i
m
e
r
W
e
i
g
h
t
A
u
t
o
M
e
n
u
00 0 0
Micro ./
Grill /Combi.
W.T./Tim e
Defro st
Clock /
Pre-S et
Stop/ Clear
Start /
+30Se c./Conf irm
T
i
m
e
r
W
e
i
g
h
t
A
u
t
o
M
e
n
u
Start /
+30Se c./Conf irm
for å stille inn tilberedelsestiden på 7 minutter.
8. Lukk igjen døren og trykk på Start/+30Sec/Con rm-knappen for å starte mikrobølgeovnen.
Tidsinnstilt start av ovn
Mikrobølgeovnen kan programmeres til å starte til et bestemt klokkeslett.
1. Påse at ovnens klokke er riktig innstilt (se avsnittet Å stille klokken).
2. Still inn mikrobølgeovnen for tilberedning i henhold til instruksjonene i denne bruksanvisningen
(bør ikke brukes til opptining). Tilberedningen kan stilles inn på to forskjellige trinn.
Eksempel: Du ønsker å tilberede maten med 80 % effekt i 7 minutter.
1. Trykk en gang på Micro/Grill/Combi-knappen.
2. Vri på
T
i
m
e
r
W
e
i
g
h
t
A
u
t
o
M
e
n
u
00 0 0
Micro ./
Grill /Combi.
W.T./Tim e
Defro st
Clock /
Pre-S et
Stop/ Clear
Start /
+30Se c./Conf irm
T
i
m
e
r
W
e
i
g
h
t
A
u
t
o
M
e
n
u
Start /
+30Se c./Conf irm
for å stille inn mikrobølgeeffekten på 80 %. Displayet viser ”P80”.
3. Trykk en gang på knappen Start/+30Sec/Con rm for å bekrefte funksjon.
4. Vri på
T
i
m
e
r
W
e
i
g
h
t
A
u
t
o
M
e
n
u
00 0 0
Micro ./
Grill /Combi.
W.T./Tim e
Defro st
Clock /
Pre-S et
Stop/ Clear
Start /
+30Se c./Conf irm
T
i
m
e
r
W
e
i
g
h
t
A
u
t
o
M
e
n
u
Start /
+30Se c./Conf irm
for å stille inn tilberedelsestiden på 7 minutter.
5. Trykk en gang på CLOCK/PRE-SET. Timeangivelsen blinker.
6. Vri på
T
i
m
e
r
W
e
i
g
h
t
A
u
t
o
M
e
n
u
00 0 0
Micro ./
Grill /Combi.
W.T./Tim e
Defro st
Clock /
Pre-S et
Stop/ Clear
Start /
+30Se c./Conf irm
T
i
m
e
r
W
e
i
g
h
t
A
u
t
o
M
e
n
u
Start /
+30Se c./Conf irm
for å stille inn timene.
7. Trykk på CLOCK/PRE-SET igjen. Aktuell tid vises og minuttangivelsen blinker. Vri på
T
i
m
e
r
W
e
i
g
h
t
A
u
t
o
M
e
n
u
00 0 0
Micro ./
Grill /Combi.
W.T./Tim e
Defro st
Clock /
Pre-S et
Stop/ Clear
Start /
+30Se c./Conf irm
T
i
m
e
r
W
e
i
g
h
t
A
u
t
o
M
e
n
u
Start /
+30Se c./Conf irm
for
å stille inn minutter.
8. Lukk igjen døren og trykk på Start/+30Sec/Con rm-knappen for å bekrefte og å lagre innstillingene.
9. Når den innstilte tiden inntreffer avgis et lydsignal og ovnen starter på det forhåndsinnstilte programmet.
Anm.
- Døren må være lukket når den innstilte tiden inntreffer, ellers vil ikke ovnen starte.
- Klokken må være innstilt for at denne funksjonen skal kunne brukes.
Hurtigstart
1. Sett inn det du vil tilberede/varme og steng døren.
2. Trykk på knappen Start/+30Sec/Con rm for å starte ovnen i 30 sekunder med full effekt (100 %).
3. For å øke tiden, trykk en eller ere ganger på Start/+30Sec/Con rm. Hvert trykk øker tiden med
30 sekunder.
Anm.
- Ved opptining, automatisk oppvarming og multifunksjon kan ikke tiden økes på denne måten
(Ved å trykke på Start/+30Sec/Con rm).
- Ovnen kan kun hurtigstartes i normalmodus ved å vri moturs på
T
i
m
e
r
W
e
i
g
h
t
A
u
t
o
M
e
n
u
00 0 0
Micro ./
Grill /Combi.
W.T./Tim e
Defro st
Clock /
Pre-S et
Stop/ Clear
Start /
+30Se c./Conf irm
T
i
m
e
r
W
e
i
g
h
t
A
u
t
o
M
e
n
u
Start /
+30Se c./Conf irm
for å stille inn tiden direkte.
Bekreft innstillingen ved å trykke på Start/+30Sec/Con rm. Effektnivået er 100 %.
Page 25

5
NORSK
Automatiske tilberedelsesprogram
1. Sett inn det du skal tilberede/varme.
2. Vri medurs på
T
i
m
e
r
W
e
i
g
h
t
A
u
t
o
M
e
n
u
00 0 0
Micro ./
Grill /Combi.
W.T./Tim e
Defro st
Clock /
Pre-S et
Stop/ Clear
Start /
+30Se c./Conf irm
T
i
m
e
r
W
e
i
g
h
t
A
u
t
o
M
e
n
u
Start /
+30Se c./Conf irm
for å velge tilberedelsesprogram (A-1 til A-8). Se tabellen nedenfor for de forskjellige
matvarer/retter.
3. Trykk på knappen Start/+30Sec/Con rm for å bekrefte ditt valg.
4. Vri på
T
i
m
e
r
W
e
i
g
h
t
A
u
t
o
M
e
n
u
00 0 0
Micro ./
Grill /Combi.
W.T./Tim e
Defro st
Clock /
Pre-S et
Stop/ Clear
Start /
+30Se c./Conf irm
T
i
m
e
r
W
e
i
g
h
t
A
u
t
o
M
e
n
u
Start /
+30Se c./Conf irm
for å stille inn type næringsmiddel/vekt/porsjon.
5. Lukk igjen døren og trykk på Start/+30SEC/Con rm-knappen for å starte mikrobølgeovnen.
6. Når prosessen er ferdig vil det komme et signal.
Meny Vekt: Displayet viser Effekt:
A-1
Oppvarming
200 g 200 100 %
400 g 400 100 %
600 g 600 100 %
A-2
Grønnsaker
200 g 200 100 %
300 g 300 100 %
400 g 400 100 %
A-3
Fisk
250 g 250 80 %
350 g 350 80 %
450 g 450 80 %
A-4
Kjøtt
250 g 250 100 %
350 g 350 100 %
450 g 450 100 %
A-5
Pasta
50 g (med vann 450 g) 50 80 %
100 g (med vann 800 g) 100 80 %
A-6
Poteter
200 g 200
100 %
400 g 400
100 %
600 g 600
100 %
A-7
Pizza
200 g 500 100 %
750 g 750 100 %
A-8
Suppe
200 g 200 80 %
400 g 400 80 %
Etterkontroll av dine innstillinger
Du kan alltid, i etterkant, kontrollere hvilke innstillinger du har foretatt.
- Under tilberedelse, trykk på Micro/Grill/Combi for å kontrollere hvilken funksjon som er aktivert.
- Ved tidsinnstilt start av ovnen, trykk på knappen CLOCK/PRE-SET for å kontrollere hvilken tid du har
bestilt for oppstart av ovnen.
- Ved tilberedelse, trykk på CLOCK/PRE-SET for å vise klokken.
Tastelås
Tastelåsen er ideell for å forhindre at barn ved en feiltagelse starter ovnen.
Låsing av knapper
- Hold knappen STOP/CLEAR inntrykket i ca. 3 sekunder mens ovnen er i ventemodus. Et signal høres,
og et nøkkelsymbol
kommer opp på displayet.
Låsing opp knapper igjen
- Hold knappen STOP/CLEAR inntrykket i ca. 3 sekunder. Et signal høres og nøkkelsymbolet forsvinner.
Page 26

Anm.
- Mikrobølgeovnens innebygde summer avgir fem signaler når tilberedelsen/funksjonen er avsluttet.
- Hvis døren åpnes under tilberedelsene må alltid knappen Start/+30Sec/Conrm trykkes inn igjen
for å fortsette tilberedelsene.
- Hvis knappen Start/+30Sec/Conrm ikke trykkes inn i løpet av 1 minutt etter innstilling av tilberedelsen/
funksjon går mikrobølgeovnen tilbake til ventemodus. Du må da stille inn ønsket funksjon igjen.
Stell og vedlikehold
Trekk alltid støpselet ut fra strømuttaket før rengjøring. Senk aldri mikrobølgeovnen ned i vann for å få den
rengjort. Tørk ovnens innside og utside med en myk fuktet klut. Bruk et mildt rengjøringsmiddel. Unngå
slipende rengjøringsmidler og løsemidler. Vask glasstallerkenen, støttering og grillgitter i varmt vann
med oppvaskmiddel.
Feilsøkingsskjema
Problem Mulig årsak Mulig løsning
NORSK
Ovnen starter ikke. Strømmen er ikke koblet til. Sett støpselet i vegguttaket.
Døren er åpen. Steng døren.
Det oppstår lys og
gnistring.
Maten varmes opp
ujevnt.
Upassende materiale i beholder, som
f.eks. metall.
Mikrobølgeovnen er tom. Ikke sett på ovnen når den er tom.
Upassende materiale i beholder, som
f.eks. metall.
Maten er ikke blitt snudd på eller rørt i. Vend på eller rør i maten.
Bruk beholdere i anbefalt materiale som
f.eks. glass eller porselen.
Bruk beholdere i anbefalt materiale som
f.eks. glass eller porselen.
Avfallshåndtering
Når dette produktet skal kasseres, må dette skje i henhold til lokale forskrifter. Er du usikker på hvordan du
går fram, ta kontakt med lokale myndigheter.
Spesifikasjoner
Modell AG820CRL
Strømforsyning 230 V AC, 50 Hz
Mikrobølgeovnens inneffekt 1270 W
Mikrobølgeovnens uteffekt 800 W
Grillens inneffekt 1000 W
Størrelse 20 liter
Glasstallerkenens diameter 24,5 cm
Ytre mål 43,3 x 25,8 x 33,5 cm
Vekt (ca.) 10,5 kg
6
Page 27

Mikroaaltouuni
Tuotenumero 4-4059 Malli AG80CRL
Lue käyttöohjeet ennen tuotteen käyttöönottoa. Säilytä käyttöohjeet tulevaa tarvetta varten.
Pidätämme oikeuden teknisten tietojen muutoksiin. Emme vastaa mahdollisista teksti- tai kuvavirheistä.
Jos laitteeseen tulee teknisiä ongelmia, ota yhteys myymälään tai asiakaspalveluun (yhteystiedot
käyttöohjeen lopussa).
Turvallisuus
Varoitus!
Vältä vaaralliset mikroaallot noudattamalla seuraavia ohjeita:
- Älä käytä mikroaaltouunia, jos sen ovi tai kuori on vaurioitunut.
- Vain valtuutettu ammattilainen saa purkaa ja korjata mikroaaltouunin.
- Älä avaa laitteen kuorta! Tuotteen rungon sisällä on vaarallista jännitettä sisältäviä suojaamattomia
komponentteja. Niihin koskeminen saattaa aiheuttaa sähköiskun.
- Tuotetta ei saa purkaa eikä muuttaa.
- Lapset eivät saa käyttää mikroaaltouunia ilman aikuisen valvontaa, ellei heillä ole riittäviä taitoja siihen.
- Älä kuumenna juomia tai muita elintarvikkeita suljetuissa pakkauksissa, sillä ne saattavat räjähtää.
- Käytä ainoastaan mikroaaltouunille sopivia astioita.
- Älä jätä mikroaaltouunia ilman valvontaa, jos kuumennat elintarvikkeita muovi- tai paperipakkauksissa.
Ne saattavat syttyä palamaan.
- Jos huomaat savua, sammuta mikroaaltouuni välittömästi tai irrota pistoke pistorasiasta. Anna luukun olla
kiinni, jotta mahdolliset liekit tukahtuvat.
- Sekoita tai ravista aina lastenruokapurkkien tai tuttipullojen sisältö kuumentamisen jälkeen. Tarkista aina
ruuan lämpötila ennen tarjoilua, niin vältät palovammat.
- Viipaloimattomia tai kovaksi keitettyjä munia ei saa kuumentaa mikroaaltouunissa. On mahdollista, että
ne räjähtävät vielä kuumennuksen jälkeenkin.
- Puhdista mikroaaltouuni säännöllisesti. Poista mahdolliset ruuantähteet.
- Sijoita mikroaaltouuni kuivalle ja tasaiselle alustalle.
- Älä sijoita mikroaaltouunia sellaiseen paikkaan, josta se voi tippua veteen tai muuhun nesteeseen.
- Varmista, että sähköverkon jännite on 230 V ja että pistorasia on maadoitettu.
- Irrota aina pistoke pistorasiasta ennen mikroaaltouunin puhdistamista.
- Älä altista mikroaaltouunia tai sen virtajohtoa iskuille tai kolhuille.
- Huolehdi, ettei virtajohto joudu kosketuksiin lämpimien pintojen, esim. keittolevyjen kanssa.
- Älä käytä mikroaaltouunia, mikäli virtajohto tai pistoke on vioittunut.
- Mikroaaltouunia saa käyttää ja se tulee säilyttää ainoastaan sisätiloissa.
SUOMI
- Ota huomioon, että astiat kuumenevat mikrossa. Suosittelemme, että käytät patalappua tai muuta suojaa,
ettet polta itseäsi.
- Älä käytä mikroaaltouunia tyhjänä. Laite saattaa alkaa kipinöidä ja vioittua.
7
Page 28

8
SUOMI
T
i
m
e
r
W
e
i
g
h
t
A
u
t
o
M
e
n
u
000 0
Micro ./
Grill /Comb i.
W.T./Ti me
Defro st
Clock /
Pre-S et
Stop/ Clear
Start /
+30Se c./Co nfirm
Tuotekuvaus
Mikroaaltouuniin sopivia astioita
Suosittelemme ruoanlaittoon mikroaaltouuniin soveltuvia astioita. Sopivia materiaaleja ovat lasi, posliini ja
tietyt muovimateriaalit. Älä käytä metalliastioita, äläkä astioita, joissa on kulta- tai hopeareunus. Myöskään
puuastiat tai puuosia sisältävät astiat eivät sovellu käytettäviksi mikroon, sillä puu kuivuu mikroaaltouunissa
ja alkaa halkeilla.
Painikkeet ja toiminnot
1. Mikro/Grilli/Combi – Toiminnonvalitsin
2. W.T./Time Defrost – Automaattiset sulatusohjelmat
3. Clock/Pre-Set – Aseta kello/Ajastettu käynnistys
4. Stop/Clear – Pysäytä/Asetusten poisto/Näppäinlukko
5. Start/+30Sec./Con rm – Käynnistä/Asetusten vahvistukset
6. Säädin
7. Lasilautasen pyörittäjä
8. Lasilautasen tukirengas
9. Lasilautanen
10. Metalliritilä/Grilliritilä
1
4
5
7 8
6
9
10
Page 29

9
SUOMI
Asennus ja esivalmistelut
Poista kaikki osat pakkauksesta ja katso että ne eivät ole vioittuneet. Pakkauksen sisältö:
- Mikroaaltouuni
- Lasilautanen
- Lasilautasen tukirengas
- Grilliritilä
- Käyttöohje
Pyörivän lasilautasen asentaminen
- Älä aseta lasilautasta (9) ylösalaisin (keskellä olevien
kolmen ulkoneman tulee olla alapuolella).
- Lasilautasen (9) ja tukirenkaan (8) tulee olla paikoillaan
aina kun mikroaaltouunia käytetään.
- Kaikki sulatettava tai lämmitettävä ruoka ja astiat tulee
aina asettaa lasilautaselle.
- Ota yhteys asiakaspalveluun, mikäli tukirengas tai
lasilautanen hajoaa.
Mikroaaltouunin sijoittaminen
- Valitse mikroaaltouunille tasainen ja kuiva sijoituspaikka.
- Varmista, etteivät mikroaaltouunin ilmanotto- tai
tuloaukot ole tukittuna. Mikroaaltouunin sivuilla tulee
olla vähintään 7,5 cm vapaata tilaa ja uunin päällä
vähintään 30 cm.
- Älä irrota mikroaaltouunin jalkoja. Ne varmistavat
riittävän ilmanvaihdon uunin alla.
- Sijoita mikroaaltouuni mahdollisimman kauas
televisiosta ja radiosta. Mikroaaltouuni voi käytön
aikana aiheuttaa televisio- ja radiolähetyksiin häiriöitä.
Kellonajan asetus
Kun mikroaaltouuni liitetään verkkovirtaan, laitteesta kuuluu merkkiääni ja näytöllä näkyy ”0:00”.
1. Paina kerran tai kahdesti Clock/Pre-Set. Tunnit vilkkuvat.
2. Aseta tunnit kääntämällä
T
i
m
e
r
W
e
i
g
h
t
A
u
t
o
M
e
n
u
00 0 0
Micro ./
Grill /Combi.
W.T./Tim e
Defro st
Clock /
Pre-S et
Stop/ Clear
Start /
+30Se c./Conf irm
T
i
m
e
r
W
e
i
g
h
t
A
u
t
o
M
e
n
u
Start /
+30Se c./Conf irm
.
3. Siirry minuuttien asetustilaan painamalla Clock/Pre-Set.
4. Aseta minuutit kääntämällä
T
i
m
e
r
W
e
i
g
h
t
A
u
t
o
M
e
n
u
00 0 0
Micro ./
Grill /Combi.
W.T./Tim e
Defro st
Clock /
Pre-S et
Stop/ Clear
Start /
+30Se c./Conf irm
T
i
m
e
r
W
e
i
g
h
t
A
u
t
o
M
e
n
u
Start /
+30Se c./Conf irm
.
5. Tallenna ja vahvista asetukset painamalla uudelleen Clock/Pre-Set.
7,5 cm
7,5 cm
7,5 cm
30 cm
8
9
Page 30

0
SUOMI
Käyttö
Mikroaaltouunin käyttö
1. Aseta valmistettava ruoka mikroaaltouuniin.
2. Valitse toivottu teho painamalla useita kertoja Micro/Grill/Combi -painiketta tai kääntämällä
T
i
m
e
r
W
e
i
g
h
t
A
u
t
o
M
e
n
u
00 0 0
Micro ./
Grill /Combi.
W.T./Tim e
Defro st
Clock /
Pre-S et
Stop/ Clear
Start /
+30Se c./Conf irm
T
i
m
e
r
W
e
i
g
h
t
A
u
t
o
M
e
n
u
Start /
+30Se c./Conf irm
.
Näytöllä näkyy järjestyksessä ”P 100”, ”P 80”, ”P 50”, ”P 30” ja ”P 10”.
Esimerkkejä tehonsäädöstä:
Sulatus P 30
Lämmittäminen P 80
Veden keittäminen P 100
Vahvista valitsemasi teho painamalla Start/+30Sec/Con rm.
3. Aseta sitten haluamasi aika kääntämällä
T
i
m
e
r
W
e
i
g
h
t
A
u
t
o
M
e
n
u
00 0 0
Micro ./
Grill /Combi.
W.T./Tim e
Defro st
Clock /
Pre-S et
Stop/ Clear
Start /
+30Se c./Conf irm
T
i
m
e
r
W
e
i
g
h
t
A
u
t
o
M
e
n
u
Start /
+30Se c./Conf irm
-säädintä (maksimi 95 minuuttia).
4. Sulje luukku ja käynnistä mikroaaltouuni painamalla Start/+30Sec/Con rm.
HUOM.! Ajan voi asettaa
seuraavalla tarkkuudella:
0–1 min 5 sekuntia
1–5 min 10 sekuntia
5–10 min 30 sekuntia
10–30 min 1 minuutti
30 –95 min 5 minuuttia
Grillitoiminto
1. Aseta valmistettava ruoka mikroaaltouuniin.
2. Paina kerran Micro/Grill/Combi-painiketta. Näytöllä vilkkuu ”100”.
3. Valitse grillitoiminto kääntämällä
T
i
m
e
r
W
e
i
g
h
t
A
u
t
o
M
e
n
u
00 0 0
Micro ./
Grill /Combi.
W.T./Tim e
Defro st
Clock /
Pre-S et
Stop/ Clear
Start /
+30Se c./Conf irm
T
i
m
e
r
W
e
i
g
h
t
A
u
t
o
M
e
n
u
Start /
+30Se c./Conf irm
-säädintä. Näytöllä lukee ”G” grillitoiminnon merkkinä.
4. Kun näytöllä lukee ”G”, vahvista valintasi painamalla kerran Start/+30Sec/Con rm.
5. Valitse haluamasi valmistusaika kääntämällä
T
i
m
e
r
W
e
i
g
h
t
A
u
t
o
M
e
n
u
00 0 0
Micro ./
Grill /Combi.
W.T./Tim e
Defro st
Clock /
Pre-S et
Stop/ Clear
Start /
+30Se c./Conf irm
T
i
m
e
r
W
e
i
g
h
t
A
u
t
o
M
e
n
u
Start /
+30Se c./Conf irm
-säädintä (maksimi 95 minuuttia).
6. Sulje luukku ja käynnistä mikroaaltouuni painamalla Start/+30Sec/Con rm.
Huom.!
Kun puolet grillausajasta on kulunut, mikroaaltouunista kuuluu kaksi merkkiääntä. Tämä on täysin normaalia
ja kertoo vain, että puolet ajasta on kulunut.
Jotta grillaustulos olisi tasainen, käännä ruoka kun puolet ajasta on kulunut. Sulje luukku ja jatka grillausta
painamalla Start/+30Sec/Con rm.
Teho
Näytön merkintä Teho
P100 100 %
P80 80 %
P50 50 %
P30 30 %
P10 10 %
Page 31

1
SUOMI
Yhdistetty käyttö
Voit valita kahdesta vaihtoehdosta: C-1 ja C-2.
Yhdistelmien kuvaus:
Toiminto Mikroaaltouuni Grilli
C-1 55 % 45 %
C-2 36 % 64 %
1. Aseta valmistettava ruoka mikroaaltouuniin.
2. Paina kerran Micro/Grill/Combi-painiketta. Näytöllä vilkkuu ”100”.
3. Valitse toiminto (C-1 tai C-2) kääntämällä
T
i
m
e
r
W
e
i
g
h
t
A
u
t
o
M
e
n
u
00 0 0
Micro ./
Grill /Combi.
W.T./Tim e
Defro st
Clock /
Pre-S et
Stop/ Clear
Start /
+30Se c./Conf irm
T
i
m
e
r
W
e
i
g
h
t
A
u
t
o
M
e
n
u
Start /
+30Se c./Conf irm
-säädintä.
4. Vahvista valinta painamalla kerran Start/+30Sec/Con rm.
5. Valitse haluamasi valmistusaika kääntämällä
T
i
m
e
r
W
e
i
g
h
t
A
u
t
o
M
e
n
u
00 0 0
Micro ./
Grill /Combi.
W.T./Tim e
Defro st
Clock /
Pre-S et
Stop/ Clear
Start /
+30Se c./Conf irm
T
i
m
e
r
W
e
i
g
h
t
A
u
t
o
M
e
n
u
Start /
+30Se c./Conf irm
-säädintä (maksimi 95 minuuttia).
6. Sulje luukku ja käynnistä mikroaaltouuni painamalla Start/+30Sec/Con rm.
Sulatus
Sulatus painon mukaan
1. Aseta sulatettava ruoka mikroaaltouuniin.
2. Paina kerran W.T./Time Defrost. Näytöllä lukee ”def1”.
3. Aseta sulatettavan ruoan paino kääntämällä
T
i
m
e
r
W
e
i
g
h
t
A
u
t
o
M
e
n
u
00 0 0
Micro ./
Grill /Combi.
W.T./Tim e
Defro st
Clock /
Pre-S et
Stop/ Clear
Start /
+30Se c./Conf irm
T
i
m
e
r
W
e
i
g
h
t
A
u
t
o
M
e
n
u
Start /
+30Se c./Conf irm
-säädintä. Voit valita painon 100 ja
2000 gramman väliltä.
4. Sulje luukku ja aloita sulatus painamalla Start/+30Sec/Con rm.
Sulatus ajan mukaan
1. Aseta sulatettava ruoka mikroaaltouuniin.
2. Paina kaksi kertaa DEFROST BY W.T/TIME. Näytöllä lukee ”def2”.
3. Aseta sulatusaika (5 sekuntia – 95 minuuttia) kääntämällä
T
i
m
e
r
W
e
i
g
h
t
A
u
t
o
M
e
n
u
00 0 0
Micro ./
Grill /Combi.
W.T./Tim e
Defro st
Clock /
Pre-S et
Stop/ Clear
Start /
+30Se c./Conf irm
T
i
m
e
r
W
e
i
g
h
t
A
u
t
o
M
e
n
u
Start /
+30Se c./Conf irm
-säädintä.
4. Sulje luukku ja aloita sulatus painamalla Start/+30Sec/Con rm.
Muut ominaisuudet
Multitoiminto
Voit käyttää multitoimintoa, kun haluat käyttää mikroaaltouunin eri toimintoja automaattisesti toistensa
perään. Valmistukseen voidaan valita korkeintaan kaksi askelta.
Esimerkki: Haluat sulattaa ruokaa 5 minuuttia ja sitten jatkaa sen lämmitystä 80 %:n teholla 7 minuuttia.
1. Aseta valmistettava ruoka mikroaaltouuniin.
2. Paina kerran W.T./Time Defrost. Näytöllä lukee ”def1” (100 %).
3. Aseta sulatusajaksi 5 minuuttia
T
i
m
e
r
W
e
i
g
h
t
A
u
t
o
M
e
n
u
00 0 0
Micro ./
Grill /Combi.
W.T./Tim e
Defro st
Clock /
Pre-S et
Stop/ Clear
Start /
+30Se c./Conf irm
T
i
m
e
r
W
e
i
g
h
t
A
u
t
o
M
e
n
u
Start /
+30Se c./Conf irm
-säätimellä.
4. Paina kerran Micro/Grill/Combi -painiketta.
Page 32

SUOMI
5. Aseta mikroaaltojen tehoksi 80 %
T
i
m
e
r
W
e
i
g
h
t
A
u
t
o
M
e
n
u
00 0 0
Micro ./
Grill /Combi.
W.T./Tim e
Defro st
Clock /
Pre-S et
Stop/ Clear
Start /
+30Se c./Conf irm
T
i
m
e
r
W
e
i
g
h
t
A
u
t
o
M
e
n
u
Start /
+30Se c./Conf irm
-säätimellä. Näytöllä lukee ”P80”.
6. Vahvista valinta painamalla kerran Start/+30Sec/Con rm.
7. Aseta lämmitysajaksi 7 minuuttia
T
i
m
e
r
W
e
i
g
h
t
A
u
t
o
M
e
n
u
00 0 0
Micro ./
Grill /Combi.
W.T./Tim e
Defro st
Clock /
Pre-S et
Stop/ Clear
Start /
+30Se c./Conf irm
T
i
m
e
r
W
e
i
g
h
t
A
u
t
o
M
e
n
u
Start /
+30Se c./Conf irm
-säätimellä.
8. Sulje luukku ja käynnistä mikroaaltouuni painamalla Start/+30Sec/Con rm.
Ajastettu käynnistys
Voit ohjelmoida mikroaaltouunin käynnistymään ennalta määrättynä aikana.
1. Tarkista, että mikroaaltouunin kello on oikeassa ajassa (katso kappaletta Kellonajan asetus).
2. Säädä mikroaaltouuni ruoanvalmistustilaan tämän käyttöohjeen mukaisesti (ei voi käyttää sulatukseen).
Valmistukseen voidaan valita korkeintaan kaksi askelta.
Esimerkki: Haluat lämmittää ruokaa 80 %:n teholla 7 minuutin ajan.
1. Paina kerran Micro/Grill/Combi -painiketta.
2. Aseta mikroaaltojen tehoksi 80 %
T
i
m
e
r
W
e
i
g
h
t
A
u
t
o
M
e
n
u
00 0 0
Micro ./
Grill /Combi.
W.T./Tim e
Defro st
Clock /
Pre-S et
Stop/ Clear
Start /
+30Se c./Conf irm
T
i
m
e
r
W
e
i
g
h
t
A
u
t
o
M
e
n
u
Start /
+30Se c./Conf irm
-säätimellä. Näytöllä lukee ”P80”.
3. Vahvista valinta painamalla kerran Start/+30Sec/Con rm.
4. Aseta lämmitysajaksi 7 minuuttia
T
i
m
e
r
W
e
i
g
h
t
A
u
t
o
M
e
n
u
00 0 0
Micro ./
Grill /Combi.
W.T./Tim e
Defro st
Clock /
Pre-S et
Stop/ Clear
Start /
+30Se c./Conf irm
T
i
m
e
r
W
e
i
g
h
t
A
u
t
o
M
e
n
u
Start /
+30Se c./Conf irm
-säätimellä.
5. Paina kerran Clock/Pre-Set. Tunnit vilkkuvat.
6. Aseta tunnit kääntämällä
T
i
m
e
r
W
e
i
g
h
t
A
u
t
o
M
e
n
u
00 0 0
Micro ./
Grill /Combi.
W.T./Tim e
Defro st
Clock /
Pre-S et
Stop/ Clear
Start /
+30Se c./Conf irm
T
i
m
e
r
W
e
i
g
h
t
A
u
t
o
M
e
n
u
Start /
+30Se c./Conf irm
.
7. Paina uudestaan Clock/Pre-Set. Kellonaika näkyy näytöllä ja minuutit vilkkuvat. Aseta minuutit
kääntämällä
T
i
m
e
r
W
e
i
g
h
t
A
u
t
o
M
e
n
u
00 0 0
Micro ./
Grill /Combi.
W.T./Tim e
Defro st
Clock /
Pre-S et
Stop/ Clear
Start /
+30Se c./Conf irm
T
i
m
e
r
W
e
i
g
h
t
A
u
t
o
M
e
n
u
Start /
+30Se c./Conf irm
-säädintä.
8. Sulje luukku. Tallenna asetukset painamalla Start/+30Sec/Con rm.
9. Kun asetettu aika koittaa, mikroaaltouunista kuuluu merkkiääni, ja mikroaaltouuni käynnistyy asetetun
ohjelman mukaisesti.
Huom.
- Luukun tulee olla suljettu asetettuna aikana. Muuten mikroaaltouuni ei käynnisty.
- Kellon tulee olla asetettu oikeaan aikaan, jotta ajastettua käynnistystä voi käyttää.
Pikakäynnistys
1. Laita ruoka mikroon ja sulje luukku.
2. Käynnistä mikroaaltouuni 30 sekunniksi täydelle teholle (100 %) painamalla Start/+30Sec/Con rm.
3. Jos haluat lisätä aikaa, paina painiketta Start/+30Sec/Con rm uudestaan. Yksi painallus lisää aikaa
30 sekunnilla.
Huom.
- Kun valitset sulatuksen, automaattisen uudelleenlämmityksen tai multitoiminnon, et voi lisätä aikaa
painamalla Start/+30SEC/Con rm.
- Voit myös pikakäynnistää mikroaaltouunin kääntämällä
T
i
m
e
r
W
e
i
g
h
t
A
u
t
o
M
e
n
u
00 0 0
Micro ./
Grill /Combi.
W.T./Tim e
Defro st
Clock /
Pre-S et
Stop/ Clear
Start /
+30Se c./Conf irm
T
i
m
e
r
W
e
i
g
h
t
A
u
t
o
M
e
n
u
Start /
+30Se c./Conf irm
säädintä vastapäivään normaalitilassa ja
asettaa ajan suoraan. Käynnistä uuni painamalla Start/+30Sec/Con rm. Tehon taso on 100 %.
Page 33

SUOMI
Automaattinen ruoanvalmistusohjelma
1. Aseta ruoka mikroaaltouuniin.
2. Valitse ruoanvalmistusohjelma (A-1–A-8) kääntämällä
T
i
m
e
r
W
e
i
g
h
t
A
u
t
o
M
e
n
u
00 0 0
Micro ./
Grill /Combi.
W.T./Tim e
Defro st
Clock /
Pre-S et
Stop/ Clear
Start /
+30Se c./Conf irm
T
i
m
e
r
W
e
i
g
h
t
A
u
t
o
M
e
n
u
Start /
+30Se c./Conf irm
-säädintä myötäpäivään.
Katso elintarvikkeiden/ruoka-aineiden taulukkoa.
3. Vahvista valinta painamalla kerran Start/+30Sec/Con rm.
4. Aseta elintarvikkeen/ruoka-aineen paino/määrä kääntämällä
T
i
m
e
r
W
e
i
g
h
t
A
u
t
o
M
e
n
u
00 0 0
Micro ./
Grill /Combi.
W.T./Tim e
Defro st
Clock /
Pre-S et
Stop/ Clear
Start /
+30Se c./Conf irm
T
i
m
e
r
W
e
i
g
h
t
A
u
t
o
M
e
n
u
Start /
+30Se c./Conf irm
-säädintä.
5. Sulje luukku ja käynnistä mikroaaltouuni painamalla Start/+30Sec/Con rm.
6. Kun ruoan valmistus on valmis, kuuluu mikrosta merkkiääni.
Valikko Paino Näytön merkintä Teho
A-1
Uudelleenlämmitys
200 g 200 100 %
400 g 400 100 %
600 g 600 100 %
A-2
Vihannekset
200 g 200 100 %
300 g 300 100 %
400 g 400 100 %
A-3
Kala
250 g 250 80 %
350 g 350 80 %
450 g 450 80 %
A-4
Liha
250 g 250 100 %
350 g 350 100 %
450 g 450 100 %
A-5
Pasta
50 g (veden kanssa 450 g) 50 80 %
100 g (veden kanssa 800 g) 100 80 %
A-6
Perunat
200 g 200
100 %
400 g 400
100 %
600 g 600
100 %
A-7
Pizza
200 g 500 100 %
750 g 750 100 %
A-8
Keitto
200 g 200 80 %
400 g 400 80 %
Tehtyjen asetusten tarkistaminen
Voit tarkistaa käytön aikana, mitä asetuksia mikroon on tehty.
- Tarkista asetukset valmistuksen aikana painamalla Micro/Grill/Combi -painiketta.
- Jos olet ajastanut mikroaaltouunin käynnistymään tiettynä aikana, voit tarkistaa asetetun käynnistysajan
painamalla Clock/Pre-Set.
- Kun valmistat ruokaa mikroaaltouunissa, voit tarkistaa kellonajan painamalla Clock/Pre-Set.
Näppäinlukitus
Näppäinlukitus on hyvä tapa estää lapsia käynnistämästä mikroaaltouunia vahingossa.
Painikkeiden lukitus
- Paina painiketta STOP/CLEAR 3 sekunnin ajan, kun mikroaaltouuni on normaalitilassa. Mikroaaltouunista
kuuluu merkkiääni ja näytölle ilmestyy avainsymboli
.
Painikkeiden lukituksen avaus
- Paina painiketta STOP/CLEAR 3 sekunnin ajan. Mikrosta kuuluu merkkiääni ja avainsymboli katoaa.
Page 34

Huom.
- Mikroaaltouunista kuuluu viisi merkkiääntä, kun ruoanvalmistus/toiminto on päättynyt.
- Jos avaat luukun mikron ollessa käynnissä, paina painiketta Start/+30Sec/Conrm, kun olet sulkenut
luukun, niin ohjelma jatkuu.
- Jos et paina painiketta Start/+30Sec/Conrm minuutin kuluessa siitä kun olet valinnut ohjelman,
mikroaaltouuni palaa takaisin normaalitilaan. Aseta tällöin ohjelma uudestaan.
Huolto ja ylläpito
Irrota pistoke pistorasiasta ennen laitteen puhdistamista. Älä puhdista mikroaaltouunia upottamalla sitä veteen.
Puhdista uunin sisä- ja ulkopuoli pehmeällä liinalla, jossa on mietoa puhdistusainetta. Älä käytä liuotusaineita
tai hankaavia puhdistusaineita. Tiskaa lasilautanen, tukirengas ja grilliritilä kuumalla vedellä ja tiskiaineella.
Vianhakutaulukko
Ongelma Mahdollinen syy Mahdollinen ratkaisu
Mikroaaltouuni ei käynnisty. Virtajohtoa ei ole liitetty. Laita pistoke pistorasiaan.
Luukku on auki. Sulje luukku.
Laitteesta tulee valoja tai
pieniä kipinöitä.
Ruoka lämpenee
epätasaisesti.
SUOMI
Mikroaaltouunissa on sopimatonta
materiaalia, esim. metallia.
Mikroaaltouunia käytetään tyhjänä. Älä käytä mikroa tyhjänä.
Mikroaaltouunissa on sopimatonta
materiaalia, esim. metallia.
Ruokaa ei ole käännetty tai
sekoitettu.
Käytä ainoastaan mikroaaltouuniin
soveltuvia astioita, esim. lasia tai
posliinia
Käytä ainoastaan mikroaaltouuniin
soveltuvia astioita, esim. lasia tai
posliinia.
Käännä tai sekoita ruokaa.
Kierrätys
Kierrätä tuote asianmukaisesti, kun poistat sen käytöstä. Kysy tarkempia kierrätysohjeita kuntasi
jäteneuvonnasta.
Tekniset tiedot
Malli AG820CRL
Virtalähde 230 V AC, 50 Hz
Mikroaaltouunin teho 1270 W
Mikroaaltouunin antoteho 800 W
Grillin teho 1000 W
Tilavuus 20 litraa
Lasilautasen halkaisija 24,5 cm
Ulkomitat 43,3 x 25,8 x 33,5 cm
Paino (noin) 10,5 kg
4
Page 35

5
Page 36

SVERIGE
KUNDTJÄNST Tel: 0247/445 00
Fax: 0247/445 09
E-post: kundtjanst@clasohlson.se
INTERNET www.clasohlson.se
BREV Clas Ohlson AB, 793 85 INSJÖN
NORGE
KUNDESENTER Tlf.: 23 21 40 00
Faks: 23 21 40 80
E-post: kundesenter@clasohlson.no
INTERNETT www.clasohlson.no
POST Clas Ohlson AS, Postboks 485 Sentrum, 0105 OSLO
SUOMI
ASIAKASPALVELU Puh: 020 111 2222
Faksi: 020 111 2221
Sähköposti: info@clasohlson.fi
INTERNET www.clasohlson.fi
OSOITE Clas Ohlson Oy, Yrjönkatu 23 A, 00100 HELSINKI
GREAT BRITAIN
For consumer contact, please visit
www.clasohlson.co.uk and click on
customer service.
INTERNET www.clasohlson.co.uk
 Loading...