

Page 1
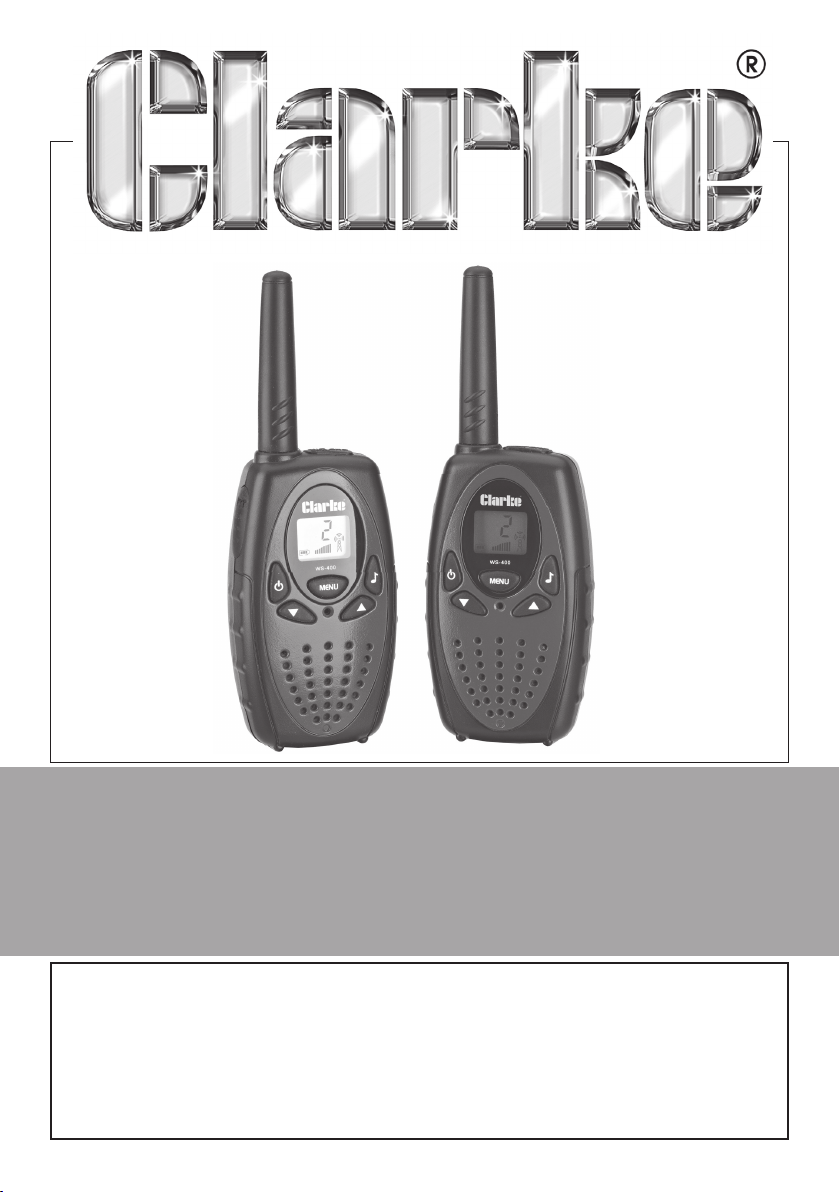
Two Way Radio Kit
MODEL NO: TR300
Part No: 4560705
User Guide
LS0414
Page 2
INTRODUCTION
Thank you for purchasing this CLARKE product.
Before attempting to use the product, it is essential that you read this manual
thoroughly and carefully follow all instructions given. In doing so you will ensure
the safety of yourself and that of others around you, and you can also look
forward to the product giving you long and satisfactory service.
GUARANTEE
This CLARKE product is guaranteed against faulty manufacture for a period of
12 months from the date of purchase. Please keep your receipt as proof of
purchase.
This guarantee is invalid if the product is found to have been abused or
tampered with in any way, or not used for the purpose for which it was
intended.
Faulty goods should be returned to their place of purchase, no product can
be returned to us without prior permission.
This guarantee does not effect your statutory rights.
ENVIRONMENTAL RECYCLING POLICY
Through purchase of this product, the customer is taking on the
obligation to deal with the WEEE in accordance with the WEEE
regulations in relation to the treatment, recycling & recovery and
environmentally sound disposal of the WEEE.
In effect, this means that this product must not be disposed of with general
household waste. It must be disposed of according to the laws governing
Waste Electrical and Electronic Equipment (WEEE) at a recognised disposal
facility.
2
Page 3
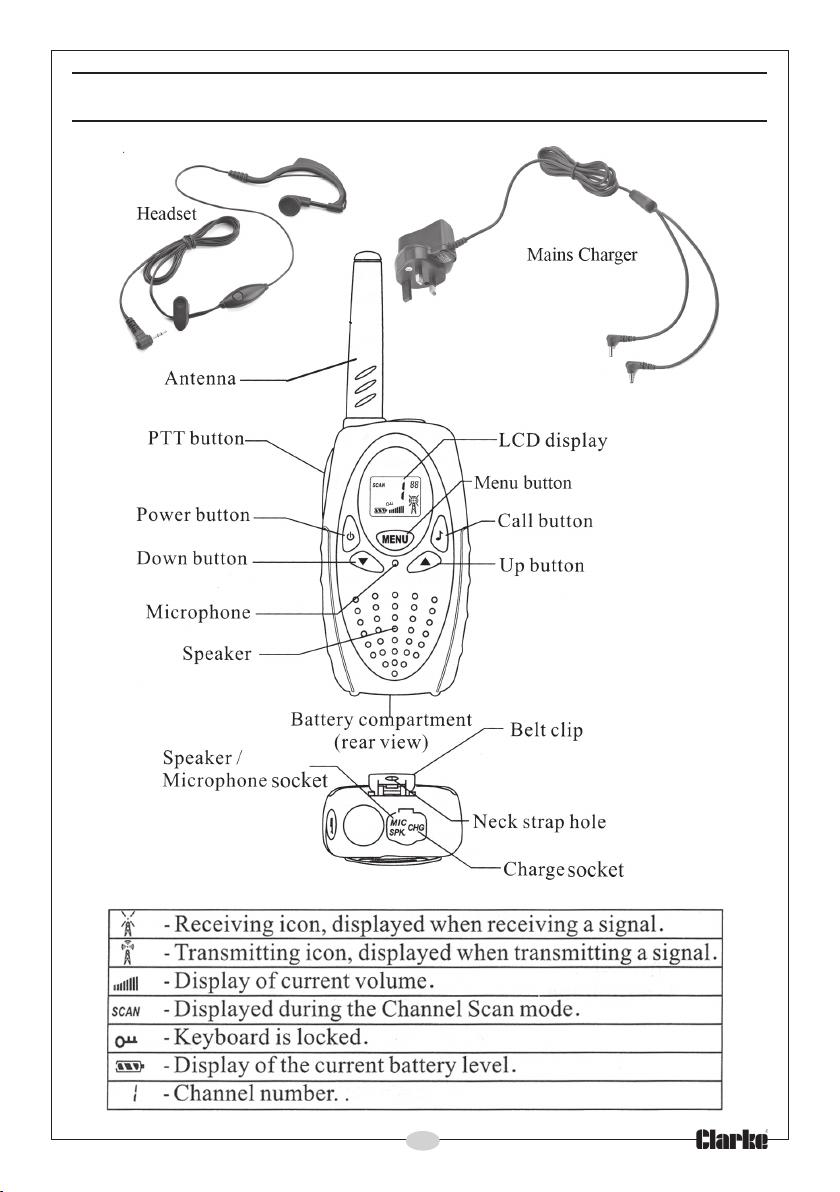
PARTS IDENTIFICATION
3
Page 4
OPERATION
BATTERY INSTALLATION
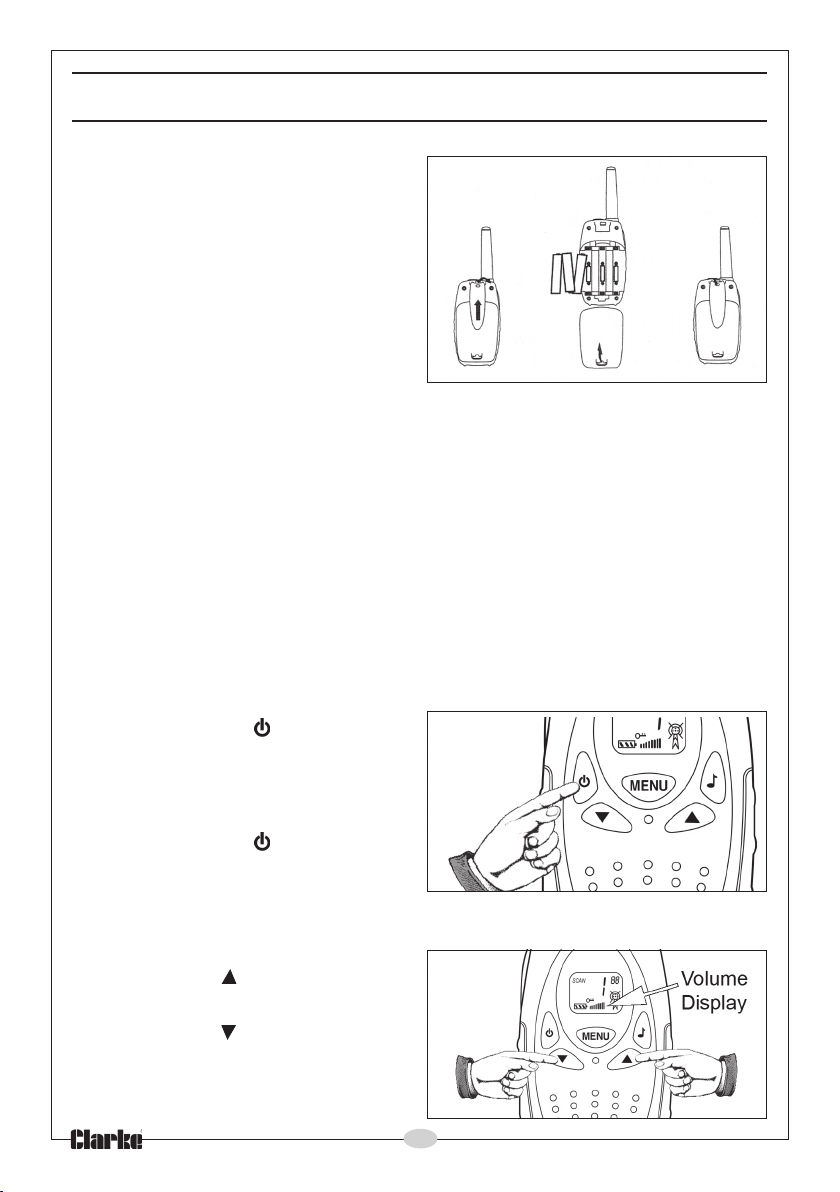
1. Remove the belt clip by lifting the
tab slightly and sliding it up.
2. Pull the battery door lock tab up
to release the battery cover.
3. Insert the 3 “AA” rechargeable
batteries supplied, ensuring you
follow the polarity diagram inside
the compartment.
4. Replace the battery cover and belt clip.
• Do not mix old and new batteries.
• Do not mix alkaline or rechargeable batteries.
• Do not put batteries on a fire or expose them to high heat.
CHARGING
1. Insert the mains charger to a mains power socket.
2. Insert one of the charging leads into the charge socket on top of the radio.
• Charge for 10 hours before using the radios for the first time.
• Do not charge for more than 24 hours.
TURNING THE UNIT ON
Press and hold the button. The
unit will beep and the LCD display
will show the current channel.
TURNING THE UNIT OFF
Press and hold the button. The
unit will beep and the LCD display
will turn blank.
ADJUSTING THE SPEAKER VOLUME
• Press the button to increase
the speaker volume.
• Press the
decrease the speaker
volume.
button to
4
Page 5
USING TWO WAY RADIOS
When the radio is switched on and not being used, it is always in receiving
mode .
• Press the PTT or Call button to override this and allow the radio to
transmit.
• The Call button transmits a tone to attract the attention of any
radio on the same channel.
NOTE: In order for other people to receive your transmissions, they must
also be on the same channel as you.
CALLING ANOTHER RADIO
1. Make sure both units are on.
2. Set the volume to an audible level.
3. Set both units to the same channel (see next section)
4. Press and release the Call
• The other unit will receive a call (page) tone. They can then respond
to your call by pressing the PTT button and speaking into their radio.
button on the front of your radio.
RESPOND PROMPT TONE:
When the PTT button is released, the receiving party will hear a tone indicating
that you have finished transmitting.
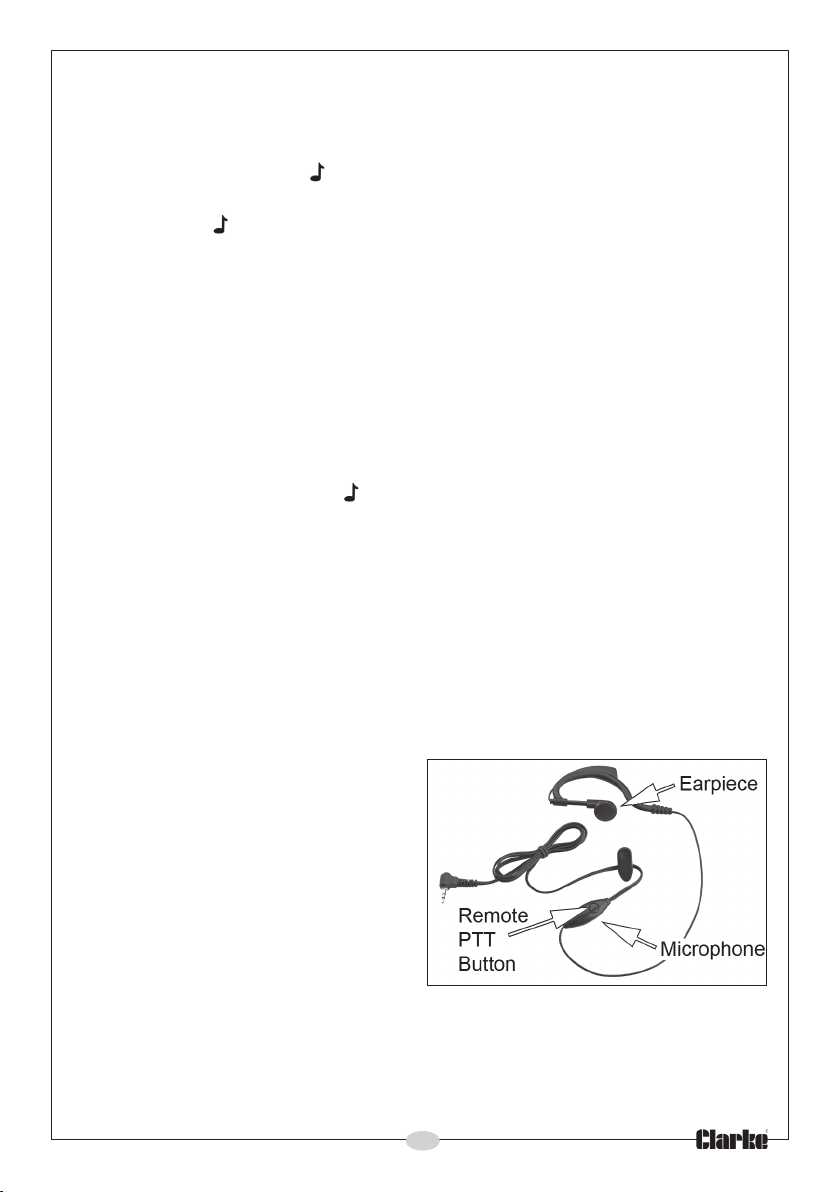
USING THE EARPIECE/MICROPHONE ATTACHMENT
Plug your earpiece/microphone into
the ‘MIC/SPK’ socket on the top of
your radio.
The sound will be heard through the
earpiece and not the speakers.
Your voice will be picked up through
the microphone built in to the
attachment.
The Remote PTT Button does the
same thing as the PTT button on the
radio.
5
Page 6
MENU
CHANGING CHANNELS
1. Press the MENU button once.
2. Press the
3. Press the PTT button to select the channel and return to normal mode.
or buttons to select a channel (1-8).
SETTING THE CALL RING MELODY (CA)
The unit has 5 call ring melodies to select from.
1. Press the MENU button twice.
2. Press the
3. Press the PTT button to select the melody and return to normal mode.
or button to select your call ring melody.
SETTING THE BUTTON TONE (TO)
1. Press the MENU button three times.
2. Press the or button to select ‘on’ or ‘off’.
3. Press the PTT button to confirm the setting and return to normal mode.
SETTING THE PTT TONE
1. Press the MENU button four times
2. Press the
3. Press the PTT button to confirm the setting and return to normal mode.
or button to select ‘on’ or ‘off’
6
Page 7
ADVANCED OPERATIONS
CHANNEL SCAN
The channel scan feature is when the radio searches all the channels
sequentially for a valid transmission. A valid transmission is a channel with any
signal being transmitted.
TO ACTIVATE THE CHANNEL SCAN:
1. Press the and MENU buttons at the same time.
• The channel number will run rapidly on the display. When a signal is
detected, the channel scan pauses, keeping the active signal
broadcasted.
2. Press the PTT button to communicate on that channel and cancel the
channel scan feature.
• To continue the channel scan press the
next active channel.
3. To stop the scanning operation, press the MENU button again.
CHANNEL LOCK
This feature locks the channel so that the channel cannot be changed
accidentally.
1. Press the and MENU buttons for 2 seconds until a beep sound is heard.
• The lock symbol will appear on the display when the channel is
locked.
button to search for the
AUTOMATIC SQUELCH
This two way radio is equipped with an automatic squelch circuitry, This filters
out weak transmissions and unwanted noise, usually caused by terrain
conditions.
This feature can be turned off to allow you to receive weaker signals from
radios at close to the maximum range. In doing so, you may pick up static
signals too.
TO TURN THE AUTOMATIC SQUELCH FEATURE ON OR OFF PERMANENTLY
1. Press and hold the
TO TURN THE AUTOMATIC SQUELCH FEATURE OFF TEMPORARILY
1. Press the or buttons briefly.
2. Release the button to restore the automatic squelch.
or buttons for 2 seconds.
7
Page 8
SPECIFICATIONS
Charger Voltage 230V @ 50Hz
Two Way Radio Voltage 4.5V
Number of Channels 8
Operating Range (Miles/Km) 2.5Miles / 4 Km
Battery Type 3 x 1000mAh Ni-MH (per radio)
Battery Size AA
Operating Frequency 446 MHZ
Headphone/Microphone Jack Size 2.5 mm
8
Page 9
9
Page 10

NOTES
10
Page 11

NOTES
11
Page 12

 Loading...