

Page 1
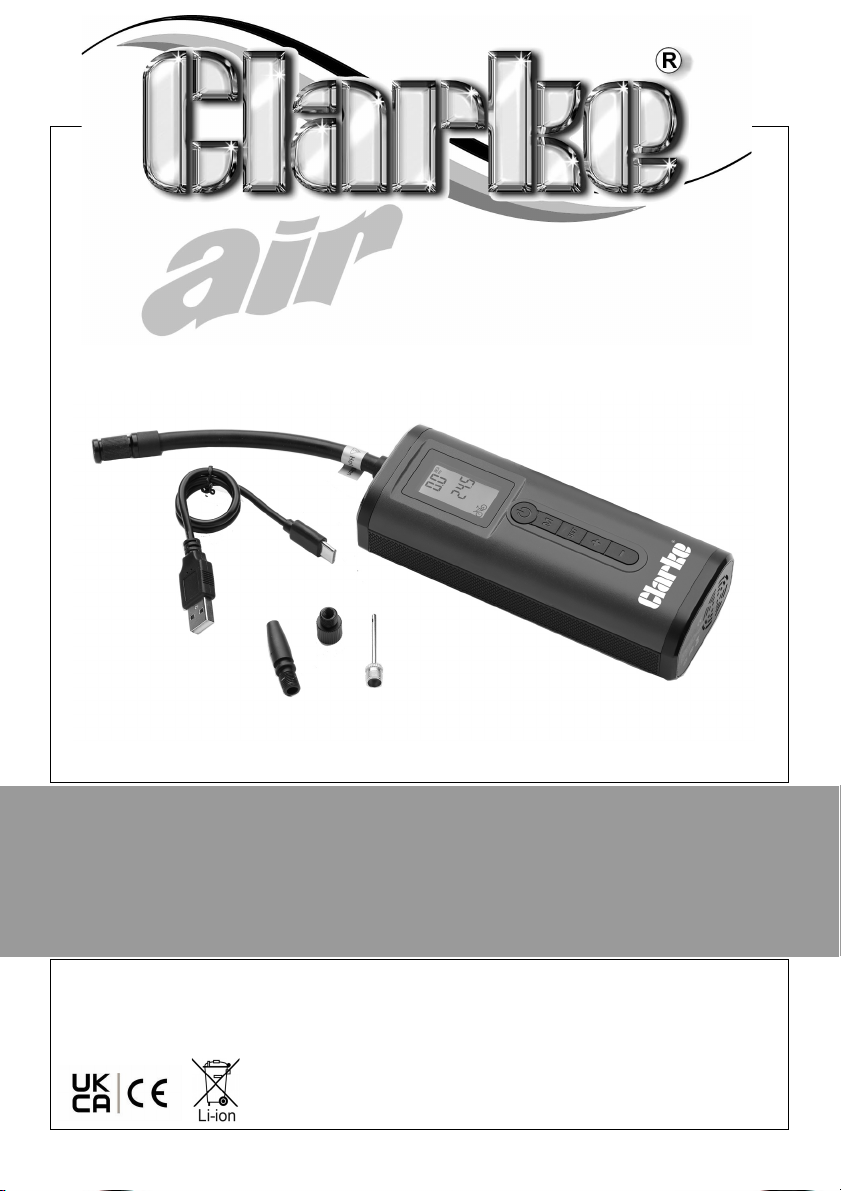
RECHARGEABLE INFLATOR
MODEL NO: RI150LI
PART NO: 7640291
OPERATION & MAINTENANCE
INSTRUCTIONS
ORIGINAL INSTRUCTIONS GC10/22
Page 2
INTRODUCTION
Thank you for purchasing this CLARKE Tyre Inflator. The RI150Li can be used for
inflating car, motorcycle and bicycle tyres, inflatable sports balls and other
inflatables. The compressor is not waterproof and should not be used in any
wet applications.
Before attempting to use the product it is essential that you read this manual
thoroughly and carefully follow all instructions given. In doing so you will ensure
the safety of yourself and that of others around you and you can also look
forward to the product giving you long and satisfactory service
PRODUCT SPECIFICATIONS
Model RI150Li
Hose length 150mm
Max working pressure 10.3 Bar/150 psi
Max flow rate 20L/min (zero load)
Ingress protection IP20
Duty cycle 20-25 mins running
Working temperature
Dimensions (L x W x H) 41 x 62 x 155 mm
Weight 415 g
Charging lead USB-C
Cable length 320mm
Battery Type Lithium Ion
Battery capacity 2000mAh/7.4V(14.8Whr)
Charging time Approx 3-4 hours
Sound output 85dB
-10 to 45
o
C
2
Parts & Service: 020 8988 7400 / E-mail: [email protected] or [email protected]
Page 3
GENERAL SAFETY WARNINGS
WARNING: WHEN USING BATTERY POWERED TOOLS, BASIC SAFETY
PRECAUTIONS SHOULD ALWAYS BE FOLLOWED TO REDUCE THE RISK OF
FIRE OR PERSONAL INJURY. PLEASE READ ALL THE SAFETY AND
OPERATING INSTRUCTIONS CAREFULLY BEFORE USING THIS PRODUCT
PERSONAL SAFETY
1. ALWAYS thoroughly familiarise yourself with this product and its operation
and always read the instructions in this manual before using the product.
2. ALWAYS stay alert, watch what you are doing and use common sense
when operating the tyre inflator. DO NOT use while you are tired or under
the influence of medication, drugs or alcohol. A moment of inattention
can result in personal injury.
WORKING CONDITIONS
1. DO NOT use the tyre inflator in a damp or wet environment. The inflator
should only be used with good ventilation. There should be no dust, acids,
vapour, explosive or flammable gases in the room.
2. DO NOT cover the tyre inflator. ALWAYS use it with good all-round air
ventilation and that the air intake air is dry and dust free.
3. Keep the work area clean and well lit. Floors should always be kept clear.
Cluttered or dark areas invite accidents.
4. NEVER operate the tyre inflator in wet or damp locations.
5. NEVER over-reach. Keep your proper footing and balance at all times to
enable better control of the tyre inflator in unexpected situations.
6. ALWAYS use in a safe area away from traffic and other hazards.
GENERAL PRODUCT USE AND CARE
1. NEVER attempt to modify the fittings or attachments in any way. Doing so
will invalidate the guarantee and could result in personal injury.
2. NEVER abuse the charging cable. NEVER pull on the cable when removing
the plug from the socket or lift the tyre inflator by the power cable.
3. NEVER leave the inflator running while unattended.
4. Take care when using this tyre inflator to inflate small, low-pressure objects
such as children's toys or footballs can explode if over-inflated.
5. ALWAYS take care to maintain tyres to vehicle manufacturer’s
recommended pressures.
3
Parts & Service: 020 8988 7400 / E-mail: [email protected] or [email protected]
Page 4
6. ALWAYS store the tyre inflator at moderate temperature and out of reach
of children.
7. NEVER use this product if it appears defective or is operating abnormally: If
the tyre inflator operates unusually or makes strange noises, switch off
immediately. Arrange repairs by your CLARKE dealer.
8. NEVER attempt any repairs yourself. If you have a technical problem
contact your local CLARKE dealer.
9. NEVER throw the product away with household garbage or allow to fall
into a fire.
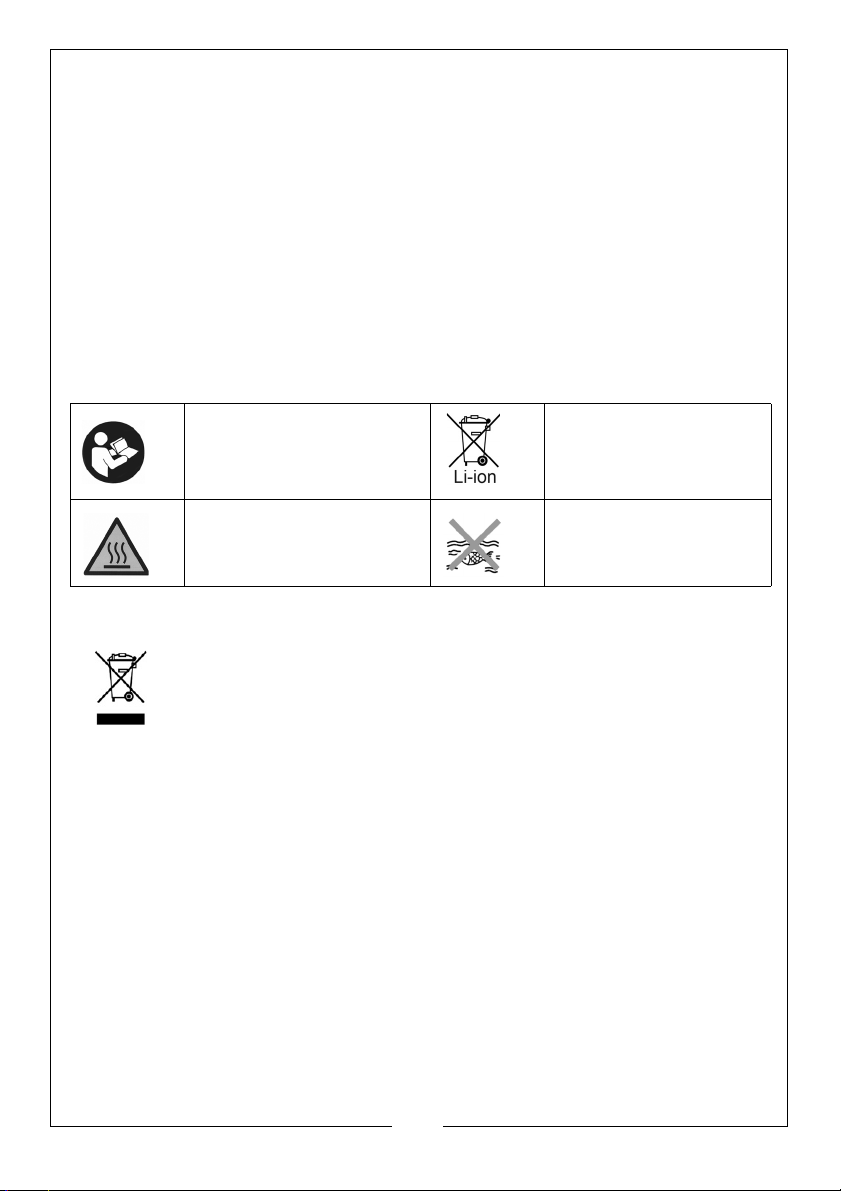
SAFETY SYMBOLS
The following safety symbols are shown on the product and/or it’s packaging..
Read this instruction
booklet carefully before
use
Caution-hot surfaces. Do
not handle.
Lithium-Ion battery
supplied to be re-cycled
in accordance with
regulations.
Do not immerse battery
in water. Harmful to
aquatic life.
ENVIRONMENTAL RECYCLING POLICY
By purchasing this product, the customer is taking on the obligation
to comply with current WEEE regulations.
This means that this product must not be disposed of with general
household waste. It must be disposed of according to the laws
governing Waste Electrical and Electronic Equipment (WEEE) at a recognised
disposal facility.
This product contains valuable raw materials. Metal products should be taken
to your local civic amenity site for recycling of metal products.
4
Parts & Service: 020 8988 7400 / E-mail: [email protected] or [email protected]
Page 5
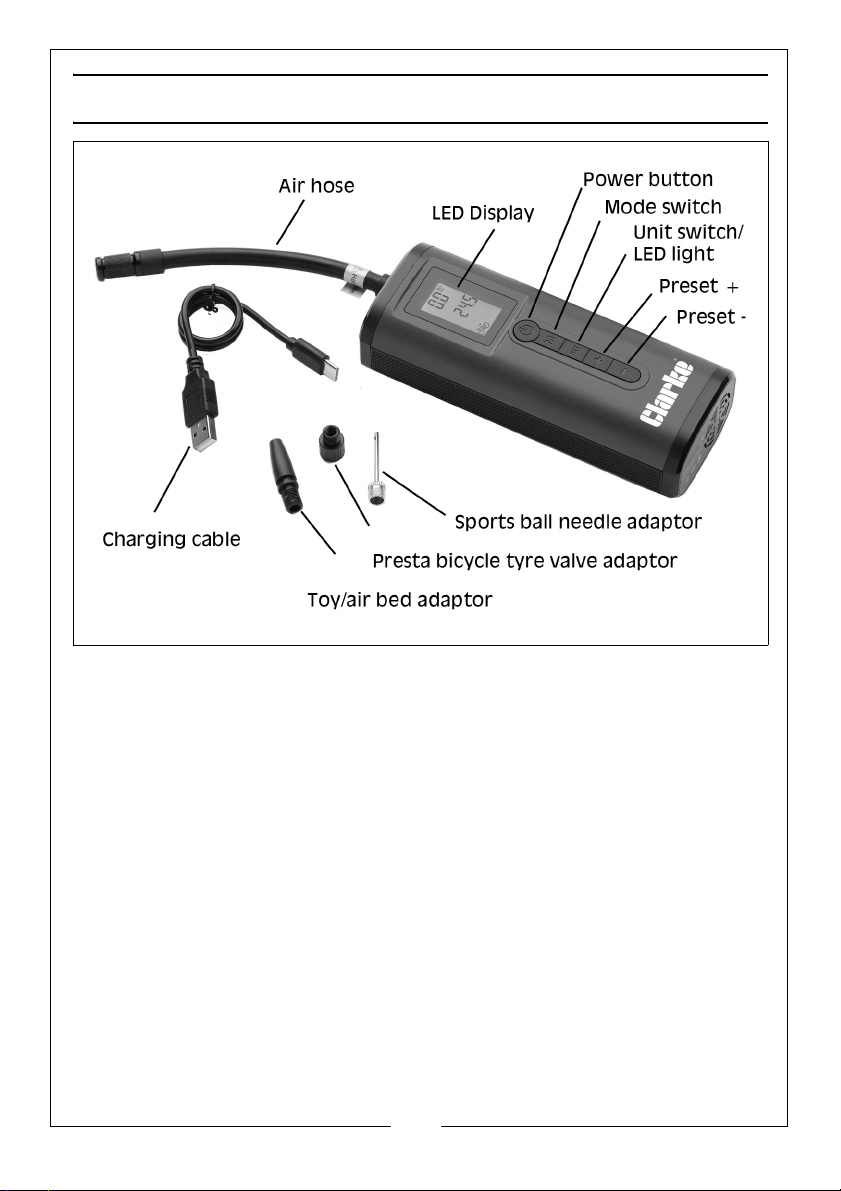
OVERVIEW
UNPACKING
After removing the tyre inflator from its packaging, check that it has not been
damaged in transit. Report any damage immediately to the CLARKE dealer
where the item was purchased.
ATTACHMENTS
Supplied with the tyre inflator are three adaptors for different uses. These are
provided to inflate car tyres, sports balls, air beds, small inflatables and bicycle
tyres etc. To avoid over-inflation, always follow manufacturer’s instructions for
the item to be inflated.
• Air Hose
• Toy/air bed adaptor
• Sports ball needle adaptor
• ‘Presta’ bicycle tyre valve adaptor
• C type charging cable
•Storage bag
5
Parts & Service: 020 8988 7400 / E-mail: [email protected] or [email protected]
Page 6
OPERATION
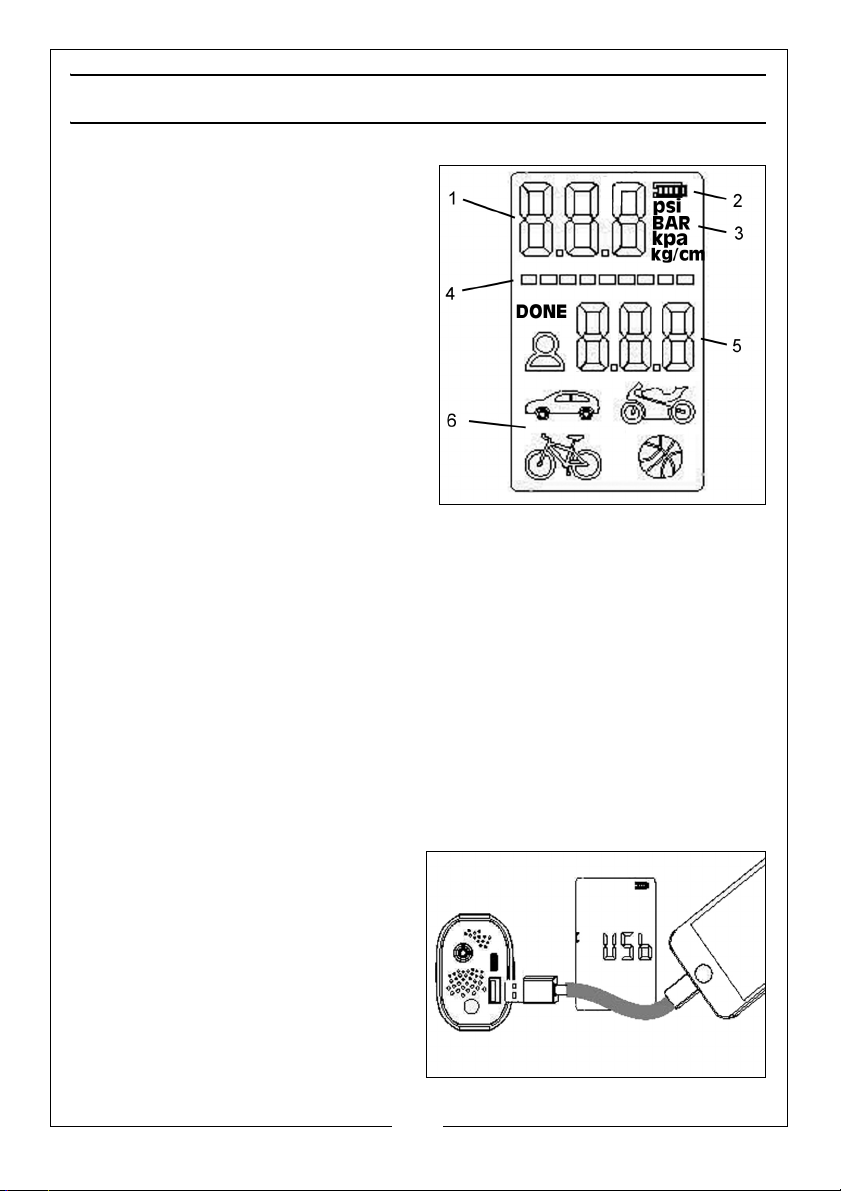
THE DISPLAY PANEL
The display panel will illuminate and
display the following:
• Measured pressure value (1)
• Battery level (2)
• Unit of measurement (3)
• Progress bar (4)
• Preset pressure value (5)
•Operating mode (6)
CHARGE AND DISCHARGE MODES
Connect the USB-C cable to an adaptor (not supplied) to charge the device.
• When charging, the battery indicator will flash.
• When fully charged, the battery indicator lights will remain on.
• After 10 seconds of no operation during charging, the display will
automatically turn off.
The device must not be used during charging.
After using a long press to turn the device on, the charging port (4) can supply
power to charge other electronic devices via the USB output. (5V/1.5A max).
The device will shut down if the battery becomes too low or when the battery
is fully charged.
POWER ON/OFF
Press the Power button (long press) to
turn the device on.
Press the Power button (long press of
3 seconds) to turn the device off.
• The progress bar will move across
the screen to the point of start-up.
• The USB port can now supply
power to charge another
electrical device.
6
Parts & Service: 020 8988 7400 / E-mail: [email protected] or [email protected]
Page 7
• The unit will automatically shut down when the battery becomes low and
will stop charging when fully charged.
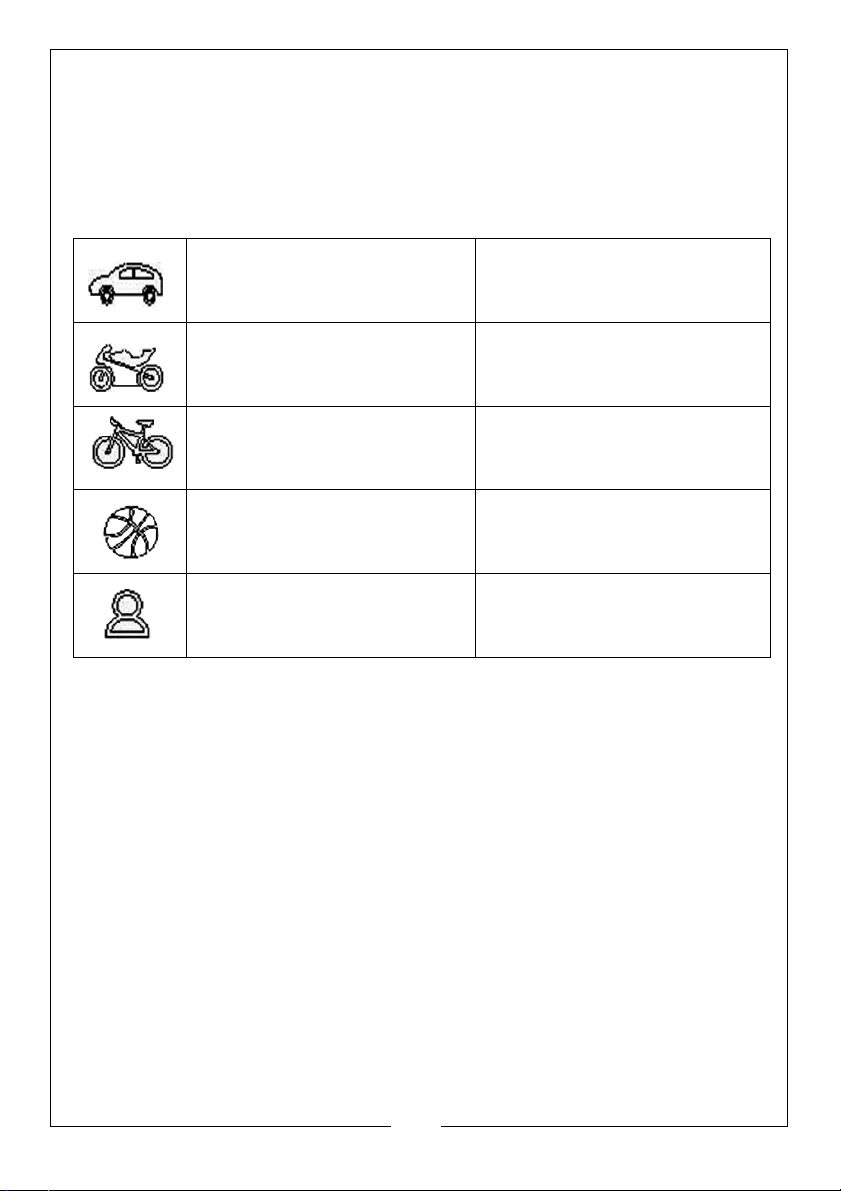
SELECTING DIFFERENT MODES
A short press of the mode button can be used for the following different
applications.
Car mode;
Default pressure: 35psi Adjusting range;-0-65 psi
Motorcycle mode;
Default pressure: 40psi Adjusting range;-0-55 psi
Bicycle mode;
Default pressure: 38psi Adjusting range;-0-150 psi
Ball mode;
Default pressure: 8psi Adjusting range;-0-150 psi
Custom mode;
Default pressure: 100psi Adjusting range;-0-150 psi
USING THE PUSHBUTTONS
Use a short press of the preset button +/- to adjust the pre-set pressure.
Use a long press of the preset button +/- to rapidly adjust the pre-set pressure
value.
Use a long press of the LED light button to turn on/off the LED light.
Use a short press of the power button to actuate the inflation, real time
pressure valve changes during inflation.
NOTE: The mode and pre-set pressure value will be automatically saved
when the machine is turned off and the last pre-set pressure value
will be automatically restored for the next use.
7
Parts & Service: 020 8988 7400 / E-mail: [email protected] or [email protected]
Page 8
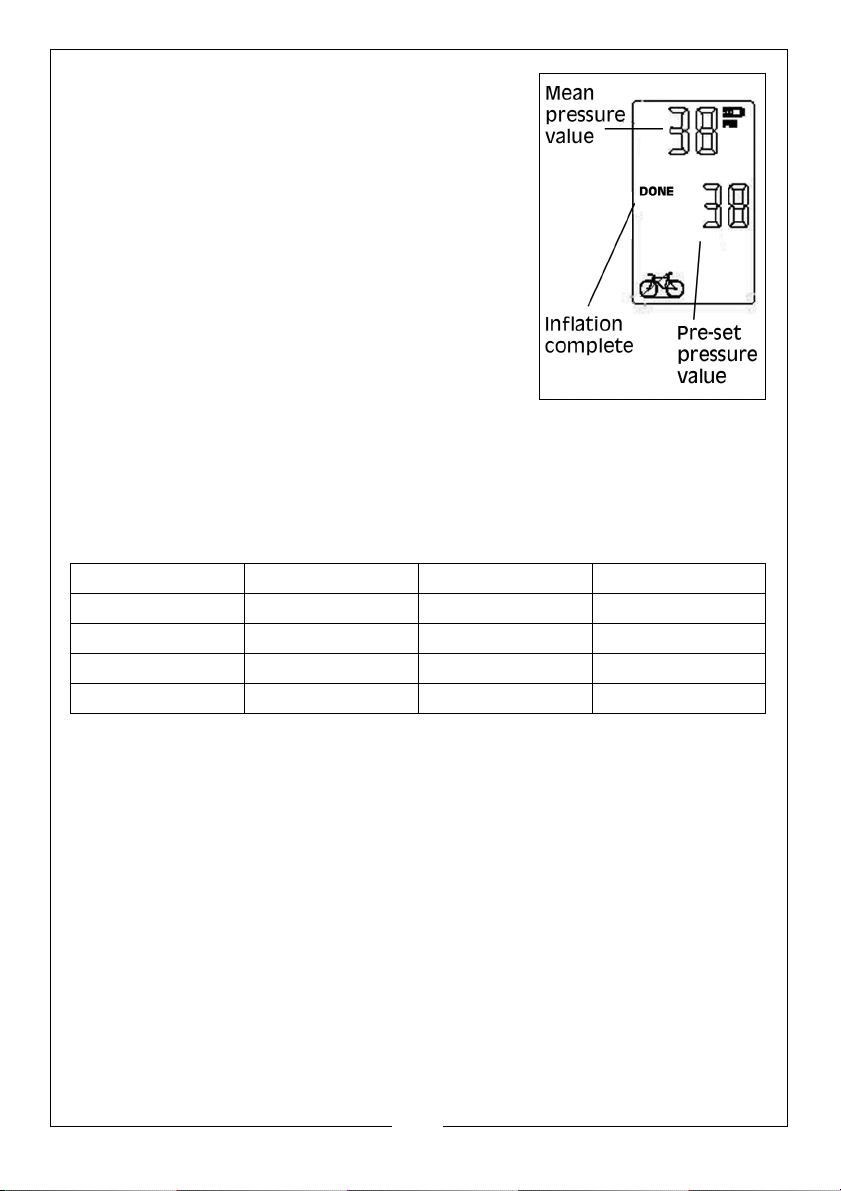
PRESSURE DETECTION AND INFLATION
A short press on the power button will start
inflation. A second short press will stop inflation.
When the pressure reaches the pre-set pressure
value the pump will automatically stop. After
turning on, connect the hose to the object to be
measured. The real-time pressure (12) will show the
pressure value.
PRESSURE CALIBRATION
After turning on, if the displayed pressure value is
not 0, press button (+) and (-) simultaneously for 2
seconds to enter the calibration mode. The display
will flash quickly, meaning the reset is complete.
Note: The device has been calibrated at the factory but a Reset/calibration
can improve accuracy due to variations in air pressure due to altitude.
DO NOT attempt to re-calibrate while connected to inflatable objects.
COMMON INFLATION PRESSURES
PSI KPA BAR
Car 35 - 50 240 - 350 2.4 - 3.5
Motorcycle 26 - 40 180 - 275 1.8-2.75
Bicycle 35 - 100 240 - 690 2.4-6.9
Ball 3-14 20-100 0.2-1.0
• When inflating tyres with normal “Schrader” valves, no adaptors need to
be fitted to the hose.
• Presta valves require the adaptor to be screwed onto the valve before
attaching the hose.
Avoid inflating the objects above the recommended inflation pressure. This
could lead to damage and /or injuries.
Low pressure products such as balloons/swimming rings/balls are outside the
minimum pressure range of the product as the air pressure is very low and the
pressure value cannot be pre-set. Use the inflator with caution.
8
Parts & Service: 020 8988 7400 / E-mail: [email protected] or [email protected]
Page 9
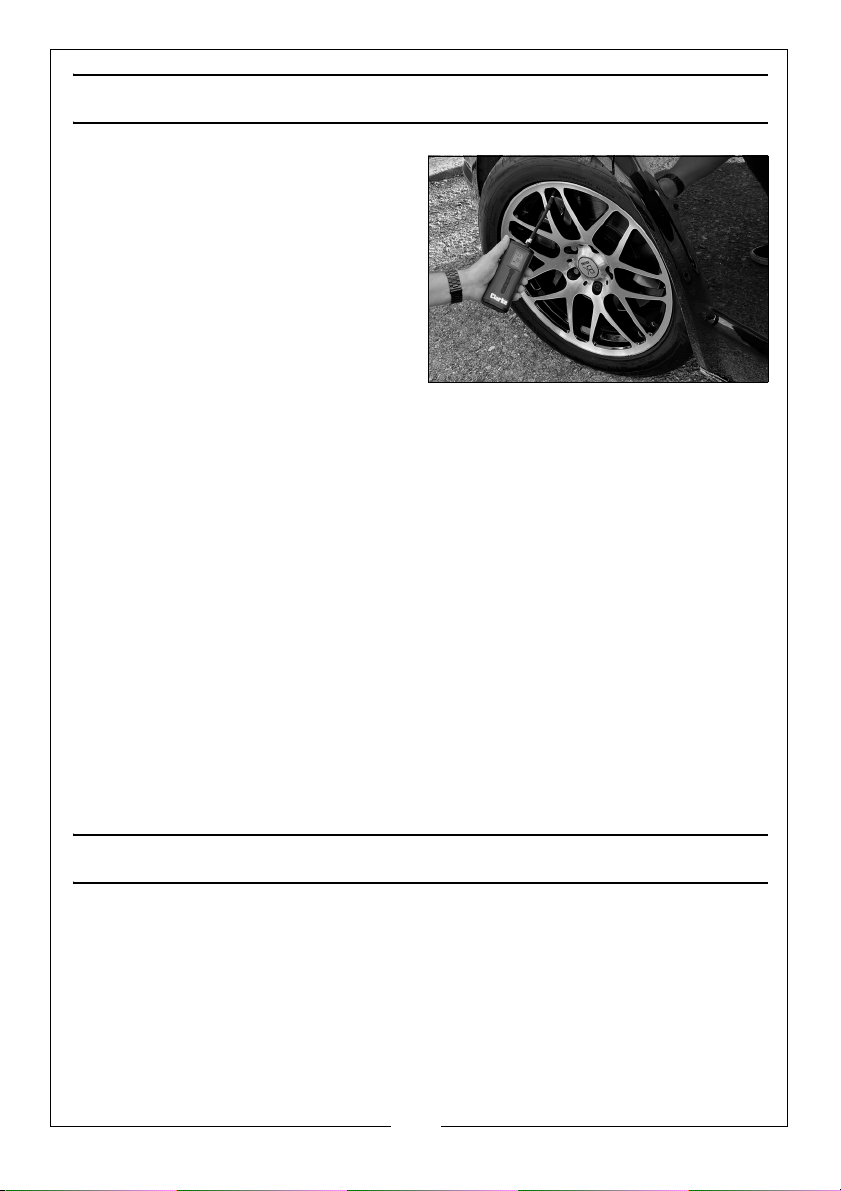
TYRE INFLATION
1. Fix the tyre valve connector onto
the vehicle tyre valve, ensuring
the valve is clean.
• When connected correctly, the
digital display will show the
current pressure in the tyre. If this is
the correct tyre pressure as stated
in your vehicle handbook, remove
the valve connector.
2. If the tyre is below the
recommended pressure (as specified in your vehicle handbook), press
either the ‘-’ or ‘+’ pre-set button to adjust the pre-set value on the display
to the correct tyre pressure.
NOTE: The unit will default to the last tyre pressure set. You can then
adjust this using the ‘-’ or ‘+’ buttons.
3. Press the Power button to activate the inflator.
4. The tyre inflator will now inflate your tyre to the pre-set pressure and switch
off automatically when the pressure is reached. Towards final inflation, the
tyre pressure display reading will be slightly higher than the selected
pressure. When the tyre inflator stops, the final reading will be the selected
pressure. This is a normal function of the unit.
5. Press the power button to switch OFF the tyre inflator and remove the tyre
valve connector from the tyre valve, returning the hose to its storage
position.
6. Take care that the hose has not become hot to the touch when
disconnecting.
CARE & MAINTENANCE
Keep the tyre inflator free of dirt and dust as far as possible. Wipe with a clean
cloth or blow it down with compressed air at low pressure. DO NOT use
cleaning agents or solvents as these may be aggressive to the plastic parts.
Ensure that no water can get into the interior of the tyre inflator.
Your tyre inflator has been designed to give long and trouble free service. If,
however, having followed the instructions in this booklet carefully, you
encounter problems, take the tyre inflator to your local CLARKE dealer.
Store the tyre inflator in a dry location.
9
Parts & Service: 020 8988 7400 / E-mail: [email protected] or [email protected]
Page 10
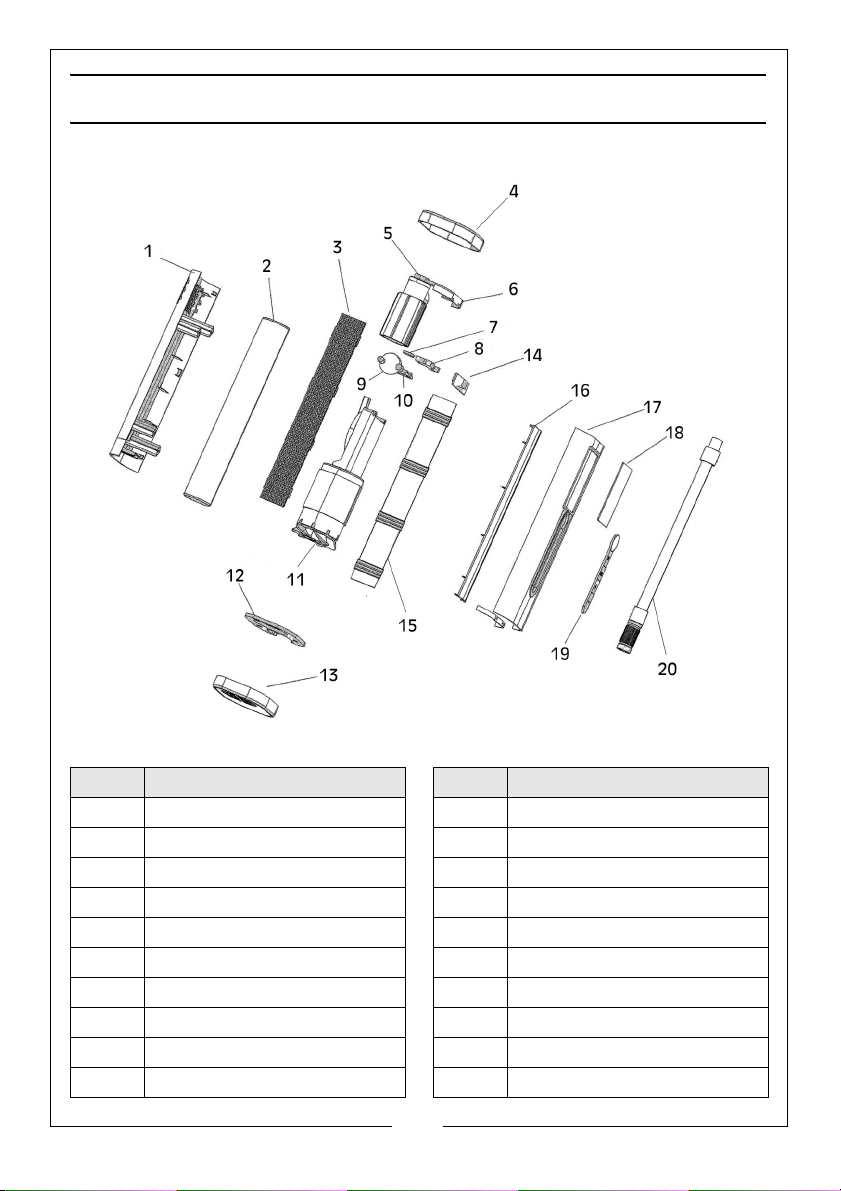
COMPONENT PARTS
No Description No Description
1 Housing - back 11 Motor
2 Battery 12 Support
3 Support 13 Housing-bottom
4 Housing-top 14 Silicone pad
5 Cylinder 15 Motor support
6 Support 16 Battery support
7 Sealing ring 17 Housing-front
8 Silicone pad 18 Lens
9 Pressure-sensitive film 19 Switch
10 Pressure sensor 20 Hose
10
Parts & Service: 020 8988 7400 / E-mail: [email protected] or [email protected]
Page 11
DECLARATIONS OF CONFORMITY
11
Parts & Service: 020 8988 7400 / E-mail: [email protected] or [email protected]
Page 12
 Loading...