

Page 1
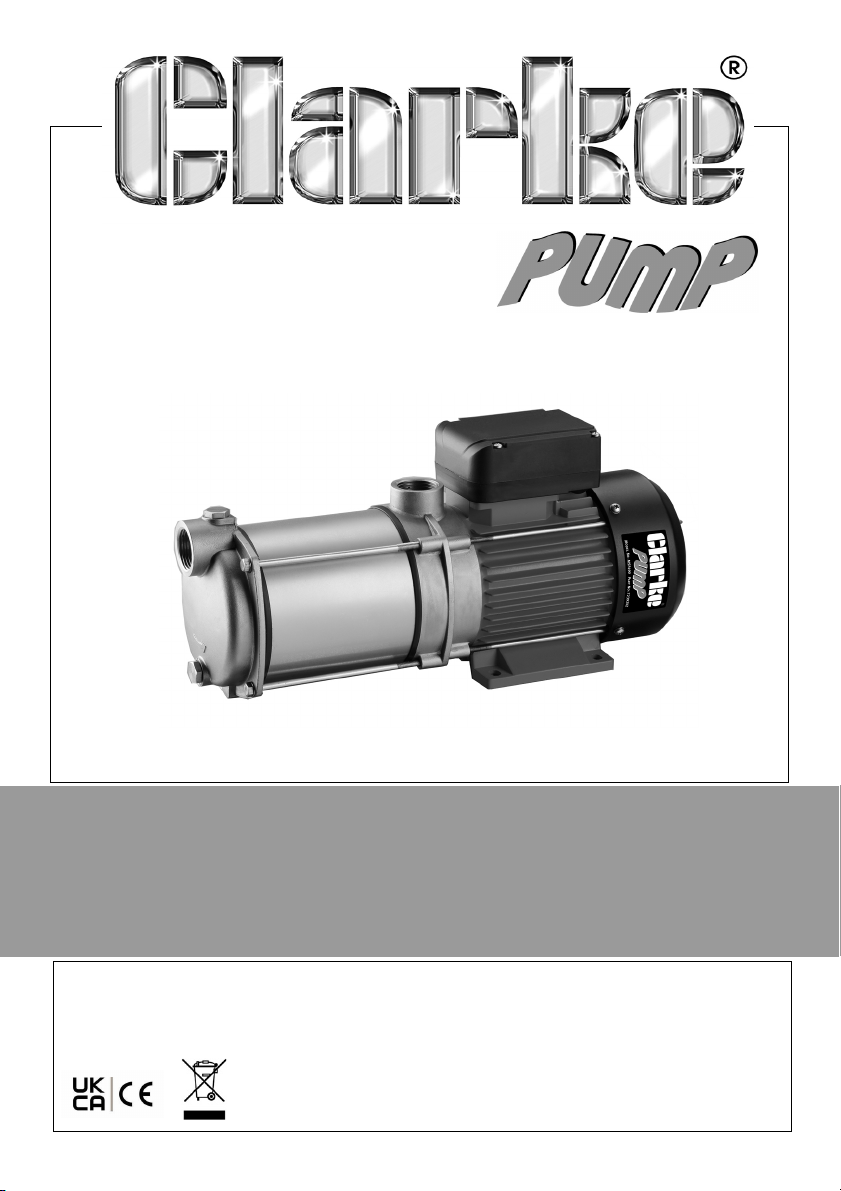
MULTI-STAGE BOOSTER PUMPS
MODEL NO: MSP490, 590 & 690
PART NO: 7239202, 7239203 & 7239204
OPERATION & MAINTENANCE
INSTRUCTIONS
ORIGINAL INSTRUCTIONS GC06/24
Page 2
INTRODUCTION
Thank you for purchasing this CLARKE Booster Pump which is suitable for a
variety of applications involving the transfer of clean, cold water for domestic
and gardening applications.
Please read this manual thoroughly and ensure you are familiar with all
aspects relating to your particular pump before its connection and use. This
will ensure the safe and proper installation of the pump and assist it in
providing a long, trouble free performance.
Please keep these instructions in a safe place for future reference.
GUARANTEE
This product is guaranteed against faulty manufacture for a period of 12
months from the date of purchase. Please keep your receipt which will be
required as proof of purchase.
This guarantee is invalid if the product is found to have been abused or
tampered with in any way, or not used for the purpose for which it was
intended.
Faulty goods should be returned to their place of purchase, no product can
be returned to us without prior permission.
This guarantee does not effect your statutory rights.
ENVIRONMENTAL RECYCLING POLICY
Through purchase of this product, the customer is taking on the
obligation to deal with the WEEE in accordance with the WEEE
regulations in relation to the treatment, recycling & recovery and
environmentally sound disposal of the WEEE.
In effect, this means that this product must not be disposed of with general
household waste. It must be disposed of according to the laws governing
Waste Electrical and Electronic Equipment (WEEE) at a recognised disposal
facility.
If disposing of this product or any damaged components, do not dispose of
with general waste. This product contains valuable raw materials. Metal
products should be taken to your local civic amenity site for recycling of metal
products.
2
Parts & Service: 020 8988 7400 / E-mail: [email protected] or [email protected]
Page 3
SPECIFICATION
Model MSP490 MSP590 MSP690
Maximum Delivery 90 L/min 90 L/min 90 L/min
Maximum Head 43 metres 53 metres 64 metres
Maximum water temperature 65 degC 65 degC 65 degC
Operating Pressure 4.3 Bar 5.3 Bar 6.4 Bar
Ingress Protection Rating IPx5 IPx5 IPx5
Supply 230V~ 50Hz 230V~ 50Hz 230V~ 50Hz
Rated Input Power 1100 W 1350 W 1650 W
Rated Output Power 850 W 1050 W 1300 W
Input current @ Maximum Head 3.06 A 3.73 A 4.38 A
Input current @ Maximum Flow 4.61 A 5.70 A 6.82 A
Inlet/Outlet Thread Size 1” BSP 1” BSP 1” BSP
Product weight 11.8 kg 13.1 kg 14.8 kg
Overall dimensions (L x W x H) mm 406x140x192 431x140x192 485x140x192
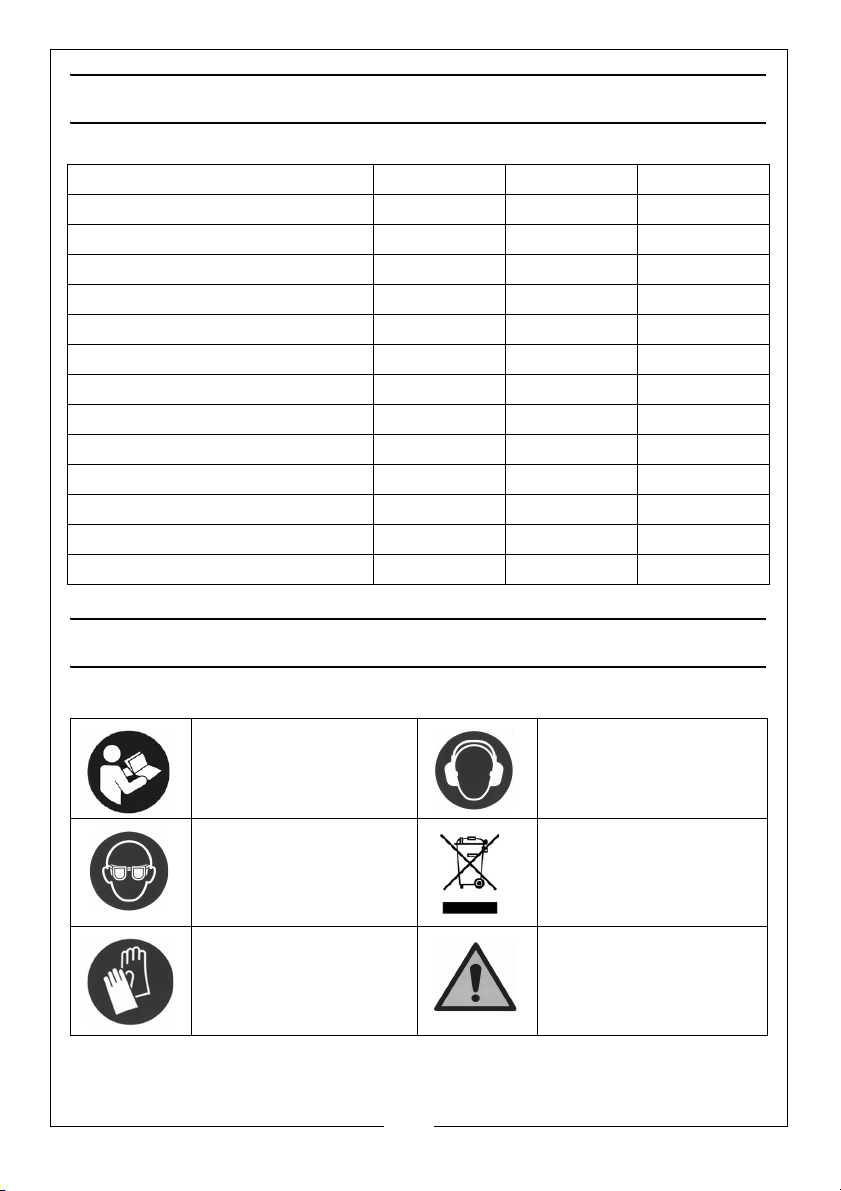
SAFETY SYMBOLS
The following symbols may be displayed on the machine or its packaging.
Read this instruction
booklet carefully
before use.
Wear eye protection Recycle unwanted
Wear protective gloves General Hazard
3
Parts & Service: 020 8988 7400 / E-mail: [email protected] or [email protected]
Wear ear defenders
materials under WEEE
Directive
Page 4
GENERAL SAFETY PRECAUTIONS
Before using this product it is in your own interest to read and pay attention to
the following safety rules.
WARNING: ALWAYS CONNECT THE PUMP TO AN EARTHED POWER SUPPLY
VIA AN RCD.
1. ALWAYS keep the working area clean and well lit. Floors should always be
kept clear. Cluttered or dark areas invite accidents.
2. NEVER over-reach. Keep your proper footing and balance at all times
when installing or maintaining the pump.
3. NEVER direct any water discharge towards electrical wiring or equipment.
4. ALWAYS thoroughly familiarise yourself with this pump & its operation, and
follow all instructions in this manual. NEVER allow persons unfamiliar with
these instructions to install or operate the pump.
5. ALWAYS ensure that the pump is properly installed to prevent it from moving
during operation and that the immediate area surrounding the pump is
kept clear.
6. ALWAYS maintain the pump with care and keep it clean for best / safest
performance.
7. NEVER modify this pump in any way. Use it only for the purpose for which it
is designed.
8. NEVER use for pumping flammable liquids or corrosive chemicals. This
pump is only designed to pump clean water.
9. ALWAYS have the pump serviced by your local dealer, using only identical
replacement parts. This will ensure the safety of the pump is maintained.
The use of non standard parts could be hazardous.
10. NEVER use this product if any part is damaged. Have it inspected and
repaired by your local CLARKE dealer. ALWAYS turn the pump off before
carrying out any maintenance.
11. NEVER allow the pump to run dry.
CAUTION: THIS PUMP IS NOT A SUBMERSIBLE PUMP. ON NO ACCOUNT
SHOULD IT EVER BE IMMERSED IN WATER.
4
Parts & Service: 020 8988 7400 / E-mail: [email protected] or [email protected]
Page 5
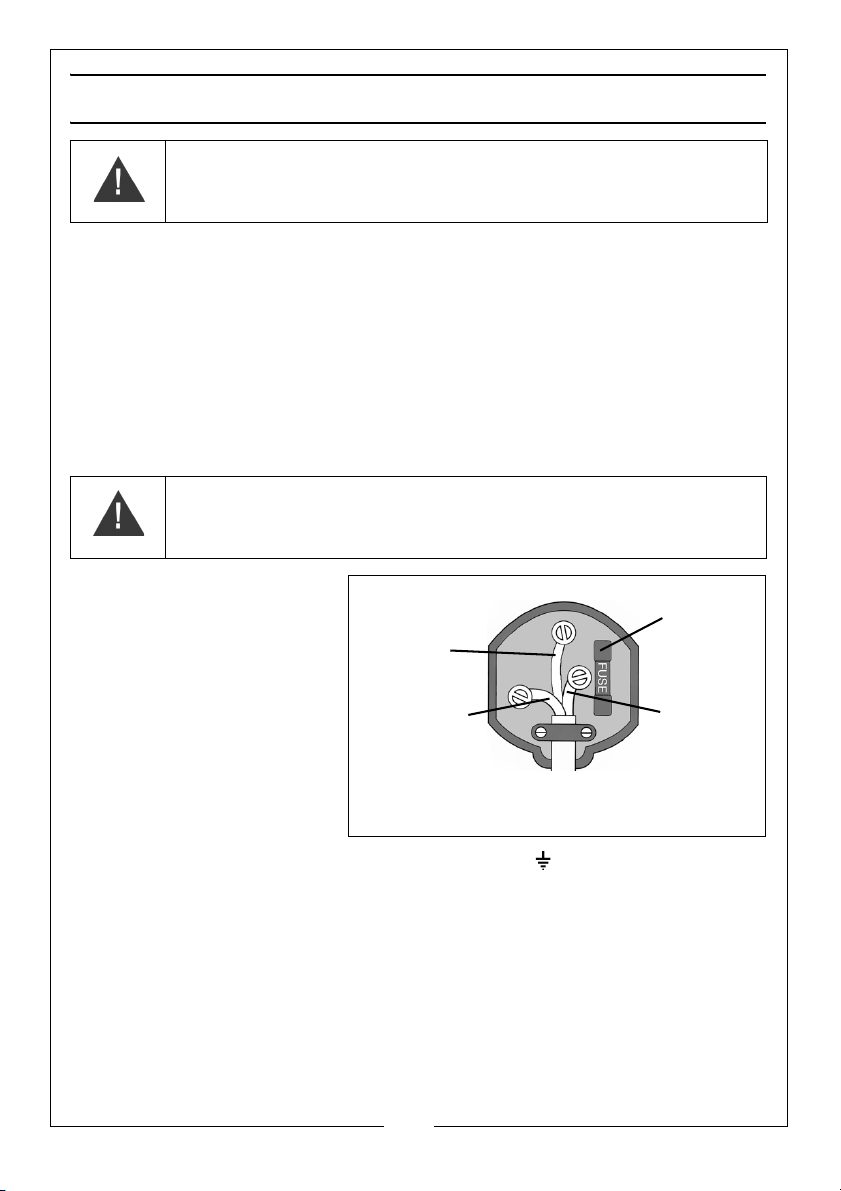
ELECTRICAL INSTALLATION
Plug must be BS1363/A approved.
Always fit
Ensure that the outer sheath of
Neutral
(Blue)
Live
(Brown)
Earth
(Green and
a 13 Amp
the cable is firmly held by the clamp
fuse.
Yel low)
WARNING: READ THESE ELECTRICAL SAFETY INSTRUCTIONS
THOROUGHLY BEFORE CONNECTING THE PRODUCT TO THE MAINS
SUPPLY.
Connect the mains lead to a standard, 230 Volt (50Hz) electrical supply
through an approved 13 amp BS 1363 plug or a suitably fused isolator switch.
This product may be fitted with a non-rewireable plug. If it is necessary to
change the fuse in the plug, the fuse cover must be refitted. If the fuse cover
becomes lost or damaged, the plug must not be used until a suitable
replacement is obtained.
If the plug has to be changed because it is not suitable for your socket, or
because of damage, it must be removed and a replacement fitted, following
the wiring instructions shown below. The old plug must be discarded safely, as
insertion into a power socket could cause an electrical hazard.
WARNING: THE WIRES IN THE POWER CABLE OF THIS PRODUCT ARE
COLOURED IN ACCORDANCE WITH THE FOLLOWING CODE:
BLUE = NEUTRAL BROWN = LIVE YELLOW AND GREEN = EARTH
The colours of the wires in
the power cable must
agree with the markings on
the plug.
• Connect the BLUE wire
to the terminal
marked N.
• Connect the BROWN
wire to the terminal
marked L.
• Connect the YELLOW
AND GREEN wire to the terminal marked E or .
AN APPROVED RESIDUAL CURRENT DEVICE (RCD) WHICH HAS A TRIPPING
CURRENT OF LESS THAN 30 mA MUST BE USED.
If you are not sure consult a qualified electrician.
Parts & Service: 020 8988 7400 / E-mail: [email protected] or [email protected]
5
Page 6

INSTALLATION OF THE PUMP
IMPORTANT: The pump MUST NOT be connected to the mains power supply
until all hose/pipe installations are completed.
These notes are for guidance on how to achieve a proper working system. If
any part of the system is to be connected to the mains water supply, ensure
that you comply with your local water authority regulations.
INSTALLATION LAYOUT
The pump must always be installed and operated in a horizontal position using
the fixing holes in the base to secure the pump firmly in its operating position.
Ensure that there is adequate air circulation around the motor.
Avoid situations where there is the risk of water coming into contact with the
outside of the pump. Neither the motor or the terminal box are designed to be
waterproof.
The suction lift i.e. the vertical distance between the water level and the
pump, should not exceed the distance specified for your pump.
Where the pump is to be a permanent fixture, the fittings to the pump MUST be
flexible, i.e. a short piece of hose should be inserted between any rigid metal
pipework and the pump.
To prevent unnecessary strain or possible distortion to the pump, ensure that
adequate support is provided to the hoses and/or pipes. Remember they will
be considerably heavier when filled with water.
PIPELINE FITTINGS REQUIRED
Because of the variety of possible installations, no plumbing accessories are
supplied. However, accessories designed specifically for this range of pumps
are available from your CLARKE dealer.
The performance of your pump will be effected by the diameter of the inlet
pipe - any restriction will greatly reduce the flow. We recommend that you use
a diameter which is as large as practicable with a suitable reducer for
connection to the 1” BSP inlet adapter. The discharge hose should be
attached to the outlet adapter (not supplied).
A 1” BSP hose adapter will be required for connection to the inlet and outlet
port. These are available from your CLARKE dealer.
A gate valve may be installed in-line on the outlet side of the pump which can
be set as required to regulate the flow of water. Do not place any such
restriction on the suction side of the pump unless it is an isolator valve in a
gravity fed system.
6
Parts & Service: 020 8988 7400 / E-mail: [email protected] or [email protected]
Page 7
PREPARATION FOR USE
PRIMING THE PUMP
When suction lift is used to draw water into the pump it is essential that all
connections and hoses are completely air tight or the system will not work.
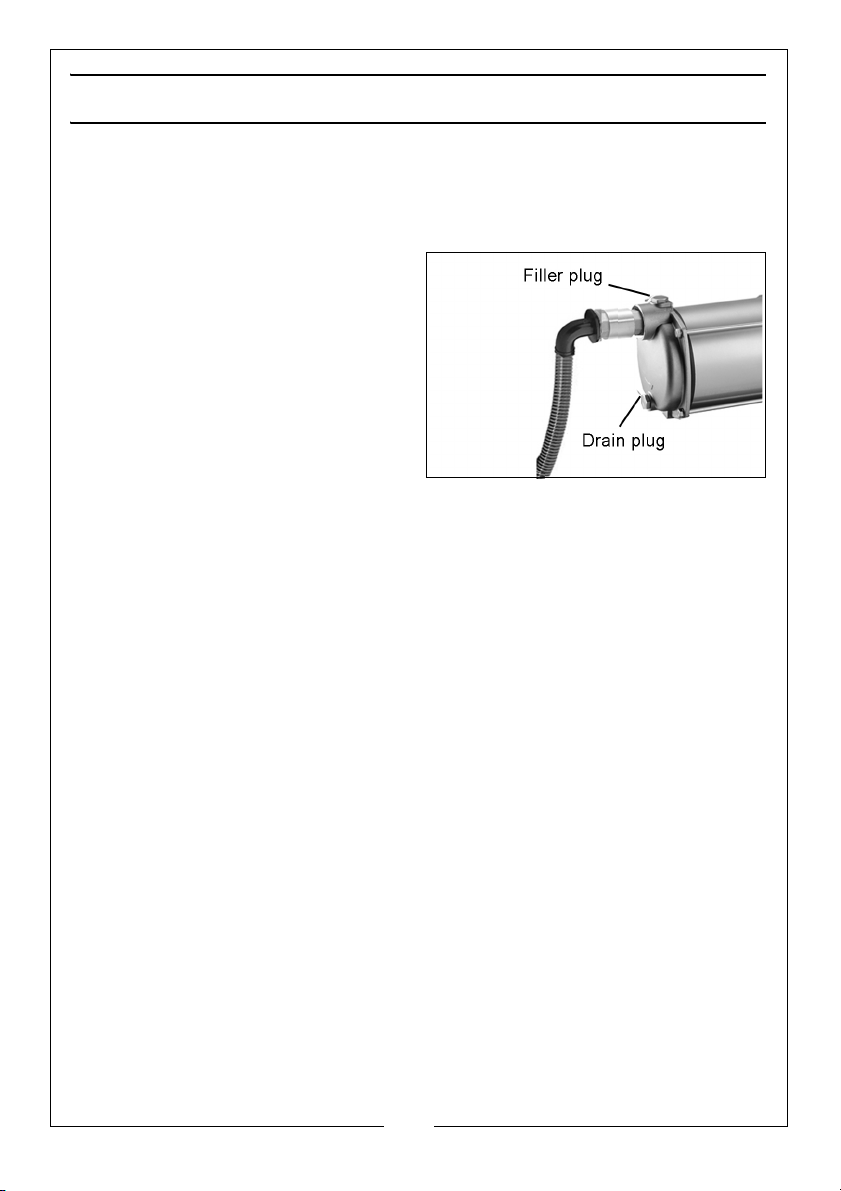
Although the pump is a ‘self priming’
type, it is still necessary to completely
fill the inlet side of the pump with
water before being started for the
first time or if the system has been
drained for maintenance/repair. This
is carried out as follows:-
1. Remove the filler plug on the top
of the pump chamber and fill the
pump with water until all air is
expelled.
NOTE: If a filter is fitted to your pump it is recommended that you remove
the brass plug on top and fill the filter bowl with water.
2. Adjust any valves which may be fitted to the outlet side of the pump so as
to ensure as great a flow as possible.
3. Switch on the pump and check for leaks. Water should quickly start to flow
through the system. If, depending upon the suction depth, water does not
flow, check to ensure:
• The inlet pipe is secure and free from defects. Even a pin hole could
prevent the pump from drawing water efficiently. This is the most
common problem encountered when operating water pumps.
• The pump body has been primed correctly and is completely filled
with water.
NOTE: If the pump is gravity or pressure fed, priming will not be necessary
as the pressure of water will purge the system of air.
It is essential that all connections and hoses are completely air tight or the
system will not work effectively.
The pump should never be operated with any delivery valve completely
closed.
7
Parts & Service: 020 8988 7400 / E-mail: [email protected] or [email protected]
Page 8
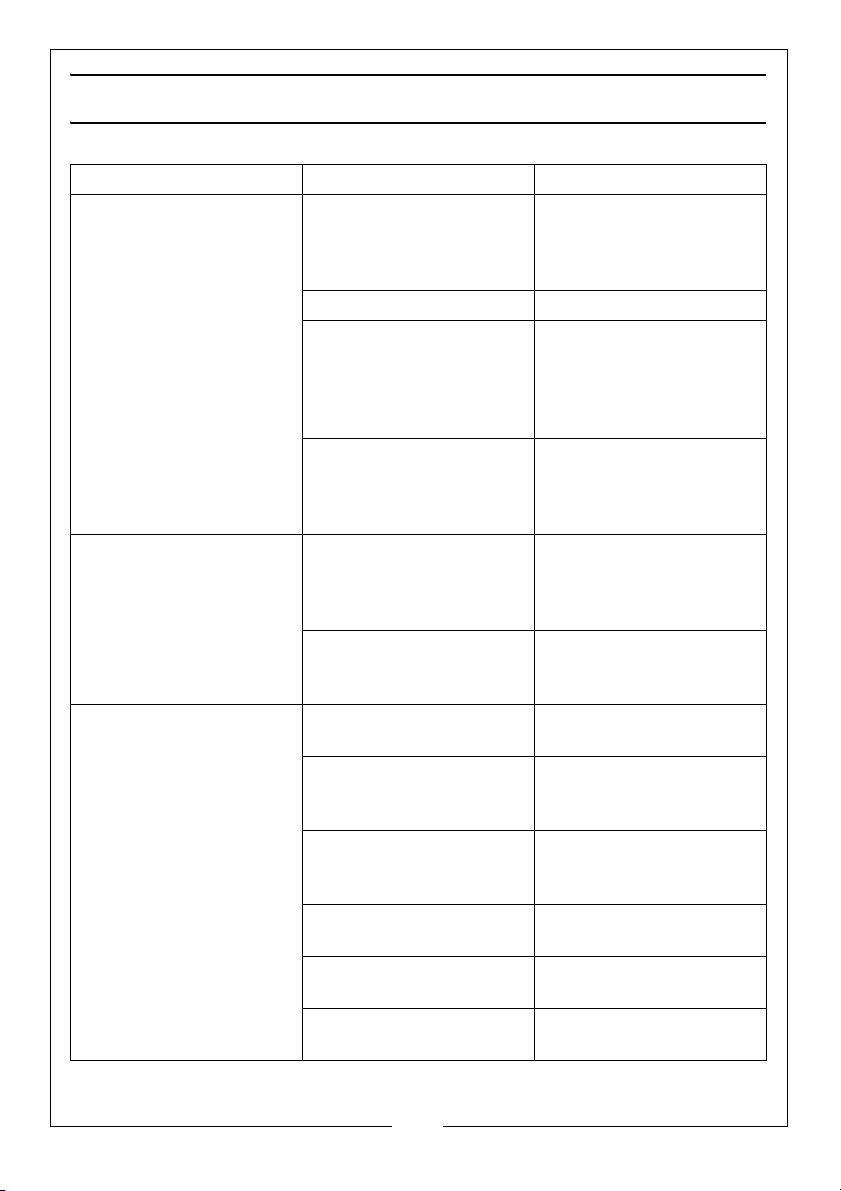
TROUBLESHOOTING
Problem Cause Solution
Pump does not run. Thermal protection has
been activated.
Faulty power connection Insert plug securely.
No mains supply. Check fused power
Impeller seized/blocked Disconnect pump from
Pump fails to prime Air leaks through suction
hose joints (damaged
hose or damaged
clamp).
Blocked inlet hose. Check pipeline for block-
Pump runs but gives poor
output
Congested material
inside pump
Suction or delivery line
obstructed.
Inlet pipe leakage. Check inlet pipe and
Air leaks through
damaged seal.
Impeller damaged and
making poor seal.
Impeller / mechanical
seal is badly worn.
If the motor has overheated, wait for it to cool
down before trying
again.
supply and replace fuse
if necessary (check fuse
rating). Check circuit
breaker.
power supply.
Investigate cause and
clear blockage.
Repair connections/
replace hose as
necessary.
age. Check any inlet
valve fitted is fully open.
Clean out & backflush
pump.
Remove obstruction and
ensure there are no kinks
in delivery line.
connector for leaks.
Tighten as required.
Renew seal.
Return to your CLARKE
dealer for repair.
Return to your CLARKE
dealer for repair.
8
Parts & Service: 020 8988 7400 / E-mail: [email protected] or [email protected]
Page 9
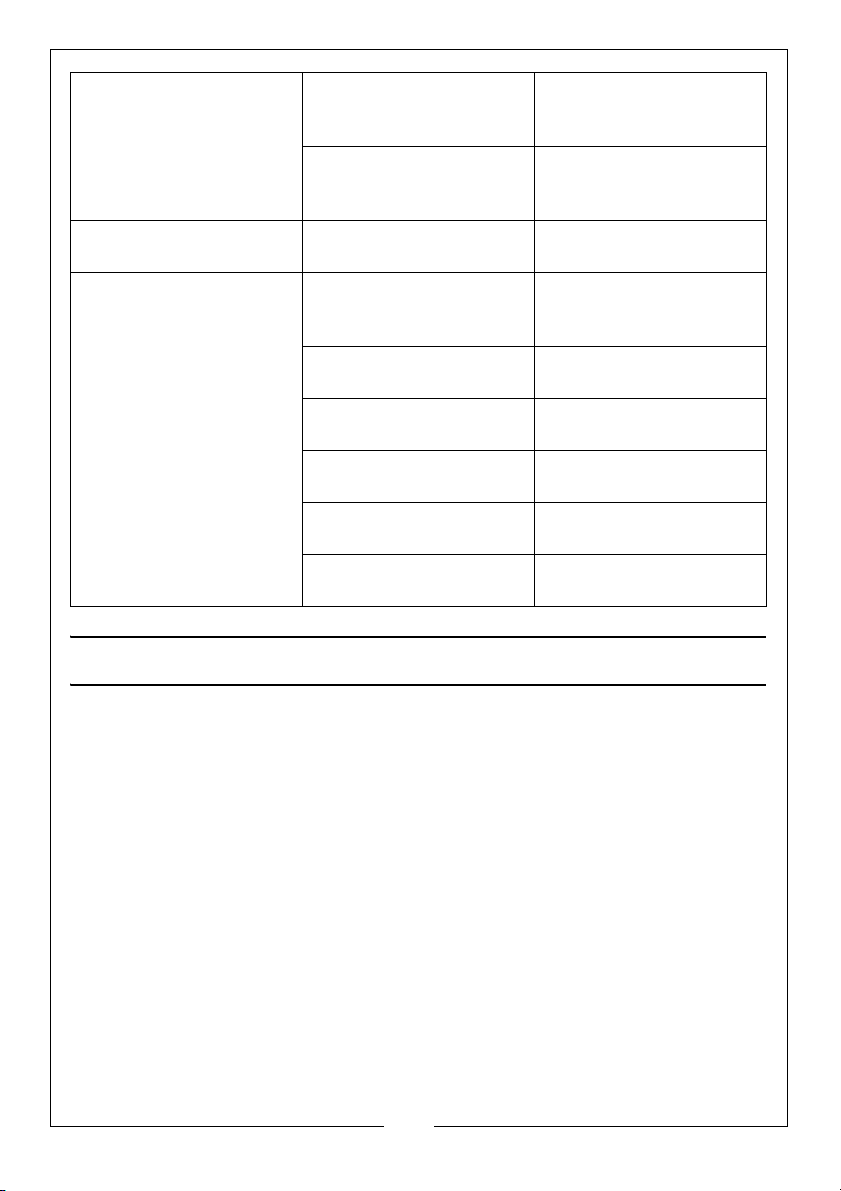
High friction losses in the
suction line.
Pump badly sited resulting in suction lift too high.
Sudden loss of flow. Blockage of inlet pipe. Check pipeline for
Undue vibration or noise. Excessive flow of water. Decrease flow of water.
Resistance in inlet pipe
caused by obstruction.
Loose rotating
component.
Installation of pump is
unstable.
Air pocket in pump or
pipeline.
Damaged impeller. Return to your CLARKE
Avoid unnecessary
curves, restrictions or
valves.
Set pump as close as
possible to the level of
the water to be pumped
blockage.
by adjusting inlet/outlet
valves in system.
Check pipe and clean
out as necessary
Return to your dealer for
repairs.
Stop pump and
re-position.
Release plug in impeller
housing to release air.
dealer for repair.
CARE AND MAINTENANCE
Protect the pump and pipework from freezing as the formation of ice may
cause serious damage.
The only maintenance required is a regular inspection to ensure that debris is
not blocking the passage of water through the pump. Should sediment,
chemical or other contaminants come into contact with the pump, flush
through with cold clean water as soon as possible.
If you suspect the pump is blocked by debris etc, disconnect it from the power
supply and back-flush to clear any blockage using a garden hose.
• You will need to disconnect the outlet hose to do this.
Always keep the pump in a clean condition, checking regularly for loose
fastenings or a damaged power cable etc.
The pump should not be taken apart by the user if overhaul is required, but
should be taken to your nearest CLARKE dealer for repair.
9
Parts & Service: 020 8988 7400 / E-mail: [email protected] or [email protected]
Page 10
Page 11
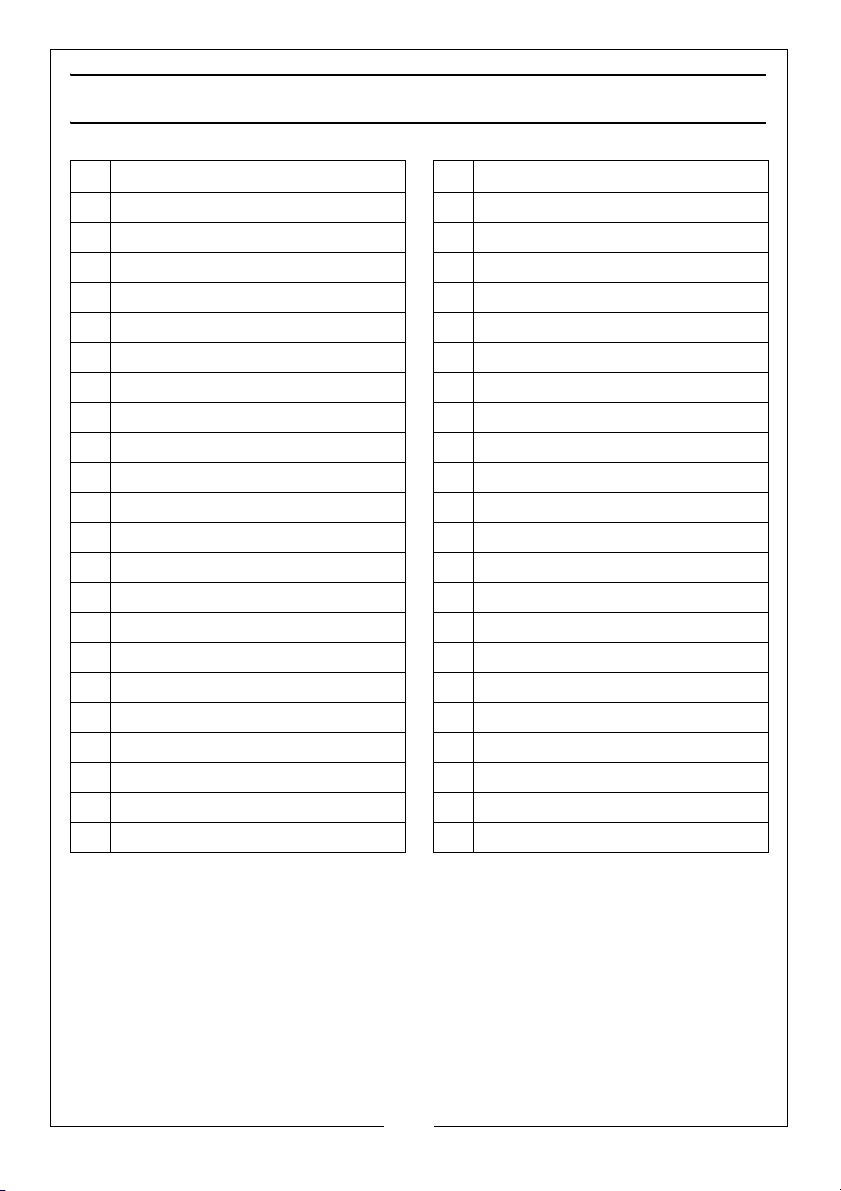
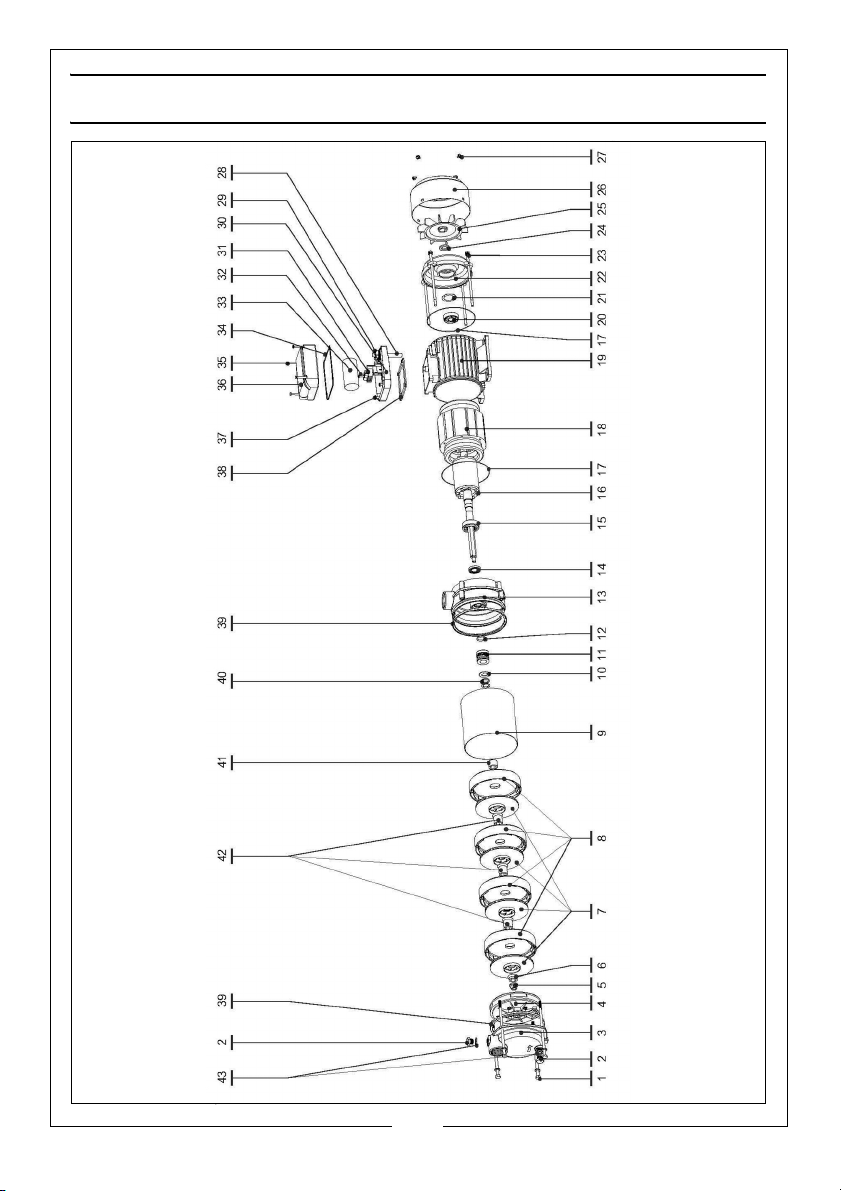
COMPONENT PARTS
ID DESCRIPTION ID DESCRIPTION
1 Tie bolt (1) 23 Tie bolt (2)
2 Screw (1) 24 Seal (1)
3 Suction mounting 25 Fan
4 Self priming cover 26 Fan cover
5 Locking nut 27 Screw (2)
6 First bushing 28 Power cable
7 Impeller 29 Terminal box screw
8 Diffuser 30 Terminal box
9 Pump housing 31 Terminal block
10 Washer 32 Screw (3)
11 Mechanical seal 33 Capacitor
12 O-ring (1) 34 Seal (2)
13 Discharge mounting 35 Screw (4)
14 Shaft seal 36 Terminal box cover
15 Ball bearing (1) 37 Screw (5)
16 Motor rotor 38 Seal (3)
17 O-ring (2) 39 Seal (4)
18 Stator 40 Washer (2)
19 Motor body 41 End bushing
20 Ball bearing (2) 42 Centre bushing
21 Spring washer 43 Seal (5)
22 Motor end cover
11
Parts & Service: 020 8988 7400 / E-mail: [email protected] or [email protected]
Page 12
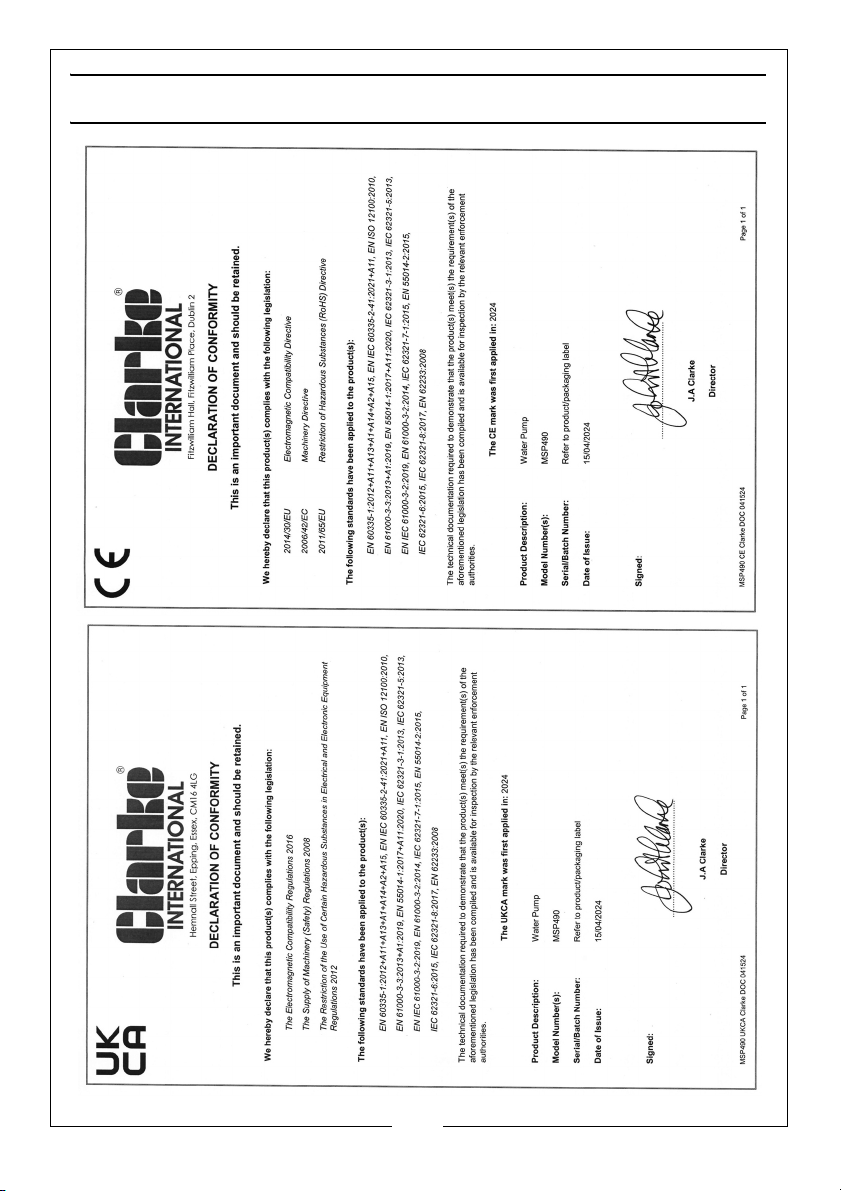
DECLARATION OF CONFORMITY - MSP490
12
Parts & Service: 020 8988 7400 / E-mail: [email protected] or [email protected]
Page 13
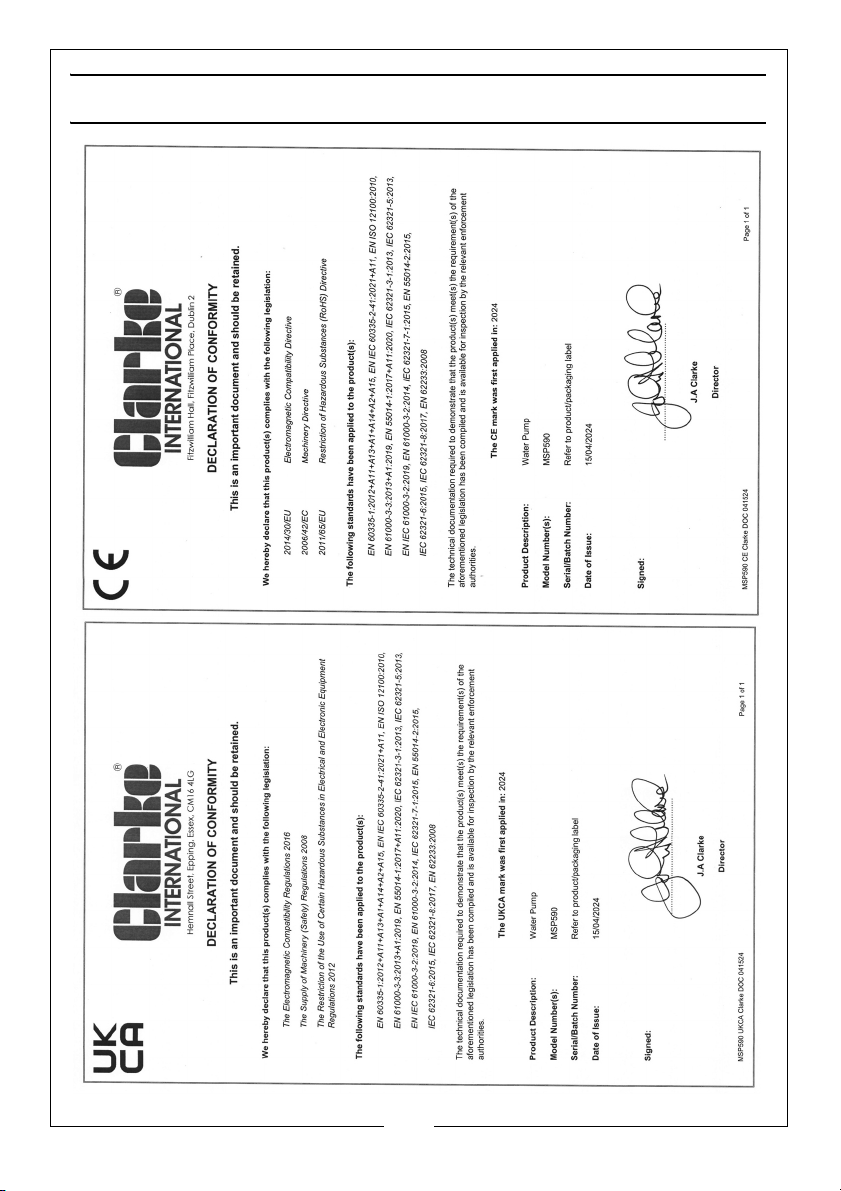
DECLARATION OF CONFORMITY - MSP590
13
Parts & Service: 020 8988 7400 / E-mail: [email protected] or [email protected]
Page 14
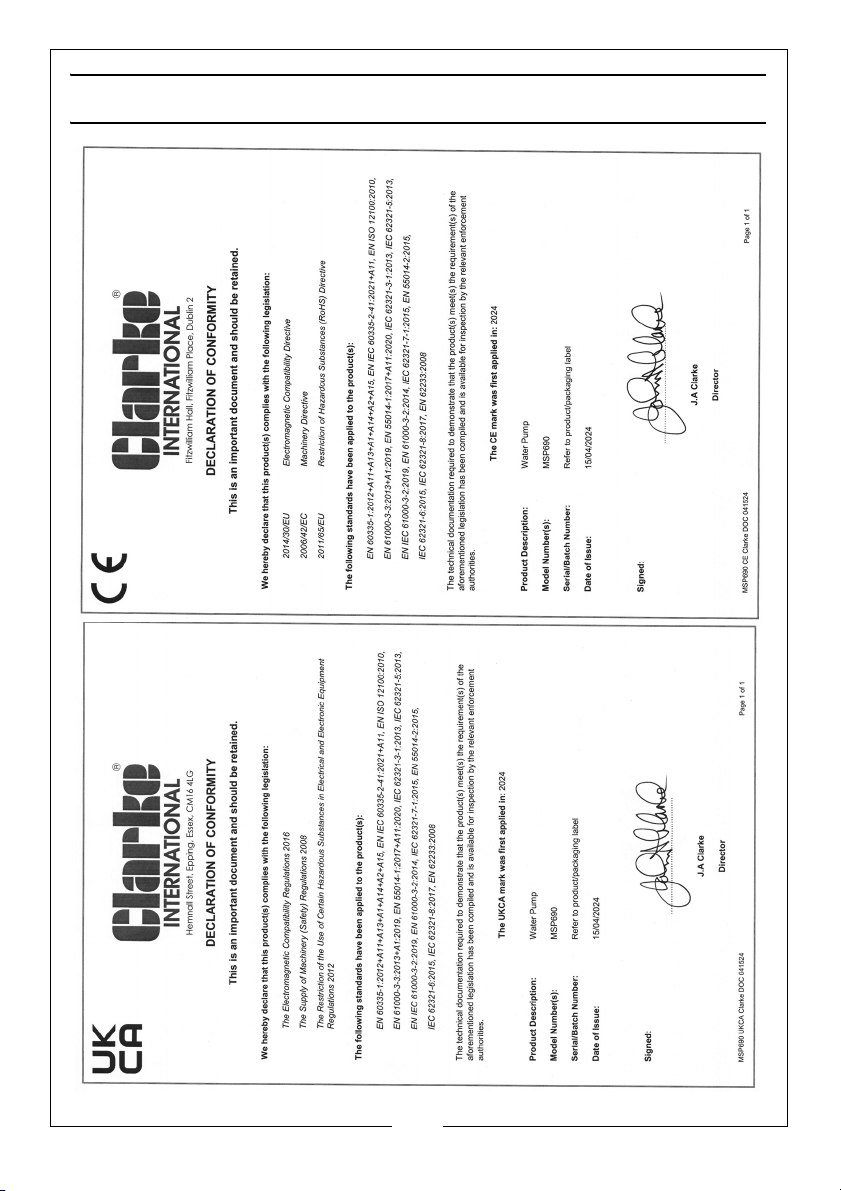
DECLARATION OF CONFORMITY - MSP690
14
Parts & Service: 020 8988 7400 / E-mail: [email protected] or [email protected]
Page 15
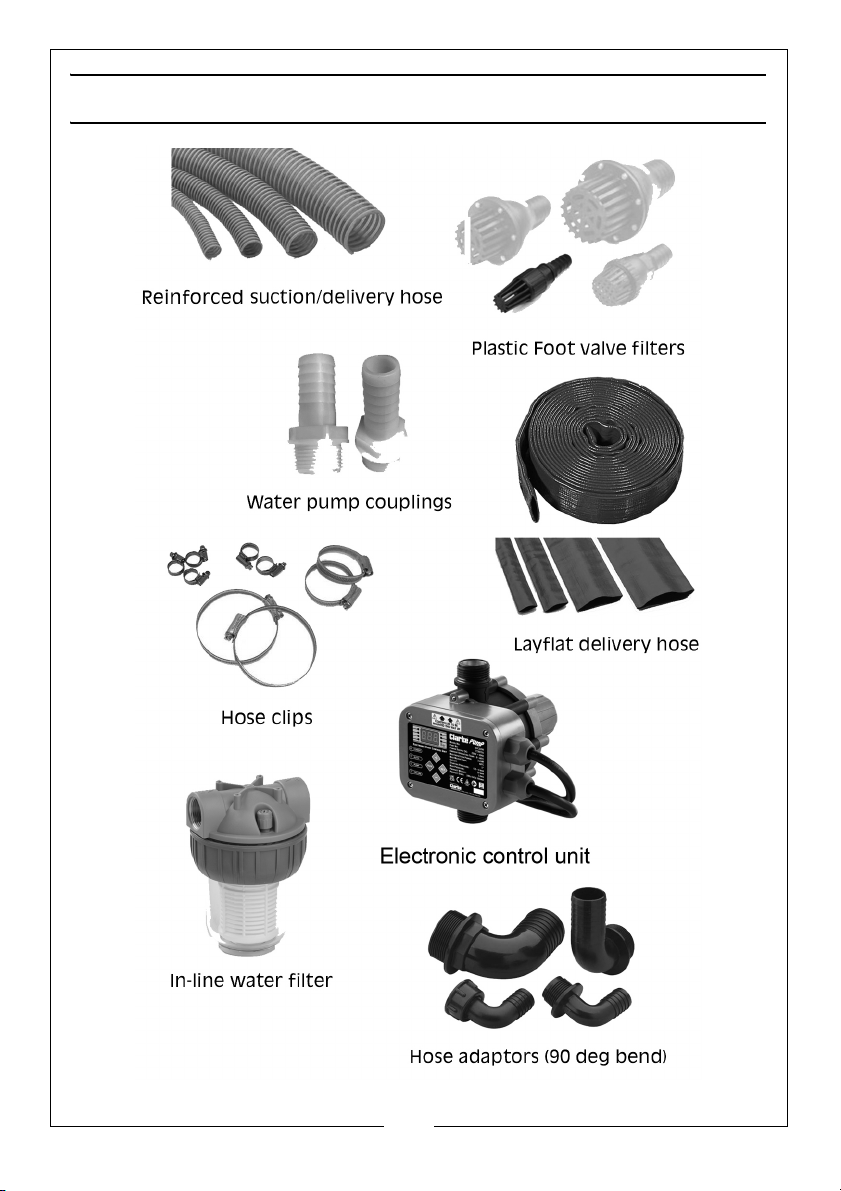
PUMP ACCESSORIES FROM THE CLARKE RANGE
15
Parts & Service: 020 8988 7400 / E-mail: [email protected] or [email protected]
Page 16

 Loading...