

Page 1
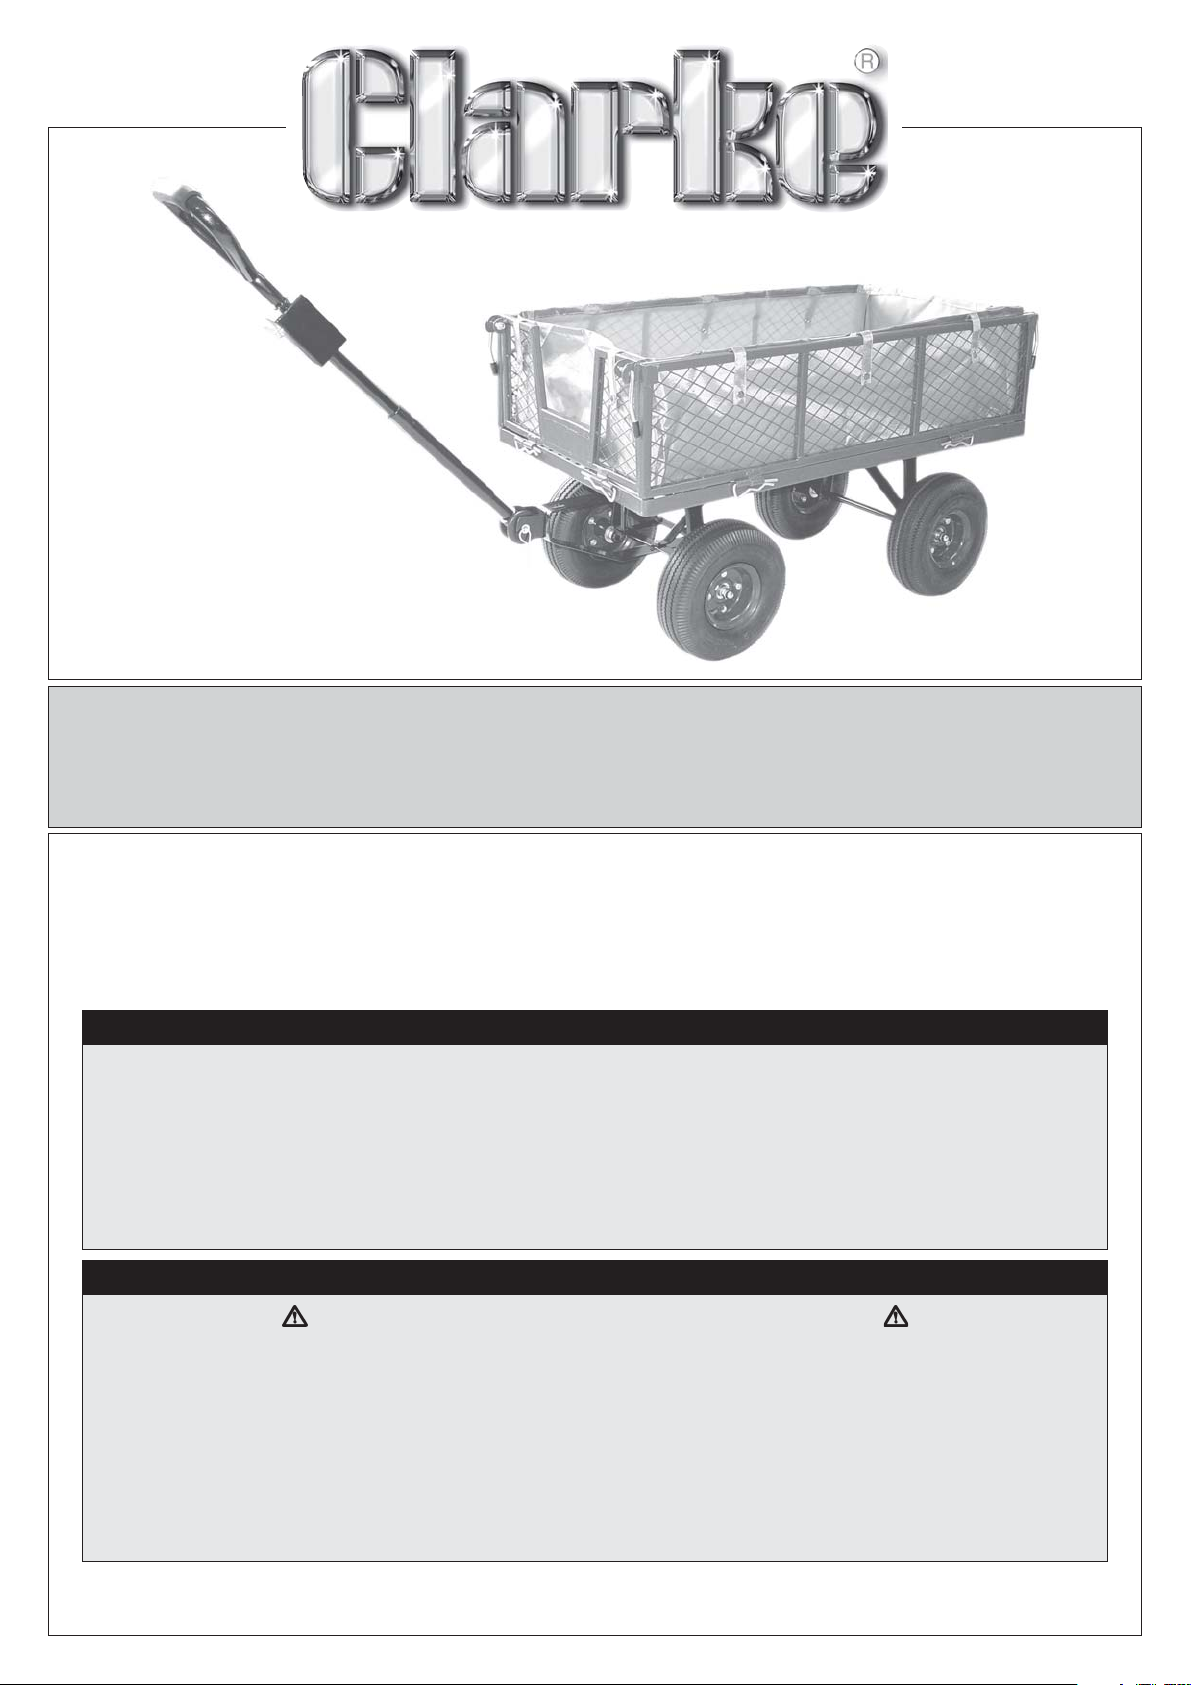
Garden Cart With Removable Liner
Garden Cart With Removable Liner
Model No: GT3
Part No: 3400185
Thank you for purchasing this CLARKE Garden Cart with removable liner, which is designed for domestic and
light industrial use only.
Please read this instruction sheet thoroughly and follow the instructions carefully. In doing so you will ensure the
safety of yourself and that of others around you and will also ensure that the Garden Cart will give you long and
satisfactory service.
Please keep these instructions in a safe place for future reference.
CLARKE GUARANTEE
This CLARKE product is guaranteed against faulty manufacture for a period of 12 months from the date of
purchase. Please keep your receipt as proof of purchase.
This guarantee is invalid if the product is found to have been abused or tampered with in any way, or not used for
the purpose for which is was intended.
Faulty goods should be returned to their place of purchase. No product can be returned to us without prior
permission.
This guarantee does not effect your statutory rights.
GC0717
SAFETY PRECAUTIONS
WARNING!: Read these instructions before using the equipment.
• BEFORE attempting to transport any load, ensure you are physically able to do so.
• DO NOT exceed the maximum working load for this garden cart - 150Kg.
• DO NOT leave the cart on a gradient without first securely chocking the wheels.
• DO NOT allow children to play with or ride in the cart.
• NEVER use the cart if any of the tyres are deflated.
• NEVER use the cart to transport personnel or animals.
•ALWAYS inspect the cart for signs of wear or damage before use.
•ALWAYS ensure the load is evenly distributed and is perfectly stable.
Please Note that details and specifications herein, are correct of time of going to print.
However CLARKE International reserve the right to change specifications at any time without prior notice.
Copyright CLARKE International All rights Reserved 04/2006.
Page 2
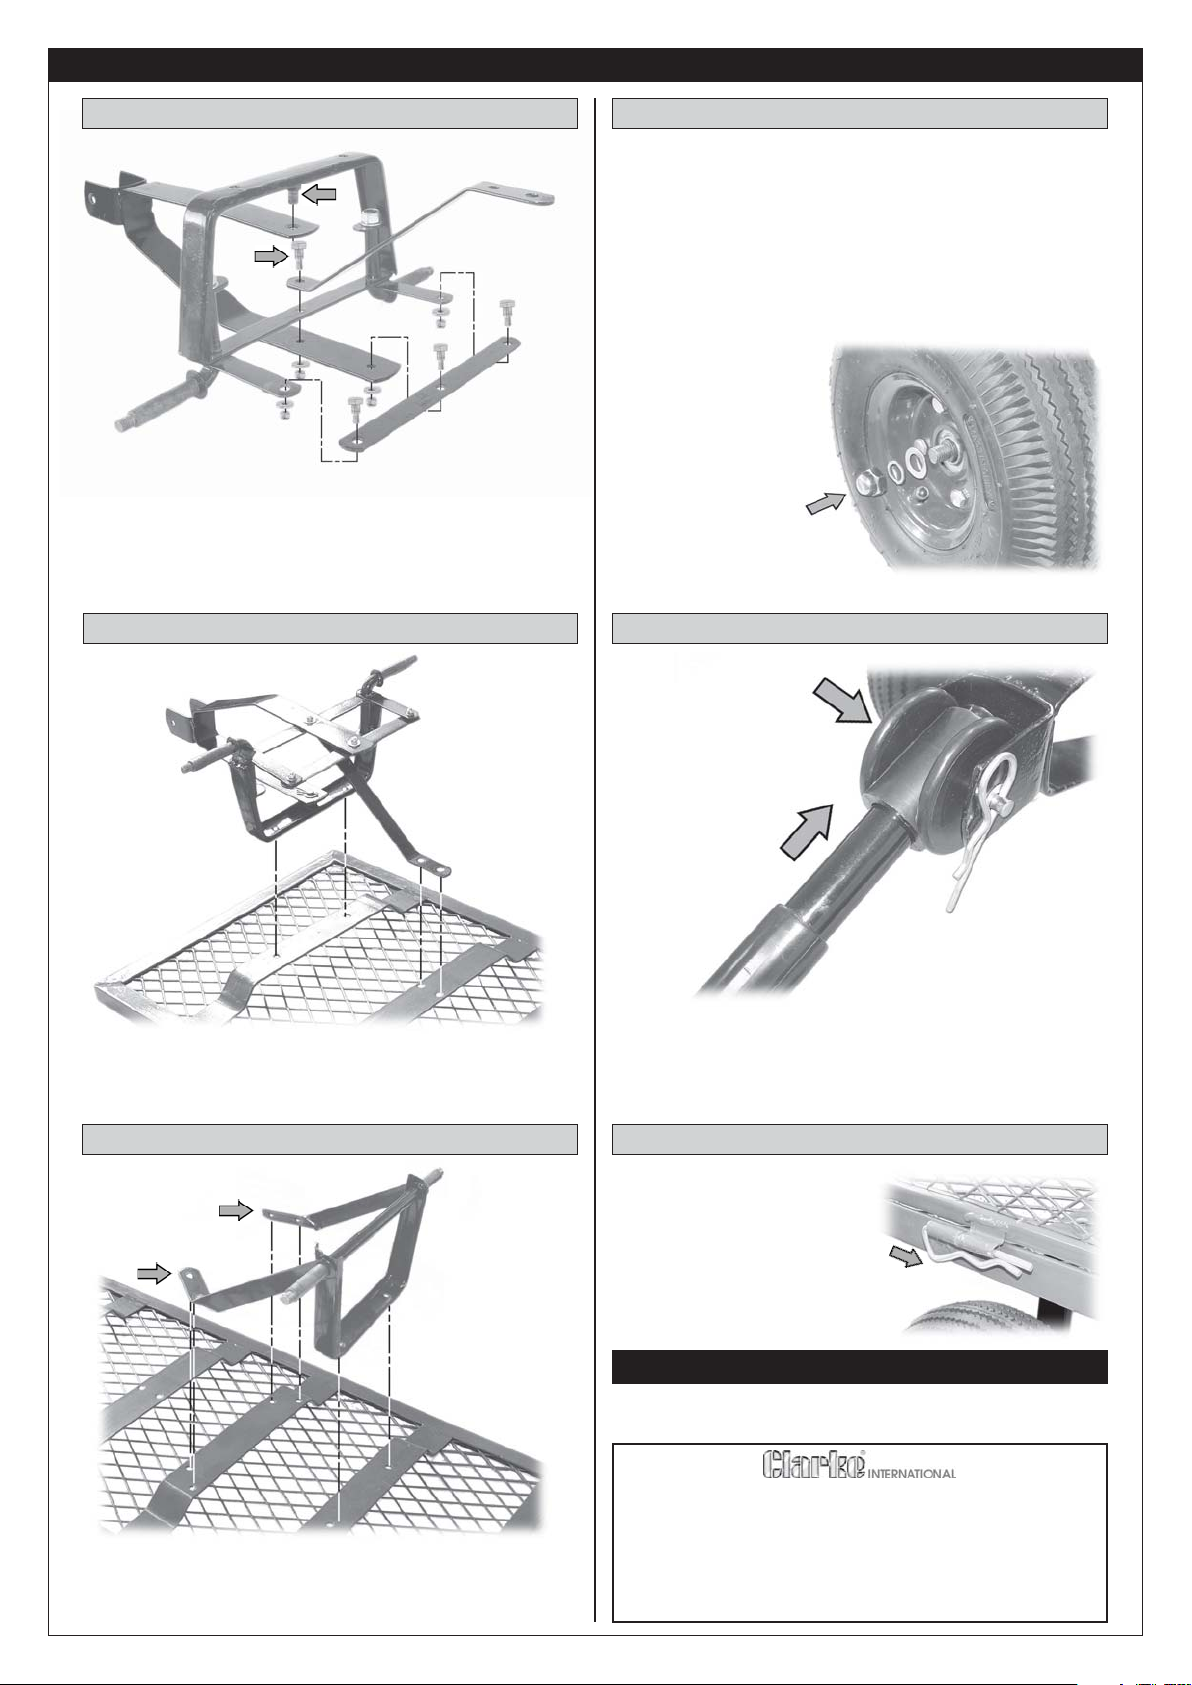
ASSEMBLY
1.
Fig.1
B
A
Assemble the steering linkage parts as shown in Fig 1.
Bolts with locking nuts are used at all linkage points, the
longest bolt being used at point ‘A’.
the linkage will not move freely. Secure the bracket at
point ‘B’ using the flat washer and split pin.
Do not overtighten or
2.
Fig.2
4.
Secure the wheels using the supplied flat washers,
spring washers and nuts as shown in fig. 4.
Fig.4
5.
Fig.5
Turn the bed on its back and attach the steering linkage
using the bolts, flat washers and locknuts supplied as shown
in fig.2.
NOTE: Flat washers should be used against the nuts.
3.
Fig.3
A
A
Slide the braces ‘A’, over the ends of the rear axle. Attach
the assembly to the bed using the bolts, flat washers
and locknuts supplied as shown in fig 3.
NOTE: Flat washers should be used against the nuts.
Slide the handle into the trunnion and attach the assembly
to the yolk on the steering assembly as shown in fig 5.
Slide the pin through the yolk and trunnion and secure
with the washer and ‘R’ clip.
6.
Attach the fences to the bed
by using the ‘R’ clips as shown
in fig.6. If desired place the
removable liner in the cart and
clip to the fences.
Fig.6
PARTS & SERVICE
Replacement wheel assemblies are available from your
CLARKE dealer. Please quote Part No: GT301.
For spare parts and servicing, please contact your nearest dealer,
or CLARKE International on:
020 8988 7400
or email:
CLARKE International, Hemnall Street, Epping, Essex, CM16 4LG
 Loading...