

Page 1
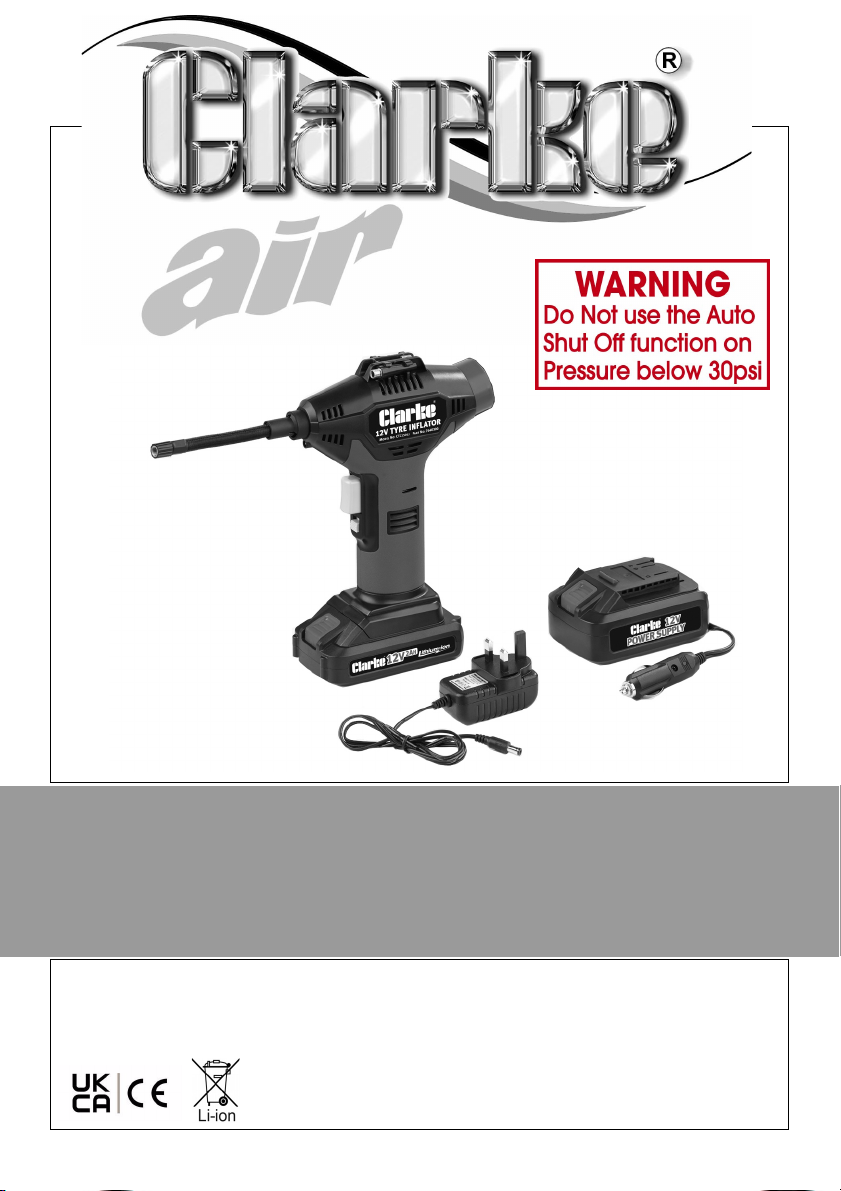
12V CORDLESS TYRE INFLATOR
MODEL NO: CTC150LI
PART NO: 7640300
OPERATION & MAINTENANCE
INSTRUCTIONS
ORIGINAL INSTRUCTIONS GC03/22 Rev 1
Page 2

INTRODUCTION
Thank you for purchasing this CLARKE Tyre Inflator. The CTC150Li can be used
for inflating car, motorcycle and bicycle tyres, inflatable sports balls and other
inflatables. The compressor is not waterproof and should not be used in any
wet applications.
Before attempting to use the product it is essential that you read this manual
thoroughly and carefully follow all instructions given. In doing so you will ensure
the safety of yourself and that of others around you and you can also look
forward to the product giving you long and satisfactory service.
Model CTC150Li
Part No 7640300
Tyre Inflator
Hose length 300mm
Max working pressure 10.3 Bar/150 psi
Max flow rate 22L/min
Ingress protection IPX0 (non-waterproof)
Duty cycle 10 mins on/10 mins off
Dimensions (L x W x H) 315 x 78 x 265 mm
Weight 1.3 kg
12V Power supply
Extending cable length 2.8 M
Plug type In-car 12V plug-in adaptor
Battery Pack
Battery Type Lithium Ion
Battery capacity 12V / 2000mAh
Input 15V-0.5A
USB Output 5V-1A
Charging time Approx 60 minutes
Power Adaptor for Battery Pack
Cable Length 1m
Input AC 230V~50Hz
Output DC 15V-0.5A
Insulation Class II
2
Parts & Service: 020 8988 7400 / E-mail: [email protected] or [email protected]
Page 3
SAFETY SYMBOLS
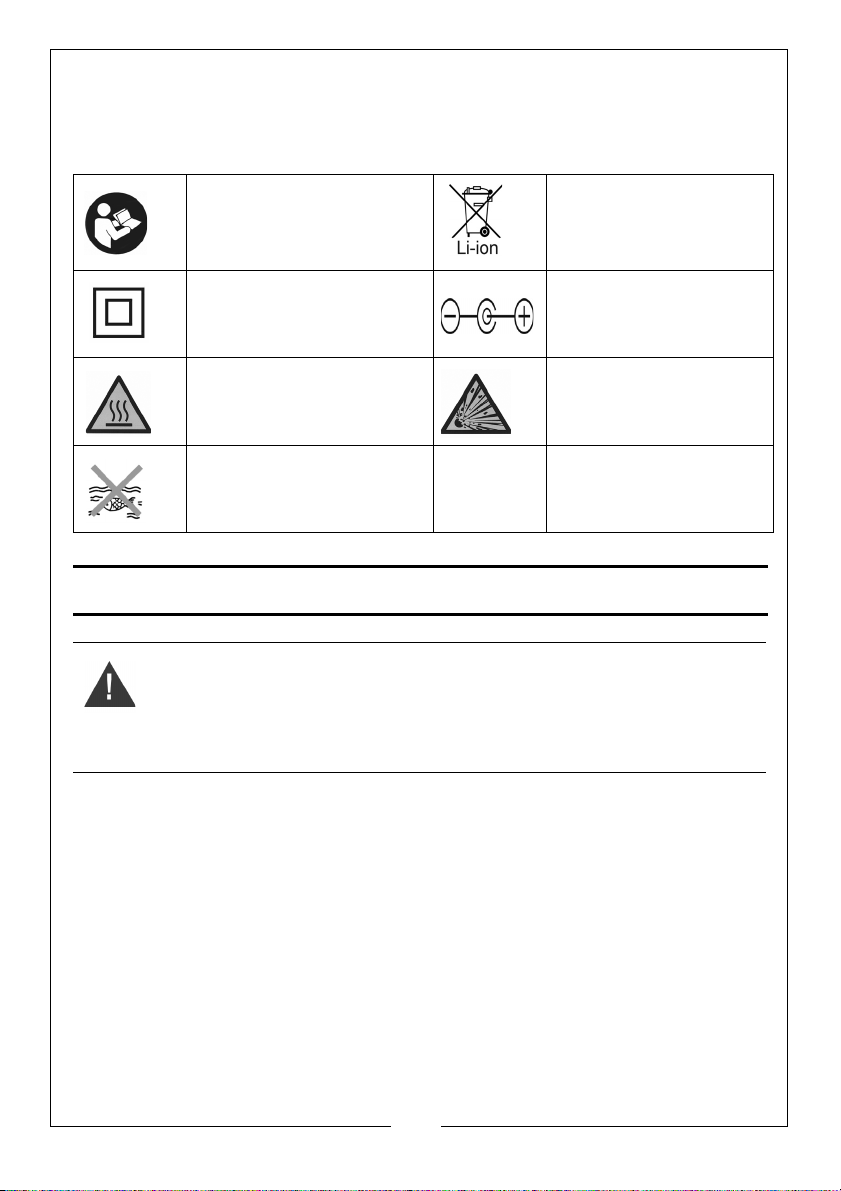
The following safety symbols are shown on the product and/or it’s packaging.
Please read all of the safety and operating instructions carefully before use..
Read this instruction
booklet carefully before
use
Class II appliance without
earth connection.
Caution-hot surfaces Danger;- potentially
Do not immerse battery in
water.
Lithium-Ion battery
supplied to be re-cycled
in accordance with
regulations.
Positive tip plug-in
connector
explosive battery
material.
GENERAL SAFETY WARNINGS
WARNING: WHEN USING ELECTRICAL TOOLS, BASIC SAFETY
PRECAUTIONS SHOULD ALWAYS BE FOLLOWED TO REDUCE THE RISK OF
FIRE, ELECTRIC SHOCK AND PERSONAL INJURY.
WARNING: READ ALL THESE INSTRUCTIONS BEFORE ATTEMPTING TO USE
THIS PRODUCT AND KEEP THESE INSTRUCTIONS IN A SAFE PLACE.
PERSONAL SAFETY
1. ALWAYS stay alert, watch what you are doing and use common sense
when operating the tyre inflator. DO NOT use while you are tired or under
the influence of medication, drugs or alcohol. A moment of inattention
can result in personal injury.
2. ALWAYS protect yourself against electric shock. Never operate the tyre
inflator in wet or damp locations.
3. NEVER over-reach. Keep your proper footing and balance at all times to
enable better control of the tyre inflator in unexpected situations.
4. NEVER attempt any complex repairs yourself. If you have a technical
problem contact your local CLARKE dealer.
3
Parts & Service: 020 8988 7400 / E-mail: [email protected] or [email protected]
Page 4

5. ALWAYS store the tyre inflator out of reach of children.
6. Keep the work area clean and well lit. Floors should always be kept clear.
Cluttered or dark areas invite accidents.
7. DO NOT work in enclosed areas or near naked flames.
GENERAL PRODUCT USE AND CARE
1. ALWAYS thoroughly familiarise yourself with this product and its operation
and always read the instructions in this manual before using the product.
2. NEVER use this tyre inflator if any part is damaged. If so, have it inspected
and repaired by your CLARKE dealer.
3. NEVER attempt to modify the fittings or attachments in any way. Doing so
will invalidate the guarantee and could result in personal injury.
4. NEVER abuse the charging cable. NEVER pull on the cable when removing
the plug from the socket or lift the tyre inflator by the power cable.
5. NEVER USE A TYRE INFLATOR WHICH APPEARS DEFECTIVE OR IS OPERATING
ABNORMALLY: If the tyre inflator operates unusually or makes strange
noises, switch off immediately. Arrange repairs with your CLARKE dealer.
6. BEFORE USE CHECK THE TYRE INFLATOR AND HOSE FOR DAMAGE: NEVER use
the tyre inflator if it is damaged. Have it repaired by your CLARKE dealer.
DO NOT use if the On/Off switch does not operate correctly.
7. Keep the motor air vents clear and free from dust.
8. Take care when using this tyre inflator to inflate small, low-pressure objects
such as children's toys or footballs can explode if over-inflated.
9. ALWAYS use in a safe area away from traffic and other hazards.
10. ALWAYS ensure that tyre pressure checks are carried out to the tyre and
vehicle manufacturer’s recommended pressures.
11. NEVER overstretch the power lead or high pressure hose.
ENVIRONMENTAL RECYCLING POLICY
By purchasing this product, the customer is taking on the obligation
to comply with current WEEE regulations.
This means that this product must not be disposed of with general
household waste. It must be disposed of according to the laws
governing Waste Electrical and Electronic Equipment (WEEE) at a recognised
disposal facility.
This product contains valuable raw materials. Metal products should be taken
to your local civic amenity site for recycling of metal products.
4
Parts & Service: 020 8988 7400 / E-mail: [email protected] or [email protected]
Page 5
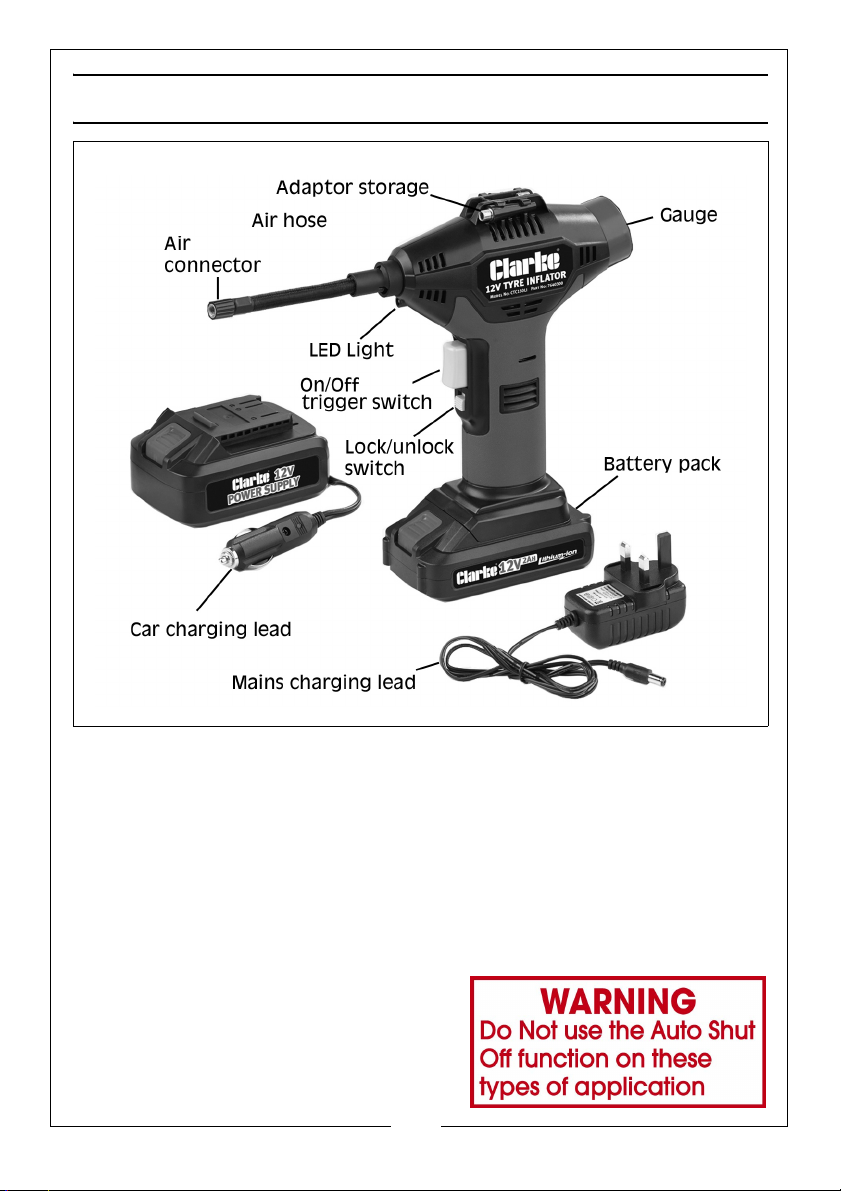
OVERVIEW
UNPACKING
After removing the tyre inflator from its packaging, check that it has not been
damaged in transit. Report any damage immediately to the CLARKE dealer
where the item was purchased.
ADAPTORS
Clipped to the top of the tyre inflator or are three adaptors for different uses.
These are provided to inflate sports balls, air beds, small inflatables and bicycle
tyres etc. To avoid over-inflation, always follow manufacturer’s instructions for
the item to be inflated.
• Toy/air bed adaptor
• Sports ball adaptor
• ‘Presta’ bicycle tyre valve adaptor
5
Parts & Service: 020 8988 7400 / E-mail: [email protected] or [email protected]
Page 6
WORKING CONDITIONS
1. DO NOT use the tyre inflator in a damp or wet environment. The compressor
should only be used with good ventilation. There should be no dust, acids,
vapour, explosive or flammable gases in the room.
2. DO NOT cover the tyre inflator. Always position it with good all-round air
ventilation and that the air intake air is dry and dust free.
POWERING THE TYRE INFLATOR
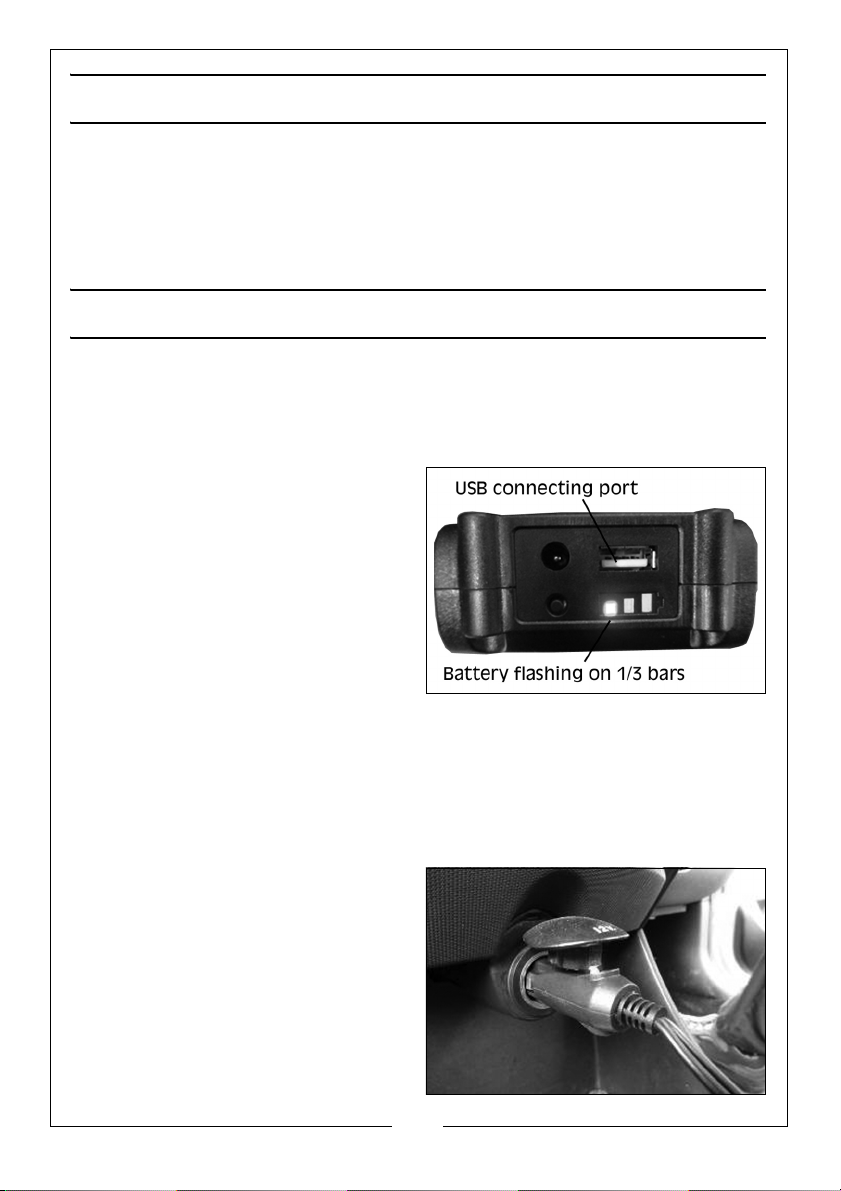
NOTE: 230V mains + USB charges the battery,
Car charger charges the 12V power pack
USING THE BATTERY
Charge the battery using the 230V
mains power supply adaptor cable.
Connect one end to the battery
pack and the other end to any mains
power socket. The 3 x LED bars will all
be illuminated when the battery is
fully charged.
Fit the power pack to the base of the
tyre inflator by sliding it forward until it
clips into place.
NOTE: The base of the power pack can only slide one way.
USING A USB CABLE
Charge the battery using a USB cable (not supplied) via the USB port.
USING THE CAR CHARGER VIA THE POWER PACK
Power the tyre inflator directly from
the vehicle 12V power pack using the
car adaptor.
Fit the adaptor to the base of the tyre
inflator by sliding it forward until it
clips into place.
NOTE: The vehicle adaptor can
only slide one way.
6
Parts & Service: 020 8988 7400 / E-mail: [email protected] or [email protected]
Page 7
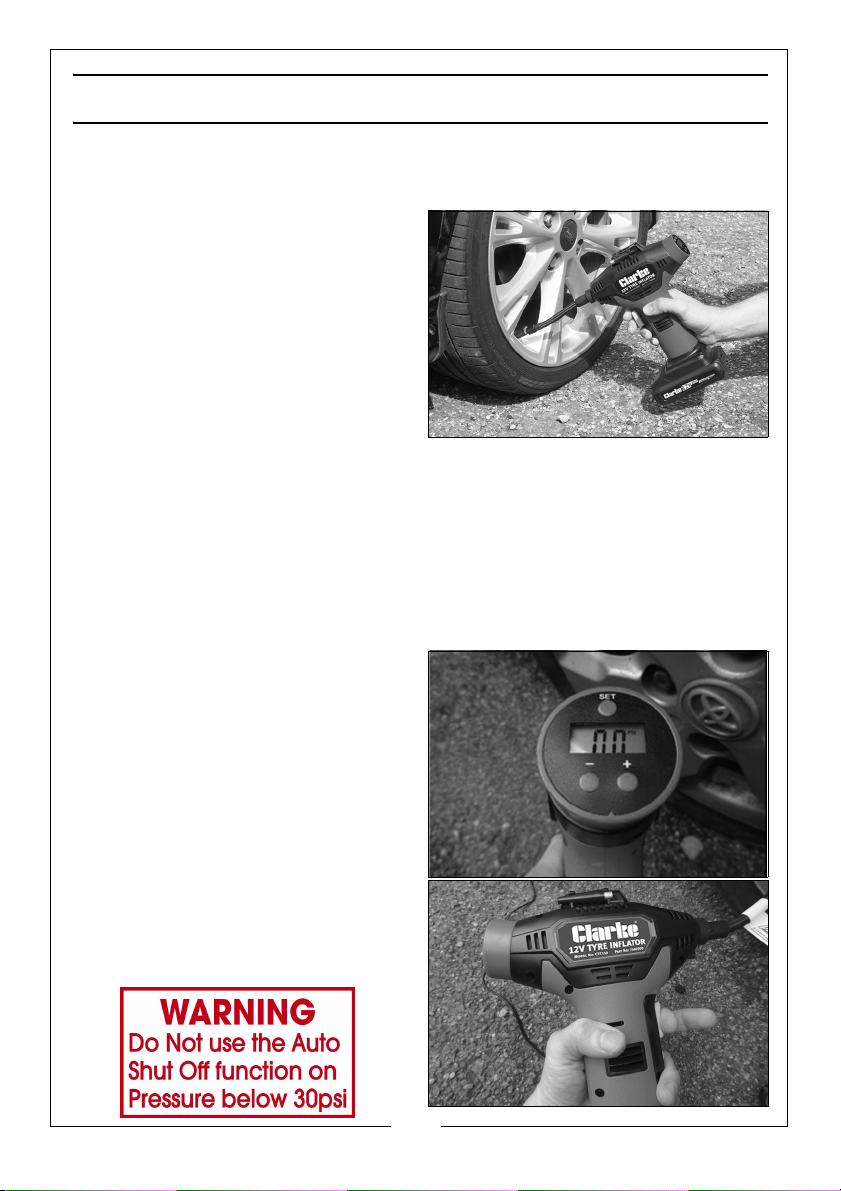
USING THE TYRE INFLATOR
1. Always inspect the tyre inflator before use to ensure the high pressure hose
is in good condition.
2. Connect the air hose to the tyre
inflator by screwing the hose into
the end of the tyre inflator.
3. Connect the other end of the air
hose to the valve stem of the item
you are inflating.
• An adaptor is supplied for inflating
sport balls including soccer,
basketballs and footballs.
NOTE: When inflating items of 10
PSI or less, inflate in short bursts and check after each burst by
feel or with a calibrated measuring device to determine
accurate pressure. Pressure required for most sports balls is too low
for accurate reading on tool gauge.
4. Connect power to the tyre inflator using options on page 6.
• The manufacturer set pressure is 35 PSI and this tyre inflator has memory
function. The gauge will indicate units and value.
5. Press "SET" button to choose the
desired unit (PSI,BAR,KPA,kg/cm
6. Press "-" or "+" button to choose
the desired value. Press and hold
or "+" button will accelerate
"-”
numerical change. After the
screen flashes three times, the
screen will show "0" and the
system will enter the chosen unit.
7. Press the On/Off trigger to start
and hold for continuous working.
• The built-in LED light is on during
inflation.
2
).
7
Parts & Service: 020 8988 7400 / E-mail: [email protected] or [email protected]
Page 8
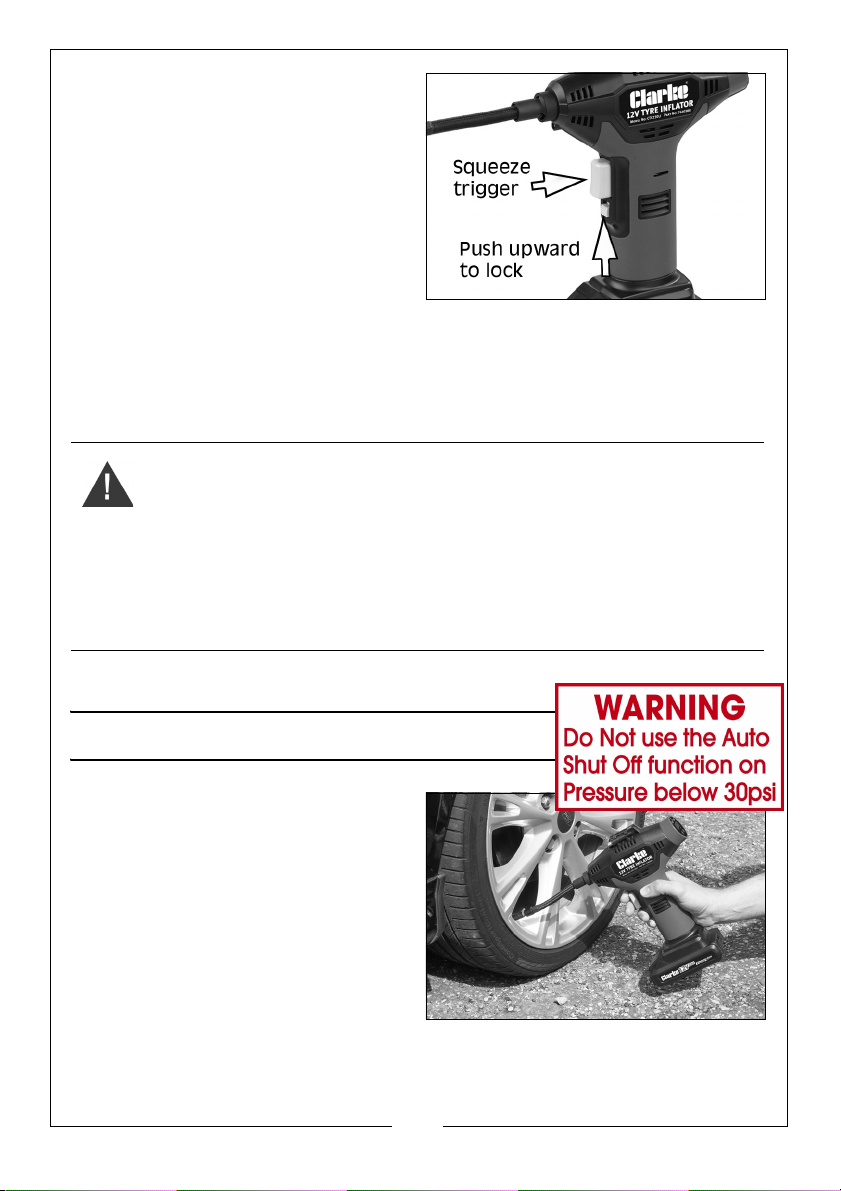
• For continuous inflation you can
push the switch lock upwards to
lock while the On/Off trigger is
depressed. In this way, inflation
continues without pressing any
button. To stop, simply squeeze
the trigger to release the locking
switch.
NOTE: Note that the tyre inflator has
a 10 minute running/10
minutes resting duty cycle.
• When the desired pressure is reached, the tyre inflator will stop working
as it has pre-set function. when the desired the pressure is reached,
the reading may have a +/- 3.0 PSI difference. (This is normal)
8. After use, loosen the hose and remove from the tyre inflator.
WARNING: THE HOSE WILL BE HOT AFTER USE. REMOVE CAREFULLY.
WARNING: IMPROPERLY ATTACHED HOSES OR ACCESSORIES CAN
BECOME DETACHED UNDER PRESSURE AND CAUSE SERIOUS INJURY.
POSSIBLE AIR LEAKS CAN CAUSE FAULTY PRESSURE READINGS. MAKE
SURE ALL CONNECTIONS ARE TIGHTLY SECURED.
WARNING: THE GAUGE IS ONLY TO BE USED AS A REFERENCE, ALWAYS
CARRY OUT A FINAL CHECK OF THE TYRE PRESSURE WITH A GAUGE
CONFORMING TO BS EN 12645.
• When not in use, adaptors provided with the compressor can be clipped
to the storage area on the top of the compressor.
TYRE INFLATION
1. Fix the tyre valve connector onto
the vehicle tyre valve, ensuring
the valve is clean.
• When connected correctly, the
digital display will show the
current pressure in the tyre. If this is
the correct tyre pressure as stated
in your vehicle handbook, remove
the valve connector.
2. If the tyre is below the
recommended pressure (as specified in your vehicle handbook), press
either the ‘-’ or ‘+’ pre-set button to adjust the pre-set value on the display
to the correct tyre pressure.
8
Parts & Service: 020 8988 7400 / E-mail: [email protected] or [email protected]
Page 9

NOTE: The unit will default to the last tyre pressure set. You can then
adjust this using the ‘-’ or ‘+’ buttons.
3. Press the Power Switch to 'ON'.
4. The tyre inflator will now inflate your tyre to the pre-set pressure and switch
off automatically when the pressure is reached. Towards final inflation, the
tyre pressure display reading will be slightly higher than the selected
pressure. When the tyre inflator stops, the final reading will be the selected
pressure. This is a normal function of the unit.
5. Switch OFF the tyre inflator and remove the tyre valve connector from the
tyre valve, returning the hose to its storage position.
IMPORTANT: The ‘-’ or ‘+’ buttons should never be pressed while the tyre
inflator is running.
If you leave the tyre inflator connected to the 12V supply but do not inflate the
tyre, after a few minutes the Digital Display will switch off. To turn back on,
press the Pressure Format Select Button.
• When inflating tyres with normal “Schrader” valves, no adaptors need to
be fitted to the hose.
• Presta valves require the adaptor to be screwed onto the valve before
attaching the hose.
6. Avoid inflating the objects above the recommended inflation pressure. This
could lead to damage and /or injuries.
MAINTENANCE
Keep the tyre inflator free of dirt and dust as far as possible. Wipe with a clean
cloth or blow it down with compressed air at low pressure. Do not use cleaning
agents or solvents as these may be aggressive to the plastic parts. Ensure that
no water can get into the interior of the tyre inflator
Your CLARKE tyre inflator has been designed to give long and trouble free
service. If, however, having followed the instructions in this booklet carefully,
you encounter problems, take the tyre inflator to your local CLARKE dealer.
The car adaptor incorporates a 15A fuse which can be replaced by
unscrewing the end of the plug.
Store the tyre inflator in a dry location.
9
Parts & Service: 020 8988 7400 / E-mail: [email protected] or [email protected]
Page 10
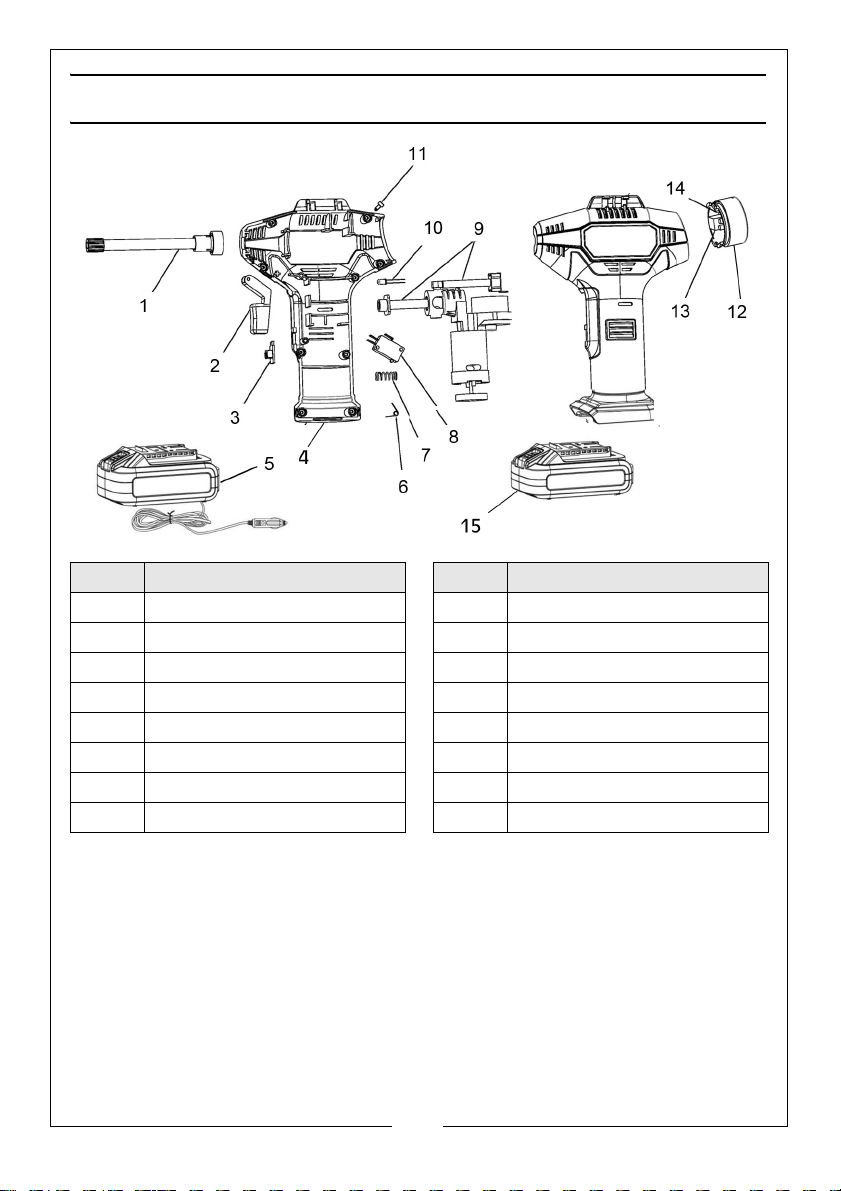
COMPONENT PARTS
No Description No Description
1 Flexible hose attachment 9 Motor/pump assembly
2 Trigger 10 Nozzle attachment
3 Trigger Lock switch 11 Screw
4 Locating base 12 Display housing
5 12V Adaptor 13 Pressure selector PCB
6 Hair spring 14 Digital display
7 Coil spring 15 Battery Pack
8Operating switch
GUARANTEE
This CLARKE product is guaranteed against faulty manufacture for a period of
12 months from the date of purchase. Please keep your receipt as proof of
purchase. This guarantee is invalid if the product is found to have been
abused or tampered with in any way, or not used for the purpose for which it
was intended.
Faulty goods should be returned to their place of purchase, no product can
be returned to us without prior permission. This guarantee does not effect your
statutory rights.
10
Parts & Service: 020 8988 7400 / E-mail: [email protected] or [email protected]
Page 11
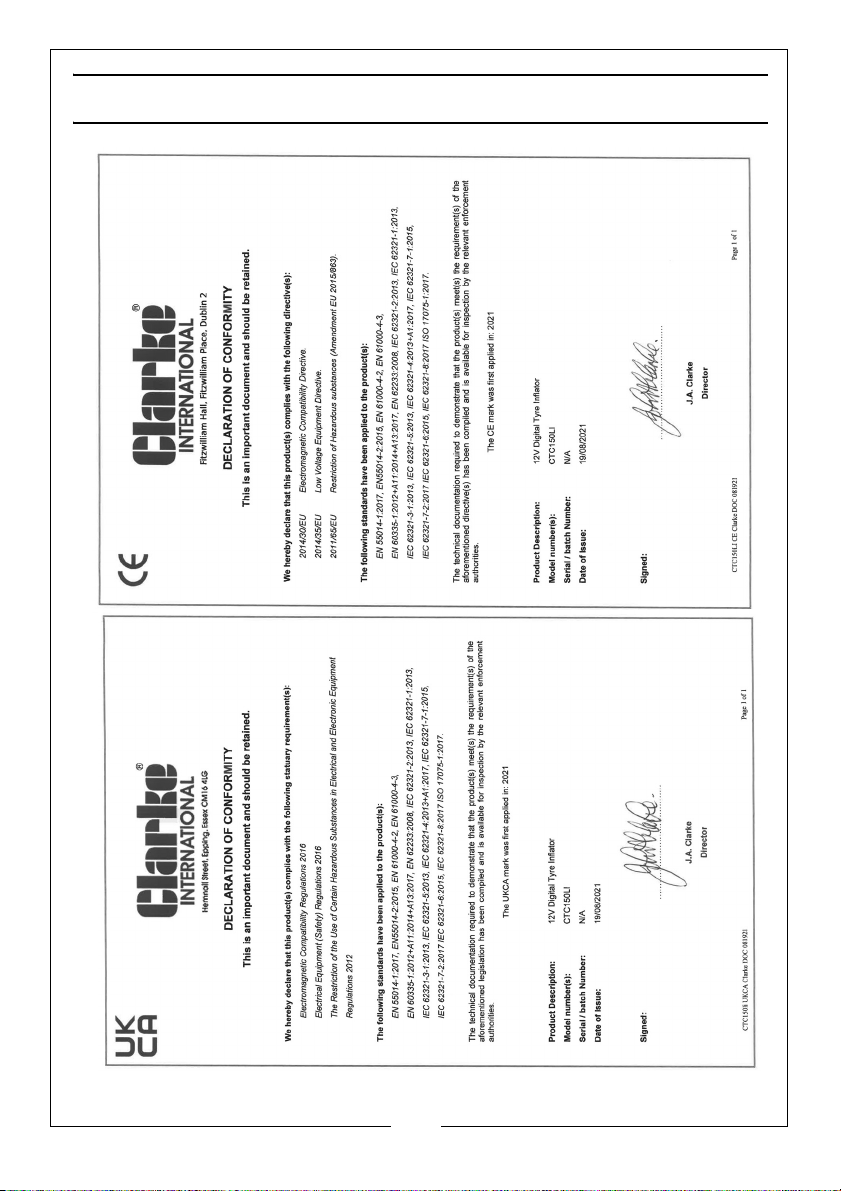
DECLARATIONS OF CONFORMITY
11
Parts & Service: 020 8988 7400 / E-mail: [email protected] or [email protected]
Page 12
 Loading...